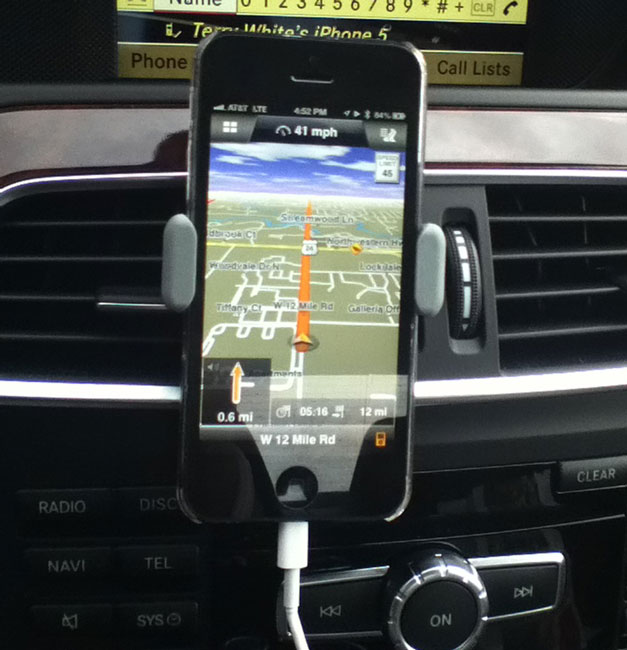
iPhone 5 mounted to the air vent via the Kenu Airframe and running Navigon North America turn-by-turn GPS App.
I have been searching for the perfect car mount for my iPhone 5. All the ones I’ve seen or used to date were either too big or too cumbersome. Let me first explain that I also want a mount that I can travel with and use in rental cars. Most mounts fall into four categories. They either attach to the windshield, dashboard, cup holder or air vent. While the air vent ones I’ve used fit the bill for the most part they usually don’t travel well because they are too delicate or have too many pieces or are simply too big. I like air vent mounts and dashboard mounts best as they position the phone at a comfortable eye level to minimize distraction.
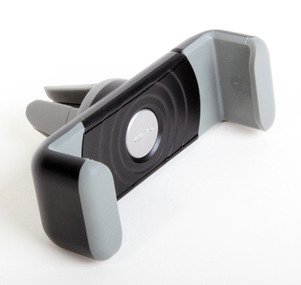
The Kenu Airframe is exactly what I was looking for
1. It mounts my iPhone 5 on the air vent. 2. It accommodates most phones even with their cases on. 3. It’s easy to clip the phone onto it and remove it (spring loaded). 4. It rotates to either vertical or horizontal. 5. It works on just about any vent style (round, rectangle, horizontal vents or vertical vents). 6. It slides right onto the vent in 2 seconds. 7. It’s small and very easy to travel with.
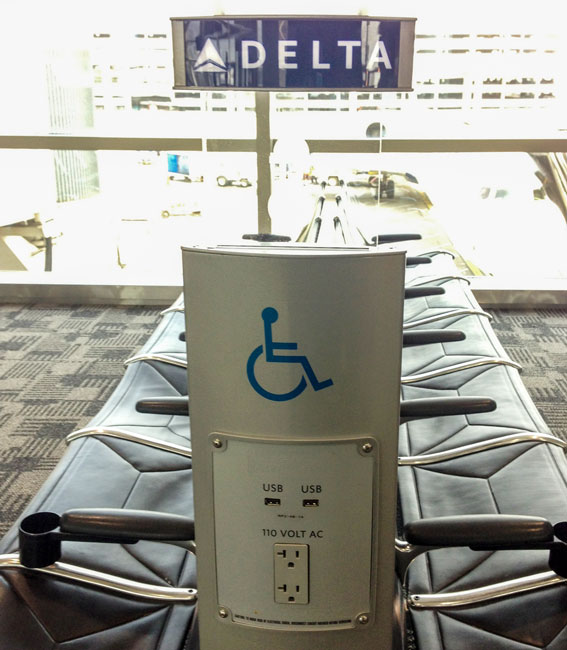
As a frequent traveler with gadgets I’m always looking for opportunities to charge up. Anytime that I have more than a 15-minute wait in one spot I check my surroundings to see what power options are nearby. If nothing is around then I don’t worry about it, but if there’s an opportunity to juice up I’ll usually take it. I fly Delta 99% of the time and Delta has been doing a good job in equipping their gate areas with not only standard AC power, but also USB power. This means that you can easily just plug in your phone or tablet without having to plug in a power adapter/brick. This leaves the regular outlets for those that need to charge up other devices such as laptops.
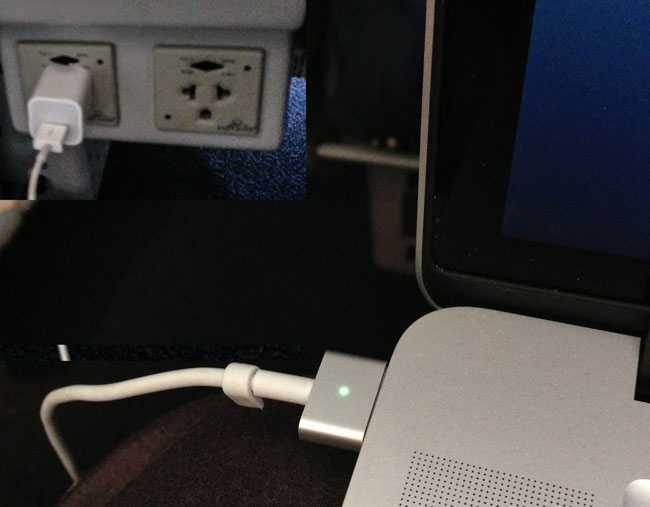
Delta in-flight power in First Class
While regular power outlets and USB powered outlets are a welcome sight in the gate area, I do wish that airlines and the rest of the transportation industry would move faster towards having power available at every seat on planes, trains, etc. Delta was one of the first if not the first to equip most of their entire fleet with WiFi! Yay! Gogo WiFi is great. However, it’s only as good as having enough juice to actually use it. Since I’m a top tier flyer on Delta (Diamond Medallion), I get upgraded a lot and more often than not there is power at the seats in First/Business Class. This is great, but it shouldn’t be limited to just one part of the cabin. What happens if I don’t get upgraded and I have a lot of work to do? Also even when I do have the benefit of having power at my seat, it doesn’t always work. It’s really hit or miss if the outlet will actually function and power my MacBook Pro.
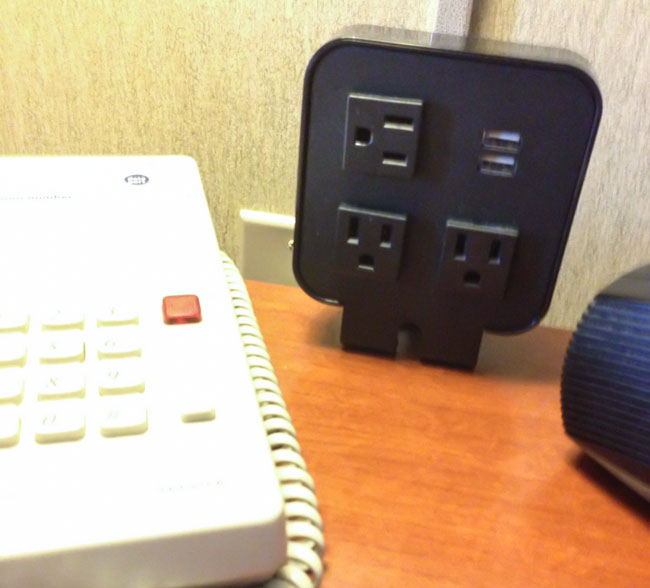
Hampton Inn power at the nightstand
Some hotels are starting to get the point. One of the fanciest hotels I’ve ever stayed in from a technology standpoint was the Aria Hotel in Las Vegas. However, it was one of the worst in terms of power! The only available outlet during my stay was at the desk across the room. Want to charge your phone next to to bed? Sorry. Yet, recently I stayed in a Hampton Inn in the middle of nowhere and they not only had multiple outlets on the nightstand, but it also was equipped with USB ports to boot.
People are always asking me about backup strategies and while I usually discuss my home/studio backups I rarely discuss my “on the road” backups. My MacBook Pro has a 768GB SSD internal drive. While SSDs tend to be more reliable than old school rotating platters, I’m still as paranoid as I’ve always been. I don’t back it up any less than I did before SSD. I’ve had two major data scares while traveling on business. The 1st was on a trip to Toronto several years ago to do a seminar. I was the main/only presenter and I had an audience of about 400 people. My presentation was going to start at 10AM and I was in the hotel connected to the event hall. I woke up that morning and did some work on my laptop before heading over to the hall. I closed my laptop and headed over giving myself just enough time to get there and plug in to the projector. I got there, plugged in and opened my laptop to a “blue screen”. I immediately thought “oh my God, if this thing doesn’t come up I’m screwed!” Although I had my files and fonts on a drive at the time and I could have used a colleague’s computer it would have taken no less than 30 minutes to get everything loaded and setup. It could have easily taken an hour or more if they didn’t have the right applications loaded. Luckily everything came back after a forced reboot. But what if it hadn’t?
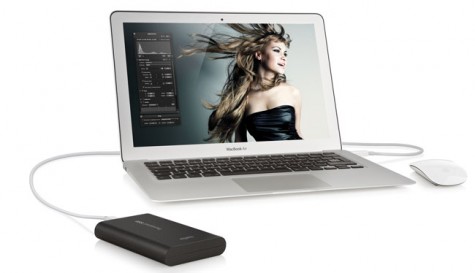
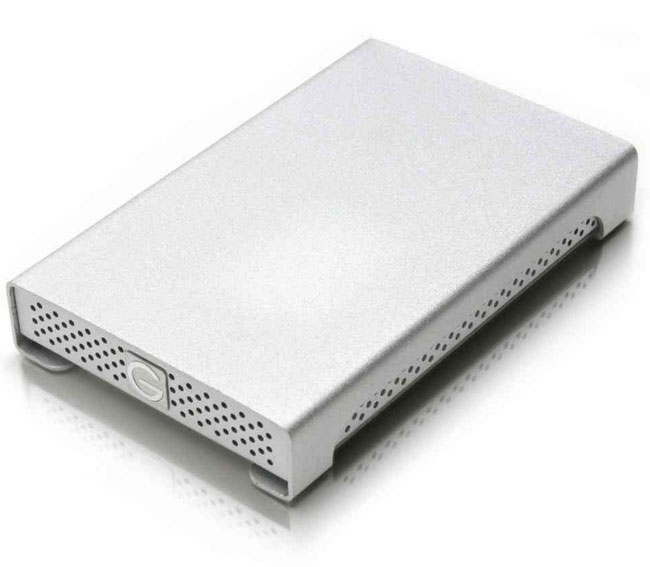
After my experience above in Toronto I realized that simply having a backup of the data was not good enough. I need to be able to be up and running in 5 minutes or less in the event of a total drive failure. From that day forward I started carrying an external portable hard drive that was an exact clone of my internal drive. I update this clone before heading out on each trip. I use SuperDuper!, which is a fantastic utility to clone your drive from one to another. In the case of a blue screen or total drive failure I could plug in the clone backup drive and reboot directly from that drive. Since it’s a recent clone it would have all of my applications and demo/data files. Continue reading “Why I Carry 3 Portable Hard Drives When I Travel”
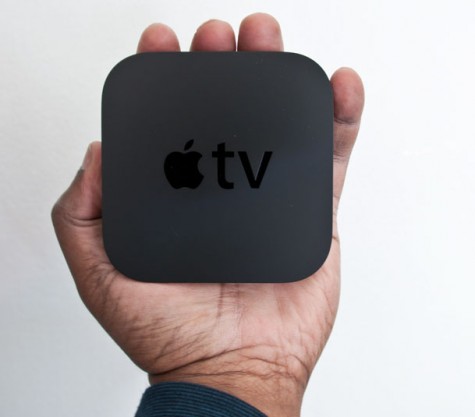
Im quite fond of the Apple TV for streaming content, watching movies and displaying my photos throughout my studio. This little box does a lot and with each software update Apple adds more capabilities to it. Recently I saw a deal on a refurbished one and I decided to snag it and use it as my “on the road” Apple TV. The idea is that since I travel so much and it seems that most hotels now have flat screen HDTVs in their rooms that I could potentially use an Apple TV to stream my own content during down time. However, the thing you have to keep in mind is that the Apple TV was never really designed to be taken on the road.
It needs a network connection
Unlike the 1st generation Apple TV, the newer models don’t have hard drives in them. So there really is no effective way to load it up with content before heading out. You have to either stream to it from a computer/iOS Device or you have to stream to it from the internet. The Apple TV has both WiFi and an Ethernet port. That helps a lot! Although it has WiFi it was not really designed to connect to random hotspots. There’s no web browser and therefore no way to really accept the terms and conditions even if the WiFi is free. I have been traveling with an AirPort Express Base Station for years. If my hotel room has an ethernet port I can just plug the AirPort in and provide WiFi to all my devices, including an Apple TV. Also the newer AirPort Express Base Station has an additional Ethernet jack so that you can even plug in a wired device to share the connection, such as an Apple TV. However, if there is no Ethernet port in the room and the WiFi network isn’t wide open you would be pretty much out of luck. You could use a MiFi or tethering to a smartphone/iOS device. You could also share the hotel WiFi connection from your laptop using Internet Sharing to the Ethernet port on your Apple TV. Before I’d do the latter I’d have to really really want to use my Apple TV. Otherwise I could just plug the computer into the TV and bypass the Apple TV altogether.
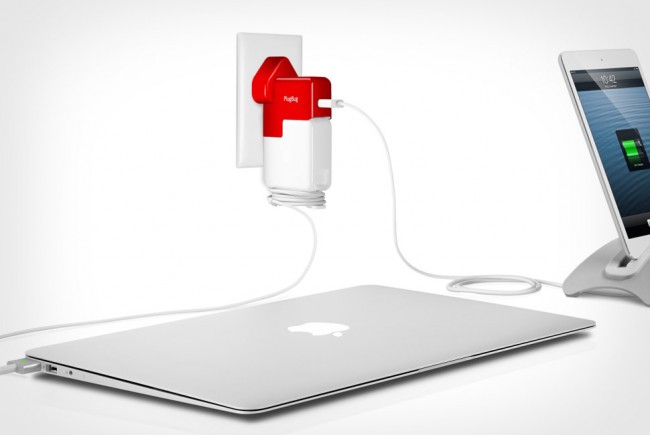
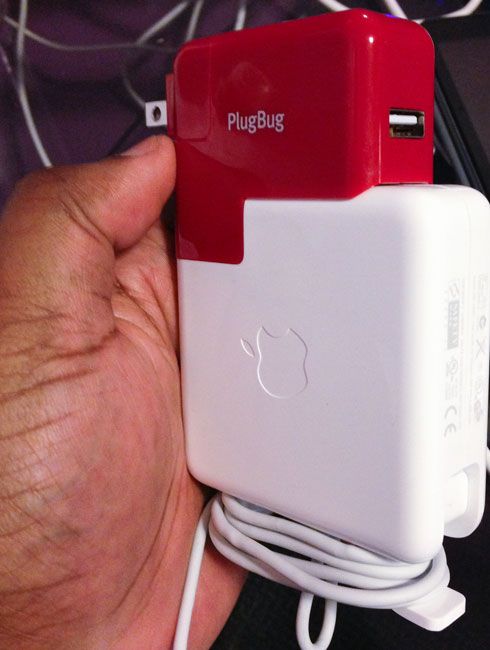
As a frequent traveler I’m always looking for ways to charge my multiple devices with fewer chargers or taking up less outlets in a hotel room. I saw an ad for PlugBug and decided to order one and see if I liked it or not. The idea behind PlugBug is that it replaces the standard plug of your MacBook Pro or MacBook Air Adapter with one that has a USB (2.1 Amp) port built-in. This way you can charge both your laptop AND any USB power device at the same time. The concept is simple and it takes all of 2 seconds to install. I opted for the PlugBug World, which comes with all the necessary adapters to plug into various outlets around the globe. It works as advertised and although it’s “short” on the 85w MacBook Pro adapter, it doesn’t hender its use.
How could it be better?
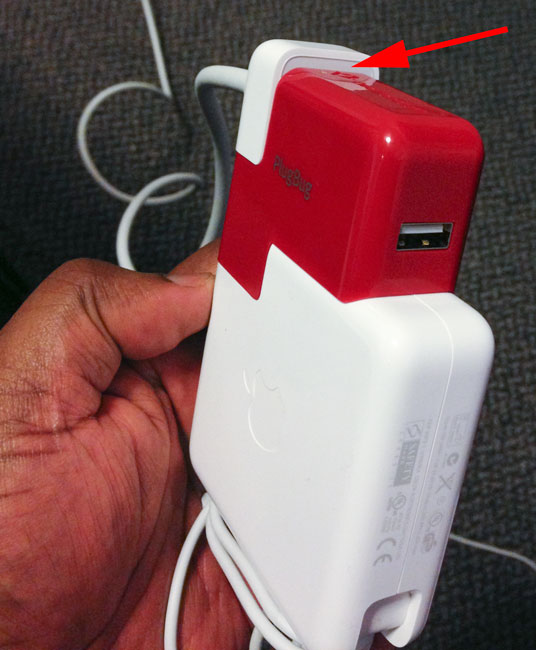
The 1st thing that I wasn’t crazy about was that it replaces the “extended cord” on the MacBook Pro adapter. I know that you can simply plug the adapter into the wall with or without a PlugBug, but I prefer using the optional extended cord that comes with the MacBooks so that I don’t take up so much space on a power strip and I get a longer cord.
That’s a personal thing with me, but the product works as advertised. Although I CAN use the extended cord, it’s clear by the way it sticks up over the PlugBug that they didn’t design it to be used this way. While we’re at it, I’d also like to see TWO USB ports instead of just one. It would make it much more useful to me if I could use one plug to charge my MacBook, iPhone and iPad at the same time. So make it a little taller to accomodate the extended cord AND a second USB port and I’d “love” it.
I recently replaced my Nikon D7000 with a Nikon D600. The D600 is to serve as my travel body and backup body to my Nikon D4. Although the D7000 served me well, I couldn’t help but be tempted by having another Full Frame (FX) body. All but one of my lenses are Full Frame lenses. So the D600 fits in perfectly. It’s Nikon’s lowest priced Full Frame body and while it’s not technically a D700 replacement, it is the closest thing to date that Nikon has introduced to replace the D700. Let me answer some questions right off the bat…
Why not a D800?
As I’ve said before, I love the D800 and the only thing that is stopping me from getting one is the fact that it shoots 36MP RAW files and that’s just more data than I “need” and certainly much more than I want to deal with in terms of retouching, RAM requirements, storage, transfer speeds, etc. etc. If they come out with a model or update that allows you to turn down the size of the RAW files I’d certainly give it another look.
What about the problems I’ve heard about the D600?
The first negative I read about the D600 was from David Hobby. The deal breaker for him was the Flash Sync Speed being capped at 1/200th. Not a concern for me. The next one I read about was “dust”. Apparently there are/were D600 shipping with dust on the sensor right out of the box. I haven’t noticed this issue. I do plan to do some extensive checking/testing, but as of right now, no dust that I can see. Lastly, both Scott Kelby and Jason Lykins were frustrated by not being able to program the center select button to zoom into an image at 100%. I can certainly see this as a potential deal breaker if you were used to that configuration on your previous/other body. Since I had never configured the button to do that on my other bodies, I don’t miss it not being there on the D600. Others have asked “is the 3 exposure bracketing limit too limiting for HDR?” I would say yes and no. If you shoot a lot of HDR, yes. However, you could always manually adjust the exposure to get more in s pinch. I don’t shoot a lot of HDR so I’m fine with this limitation. All systems go!
I took this HDR shot from my hotel window in San Francisco last week.
The Feel
The first thing I noticed when I picked up a D600 was how good it felt in my hand. It’s one of those things that you can’t really put into words, but it just felt very comfortable. Of course much lighter than my D4 and even a better “more secure” feel than my D7000 and even better than that of the D700 from what I remember.
The Buttons and Controls
When I talk to photographers that are just starting out, they usually ask me why do some DSLRs cost more than others. Outside of the differences in sensors, fps, and other internal characteristics, the other major difference is the number of dials and buttons on the body itself. Most low end DSLRs have few buttons and controls as dedicated buttons. This means more trips the menu. The D600 doesn’t have as many options as the much more expensive D4, but it does have the right balance/mix for what I intend to use it for. I can operate the camera in Manual mode or a shooting mode without making any additional trips to the menu.
What about the Wireless Module?
I have ordered the WU-1b wireless module, but I have yet to see it show up. In the meantime the D600 has been working just fine with my Eye-Fi card in the 2nd SD slot just like I used it in my D7000.
Other Stuff
I was very happy to see Nikon use the same battery/charger as the D7000 and D800. Since I already had some extra batteries for my D7000 I was able to use them in the D600 instead of selling them with the D7000. Once again I went with a 3rd party Battery Grip (just as I did with the D7000), look for a separate review of that this week.
Overall I’m quite pleased, but…
I love this camera! It’s perfect for my needs of a travel body and backup body. The 24MP upgrade from 16MP isn’t too bad either. However, there is one thing that annoys the crap out of me. The mode dial has a button on the top of that you have to press before turning the dial. I’ve never had to do this with any of my other Nikon bodies and while I’m sure I’ll get used to it, it bugs me a LOT right now. The only other wish I had was that of a terminal port. It’s not crucial for me for this body, but it definitely would have been a nice to have.
Anyone that follows me and follows my photography knows that I’m a fan of shooting tethered. Last week I had the good fortune of meeting with a TetherTools rep. She showed me some samples of their newer products for mounting iPads to various things such as tripods and tables. As you know I recently reviewed the clamps from TripodClamps.com. A product that I’m quite pleased with. However, I try not to put on blinders and I’m usually willing to look at other solutions. I’ve followed TetherTools for some time now as they relate to Digital Photography, but it was neat to check out their iPad products too. I left that meeting with a few samples: Wallee iPad Case for iPad 3 – Black, Wallee iPad Connect Bracket, Wallee Connect Lite BracketRock Solid Mini ProClampRock Solid Articulating Arm with Center Lock 7″ and the Handstrap. Now keep in mind that a couple of these pieces have overlapping functionality. For example you wouldn’t use the Handstrap and Articulating Arm at the same time. Nor would you use the Connect Bracket and the Connect Lite Bracket at the same time. I left with solutions for mounting an iPad in a variety of different situations.
Using Tether Tools in a way that they hadn’t thought of
On the flight home I decided to test a theory that RC, Brad, Pete and I had during the meeting. I decided to use the Tether Tools Wallee iPad Case, Wallee Connect Lite Bracket, Rock Solid Mini ProClamp and Rock Solid Articulating Arm to mount my iPad on my tray table. The idea was to get the iPad up and at a comfortable viewing angle and freeing up the table for the in flight meal. It worked great! As a matter of fact, had I had these for sale the flight attendant would have bought one from me on the spot. Actually that brings me to the problem with using it this way. If you’re buying this gear as a professional photographer and plan to mount your iPad as part of your digital photography workflow, then this makes a great solution. However, if you were buying this just to mount your iPad for inflight use then it would be a tad bit pricy and cumbersome to travel with. This solution could work very well for mounting your iPad as an inflight entertainment system, but it would need to be streamlined a bit. It would need to be sold at a lower price and as perhaps a single kit. There’s no doubt that you could use this solution in a variety of settings. Just last week I used it to record the video on the Pocket Socket generator that I reviewed. Yep, that was an iPad video with the iPad mounted to my desk. However, for the personal looking for a single solution for iPad travel then it would be overkill unless Tether Tools repackages it for that audience.
Be sure to check out Tether Tools’ other solutions for digital photography and iPad mounting here at tethertools.com.
I’m loving the fairly new TSA PreCheck program that lets frequent travelers go through security without having to take off their shoes, belts, and they can leave their gear in their bags. However, even with TSA PreCheck it’s random and every now and then I have to go through the regular security line. I’ve been traveling for a living for years and I can get through as fast as possible, but the one thing that I dislike the most is having to take off my belt. Well actually taking off my belt is no big deal, it’s the time it takes to put it back on that bugs me. We’re talking a few extra minutes here and while that might sound trivial, it seems like an eternity when you’re trying to get to your gate.
Do you really have to take off your belt?
TSA will absolutely make you take your belt off if they see it! Sometimes I’ve actually forgotten to take it off and my shirt was on the outside and long enough to go over it and as you would guess it was no problem. Even going through the body/back scatter scanner it was no issue. I thought, “cool I’ll just always wear my shirt on the outside and not take it off.” The only problem is that doesn’t work so well on walk through metal detectors that have the sensitivity turned up. My regular dress belts have metal buckles and they will set off metal detectors at various airports.
Get rid of the metal
Problem solved! I searched for a belt that contains no metal and I found a nice one! I used it going to and coming back from Photoshop World last week with no problem. The belt I found is nice because it looks like a regular dress belt and not some nylon sport belt. It’s also reversible with black on one side and brown on the other. However, I wouldn’t use it as my primary every day belt. I don’t think it would be strong enough for daily use. However, it’s definitely my new airport travel belt. I wear this one to the airport and just pack my regular belt in my carryon luggage.
This belt is also very useful for visiting other facilities where you have to pass through a metal detector. Our County building, which also houses the courts makes you go through a metal detector and so do most Federal buildings.
When it comes to photography my primary focus is Beauty/Fashion, in other words people. However, because I travel for a living I also get to do a fair amount of landscape and travel photography too. While I did have a Landscapes Portfolio on my site, my travel shots were starting to blend in even if they weren’t technically landscapes. A couple of nights ago I decided to break them out and create a dedicated Travel Portfolio.
While I was at it I also was curious to see how many shots I had taken with my iPhone. I was toying with the idea of perhaps having an “iPhone Photography” Portfolio just for fun but I could only think about 3-4 worthy shots off the top of my head that I remember shooting with my iPhone.
I figured that I shouldn’t trust my memory and I decided to let Lightroom show me my iPhone shots by creating a Smart Collection. I was right to take that approach because there were many more shots than I remembered taking with my iPhone and as a result I was easily able to put together an iPhone Photography Portfolio just for kicks.
While I don’t see any smartphone camera replacing my DSLR any time soon, I pretty much do use the iPhone 4s 99% of the time as my point and shoot camera. I’m usually amazed by some of the shots I get considering the small sensor on that thing.
I updated my site using the Turning Gate Plug-ins and Adobe Lightroom 4.1. Also since I’m a Geotagging Freak! Most of the shots in the new galleries will show you the location where they were taken.
As a very frequent flier I was pleased to no end when the “trusted traveler” Clear Program came on to the scene. I got to use them quite a bit before they went bankrupt in 2009 when the economy crashed. I was saddened by the loss of this service, but life went on. In the last several months TSA has been rolling out their own program that is now branded TSA Pre and this “pres-screening”service offers the benefit of zipping through a TSA checkpoint without having to take off your shoes, belt, liquids or electronics out of you bag. Best of all it’s FREE. Although it totally rocks, it’s not a guarantee. You are “randomly” selected each time you check in at an airport to either go through the TSA Pre line or the regular line. It’s also only for domestic travel. If any part of your itinerary is international you won’t be selected for TSA Pre. My luck so far has been about 90% of the time I get to go through the TSA Pre line and it’s been GREAT!
CLEAR is back!
A while back Clear announced new ownership and that they were making a come back. I for whatever reason, kept my CLEAR card. I guess it was just such a cool looking card that I didn’t want to shred it. When they announced that they were re-opening CLEAR lines, I put the card back in my wallet. Just last night when leaving SFO I got to use the CLEAR line. So far they have only re-opened at MCO, DFW and now SFO.
CLEAR vs TSA Pre
You might be asking yourself at this point “do I even need CLEAR anymore?” My answer to that question is “it depends.” It seems that CLEAR is open at airports that don’t yet have TSA Pre. Also remember that TSA Pre is not guaranteed for every check-in. With that said, my CLEAR membership is good through November 2013 and TSA Pre is at all but a few of the airports I travel through most often. I would be hard pressed to renew it in 2013 and PAY again. While TSA Pre isn’t everywhere yet, it most likely will be by 11/2013. It’s FREE and even with CLEAR you still have to go through the regular screening like everyone else. CLEAR just gets you to the front of the line. There was one trip that I was leaving MCO (Orland0) and MCO doesn’t have a frequent flyer line (or at least they didn’t back then). There were no less than 2 million people in line (OK, maybe more like 200) when I was running a little late for my flight. I remembered that MCO had a CLEAR lane, I ran up to it, got escorted right to the front of the line (sorry 200 people) and had no problem making my flight. So the advantage is “CLEAR” when it’s an airport that doesn’t have TSA Pre or a priority line, but the number of those airports is far and few between.
My prediction is that we may see CLEAR shut down again in a year or so unless they can find more ways to differentiate their services over the FREE TSA Pre program and frequent flyer lines. They have a long way to go in terms of opening up and staffing lanes at all the airports they used to be in vs. all the airports period. It’s now $179/year and I would have paid that without batting an eye before, where as now I definitely question the value. If you fly out of MCO, DFW or SFO regularly then it’s probably worth it for at least this year. After that we’ll have to see.
Last night when I went through the CLEAR lane, it didn’t seem any faster than going through the Delta Sky Priority line, which only had a couple of people in it at the time. However, had the Sky Priority line been packed, the CLEAR would have been better as it’s almost never that busy. My recommendation to CLEAR is to work it out with TSA so that CLEAR members can also skip the strip down and body scanners!