An even smaller travel router – HooToo

HooToo-inmyhand

Late last year I declared that the Netgear Trek300 was my new favorite travel router. (that was sooooo last year 😉 ) However, it didn’t take long for one of my readers to point me to an even smaller travel router with many of the same features as the Netgear at half the price. I like the HooToo TripMate Nano for many of the same reasons that I like the Netgear:

  • Provides an 802.11n WiFi hotspot for all of your devices to connect to on the road.
  • Works with either Ethernet in your room or public WiFi
  • Powered via USB
  • Small lightweight and inexpensive

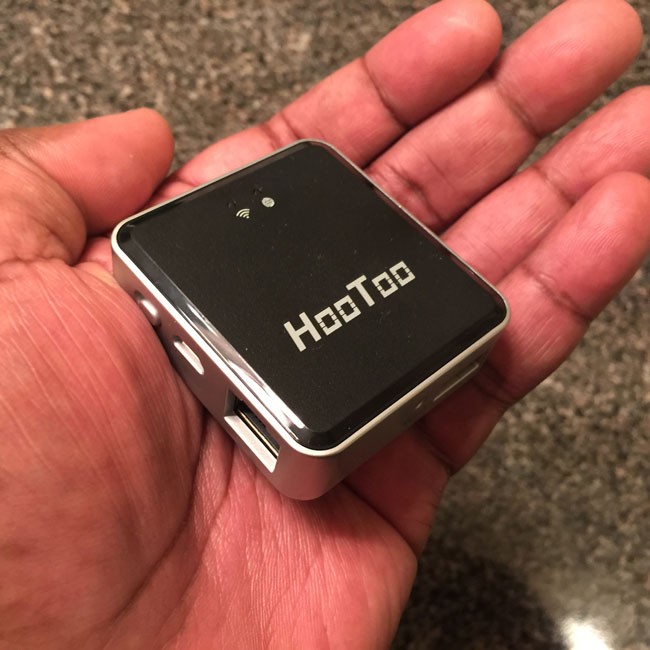
As I stated in the Netgear review, I was used to carrying around a bigger much more expensive AirPort Express Base Station, but the one thing the AirPort can’t do is allow you to share a public WiFi connection. In other words many hotel rooms now don’t have ethernet jacks anymore. This renders the AirPort Express pretty much useless because it requires an Ethernet connection to share. The HooToo has a small (everything) switch on the side that lets you toggle to either a wired connection or a wireless one. There is another feature that the HooToo has that the other ones I use don’t and that is the ability to plug in a thumb drive or other USB drive and share files wirelessly.

What’s it lack that the Netgear or AirPort has?

Well with a small size you do give up a couple of things. First off there is only one ethernet port. This means that you can only use it to connect to a wired connection (in wired mode) and not share to another device that requires a wired connection. This really isn’t an issue for me as I rarely ever need to plug in a second device that only has ethernet. The next thing is that the Netgear can be powered over USB or plugged directly into an AC outlet. The HooToo only has a micro USB port for power. Again I’m fine with that as I just plug it into my Anker 60W 6-Port Desktop Charger along with the other devices I’m charging at night. Lastly the HooToo can’t extend the range of an existing network. Again, not something I need on the road and this feature is more for home users.

Some other limitations: TripMate is Powerful, BUT:
– Cannot bridge an iPhone hotspot
– Cannot be used for IP camera FTP path
– Cannot work as a proxy server
– The Ethernet port can only be used as a WAN input port
– No app for Windows Phone OS
– Supports NTFS/FAT16/FAT32 formatted disks

The Bottom Line

The HooToo Tripmate Nano is the smallest, lightest most functional WiFi travel router that I’ve seen to date and it has officially kicked the Netgear out of my bag. I used it on my last trip with no issues (other than the bright blue LED that can keep you up at night). I stayed in an Embassy Suites hotel which only had WiFi. I was able to configure the HooToo via the iOS App or the web browser on my Mac. Once I connected I joined the hhonors hotspot and then from my Mac I got the regular Hilton logon screen to accept the terms and connect (the WiFi was free). From that point my devices were connected to my secure network in my room. Now if only Hilton would speed up their internet services across their hotel chains I would be even happier.

Get the HooToo Tripmate Nano here for a ridiculously low price.

Get the iOS app here from the .

Delta Studio: Good Idea. Really Bad Implementation.

DeltaStudio_iPad
P.S. don’t tease me with screenshots of movies that aren’t actually available on my flight…

As a frequent flier (Diamond Medallion – Million Miler) on Delta I’ve always applauded them for their firsts in making air travel a tad bit more enjoyable. It’s tough to please fliers these days because airlines tend to care more about profits these days than making the flying experience more enjoyable for its customers. However, Delta tends to come out on top when it comes to overall customer satisfaction and that’s largely in part due to the fact that they invest in their planes and try to offer a bit more than the others. Delta for example has more domestic planes equipped with WiFi than any other carrier. So much so that when I’m sometimes forced to fly other carriers I feel like I’ve stepped back in time. One of their latest perks recently introduced is Delta Studio. The idea is simple. Using your mobile device, say an iPad you can launch the Delta App and choose various video entertainment to stream over the plane’s WiFi. This content would play from the plane’s on board systems rather than streaming over the relatively slow Gogo Inflight internet. Sounds simple right? It should be, but Delta (and Gogo) chose a really bazar way to make this work. I’ve tried it twice now and have yet to be able to watch anything!

Here’s how it works currently…

You might think that you fire up the Delta App, choose a movie or tv show and watch it right? Nope. It’s not that simple. If you do fire up the Delta App first it will simply tell you that you don’t have anything in your library. Well OK, that kinda makes sense a little.

YouHaveNoVideos_DeltaStudio

Fine, let’s add something to “My Library”. Here’s where it starts to get strange. The Delta App tells you that you must leave the app and launch Safari to add content to your Library via the GoGo website. This one really boggles my mind. First off, Apple for years has allowed developers to build a browser (Safari) into their apps. So if the Delta App needed to go to a browser it could simply just bring up a window right in the App. No need to leave.

Nonetheless I launched Safari and navigated to the GoGo website. I signed into my account. I went to the entertainment tab and I found a movie that I wanted to watch and it was free. Awesome! I added it to my library and then tapped to watch it now. The website asked me to pick an app to watch it with and of course I picked the Delta app. It took me right back to the Delta App only to tell me that the movie was unavailable. WTF?

Neighbors6dollars

Sure, there could have been a problem with that selection. No problem, I went back to Safari and this time (silly me), I picked a movie that I had to rent. The cost was $6. I paid it and once again I tapped to watch it in the Delta app and I’m sure you’ve guessed by now that this movie was also unavailable and no there was no apparent way to get a refund.

videonotfound

I was at a loss for words since the Gogo site knows which plane you’re on when you’re logged in and therefore should know what’s available and what’s NOT. Alas, I went back to work on my iPad and needless to say I wasn’t entertained. You actually allowed me to choose a movie, pay for it, only to tell me after the fact that it’s not available.

Delta_Diamond_Medallion

Delta and Gogo, if you’re reading this, you’re current implementation is screwed up at best. It appears that Gogo is collecting the money for the content and that’s fine, but there is absolutely no reason that this transaction shouldn’t be transparent to the user and the entire process should happen within the Delta App. I’ve been on two flights thus far and have yet to see any of this wonderful content. The first time was on a flight without the entertainment system and therefore there were no videos available but at least it told me that up front instead of wasting my time having me browse selections that I would never be able to actually view.

BTW: Will I ever get my $6 back?

UPDATE: Gogo reached out to me on twitter to tell me that they found my purchase and refunded it. Thanks!

The way it should be

I can’t help but think about the iTunes model. If I buy/rent a movie on iTunes then it’s available to me on all of my devices at any time when I have a connection. I have the ability to download the video to my device or simply stream it. If we apply this to the Delta/Gogo model then I would envision something similar. I’m a Delta customer with a “my library”. I would be able to browse content and make choices up to 24 hours before my flight for streaming. Once I make my choices those files are download to the plane that I’m going to be on (with the 24 hour window before my flight). I fire up my device in the air and the content is streamed locally from the plane’s servers. If someone else rents/buys the same content/movie then great. You only have to download it to the plane once and stream it to both of us saving you money. Until it’s this seamless I think I’ll stick to my TiVo and iTunes content downloading to my devices the night before the flight as usual.

.


Best USB 3.0 Hub for Travel

Satechi-USB3.0-hub

Back in 2012 I did a review of what I consider to this day to be The Best USB 3.0 Hub. I still have this hub on my desk to this date with zero problems with it. It just works! While this USB 3.0 hub is great, it’s a bit too large for my travel tastes. Yes they do make this 4 port version but it’s still larger than I wanted for travel. The big decision you have to make when going with a travel USB 3.0 Hub is whether or not you want/need a powered hub or not. Obviously a powered hub is the way to go when you have the ability to plug it in to a power supply and you don’t mind carrying yet one more power supply in your bag. However, USB 3.0 offers more juice than USB 2.0 does. Therefore you may be able to get by with a self powered hub especially for occasional use during travel. When I’m using my MacBook Pro or MacBook Air on the road, I’m usually in need of one extra port. I usually have my Wacom Intuos Pro tablet plugged in and an external USB 3.0 hard drive. At that point I may need to plug in a document camera/scanner or a Lightning cable to sync/copy something from my iPhone or iPad.  Or I could simply need to plug in a thumb/flash drive to copy a quick file. These are the kinds of things I need to do via USB 3.0 on the road from time to time. The hard drive can be plugged into Thunderbolt. That frees up the USB port if needed, but not all of my portable external drives are Thunderbolt equipped.

I went with this portable USB 3.0 Hub

satechi-USB_3.0_hub_with_harddrive

Although Anker makes this 4 port USB 3.0 Hub, I went with this Satechi 4 port USB 3.0 Hub. It seemed to have high ratings across the board on multiple sites. I havent’ been disappointed as the Satechi 4 Port USB 3.0 Hub has been GREAT!. It performs as advertised as long as you keep in mind that it’s NOT a powered hub. So let’s get the rules of using a bus powered hub out of the way. First off if you plug in too many devices that require USB power you will likely run into issues where the devices may not work or may not work at their top USB 3.0 speed. So when I want to use a bus powered USB 3.0 hard drive I plug the hub into my computer first and then I plug in the hard drive. Lastly I plug in any slower devices. If you stick to these rules (plug in the hub first, and the most power hungry devices next) then you’ll be more successful. I was able to easily plug in my USB 3.0 G-Tech hard drive, and my Wacom wireless module and lastly my Ziggy document camera with one port on the hub to spare. This is likely more than I will actually use on a regular basis, but I wanted to test my worst case scenario. Also keep in mind that I have one more available USB 3.0 powered port on my MacBook Pro/Air. With this Hub I could easily have two external bus powered hard drives  (one in the USB 3.0 hub and the other in the built-in port) and still have other ports available for less power hungry devices. Since I only travel with three external hard drives on a regular basis, this is exactly what I needed as I never need to plug in more than two at a time and If for some strange reason I need all three, I can plug at least one of them in via Thunderbolt.

The Bottom Line

If you need a powered USB 3.0 Hub for travel, then you should probably get this one. However, if you’re looking for a smaller one that can be used even if you don’t have an available AC power port nearby or you don’t want to carry one more power brick, then you could go with this Satechi 4 Port USB 3.0 Hub and get the extra ports you need.


What’s In My Bag?

whatsinmybag2014

The good folks over a shotkit.com recently featured me on their site and the contents of my camera bag. You can see all the other photography gear that I use here. People are always asking what kind of gear I shoot with. On the flip side of that coin when I’m out on tour people are always asking about the gear I use on stage to do my presentations. So I thought it was time for a “What’s in my bag?” update. My backpack weighs a ton. Every now and then I take everything out and try to only put back in the things that I’m using on a regular basis. That time has come again and this past weekend while everything was out I decided to photograph it and detail it here:

  1. Let’s start with the bag itself. My FAVORITE computer backpack is the Tumi Alpha T-Pass. This backpack has really held up well with the load I put on it and shows no signs of wear. I was going through backpacks about once a year before this one. While it’s more expensive than I’m used to, it’s been worth it thus far. Also can beat the T-Pass feature for TSA checks at the airport. It unzips in half so that you don’t have to take out your laptop. Get it here.
  2. I shoot on the road and that means I need to retouch on the road. I couldn’t imagine retouching a picture in Photoshop without my Wacom Intuos Pro Small tablet. Get it here.
  3. In addition to the regular pen that comes with the Intuos Pro I have the Wacom 6D Art Pen for drawing in Illustrator. Get it here.
  4. My favorite international travel adapter. It covers most countries and has a smart design. Get it here.
  5. Nikon WU-1b Wireless Mobile Adapter. This allows me to transfer images from my Nikon D600/D610 to my iPhone or iPad wirelessly. Get it here.
  6. Adobe Ink & Slide – Pressure sensitive pen and digital ruler for drawing on the iPad. Get it here.
  7. Nikon D600 – I travel with either my Nikon D600 DSLR or my smaller Sony NEX 3 mirrorless camera. I love them both, but the DSLR is considerably bigger and heavier. Get the Nikon D610 here. Get the Sony Alpha NEX 6 here.
  8. Nikon ME-1 Stereo Micophone – You can’t have good video without good audio. The built-in microphone just doesn’t cut it. Therefore I use this one for those on the go interviews and recordings. Get it here.
  9. iPod touch – Although I have an iPhone and an iPad. I still prefer having a dedicated device on stage to play music and to run my presentation timer app. I’m usually using the iPhone and iPad in my demos. This way I have a dedicated device to do the tasks I need. Get it here.
  10. Oops – I left out #10. So let’s move on to number 11. 🙂
  11. Nikon 28-300mm lens. This is my main travel lens and while I do have better lenses, this one covers a nice range and it has a good quality. Perfect for travel. Get it here.
  12. I have to charge all these devices. My main cables are the 6 foot Lightning cable by Apple – Get it here and the nice and short Lightning cable by CableJive. Get it here.
  13. iPad Air with Logitech Ultrathin Keyboard Folio. I use my iPad Air all the time and now on stage to demo mobile apps. Get it here. I couldn’t imagine not having my Logitech ultrathin Keyboard Folio. Get it here.
  14. RavPower Battery – Sometimes my iPhone doesn’t make it through a long day of heavy use without another charge. I’m not always near an outlet. This RAVpower Battery can easily charge it twice. Get it here.
  15. I gave up fighting for additional outlets in hotel rooms and airports. Now I just bring this ultra compact 3 outlet powerstrip with me. Get it here.
  16. Charge 5 USB Devices at Once (including 2 tablets) with this slick 40w Anker 5 port charger. Get it here.
  17. Bose QuietComfort 20i Noise Cancelling Headphones. These need no explanation other than I gave up the full size pair for these because they do just as good of a job and take up a fraction of the space in my bag. Get them here.
  18. If I rent a car I want to be able to charge my iPhone and possible my iPad while I drive. This car charger gives me 4.2 Amps on BOTH USB ports. Get it here.
  19. Verizon 4G LTE Hotspot. I’m grandfathered into an unlimited data plan with AT&T on my iPhone and the only way to get the mobile hotspot feature on my phone is to give up that plan. I refuse to do that, so I have a separate hotspot to give me WiFi access in places where there is none or hotels where their internet is soooo slow that it’s unusable. Get it here.
  20. Apple Magic Mouse. It’s low profile, bluetooth, has a touch pad on it for smooth scrolling and gestures. It works. Get it here.
  21. Apple AirPort Express. I love creating my own WiFi network. This makes it easier to share a single connection on stage or in a hotel room and easily allows all my devices to talk to each other on the same subnet. Get it here.
  22. Apple MacBook Pro 15″ Retina Display Mid 2014 – This is probably the most important item in my bag. It’s my main work computer and it has enough power to handle everything I do. Get it here. The skin on top is a custom skin from Gelaskins. Make yours here.
  23. Wacom Bamboo Stylus Pen for writing and digital signatures on mobile devices. Get it here.

Not Pictured (forgot that these items were on my desk when I cleaned out my bag)!

Forgot the external hard drive that I always carry, but wasn’t in my bag at the time when I took everything out. I carry two G-Drive 1TB 7200 RPM External Thunderbolt, USB 3 Drives.

Also my favorite smartphone tripod mount.

My Hoodman USB 3.0 CF/SD Card Reader.

And my favorite cable bag to keep it all straight in my bag.


Traveling by plane with your camera gear

Recently a fellow photographer asked me about flying with her camera gear and what was allowed and what wasn’t? Since I fly for a living and I usually have at least one camera with me I’m pretty familiar with the rules and thought I’d share some tips here. First I have to give you a disclaimer in that TSA can decide to search any of your baggage at anytime and ask you  to take out every single item one-by-one for inspection. I’ve had it happen! Now with that out of the way luckily this is not the norm. Let’s go over some quick tips on carry-on vs. checked luggage. I absolutely HATE checking my luggage and only do so if I have no choice. This means that I want to carry both a camera bag AND a computer bag on board and therefore I will check the 3rd piece of luggage containing my clothes. Under no circumstances am I ever ever ever going to check my camera or computer gear. It’s like waving good-bye to it as I feel like I’d never see it again. If I have to check my camera gear, then I’m not going! Most airlines allow you one piece of carry-on luggage such as a roller-board suitcase and a personal item such as a backpack, briefcase or purse. For me that means a backpack.

A Quick FAQ

Q. Do I have to take my cameras out of the bag when going through TSA security?

A. Typically NO, but TSA at any time can ask you to take ANYTHING and EVERYTHING out of your bag. With that said I can’t remember the last time they asked to take my cameras out. It’s been years. This of course goes out the window outside the US. Foreign airport security is a lot less forgiving. Give yourself time as you will likely need to take out each piece of gear and put it in a bin.

Q. Should I just check my camera gear under the plane to save the time and hassle.

A. NO! You may never see it again if you do and the airline will NOT replace it.

Q. What about tripods/monopods?

A. I have been known to travel with a tripod from time to time and I put it in my larger roller-board suitcase with my clothes. This however, is a grey area. Some TSA checkpoints will let it go and others will require that you check it as a tripod could be used as a club/weapon. So be prepared with extra time if you’re traveling with a tripod and have it in a bag that you don’t mind checking (not with the rest of your camera gear).

The backpack pictured above is my BIG ThinkTank “Street Walker Hard Drive”  Backpack. This is the one I carry when I’m going on a trip specifically to shoot and I’m going to carry a LOT of camera gear. This one backpack also holds my MacBook Pro 15″ Retina notebook and iPad Air. It weighs a freaking ton once I have I have it loaded, but it still fits under the seat in front of me on a plane and therefore allows me to carry a rollerboard on with my clothes (and tripod) in it.

On trips where I’m carrying less photographic gear but still more than two lenses then I carry my smaller “Kata” backpack:

kata

This one will still hold one camera body and 2-3 lenses plus my MacBook Pro. Also since it’s smaller you’ll be less likely to load a ton of gear in it and therefore it will be lighter to carry and manage.

Although both backpacks above  are great for those photo specific trips I go on, neither of them are my “regular” backpacks. Since most of my trips are not photo specific I’m usually carrying only one camera body (my Nikon D600) and one lens (my Nikon 28-300mm) or my even smaller Sony Alpha NEX-3N. My daily/weekly travel backpack is actually my Tumi Alpha T-Pass Laptop Backpack.

tumi_alpha_t-Pass_backpack

I really like this backpack A LOT! The T-Pass stands for “TSA Friendly” in that the back containing your laptop can unzip so that you can lay the bag flat (open) without having to remove your laptop saving you time. Tumi bags are expensive, but they come with a 5 year warranty and are very very very well constructed. I use this bag daily and it shows no signs of wear after one year so far. There is plenty of room in it for my laptop, iPad, camera stuff and just a ton of other little items that I carry. It weighs a ton once I load it up, but it handles the load very well.


The Bottom Line

For the most part you should be fine traveling by plane with your camera gear and carrying it on as long as your carry-on bag meets the size restrictions for the overhead bin or under the seat. TSA sees cameras everyday and while they still require you to take your laptop out and put it in a separate bin (unless you are TSA Pre-Check or you have a bag like my Tumi above), they tend to not ask you to take your camera gear out. The only other thing they can be uptight about is carrying a lot of batteries. So keep your extra batteries to a minimum and spread them across multiple carry-on bags as best you can.

W-camera-gear


Join me on the Adobe Create Now 2014 World Tour!

CreateNow2014-TourBus-Terry-Jason-Paul

We put the band back together and we’re headed out on tour! Jason Levine, Paul Trani, myself and several other Adobe Evangelists are headed out on the ALL NEW Adobe Create Now 2014 World Tour. We’ll kick things off with a LIVE event in New York that will be webcast worldwide. and then immediately after we’ll be heading to a city (hopefully) near you.

Tune in Wednesday, June 18th, 2014 at 1PM ET to see “What’s Next in Creative Cloud” You can sign up right here.

meet_us_in_person_create_now

Then starting on Thursday, June 19th we’ll hit the road and visit several cities around the globe. This will give us the chance to go deeper in the products and show you even more. You can find out where we’re going and register for the one closest to you right here. If by chance you’re not near any of those major events, we’ll also be doing several more tour stops here. As usual you can see my upcoming events right here on the right sidebar of my blog (or at the bottom of this post if you’re looking at this on a smartphone.

2013-CreateNow-Chicago-2
Paul Trani and myself on stage during the Create Now 2013 Tour in Chicago

I look forward to see you all! This should be a lot of fun (saying that now of course before all the travel. 😉 )

Get a full year of Adobe Creative Cloud on sale here!


Review: Bose QuietComfort 20i Acoustic Noise Cancelling Headphones

bose-qc20i

Since I travel for a living I almost always travel with at least one pair of headphones. My favorites were the Bose QuietComfort 15 Acoustic Noise Cancelling Headphones. I’ve used Bose over-the-ear noise cancelling headphones for years now. The only problem I have sometimes is having so much stuff in my backpack that I  don’t have room for them. I noticed that Bose came out with an an in-ear model, the Bose QuietComfort 20i. However, I just dismissed them as “probably not being as good as what I already had.” My buddy Jack Beckman swore by them. I still wasn’t convinced. However, in packing for my current trip I thought, boy it sure would be nice having something that does the same thing, yet fits in my pocket. So I bit the bullet and ordered a pair. Since I was going to be flying for 4.5 hours I’d be able to really put them to the test. Worse case, I’d be able to return them.

First Impressions

TW-bose-QC20i

They arrived and I took them out of their packaging. I was impressed by the size and relative light weight of them. I hadn’t researched these at all so I was a little surprised to see that they used an internal rechargeable battery. This is a plus and a minus. The plus is that you don’t have to buy batteries. The minus is that if the battery dies or you forget to recharge them there goes your noise cancelling. I was pleasantly surprised that unlike the QC 15,  the QC 20i will still allow you to hear your source audio/music even in the OFF mode. That always bugged me about the QC 15. If the battery goes dead and you don’t have another one they become a paperweight. So the fact that these will at least still function has headphones without power made me feel much better about the battery not being user-replaceable. You charge the battery with a standard Micro USB connection. They provide the cable, but not an actual charger. I understand that most people have no less than a hundred chargers lying around from all the cellphones, iPads, and other devices that charge via USB, but for the asking price a charger should be included nonetheless. Perhaps even a dual charger so that you can charge your headphones and the device that you’re going to plug them into, as a nice touch. Speaking of battery, the internal battery takes about 2 hours to charge and last about 16 hours per charge. It does include three different sized sets of gels to fit your ears properly. I’ve only tried the medium ones that seem to fit well in my ears without falling out. I’ll probably try the large ones to compare. It also comes with a carrying case.

The Controls

There is a control box attached to the cable near the audio plug end. This box contains the battery and is where you plug in the charger. It also has the on/off switch . All the way on the other end of the cable before they split into a Y you have a clothes clip and the remote. The remote lets you control the volume, mute, and temporarily allows you to turn the noise cancelling off. If you have an iPhone, iPad, or iPod you’ll be happy to know that this remote works just like the remote on your Apple Earphones/Earpods. There is also an integrated mic so that you can use it on phone calls. Yes I even tested the volume button to control the shutter of the iPhone camera and it works. My only complaint with the noise cancelling button is that it doesn’t also mute the audio. Whenever the flight attendant would speak to me I found that I had to press both buttons to hear him. There should be ONE button that does both. The whole point of putting that button there is to turn off the noise cancelling so that you can hear what’s going on around you. What good is it if the music is still blaring?


The Sound

The ultimate test of these is both the sound quality and effectiveness of the noise cancelling. I was quite surprised at how well they sounded and how well they blocked the noise around me. While I’m certainly no audiophile, I would definitely say that these are definitely on par with my QC 15s. I don’t miss them at all. These are more comfortable to wear for longer periods of time. Since I wear glasses, any over-the-ear or on-ear headphones begin to pinch after an hour or so, even sometimes causing a headache.


The Bottom Line

bose-qc20i-set

I have a new favorite set of travel headphones. The Bose QuietComfort 20i Acoustic Noise Cancelling Headphones are every bit as good if not better than their bigger brothers. They take up a fraction of the space and weight. Anyone that has ever attempted to lift my backpack will know how much I appreciate this. These are a winner and I highly recommend them.

You can get a set here.

FAA Finally Relaxes Rules on Using Small Electronics During Taxi/Takeoff/Landing

compliments of istockphoto.com

If you’re a frequent flyer like I am then you know the drill when it comes to your mobile devices. Usually in the US you could use them while at the gate with the plane door open. However, once that door closes it was time to “power off and stow all electronic devices with an on/off switch.” Use of such devices during flight could interfere with the plane’s navigation system. Quite frankly I never bought this. The reason I never really believed that this was a real issue is because if there was some real way for this to happen believe me portable electronic devices would be banned from planes! If 4 oz of tooth paste constitutes a potential threat and is siezed by TSA,then what chance do you think your iPad would have? Also there was never any real policing of this. Sure the flight attendants would do their best to visually look for gadgets, but I’ve accidentally left things on in my bag in the overhead bin. Well it looks like we can finally stop second guessing this weird rule as the FAA has now started allowing some airlines (i’m sure more will follow) to allow use of these devices pretty much during the whole flight. They still want you to have the device in airplane mode, but now it’s no longer required that you shut if off and put it away.

Currently Delta, United, American Airlines, US Airways and Jet Blue have been cleared to allow the use of personal (small) electronics during take off and landing. Even the Delta flight attendants on my last flight were so used to telling everyone to turn things off they had to catch themselves a few times.

Air travel is definitely not “fun”. It’s actually a pain in the ass at times. However, as a frequent flyer the little liberties (like TSA Pre-Check) we’re starting to get back are helping make air travel suck less. Now can we get the seats redesigned on these planes?

I’m Headed To A City Near You! #CreateNow

wpid12436-BOtWnO3CMAAdPDO.jpg-large_sm.jpg
photo by Jason Levine

Today I head out on the Adobe Create Now World Tour. I’ll personally be making stops throughout the US and Canada. My 1st stop is Portland tomorrow and I’m looking forward to seeing YOU! To see all the tour stops, go here.

I also recorded a couple of QuickTip videos to whet your appetite for the kinds of things I’ll be showing on tour:


I’m Off To APAC for the Adobe Create Now Tour

AdobeCreateNowBanner

Rarely do I do a blog post on a Friday evening. However, since I totally forgot to do it earlier and I’ll be offline for about 24 hours I figured better late than never.

I’m headed to Asia and I’m actually thrilled to be back on the road. This is my first international trip this year and I get the pleasure of going to a few places that I haven’t been before. Here’s where and when I’ll be presenting with my colleagues Jason Levine and Paul Burnett.

09-Jul Create Now Roadshow: Bangkok, Thailand
11-Jul Create Now Roadshow: Singapore
16-Jul Create Now Roadshow: Delhi, India
17-Jul Create Now Roadshow: Chennai, India
18-Jul Create Now Roadshow: Bangalore, India

I’m looking forward to seeing all of you on the other side of the planet! If you can make it to the Adobe Create Now Tour be sure to come up and say hello.

P.S. If you approach me and I look sleepy, I probably am 😉