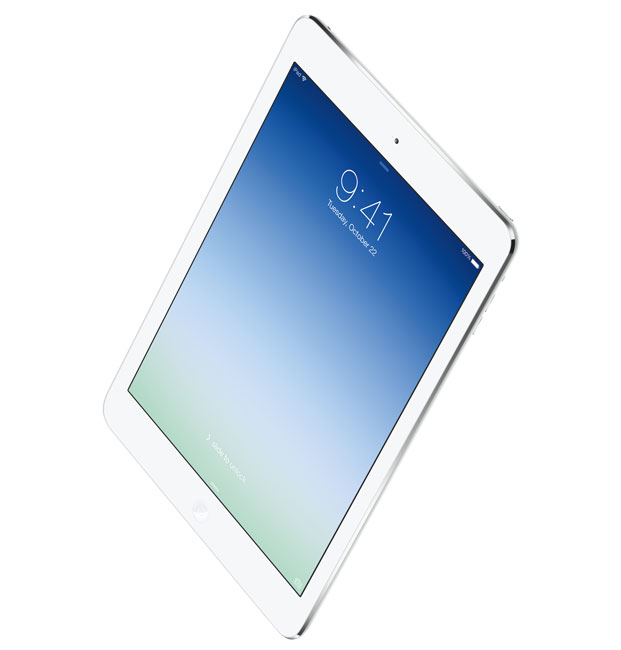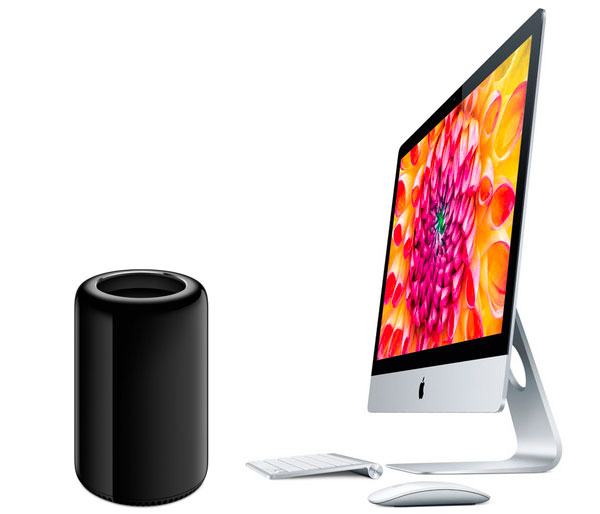
Photographers: iMac or Mac Pro?

macpro-imac

Rather than just do a review of the new Mac Pro and tell you how fast it is vs. any other Mac that Apple has made, I decided to approach this review from a different angle. There was a time when I bought Mac Pro towers because I wanted the fastest Mac available. However, I soon realized that as much as I didn’t want to admit it, the Mac Pro is “overkill” for what I do on a day-to-day basis. Sure, faster is always nicer than slower when it comes to waiting for a process to complete, but honestly I’m rarely waiting for a process to complete these days. Sure, I render video on a weekly basis and it would always be nicer to have those videos render faster, but is the faster render worth the money for a Mac Pro? The answer will of course depend on how much you find yourself waiting on your computer and not being able to do anything else while you’re waiting.

Let’s get some ground rules out of the way first

If you don’t like Macs or don’t want a Mac for whatever your reasons are, you can pretty much stop here and find something else to do with your time. I find it entertaining when people feel compelled to tell you/me how much they don’t want the thing you’re reviewing or writing about because they use something else. This is not a Mac vs. _______ post. If you’re happy with a Windows PC or Linux, or anything else, I’m happy for you. If you’re reading the rest of this post then I’ll assume that you’re a Mac user or thinking of becoming one.

The next thing I’d like to get out of the way is that if you’re looking for a Mac Pro review that tells you this new Mac Pro is better than the previous Mac Pro with all the benchmarks to back it up, then you’d probably be better served by other reviewers who have targeted the performance of the new model vs. the older model. I’m doing this review/comparison simply to answer the question, “as a photographer would I be better off spending my money on an iMac/MacBook Pro or a Mac Pro?” If you’re a videographer and you’re a Mac user then you probably already have the new Mac Pro because you demanded the fastest Mac you could get to render your videos.


Introduction

When I saw the rumors that Apple was going to release a radically different design for the Mac Pro, to be quite honest I was only mildly interested. As I stated above, I realized with my last Mac Pro that I wasn’t really a Mac Pro customer. Sure I appreciate the faster performance, but I found myself only using my Mac Pro when I knew a process was going to take a long time to complete. Otherwise I was quite happy just using my MacBook Pro simply because I could use it in any room at any time. I could take it with me on the road. However, I said to myself perhaps if the performance (for what I do) is significantly better and the price point for an entry model was $2,500 or less, I’d consider getting one. Well we know the latter didn’t happen, so now it was time to test the performance. I got the opportunity to test a Mac Pro standard configuration in my studio for a few weeks. I loaded the latest version of my Adobe Creative Cloud applications on it as well as a few utilities that I use such as ScreenFlow. Next, I began running side-by-side tests of the things that I do daily that take more than a few seconds. My assumption was that the Mac Pro would certainly be at least twice as fast at everything I threw at it than my 2012 MacBook Pro Retina Display Mac. Actually I was wrong!
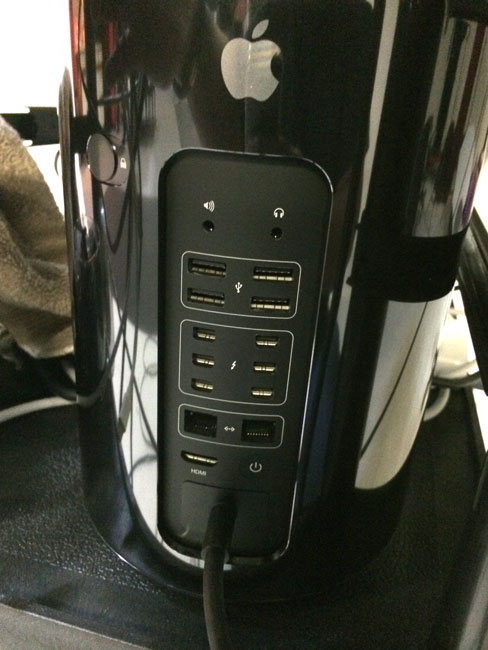
MacPro-back

When will a Mac Pro significantly outperform any other Mac?

As I said above, I was wrong in my assumption that the Mac Pro would be at least twice as fast at everything. Actually it is faster at everything! Just not by a margin of two. On every test I threw at it the Mac Pro outperformed my now two-year-old MacBook Pro, but in some cases it was only slightly faster. This is when I realized that in order to see significant speed improvements the software you’re testing not only needs to be optimized for the faster processors, but also it would need to take advantage of the multiple cores. Even then, the MacBook Pro is no slouch. It’s got multiple cores too. Where I saw the biggest differences was in (no surprise) video rendering and processes that take longer than a minute or so anyway.


What I do as a photographer

As a photographer I spend most of my time in Adobe Lightroom 5 and Adobe Photoshop CC. Photoshop CC definitely takes advantage of multiple cores and now has Open CL support. So filters will run faster on the new Mac Pro. All of these applications are 64bit native and that means that they’ll take advantage of additional RAM.

My first test was one of the things I do after every shoot. I convert my RAW files into .DNG (Digital Negative) format. This is one of the few times that I see a progress bar in Lightroom because it does take time to do it. I converted 435 16MP Nikon .NEF RAW files into DNG format.

First on the MacBook Pro it took 14 minutes 35 seconds

On the Mac Pro the same conversion took 12 minutes 12 seconds.

Yes it was faster! However, it was only about 2 minutes faster. I must say that I was a little disappointed. However, I moved on to the next test.

The next test was using the Web module in Lightroom to export a web gallery using the Client Response Gallery Template from The Turning Gate.

MBP-7

On the MacBook Pro this export took 7 minutes 41 seconds

MP-4

On the NEW Mac Pro it took 4 minutes 9 seconds.

Ahhhh, much better. Almost half the time.

The next test was a simple HDR (High Dynamic Range) conversion in Photoshop CC using three RAW files. This is a two-part process. The first part is simply combining the three (or more) images together and aligning them. Then the second part of the process is applying whatever settings you want to control how your HDR looks.

The first part on the MacBook Pro took 12.70 seconds and on the Mac Pro it took 9.10 seconds

The second part on the MacBook Pro took 13.00 seconds and on the Mac Pro it took 11.13 seconds.

The next test was stitching a Panorama together using Photoshop CC and 10 RAW files

On the MacBook Pro this process took 1 minute 12 seconds

On the Mac Pro this process took 51 seconds.

I could have gone on running other tests and other filters, but these are the things I do on a regular basis. If it was faster at something that I rarely do, then I really don’t care as much. As you can see from the results above, the Mac Pro wins on every test as you would expect it to, but the results (even if it was twice as fast in every case) may not justify the difference in cost. We’ll get to that at the end.

Next it was time to look at what I do as a Photographer when it comes to video

I use video in a couple of different ways. The first as a photographer is to tell my story. This means capturing video with my DLSR, GoPro, iPhone, etc. I use Adobe Premiere Pro CC to assemble those videos and then output them to share (usually on YouTube). The next way that I use video and probably the way that I use video the most often is to record my Creative Cloud TV video podcasts. These screen recordings are done with ScreenFlow and since the editing I do is pretty simple I can edit these right in ScreenFlow. Of course I need to export those videos out and this can take a while depending on the length of the video. I had no doubts that this is where the Mac Pro would really shine. After all these are the kind of processor and resource intensive tasks that the Mac Pro was built for. I was not disappointed.

The first test I ran was an export of an hour-long edited video out of ScreenFlow.

On the MacBook Pro this export took 60 minutes

On the Mac Pro this export took 33 minutes.

It gets better in Adobe Premiere Pro CC and the Adobe Media Encoder CC. I needed to convert this video into a different format using the Adobe Media Encoder CC.

MBP-34

On the MacBook Pro this conversion/export took 34 minutes 36 seconds

MP-12

On the Mac Pro this conversion/export took only 12 minutes 36 seconds


The Bottom Line

The NEW Mac Pro is the fastest Mac that Apple has ever created. The question you have to ask yourself is, “Is the speed difference worth the difference in price?” For me the answer is no. Sure if I spent my days rendering video all day every day, I’d already have the Mac Pro. There would be no question. However, as a photographer I can’t justify the difference in price. Hey! Wait a minute, you said in the title of this post “iMac or Mac Pro?”, yet all you’ve talked about is the MacBook Pro vs. the Mac Pro. This is true. I didn’t have a new iMac to compare it with. However, if you’re looking for a “desktop” Mac as a photographer, I’d seriously consider the current iMac. The current iMac will be as fast or faster than my 2012 MacBook Pro in every case. So here are some prices and specs to look at:

The Mac Pro model and configuration that I tested above is here. (Now keep in mind that if I was going to buy one I’d start with this configuration and I’d go with a bigger internal drive and more RAM)

The base configuration 4th gen 21.5″ iMac is here. However, this model is not a fair comparison. It’s probably a little slower than my MacBook Pro as it has a slower processor, less RAM, and no Flash Drive.

This would be the configuration that I would recommend and would be more of a fair comparison: 27″ iMac here.

If you’re interested in a similar configuration (using the current model) to my MacBook Pro 15″ Retina, it would be this one.

Why an iMac? Although I don’t use one, an iMac makes sense because you’re getting a fast Mac with a nice big 27″ display all in one.
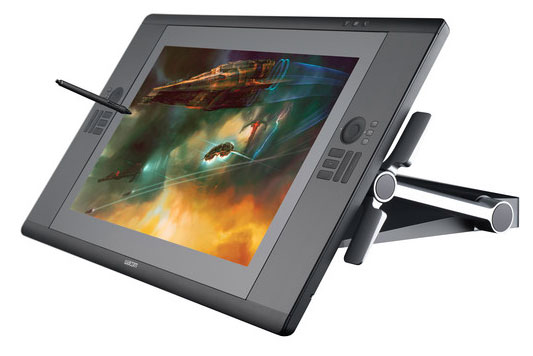
Wacom_cintiq-24hd

Why a MacBook Pro? For me the MacBook Pro makes the most sense because when I’m at my desk I have connected to a nice 24″ HD Wacom Cintiq display/tablet. When i get ready to go I disconnect it and go. I have a computer with a nice 15″ Retina display when I’m on the road. If I didn’t travel for a living then I’d probably have an iMac. Since I travel a lot, a MacBook Pro makes more sense.

If you want the fastest Mac and you don’t mind spending $3,000-$4,000 (or more) on it, then definitely go with a Mac Pro. Everything you do will likely be faster than the Mac you’re currently using. Keep in mind that you’ll also need to buy a display, keyboard and mouse/tablet to go with it. At the end of the day I realize that computers have become “fast enough” and that I don’t spend a lot of time waiting these days. Even when a process such as a video render/export is going to take a few minutes I can toss it to the background and work on other things in the foreground. My last Mac Pro once configured set me back over $5,000 and while it was a beast, I found that I wasn’t really using it as much as I had hoped I would, so I sold it. The new Mac Pro is faster, but is it $4,000 faster? For me it’s not.


UPDATE: Now that the iMac Retina 5K is out I got my hands on one and did a comparison here.


Why I switched back to Pandora Radio from iTunes Radio

pandora_radio-iPhone5

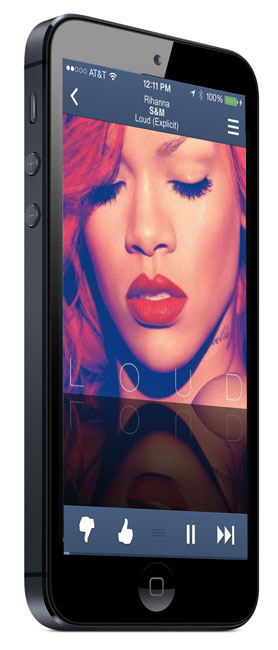
I really wanted to like iTunes Radio for two simple reasons. The first is that it’s integrated into all my iOS devices and iTunes and that just makes it easier to enjoy and control. The second reason was that since I’m already paying for iTunes Match $25/year (that I absolutely love), iTunes Radio is delivered to me Ad free. Yes I had high hopes that I would be able to drop my Pandora Radio subscription (yes I hate ads), and just use iTunes Radio, however I just resubscribed to Pandora Radio ($3.99/month, which ironically bills through my iTunes account).

Why go back?

I went back for one reason and one reason only. THE MUSIC! As much as I tried to tweak my iTunes Radio stations I just couldn’t seem to get the same variety/favorite mix that I get on Pandora. iTunes Radio seemed to play the same songs over and and over again and yet not play the ones that I wanted to hear. Even if I added specific songs to stations it seems like I would NEVER hear them. I just can’t seem to get iTunes Radio to play the songs I like or new songs that I wouldn’t mind hearing consistently and this problem doesn’t exist for me on Pandora Radio.

I may go back to iTunes Radio from time to time because of the tight integration in iOS, but for now when I just want to hear good music I fire up Pandora Radio.

What’s been your iTunes Radio experience? Also why do many of you prefer Spotify?

Get the Pandora Radio app here:

.

4 Cool Ways to Charge Your iPhone, iPad and other Mobile Devices on the Go

lightning_wall_outlet

If you have a smartphone and you use it throughout the day chances are your battery won’t last from the time you wake up til the time you go to bed. If you work in an office or other stationary place then you probably charge your device at your desk. If you drive around you probably charge your device in the car. However, what if you’re out and about all day, take trains and are just not near a wall outlet? There are ways to charge on the go. Here are a few of my favorite accessories:


ChargeCard

chargecard

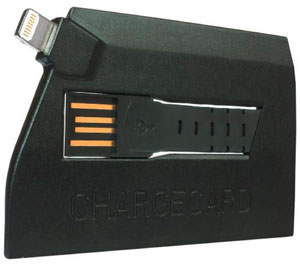
First off even if you can get to a charger or USB port and you’re an iDevice user then you’re going to need a cable. Good luck if you are borrowing a charger from your friends that use Android and other platforms. This is why I love the “ChargeCard” it’s a credit card size “cable” that I keep in my wallet. Pop out the USB plug, plug it into any standard charger or USB port and the other end into your Lightning port on your iPhone, iPad or iPod touch. Away you go…

Get the ChargeCard for Lightning devices here

Yep, they make one for Android here and older 30pin connectors on iDevices here.
 

RAVPower Flashlight Battery

RAVpowerFlashlight

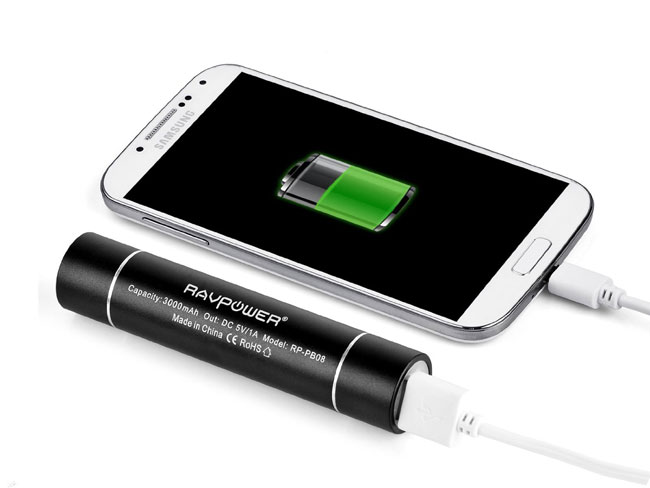
I have a variety of different portable batteries. However, this is one the coolest ones I have because of its size and form factor. At first glance it looks like a standard small LED Flashlight and it is! However, on the other end is a standard USB port so that you can plug in your smartphone and charge it back up. What more can I say? A device that serves more than one purpose effectively is always going to be a favorite of mine!

Get the RAVPower Lipstick External Power Pack here.
 

RAVPower Luster 6000 mAh Battery Pack

RAVPowerLuster

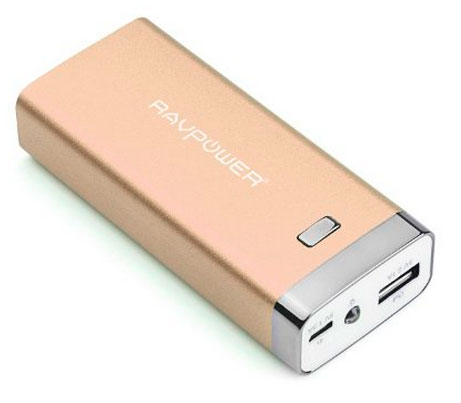
Need more juice? If you want to be able to charge either a smartphone or a tablet then you’re probably going to want 2.1A output. That’s why I carry a RAVPower Luster 6000 mAh Battery Pack. This one has enough juice to charge either my iPhone 5s or my iPad Air. Even if you’re only going to want to charge a smartphone, then you might want to get this one because the higher output will charge your smartphone faster!

Get the RAVPower Luster 6000 mAh Battery Pack  (in multiple colors) here.
 

Premium Solar Charger

solor_smartphone_charger

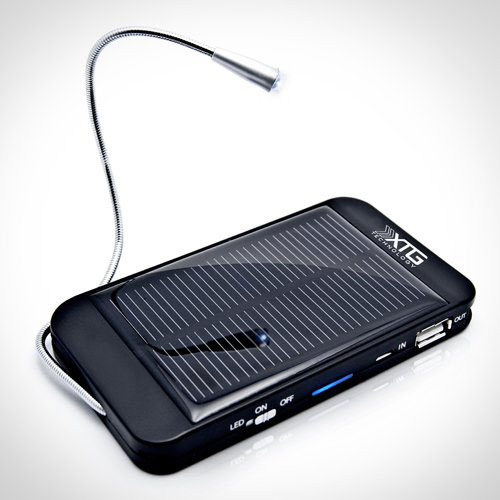
A battery is great, but what about those times when even the external battery goes dead? Well there’s always the sun as a backup. This is a battery pack similar to the ones above that can be charged up via a wall outlet, but it also can be charged via solar energy.

Get the Premium Solar Charger here for your next power outage!


7 New Things You Can Ask Siri in iOS 7

siri-IOS7

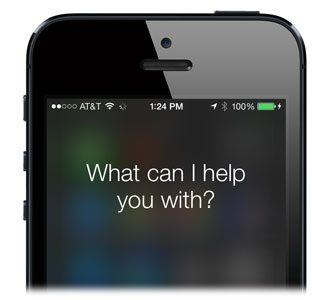
This seems to be an annual thing  for me as each new iOS version lets you do more with Siri and each year there are more and more new iPhone and iPad users. Siri lets you do so much with simple voice commands and most people have no clue what you can ask Siri to do. For quick reference here’s my original 25 Fun Things to Ask Siri post and the follow up 25 New Things To Ask Siri when iOS 6 came out. Well iOS 7 is here and of course you can Ask Siri even more things now. Here are a few of my favorites – 7 New Things You Can Ask Siri:

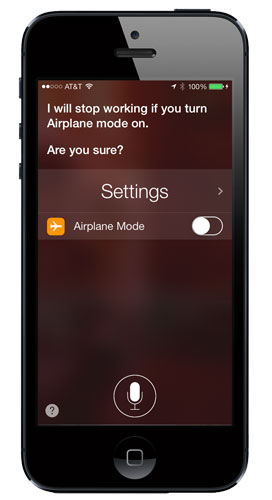
AirPlane Mode (you tell Siri to control your settings, Bluetooth on, make the screen brighter, etc.)

siri-iOS7-airplanemode

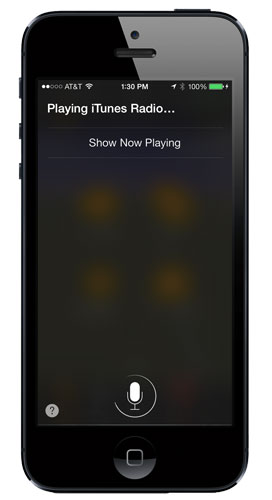
Play iTunes Radio

siri-iOS7-playitunesradio

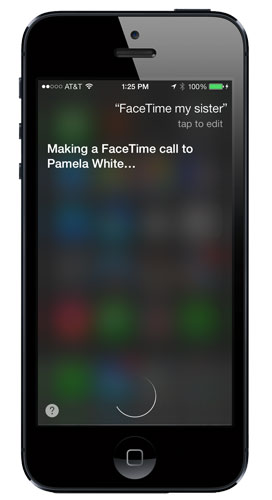
FaceTime My Sister

siri-iOS7-facetimemysister

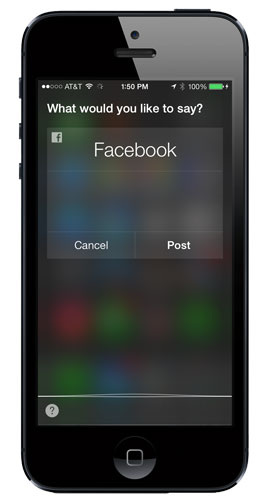
Post to Facebook (or write on my wall, or Tweet)

siri-iOS7-posttofacebook

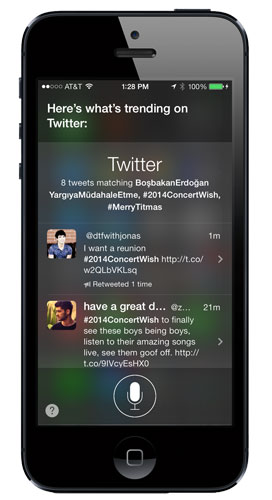
What’s trending on twitter?

siri-iOS7-trendingontwitter

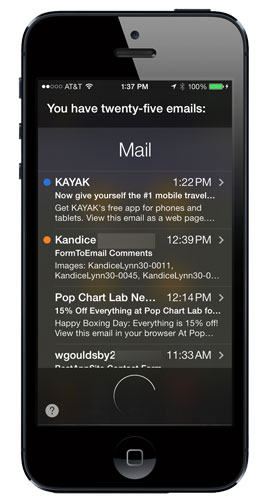
Read my email

siri-iOS7-readmyemail

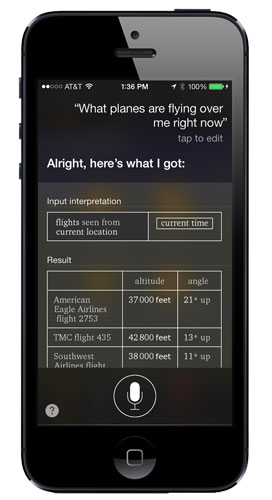
What planes are flying over me right now?

siri-iOS7-whatplanesoverme

Now for a little fun

Siri definitely has a sense of humor. Ask Siri these 5 questions and see what she comes back with:

Can you make me a sandwich?

Beam me up

What’s the answer to the universe?

Is Santa Claus real?

Who’s on first?


Kick Full Color Video Light Review

kick

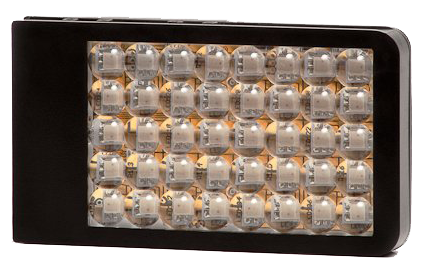
As a photographer I’m always looking at the latest and greatest lighting gear. Most of the lighting I buy is geared towards professional photographers and videographers. However, today I’m reviewing a product that is geared towards non-professionals. Just about everyone takes pictures and videos with their smartphones and point-and-shoot cameras. However, most amateurs rarely think about lighting until after the fact. Also most smartphones and small cameras don’t really do well in low light settings. Therefore, off camera lighting is nice to have, but rarely convenient or cheap. This is where the Kick LED Full Color Video Light comes in. Beyond being a nice, small, light-weight, bright, battery powered LED light, it has a built-in WiFi network. You can control it with the free Kick App for your iPhone and Android smartphone. Not only can you control the brightness, but you can also control the color too. There are even special effects such as strobe effects and effects that will continuously change the hue. You can even use the camera on your device to sample the color of the walls or lights around you to have the Kick automatically emit the same colors.

Rather than tell you more about it, I’d rather show you in this video:

before-kick-web
Sample photo taken before adding the Kick light
after-kick-web
Sample photo taken after adding the Kick light

You can get the Kick Full Color Video Light here.
 

.

Mophie Juice Pack Air for iPhone 5/5s

mophie-juicepack-air-red

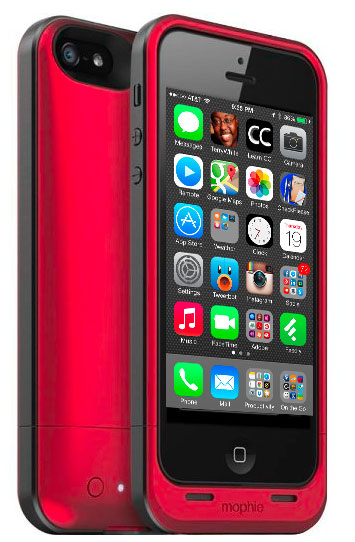
If you use your iPhone a lot during the day then chances are you’ll run out of battery before you run out of day. While at my desk I keep it plugged in and while in my car I use this car charger. However, when I’m on the road I tend to use my iPhone 5s quite a bit when I’m not near a power source. I also depend on it heavily and can’t afford to run out of juice. I’ve used a variety of external batteries before, but the one that is definitely the most convenient is the Mophie Juice Pack Air. The reason I like this one best is because it doubles as a case for iPhone 5/5s. This means that while your iPhone is in the Juice Pack Air it’s being charged and protected at the same time. Because it is a battery it does add a bit more bulk than a standard case, but not too much. It’s also very light and therefore doesn’t add a ton of weight. The Juice Pack Air charges via a micro USB cable (supplied). At first I was a bit disappointed in this because I had hoped for a Lightning connector pass-thru. However, on the plus side micro USB is more common and easier to share with non-iPhone users. You can charge just the Juice Pack or both the Juice Pack and iPhone at the same time. The Juice Pack Air has a physical switch to turn it on/off and an LED readout to let you know how much “juice” is left. The 1700mAh battery is designed to give you 100% more power effectively doubling your iPhone 5/5s battery life.
The Mophie Juice Pack Air comes in Black, White and PRODUCT (Red). I went with the PRODUCT (Red) one. I keep it charged and available for those “long days”. I’ve used previous models on previous iPhones and they have never let me down.

You can get the Mophie Juice Pack Air here.

Chromecast – Stream web content to your HDTV wirelessly

chromecast-dongle

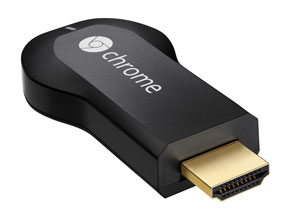
If you’ve followed my reviews you probably already know that I’m a fan of TiVo and Apple TV. Between the two devices I pretty much have all my TV watching needs covered. TiVo is definitely the best DVR experience for recording and watching TV shows and Apple TV is great for streaming all my media content, watching Netflix, YouTube, HBO Go, iTunes rentals, podcasts, etc. With Apple TV I can even stream/mirror any content from my iOS devices OR my Macs. The latest Macs and Mac OS X has AirPlay built-in. Even with all these capabilities I was intrigued by Chromecast. The low $35 entry price was low enough to give it a shot.

What’s Chromecast?

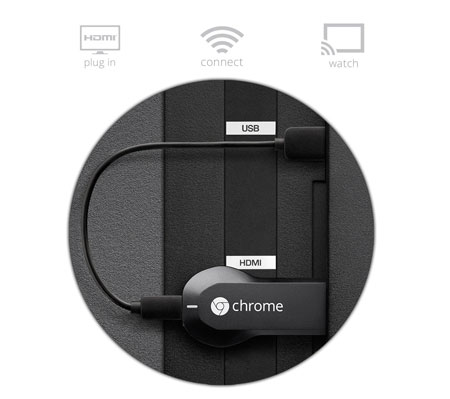
Chromecast is a small “dongle” that attaches to your TV via HDMI. However, don’t let the picture deceive you as it did me. You not only connect it to your TV via HDMI, but you also need to supply power to it. You can either use the supplied power adapter and plug it into the wall or you can use the USB cable and plug into an available USB port on or near your TV for power. This freaked me out at first because my TV is on the wall and I didn’t want any wires hanging down. However, I was lucky to have a USB port on my TV right next to the HDMI ports in the back. I was able to plug in the Chromecast and power it right off the USB port on the TV as well. No visible wires!

chromecast-setup

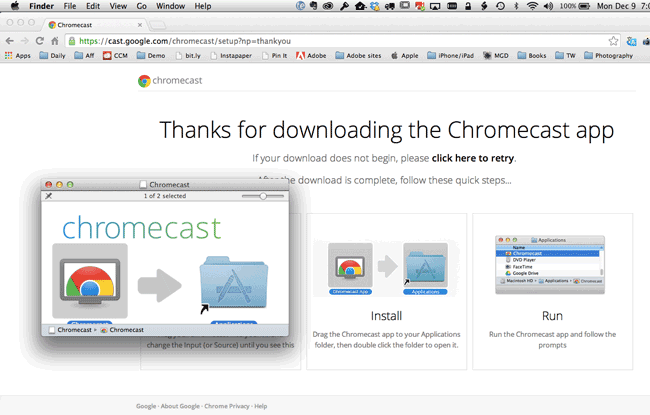
Once it’s plugged in and you turn your TV on to that HDMI input you’ll be presented with a setup screen. Head over to your computer and download the setup app. You computer should see the Chromecast wirelessly. During the setup process you’ll give it access to your WiFi network and enter your WiFi password. Mine needed to download a firmware update then I was up and running. After the Chromecast install on the TV, you’ll need to download (Google Chrome if you don’t already use it) the Chromecast extension for Chrome. This extension lets you broadcast from any browser tab you have open in Google Chrome to your TV.

settingupchromecast

How is this better or worse than Apple TV?

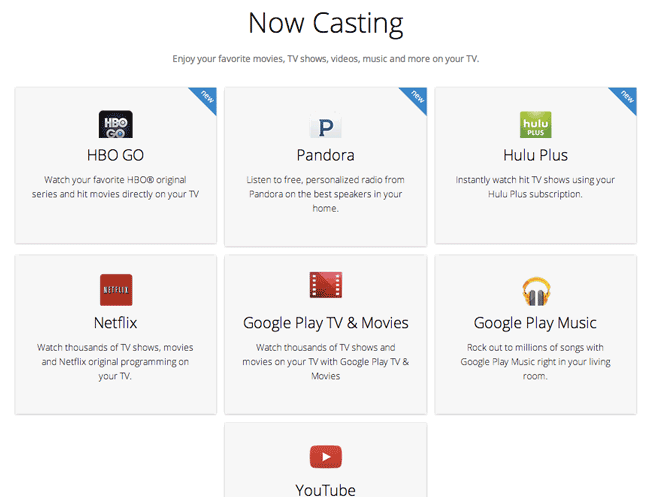
First off it’s not direct competition to Apple TV. Apple TV does way more and costs more. Chromecast only works with whatever you can display in Google Chrome or from a Chromecast compatible app on your computer or mobile device. So no streaming of other things on your computer unless they are Chomecast aware. However, that’s probably the one thing I like about it over Apple TV. While I can use AirPlay to stream ANYTHING from my MacBook Pro to my Apple TV, it’s a direct mirror. I cant’ say stream a slideshow in Lightroom and then go work on another photo in Photoshop. It’s a mirror of whatever I’m doing on the computer. (UPDATE – with Mac OS X 10.9 Mavericks you can AirPlay to an Apple TV and use the Apple TV as a second display/extended desktop and NOT mirror.) However, with Chromecast I can stream content from one browser tab and go work on anything else while that browser content is streaming in the background. That’s what I like about it most and I think that’s what people that are trying to cut the cable/satellite bills out of their lives will like too. You can stream Netflix, HBO Go, YouTube or any other site to your TV while not tying up your whole computer. There are times that I watch my Slingbox via my web browser. Now I’ll be able to stream that content to my TV.

What about audio? This is the tricky part. If your content is either Flash based or coming from an App that is compatible with Chromecast then your audio will also stream to your TV. However, if the content is not Flash based then the audio will play through your computer.

The Bottom Line

If you want to stream content from the web to your TV, this is your easiest most cost effective way to do it wirelessly. The playback rate is “decent”, not great or perfect, but certainly watchable without dropping too many frames. The picture quality was very good. It’s a one time cost with no monthly fees. I’m tempted to get another one for travel/hotel room use.  You can get one here for $32.88. If you want to MORE, then I’d still recommend getting an Apple TV.

chromecast-nowshowing

Logitech Ultrathin Keyboard Cover for iPad Air Review

logitech_ultrathin_ipad_air

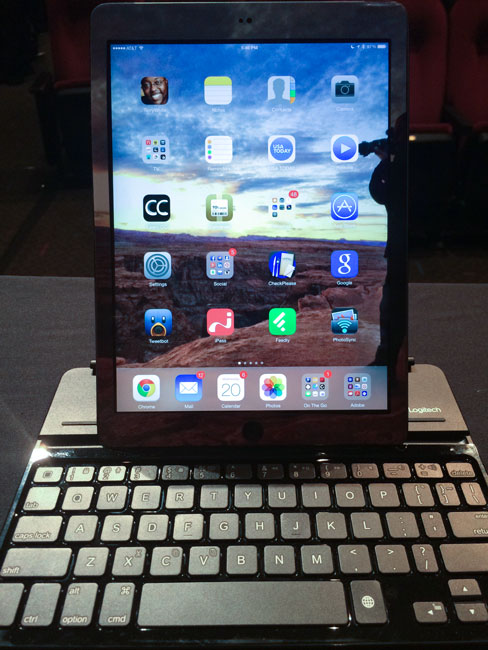
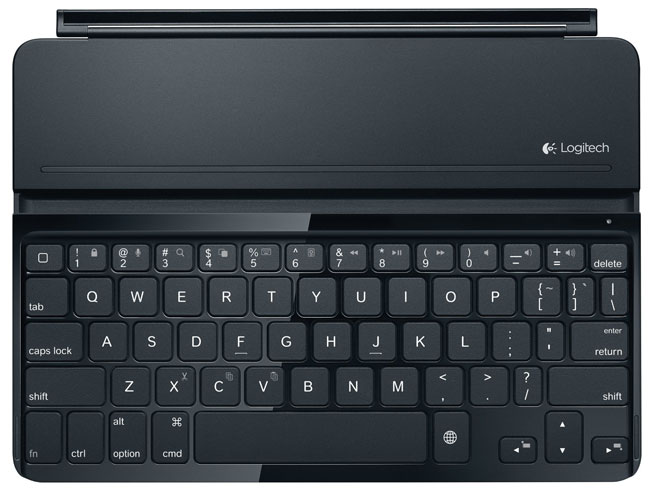
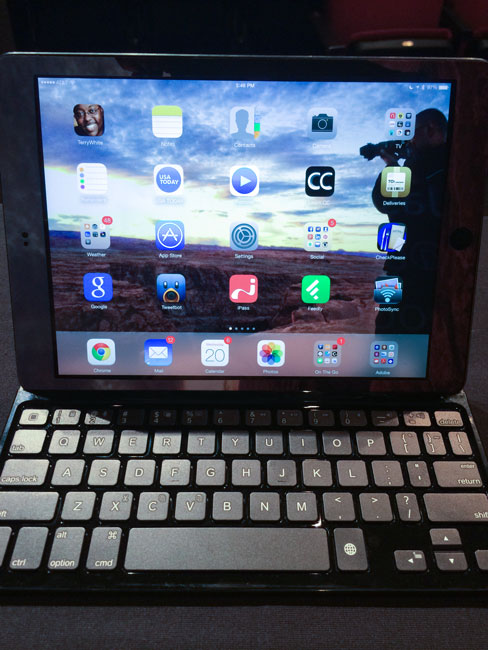
Hands down the Logitech Ultrathin Keyboard Cover has been my choice for iPad keyboards. I had one on my 3rd generation iPad and even one on my iPad mini. When the iPad Air came out I decided it was time to upgrade and of course replace the iPad 3rd generation. The one piece I had already begun to miss was my keyboard. Don’t get me wrong, the iPad’s onscreen keyboard is fine for typing quick, short things. However, I often use my iPad during travel and in flight instead of my MacBook Pro. This usually means I’m responding to email and writing. For these longer sessions, I’m spoiled by a physical keyboard. Logitech wasted no time in getting out the Logitech Ultrathin Keyboard Cover for iPad Air. Just like the previous models it connects wirelessly via bluetooth, but it’s also a smart cover that magnetically attaches to the iPad itself. Once you disconnect the iPad from the keyboard you can stand the iPad Air up in the keyboard in either horizontal or vertical orientation.

logitech_ultrathin_ipad_air_h

Logitech made some refinements from the original model that I had. The first one is that they got rid of the shinny plastic on top. It now has a more matte feel/look to it that will definitely not be as much of a fingerprint magnet. On the bottom they’ve attached very small rubber feet that should help prevent the back from getting scratched up so easily. Unfortunately the cover isn’t any thinner. This means that it will add some thickness to your nice thin iPad Air. It pretty much doubles the thickness when attached and closed.

logitech_ultrathin_ipad_air_v

Overall I’m quite happy with this new version and glad to have a physical keyboard again. I did read some of the other reviews out there that complained about things like the magnet not being strong enough and I’ve no issues so far. As a matter of fact the magnet seems stronger than the previous model I had. My 3rd generation iPad would easily slide apart from the keyboard in my bag, but this one seems to stay in place. The battery life of the keyboard is insane. You can easily go weeks if not months between charges. It’s the best keyboard for iPad period.

You can get the Logitech Ultrathin Keyboard Cover in Black/White for iPad Air Here.

You can get the Logitech Ultrathin Keyboard Cover in Black/White for iPad 2, 3 and 4 Here.

You can get the Logitech Ultrathin Keyboard Cover in Black/White for iPad mini Here.

iPad Air Review

ipad-air-tw

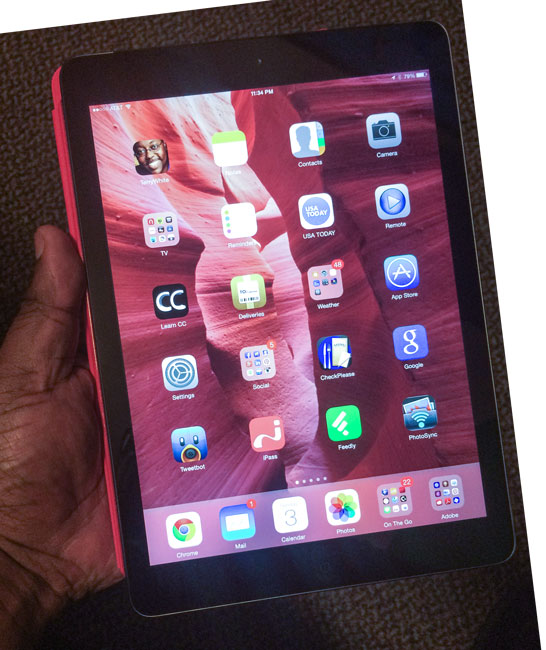
I use my work iPad quite a bit. I had been on an iPad 3rd generation (The New iPad) since it first came out. I skipped the 4th generation iPad since it really didn’t offer much in terms of an upgrade. The 4th generation iPad also came out a mere six months after the 3rd generation. I decided to wait for the next iPad. As you probably know by now, that iPad was introduced on October 22nd, 2013 and available in stores on November 1st, 2013. This iPad is a completely new design for the full sized iPad. While it still has the same size 9.7 inch Retina Display, it’s smaller and lighter in every other way. It’s narrower by reducing the bezel size on the sides. It’s also thinner and noticeably lighter in weight. So much so that I actually no longer feel the need to have an iPad mini. I prefer the larger screen size over the mini and now that the iPad Air  is lighter and thinner, my iPad mini envy has come to an end. The other thing I was really interested in was the increase in performance. The iPad 3rd generation was a good performer, but the 4th generation promised twice the performance and the iPad Air even faster than the 4th generation. The more heavy duty apps I was running the more I craved a faster iPad.

First impressions

It’s impossible to pick up the new iPad Air and not notice the difference in weight. It has the feel of the iPad mini due to the form factor and curves, but all the power and full screen size of an iPad Retina Display. Once I got it set up I could immediately see the difference in performance. Apps launch faster and the iPad Air is more responsive over all. It’s definitely much faster than my iPad 3rd generation. Since I never had the 4th generation I can’t really compare against that model (sorry).  Since the iPad Air is physically smaller in size you’ll likely need new cases, covers, etc. This means that I’m now anxiously awaiting Logitech to come out with a new Logitech Ultrathin Keyboard Cover. They make the best iPad keyboards on the market. Gelaskins has already announced new iPad Air skins. The other thing I’m pleased by is that the built-in speakers are definitely louder. I use my iPad to watch TV with the HBO Go and Xfinity Apps. On the iPad 3rd generation with the volume all the way up it still wasn’t quite loud enough. Now I can definitely hear the difference in the iPad Air. Apple did the same thing with the iPhone 5/5s over the 4s. Lastly you’ll notice an increase in WiFi speed too.

I went with the 128GB WiFi+Cellular AT&T model. This is a switch for me from Verizon. I had no problems with Verizon, but since I was grandfathered into the original AT&T unlimited plan for iPad and now they allow FaceTime over 4G, I was ready to come back. AT&T has more LTE 4G coverage now than they originally had as well. Also I was running out of space regularly on the 64GB model. The other thing I appreciate is the Lightning connector for charging/syncing. It’s nice to finally be able to use one cable to charge both my iPad and my iPhone 5s.

The Bottom Line

The iPad Air is better in every way over its predecessors. There’s nothing really revolutionary about it though. It’s an iPad and it works just like all other iPads before it. It’s smaller, thinner, lighter in weight and faster. These are all the things we would expect from an upgraded device. Surprisingly though the price is the same and it’s amazing that it hasn’t changed since day one. The iPad Air starts at $499 for the 16GB WiFi version. That was the same price/configuration when the iPad launched back in 2010. If you were looking for a smaller, lighter weight, faster full size iPad, then you can stop waiting. This is the one you’ve been wanting/waiting for. While I wish the price had dropped $100, the iPad Air doesn’t disappoint and lives up the promises made by Apple. iOS 7 runs like a dream on it too. No issues to report so far.

iPadAir

Update: Logitech is taking Pre-orders for the NEW iPad Air version of their Ultraslim Keyboard cover.

iTunes Radio Review

itunes_radio

I was one of the ones anxiously awaiting the arrival of iTunes Radio. Before iTunes Radio I was a paid user of Pandora Radio. While Pandora does offer streaming Internet radio for free, I paid to avoid hearing ads. I like Pandora, but the beauty of iTunes Radio is that it would integrate right into iOS 7,  iTunes on Mac/PC, and Apple TV. Like Pandora you create stations from your favorite artists, songs, genres, etc. iTunes Radio will sync all your stations to all your devices automatically via iCloud. The interface is pretty clean and consistent for the most part.

Getting Started

create_new_station

It was really easy to get started. Launch iTunes Radio on an iOS device or go to in iTunes and tap/click the + sign to add a new station. Key in an artist, song, genre, etc. and you’re done. You can add additional artists, songs, etc. if you like. I also LOVE the ability to add artists that I NEVER want to hear! (Justin Bieber). I don’t know if there is a limit on the number of stations you can add, but I was able to add in several with no problem.


Music Playback and Repeats

The audio quality is excellent and I’ve used it both on WiFi at home and 4G on the road and in my car with no problems or skips. I did have one problem station that I ended up deleting and recreating. It actually got stuck playing the same 3 songs in a row over and over again. Once I got my stations sorted out with favorite artists and artists to never hear from, I have been using it every day. I have noticed that it does play a lot of the same songs repeatedly, especially when starting out at the beginning of my day. It seems that only after I’ve listened for a while (at least 3 songs) do I start to hear new songs. Luckily the songs it repeats are ones I really like.


Skipping Tracks and Thumbs Down

never_play

You can skip up to 6 tracks per hour per station. This is similar to Pandora. Due to the licensing restrictions from the music industry you can’t just keep skipping songs until you hear the one you want. One of the odd interface things in iTunes Radio is that at first glance there doesn’t appear to be a way to thumbs down or tell it that you never want to hear a particular song again. You CAN do it! However, it’s oddly hidden under the Star icon. At first glance I figured the Star was to mark songs that I like (thumbs up). It wasn’t until I tapped on it on my iPhone and discovered that it’s actually a menu that contains the choices “Play more like this”, Never Play this Song” and “Add to iTunes Wishlist”

Your stations can also be shared with your friends and family or on social media. You can also turn on/off explicit lyrics.


Costs and The Bottom Line

Like Pandora Radio, iTunes Radio is FREE with Ads. However, if you are an iTunes Match ($25/year) customer (and I am) then you won’t hear ads on the devices that you have set up for iTunes Match! This works out to be a cost savings for me ($3.99/month) since I already had iTunes Match  and was able to stop my Pandora Radio subscription. If you hear a song you like and want to buy it there’s a button in the upper right corner that lists the price. Just tap it and buy the song. Also each station keeps a “recent” history so that you can go back through and see which songs have played and buy them if you like.

While I like the potential of iTunes Radio and how it’s integrated into all my devices, it will take a little more time to see if the music really works itself out. I have used Pandora Radio for over a year and with the thumbs up and thumbs downs that I’ve done over the past year, I could listen to Pandora for hours on end and hear music that I liked. It will take time to train all my iTunes Radio stations the same way.

As far as improvements go, I’d love the ability to restrict a station to only songs from a particular artist. I’m sure this is probably against the licensing agreements, but it would be nice.

If you’ve upgraded to the latest iTunes (and you’re running on a newer Mac/PC OS – Lion or above on Mac) you’ll have iTunes Radio right in your Music section. If you’ve upgraded your iOS devices/Apple TV you can check out iTunes Radio right in the Music App or main menu.