30 Days Later – 30 NEW Adobe Creative Cloud Tutorials

creative_cloud_2014

One New Years Resolution completed. At the beginning of the year I promised to deliver a new Adobe Creative Cloud Tutorial each day during the month of January starting on January 2nd. I’m happy to say that my 30 Days of Creative Cloud Tutorials are done and have been very well received! At last count the video have had over 80,000 views and climbing. I also received lots of direct feedback on Twitter and my Facebook page. Most of the tutorials focused on the questions I get every day over and over again. I also took the liberty of working in mobile workflows wherever I could. Of course I’ll continue to do more throughout the year and cover new features as they are added to Creative Cloud. In the mean time, check out what you’ve missed here in this playlist featuring all 30 videos:


OWC Creates a Better Thunderbolt Dock

OWC-thunderbolt-2-dock

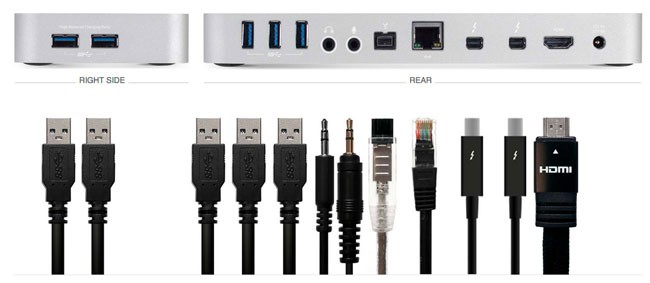
In 2013 I got the Belkin Thunderbolt Dock and I’ve been quite happy with it. So what could change in two years? Well, a lot. The basic principle is the same. A Thunderbolt dock allows you to plug in a single Thunderbolt cable into your Mac and expand the ports giving you more USB 3 ports, Firewire 800, audio line in/line out, etc. The NEW OWC Thunderbolt 2 Dock does what you would expect but offers 5 USB 3.0 ports instead of 3. It offers 2 Thunderbolt 2 ports, and HDMI (with 4K support) in addition to Firewire 800, Gigabit Ethernet, Audio in/out. Two of the five USB 3.0 ports are also high powered for charging your bigger devices such as iPads. With they addition of HDMI this means that now I only have to plug ONE Thunderbolt 2 cable and one display port cable to my Cintiq 24HD into my MacBook Pro and ALL of my devices and displays are connected.

wpid14281-IMG_3522_sm.jpg

For those of us who use our MacBook Pros like a desktop computer when we’re at our desks, these Thunderbolt docks are indispensable. It makes coming home or back to the office so much easier by just having to plug in one or two cables to have all of your devices connected. Now if it could only cut down on the amount of clutter on my desk, I’d be even happier! 🙂

You can get/pre-order the OWC Thunderbolt 2 Dock here. Initial supplies are limited. I ordered mine the minute they announced it and was happy when it shipped.


My Favorite Lightroom plugin Client Response Gallery gets Upgraded!

victoria-gallery-TTG-CE4-CRG

I’ve talked about and shown The Turning Gate’s Client Response Gallery plugin for Lightroom. This plugin produces a totally customizable web gallery to get feedback/pic selections from your client. I couldn’t imagine being a photographer without this awesome solution. Last year The Turning Gate moved all of their popular web publishing solutions to their CE4 platform. The obvious omission was the Client Response Gallery (CRG). What the CE4 platform enabled was the ability to use Lightroom’s “Publish Services” to update your website (no matter where it’s hosted) with the same ease as publishing directly to Facebook or Flickr. No more having to export a gallery and use FTP or having to configure and use Lightroom’s FTP. Although the front end of my photography website (http://terrywhitephotography.com) was created with Adobe Muse CC, the galleries are all powered via the The Turning Gate’s Web Publishing Suite. This means that all I have to do to update my site is drag photos into a collection and hit the “Publish” button – Done!

Now imagine that same convenience for putting up a web gallery of “proofs” for your client to look through, select and send those selections back to you. That’s exactly what the NEW CE4 Client Response Gallery brings to the table.

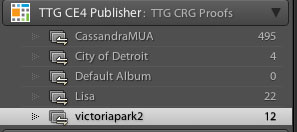
TTG-CRG-CE4-Albums

Now I can just create a new Lightroom Collection under the Client Response Gallery Publish Service and click the Publish button.

TTG-CRG-CE4-Collection

My images are uploaded at the web resolution I specify with my copyright watermark on them. Once the upload completes I just send my client an email or text message with the link to their gallery.

TTG-CRG-CE4-largeimage

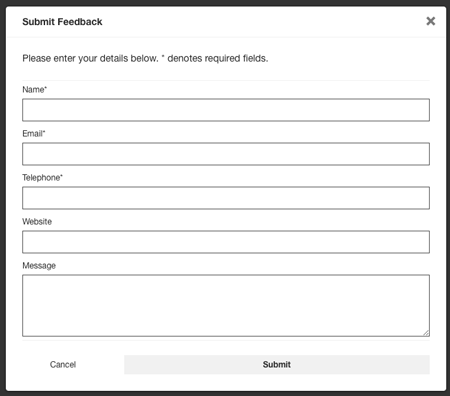
They can scroll through the thumbnails, click to view the larger versions, play a slideshow and make selections. Even the color labels that I use for identifying my favorites or their (in studio) favorites are shown to make the selection process go faster. They click the Send button, put their name, email address and any comments in and I get an email with the exact photo “titles” that they chose. Now I can simply select the names in the email, copy them and then paste them in the Text search in Lightroom to show me exactly which ones I need to retouch.

TTG-CRG-CE4-responseform

The NEW CE4 Client Response Gallery offers even more customization options and the overall performance has been improved. While the price has increased from $25 to now $50 (upgrade pricing is available), it is worth every penny as it saves me time and headache with every single shoot that I do.

You can get the CE4 Client Response Gallery here.

If you’re looking for a GREAT place to host your website or your web galleries, check out Bluehost.com as they’re having a sale on their hosting from now through the end of January 2015.

bluehost-jan-banner


Web Hosting Sale! – Ends January 31, 2015

bluehost-jan-banner

Hey everyone, the good folks over at Bluehost.com are offering my readers 42% off web hosting if you signup by January 31, 2015. As you know, Bluehost is now my preferred hosting service and I have successfully moved my sites there with no issues to date.

If you need good web hosting for your Adobe Muse websites, Lightroom galleries, etc., then check out Bluehost.com here.

An even smaller travel router – HooToo

HooToo-inmyhand

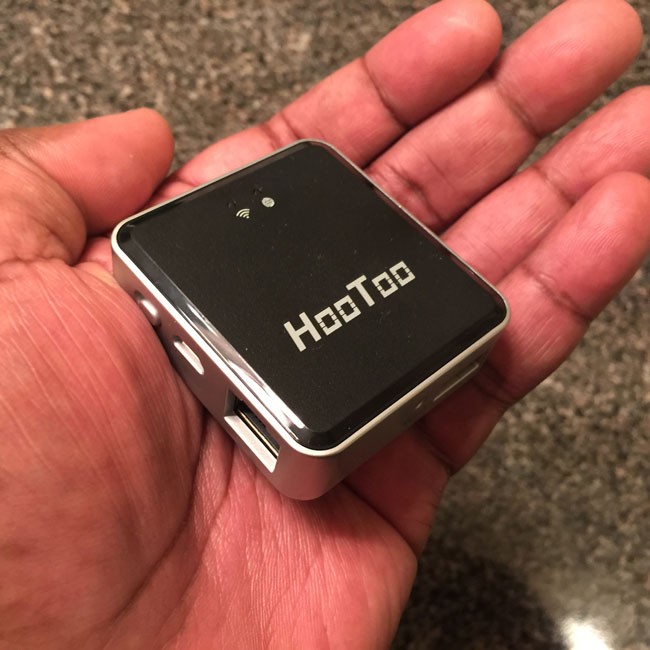
Late last year I declared that the Netgear Trek300 was my new favorite travel router. (that was sooooo last year 😉 ) However, it didn’t take long for one of my readers to point me to an even smaller travel router with many of the same features as the Netgear at half the price. I like the HooToo TripMate Nano for many of the same reasons that I like the Netgear:

  • Provides an 802.11n WiFi hotspot for all of your devices to connect to on the road.
  • Works with either Ethernet in your room or public WiFi
  • Powered via USB
  • Small lightweight and inexpensive

As I stated in the Netgear review, I was used to carrying around a bigger much more expensive AirPort Express Base Station, but the one thing the AirPort can’t do is allow you to share a public WiFi connection. In other words many hotel rooms now don’t have ethernet jacks anymore. This renders the AirPort Express pretty much useless because it requires an Ethernet connection to share. The HooToo has a small (everything) switch on the side that lets you toggle to either a wired connection or a wireless one. There is another feature that the HooToo has that the other ones I use don’t and that is the ability to plug in a thumb drive or other USB drive and share files wirelessly.

What’s it lack that the Netgear or AirPort has?

Well with a small size you do give up a couple of things. First off there is only one ethernet port. This means that you can only use it to connect to a wired connection (in wired mode) and not share to another device that requires a wired connection. This really isn’t an issue for me as I rarely ever need to plug in a second device that only has ethernet. The next thing is that the Netgear can be powered over USB or plugged directly into an AC outlet. The HooToo only has a micro USB port for power. Again I’m fine with that as I just plug it into my Anker 60W 6-Port Desktop Charger along with the other devices I’m charging at night. Lastly the HooToo can’t extend the range of an existing network. Again, not something I need on the road and this feature is more for home users.

Some other limitations: TripMate is Powerful, BUT:
– Cannot bridge an iPhone hotspot
– Cannot be used for IP camera FTP path
– Cannot work as a proxy server
– The Ethernet port can only be used as a WAN input port
– No app for Windows Phone OS
– Supports NTFS/FAT16/FAT32 formatted disks

The Bottom Line

The HooToo Tripmate Nano is the smallest, lightest most functional WiFi travel router that I’ve seen to date and it has officially kicked the Netgear out of my bag. I used it on my last trip with no issues (other than the bright blue LED that can keep you up at night). I stayed in an Embassy Suites hotel which only had WiFi. I was able to configure the HooToo via the iOS App or the web browser on my Mac. Once I connected I joined the hhonors hotspot and then from my Mac I got the regular Hilton logon screen to accept the terms and connect (the WiFi was free). From that point my devices were connected to my secure network in my room. Now if only Hilton would speed up their internet services across their hotel chains I would be even happier.

Get the HooToo Tripmate Nano here for a ridiculously low price.

Get the iOS app here from the .

I finally have a cappuccino machine at home

rivo

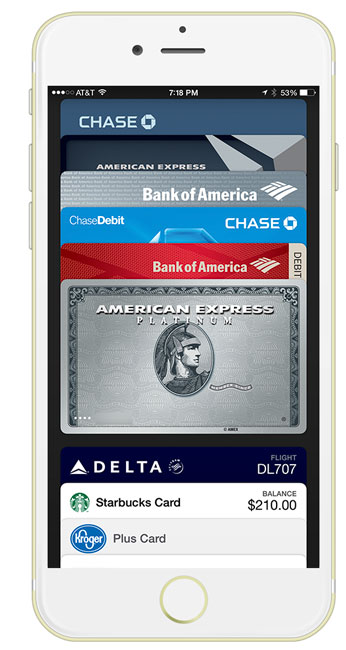
People in my immediate circle know that I enjoy a good cappuccino or latte. People even commented on my Starbucks card in the screenshot that I did in my Apple Pay review.

apple-pay-iPhone-6-plus

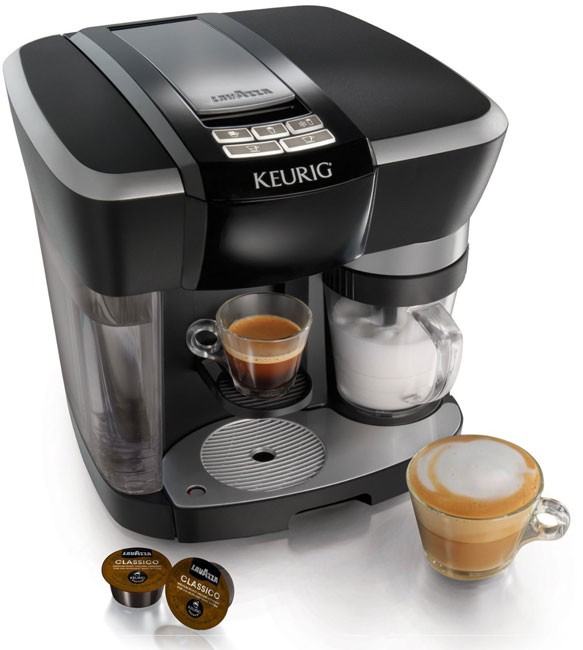
However, when I moved last year the one thing I missed was having a Starbucks nearby. Yes there are other coffee shops in the area and probably even better coffee, but I just haven’t found one that I enjoy enough to make it a regular stop. My old Starbucks was “on the way” to a lot of things. I have looked at expresso makers in the past and for a good one they seemed very pricey and very complicated to operate. Not to mention very big. I never thought about Keurig even though I enjoy my K-cups regularly. Had I known they had an expresso maker I probably would have gotten it day one. Well I did discover it and after a quick glance at the reviews with nothing horrifically jumping out, I ordered one on the spot.

keurig-rivo

This thing is AWESOME. I can now have cappuccinos and lattes without leaving my home. It’s also very easy to use and fast. Press the on button (it automatically turns off when not in use) and after a few moments of warming up you hear a beep. There is a water reservoir on the left side and a small container on the right for your milk. Drop in the Rivo cup and press the button for the kind of drink you want to make. The expresso will be made in the middle directly to your cup while the milk will froth on the right. Pour the milk in and you’re set! Like the K-cup system there is virtually no waste. Not counting the milk you’re paying approximately $1.20 per cup (not buying Rivo cups on bulk). Yeah that’s expensive, but a tall (small) latte at Starbucks goes for $2.75. So it’s actually cheaper for me. The taste was surprisingly really really good. I didn’t expect it to taste the same, but for some reason I didn’t think it would taste as good as it does. I’m very pleased. It’s also nice to be able to use almond milk instead of dairy.

You can get the Keurig Rivo here.

30 Days of Creative Cloud Tutorials – Recap Days 1-8

Adobe_Creative_Cloud

My 30 Days of Creative Cloud Tutorials is off to a great start! If you haven’t been following along, here are the videos you’ve missed:

Day 8 – How to Mask a Moving Object in Your Video with Premiere Pro CC

Day 7 – How to Change the Background in Photoshop CC


Day 6 – How to do an Image Map in Adobe Muse CC


Day 5 – How To Draw in Adobe Illustrator CC with the NEW Pencil Tool


Day 4 – How To Share Files and Folders in Adobe Creative Cloud


Day 3 – How To Place a Photo inside Text in Adobe InDesign CC


Day 2 – How To Rank, Rate and Mark your Photos in Lightroom


Day 1 – How to Do Masking in Adobe Photoshop


30 Creative Cloud Tutorials in 30 Days

PS_CC_totem


Happy New Year! I made a resolution to try to do even more video content this year and I thought of a way to stick to it. Starting today I’m releasing a new video tutorial each day for the next 30 days. These videos will be probably be shorter than my average videos concentrating on one or two techniques each. They will also cover a range of Creative Cloud applications including the Creative Cloud desktop app and the mobile apps as well. These videos will be delivered exclusively on my YouTube channel with the best of the best also appearing in my app:
.

So sit back and enjoy video one:

How To Do Masking in Photoshop CC


Comcast It’s Time To Rethink Your 300GB Data Cap

bandwidth_money

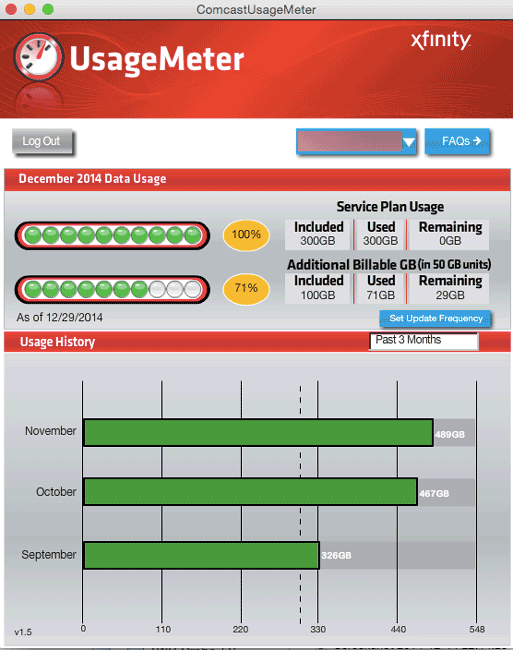
Hey Comcast, it’s almost 2015! We’re deep into the Netflix and online gaming age. While I appreciate my high speed Xfinity service and the relatively low down time, the 300GB per month data cap seems to be a bit archaic. I moved at the beginning of September and when I did I signed up for your fastest (and most expensive) consumer internet plan. I get a nice 105Mbps download speed and a good 20Mbps upload speed. Once it was finally installed properly (that’s another post), the service has been very speedy and stable. No complaints there. However, in about 2 weeks after I got connected I started getting the emails and automated phone calls alerting me that I was nearing my 300GB data cap and then eventually that I had passed it. Many of my readers here probably don’t realize that most internet providers have a data cap. Whether it’s enforced or not is another story. In the case of Comcast Xfinity it’s 300GB per month for years, but not really enforced until 2012. That sounds like a lot! However, in today’s world of streaming media, cloud storage, online gaming and cloud backups it’s really not a lot at all. I would imagine that there is a need for data caps. If they let everyone do anything they wanted there would likely be some abuse that would slow down other customers. The fact that there’s a data cap is not my issue. My issue is that Comcast has one data cap for ALL customers (except Comcast Business customers). So if you’re on their cheapest plan or their most expensive plan the data cap is the same. That’s the part that I have an issue with. It’s like punishing your best customers who chose your fastest speed because they’ll be more than likely to hit the cap sooner!
comcast-data-meter

What happens when you go over?

A few years ago I hit the cap and I got a very threatening call from Comcast. They actually gave me a warning that If I went over 2 more times they would actually cancel my service. Back then I thought “how stupid is that?” You have a customer that’s using a lot of your service. Find a way to give them what they need and charge them for it. Well it seems that Comcast realized they were missing out and now they give you 3 overage grace months before they start charging you $10 for 50GB units. As you near your 300GB limit you get the warning emails/phone calls. Once you use 300GBs of bandwidth they add on another 50GB of data for $10. Go over 350GB and they add on another $10/50GB unit (this time without warning).

Actually the extra $10 charges (while annoying) aren’t the real issue. It gives us the ability to either stick to the 300GB limit or a way to pay extra for the extra bandwidth that we need. There is one problem though. Let’s say it’s the last day of the month and you hit the 300GB limit. No problem Comcast doesn’t interrupt your service, they just tack on another $10/50GB unit. However, chances are you won’t use that 50GB in one day. Let’s say you only use 5GB of the 50GB unit and you technically have 45GB left. On the first of the month the meter starts over again and you lose that extra bandwidth that you paid extra for. At a minimum you should at least get to carry any extra bandwidth that you paid for over to the next month.

Let’s get back to the main issue though. Not only is 300GB really too small in today’s high speed world, it’s also just not reasonable to have one limit for ALL consumer customers. Comcast I ask that you either raise the cap for all or offer higher caps for those of us on your higher plans. My average appears to be under 500GB so let’s start there!

A little Q&A

Q. Terry can’t you just go with Comcast Business since you use more data than the average person?

A. Sure and as a matter of fact I had it in my studio. However, there are some other limits like NO premium channels and you have to sign a contract with steep penalties for early termination (which is why I’m still on the hook for paying for it until March 2015).

Q. Terry can’t you just pay for the overages? That way you only pay for the amount you use over the cap?

A. Yes and I do. However, since I’m already paying for their most expensive/fastest plan it would seem that their should be a larger cap. Also the unused portion of the overage units is lost at the end of the month.

Q. Why not go with a different provider?

A. When it comes to high speed internet I need the fast available and in my area it’s Comcast. If there was a competitor that offered comparable speeds I’d consider a switch.