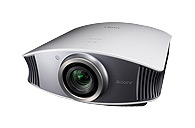
Epson PowerLite Home Cinema 1080 UB HD Projector Review

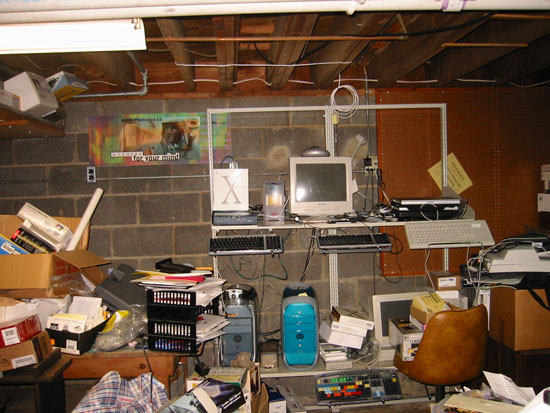
In October of 2004 I decided to convert a storage/server room in my home into a home theater. This room used to be the catch all for empty boxes, discarded computer equipment, my web and file servers as well as the place that old papers and software seemed to go to die. At one point it was almost impossible to walk from one end of the room to the other, because of the amount of crap that was in the way.


So I decided it was time to turn this:

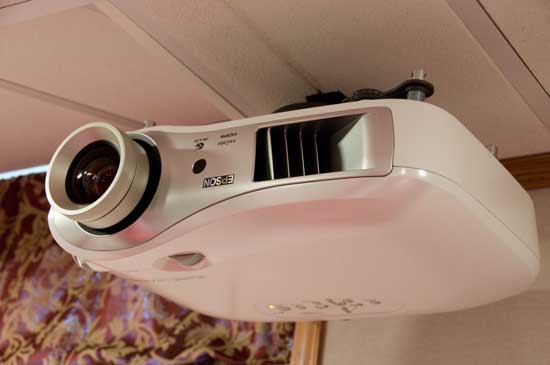
into this:


At the time I spec’d out the latest and greatest sound and video gear. I settled on the Sony Cineza VPL-HS20 1080i HD Projector. My friends were telling me this one was the one to get and the good folks over at projectorcentral.com had this GREAT REVIEW. So it was a done deal and I’ve enjoyed that projector for the past 3+ years. However, my cravings for "higher Def" lead me to want to experience Blu-ray at its best which meant that it was time to upgrade from 1080i (interlace) to a true 1080p (progressive) projector. I started asking around and my colleagues at Adobe (Kevan O’Brien and Dave Helmly) were both quite impressed with the Epson PowerLite Home Cinema 1080 UB projector. I’ve always been a fan of Epson projectors for data/business presentations, so it didn’t take much convincing to look into Epson to replace my Sony.

I also turned to ProjectorCentral.com once again to see what they had to say. They had not only reviewed the pro version of this projector, but they gave it their highest honor of Editor’s Choice! That’s all I needed to hear. My mind was made up! I figured I’d get it in the next few weeks when my schedule settled down a bit. However, I noticed that B&H Photo and Video had it and also alerted me to the current $200 rebate that is in effect until 3/31/08. So that pushed me to order it now instead of waiting. After all, $200 is $200 right?

I ordered it so that it would arrive in time for the weekend. That way I’d have time to set it up and enjoy it before going back to work and back on the road. Setup was quite easy. I used the same universal mounting bracket that I had used with my Sony projector and I ran a new HDMI cable to replace the DVI and Component cables I was using with the Sony. Although they (Epson) offer a ton of different configurations for getting just the right color and picture, the defaults produced STUNNING image! Yes, I might go back and play with the settings to compare, but out of the box I was blown away by the picture quality. It wasn’t like I looked at it and said, "well it’s a little too green or it’s a little to contrasty." It was dead on right out of the box. I can’t imagine it being better!


Comparing the old to the new

The Sony VPL-HS20 has a power zoom and focus. The Epson relies on a manual focus and zoom ring. So I sat right under it and just reached up and adjusted it until I was happy. There is also a "Pattern" button on the remote that allows you to throw up a pattern on the screen to make sure you have it aligned properly. The lens will shift up/down and left/right so that even if your mounting location is not dead on, you have some wiggle room (which worked out great for me!) This way I didn’t have to move the mounting bracket since the Sony’s lens is centered and the Epson lens is off to one side. It would have been a major pain in the butt if I would have had to relocate the mounting hardware in the ceiling. Luckily I didn’t have to.

The Epson is better in just about every way over my almost 4 year old Sony. It powers on and starts to display your image almost instantly. It powers off quickly too. There are a few little things I like about it: for example, there is a separate on and off button on the remote instead of just one power button. This makes it nice for programming universal remotes and macro sequences. In other words with a single power button, if the projector were already on and someone accidentally hit the power on macro, it would power the old projector OFF! Then we’d have to wait for it power all the way down before being able to bring it back up again. Although I’m only using a single HDMI cable to it, I like the fact that the Epson remote has buttons for each source. With the Sony I had to cycle through several sources to get to the one I wanted. Epson also allows you to diable the projector’s control panel so that kids or other people don’t mess with your settings. There is even a "Child Lock" that prevents small children from accidently turning the projector on.

I will have to hand the overall styling to Sony though! The Epson projector doesn’t win any awards in my book for design of their cases. The Home version is white and the Pro version is black. The latest Sony projectors look like something right out of War of the Worlds. Their home theater projector designs set themselves apart from standard business projectors. Epson could learn a thing or too here.

A scene from War of the Worlds where the alien probe has a look around. This bears a striking resemblance to the Sony Bravia VPL-VW40.


Back to the Epson…

Epson also does the right thing by standing behind their products if something does go wrong. Rather than making you take it into a service center, they will advance ship you a replacement! You just send the defective one back when the new one arrives. However, in my over 10 years of using Epson projectors, I’ve yet to have one break down!

I did find it funny that in the literature when they were bragging about their service, that they used the example of if your projector goes down before the "big game", they’d send you a replacement. I had a simple question and I thought I’d give them a call only to find out the service is open Monday through Friday only. So if the big game is on the weekend, you might be hosed ๐Ÿ™‚


What about Blu-ray playback?

Now it was time to try out the one thing that I upgraded for. I wanted to see a Blu-ray movie in true 1080p high def. So I fired up the Playstation 3 and loaded up a movie. Believe it or not, Rocky Balboa was the closest so that’s what went in. I’m glad that it was, because that particular Blu-ray disc starts off with an opening ad for Blu-ray movies with clips and scenes from several blockbuster movies. I had seen this ad before, so it was a great comparison. My mouth hit the floor. I had never seen that ad with such clarity and depth. I was stunned by how much better the quality was. I also set my Apple TV to 1080p output and the photo slideshows are even more spectacular!


The Bottom Line

If you’re looking for a true 1080p Projector Experience, you can’t go wrong with the Epson PowerLite Home Cinema 1080 UB. If you’re not technically inclined and want someone to set it up for you and calibrate it, then you’d want to go with the Pro Cinema 1080 UB version which is only sold through Home Theater companies. Now I know what you’re thinking: "what are you going to do with your Sony VPL-HS20 HD projector?" Well, if you hurry, you can get a great deal on it here ๐Ÿ™‚


Time Capsule Review

As the saying goes, "there are two kinds of computer users: those who have lost data and those who are about to!" Unfortunately, I’ve lost data in the past. Therefore, I’m a firm believer in having a good backup strategy. When it comes to hard drives, it’s not a matter of if they will fail, it’s a matter of WHEN? I was always puzzled as to why Apple never had a backup utility built-in to the OS. However, I couldn’t wait for this to happen so I’ve used various backup utilities over the years and my absolute favorite is SuperDuper! SuperDuper makes a clone "bootable" backup of your drive to another drive. It has a schedule feature so that it can run unattended and it is the way that my server gets backed up every night. However, for my other Macs I wasn’t backing them up nightly. It was more like weekly (or sometimes bi-weekly) when I would think to plug in the external drive and do it. This was especially the case for my laptops which move around and don’t always have an external drive plugged in.

So needless to say I was quite intrigued by Mac OS X 10.5 Leopard’s Time Machine feature. You could call this "backup for idiots." In typical Apple fashion it’s just drop dead simple. You plug in an external drive, Time Machine asks if this is the drive you want to use for backups, you say "yes" and that’s it. There’s nothing to think about from that point on. It manages the backups from that point on automatically and hourly. When the drive fills up with all the incremental backups, Time Machine manages the task of deleting the oldest backups for you. It doesn’t stop there! The Time Machine interface for retrieving data from your backup is equally as slick, showing you cascading folders and allow you to scroll back in time to find the files that you want to bring back. You can even do a Spotlight search for them or bring back the whole drive if need be. Yes, Apple hit a home run with finally making backup so easy that you’d be a fool not to do it now.
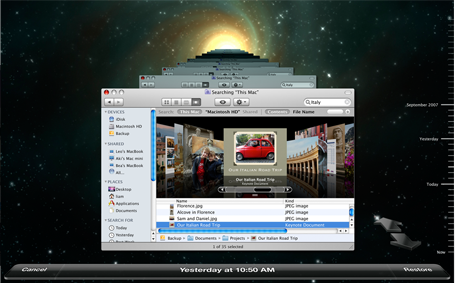
This is all good except for one thing, those darn laptops. I have a young teenager that’s now on a MacBook instead of an iMac. Although I have an external drive setup on her desk, she doesn’t always remember to plug it in and of course if the drive is not plugged in, her MacBook is not being backed up.


This is where Time Capsule comes in

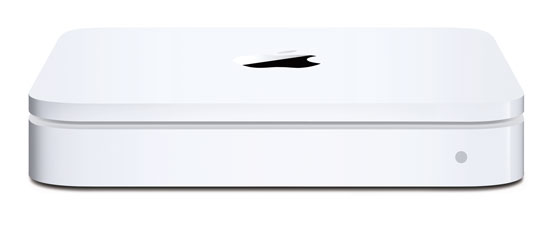
Although my desktop Macs are fine, each with their own external drives for Time Machine backups, I wanted an easier more seamless way to backup notebooks. Time Capsule is simply an 802.11n AirPort Base Station (wireless router) with a 500 GB or 1 TB hard drive built-in. I opted for the 1 TB model and used it to replace one of my existing AirPort Extreme Base Stations. It has 1 Gigabit WAN port and 3 Gigabit Ethernet ports for wired devices. So I have my iTunes Server plugged in as well as my Slingbox Pro. I had already set up a separate 802.11n network with my existing AirPort Extreme Base Stations so that I could have a really fast network that wouldn’t drop down in speed when 802.11b/g devices connected to it. They are still on my older wireless network. It all works great! When I plugged in the Time Capsule and installed the updated AirPort Utility that comes with it, setup was a snap. Took less than 5 minutes to put in all the settings I wanted. Although you can hang printers and hard drives off it to share, I don’t have a need for those features. Once I had the Time Capsule set up, I took the first MacBook and plugged it in to my network from my office via Ethernet. It saw the Time Capsule right away and I was able to pick it as my Time Machine drive. I had already figured and heard that the initial Time Machine backup over ethernet would take a long time, so I did this over night and just let it run. When I woke up the next day it was done backing up. I then unplugged it from Ethernet and put it back on Wi-Fi.

In addition to the Ethernet ports Time Capsule is expandable via the USB port which allows you to add external USB hard drives which could also be used for Time Machine backups. It’s also nice having the power supply built-in.


One of the biggest questions on my mind…

was how would it handle subsequent hourly backups. In other words, I knew that my family would NOT remember to mount the Time Capsule drive. If you’ve ever had a kid lose an important term paper or book report due to a drive hiccup, it’s not pretty! Although I had read other Time Capsule reviews, I didn’t find one that mentioned whether or not the Time Capsule drive would automount each hour. I was hoping that Time Machine would do the right thing and mount the drive as needed. I was happy that it does just that. There is no further interaction required on the users’s part. Time Machine automatically mounts the Time Capsule drive each hour (wirelessly), does the incremental backup and then unmounts the drive. Again, this is the solution I’ve waited for for years.


The next Mac to be added to the Time Capsule backup plan was my iTunes server which I had just upgraded to a 1 TB hard drive as well. This Mac is always connected to Gigabit Ethernet. When I switched to Time Machine drives to the Time Capsule I didn’t realize that Time Machine automatically backs up other attached hard drives. So my initial backup was 200 GBs bigger than it needed to be (400 GB in all). Even over Gigabit Ethernet, this took freakin’ forever! I’m not kidding, this took close to 18 hours. So let’s cut that in half and say 9 hours for 200GB. That’s a long time for the initial backup and I can’t even imagine how long that would have taken over Wi-Fi. The next day when I realized that I had backed up the second drive unnecessarily, I added it to the "do not" backup section of Time Machine. However, it didn’t automatically delete the data from Time Capsule. I assume that once the drive fills up that  that will be the first data set to go, but I would think that there would be a way to kill the extra 200GB manually. I tried and got all kinds of permission warnings and just aborted my attempts.

Now that the initial backups are done, Time Machine takes only a few minute to do the hourly backups and of course it does it in the background.


The Bottom Line

I’m happy with Time Capsule so far and have had no problems. It doesn’t get any easier than this and Time Capsule is the BEST/EASIEST way to backup your multiple Macs running Leopard. Although you could also use Time Capsule as a network drive to put data on and share it amongst your users, I don’t recommend this. The reason is, if you get in the habit of using it as a server to store your daily work files, then how will they be getting backed up? If your Time Capsule dies, you’d still have your Mac hard drives. However, if Time Capsule dies and you were using it as a network server, then that data that was on it would be lost.

Time Capsule is bigger than the AirPort Extreme Base Station and while it is quiet, it’s not silent. Like Apple’s other white boxes (AirPort, Apple TV, etc.) it does run warm.

The initial backup takes way too long. So the best way to do it is to plug in and let it run overnight or over the weekend. Don’t forget to exclude things that you don’t want backed up or things that are already backed up in another location and don’t change regularly. This will save on disk space. All in all Time Machine was worth the investment for me. Time Capsule/Time Machine only works with Macs running Leopard. It will not back up PC’s or Boot Camp partitions. For a complete list of specs, go here.

500 GB Time Capsule $299, 1 TB Time Capsule $499
Web conference with BRIO for Free

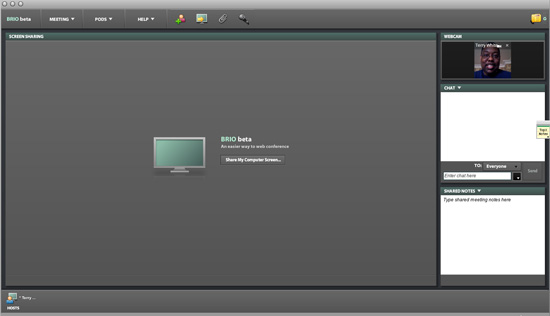
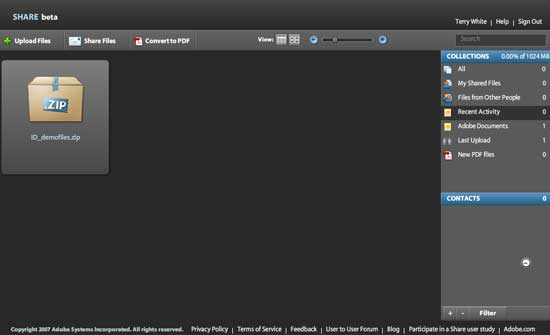
More and more people are wanting to share ideas and and concepts without having to physically drive or fly to where their clients, colleagues or friends are. Typically web conferencing systems are reserved for business use and well, out of the reach of smaller shops, consultants and individuals. Adobe hopes to change all that with a new FREE service code named BRIO. One of Adobe’s best kept secrets is Adobe Acrobat Connect Pro which is a full fledged conferencing and eLearning system for business and education. BRIO is based upon the same technologies (Flash) and aimed at getting people to experience web conferencing first hand without the up front costs and infrastructure.


How could I use this?

As we all know it’s sometimes (most times) easier to show someone something rather than trying to explain it over the phone or via email. Once you set up your BRIO account you get a static URL to your meeting room. You login to your room and invite up to two other people. Once all 3 of you (or 2 of you) are in the room, you can then share your screen and the other folks see exactly what you’re doing in real-time. Although you’re limited to 3 paricipants in your room at once, that doesn’t mean that those participants have to be alone in their physical rooms. This could be 3 conference rooms full of people all watching on a big screen.

This would be a great way to show your client the work you’re doing without actually having to give them the files just yet. You can show the actually apps you’re working in, slides or whatever you want. Not only can you share your screen, but you can upload files for them to download (we all know how hard it can be to send email attachments through corporate firewalls right?). It gets better, your BRIO account comes with the ability to use your webcam to broadcast your live video. You also get VoIP AND a teleconference number to boot. Although the teleconference number is not toll-free (ie. it’s a long distance call), it is free to use. So if you don’t have the bandwidth or microphone setup to do VoIP, just have your folks dial in to the conference on their phones. In addition to screen sharing, webcam video, and VoIP, there’s also whiteboarding and even the ability to request control of a meeting participant’s computer so that you can not only show them how to do something, but you can do it yourself while they watch.


Yes, it really is FREE

Although your BRIO account is in fact FREE, there are some limits compared to the full Connect Pro product. In the full Connect Pro product you’re not limited to just 3 participants. You can also setup multiple meeting rooms, you get multiple room layouts to choose from, the ability to upload video content that plays back through Connect Pro, record meetings and host of other features. However, for just starting out and for smaller meetings, you just can’t go wrong with BRIO. Also keep in mind that BRIO is cross platform and doesn’t require your participants to download or install anything. They likely already have what they need to watch the meeting in their browser, the Adobe Flash Player!


OK, nothing’s free, what’s the catch

Yep, you caught me! You’re right, there is some angle. There must be! Well, it’s true. OK, here goes. It’s FREE! I know, I know, but it is. The only catch is that Adobe hopes that by trying this FREE version out, you’ll get so hooked that you’ll want more and you’ll want to step up to the full version of Connect Pro for your business or organization to get rid of the limits. However, you’re not obligated to do so. So you have nothing to lose. Account setup is painless and if you already have an Adobe ID, it takes about 1 minute to set up your BRIO account.


Um, so what are you waiting for? Go create your FREE BRIO account and meeting room today and give it a shot. Show off that cool work you’ve been doing. You’ll look so good to your clients this way.

AT&T and Verizon 3G cards compared

I’ve been a long time fan of Verizon’s EVDO network. I was a fairly early adopter and have been quite happy with the service. However, there is one thing that has led me to have to look at an alternative network and that’s the fact that I’m traveling abroad more and more for work. Verizon’s EVDO network is great in the states, however it’s practically non-existent outside of the US.

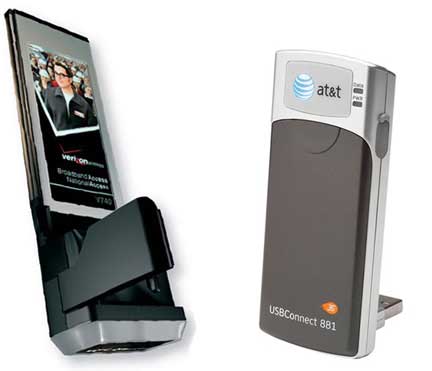
So with that in mind I signed up to get a AT&T 3G card through work. At the time I ordered the card, the ExpressCard version was not available to us to order. So I went with the USBConnect 881 card. While I would much rather have an ExpressCard version simply because it fits better into the MacBook Pro, the USB version works with computers that don’t have ExpressCard slots and it’s not that bad.

Before I have my Verizon card turned off, I decided to do some speed tests in various locations before my next international trip. I went to Miami for a conference and I fired up both cards and did some tests at my favorite internet speed testing site, speakeasy.net/speedtest/. While I was in Miami, I got these results (tested against the Atlanta server):

Verizon EVDO speeds using a V740 (rev.A) card

AT&T USBConnect 881 card


Next I traveled to Seattle for a week of meetings and here’s what I got (tested against the Seattle server):

Verizon EVDO speeds using a V740 (rev.A) card

AT&T USBConnect 881 card

The speeds vary from location to location. However, AT&T’s upload speeds seem consistently faster than Verizon’s.


Traveling internationally

Sunrise in Marbella Spain this morning (makes you feel all warm and fuzzy doesn’t it? ๐Ÿ™‚ ) If you’re interested in exactly where this shot was taken, check out the embedded GPS metadata in the shot or simply click on it above.


This week I’m in Marbella Spain for meetings and while I have a very good Wi-Fi connection at the hotel here, there were a couple of times I had no access and used the AT&T card. So I decided to run a test here too and here’s what I got (tested against the New York server):

As you can see 3G speeds are not the same everywhere. Although the driver reported that I was on a "3G" network here, the speeds were dramatically slower than what I was getting in the states. Although slower, the speed I’m getting here in Spain is fine for email and general web surfing.


Mac compatibility?

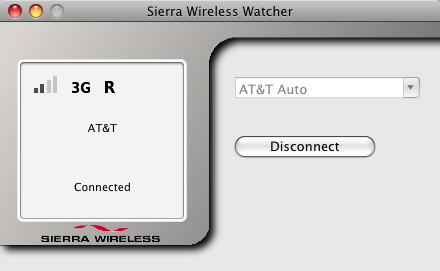
The Verizon cards are directly supported by Mac OS X 10.4.x Tiger and Mac OS X 10.5.x Leopard. This is a great thing because it means never having to worry about installing or updating drivers. You just plug the Verizon card in and activate it directly from the menu that pops up in your menu bar. However, this is not the case with the AT&T USBConnect 881 card or the AT&T ExpressCards. With the USBConnect 881 card I had to go download the free driver from Sierra Wireless. The instructions were pretty clear on where to download the driver right in the packaging that came with the card. However, this driver seems minimal at best. I find that I have to launch and relaunch it a few times occasionally to get it to actually connect. Once it does connect it’s pretty stable and stays connected for me. I’m surprised that Apple doesn’t support the AT&T cards natively in the OS like they do for Verizon cards considering their relationship with AT&T with the iPhone.

Sierra’s Mac driver


What about the costs?

3G wireless cards/plans aren’t cheap. However, if you travel regularly you could easily justify one if you regularly pay for hotel internet access which ranges from from $9.95-$24.95/day. Of course some hotels have free internet access, but unfortunately that’s not the norm. The Verizon V740 EVDO card/plan goes for $59.99/mo. ($79.99 for the card if you do a 2 year contract or $204.99 if you do a 1 year contract). Verizon also offers a USB solution. Although Verizon claims their service to be "unlimited", there are in fact limits and if you hog too much bandwidth, you could get your service suspended. Check out the 3gstore.com site for best prices and info.

The AT&T card goes for $60/mo. (5000MB/mo. max bandwidth without paying overages) When roaming in Canada – 0.015/KB, when roaming internationally 0.0195/KB. The card is $49.99 with a 2 yr. contract and after rebates. You could just buy the card outright for $299.99 with no contracts.


The Bottom Line

If you spend more than 7 nights a month in hotels paying for high speed internet, getting a 3G wireless card is a no brainer. If you travel internationally, then you’ll want to go with one of the AT&T cards. By the way, the hotel internet here in Spain is รขโ€šยฌ 19.95/day (including local tax) which works out to be $30.63/day US! If you only travel in the US, then Verizon has the better coverage at the moment than AT&T.

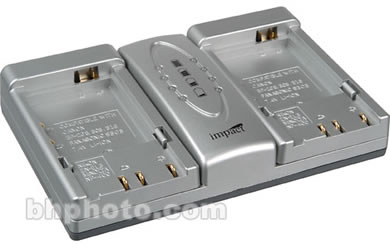
Dual Nikon, Canon, Panasonic & Minolta Battery Charger

One of the major keys to digital photography is being able to take the shot. Sounds like a "duh" statement I know, but what I’m referring to is having a charged battery. Nothing is more frustrating than running out of power in the middle of a shoot. So as digital photographers we’ve learned to carry extra batteries. I use a battery grip with my Nikon D300 (and my Nikon D80 before that) which allows me to put two batteries in my camera at once. This does a great job at practically doubling my shooting time, however, there are still times where shooting a lot will drain the batteries. Therefore I carry at least two extra batteries at all times. However, when it’s time to swap out batteries, I don’t want to charge them one at a time. That’s where the Impact Dual Battery Charger comes in.

I’ve used the Impact Dual Battery Charger for over a year now. It’s been working out great. I found out about it when I bought a couple of their (Impact) batteries for my D80. While the charger has been working great, one of the two batteries no longer works (there goes my $10 savings). So I don’t recommend their batteries, but the charger will charge your original batteries so you’re good to go. Now keep in mind that most companies will recommend that you only charge their batteries with their chargers. So if you have warranty concerns, then I guess you can stop reading here. However, like I said, I’ve charged my Nikon brand batteries for over a year with the charger with no issues.

It charges the following battery types:

Canon: BP-208, BP-308, BP-315
Minolta: NP-400
Nikon: EN-EL3, EN-EL3a, EN-EL3e
Panasonic: CGA-S303

The Impact Dual Charger goes for $69.95 at B&H Photo & Video

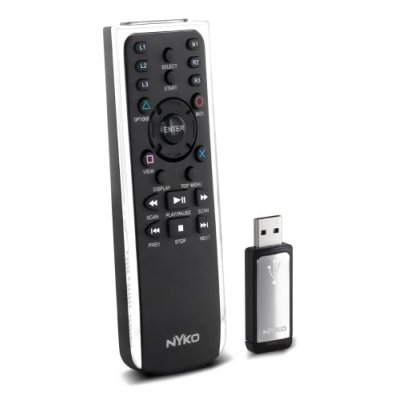
You can use your universal remote with your PS3

As I have written in the past, I use the Sony Playstation 3 (PS3) as my Blu-ray player in my home theater. It works great, however the one complaint that I had with it was that I couldn’t control it with my favorite universal remote (which happens to be a Sony remote). The problem is that the PS3 uses Bluetooth for its wireless game controllers AND for the Sony DVD remote.  I have the Sony PS3 DVD remote and as you may have guessed, it only works with the PS3 and controls nothing else. Also I have say that it kind of sucks as a remote in general. In typical Sony fashion the PS3 DVD remote is BLACK and impossible to see in the dark. There is no light on it and it doesn’t even have glow in the dark buttons. The Sony PS3 DVD remote is Bluetooth based which is why it doesn’t work with anything else but the PS3.

The good folks at Nyko have created a remote that uses IR instead of Bluetooth. Their Playstation 3 Blu Wave Remote comes with a USB dongle that plugs into the PS3. Then you can use their remote to control the PS3. So here’s what I did. I plugged in their dongle and then I put my Sony Universal Remote in "Learning mode" and I used the supplied remote to teach my universal remote the commands to control the DVD/Blu-ray playback of my PS3. Next I put their remote in a drawer. That’s it! I now have ONE REMOTE that controls my home theater environment again. So if you have a favorite universal remote that can learn commands and you have a PS3, this will be the best $14 you’ve ever spent. Now also if the PS3 is not in a great location for IR line of sight, you might also want to get a USB extension cable so that you can place the dongle in a better location.

The Playstation 3 Blu Wave Remote goes $13.99 at Amazon.com.

Let the iPhone app development begin

As expected Apple delivered upon their promise of an iPhone SDK (software developer kit) which will allow developers to write native apps for the iPhone or iPod touch. The Beta of the SDK is FREE for download today. You can then write your own apps and test them directly on supplied simulator. However, if you want to distribute your app, you would then have to sign up for their developer program ($99/year) even if you plan to make FREE apps. Once you write your app and sign up. Apple will then have to approve your app and then it will be available through a new App Store app directly on the device or via iTunes. If your App is FREE, then you’re all done. If you want to charge for your app, then you set the price. After that Apple sells your app, collects the money, deals with credit card fees, etc. and keeps 30% off the top. You get a check for the remaining 70% on a monthly basis. I’m not a developer, but this doesn’t sound too bad to me. Also this will be the only legitimate way to do it.


Apple is really getting ready for business now!

Not only did Apple release the SDK, but they also announced support for Enterprise connectivity! This is big because it answers all (or almost all) of the issues that most companies had with deploying iPhones company wide. Apple has licensed Exchange ActiveSync from Microsoft and is building it right into the iPhone, so that iPhone will connect out-of-the-box to Microsoft Exchange Servers 2003 and 2007 for secure over-the-air push email, contacts, calendars and global address lists. Built-in Exchange ActiveSync support also enables security features such as remote wipe, password policies and auto-discovery. The iPhone 2.0 software supports Cisco IPsec VPN to ensure the highest level of IP-based encryption available for transmission of sensitive corporate data, as well as the ability to authenticate using digital certificates or password-based, multi-factor authentication. The addition of WPA2 Enterprise with 802.1x authentication enables enterprise customers to deploy iPhone and iPod touch with the latest standards for protection of Wi-Fi networks. My IT guys are probably salivating at the moment ๐Ÿ™‚


Games and AIM

Apple also showcased some really cool games. A couple of these games took advantage of the iPhone’s accelerometer that is built-in the iPhone. Think of it as a hand held Wii. Apple also gave AOL some stage time to show a native AIM chat client on the iPhone. This was one of my “10 iPhone Apps I Want“. This will be really cool! Surprisingly Apple also said that they wouldn’t stand in the way of VoIP apps that work via Wi-Fi! I was shocked to read that.


Sounds great, but we’ll have to wait a few more months

This all sounds very exciting! However, Apple won’t deliver the 2.0 software update to the iPhone until June. The up side of this is that it gives developers 3 months to get some apps ready. So I imagine by June we should see LOTS of available apps. It would be nice to have the ActiveSync stuff sooner than later, but I’ve waited this long, another 3 months won’t kill me. This also makes me feel even better about my iPhone investment because this update for the iPhone will be FREE. However, around the June timeframe I’m expecting their to be a 3G version of the iPhone too. So Apple will have come a long way in 1 year and they should be a lot closer to their goal of selling 10 million iPhones.

You can watch the event here.

10 iPhone Apps I Want

Well tomorrow’s the big day. It’s the day that Apple is rumored to be delivering the iPhone SDK(possibly just a beta of it) so that developers can begin to write native 3rd party iPhone apps. The rumors have been all of the map as to whether Apple will control/have to approve the distribution of these apps or not. Also will they only be available through iTunes or directly from the developers? I’m sure we’ll find out soon enough. Apple is supposed to release the SDK (software developer kit) at a special even on Thursday, March 6, 2008.

What I wanted to list here are the apps that I would like to see and even willing to pay for. Now keep in mind I’m talking 3rd party apps, not necessarily updates to the iPhone itself. I still have a long laundry list (50 ways to make the iPhone better) of "features" that I would like to see come to the iPhone via firmware updates (some of which have recently been addressed – ie. custom ringtones via GarageBand, iPhones on corporate plans, pseudo GPS, SMS to multiple people, etc.). However, there are certain things that Apple may never do. That’s where the 3rd party apps come in. Macworld published their list of 25 apps that they would like to see and we agree on a few, but there are some that I would like to see that they didn’t list. So here goes. These are apps that I would be willing to pay for:


10 – AIM based Instant Messenger

SMS messaging is great, but I would also like to do iChat (AIM based instant messaging). There are a couple of web based solutions, but having a native iPhone client would be great. It may not happen because it would take revenue away from AT&T. However, if a 3rd party developer could do it, It would be great.


9 – Skype/Vonage VoIP

This is another controversial one. If people could make calls while they were connected to Wi-Fi via VoIP, that would certainly save on those wireless minutes. However, this would definitely be one that AT&T wouldn’t be to happy about. However, if this one were available it would sell like hot cakes.


8 – Expense Tracker

While some are asking for a Pocket Quicken kind of app, my needs are simpler. I would like an expense tracker that I could input expenses in as they occur and then email myself an expense report at the end of the week that I could print. I could then do my real expense report quicker.


7 – Blogging App

How cool would be it be if I could take a picture(s) with the iPhone’s camera and then create a blog entry incorporating that shot? People would definitely do more blogging if they could do the whole process (EASILY) from their iPhones. So a native iPhone app that tied into the standard blogging engines (Blogger, WordPress, etc.) would be hot!


6 – Dictionary/Thesaurus

Having some more apps that I would use regularly would be nice. Not only would I like a dictionary/thesaurus, but also a unit converter and currency converter. These are no brainers and should be pretty easy for a 3rd party developer to make.


5 – FileMaker Pro Light

FileMaker Pro is one of the best database apps in existence. I’ve used it for years. It would be really cool if I could take my databases with me. The iPhone has enough storage and horsepower. It would be great to be able to sync a FMP database and update it while on the go. Come back and sync the changes I made while I was out to the main database on my desktop. Take it step further and let me update it or send the changes over the internet.


4 – Shopping List

This is so basic! Since the iPhone doesn’t have a To-Do function (go figure), it would be nice to generate shopping lists, errand lists, etc. that you could then check off as you complete or buy each item. Take it step further and allow someone to log into a website (say your spouse), generate a list and send it directly to your iPhone. This would be the answer to "honey, I’m stopping by ______, do you want anything?" Now you’re probably sorry you made that call because they start rattling off this list of things you’ll never remember. Now they could just logon on, create the list and send it directly to your iPhone.


3 – Movies App

There is a VERY GOOD web based Movies App for the iPhone now. However, since it’s web based it doesn’t really save my prefs. I would like to see this app really beefed up and made native. I would like to see not only theaters in the area and movie times, but also movies that were just released on DVD and in theaters. I would like to save my favorite theaters as preferences and be able to tap each one to see what’s playing and when.


2 – Slingbox Player

Sling Media has already expressed an interest in making a Slingbox Player for iPhone. However, the problem is going to be bandwidth over EDGE. You would either have to use it only while connected to Wi-Fi or wait for the 3G version of the iPhone. This would be a killer app though.


1 – Screen Capture

My number one need at the moment is to be able to make screen captures of what’s on the iPhone’s screen. As the co-author of The iPhone Book and a guy who writes about tech, it would be so much easier and nicer if I could pull screen captures directly from the iPhone without having to hack/jailbreak it. Hopefully the good folks at Ambrosia Software will make a version of SnapzPro for iPhone.

Shooting tethered just got easier

I’ve been doing a lot more studio shooting lately and the one thing I’m addicted to (besides pretty models) is shooting tethered into Adobe Photoshop Lightroom. Although my new Nikon D300 has a nice big LCD screen on the back, it pales by comparison to the 15" display on my MacBook Pro. So I like to see the shots as I take them on the laptop screen so that I can make adjustments to lighting, exposure, etc. as I go. This way my shots bypass the camera’s memory card and download right to my hard drive of choice. My setup involves the D300, a long amplified USB2 cable, Nikon’s Camera Control Pro 2 software, which by the way supports the new Live View feature of the D300/D3. However, I think this app is still way overpriced! (Canon shooters, just use the software that came with your camera – It’s free) and of course Adobe Photoshop Lightroom. This setup has been working just fine.

However, what I got (after reading Joe McNally’s blog) was this Bogen-Manfrotto Double Head Accessory Arm and Gitzo Laptop tray that sits right on my tripod. I had been using a somewhat flimsy portable stand or whatever surface was nearby for the laptop to sit on. The problem was that I was always having to stoop down to see the screen. This NEW setup on top of my tripod puts everything at eye level. The difference is night and day in my productivity and speed. So I want to thank Joe for turning me on to this solution. It’s been working great.

Back to editing…


It’s Tuesday, so that means new Apple stuff

Apple has been a roll lately! They have been releasing new products on just about every Tuesday since Macworld Expo. Well today is no different and the highly anticipated, highly rumored updates to the MacBook Pro and MacBook made their debut just minutes ago.


The New MacBook Pro

Using the latest intel core 2 duo chips, now comes in speeds up to 2.6GHz. They also feature 2GB of RAM standard and also come with larger hard drives, not to mention the latest NVIDIA graphics cards. As expected Apple also brought over the new "Multi-Touch" trackpad feature first introduced on the MacBook Air. The MacBook Pro prices start at $1,999 for the 15" model and $2,799 for the 17" model.


The New MacBook

Apple’s consumer notebook also got a speed bump as well as 2GB of RAM standard and larger hard drive options. No Multi-Touch trackpad for the MacBook. The MacBook now comes in 2.1GHz and 2.4GHz models and hard drive capacity up to 250GB all starting at $1,099.


What’s my take?

While I certainly welcome a faster MacBook Pro (since I use the MacBook Pro as my main computer), there isn’t anything revolutionary here. I had hoped that Apple would see fit to include Blu-ray movie playback as well as an option for 3G wireless support. Steve seems quite adamant about killing the optical drive before its time. While these new MacBooks still have built-in optical "super" drives, there is nothing new about them. Since Apple doesn’t rent HD movies for download on Macs and PCs (only on Apple TVs), I’m puzzled by the lack of Blu-ray support especially now that the format war has ended. Also before you start commenting on the fact that the displays may not be high def and therefore no need for high def movie playback, I get that. The problem is that I want ONE movie format from here on out. When I rent from Netflix, I now rent Blu-ray if it’s available. This means that if I decide to take that movie with me on the road, I can’t watch it. Also a Blu-ray burner “option” would mean being able to backup 50GB to one disc! I will ultimately upgrade my work notebook, but I’m certainly not in as big of a hurry as I would have been if these would have had the above features.