Travel Tip: Use Wired Internet instead of WiFi

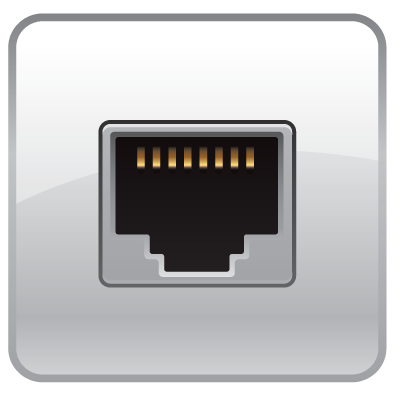
ethernet port

i'm currently traveling on the 2012 Adobe Nordic Design Tour. This means a different hotel each night or so. I spent the weekend in Sweden and my hotel (Radisson Blu) offered FREE WiFi throughout the hotel. All you need to do is confirm your room number, last name and accept the terms/conditions. Great! However, there was one major problem. The internet was almost unusable in the evenings because (and I'm guessing) that it was saturated with hotel guests. My connection dropped constantly and when I could get connected the speed reminded me of dial-up. Sadly, it wasn't until my last night at this particular hotel that I noticed an Ethernet port on the desk under the TV. Lately it has been my experience that when a hotel offers WiFi, that they pull the plug on the Ethernet ports in the guest rooms. However, i figured I had nothing to lose by plugging in and giving it a try. Not only was the port active, but it was about 10-20 times faster than the WiFi network!
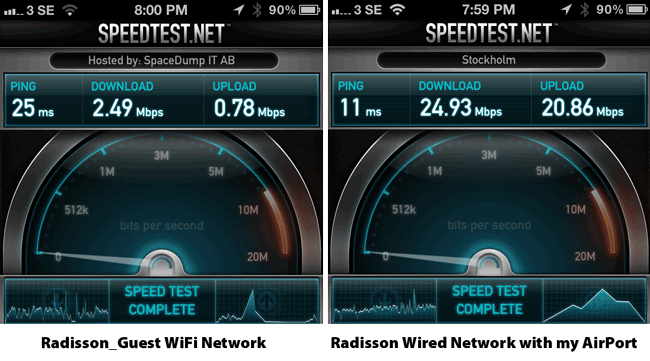
 

Get the SpeedTest.net App I used above here from the iTunes


Yes, I still want wireless!

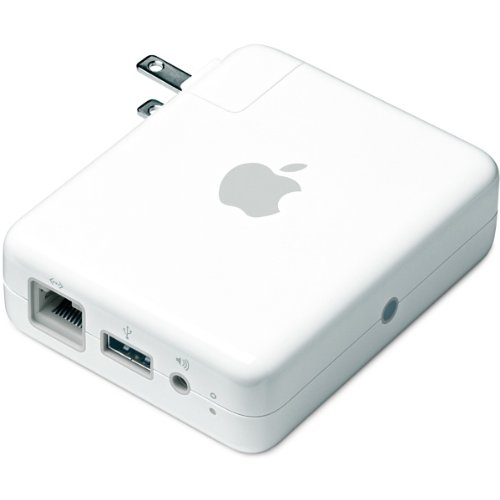
I carry an AirPort Express Base Station as part of my "always packed" travel gear. I plugged it in and in about 15 seconds I had my own private WiFi network that was way faster than the Radisson one and best of all I could put all my devices on it without having to do the terms and conditions setup, dropped connections, etc. on each one. 

You can get the AirPort Express Base Station Here. You might also want to carry a short ethernet cable as there wasn't one anywhere to be found in my room.


The Bottom Line
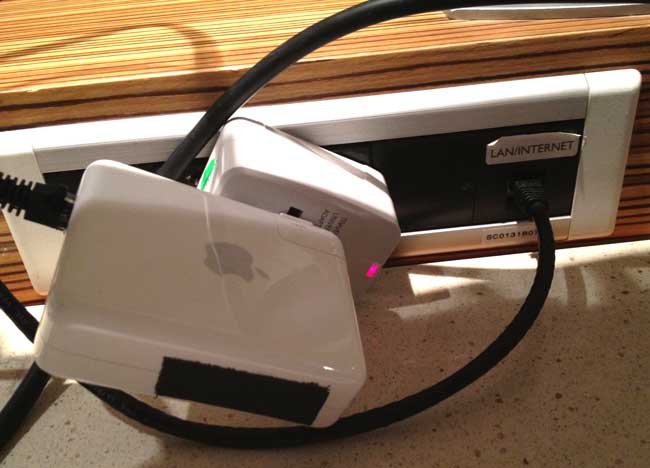
If you have the option of going wired vs. wireless, give it a shot. You'll probably get better performance not only because wired is faster, but because most people are going to connect to the public WiFi (overloading the routers) rather than the wired option. By having your own WiFi hotspot you still get the benefits of WiFi too! And yes, the wired connection in my room was also FREE.

The other benefit of a faster connection is faster VoIP calls, FaceTime, Skype, Netflix, Slingplayer, etc.  I was able to get so much more done with the faster connection, not the least of which was this blog post. 🙂
Solmeta Outs a New N3 GPS for Nikon DSLRs


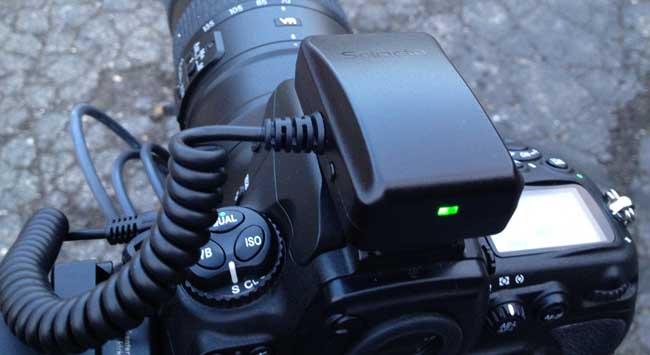
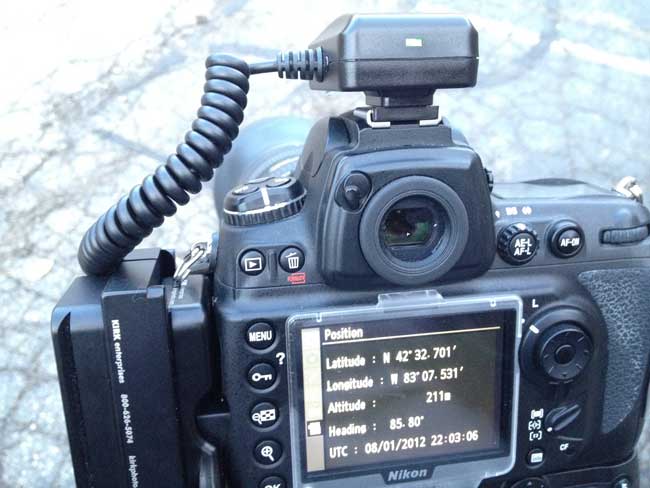
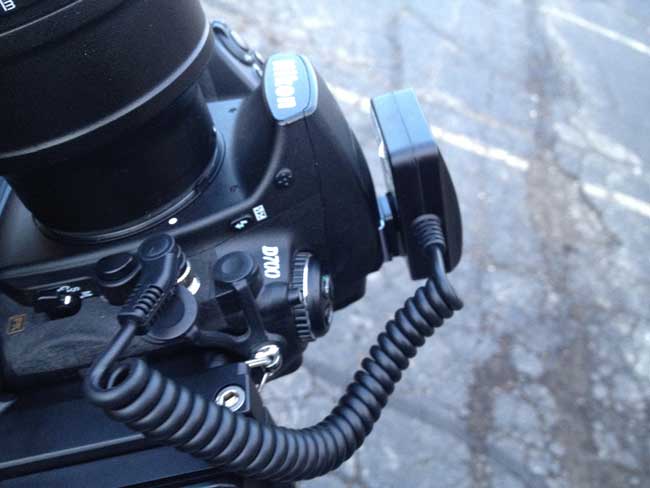
It's been a while since I did my Nikon GPS Smack Down. Back then I chose the Solmeta N2 as the winner for overall best GPS for Nikon DSLRs. Since that time Solemta has come out with another new model, the N3 and I got a chance to try one out. Like previous model the Solmeta N3 plugs right into your compatible Nikon DSLR and geotags (adds longitude/latitude and heading) your photos as you take them (both JPG and RAW support). However, unlike the previous model you now have to choose between the one for professional DSLRs like the D700, D3, D4, etc. and the prosumer models like the D5100, D7000, etc. The reason you have to choose is because the interface cable is now hardwired in. This has it's advantages and disadvantages. The advantage is that the connection is perfectly secure. The N2 allows you to plug in a cable to match your camera, but the connection could easily get damaged if you bumped/hit it the wrong way. The new connection is very well designed. The disadvantage (at least for me) is that if you have multiple camera bodies of different types you'll now need one of each type to go with your camera as opposed to just ordering the additional cable. This will only affect a small percentage of people, but it is a slight step down in convenience for me. Another small but notable cable improvement is that the cable is now coiled instead of being too long or too short. It will be just right for however you attach your GPS (in the hotshoe or on the strap). 


Faster and more accurate

This model uses a 3-axis electronic compass like their top of the line model the Geotagger Pro. The N2 uses a 2 axis compass. The first thing that impressed me was how fast it was ready to go. By the time I tuned the camera on and was ready to snap the 1st picture it had already locked on to a satellite and was providing the location info to my Nikon D700. The other big difference is that this model gets its power directly from the camera. The other models have internal batteries that you charge and then only after they run down will it get power from the camera. While having a built-in battery does provide for potentially longer shooting, the N3 is designed to use less power, sleep and take advantage of the Nikon GPS power saving features. I haven't had it long enough to compare battery life, but I did notice that it went to sleep a few seconds after I turned the camera off and was ready almost instantly when I turned the camera back on.

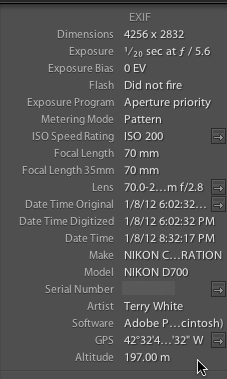
The GPS data shows in Lightroom 3 and allows you to click the arrow/button to take you to that spot on Google Maps.


New Indoor Fixed Mode

GPS units work best when used outside, but if you are going in and out of buildings a GPS that only works outside isn't much use to you. The N3 has an Indoor Fixed Mode that will use you last known location to continue tagging photos as you take them inside.


Built-in Remote Trigger Support

One of the usual concerns pro photographers have is that the model for the pro cameras use the 10 pin terminal port. That port is also often used for cable releases (remotes). While Solmeta does sell a Y splitter cable so that you can use your existing cable release, the also have a port on the side for use with a basic remote too.


The Bottom Line

I have mixed feelings about this model. I'm happy with the speed and accuracy, but I'm less happy about needing a specific model for your camera. Luckily the N2 and Geotagger Pro are still available as options. Solmeta has positioned the N3 right between the Pro and N2 and it's priced at $189. You can't go wrong with any of these models as they are all solid performers. 

Learn more or order here.

Review: Kindle Fire – A great tablet for the price!


When I reached out on my social media channels for ideas of what gadgets you'd like to see me take a look at, overwhelmingly the response was "Kindle Fire". People also wanted a comparison of the Kindle Fire and Color Nook. I'll say more on that in a minute. First of all, as many of you already know, this is not a general review site. The guys over at Engadget do a great job of reviewing ALL things tech. My goal has always been to talk about the products I actually use. Luckily I do have a use for the Kindle Fire and it's actually more to do with my day job at Adobe. We are bringing the Kindle Fire into our list of supported devices for the Adobe Digital Publishing Suite. With that in mind I figured it would good to have a Kindle Fire to test on and while I've got it, it couldn't hurt to review it.


People really want to compare it to the iPad

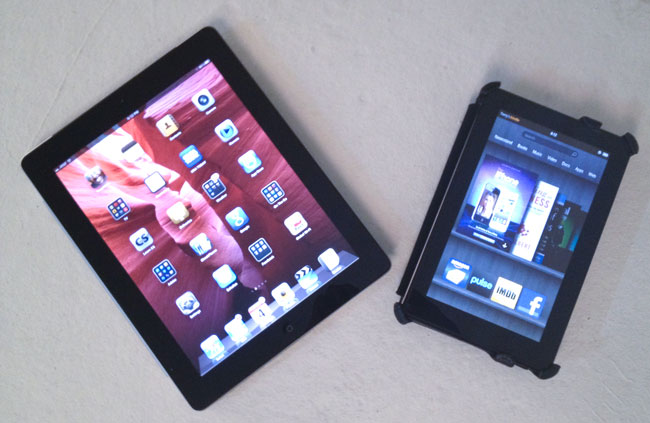
While it's easy to want to draw comparisons to the iPad (and I will), I look at the two as aimed at two totally different markets. To keep it simple I would say that if you are primarily looking for a general purpose tablet to run lots of Apps on and possibly use instead of a laptop/desktop computer then the iPad is probably going to suit you better. If you're looking primarily for a digital book/magazine reader that can also run Apps/play content and you don't want to spend a lot of money, then the Kindle Fire is a PERFECT choice!

What about the Nook? I don't have one, have never held one and therefore have no comparison to give you. I have no plans to get one at this time, but if I do then I'l compare it with the Kindle Fire.


How do I like it?

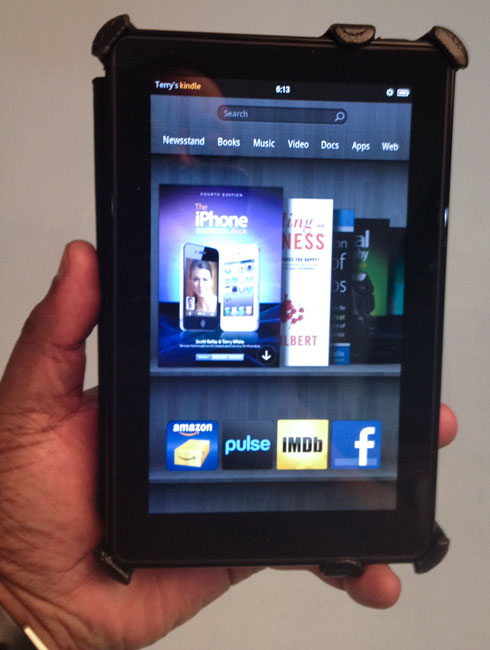
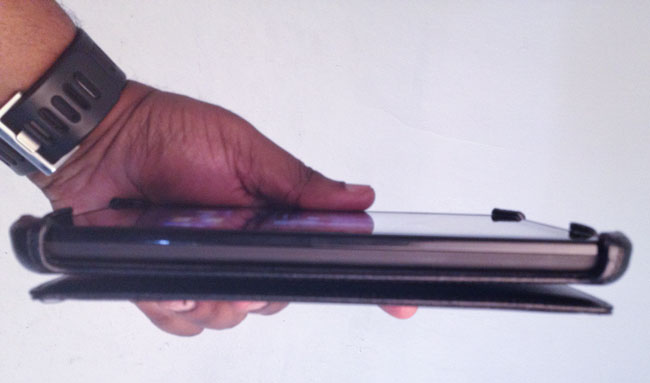
Now that I got the iPad vs. Kindle Fire piece out of the way, let's concentrate on the goodness of the Kindle Fire. It's a 7" color Wi-Fi tablet. The display is very vivid and easy on my eyes. The design is a bit on the thick side (7.5" x 4.7" x 0.45"), but still very comfortable to hold and use (14.6 ounces).

It has 8GB's of storage (not a lot) and only 6GB of that is available to you for content. You can expect to get about 7-8 hours of continuous use out of it. I was impressed with the out of the box experience. What I didn't notice during the ordering process is that Amazon knows me! Therefore when my Kindle Fire arrived it was already configured to my Kindle/Amazon account and all my books were already there. That gave me a definite "aha" moment, because I then realized that since Amazon knows me that my Amazon Cloud music was also there for streaming/download. Don't worry, if you're buying one as a gift then you can specify that it's NOT for you during the ordering process and it will ship unregistered. Navigation seems pretty straight forward and out of the box there really wasn't anything that I struggled with not knowing how to do or having to refer to a manual. It asked me to log on to my WiFi network and I was off and running. The battery had enough charge in it out of the box for me to set it up and play. 

More than books and magazines! While the Kindle line has been traditionally targeted at only those interested in reading, the Kindle Fire breaks away from this mold nicely. It can browse the web, do email, run Apps (yes games too), play music, play movies, and play TV shows. Amazon is giving away free cloud storage for your digital content this helps combat the limited storage on the device. Also Amazon offers up their Kindle Lending Library so that you can actually borrow free books with no due dates.  


What could be better?

The Kindle Fire can run Android Apps and that's a great thing! However, there is one small problem and that is that there is no built-in way to access the Android Market. That's right! No Android Market. If you want to buy or download free Apps you have to do it from the Amazon App Store. To a new Kindle Fire/Android user this won't be a big deal at all, but in my case I have a few Android Apps that I've paid for and unless I do some hacks, I'd have to buy them again from Amazon. It's not the end of the world because I don't have that many, but it kinda blows! While WiFi is great I would have loved to have seen a 3G offering too even if it costs more. 

The built-in stuff – This will likely be another source of disappointment for anyone who has looked at or used an iPad. The quality of the built-in Apps vary. For example, the email App, while not stellar is functional. The web browser is OK too, but when I tapped on the Facebook "app" it merely took me to the Facebook mobile page. In other words what appear to be Apps in some cases are merely bookmarks. 


The Bottom Line

The Kindle Fire is an excellent choice for those of you that kinda want a tablet, but don't want to spend $500 on one. At $199 the Kindle Fire is priced right and will definitely keep the guys in Cupertino on their toes. Best Buy recently announced that the Kindle Fire was the first and only tablet they've sold to outsell the iPad and at that price it's a no brainer. However, for the heavy tablet user you will probably be disappointed in the Kindle Fire App selection at this point. This will hopefully only be a temporary problem. I've already bought a second one as a gift for an immediate family member who has never wanted an iPad and who has an older Kindle. 

You can get the Kindle Fire for $199 here.

My Desert Fashion Shoot


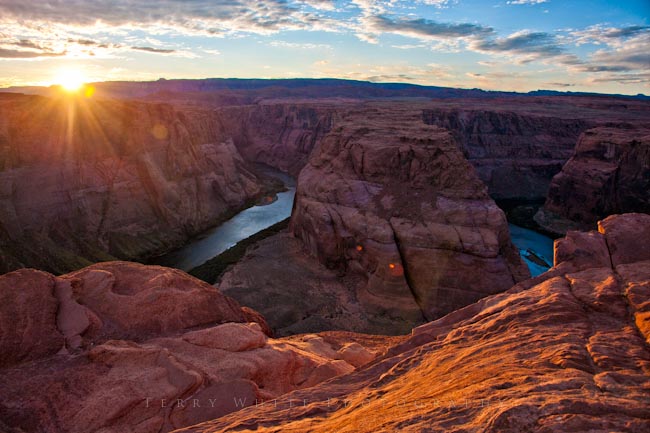
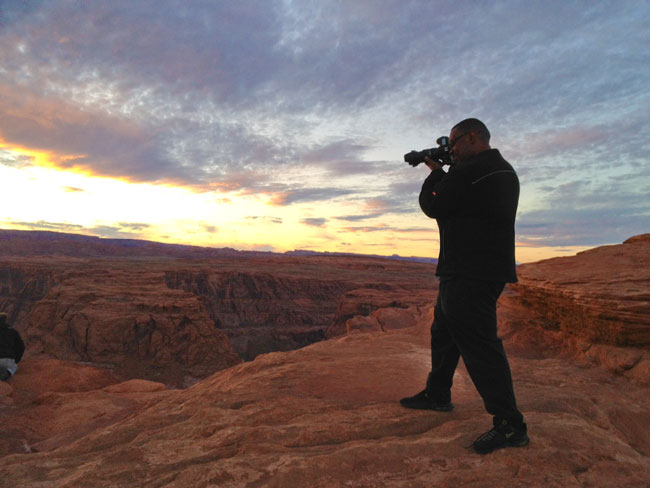
You might remember my photographic adventure from a couple of years ago where I visited Page AZ to shoot the slot canyons and Horseshoe Bend. During that trip I knew that I wanted to go back and some day do a fashion shoot there.


The funny thing about this is that you would think this would be an everyday event for photographers, but really it's not. You can find tons of images of Antelope Canyon and Horseshoe Bend, but very rarely do you ever see images with models in them (unless they've been composited in afterwards). 


Having been there once before I kinda know why this is rare. First of all this area is kinda in the middle of no where! So if you're wanting to shoot a model in this location you're most likely going to have to bring one in. 


The second problem is that it's not that easy to get to. While there are small airports in the area, most of them don't have the major airlines. This means flying into Phoenix and driving for 4-5 hours to get there. (BTW: She's freezing her butt off, but she'd never let it show!)


Luckily I was already on the west coast doing the HOW Interactive Design Conference in San Francisco, so all I had to do was fly from San Fran to Phoenix and meet the model there for the drive to Page on Saturday. I chose my favorite model, Kandice Lynn for this trip because there's one thing that I realized about Kandice. Not only do I get great shots when I work with her, she's also not a "diva". LOL


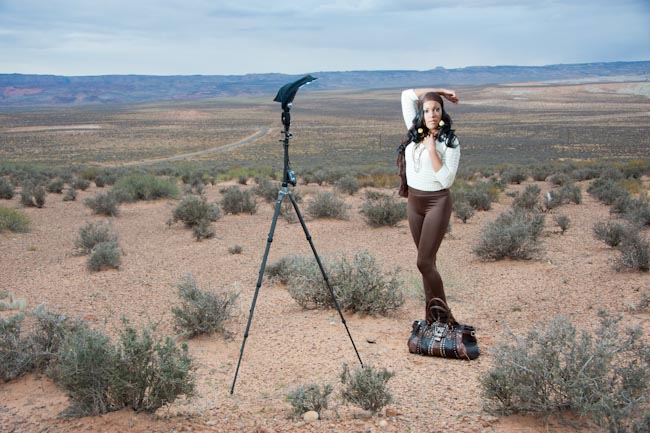
Kandice accepted the challenge of extreme temperatures, hiking in the desert, making quick wardrobe changes, hair and makeup. 


What I learned…

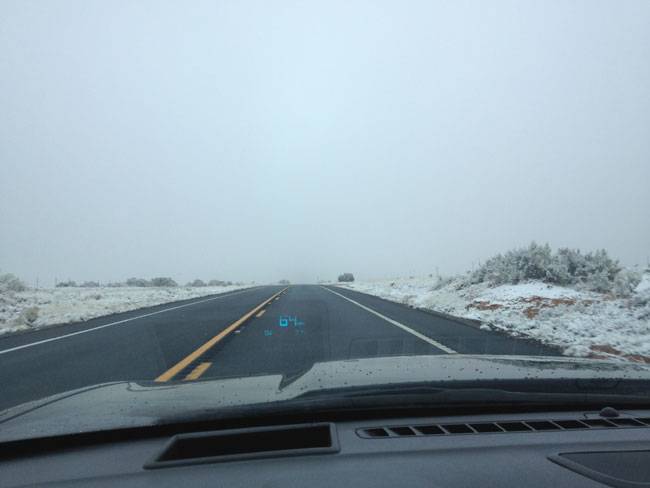
The best times to vist this area are April and October. Due to our schedules we couldn't go until November. You would think that a few weeks wouldn't make that big of a difference in climate and light, but it does! It was FREEZING! As soon as we got out of Phoenix and started heading north we were shocked to see snow on the ground!!! Pretty, yes, but it would kill the shoot. We called ahead to see if there was snow on the ground in Page and luckily there wasn't (YET). 


The next thing I learned was that while the slot canyons are BEAUTIFUL and you can have wonderful rays of light coming in. The time of year also affects this. I knew from doing a little reading that we would NOT have the rays of light due to the fact that the sun would be in a different postion.

However, what I didn't think about was that on an overcast Fall day that the canyons would be just that much darker. While this isn't a problem shooting long exposures on a tripod, it becomes a challenge shooting a live subject due to the fact that no human being can stand perfectly still that long. This means either shooting at a higher ISO or introducing lights. They kinda frown upon flash photography in the canyons. Therefore I had to make the best of the combination of finding the right spots and working at higher ISOs. Lastly the light isn't as warm on the walls as it is in April and October, so you have to really look for the bright vibrant colors that would normally be everywhere!


Of course shooting in the desert there are no restrictions on bringing speed lights. I used my Gitzo tripod as a light stand to hold my SB800 and FlashBender.


Once again there's Kandice being a trooper laying on the cold hard desert terrain to get the shot!


Yeah I know the cropping is a bit tight at the bottom of this shot, but it's the one she really liked best.


The gratuitous car shot 🙂

 

Photo by iPhone photographer Kandice Lynn


All in all it was a fun trip and as always I'm learning more and more about this whole photography thing.

Hey Logitech! Can I get a tripod mount?

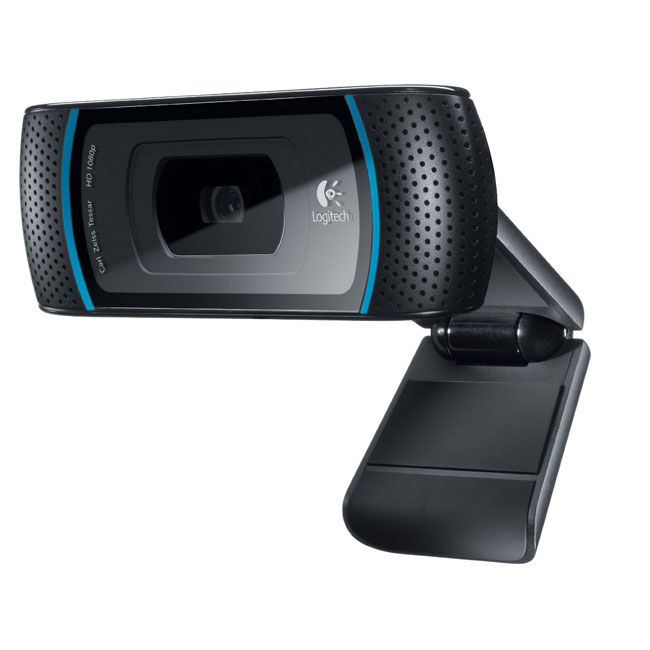
I'm really impressed by the video quality of Logitech's 1080p HD Web Cams. As a matter of fact I've started using them for my Adobe Creative Suite Podcast when I'm recording an episode in studio. The only problem that I have with them is that Logitech (along with all the other webcam makers) seem to think that the only place anyone would ever want to mount a webcam is on top of their monitors. The reality is I already have an HD webcam on my MacBook's. It's called an FaceTime HD Camera. If I'm doing a video chat it's great having it built-in. However, If I want the camera further back to capture more of the set that's when an external video camera works best. 


Drill a hole

There is no physical reason why the Logitech HD C910 pictured above couldn't have a standard tripod mount built-in. As you can see the mount is just dead weight with no electronics in it. There's even room for a standard mount without changing the design. I've even seen some do-it-your-selfers out there posting all the steps necessary to do it yourself. While I know it wouldn't take much for me to do it, there's not reason for Logitech not to build it in.


My Solution

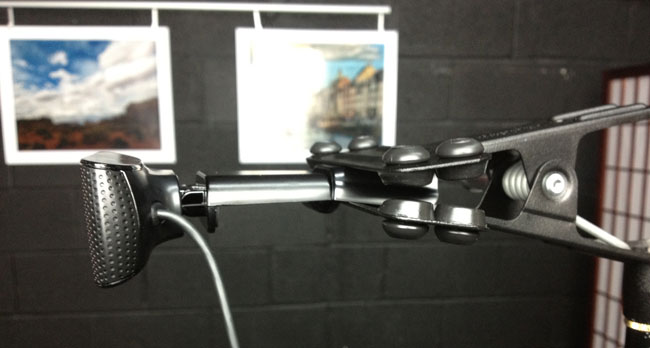
Instead of drilling a hole. I just went with something I already had in studio. A Justin Clamp mounted on a light stand. These are great for mounting speed lights and holding reflectors on standard light stands. They also work great for holding the Logitech Web Cams. The only problem is that they cost almost as much as the webcams themselves. If you're buying one for just the purpose of holding a webcam or reflector, then there is a much lower cost alternative. The Manfrotto Spring Clamp is less than half the cost of the standard Manfrotto Spring Clamp with Flash Shoe and it gets the job done just as good. You can get one here for about $17 or less.


Logitech Could Even Take It Up A Notch Further

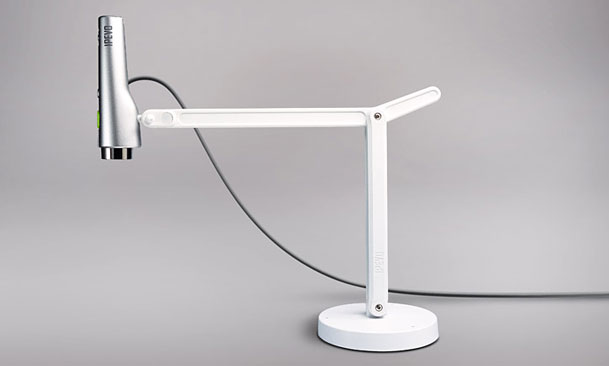
Besides adding a tripod mount hole they could really kick things up by adding or selling a separate stand to allow the camera to be pointed down at say, oh I don't know,  a mobile device such as a tablet or smartphone. More and more presenters are having to present from their mobile devices and the current solutions are expensive and bulky or low quality video. I love having video out on my iPad 2, but the problem with that is that people can't really see the gestures that you're doing. They just see things happing on the screen.  If a Logitech HD webcam could be mounted on a lightweight stand that's easy to travel with (See my Point 2 View review), then it would make them even more attractive.


What say you Logitech?

You build great webcams. Please look outside the box and look at more uses than just sitting it on top of a monitor!


UPDATE: Twitter follower @EricKintz alerted me to this Logitech Model (C615), which does in fact have a tripod mount on it. Woot!

Review: IPEVO Tubular Wireless Speakers


I've been watching the Bluetooth Wireless Speaker revolution from the sidelines now for several months. I've reviewed a few different sets of travel speakers in the past but they were all wired. While I have wanted to try out some of the new bluetooth wireless options such as the Jawbone Jambox, I couldn't get past the asking price of $199 retail ($179 street) for a speaker that would spend the bulk of its time in my suitcase. Don't get me wrong, I'm sure the Jambox is fantastic, sounds great and is worth the money if you plan to use it regularly. I also certainly don't have a problem spending money on something of good quality. It's just that my need for a travel speaker is for those occasions when I'm traveling and want to hear my music, videos, etc. on something better than the speakers in my laptop or iPad. 


IPEVO Tubular Doesn't Break The Bank

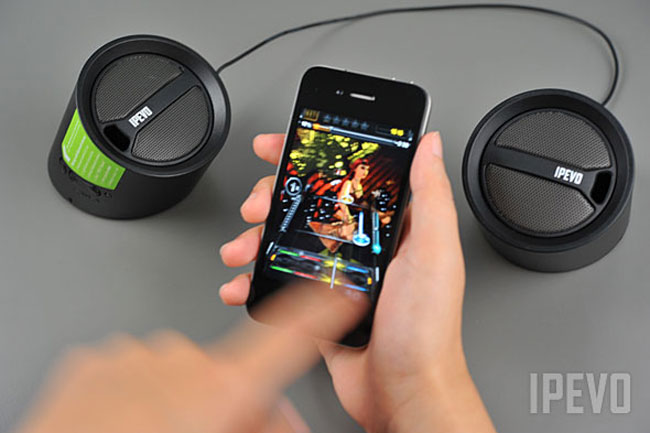
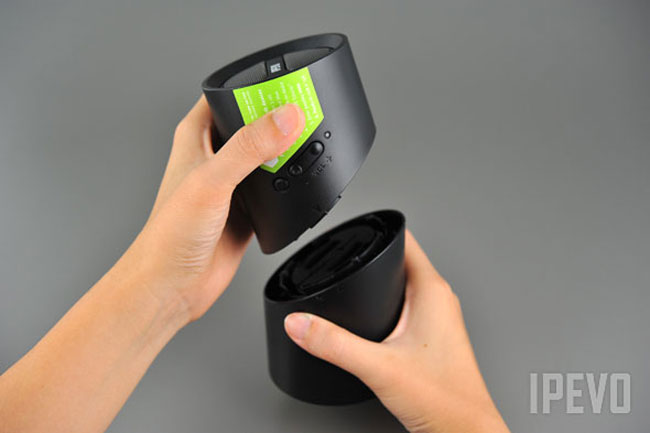
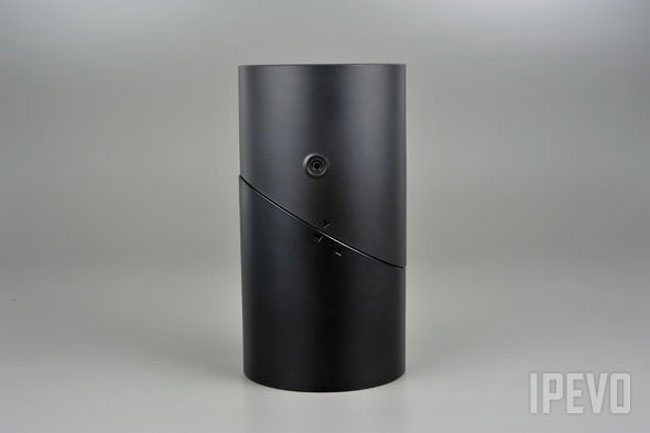
This is actually my second IPEVO product. You might remember my review of the IPEVO P2V webcam for doing mobile device demos. Again, it's a product that solves a specific need that I have at a reasonable price. The IPEVO Tubular Speakers are exactly what I was looking for. They are small enough to stick in a suitcase or laptop bag, yet the sound good enough to compete with most "small shelf" speakers. They are designed for travel. The two speakers connect together in a "tube" fashion when not in use. When you're ready to use them you untwist the tube to separate them out. They connect to each other via a single built-in cable. That's the only "wire" you have to deal with during normal operation. You can play your music to them via Bluetooth. iOS 4.x supports stereo bluetooth music playback. So your iPod touch, iPhone or iPad can stream music to these speakers wirelessly. I also had no problem pairing them to my MacBook Pro. They showed up immediately after pairing as a an Sound Output Device. 

There is a power button and volume control right on the speaker itself. Not to mention a small LED status indicator to let you know that they are on or in pairing mode.


How are they powered?

This is both a plus and a minus. The speakers have their own built-in rechargeable battery. There's a USB connector on the bottom of the main speaker that you can plug into any USB power source. It takes 2 hours to charge for 6 to 8 hours of playback. While it's great having a built-in battery, it also means that if you forget to charge them you can't simply pop in a set of AA's. 


Room for improvement

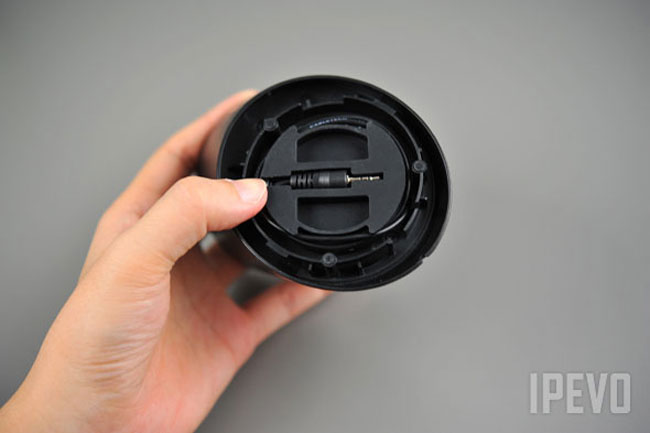
The speakers work and sound great. I've had zero problems with connectivity or playback. My only issue is that the cable under the speaker for connecting to the second speaker simply wraps around a circular section in the base of the speaker. I would have preferred this to be a retractable cable as it sometimes takes 2-3 tries to get it wrapped around just right so that the end of the cable fits in the holder for storage. Otherwise I have no complaints.


The Bottom Line

These speakers are a great alternative to the more expensive options out there. While they perform well, the best part is the price. The IPEVO Tubular Wireless Speakers go for a mere $59.95 (list price $79.99). That's less than half the price of other speakers in the category and they sound as good if not better than any other travel speakers I've tried.

Charge your iPad and Phone at the Same Time

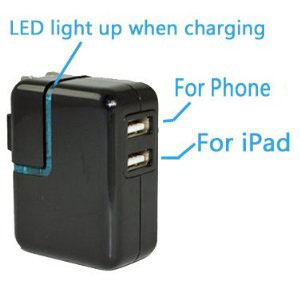
I'm always on the look out for ways to reduce the number of chargers I travel with and while I have found some great 4 Port USB Chargers in the past the one thing they all seem to lack is the 5V 2 AMP (10W) power requirement for the iPad. Granted the iPad will still charge on the lesser current, but it will take longer. Recently I found a dual USB charger that has one port that operates at the higher voltage. The other USB port is a standard 5V 1 Amp port for your other USB devices such as your cellphone. This is GREAT! This means that I can charge my iPad 2 at full speed and still have a port to charge my phone. The other requirement I have is that any charger I buy has to also work on the higher powered International plugs and this one does (with an appropriate wall plug adapter).

I have replaced my standard iPad white chargers with these for on the road. Yes it comes with a sync cable too. The only annoyance is the bright blue LED that lets you know it's plugged in. You know how I feel about LEDs 🙂
You can get the Dual Port USB Charger here for about $12 or here on eBay for about $12.

A standard Apple iPad charger retails for $29 (granted it does come with a long cord too).


Here's one for the Car too:

Order it here.

Adobe CS5 Evolution Tour Pt 2 Kicks off in Warsaw

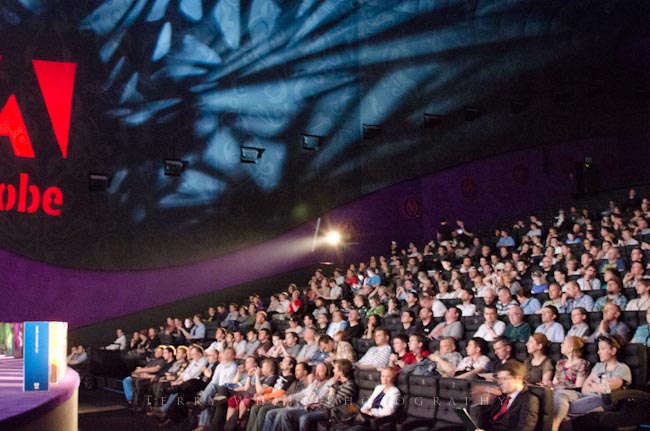
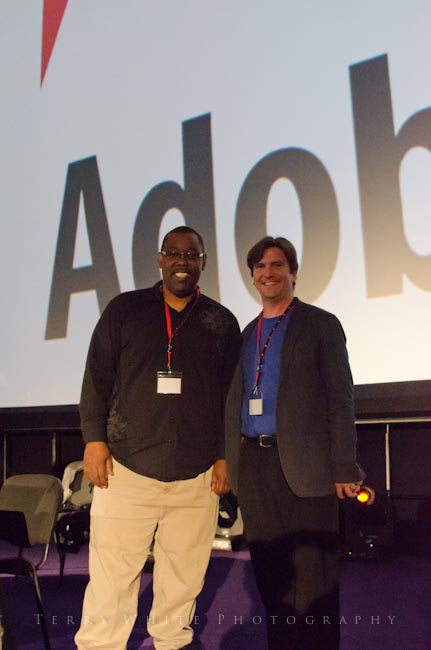
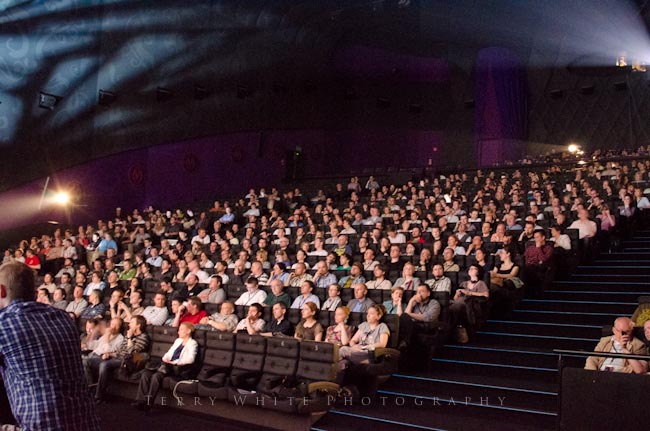
I just had to take a moment and thank the crowd in Warsaw that came out in full force for the Adobe CS5 Evolution Tour! We had an over capacity crowd of 800+ people with many sitting in the aisles. While it was unfortunate that Jason Levine and Greg Rewis couldn't make it due to flight delays and missed connections, Michael O'Neil from the UK and Paul Trani did a good job picking up the slack for the Video and Web presentations. 


Me and Michael (or Michael and I)


Glad I brought enough door prizes for everyone. However, I forgot to tell them to look under their chairs.


Continue reading “Adobe CS5 Evolution Tour Pt 2 Kicks off in Warsaw”

Scottevest Wearable Tech

Got Gadgets?

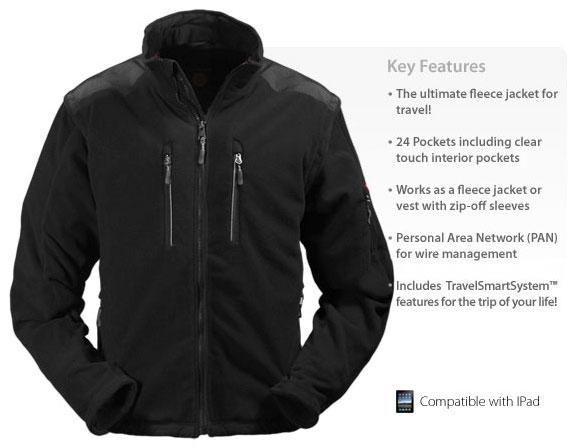
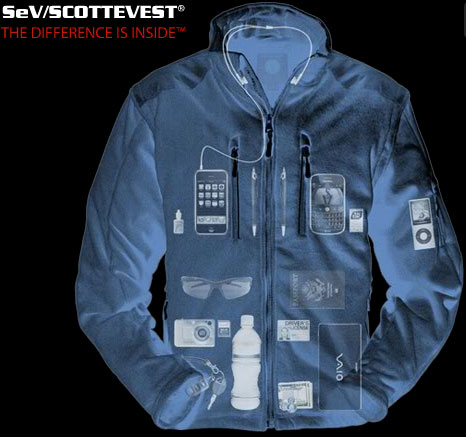
Of course you do. Why else would you be reading my blog? I routinely walk around with iDevices, Android devices, cameras, gps units, chargers, cables, batteries, etc. Normally these items are in my pocket if they are small enough or in my computer bag if they are larger items. When I travel I almost never check my luggage. If I do check a bag, it's a bag of clothing and never a bag with gear in it. At the same time my carry on bag has to be small enough to fit under the seat in front of me. Since I'm now tasked with carrying more and more devices for work and having to carry a smaller bag due to the ever decreasing space under the airline seats I'm always looking alternative ways to carry stuff. I read a review from a friend of mine on the Scottevest line of clothing. I've seen "geek wear" before and had no interest in integrating gadgets into my clothing. I still don't have any interest in "wearable tech." However, I am very interested in clothing that is simply designed to carry more of my tech gear. That's exactly what Scottevest jackets/vest are to me.
 

It's my 3rd carry-on

Scottevest jackets have on average 20+ pockets in them. They are designed to carry today's portable electronic gear and at the same time not showing visible bulges. That last part was pretty hard for me to believe. That was until i got one. The Scottevest clothing doesn't just have a bunch of pockets, It has a bunch of pockets that are carefully laid out to provide optimum storage and accessibility while providing minimal visible bulge. They thought of the little things. For example the two inner breast pockets are see through on the inside so that you can see and operate touch screen devices. Also you can run a set of earbuds through the inside of the jacket up to the collar where there is a special set of flaps to completely hide them when you're not listening to music/making calls. They put a screen cleaning cloth in one of the inside pockets on a string to allow you to quickly wipe your touch screens or camera lenses. There's even a pocket large enough to carry a tablet like the iPad. I first thought: "NO WAY will that not show from the outside!" While I don't really plan to carry my iPad 2 in my jacket, I did have to try it. OMG! It actually does fit and doesn't show from the outside.
 

What's in my pockets?

To date I have carried my: Kodak Zi8, Motorola Atrix, Mophie Air iPhone 4 Backup Battery, Holux GPS module, iPad stylus, keys, iDevice sync cables, iPad charger, boarding pass, passport, business cards, 2 ink pens, cash, and yes on occasion an iPad 2 🙂
 

Added security

While on my latest international tour I realized that the Scottevest has an additional benefit. It allows you walk around with gear that isn't showing to the general public. Granted, it doesn't hide a DSLR, but it can hide just about every other valuable that you're carrying.
 

The Bottom Line

Is that while I have jackets that I like to wear, the Scottevest has become my new favorite travel jacket. They come in a variety of styles and materials for both men and women.
You can check them out here.

Continue reading “Scottevest Wearable Tech”

5 Ways To Take Advantage of Dropbox

I started out using Dropbox.com because someone shared a file with me using that service. I really didn't think much about it at the time and treated it like all the rest of the File Sharing over the Internet services out ther. However, the more I used it the more I got hooked on it. I'll also state for the record that I have no affiliation with Dropbox.com, don't know them, never have met them and get nothing from them other than great service. Now that I have that out of the way let me explain briefly what sets Dropbox.com apart from the rest of the services I've tried.


How does Dropbox.com work?

First off you head over to Dropbox.com and setup your FREE account. You get 2GBs for free and while that doesn't sound like a lot (it's really not, but…), it's free and will cover most people's needs for sharing documents. You can also earn an additional 250MB's of space (up to 10GB total), per each friend you refer that signs up for a free account.

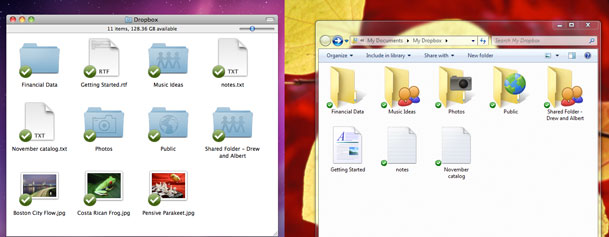
At this point you haven't done anything special that you couldn't have done on a dozen file sharing sites out there. However, what you also get is the ability to download the Dropbox.com application for your Mac or PC (as well as mobile devices such as iPad, iPhone, Android, Blackberry, etc.). With the Dropbox App installed it sets up a "Dropbox" folder wherever you want it be on your drive. You can treat this folder like any other folder. You can create subfolders in it as well. The difference is that anything you put in this folder will AUTOMATICALLY and securely sync up to the "Dropbox" cloud. The files will still be on your local drive, but they will also be available online via the Dropbox website as well as accessible from any of your mobile devices and sync'd to any other computers you have Dropbox installed on. This is what really sets it appart from most similar services out there. The latest version even offers the ability to keep this folder sync'd with your other computers on your LAN, which is a lot faster. Now that we know how it works (if not, watch the video at the end of this post), here are 5 ways to take advantage of it:


Have the same files on your Laptop and Desktop computer

Because Dropbox will sync the contents of your Dropbox folder across ALL of your computers (Mac, Windows, Linux), it makes it really easy to have the same files on a work/office/studio computer and a home computer or a Desktop Computer and a Laptop. Every operating system out there gives each user account a "Documents" folder. Instead of putting your documents in the default "Documents" folder, put them in a Documents folder located inside your Dropbox folder. Now you can work as you always do and when you get home those same documents will be there waiting for you on your home computer or on your laptop. This same concept would work for photos, music and movies as well.  Syncing happens in the background once the document is saved and closed. 


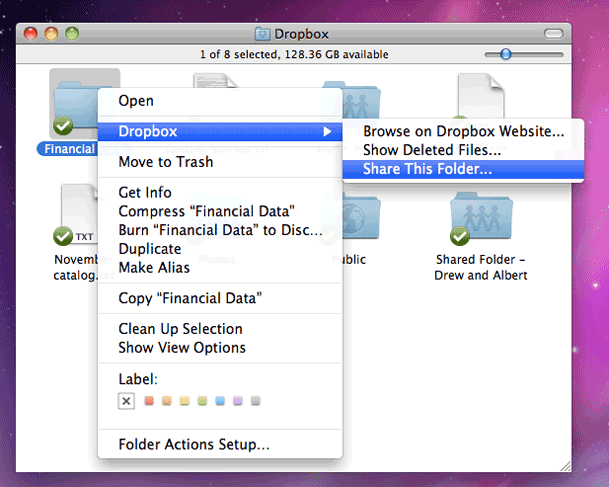
Share a folder with your colleagues

The shared folder concept is how I got started with Dropbox in the first place. Someone shared a folder with me and the other people working on the project. When any of us would add things or make changes to the stuff in that folder, it would automatically sync those things to each of our computers. No more emailing files back and forth or using thumb drives. This is also useful for sharing photos with a group of if multiple people take photos at an event, they can all copy them to a shared Dropbox folder for everyone to have a set.


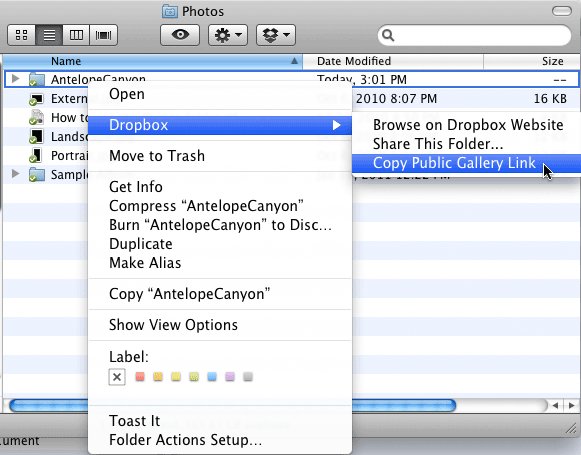
Create instant online, sharable photo galleries

I hadn't really discovered this feature until recently. If you stick a folder of JPGs in the default "Photos" folder, Drobbox will automatically turn it into a gallery and let you share a link to that specific folder for anyone to see even if they don't have a Dropbox account. Here's an example gallery that I created.

Continue reading “5 Ways To Take Advantage of Dropbox”