Review: IPEVO Point 2 View USB Camera for iPad/Mobile Device Demos

As I go out a demo Adobe's Digital Publishing Suite one of the biggest challenges is showing the final product to the audience on the iPad/Android tablet. Although the iPad does have a video out solution via the iPad to VGA adapter, that Adapter only works in certain Apps and apparently adding support for to your App (depending on what your app does) can be tricky. The only other solution is to use a document camera. While document cameras certainly aren't new, they are not really designed for travel. My colleague Colin Fleming pointed me to the IPEVO Point 2 View USB Camera. He hadn't tried it yet, but it came up in his Goole search. While I loved the size I was very leary about the "USB 2" connection. Most solutions I've tried that are USB 2 based have low frame rates, which makes it challenging to show any type of movement. These "document cameras" were never designed to shoot anything moving (ie. movies, multi-gestures) or animating on screen. They were designed to take still pictures of objects or "documents".  


Low cost of entry

I went out and read every review of the Point 2 View that I could find and most of the reviews slammed it as  "webcam". This is largely due to the fact that it doesn't have a built-in microphone. Since I have no desire to use it as a webcam and the fact that it was only $70 (cheap compared to other solutions), I decided to give it a shot.


It works!

The good news is that it works! It should be fine for what I want to use it for. It's small enough to put in a laptop bag or suitcase and the weighted base means that it won't easily fall over. It's far from perfect though:

The Good

  • It's Cheap! $70 – most solutions cost at least twice as much
  • It's very portable and travel friendly – A MUST
  • It has a weighted base and is designed to point down
  • Doesn't require any drivers on the Mac. Just launch their supplied App and turn it on.
  • One button auto focus or choose Continuous Focus (not fast, but good)
  • Has a full screen mode – great for making training videos
  • In App Zoom, Exposure Controls
  • Update: Works with other Apps too including iChat, ScreenFlow, Skype, etc., which will make giving mobile demos online and recording them even easier. Thanks Cari!
  • Software lets you reverse the image both horizontally and vertically which means it doesn't have to face the same way in every situation. 
  • The included stand allows the camera to be mounted in front or on the sides
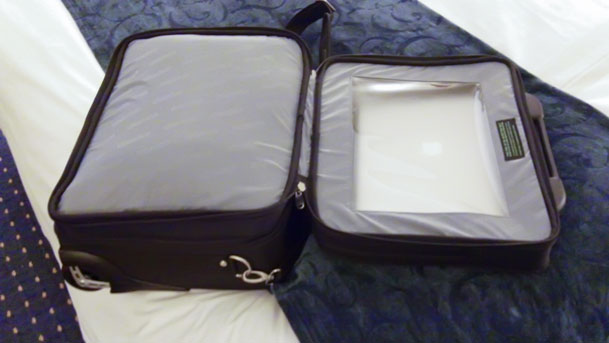
  • It can take a picture too. (download two sample shots here)

The Bad

  • The frame rate is not great, but should be good enough for Adobe Connect demos and  live demos
  • You HAVE TO USE THEIR APP. Not the end of the world, but it's the only way you will see it on screen CORRECTION, it works in other apps too
  • The stand is barely tall enough for iPad in portrait view so may need to put the stand on top of something else to raise it up a bit.
  • No built-in mic – I don't care.
  • White Balance Sucks – no controls for it either
  • Not great in low light, but shouldn't be a problem shooting a lit display of a device
  • USB cable is hardwired in, but luckily it's long enough.


The Bottom Line

Frankly I'm stunned that someone hasn't designed a device for the sole purpose of demoing mobile devices. Mobile devices are exploding and it seems like some clever  person would see the need and develop a specific product to do this! While you could go with a cheaper webcam with better video quality, the challenge is always finding a way to mount it on a stand and face it down as most webcams are designed to attach to your computer display. In the meantime the IPEVO Point 2 View USB Camera will be my solution until something better comes along. It does have the right blend of size, price and features to be the best solution that  I've seen so far for doing demos of mobile devices on the go.

You can get the IPEVO Point 2 View USB Camera for $69 here.

Continue reading “Review: IPEVO Point 2 View USB Camera for iPad/Mobile Device Demos”

I want a 15″ MacBook Air

I've always been a fan of the size and weight of the MacBook Air. However, due to the low end performance that they typically have I could never use one as my primary notebook. It's rumored that we will see New MacBook Pros sometime in March and it's also rumored that Apple will take some design cues from the MacBook Air and implement them in the MacBook Pro. For example, eliminating the optical drive. That got me to thinking about what I would want in my next MacBook Pro? Here's my wishlist:

  • 15.4" ANTI-GLARE Display (I could live with a 13" display, but I really like the 15.4" size)
  • Intel Core i7 level of performance <-this is probably the hardest to do and the biggest deal breaker for me on the current Airs
  • 2 USB Ports
  • 4GB RAM minimum, expandable to 8GB of RAM or more (If i can't get Core i7 performance, then I definitely want 8GBs of RAM
  • 1 FW 800 Port (I'd be willing to give up the FW 800 port in favor of USB 3.0)
  • 1 Gigabit Ethernet Port (not  a deal breaker if it had to be 10/100)
  • 1 SD card slot (I would give this up in favor of the other ports though)
  • Audio in/Audio out
  • iSight Camera
  • 512GB SSD
  • 802.11n WiFi/ Bluetooth of course
  • a built-in 3G data option would be nice, but I'd probably use my MiFi anyway
  • 4-5 hours of REAL battery life (does anyone ever get the 8-9 hours they claim on the current model, ever?)
  • Fast Nvidia Graphics Card <-a wish, I know
  • Display Port video out

I really could live without the optical drive. I only use it every blue moon these days and as long as there was an option to use the external SuperDrive when I needed to, I'd be fine.

What really attracts me to the MacBook Air is that it's so darn light! If Apple could build a MacBook Pro with the above specs and have it come in under 4 pounds I'd order one without blinking.


Call it a MacBook Prair 🙂  – thanks Lukas for that!

Charge Up To 4 Devices At Once

photo compliments of iStockphoto.com

Last week I told you about a great new home improvement gadget, the U-Socket that allows you to charge multiple USB devices via newly designed wall outlet. However, what if you want to charge multiple USB devices while you're on the road? After all I'm finding more and more of my devices (phone, bluetooth headset, iPod, iPad, camera GPS, etc.) now charge via USB power. 

I do like the Belkin Mini Surge Protector Dual USB Charger, but it doesn't play well on the higher voltage abroad. For this reason it's no longer in my travel bag.


Charge Up to 4 Devices via USB On The Go


I found this wall charger that charges up to 4 devices (including the iPad) at once. It also can handle 100-240v input, which means I can use it abroad with the appropriate adapter. I like that it has a blue LED to let you know whether or not it's getting power. In my limited testing it works great and has charged everything I've thrown at it. However, make no mistake about it, this thing was cheaply made 🙂 While it make resemble an AirPort Express, they used a lighter weight plastic. However, it looks like as long as you don't beat it up to badly it should last for a while.

The other advantage that this charger gives me is not having to carry multiple USB adapters with me. I can carry one instead of 3 or 4.

You can get it here for $17


Got one for the car too

Why stop there? I also found this one by the same company (XTG) for your cigarette lighter socket in your car. 

You can get it here for $12.

Downsizing My Carry On Laptop Bag

I do a fair amount of Travel for work. I hit Delta's Diamond Elite status by the end of June this year. I typically travel with two carry ons. One is  standard Swiss Gear 20" rollerbag (that happens to have a laptop compartment) and the other is my favorite laptop bag of all time. It's the Skooba TSA Friendly Check-through rollerbag.

While this combination has worked great for me and my travels all over the world, it looks like I'm going to have to give up my Skooba rollerbag for now. The bag is great. The problem is having less space under the seat in front of me these days. Delta Airlines (I live in a hub city) has given us a mixed blessing. On the one hand I applaud them and THANK Delta for the swift move to outfitting the vast majority of their domestic fleet with Gogo inflight Wi-Fi. I use it all the time when I fly domestically and now I pretty much expect to see it when I board my flight. While this is great, Delta has also been busy upgrading their fleet with an in-flight entertainment system. This upgrade hasn't been getting much press and even Delta seems to be pretty quiet about it. 

The new system gives each passenger an LCD on the seatback in front of them and access to movies, TV shows, satellite TV, music, games, etc. AWESOME! Great, what's the downside? The downside to this upgrade is that the electronics for this system at each seat is being housed under the seat itself, significantly reducing the storage space under the seat for carryons. With my last few flights I've had to resort to putting both of my bags in the overhead bin because my laptop bag simply just won't fit under the seat anymore. So far I haven't been yelled at. However, I want to be fair to my fellow passengers and put my second bag under the seat as everyone should. Unfortunately for me this means going with a smaller bag. 


Time for a NEW Skooba TSA Friendly Bag!

Luckily Skooba does make a smaller TSA Friendly Laptop case. I swore I would never carry a shoulder bag again. I still don't want to and the good news is this bag is designed to slip over the handle of your rollerbag. You can still carry it with the supplied shoulder strap or the built-in handle. Although this bag is about half as thick as the Skooba rollerbag, I should still be able to carry my usual amount of gear give or take a DSLR body/lens. 

The beauty of these bags is NOT having to take your laptop out when going through a TSA checkpoint. I could never go back now after zipping right through for a year!

You can get the Skooba Checkthrough Executive Brief Small (for 15/16" or smaller laptops) here on sale for under $100 or

You can get the Skooba Checkthrough Executive Brief Large (for 17" laptops) here on sale for for about $105.

You should also check out the ThinkTank 50 Cable Management Bag for all that little stuff that causes you to get a "bag check" by TSA.

Nikon D7000 First Impressions

This is going to be an easy one! First off I've been waiting for this camera for a long time. I was waiting for it before I even knew it existed. What I was waiting for was a camera that met the specs I wanted for a second body that I would use primarily for travel and DSLR video. When I saw the rumors of the D7000 I salivated because if those rumors were true I would have the exact camera I wanted. When the D7000 was officially announced I almost couldn't believe it. Although my needs are actually quite simple for this camera, this is the first time that Nikon has shipped a model meeting those requirements. I love my D700 for my studio work. It's a full frame body and I get fantastic results. I got the NEW D7000 for use as my travel camera and for DSLR Video. 


What I wanted

Like I said, my needs for this camera were pretty simple. I wanted a Nikon body to support the lenses that I already have. Canon makes great DSLRs and their DSLR video features are legendary (I've never shot Canon so I can't compare this one to a 7D – sorry). However, in order for DSLR video to make sense it's best if you can use the lenses you already own. That means I need great DSLR video from Nikon. While I originally got the D5000 for this need it fell short in one important area. The audio on the D5000 is,…well….awful! It has a built-in mic that only supports 11hz mono audio. While that might be ok for a simple interview (talking head), it's not good for events, live shows/concerts, anything loud with bass, etc. The built-in Audio on the D7000 probably isn't much better, however it has the one thing you need to over come this and that's an audio/mic input! This way you can plug in whatever mic you want to get great audio. The next thing I wanted was 1080p HD. The D5000 only supported resolutions up to 720p for video. Not only does the D7000 have 1080p 24fps video, but it also supports face detection/auto focus to keep the shot in focus automatically. I was skeptical at first, but this actually works well as long as the subject isn't moving around frantically in the shot.


Here's a sample clip

I shot this clip in Cairo with the D7000 and 28-300mm VRII lens. There was no post production or editing applied to this. In other words shot, transferred to the computer and uploaded to YouTube (as is) as a 1080p clip.

httpv://www.youtube.com/watch?v=Tg_71brozxU


What about the camera?

Oh yeah, it's a great camera too 🙂 That almost goes without saying. While video is important to me I will most likely always be shooting stills more than video with this camera.  The minute I took it out of the box I smiled because it had a GREAT FEEL to it. Bigger than my D5000 and smaller than my D700. Probably more in line with the D300s. It definitely feels less "consumery" than the D5000. The next thing I appreciated was the dual SD card slots. You can configure these to work in a few different ways. For me I set it to capture the stills to card 1 and the movies to card 2. Also by default if card 1 fills up it will start capturing to card 2. After about 15 minutes of tinkering with the settings I was all set with how I wanted the camera to work. Another new feature that I absolutely love is the user customizable settings "U1" and "U2" are on the main dial. You can set those up anyway you want. For example, to go into Bracketing Exposures on the D5000 was 2-3 steps. Now I just switch the dial to U1 and I'm all set! When I'm done taking the shot, I switch back to manual or aperture priority. While the megapixels have gone up to 16.2 from 12mp, that really doesn't matter a lot to me. I was quite happy with 12mp images. However, for those in the megapixel race, you'll be happy to have more. 

Continue reading “Nikon D7000 First Impressions”

Is That 1TB in Your Pocket or Are You Just Happy To See Me?

I recently got the OWC Mercury On-The-Go Pro 1TB (one terabyte) drive to test. Before this drive I was carrying TWO external hard drives with me when I traveled. One was a clone backup of my internal drive. I swear by having a clone backup because I want the ability to "boot" from the external if my drive dies right before or during a presentation. Mac OS X's Time Machine is great, but since it's not bootable, there's no time to do a restore if something happens while on stage. The other drive contains files and videos that I may use from time to time during a presentation, but don't need to tie up my internal drive with. I also use that other drive to backup photos onto from a photo shoot in my studio until I get home. 


The 1TB OWC Drive Replaces 2 of My External Drives

My goal for this drive was to use it to replace the two drives I'm currently carrying. I got the drive and partitioned it to 2 500GB partitions. The first partition I use to backup (clone) my internal drive via SuperDuper! The second 500GB partition is for those other misc files and temporary backups I travel with. Although I knew from a size perspective that the 1TB capacity would be exactly what I needed, I was concerned about the relatively slow speed of this drive. Most laptop 2.5" drives spin at either 7200 rpms or 5400 rpms. This drive spins at only 5200 rpms. Back in the day, some 2.5" drives were as slow as 4200 rpms. So while it's not the slowest drive on the planet, it is slower than the speeds regularly available in other capacities today. So for the choice was either carry two fast drives or one big slower drive. 

After I did my clone backup and loaded on all the files I wanted to carry via the other partition, I did a boot test from this drive while it was connected via Firewire 800. It worked. While I could tell that it was slower than my internal 7200 rpm drive, it was tolerable. Keeping in mind that I would only be booting from this drive in an emergency anyway, I can live with the speed if it means carrying one less drive 100% of the time. 


The Mercury On-The-Go Pro  3 in 1 enclosure

I've been a fan of this enclosure for years. Although there are certainly smaller, sleeker 2.5" drive enclosures out there, this enclosure has never failed me. I can connect via Firewire 800, 400 or USB 2. It's bus powered on all 3 ports and at a glance I can "see" exactly which drive is inside (make, model and capacity). I've had smaller enclosures overheat before and that's never been a problem for me with the Mercury On-The-Go Pro. The drive comes with all the cables you need, a carrying case and an Firewire 800-400 cable. 

The 1TB Mercury On-The-Go Pro drive goes for $260 and you can get it here.

I recommend this particular model for someone who needs to carry around a lot of data and speed is not the most important factor. If you want a faster drive, look at their other models here. The folks over at OWC are GREAT to deal with and I also buy my RAM from them too. Never had any issues buying from them. They stand behind what they sell.

Get a MiFi without the monthly data plan charges: Pay as you go!

I love my MiFi! However, the minute I tell people about it they get turned off when they hear that it runs $60/month. Luckily for me this road warrior perk provided by my employer. Even though I couldn't think of going on a trip without it, I can certainly see how someone that doesn't travel as often as I do, wanting the convenience of a MiFi. It's easy for me to justify a MiFi for work: At $60/month I look at it as that's 6 nights worth of hotel internet at $9.99/night (and that's if you're lucky. Yes I know some hotels offer it free, but most don't). So if I use my MiFi at least 6 nights a month instead of hotel internet it's a wash. Let's say you don't travel much. However, when you do travel you want the freedom of having your own mobile hotspot without paying a monthly fee or the ridiculous tethering charges that AT&T and others charge to use your smartphone as a modem. 


Virgin Mobile Has the Right Idea

Pay as you go! Buy a MiFi from them for $150 (great price). Then only pay for it when you need to use it:

Even the 30 days/300MB at $20 option is probably more than most people would need for a two-four week trip. 


If I suddenly found myself having to pay for a MiFi out of my own pocket, I wouldn't think twice about going this route. I don't use it every day and this way I can buy the device once and use it/pay for it when I need it.

Check it out here.

Thanks goes out to Jim Nichols for the lead to this offering.

Get a Snowflake for Podcasting on the Go

I recently spent a lot of time reviewing various desktop USB microphones for podcasting. Recently I've been traveling a lot for business and I'm not always able to use my favorite desktop mics on the go. Although I've had the Blue Snowflake mic for a while now, I've really been using it a lot lately and I'm reminded of just how great of a Mic this is. I recorded my last two episodes of the Adobe Creative Suite Video Podcast with it while on the road right in my hotel room. As a matter of fact this Mic lives in my suitcase. That way I know I always have a great mic with me when I'm on the go. 

Continue reading “Get a Snowflake for Podcasting on the Go”

Airlines starting to move into the 21st century

usbportinflight

I hear rumors that Airlines have started to have Wi-Fi on their flights. While I have yet to prove this, it's an interesting concept. Of course I'm joking about it being a rumor and yes airlines are working quickly (not quickly enough) to offer inflight Wi-Fi. I fly Delta (formally NWA) probably 99% of the time.Although Delta as a company has been offering Wi-Fi on several flights for months, I have yet to fly one of those flights. This is mostly due to the fact that although Delta has acquired NWA, the planes themselves are still the old NWA planes and will likely be the last ones in the fleet to be upgraded. 

Continue reading “Airlines starting to move into the 21st century”

My iPhone 3GS has become my Travel GPS

When I travel I sometimes have to rent a car. Although in the past I had been simply adding on the Hertz Neverlost option (or as my buddy Scott refers to it as Everlost), I stopped doing that once the portable GPS units became good enough. My first one was the Garmin Nuvi 350, then the 360, then the 400 series and finally a Nuvi 765t that I love. I also briefly used the Navigon 2100. They are all great units and I really didn't have any complaints with them. The 765t has performed perfectly for me and never misses a beat/turn. Nonetheless, I was still very intrigued when Apple announced the iPhone 3.0 OS update and that it would allow 3rd party apps to have turn-by-turn navigation abilities. The first one that I tried was Navigon. It certainly had promise, but the 1.0 version was missing key features such as text-to-speech. TomTom also came out with their app and it was also missing many of the same key features in its 1.0 version. This kept me from wanting to go solo with just an iPhone GPS app. Well a lot has changed since then!


The iPhone 3G/3GS and even iPod touch GPS Navigation Apps are ready for prime time

Continue reading “My iPhone 3GS has become my Travel GPS”