Finally! A 1TB 7200rpm 2.5″ Drive

1tb_7200rpm_travelstar_bare

Last August I wrote a post and created a video showing the speed difference between USB 3 and Firewire 800 and while that was fine, what I realized was that the real bottleneck was the drive itself. I typically buy 1TB portable drives for on the road backup and emergency use. Until now all 1TB 2.5″ drives were only rated at 5400 rpm. In other words, slow! This means that the interfaces like Firewire 800, USB 3 and Thunderbolt really didn’t matter much if they all outpaced the speed of the drive itself. I bought a Buffalo Tech 1TB Thunderbolt/USB 3 portable drive. I couldn’t wait to see how “fast” this new drive would be? I was disappointed as it was no faster than my Firewire 800 or USB 3 drives. The problem wasn’t Thunderbolt or something that Buffalo Tech did wrong, the problem was that 1TB drives didn’t spin any faster than 5400 RPMs.

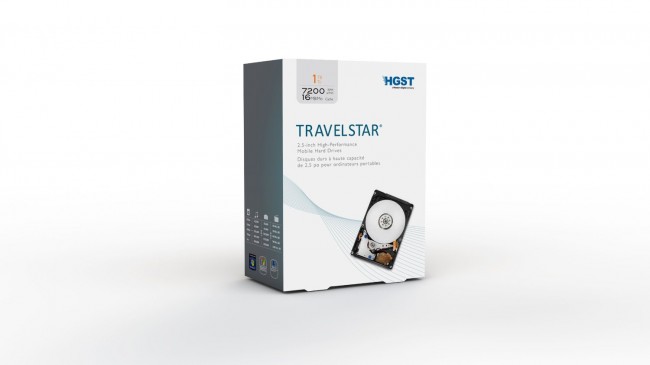
HGST shipped a 1TB 7200RPM Travelstar 2.5″ Drive!
1tb_7200rpm_travelstar

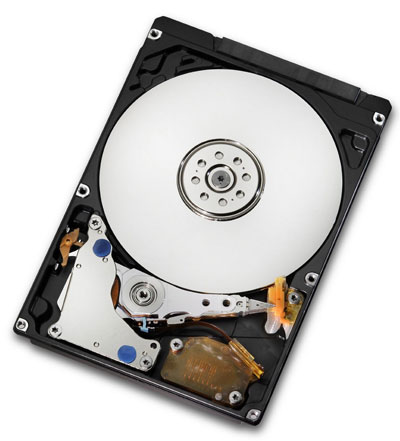
I noticed that I was seeing NEW Drives from OWC and G-Tech that stated that the drives were 1TB 7200 RPMs. This meant that there had to be a NEW 7200 RPM 1TB internal drive that I wasn’t aware of. I did some research and found that HGST (a Western Digital company) had in fact shipped a 1TB 7200RPM 2.5″ drive.


Upgrading my existing drives

Rather than run out and buy a couple new drives, I decided that there was nothing wrong with my enclosures. I figured I could just buy the new bare drive and swap out the slower drive in the enclosures that I already owned. Great idea, but it really depends on the enclosure. Some enclosures are really easy to open and others aren’t. Almost in ALL cases you’re going to void your warranty on the original drive/enclosure.
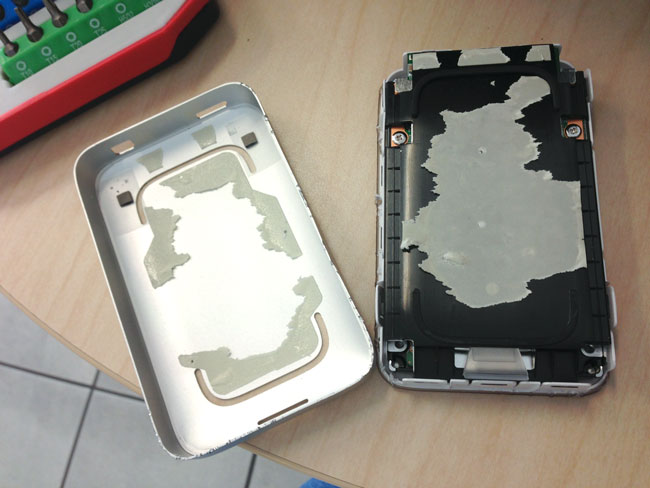
buffalo_tech_opened

It was clear that the Buffalo Ministation Thunderbolt/USB 3 enclosure was NEVER intended to be opened by the consumer. This is probably one of the hardest cases I’ve ever had to open. You pretty much have to “pry” it open to get to the drive and it won’t look pretty when you’re done. Not only is the case secured by internal tabs, but the internal drive tray is “glued” in place. That makes it even harder to open because the glue is fighting against you to. I was determined to swap this drive out and I wasn’t concerned about the cosmetic appearance of the case once I was done. If you want it to still look pretty, don’t try to open this case. You will leave pry marks no matter what.
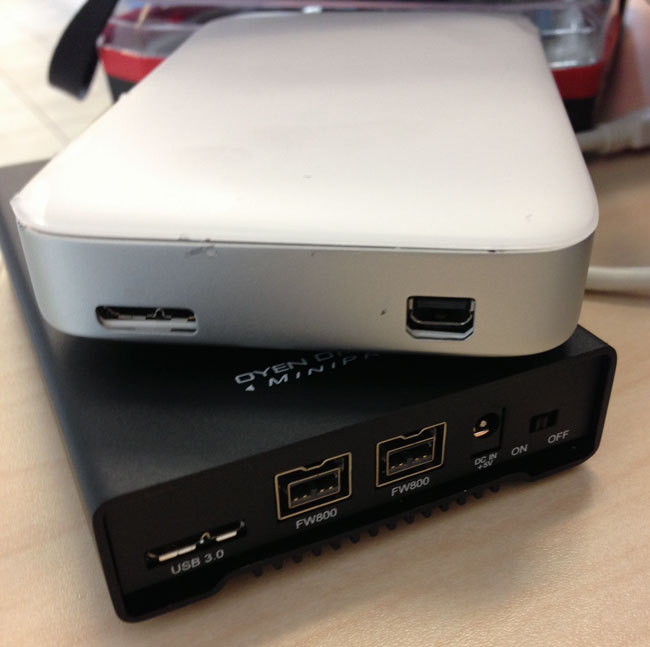
after_1tb_7200rpm_drive_install

On the other hand my Oyen Digital Firewire 800/USB 3 case opened up very easily by simply removing the screws on the bottom and sides of the drive. I swapped out the drive and it went back together just as easily.


The Speed Tests
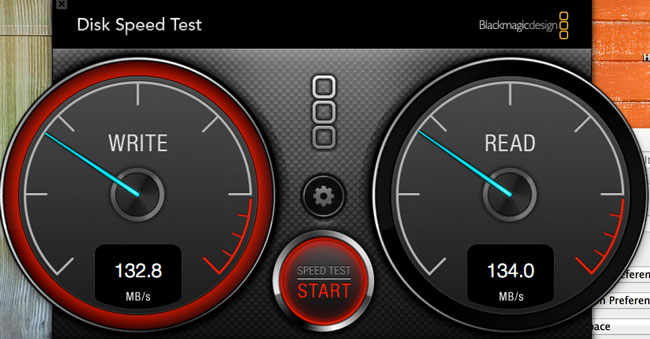
1tb_7200rpm_drive_speedtest
1TB 7200 RPM Drive Speed Test via USB 3

As I suspected, the new 7200 RPM drive was MUCH FASTER than the 5400 RPM ones. There was still virtually no difference in speed between the Thunderbolt and USB 3 interfaces. This could be due to several factors, but in all cases both drive enclosures tested faster than they did with the slower drives.
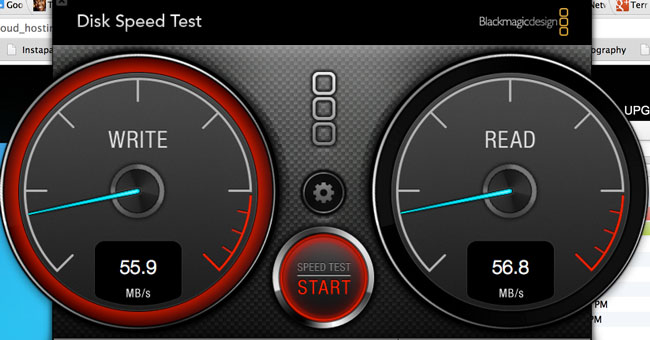
1tb_5400rpm_drive_speedtest
1TB 5400 RPM Speed Test via USB 3


The Bottom Line

Until SSD drives go up in capacity and come way down in price, these traditional hard drives are still going to be useful for backups and transporting large amounts of data. Now that this drive is out I expect all the drive manufacturers to start making it available in their enclosures. If you’re not a do-it-yourself kinda person, then I would either wait for the Buffalo Minstation to get an upgrade or I’d go with this G-Technology 1TB G-DRIVE mini Portable USB 3, Firewire 800 Drive. If all you need is USB 3, then you’re better off just ordering the bare HGST 1TB 7200 RPM drive and low cost portable enclosure like this one.

PlugBug World Can Charge your MacBook Pro and Your Mobile Devices Too


plugbug_world

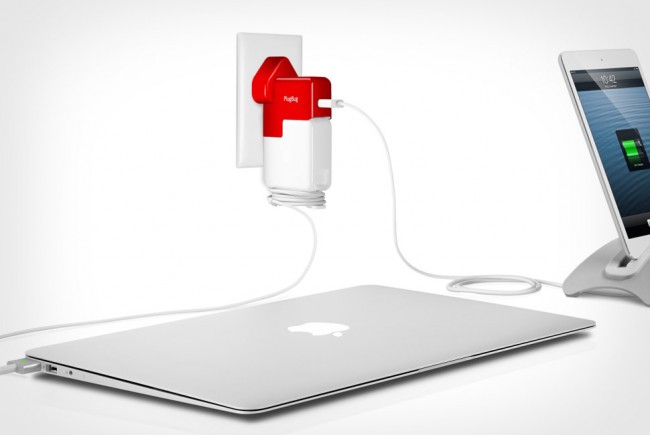
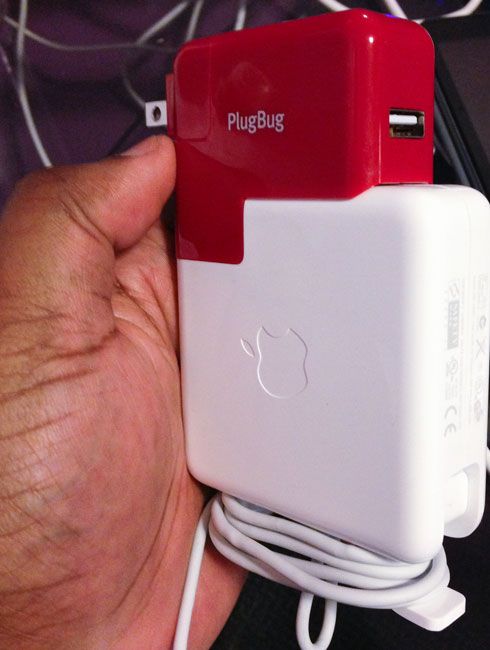
As a frequent traveler I’m always looking for ways to charge my multiple devices with fewer chargers or taking up less outlets in a hotel room. I saw an ad for PlugBug and decided to order one and see if I liked it or not. The idea behind PlugBug is that it replaces the standard plug of your MacBook Pro or MacBook Air Adapter with one that has a USB (2.1 Amp) port built-in. This way you can charge both your laptop AND any USB power device at the same time. The concept is simple and it takes all of 2 seconds to install. I opted for the PlugBug World, which comes with all the necessary adapters to plug into various outlets around the globe. It works as advertised and although it’s “short” on the 85w MacBook Pro adapter, it doesn’t hender its use.

plugbug_1

How could it be better?

The 1st thing that I wasn’t crazy about was that it replaces the “extended cord” on the MacBook Pro adapter. I know that you can simply plug the adapter into the wall with or without a PlugBug, but I prefer using the optional extended cord that comes with the MacBooks so that I don’t take up so much space on a power strip and I get a longer cord.

plugbug_2

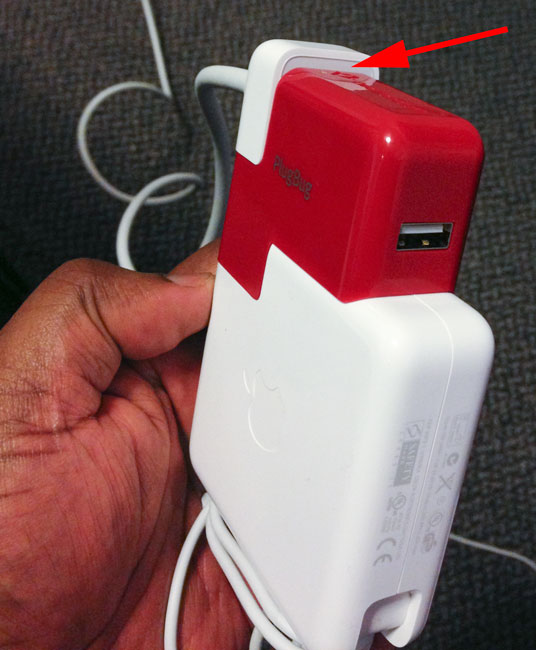
That’s a personal thing with me, but the product works as advertised. Although I CAN use the extended cord, it’s clear by the way it sticks up over the PlugBug that they didn’t design it to be used this way. While we’re at it, I’d also like to see TWO USB ports instead of just one. It would make it much more useful to me if I could use one plug to charge my MacBook, iPhone and iPad at the same time. So make it a little taller to accomodate the extended cord AND a second USB port and I’d “love” it.

You can get a PlugBug here or PlugBug World here.

Firewire 800 vs USB 3.0 – Which is Faster?

Now that both the MacBook Pro Retina Display and MacBook Air ship with USB 3 I was curious to find out which was actually faster? Going with my existing Firewire 800 drives and the Thunderbolt to Firewire adapter or USB 3 drives. I did searches online and really didn’t come up with much in the way of current data or test. Most of what I found was comparisons to USB 2 or tests done before Macs had USB 3 built-in. Since I couldn’t find the data I wanted, I decided to do my own tests.

Making it fair

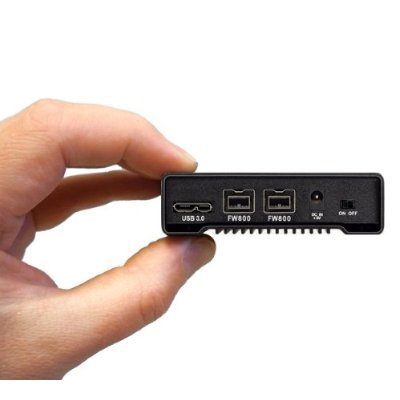
I wanted this to be as fair as possible. That meant that I didn’t want to use two different drives. Ideally I would want to test the same drive that has both Firewire 800 and USB 3 built-in. That configuration isn’t as easy to find as you would think on a portable drive. I found two: LaCie’s Rugged 1TB (which I’ve used in the past with no issues) and the Oyen Digital Mini Pro. Since I was looking to have a smaller enclosure, I decided to give the Oyen Digital a shot. It was also a few bucks cheaper.

For the benchmarks I went with the Free App – BlackMagic Disk Speed Test.

Get it here .

I recorded my results in the video above.

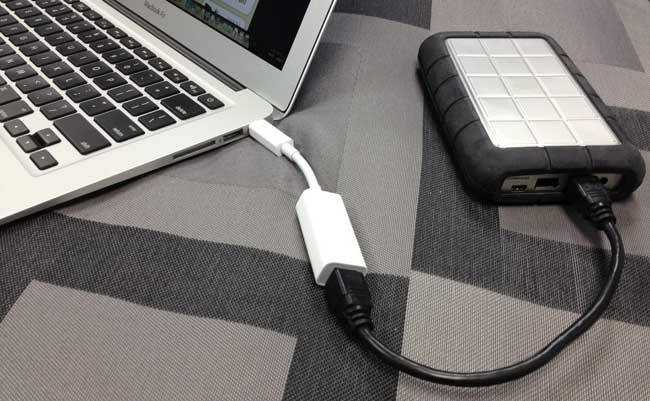
Apple Thunderbolt to Firewire Adapter

The MacBook Pro Retina Display is the 1st “Pro” Mac to ship without Firewire. However, Apple also announced that they would ship a Thunderbolt to Firewire Adapter in July. Although the adapter did ship a few days late, it’s here and no surprises – it works!

I was shopping for USB 3 drives, but I kinda just stopped looking. I figured that I could get by with connecting my existing drives via USB 2 until the adapter shipped. I’m glad I waited, because out of the box I just plugged in my existing Firewire 800 drives and up they came onto the desktop. This makes my MacBook Pro Retina Display complete.

Bonus

One of the downsides with going with the MacBook Air in the past was that you’d be giving up high speed connectivity to external drives. The original MacBook Air only came with USB 2. The last two models included Thunderbolt, but Thunderbolt drive availability was far and few between. This adapter also brings Firewire connectivity to the MacBook Air for the 1st time! I plugged in my LaCie Rugged 1TB drive into my MacBook Air via the Adapter and it just worked.

Although I haven’t done any speed tests, the speed should be the same as Thunderbolt is faster than Firewire. It should therefore be able to keep up with Firewire drives.

You can get the Thunderbolt to Firewire Adapter here.

MacBook Pro Retina Display 1st Impressions

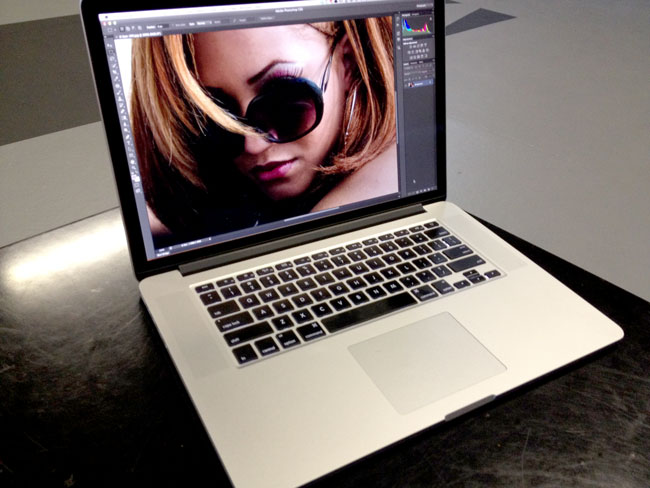
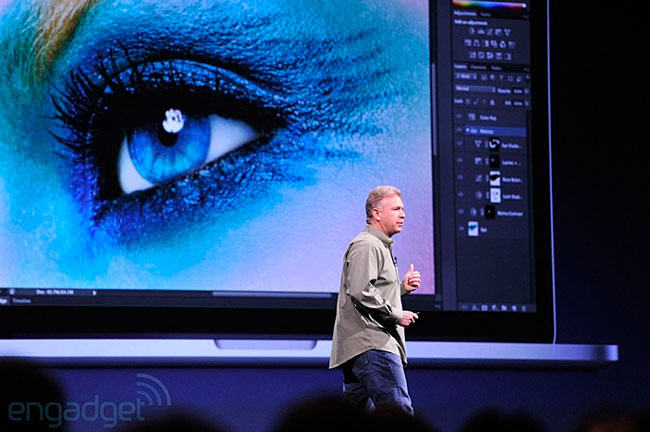
Many of you have been asking me about my impressions of the new MacBook Pro Retina Display from a “Photographer’s Perspective” and I’m not quite ready with that review yet. However, I have done my 1st review and given my overall impressions of it, which you can read here. The reason that I’m not really ready to talk about it from a photographer’s or even a designer’s perspective yet is that to be fair we really have to wait for Apps to be updated to take advantage of this (Hi-DPI) display. While Apple did showcase a “future” version of Photoshop CS6 on stage, that version is not quite ready for distribution yet.


photo credit – Engadget.com

We’re also waiting on Lightroom, InDesign and Illustrator. What I can say now is that while the current CS6 versions haven’t been updated yet, they do work just fine and I have no problem using them in my daily routine.

As a matter of fact I’ve completely switched over to the New MacBook Pro Retina Display and used it on stage during my Detroit InDesign Users Group meeting last week without any issues. I did my entire demo including Photoshop CS6, Bridge CS6, Illustrator CS6, InDesign CS6, Acrobat Pro X, and Adobe Muse. I figured that there was no better way to really test its capabilities than to do a full blown demo on stage in front of 200+ people 🙂 Crazy=Brave. I didn’t even bring the old one as a backup. It all worked perfectly!

How do non-Hi-DPI apps look?

That’s the question you’re probably wondering about and I have to say that while not as crisp as a native Hi-DPI app would look, these apps don’t don’t look bad at all. At least not as bad as I feared. Sure they are a little “soft” and if you zoom in in Photoshop you’ll see more jaggies around the edges, but even with these annoyances, I have no problem doing my day to day work including photo retouching. I actually feared that it would be unusable and I’d have to keep using my other MacBook Pro until the updates came out. I’m glad that that turned out to not be the case (Y.M.M.V. – I can’t tell you how YOUR eyes will perceive ANY display. You really have to see YOUR work on a display that you are considering and be YOUR own judge! I can only tell you works or doesn’t work for me.)

When these apps are updated for Hi-DPI life will be even better! So stay tuned for an updated review or second look once we have an update to Photoshop and perhaps some of the other apps. As a photographer you’re definitely going to want this USB 3 CF/SD Card Reader by Lexar.

CLEAR vs TSA Pre

As a very frequent flier I was pleased to no end when the “trusted traveler” Clear Program came on to the scene. I got to use them quite a bit before they went bankrupt in 2009 when the economy crashed. I was saddened by the loss of this service, but life went on. In the last several months TSA has been rolling out their own program that is now branded TSA Pre and this “pres-screening”service offers the benefit of zipping through a TSA checkpoint without having to take off your shoes, belt, liquids or electronics out of you bag. Best of all it’s FREE. Although it totally rocks, it’s not a guarantee. You are “randomly” selected each time you check in at an airport to either go through the TSA Pre line or the regular line. It’s also only for domestic travel. If any part of your itinerary is international you won’t be selected for TSA Pre. My luck so far has been about 90% of the time I get to go through the TSA Pre line and it’s been GREAT!

CLEAR is back!

A while back Clear announced new ownership and that they were making a come back. I for whatever reason, kept my CLEAR card. I guess it was just such a cool looking card that I didn’t want to shred it. When they announced that they were re-opening CLEAR lines, I put the card back in my wallet. Just last night when leaving SFO I got to use the CLEAR line. So far they have only re-opened at MCO, DFW and now SFO.

CLEAR vs TSA Pre

You might be asking yourself at this point “do I even need CLEAR anymore?” My answer to that question is “it depends.” It seems that CLEAR is open at airports that don’t yet have TSA Pre. Also remember that TSA Pre is not guaranteed for every check-in. With that said, my CLEAR membership is good through November 2013 and TSA Pre is at all but a few of the airports I travel through most often. I would be hard pressed to renew it in 2013 and PAY again. While TSA Pre isn’t everywhere yet, it most likely will be by 11/2013. It’s FREE and even with CLEAR you still have to go through the regular screening like everyone else. CLEAR just gets you to the front of the line. There was one trip that I was leaving MCO (Orland0) and MCO doesn’t have a frequent flyer line (or at least they didn’t back then). There were no less than 2 million people in line (OK, maybe more like 200) when I was running a little late for my flight. I remembered that MCO had a CLEAR lane, I ran up to it, got escorted right to the front of the line (sorry 200 people) and had no problem making my flight. So the advantage is “CLEAR” when it’s an airport that doesn’t have TSA Pre or a priority line, but the number of those airports is far and few between.

My prediction is that we may see CLEAR shut down again in a year or so unless they can find more ways to differentiate their services over the FREE TSA Pre program and frequent flyer lines. They have a long way to go in terms of opening up and staffing lanes at all the airports they used to be in vs. all the airports period. It’s now $179/year and I would have paid that without batting an eye before, where as now I definitely question the value. If you fly out of MCO, DFW or SFO regularly then it’s probably worth it for at least this year. After that we’ll have to see.

Last night when I went through the CLEAR lane, it didn’t seem any faster than going through the Delta Sky Priority line, which only had a couple of people in it at the time. However, had the Sky Priority line been packed, the CLEAR would have been better as it’s almost never that busy.  My recommendation to CLEAR is to work it out with TSA so that CLEAR members can also skip the strip down and body scanners!

Skooba Design Outs a New Skooba Tablet Messenger v.3

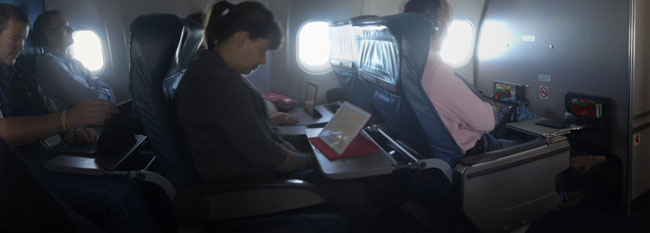
The more I travel, the more I see people using iPads (and to a much smaller degree Android tablets) in lieu of laptops. This is especially true on planes.

On my recent flights I’m seeing iPads out number laptops by about 5 to 1

In some cases I myself have gone on short trips and used just my iPad instead of my laptop. With more and more useful iPad Apps coming to market each day, I find that I don’t require a laptop nearly as much as I used to for day to day communications and social media activities. The iPad may never replace my need for a “work” laptop, but it certainly goes a long way towards reducing that need for things like email, web, expense reports, blogging, etc. That being the case I can see times where carrying just my iPad in my laptop bag is overkill.

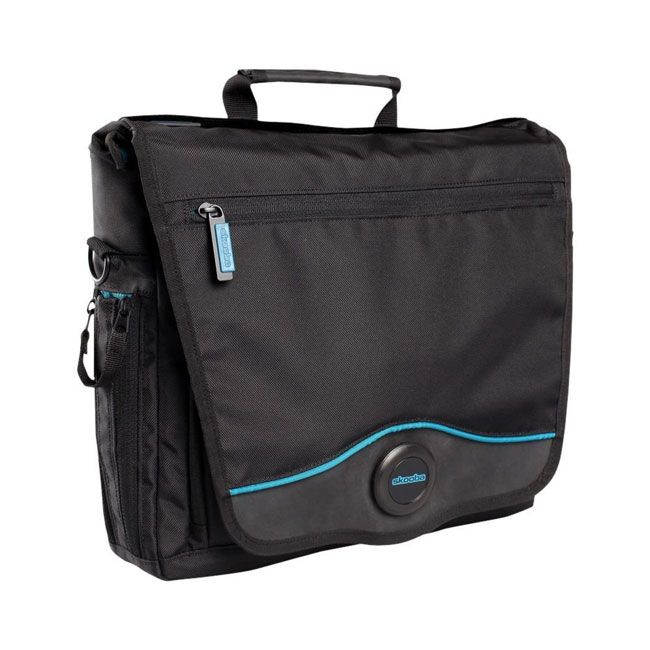
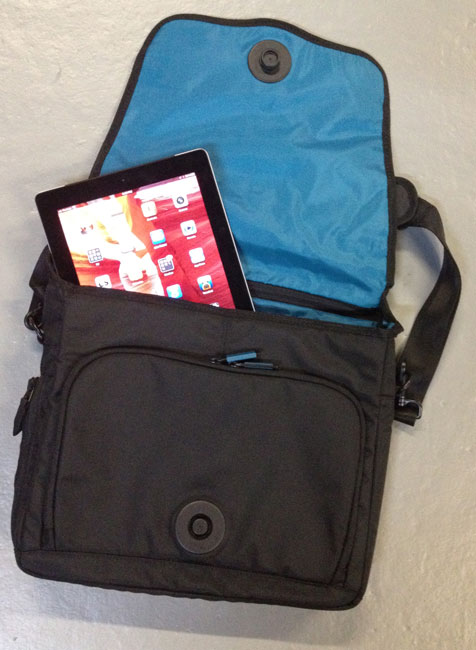
Skooba Design has the answer with their New Skooba Tablet Messenger v.3

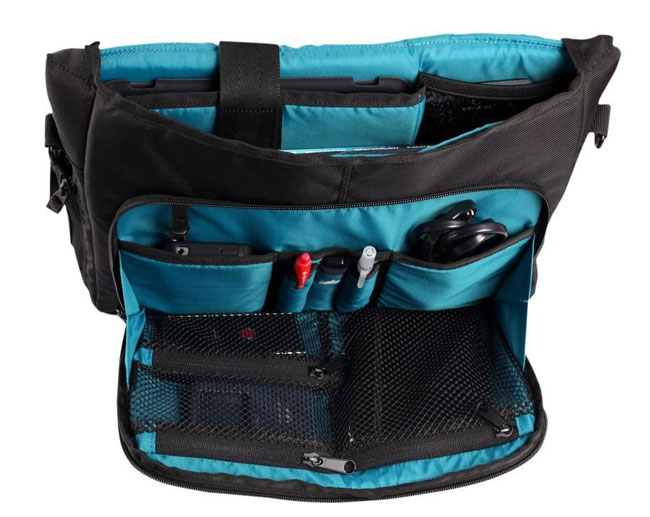
This new bag is designed from the ground up to be a tablet bag, not a laptop bag. It has a special pocket inside for a 10″ tablet.

It has plenty of room for the tablet and accessories such as a charger, sync cables, headphones, keyboard, Jambox speaker, etc. I was also pleased to see that it was large enough to also accomodate a 13″ MacBook Air. This makes it a great bag for me because I can really go light with just the iPad or if I think I may need a computer, I can still bring my MacBook Air without totally weighing it down. Since most TSA checkpoints don’t require that you remove your tablet from your bag, you can just send the whole bag through the x-ray machine.

I would say the only disadvantage that this bag has over my Skooba TSA Friendly Backpack is that it’s not large enough to carry my DSLR, but that’s OK because it’s so small that I can still carry a small camera bag and fit both under the seat in front of me.

Can you get by with just an iPad on a trip?

This question comes up all the time and my buddy Calvin Carson had a great suggestion: Before going on your trip, try using just your iPad for a day or two while you’re still at home. Do the same things that you would do on your trip. Then you’ll have a pretty good idea of whether or not you can get by without your laptop.

You can get the Skooba Tablet Messenger v.3 here for about $40 below list price.

Also check out my FAVORITE iPad Keyboard!

Review: The 2012 AirPort Express – I love it, I hate it!

One of my favorite road warrior gadgets is the AirPort Express. I have several of them for AirPlay streaming around the house and studio as well as at least one with me at all times when I travel (it lives in my bag). See “What’s In My Laptop Bag.” I never had an issue with the design of it. I actually appreciated the simplicity of it being a compact self-contained router with flip out prongs to plug it into a wall outlet for power. It was fast, easy to setup and it just worked. Now that I not only have to demo cloud services for living, but also mobile Apps, I really appreciate being able to setup my own WiFi network on stage as well as my hotel rooms. The previous generation AirPort Express had 802.11n support as well as AirPlay and supported up to 10 devices simultaneously connected. It even supports connecting a USB printer for easy wireless printing. Yep, it was just about perfect what it was.


Apple changed it!

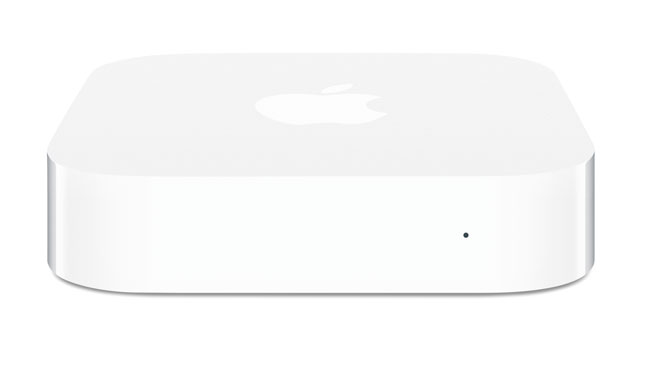
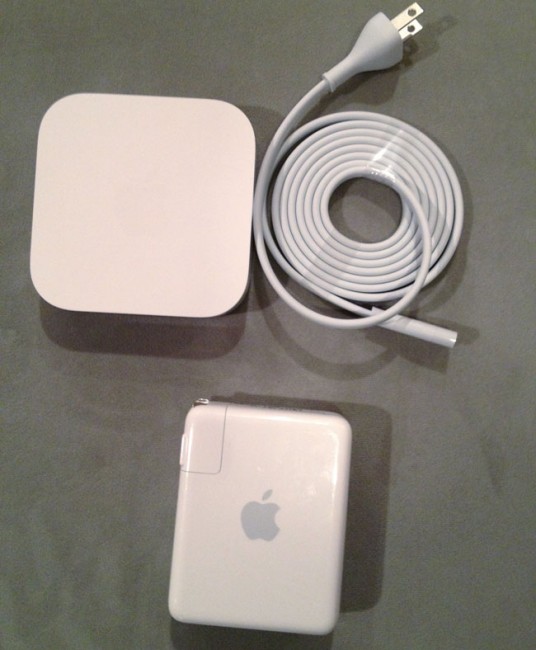
The new AirPort Express on top now comes with a freakin’ cord! Noooooooooo!


Apple quietly introduced a brand new AirPort Express model on Monday at the WWDC (along with new MacBooks and iOS 6 – yeah there was a speed bump to the Mac Pro too – sad that it’s virtually the same chassis as the Power Mac G5 and got no Thunderbolt or USB 3 love…). Although I was most excited about the new MacBook line up, I was quick to take a look at the New AirPort Express too. While the specs looked great, I cringed when I saw the back of it. Apple has gone away from the all-in-one design to one that is almost identical of the Apple TV. By that I mean that it now requires a power cord. This may not seem like a big deal and maybe it isn’t (I’ll be on the road with it next week), but I certainly will miss just flipping out the prongs and plugging it in!

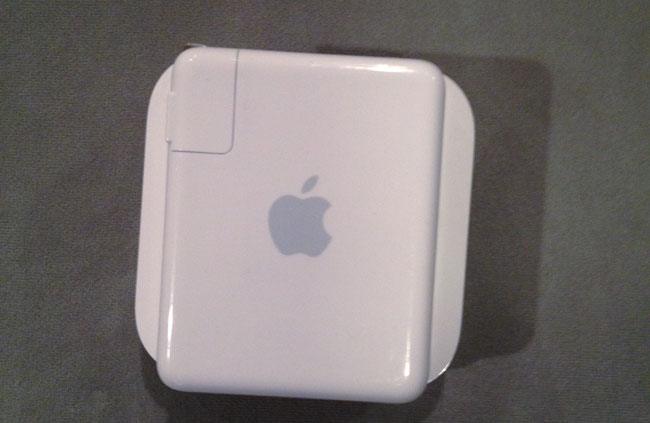
The new one is slightly wider, but also slightly thinner.

On the plus side Apple added a second Ethernet jack so that you can connect not only the ethernet cable to your internet connection, but also plug in a device via ethernet for speed. Sadly though these still aren’t gigabit ethernet ports. Not sure how much I’ll need that second port on the road, but it’s nice to have. The new AirPort Express is also dual band (like the AirPort Extreme) simultaneously supporting 5Ghz and 2.4Ghz WiFi connected devices. It still has AirPlay and a USB port for printers as well as support now for up to 50 devices. It’s that last one that pushed me over the edge. While I personally don’t need more than 10 connections on the road, there are times when I’m using the AirPort Express on stage and sharing it with other presenters and perhaps a colleague or two in the audience. With laptops, tablets and phones connecting to it, it’s much easier to go past 10 devices than it was back in the day.

Setup

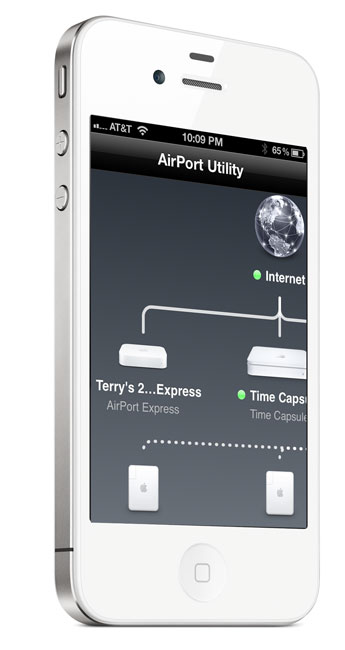
The setup is a piece of cake as usual with the AirPort Utility. You can even do the setup from your iPhone, iPad or iPod touch with the iOS version of the AirPort Utility. Now you can even setup a guest network like you can on the AirPort Extreme granting those users just internet access instead of access to your entire network.

AirPort Utility - Apple

The Bottom Line

New AirPort Express on the Left, Old AirPort Express on the right.

The 2012 AirPort Express is overall a nice upgrade at the same price as the old one. It’s about the same size as the old one being a little thinner, but a little bigger overall. I wished they had kept an all-in-one design as I don’t want to have to have one more cord to carry, but I’m sure I’ll be able to adjust. If you have a recent 802.11n model then there probably isn’t much of a reason to upgrade. However, if you’re on an older 802.11b/g model or you use one at home as your primary router, then you’ll want the new stuff in this one.

You can get it here for $99 or here for about $99.


UPDATE

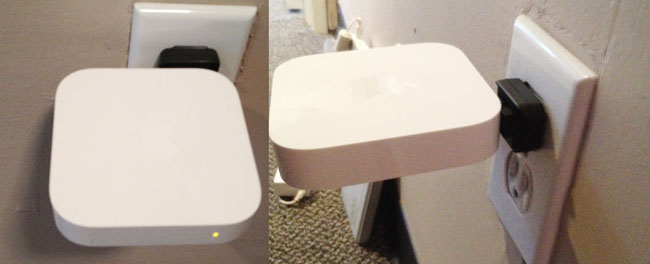
Leave it to my buddy Scott Diussa from Nikon to give me an option. Apparently the plug adapter for the Nikon D7000 battery charger will fit the New AirPort Express and work in a pinch. It’s not elegant. It’s not pretty, but it does work. Now if it were only white. 🙂

Update #2 While the Nikon plug does fit (so does the original Apple one), it slightly blocks the WAN port making it a non-starter. 🙁

From Roller to Shoulder Bag to Backpack – Still Skooba

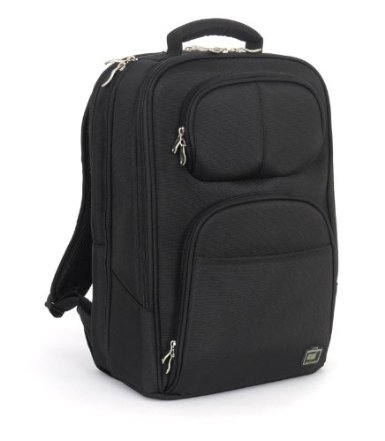
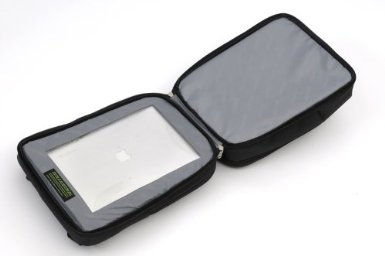
I’ve now come full circle with my laptop bag of choice. I’m a fan of the Skooba line of TSA friendly bags and I’ve reviewed them here before starting with the rollar bag. Although I liked the rollar bag for the sheer amount of stuff that I could carry in it, it started becoming a problem making it fit under the seat in front of me on planes equipped with in-seat entertainment systems. I switched to the shoulder bag version (which I still use when traveling with my MacBook Air), but found I didn’t like the weight on the one shoulder constantly. I gave up and went with their Backpack. Like most backpacks the weight is distributed. I get to carry a good amount of gear still including my 15″ MacBook Pro, accessories in my ThinkTank 30 Cable Management Bag, my iPad and Wacom Intuos 5 Small Tablet. I can even fit my Nikon D7000 and 28-300mm Lens in there too. Best of all I almost never have to remove my laptop from the bag due to the nice TSA friendly design.

I still clip this monster to my rolling suitcase whenever I can, but if I have to carry it, it’s not bad either.

You can get the Skooba Checkthrough TSA Friendly Backpack here

You can also see what I carry in my laptop bag here.

Travel Tip: Watch Your iPad Movies on the Big Screen HDTV in Your Room

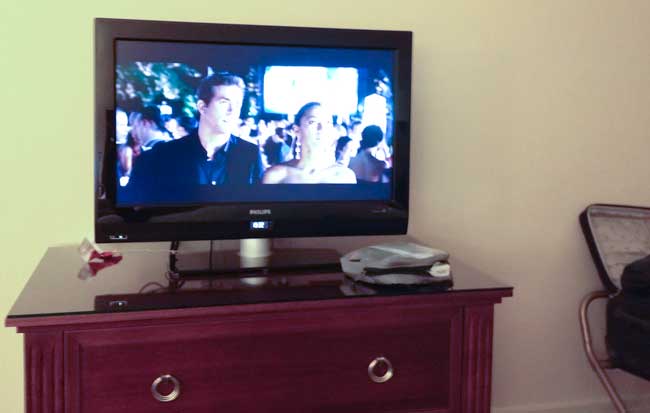
If you have an iPad 2, then you have the ability to mirror your display to either VGA or HDMI connections. While most hotels now have LCD/LED Flat Panels in their guest rooms, some even let you connect your own gear to them. Marriotts are known for this and while I was in Copenhagen I decided to watch some of my rented movies on the 32″ HDTV in my room.

What does it take to connect your iPad to a HDTV?

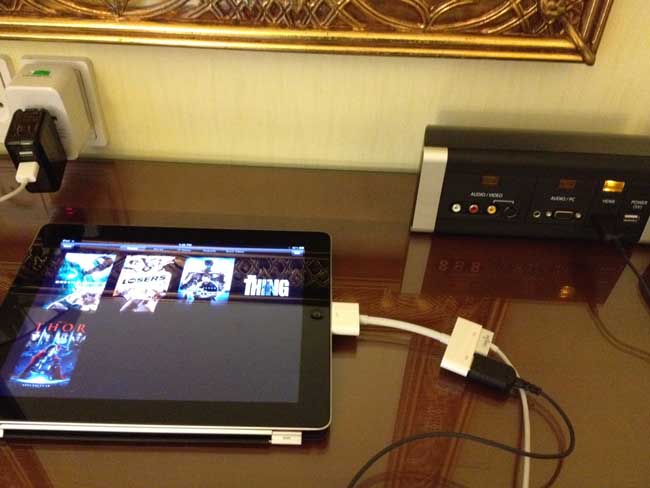
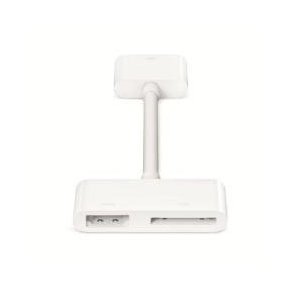
If your HDTV has an available HDMI port then it’s much easier as Apple sells an iPad HDMI (Digital AV) adapter. The best part about this adapter is that not only does it send the video and sound, but it also has a standard 30 pin connector so that you can attach your power/sync cable too. This way your iPad can be charging while you’re watching your video content. There is nothing really to setup. All you do is plug in the cable and adapter and your iPad 2 will automatically mirror its display to your HDTV.


What if my Hotel Room only has a VGA connection?

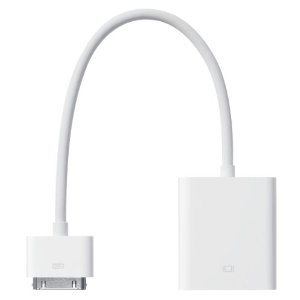
Not all hotels offer an HDMI connection. Some offer only a VGA connection assuming that you’ll be connecting your laptop. Before the iPad 2, Apple sold a VGA iPad Adapter. The good news is that this Adapter works just fine on iPad 2 as well. The downside is that the VGA connection doesn’t carry sound. So if you want to also output sound to your TV, you’ll need an adapter from your headphone jack out to RCA (left/right) connections or to a 3.5mm in.


The Bottom Line

If you’re on the road and you’ve got some time to kill and movies to watch, you might as well enjoy them on a bigger screen.

Here’s what you’ll want

Besides an iPad 2, you’ll want the following adapters/cables:

iPad HDMI (Digital AV) Adapter

Thin HDMI cable for easy travel (hotel rooms most likely will not have any cables for these connections)


If you want to be prepared for just about any connection, then you’ll want these too:

iPad VGA Adapter

Thin VGA Cable

3.5mm to 3.5mm audio cable

3.5mm to RCA cable