An awesome lens

I’ve been building my arsenal of lenses over the years and I’ve decided that the only way to go is up. I’ve got wide-angle and a multi-purpose 18-200mm Nikon VR lens, but I wanted something really fast and tack sharp so I’ve been eyeing the Nikon 70-200mm f/2.8 VR lens. This is a serious piece of glass. It’s f/2.8 all the way through the range of 70-200mm. I’ve seen more and more Nikon shooters go this route and all the reviews I’ve read were positive. The only thing most reviewers complained about was the size and weight. However, you can’t break the laws of physics. So I decided to plunk down the $1,600 asking price for this baby and I ordered it for it to arrive in time for my weekend trip to Florida. The lens arrived on Friday and although I unboxed it so I could pack it, I resisted temptation to attach it to my camera and take it for a spin. That’s right, I waited until I was on location at my buddy Dave’s (Lord Vader : ) wedding to give it a work out.

Zoomed in in Adobe Photoshop Lightroom to 1:1 and keep in mind that this shot was taken from a distance and hand held. The VR (Vibration Reduction) helped!


It’s a thing of beauty (and mass). Weighing in at 3.2 lbs. While 3.2 lbs doesn’t sound like a lot, it is when you add the camera body to it. So for those shooters looking for the "feel of a real camera" this one is for you. For those looking for something small to fit in your fanny pack, look elsewhere.

Dave and his beautiful bride Lisa


The lens performed well considering that I was hand holding it the whole time. The response time was awesome and the images were impressive. I can’t wait to go out and shoot some landscapes now.

The shots above were taken with my Nikon D80 and the Nikon Zoom Telephoto AF VR Nikkor 70-200mm f/2.8D G-AFS ED-IF Autofocus Lens (catchy name, huh?)

I got the lens from B&H Photo and Video $1,624.95. Now bring on the Nikon D3 and D300!

Klix saved my bacon

She’s jumping for joy for a reason!

While I like to think I’m organized when it comes to my computers and file management, sometimes I’m not. I did a photo shoot last month of a friend who has a really interesting face and great features. The shots were on a memory card and I never got around to importing them in to my computer. I had another shoot last week and when I picked up my camera before leaving the house I turned it on and I could tell by the number of available shots that I had some on the card. Since I wanted to start fresh I was going to format the card, but of course I checked to see what was on it first (or so I thought). I previewed the first couple of shots which I recognized (not the ones of my friend) and said, "oh yeah I’ve downloaded those already I can erase the card!" BIG MISTAKE! While I had previously downloaded those first couple that I looked at, I didn’t look at all of the shots and sure enough I deleted the ones of my friend Hosain.

Luckily when I went to do the new shoot I ended up shooting tethered and bypassing the card altogether which means I didn’t write any new data to the card. Well a couple of days ago I realized that I didn’t have the shots of Hosain and panic mode set in. I calmly took the card out of the camera and set it aside. I had bought a copy of Klix from Prosoft Engineering when they visited my users group a few months ago. Now I don’t generally review recovery software  because, it’s one of those things that I hope I never have to use. However, this was a perfect chance to try out Klix because It was exactly what I needed to get me through this minor disaster. I installed the software and keyed in my serial number. I then popped in the memory card and it stared to scan the card for shots immediately. While it doesn’t take that long, it seems like it’s going in slow motion because you’re sitting there waiting with baited breath to see if your shots are going to be found. A few minutes later the missing shots were in view!

It not only found the ones I needed, but it found shots from several shoots. I only recovered the ones I needed which were shot in Camera RAW and it worked PERFECTLY!

This is one of those apps that I hope I never need to use again. However, if I ever find myself in a bonehead situation like this again I wouldn’t be able to launch this app fast enough. My only ask for a future update is that when you click the Recover button to recover your shots to a folder on your drive, the software doesn’t let you create a new folder in that dialog box. Other than that small little request, the software worked AS ADVERTISED! Highly recommended to all digital photographers to keep handy.

Klix is available for Mac and PC (in the same box) and goes for $29.95.

Scott Kelby visits Motown

Scott Kelby paid MacGroup-Detroit a visit yesterday where he unveiled his NEW 7=Point System for Adobe Photoshop CS3. It’s always a pleasure and an honor to have Scott pay us a visit as this is the only user group meeting that Scott does each year and it’s really exciting when he shows us never before shown tips and techniques. His presentation was based on his New book (yep, you guessed it)
Scott Kelby’s 7-Point System for Adobe Photoshop CS3. Scott took us through the 7 techniques that could be used to fix just about any photo.

Thanks to Shirley Kussner (one of Scott’s biggest fans) for organizing this visual welcome!

As you can see from the shots above (photos by Mike Brady), we paid Scott a very warm welcome and it was just a big Scott Kelby love fest with about 200 people in attendance. If you missed the meeting, you missed a good one, but you don’t have to miss the techniques. Order Scott’s NEW book today!

Scott delivers another knock out presentaton!

Lightroom 1.2 & Camera RAW 4.2

Adobe has released two important updates today. One being Adobe Photoshop Lightroom 1.2 and the other being Camera RAW 4.2 (for Photoshop CS3, Photoshop Elements 4 and 5). Lightroom 1.2 offers an array of bug fixes, but also brings new camera support on board:

Canon EOS 40D, Fuji FinePix IS-1, Olympus EVOLT E-510, Panasonic DMC-FZ18 and more. Of course the Camera RAW update also supports these cameras too.

Download the updates here.

A GPS for your digital camera

Sony GPS

I’m a bit of a GPS buff. I have them in my cars and I even have a portable Garmin Nuvi 360 for travel and use in rental cars. So it’s quite natural that when I learned about this
Sony Unit for Digital Still Cameras that I was quite intrigued. I actually first saw this unit about a year ago. However, when I read the reviews on Amazon.com I was a little less excited. Some were complaining that it didn’t work that well especially around tall buildings. So I kind of forgot about it until a few weeks ago when I was having dinner with my colleagues and Colin Fleming told me that he had one. So I had to ask, "does it work?" and more importantly, "would you buy it again?" His answers to both questions were YES! Then my next question was (knowing Colin is a Mac user), what app on the Mac did he use to marry the GPS data to the images? You see the Sony GPS comes with an app to add the GPS data that it captures to your images, however it’s Windows only. So Colin turned me on to HoudaGeo which is a $30 Mac app that does just that. It extremely simple and works great.


How does it work?

The concept is simple: You go out on a shoot (outside of course) and you turn on the Sony GPS. It starts a new log file on the device itself and once it connects to a GPS satellite it starts recording your coordinates and the time/date everywhere you go. Then you pick up your camera and start shooting. Since your camera is recording the date and time (very important that you have these set correctly in your camera) of every shot and the Sony GPS is recording the date and time coordinates at the same time all you have to do is match the images with the GPS log file when you return to your computer.


What’s my workflow?

Since I shoot primarily in Camera RAW and that there are no two camera manufacturers use the same RAW format, I use Adobe’s Digital Negative .DNG format (an open standard for Camera RAW files). The HoudaGeo app can’t embed the GPS data in proprietary RAW formats anyway. However, it can embed this data in .DNG files as well as JPEGs of course. Normally I would just import my images directly into Adobe Photoshop Lightroom. However, when I shoot landscapes and want to use the GPS data from the Sony GPS, I plug in my memory card into my Mac and then I use the FREE Adobe DNG Converter (Mac|Win)to convert my Nikon’s proprietary .NEF files into .DNG files directly from the memory card into a folder on my drive. I then use the HoudaGeo app to import the .DNG files and then the Sony GPS log file that contains all the GPS data. The 3rd step in the app is to click that actually writes the GPS data to the .DNGs (or JPEGs).

Once the images have the GPS data imported into them, I then import (reference) the images into Lightroom. From there I can do all the great things that Lightroom allows me to do, but I can also bring up any image in Lightroom and not only see the GPS longitude and latitude, but I can also click one button that automatically takes me to those coordinates in Google Maps and gives me a satellite view of where the shot was taken.

Here’s the shot I took at a nearby park


Here’s the GPS data showing for that shot in Adobe Photoshop Lightroom


After clicking the "Map Location" button in Lightroom, I was taken directly to a satellite view in Google Maps.


What’s hot and what’s not?

So far it works as advertised and it’s very easy to use. Basically just turn it on. However, there is definitely room for improvement. For example, there is only one status indicator that either blinks fast green when it has NOT locked on to a satellite or slow green when it has. Guys, how hard would it have been to use two different color LEDs or lights. Green is locked on and Red isn’t. I’m constantly looking at it trying to figure out "is that a slow blink or fast blink because there isn’t that much difference between them. Also Colin tells me that it doesn’t behave well when it’s dangling from say your belt, which is clearly the way it looks like you would use it. Instead I put a strip of velcro on it to attach to a vest or brim of a baseball cap (looks dorky, but it works). Lastly, it would have been nice to include a Mac app so that I wouldn’t have to spend an additional $30 for one. However, the HoudaGeo app is probably better than what Sony would have come up with anyway.


Would I buy it again?

So far the answer is yes! I’ve only used it in testing a few times so far, however each time it had no problem locking on to a satellite and since I don’t plan to use it much around tall buildings, that’s not a concern for me. I can’t wait to take it on my next trip out in the wild and shoot some of this country’s most beautiful landscapes. However, next time I’ll actually be able to "show" people "where" the shot was taken. Not sure how useful it will really be, but it sure is FUN! The
Sony GPSCS1KA GPS Unit Kit for Most Digital Still Cameras is $104.57 at amazon.com

Also check out this CNET article on the subject of Geotagging your photos.

Nikon fires back…The fight is ON!

It didn’t take long for Nikon to fire back with a slew of announcements of their own. They announced the NEW D300 and D3 and some new lenses. Of course the camera that caught my eye (and hobby budget) was the D300. Once again they seemed to have blurred the lines between the $1,800 D300 and $5,000 D3. Now I have some real comparing to do between the Nikon D300, Canon 40D and Canon 5D. I really want to see some sample images from the Nikon D300 at higher ISO’s. If the image quality has improved then it would be a no brainer to stick with Nikon as I already have an investment in Nikon gear.


The good news for all of us consumers is that this competition is good!

Is it time to switch to Canon?

As many of you know I’ve been a long time Nikon shooter. However, unlike many photographers out there, the whole Nikon vs. Canon thing is not a religious battle for me. I really don’t have passion for one manufacture over the other. My choice to go with Nikon at the time was simply based upon my desire for a FAST DSLR camera at the time. I was moving up from an Olympus E20N (with a fixed lens) and wanted one of the new hot cameras under $1K. So at the time my choice was between the Canon Rebel which had already been out for about a year and the brand new Nikon D70. I went with the D70 because it had the better specs (faster). Of course once you go with a DSLR you start buying stuff for it and that keeps you pretty tied to that brand. As time went on I accumulated lenses, flashes, etc. Also once the D200 and D80 came out I wanted MORE! So I upgraded to the D80 and passed my D70 on to my wife.

I did recently buy a Canon Powershot 850IS point and shoot camera that so far I’m quite happy with.

Although I’m quite satisfied with my Nikon gear and the shots I get out of my camera, the one thing that intrigues me about Canon is their ability to provide cameras that shoot at higher ISOs in lower light situations with less noise. I read my buddy Scott’s "Canon 5D field report" and it got me thinking again about the whole noise issue. Also Canon just released details on a barrage of new cameras, most notably details on the NEW Canon 40D. This looks like it would be a good choice for me and my "hobby" (I have to keep reminding myself that I don’t make a dime on photography and as much as I would like that new EOS 1Ds Mark III, um, I don’t make a dime on photography) .


I’m not quite ready to just switch

I’ve got a lot of time and money invested in my Nikon gear. So I’m not quite ready to head to eBay just yet. However, I could certainly see ADDING a Canon DSLR to my arsenal. If I start using it and more importantly liking it better than my Nikon, I would then consider selling my Nikon gear. Again, I don’t have any strong feelings for one brand over the other. I know pros that use Canon and I know pros that use Nikon and they all seem quite happy with what they use. At Photoshop World each year both Nikon and Canon sponsor photo safaris and both events always sell out. So there seems to be a pretty even mix of users out there.

It would also be nice to have both cameras and simply choose the better camera for the situation. Perhaps using the Canon in portrait and low light shoots and using the Nikon gear for landscape shots? Just a thought.

I promised myself that I would wait for now and see what Nikon comes out with next and then do a comparison of whatever that is to the Canon 40D. However, after reading about the 40D is making this wait a little less comfortable than I first imagined. It’s a good thing the 40D doesn’t ship until sometime in September, otherwise my impulsive nature would be even harder to contain 🙂

A great point and shoot camera

Canon PowerShot SD850 IS

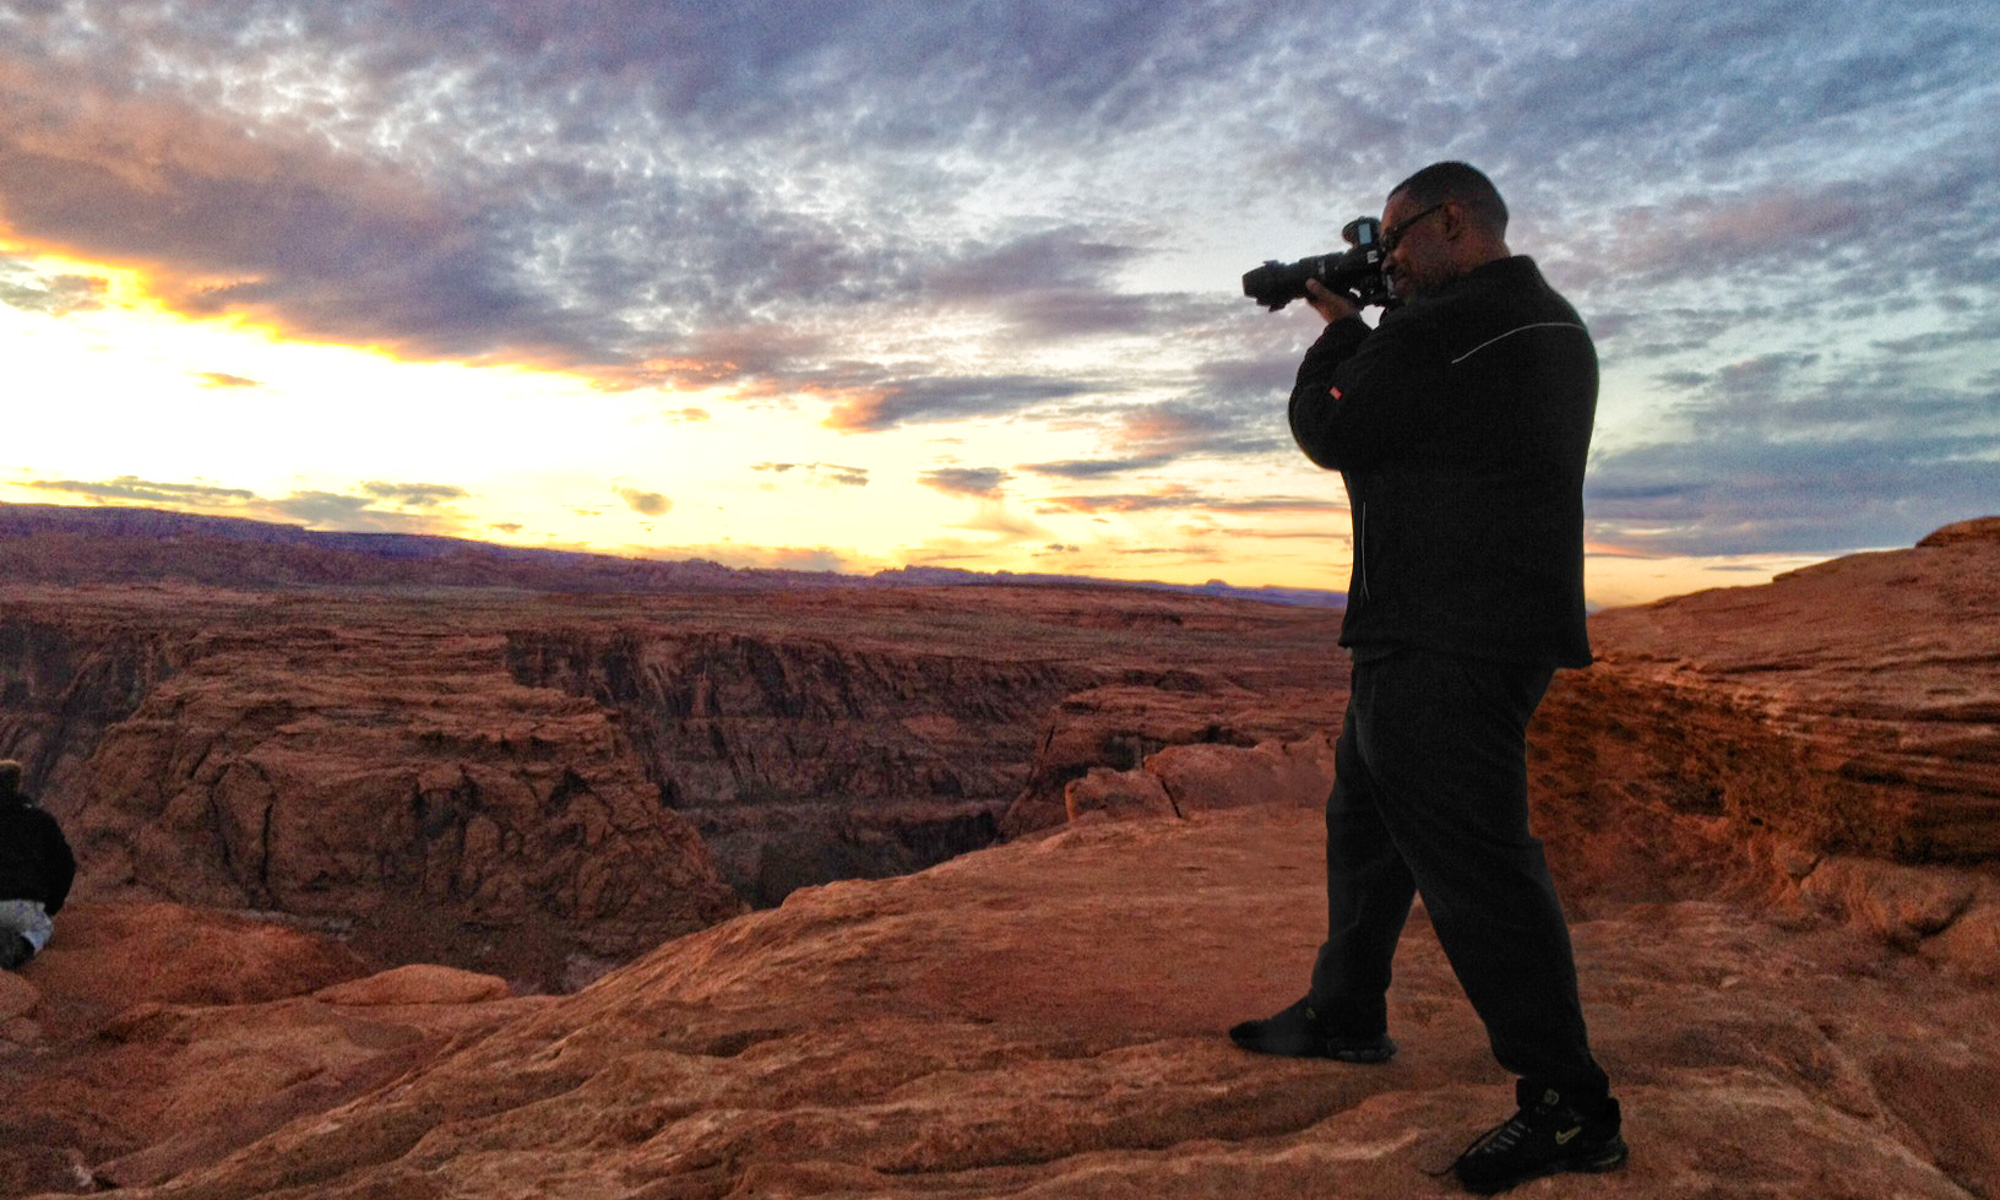
I have had my share of point and shoot cameras and since I’ve gone to a Digital SLR (DSLR) camera, I really don’t spend much time (hardly any) using point and shoot cameras any more. However, there are times when carrying a big camera around just isn’t fun or convenient. So I set out to find a really good point and shoot camera that would give me decent images.


Where I’ve come from

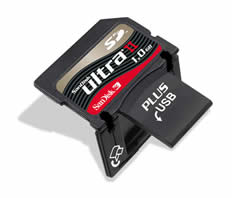
My last "pocket" point and shoot camera was the Minolta DiMAGE Xt and while this camera was a break-through in small sized cameras when it came out, the image quality just never impressed me. So consequently I never really used it much. I then thought I had struck gold with my waterproof Olympus camera and while it does take decent shots and is waterproof and shock resistant It bugs me to no end that it uses xD cards. Since going to SD cards with my Nikon D80 and using the SanDisk Ultra II SD Plus USB cards, I just don’t want to have to use a card reader any more. So I was back in the market for a point and shoot that not only took great images, but used SD cards (like the majority of point and shoot cameras out there these days).

SanDisk Ultra II Plus SD Card

I’ve always bought Canon point and shoot cameras for my family members and I thought to myself it’s time that I started looking for a Canon for myself.

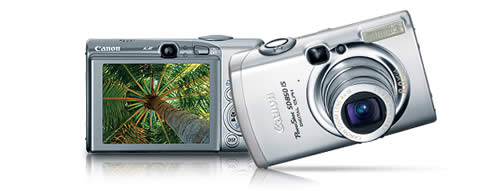
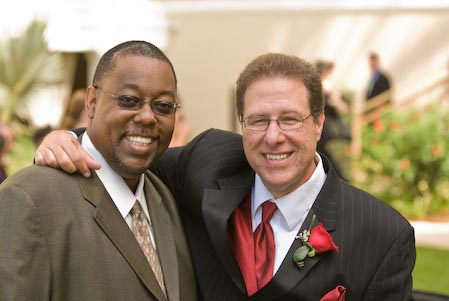
While I was in Montana attending a meeting, a colleague passed me her Canon 800 IS and asked me to take a picture of her and the two people sitting next to her. When I raised the camera to take the picture I was stunned to see 3 little squares start moving around on the screen and lock in on their faces. The Canon 800 IS has "Face Detection." I’ve never seen this in a camera before. I knew the software existed because it exists in Adobe Photoshop Elements. However, I didn’t know that it had made its way into cameras. With this technology the camera uses the face(s) to adjust the exposure of the rest of the image. So without having to go into manual mode or depend on an Auto mode you get great people shots every time. The quality was simply AMAZING! I was sold! I said to myself that this is my next camera. The "IS" stands for Image Stabilized" and Canon is known for its great image stabilization features. When I got home and did some research I found that I had a choice between the Canon Powershot SD800 IS and the Canon Powershot SD850 IS. The biggest difference is that the SD850 IS is 8 megapixels and the SD800 IS is 7.1 megapixels. There is also a difference in focal length and the 850 is slightly faster in shooting speed. So figuring that I don’t buy point and shoot cameras that often, I went with the Powershot SD850 IS.

The SD850 IS also has a 16:9 widescreen shooting mode, 6 movie modes, various white balance modes including a Custom setting and a 4x optical zoom.

Face Detection feature

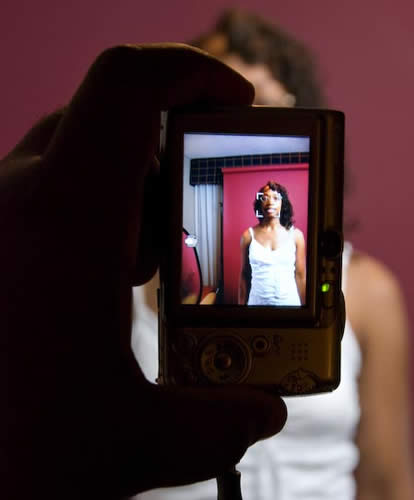
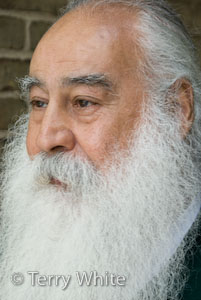
Face Detection at work on the SD850 IS


Shooting

The beauty of a point and shoot camera is that in most cases you turn it on, point and shoot. However, since I’m now so used to shooting with a DSLR, this whole "let the camera do everything" approach is kind of unsettling. I’m looking for ISO settings, shutter speeds, white balance, etc. It took me a minute to realize that the Powershot SD850 IS has a "Manual" mode right on the dial. Once I switched to it, I was in control of my settings. Now keep in mind, I don’t plan on doing a lot of shooting in Manual mode as that defeats the use of a "point and shoot" camera, however, I just wanted to know that I have the option and where to set my own settings if the shot demands it. I found everything I wanted at first glance except shutter speed. I’m not sure if I can set the shutter speed on this camera or not, but that’s not a big deal for me with this camera anyway. Even with my DSLR I shoot in Aperture Priority Mode most of the time anyway letting the camera set the shutter speed.

shot in Auto mode, ISO 200 with no flash

shot in manual mode, ISO 400, no flash. With the higher ISO there is more noise as you would expect.


The Bottom Line

You simply can’t go wrong with Canon’s line of Powershot cameras. If you’re looking for a GREAT point and shoot camera, I would definitely check them out. I guess my only complaint is that this camera offers so many features that the menus can be a bit daunting. Canon uses icons to represent most of the features. Once you learn what those icons mean you’re good to go. However, for a camera that I only plan to use occasionally, I may not remember where a certain feature is. I like the way Olympus provides a complete description of any feature or mode at the push of a button. Canon could really stand to copy this feature. However, with that said, the SD 850 IS will be a permanent fixture in my travel bag.

If you want a more exhaustive review of this camera or any other cameras for that matter, more sample shots, etc. head over to Steve’s Digi-cams Reviews. They do a great job taking cameras through their paces! I got the Powershot SD850 IS at B&H Photo for $345.

Saved by a Savage

I’m here in Miamisburg OH attending a family reunion. I planned on setting up a small on-location portrait studio. I brought my Westscott Spiderlite TD5, reflector, tripod, camera, memory cards, Epson P-3000 backup device and lenses. However, the one thing I left sitting in my office was my Westscott reversible backdrop.

A quick search on the iPhone’s Google Maps app revealed Cord Camera which was literally right around the corner from the hotel. I called them and they did sell the Westscott backdrops. However, when I arrived at the store, they only had one left in stock. While I was prepared to get it, something caught my eye. It was the Savage Porta-Stand with a roll of background paper on it. Then I noticed the assortment of different color paper rolls available. This looked like a much better setup for what I wanted to do this weekend anyway. With one question to the sales guy, "does it come with a carry bag?" and the answer being "yes." I was on my way!

As much as I like my reversible Westscott backdrops, I gotta say that I really love the Savage Porta-Stand. Cord sold the rolls of paper for $25 and the Savage Porta-Stand for $99. They might be cheaper else where, but I wasn’t about to argue their prices seeing that I was in an emergency situation. This setup will definitely be added to my on location shooting.

End result shot with the Nikon D80 with the Nikon 18-200mm VR lens against the Savage Porta-stand and lit by the Westscott Spiderlite TD5 (also processed with Adobe Photoshop Lightroom and Photoshop CS3 – of course).

Adobe ships Lightroom 1.1 update

Adobe has shipped the Photoshop Lightroom 1.1 update which is a free update to all Lightroom 1.0 users. Although this update is modestly called 1.1, it really packs in quite a few useful features beyond the normal bug fixes. This would be a 1.5 update by most other software standards. I’m really happy about this update because it incorporates two of the features that I wanted most and really pushed for. The first one is a little checkbox in the image import dialog box that allows you to Eject your Memory Card after the import is complete. It was always a pain to have to remember to go back to the Finder to do that before. Now it happens automatically. The second one is actually one that most would not encounter. I actually store my images on my Mac OS X Server. It’s a dedicated Mac here in my home office that we all access. It gets backed up daily, etc. etc. While Lightroom 1.0 had no problem with this setup and referencing the images there, the problem came in when it was time to delete an image. I would go through a shoot rejecting the images I didn’t want to keep and then when I went to actually delete those rejects Lightroom would give me an area because it was unable to move those images to my local trash. Now in Lightroom 1.1 I get a dialog box with the option to delete those images immediately. I couldn’t be happier!

The next big feature is one that I didn’t ask for personally, but now I’m really glad it’s there. The Lightroom Library is now called a Catalog. This means that you can have multiple catalogs (only one open at a time though). This is important for me because it also allows you to export images to a catalog (complete with previews and edits) and import catalogs. So now when I import images while out on location using my MacBook Pro, I can do the work on the plane ride home. When I get home I can move the images to my server and then export that catalog and then import it into my desktop Mac Pro. This way both computers will have access to the same images with all the edits. Having this option really makes multiple computer workflows so much easier.

Lightroom 1.1 also incorporates all the latest enhancements from Camera RAW 4.1 including support now for over 160 different Camera RAW formats. There are tons of other subtle changes that will greatly enhance your use of Lightroom. Don’t walk, but run over to adobe.com and download this must have update.

If you would like to see this update in action be sure to check out tomorrow’s episode of the Adobe Creative Suite Video Podcast.