Tips for Traveling Internationally in 2015

APACTour-flightboard

Having just returned from 3 weeks in the Asia Pacific region and a week in Europe a month ago I definitely have some new tips for travelers and those that travel with electronic gear or camera gear. The first thing that most travelers with tech will be concerned about is charging your devices in route and charging them once you get to your destination.

Charging in the air

plane-usb-power

More and more long haul flights are providing USB power at every seat. If you’re in an Economy Plus seat you may even have a regular AC outlet as well which would be great for charging a laptop or tablet. It goes without saying that Business Class/First Class seats almost always have both regular AC power and USB power ports at every seat. Before you get too happy about the USB power port be aware that it is more than likely a 5v port and therefore may not charge a tablet (ie. iPad).

What if you don’t have power at your seat?

If you are on an older aircraft or crappy airline then chances are you’re not going to have power at your seat. This is where you’ll probably rely on bringing a backup battery. There are dozens and dozens of different backup battery models out there. I have recently standardized on Anker products for my charging needs. Their products are quality built and reasonably priced. I have a couple of their models.
anker-astro-2nd-gen

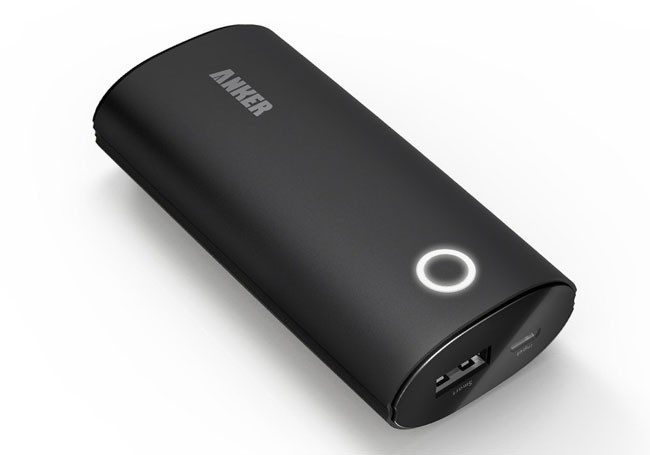
The one I now carry on my person is the Anker 2nd Generation Astro 6400 mAh portable charger. This one can charge my iPhone 6 Plus almost two times on a single charge. I love how it has round edges and no external buttons. This makes it great for a pocket without having to worry about accidentally turning it on.

You can get it here.
anker-astro-e7-web

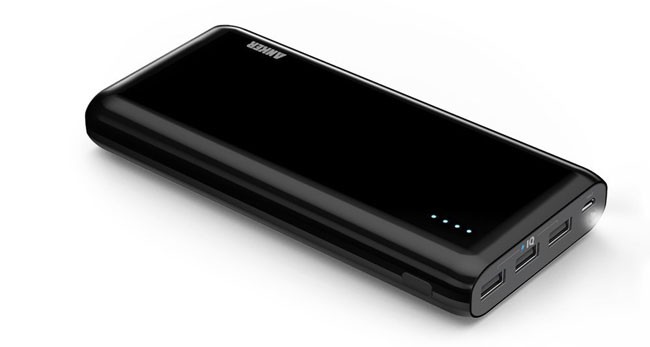
The one that I carry in my bag is the Anker Astro E7. This is the mother of all backup batteries for your mobile devices. It has a whopping 25600 mAh battery capacity with 3 ports 4A. It can charge an iPhone 6 Plus or Galaxy S6 over 6 times. An iPad twice. This means that I can use this battery for several days before needing to charge it.

You can get it here.

Inflight WiFi

wpid14721-IMG_1317_sm.jpg
I’m totally spoiled flying Delta.

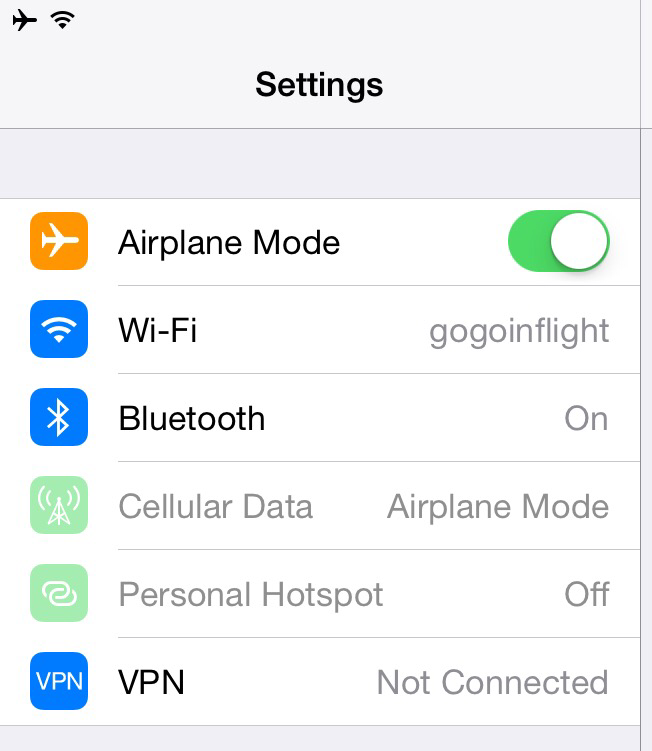
It’s 2015 and while Delta has the largest WiFi equipped fleet it’s still pretty rare to find a long haul (over the ocean) flight with WiFi. As a matter of fact I was coming back from Amsterdam earlier this year on a Delta 747 and I was shocked to see that I had access to GoGo Inflight WiFi for the entire 10 hour trip! Unfortunately this is more of an exception than a rule. Delta is ahead with half of their long haul flights equipped with fast (much faster than domestic 3G speeds) satellite WiFi. When it comes to other airlines like Qantas, Air New Zealand, AirFrance, Singapore Airlines, etc. WiFi isn’t something that they are aggressively adding. In fact when I had a Twitter exchange with Qantas they said they did a trial 3 years ago and there wasn’t much interest. Keep in mind that it was 3 years ago and they were charging by the kilobyte. I would imagine that there wasn’t much interest at that time with something that was likely way overpriced. No one wants to pay by the kilobyte/megabyte. GoGo has the right approach in charging a flat fee for an hour or the entire flight.
wpid14725-IMG_1837_sm.jpg
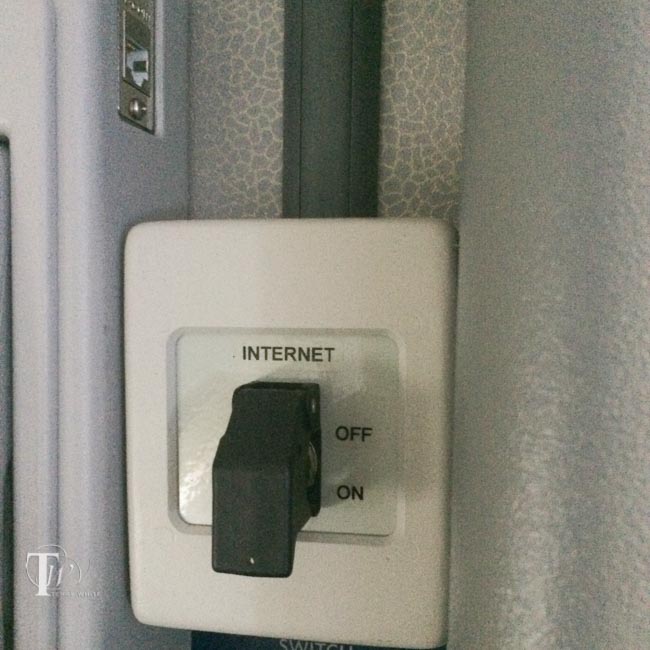
I found the switch that controls the entire internet! 🙂

I was way more productive with 10 hours of WiFi than my last flight coming home, a combined 18 hours of flight time without WiFi. If you’re expecting to get work done on a long flight be sure you’re doing things that don’t require an internet connection. With that said I can also settle the online debate of watching an iTunes rented movie with no internet connection in the air. If you rent AND download an iTunes rental on an iOS device BEFORE you board the flight. You CAN start and watch the movie WITHOUT an internet connection in the air. This wasn’t the case when iTunes rentals first hit the scene. They required a brief connection to the internet when you hit the play button to authorize the movie. Thankfully that wasn’t the case with the movie I watched on my iPad. While you can certainly watch/listen to entertainment, things like social media are out of the question without a connection.

International Power

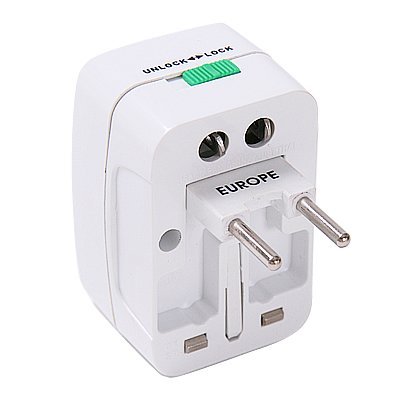
Once you land and get to your hotel or place you’re staying at you’re probably going to want to plug stuff in and charge. Luckily most if not all modern day electronics have power supplies that handle the higher voltage of international outlets (220-240v). The main issue will be adapting the plug to the wall outlet. I used to be a fan of universal adapters that allowed one adapter to plug into multiple kinds of outlets. This used to be my favorite:
UniversalAdapter

However, I’ve been frustrated in some cases with older outlets. These large universal adapters often are simply too heavy and fall out of older, looser wall sockets. On my last trip I used specific adapters for each country. In most cases you will only need three of these:
europe-adapter

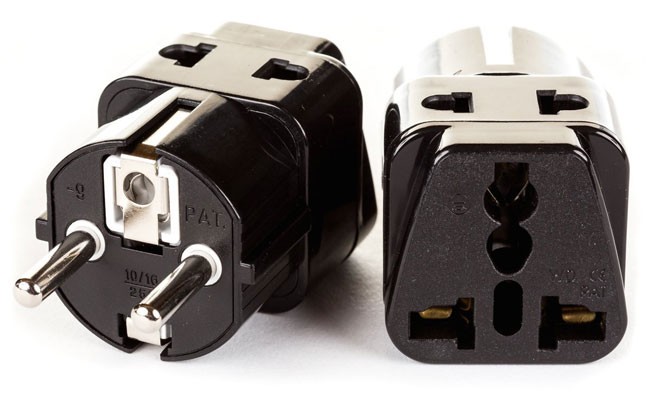
What I like out these single adapters is that they are much more reliable in just about any situation (older wall socket, power strips, etc.) and the newer design allows you to plug in two things.

I used these for Paris, Amsterdam and Italy

I used these for New Zealand and Australia

I used these for Hong Kong and Singapore (also UK)

They were cheap enough to buy 3 of each model so that I can have one of each in my computer bag and the others in my hotel room.
monster

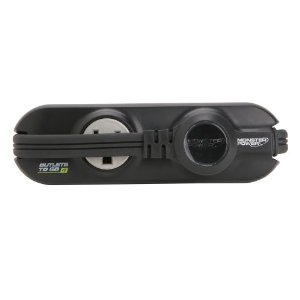
I also travel with this portable power strip so that I can use one socket in the hotel (sometimes there’s only one) and plug in multiple devices.
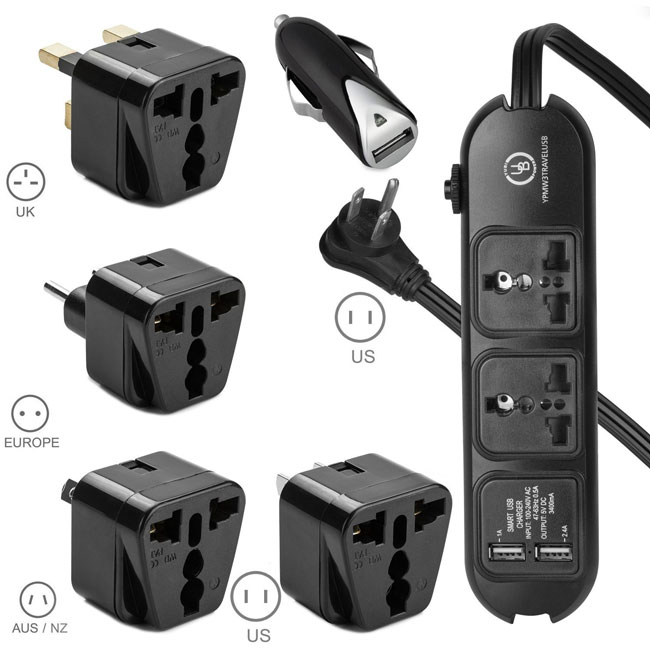
travel_power_strip

Although I haven’t tired this one, it looks like a killer strip with usb ports and adapters included!
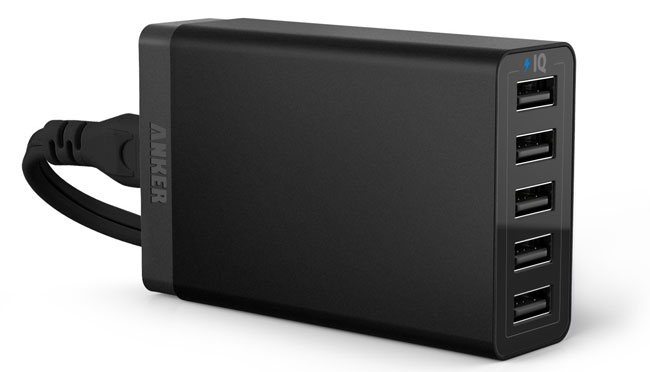
anker_40w_USB

Hands down this is the BEST multiple port/device USB charger. I keep one of these in my suitcase. Once I get to my room I can plug it in and simultaneously charge/power just about everything I travel with. The newer 60w 6 port model rocks! When it came to charging my Apple Watch I brought my extra charging cable and my favorite Apple Watch Stand.

Getting Around Once You’re There
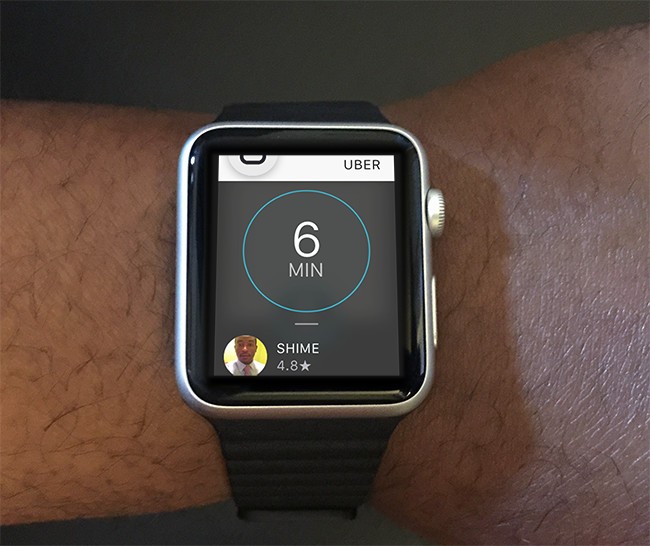
Uber on Apple Watch

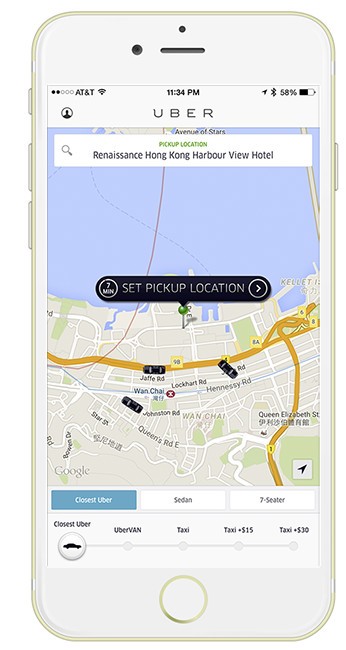
Most countries have taxis, buses, subways and trains or least some combination of them. If I’m new to the area I’m rarely brave enough to take the train/subway because I fear getting lost. Believe it or not I’m very directionally challenged. I did use the subway in Milan to get to the EXPO because it was a single train and a direct shot. Most of the time I’d normally rely on taxis. However, with a taxi there are issues of either having enough cash in the local currency or having a compatible credit card. In some places all the taxis take cards and in others like Hong Kong they look at you like you’re crazy if you try to pay with a card. This is why I’ve gained a new respect and love for Uber. Uber was available in every country/city I visited and it took the pain out of getting around. Now I had one app on my iPhone that allowed me to summon a car whenever I wanted to. The service was consistent and since your credit card is on file with Uber there are no awkward payment issues at the end of the ride. Uber worked great everywhere I went. The only odd thing was that in Hong Kong even though I would enter the destination in the App they would always ask me where I wanted to go. I could see it on the map on their smartphone on the dashboard, but I still had to restated it each time. Speaking of putting the destination in the Uber App this also cuts down on the potential language barrier. Often in Paris the driver barely spoke English and having the destination in the Uber App made it much easier to get to where I was going.

Using ATMs and Credit Cards
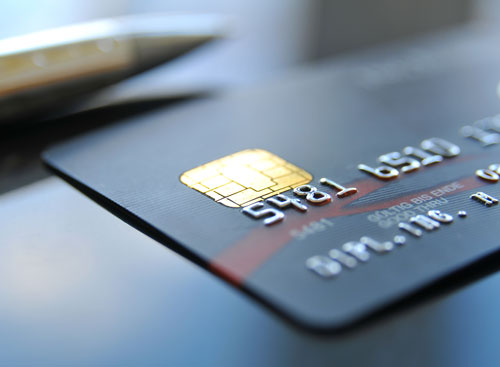
credit-card-EMV

My corporate card for expenses is an American Express card. While this is pretty much accepted everywhere in the US these days, it’s hit or miss in other countries and especially at smaller merchants. Hotels, no problem, but trying to use American Express at shops and cafe’s will usually result in you pulling out a different card. Visa and Master Card are accepted everywhere that cards are accepted, but you should make sure that your card is a newer one outfitted with a “chip”. The EMV chip that you’re probably seeing on all your new credit cards is pretty standard outside the US and will be a standard here by the end of the year. Some of the overseas merchants can’t process your card if it doesn’t have the chip. This is for your protection too as cards with chips are less likely to be spoofed/hacked. This will be even more the case for automated payment systems such as parking garages and train stations. My ATM Debit card doesn’t have the chip yet but I’ve yet to have a problem withdrawing money at BANK ATM machines. It’s also a good idea to alert your bank that you’re going to be out of the country so they don’t flag your transactions as fraud.
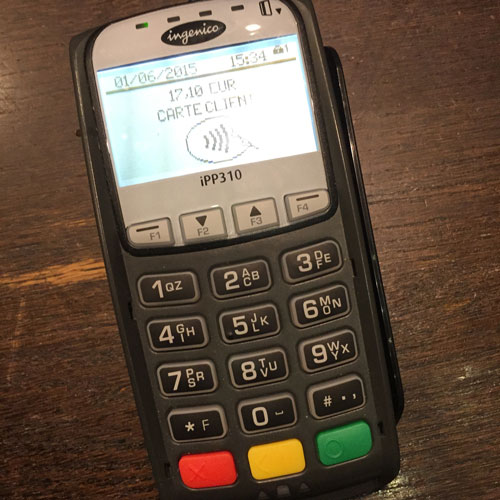
ApplePay-Paris

Yes Apple Pay works too in many places, but not all. I was able to use Apple Pay in most places in Paris.
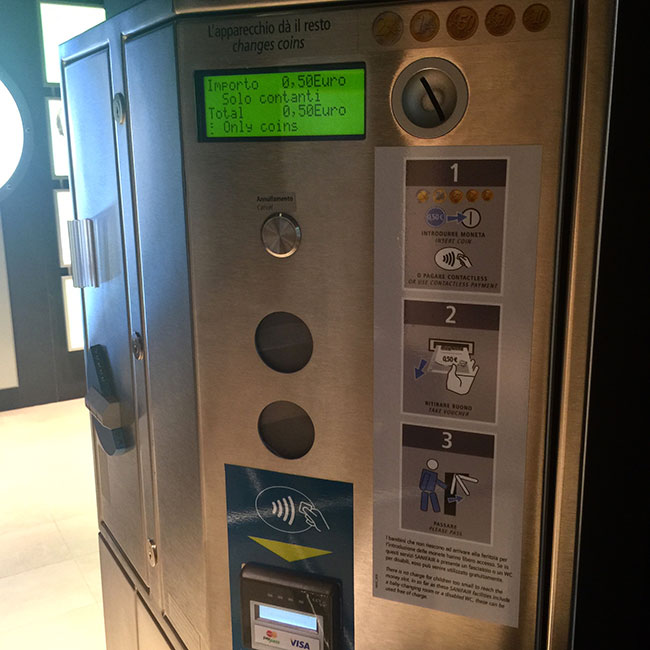
europe_pay_toilet

As a matter of fact I never realized how happy I’d be to use Apple Pay until I had to use the rest room in Milan and it was a pay toilet. I had no change!
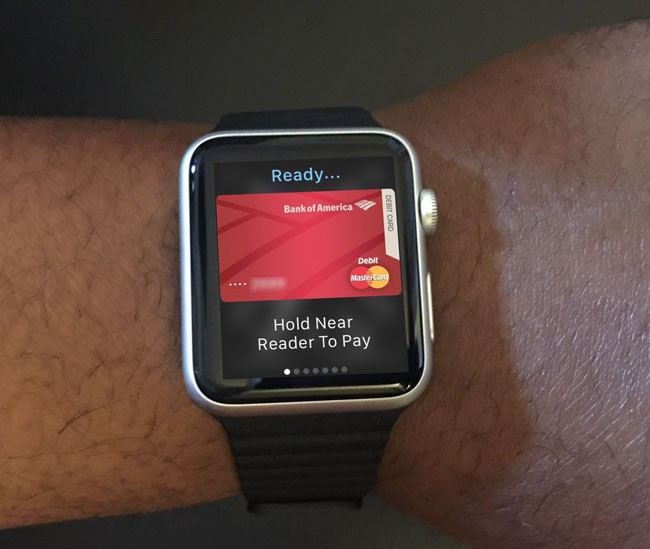
AppleWatchonMe-ApplePay

Lastly while we’re on the subject of credit cards, it’s a good idea to remove any cards that you know you’re not going to use abroad before you leave home. Only take the credit cards that you know you’re going to use, your driver’s license, health insurance card and of course you’ll need your Passport. This way if your wallet is stolen the damage will be minimized.

Making calls and texting

woman-on-phone

International roaming is notoriously expensive. While I’m grandfathered in to an old AT&T plan for unlimited international data (I know right!), calls by the minute are still expensive and international SMS (text) messages are crazy expensive. I rarely make calls on my iPhone when I’m traveling but when I do I do it using data instead. In iOS if I’m calling another iOS user I can simply use FaceTime Audio. If not I can use either Vonage or Skype. Of course FaceTime and Skype can also be used for video calls. iMessage uses data instead of cellular for text messages between iOS users. When I want to text non-iOS users I typically use WhatsApp Messenger. This cross platform App lets you text, send photos, etc, just like SMS/MMS messages without using your expensive international text messaging rates. If you find a WiFi hotspot to use then all of the above can be done for free.

Getting through airport security with your gear
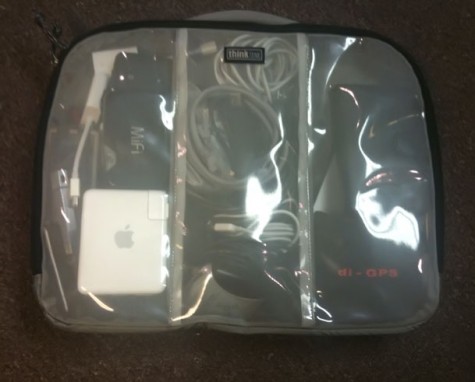
thinktank50

I get really frustrated by international airport security. If you think TSA is a hassle in the US, wait the you go abroad. On the plus side you’ll likely be able to keep your shoes on in most places, but when it comes to your belt and electronics be prepared to pretty much empty your bag. Things that can usually stay in your bag in the US like your iPad and camera, almost always have to come out at international airports. If the xray operator sees anything resembling a gadget or wad of cables you will be taking that stuff out and sending your bag back through. You can also forget leaving your laptop in a TSA approved bag. It will need to come out. Your camera and more often than not even your lenses will need to come out too. Empty your pockets. If you walk in prepared to do all of this then you will get through faster.

Pictured above is my older ThinkTank cable management bag. I now travel with this smaller one. If I take it out and put it in a bin I get through faster.

Print your itinerary
passport_itinerary

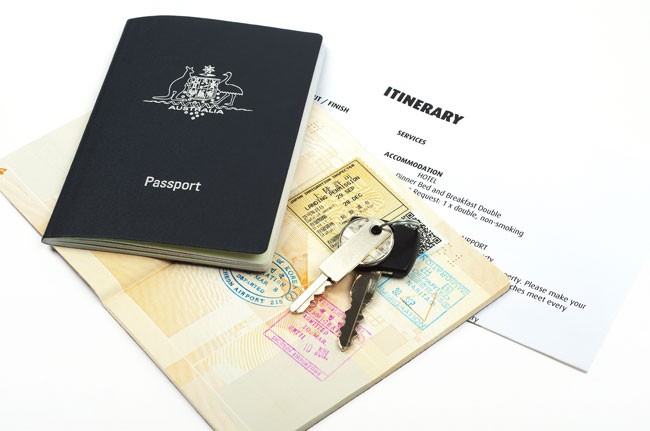
In this day of online checkin and electronic boarding passes one of the last things you’ll probably think about is having a printed itinerary. I know I didn’t used to think about having any printed documents until the one time I was coming back from India and the armed airport guard wasn’t going to let me into the airport without one. After much pleading I was able to convince him to look at the one on my iPhone. I knew from that point on to have a printed itinerary for every international trip. While you’re at it make a copy of the picture page of your passport and put it in every piece of luggage you have.

The 5 Most Useful Apps When Traveling Internationally

These are the 5 Apps that were the most useful during my travels:

FlightTrack 5
FlightTrack5_iPad_iphone5s1

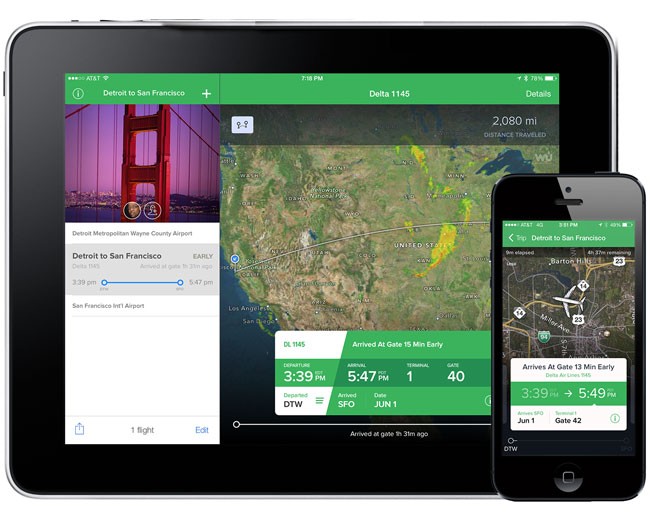
FlightTrack 5 is my favorite flight management tool. I loaded all my flights in before heading out and the app kept me updated on delays and more importantly for international travel which terminal I’d be departing from in each country.

Get it here from the .

Uber

Uber

As I mentioned above I used Uber in every city in every country I visited for a consistent convenient easy way to get around as needed including rides to and from the airport.

Get it here from the .

XE Currency Pro

XE Currency Pro

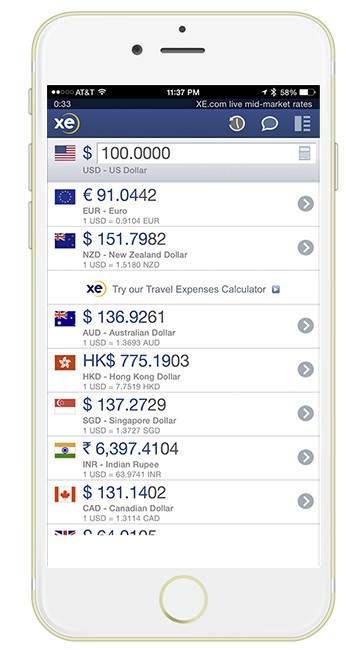
When you’re in a different country then chances are the prices you see in stores, restaurants, etc. will be in the local currency. XE Currency provides a great view of multiple currencies all at once. You can easily swap between any currency you want to be the main currency.

Get it here from the .

Speak & Translate

Speak & Translate

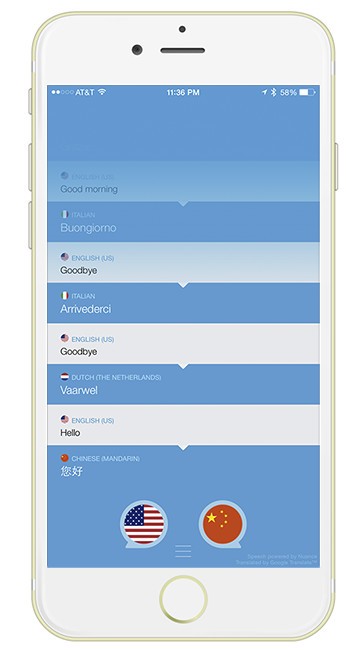
Unless you’re bi-lingual you will probably encounter someone you need to communicate with that speaks very little of your native tongue. Speak & Translate is hands down the best audible language translator app that I’ve seen to date.

Get it here from the .

AccuWeather

AccuWeather

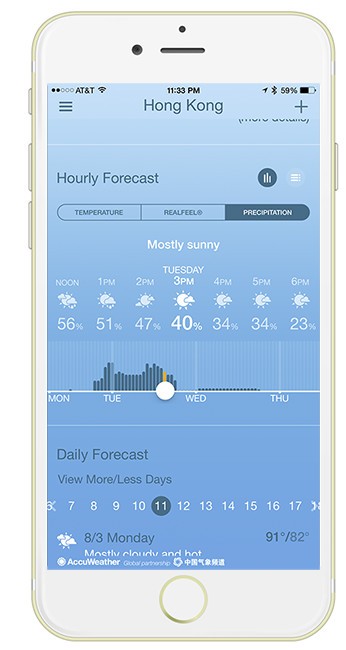
When I was in Hong Kong it was raining most of the time. The standard built-in iOS weather app just wasn’t accurate enough to let me know what time the rain would clear for me to go out and shoot. On the other hand Accuweather was very very accurate giving me the most accurate times of day when there would be no rain.

Get it here from the .


The Bottom Line

wpid14733-TLW4351-Edit_sm.jpg

Travel is constantly evolving. It’s fun going to new places and seeing different cultures. Once you solve the typical connectivity issues I addressed above then you can concentrate on having a good time and enjoying the trip. I would also recommend keeping a pen on your person especially on flight days to fill out customs forms and a small travel umbrella is a must have depending on where you’re headed. Every hotel I stayed in had in-room safes that are free to use. I recommend that you store any valuables and gear that you’re not going to be using before you head out sightseeing. Safe travels and sound off in the comments if you’ve got any questions. I hope my tips for traveling internationally help you out.
APACmiles
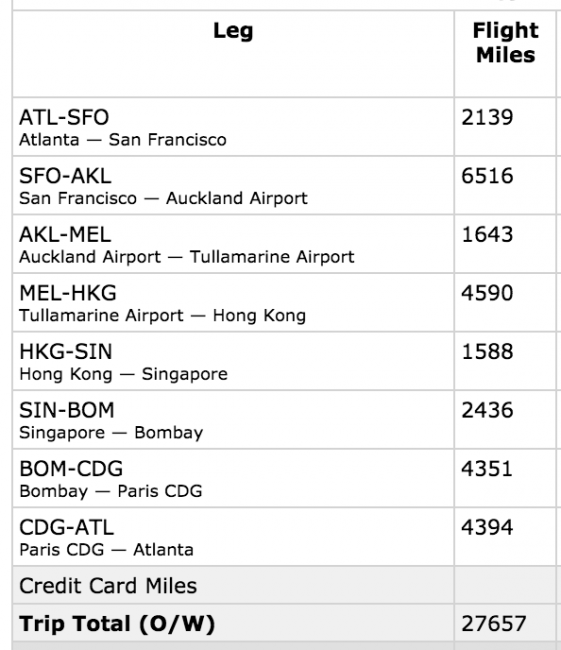
Another complete circle around the globe!

Going to Photoshop World 2015 in Vegas next week?

PSW-2015-banner

If so you can SAVE $50 by registering here with the Discount Code: TerryWhite50


Making the Most of Shooting in Crappy Weather

wpid14686-TLW3200_sm.jpg

As a portrait and fashion photographer I rarely have to worry about weather because I’m usually shooting in studio and controlling the lighting and environment. However, when I travel I become a travel/landscape photographer and just let me admit that it’s way way way more challenging. The 3rd stop on my Adobe tour took me to Hong Kong. Since it was my first trip to Hong Kong and I had plenty of time (a week) I was in no rush to go out shooting on day one. I arrived late Friday evening and on Saturday it looked like the shot above.

wpid14690-IMG_9133_sm.jpg

I went out for lunch and captured the above shot with my iPhone 6 Plus. Nothing special, just looking up and snapping a pic. I enjoyed lunch by the pool an thought, “wow! what a great weekend!” Well it all came to an end on Sunday. On Sunday it started raining and well it never really stopped.

IMG_9434

I booked a city tour for Monday morning and it rained the entire time. That’s when I realized that:

  1. Don’t procrastinate. If you can get out and shoot on a good day, DO IT! Had I gone out on the same tour on Saturday I would have had a fantastic day for capturing the city.
  2. You have to make the most of shooting in crappy weather. If the weather is not going to change by the time you leave an iconic location, then you have to do your best to get some good shots.

In my case I figured I can’t make it stop raining, so therefore I would shoot things that are supposed to be wet. My tour took me to “The Peak” first and quite frankly it was a disaster for shooting with pouring rain conditions:

wpid14693-TLW3297_sm.jpg

This is the shot I got from The Peak while it was pouring rain.

wpid14695-TLW3298_sm.jpg

While the NEW Dehaze feature in Lightroom CC does wonders and with a few adjustments I was able to get something that was somewhat usable, it was clearly not my best work and didn’t do the scene justice.

wpid14697-TLW3371_sm.jpg

Later in the tour we went to fishing villages and that’s when I applied my theory of shooting things that are ok if they’re wet. I got one of my favorite shots above.

wpid14706-IMG_9215_sm.jpg

Take the opportunity to shoot the local community interacting with the elements. In the case of rain perhaps target a sea of umbrellas in an urban setting, the cars going by and splashing puddles of water. Had I brought my macro lens I probably would have focused in on the drops of water on the leaves.

wpid14701-TLW3533-HDR_sm.jpg

Luckily the weather did clear up for a few hours on Tuesday and I didn’t hesitate to go back to The Peak as well as taking the Star ferry over to Kowloon to capture Hong Kong from the other side.

wpid14703-TLW3643-Edit_sm.jpg

The Bottom Line

If you’re going to shoot, shoot! Don’t take chances that the weather will be just as good tomorrow as it is today. If you are just stuck with bad weather, think of creative ways to shoot outside your comfort zone. Work the weather to your advantage.


Going to Photoshop World 2015 in Vegas?

PSW-2015-banner

If so you can SAVE $50 by registering here with the Discount Code: TerryWhite50


Shooting Time-Lapse with the Nikon D810

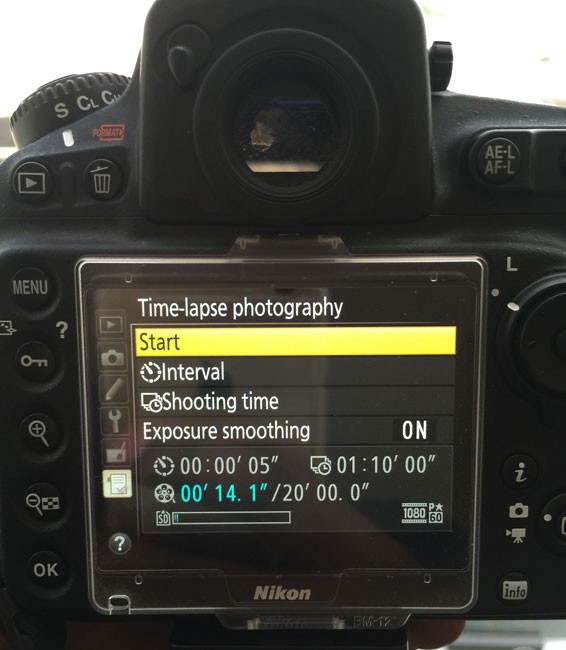
nikon_d810_time-lapse_settings

I’m traveling in Asia for the Adobe Create Now/CC Launch tour. My first stop was Auckland New Zealand and my hotel room just happened to have a balcony. Whenever, I have a private balcony that’s an added bonus when it comes to photography because it usually means that I can leave my camera setup for extended periods of time to shoot long exposures and time-lapse scenes. With a beautiful view of the harbor I decided to shoot a time-lapse. Since I don’t shoot time-lapse very often I Googled “best time-lapse settings”. Most of the result offered pretty much the same advice. For your time-lapse to look the best it’s better to use a consistent exposure and shoot in Manual mode as much as possible. This means setting a fixed exposure as well as shooting Manual focus. The reason for this is to keep your camera from changing exposure or focus in each shot, thereby creating a more smooth time-lapse video.

https://www.youtube.com/watch?v=Zvl8-SxU5EU

I learned the hard way that this works great except if your scene will change drastically during the shoot. For example, shooting a sunrise means that you will start out shooting in the dark and ending up in the light. The opposite would be the case for shooting a sunset as I attempted above. By keeping the same exposure throughout the scene it went from being properly exposed to completely dark. I salvaged it by combining it with a second one of the same scene after it got dark.

https://www.youtube.com/watch?v=5E6lZLCxJU0

The lesson here is that if the scene is going to change drastically during your time-lapse it’s probably best to shoot it on Aperture Priority mode so that the exposure will be adjusted automatically over time. Learning from this mistake I shot another one in the morning and the results were much better:

The time-lapse above was shot in Aperture Priority and Manual Focus.

Settings and Gear

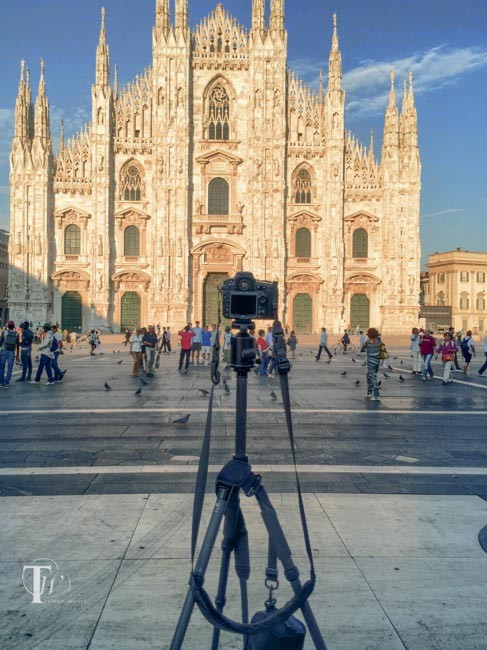
I took my Nikon D810 on this trip because I knew I’d be traveling to places I’d never been before and wanted to have my best camera with me. I also brought my Gitzo Traveler Tripod and Kirk BH-3 Ballhead. No matter which camera you have, you will definitely need a tripod. The camera will be shooting for several minutes or hours. This also means you’ll want a fresh battery. I wish I had brought my battery grip along to double my shooting time.  If your camera can be plugged into AC that would be best. I used my Nikon 28-300mm lens. I shot using:

  • f/11
  • Aperture Priority
  • Manual Focus
  • 28mm
  • Capturing a frame every 5 seconds
  • Duration 40 minutes to 1 hour 10 minutes depending on how long of a video I wanted at the end.

A note about Time-Lapse on the newer Nikon bodies. Shooting Time-Lapse used to mean shooting hundreds of stills and then putting them together in a video editing program afterwards. Starting with the Nikon D4 the Time-Lapse mode creates a video right in camera. Instead of hundreds of stills on your memory card you’ll have the single video. This is great because it makes the process much much easier and frees up all that space on your memory cards/drives. There was one thing I hadn’t figured on when doing my math. I was figuring video at 30fps. However, I had my D810’s video setting on 1080p 60fps. When I brought my first time-lapse into my computer it was only 8 seconds instead of 15/16 seconds. I scratched my head for a few seconds before it hit me that 60fps means that the time-lapse will be half the time. I stretched duration in Adobe Premiere Pro CC to 15 seconds and the results still looked good.

Here’s one that I shot in Hong Kong during the day. Since the exposure wasn’t going to change I could shoot it all in Manual as originally recommended:

The Bottom Line

Shooting Time Lapse videos can be fun. With newer cameras it’s easier than ever. If you’re in a situation where you can set your camera up for 30 minutes or more on a tripod and shoot a scene you’d be surprised by what takes place during that time. Enjoy!

Going to Photoshop World 2015 in Vegas?

PSW-2015-banner

If so you can SAVE $50 by registering here with the Discount Code: TerryWhite50


Best Tripod for Travel

wpid14561-IMG_8551_sm.jpg

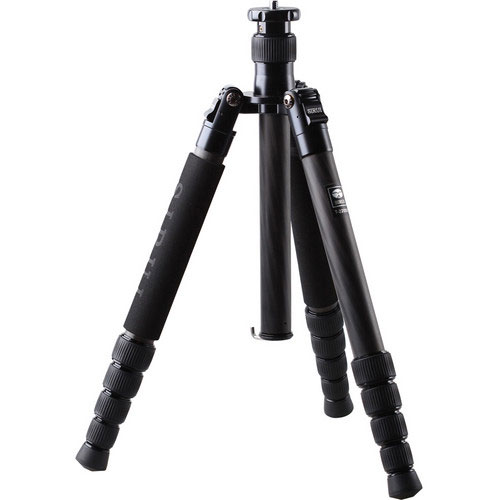
One thing that I’ve learned the hard way more than once is that if you travel to a beautiful location without a tripod, you’re really limiting your potential. If you want to shoot long exposures you need a tripod as they are impossible to shoot handheld. If you want to shoot HDR during the evening or early morning hours you’re going to want a tripod. If you’re going to shoot time lapse then you’re going to want a tripod. I have a GREAT Tripod for travel. I bought it years ago. While I love the fact that it’s carbon fiber and therefore light weight, I wanted to see if there was one that was shorter when folded down? My search lead me to Sirui. I had never heard of them before. However, the specs were what I was looking for:

  • Maximum Height of 56.9″
  • Load Capacity of 26.5 lb
  • 8x Carbon Fiber Legs
  • Forged Aluminum Alloy Chassis
  • Short Center Column for Low-Angle Shots
  • Folds Down to Just 14.6″
  • Weighs Just 2.6 lbs

This one folds down to 14.6″ vs. my Gitzo which folds down to 16.7″. While 2 inches may not sound like much, it actually makes the difference of fitting in my suitcase horizontally instead of diagonally allowing me more room for my clothes and other gear. The maximum height is a little over an inch shorter than my current one, but load capacity is 50% more than my current one. This means it can hold my bigger bodies and lenses. The weight of the Sirui is only .4 lbs more than the Gitzo. Probably the biggest factor to compare is that the Sirui is less than half the price of the Gitzo.

The Sirui T-2205X 5 Section Carbon Fiber Tripod comes with:

  • Short Center Column
  • Padded Travel Bag with Shoulder Strap
  • Allen Keys
  • 6 Year Limited Warranty

The bag is really nice, but it’s really only designed to carry the tripod and the supplied accessories. Like most professional tripods this one does NOT include a ballhead. Once I added my Kirk Ballhead to it, it was a tight fit in the bag, but it did fit.

sirui-tripod

The Bottom Line

There are wide assortment of tripods out there are all different prices and capabilities. If you’re looking for one that is pro level, folds down very compactly and can hold heavy gear, this one will suit you well. This is definitely in the category of Best Tripod for Travel!

You can get the Sirui T-2205X here.

Apple Watch: 45 Days Later…

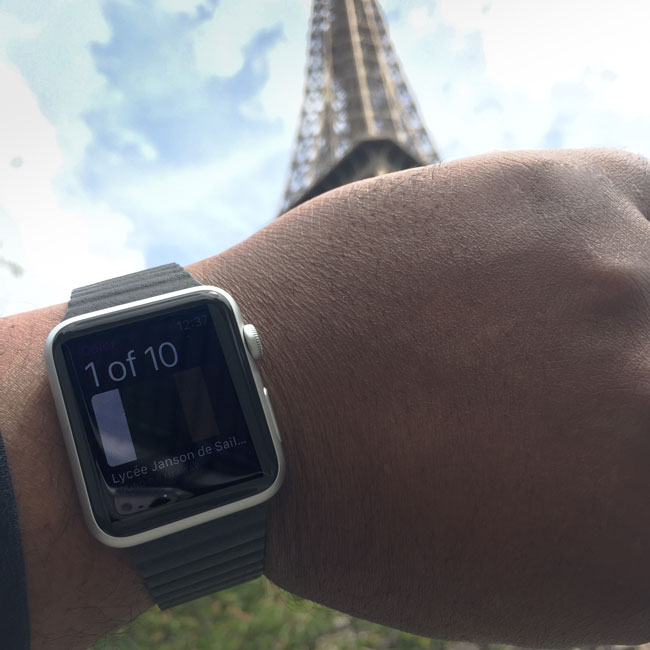
AppleWatch-Adobe_Color_EiffelTower

Whenever a stranger notices that I’m wearing an Apple Watch, the 1st thing they usually ask is “do you like it?” I always find this question to be a bit awkward because I guess if there was something as personal as a watch or other wearable item that I didn’t like, I probably wouldn’t be wearing it. It’s like saying, hey those shoes you’re wearing, do you like them? However, I get it. It’s a hot new tech gadget with a lot of hype that they’ve heard something about or perhaps are interested in possibly getting one and it’s probably the first question that comes to mind. To answer the question for the record, YES, I love it! Now with that said, it’s a 1st generation Apple product and as history has always shown us it will get better with each iteration. Think back to iPhone 1.0 in 2007 and iPad 1.0 in 2010. I loved those products too, but could never imagine going back to those first models now that the newer ones are in hand. I expect to have the same feeling about Apple Watch 1.0 in a few years. But for now I’m very happy with it.

The next question I get and this is another odd one for me to answer is “Is it worth it?” Again, it feels kinda personal. I usually answer with the truth “yes, it’s worth it to me!” I can’t answer if it will be worth it for you or not? I have no idea what you consider to be of value and what your limits are? Some things that you would spend money on I would probably find not to be worth it to me. However, for the record the answer is YES!, it’s worth it (to me). My #1 measure for answering this question is, if something were to happen to it or if I could go back in time knowing what I know now, would I buy it again? hmmmm, Yes! My only debate would be would I buy the Sport model again or would I step up to the stainless steel model. I chose not to go with the more expensive models knowing that this is a first generation 1.0 product and that when 2.0 comes out then I would spend more on the sure to be thinner model with all kinds of new bells and whistles. I do want a stainless steel one and I’ve had to close my browser window a couple of times when I was tempted to just go ahead and order one, but I’ll wait.


Probably the least expected moment when someone asked me about Apple Watch…

The city of Milan Italy from the roof of the Milan Cathedral

I would have to say that I was a bit frustrated when one of my viewers on Periscope (follow me @TerryLWhite) asked me about Apple Watch during a live broadcast from Milan Italy last week. I know that the viewer didn’t mean anything wrong by the question, but I was a bit taken back by the question during that particular moment because I was showing this beautiful scene from the top of the Milan Cathedral. The beauty, the history, the architecture, the wow factor and out of the blue “has the Apple Watch benefited you on this trip?” Huh? Really? You want to talk Apple Watch now? Right now? Are you seeing this? So I was a bit snippy with my response and for that I apologize. He didn’t deserve that and his curiosity was genuine. There was nothing wrong with the question. I actually felt bad afterwards. For that reason, I thought why not answer the question in detail with this blog post?

Using Apple Watch on my trip to Europe

Apple Watch favorite face

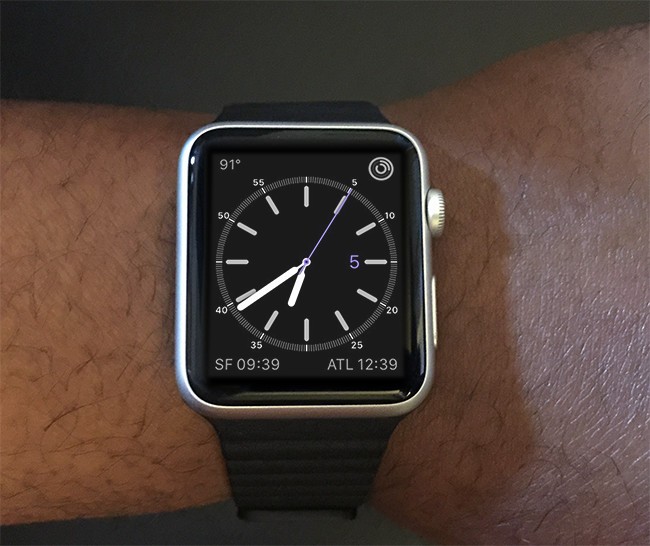
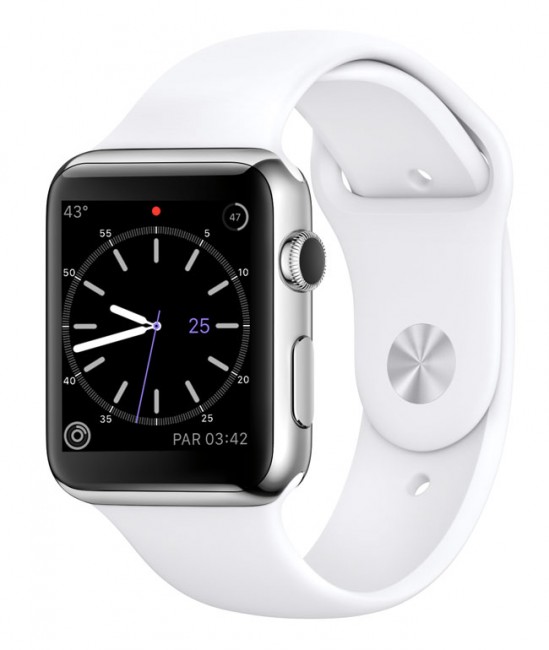
Although I had traveled with Apple Watch from day one, this was my first trip abroad with it. I would say that the first thing I like about traveling with Apple Watch is that it changes the time based on where you are just like your iPhone. So I never ever have to set it. Last week I went to the Netherlands, Paris and Milan. The first thing I thought about was what information would I want to see at a glance every time I looked at my Watch? Apple calls the 4 customizable corners of Apple Watch “Complications”, not sure I would have used that term, but that’s what they are called. Also my buddy Jack just pointed out to me that Complications is the common term used for describing features of clocks beyond the time display. Learn something new everyday. My daily 4 complications were Weather, Battery Status, Activity (like a fitness band) and the Central Europe Time Zone (Paris time). I customized it by replacing Battery Status with Pacific Time and changed Paris time to Eastern Time (my home time zone – Atlanta). I also set the default to 24 hour (military time) since that’s what the rest of the world uses.

Speaking of Battery Life… I no longer display the battery status on my watch because since day one battery has NEVER been a problem for me. Not one time in 45 days have I run out of juice. I think the lowest the battery has been when I put it on the charger at night was 30% left. It actually averages between 40%-60% left each day. Since battery life has never been an issue for me, I figured why waste the space displaying the status at all times? I can always use the battery “glance” if I’m ever curious to how much juice I have left. While Apple states that you’ll get 18 hours of battery I have actually gone over that for the 1st time on this trip. I put my watch on at 8:00 am the day I left and didn’t take it off till the next afternoon in the Netherlands at 1PM, 23 hours later! I also kept it active on the 7.5 hour flight because the Delta 747 that I was on had WiFi. No need to go into Airplane mode. Apple Watch battery life is much better than expected!

AppleWatchFace-activity

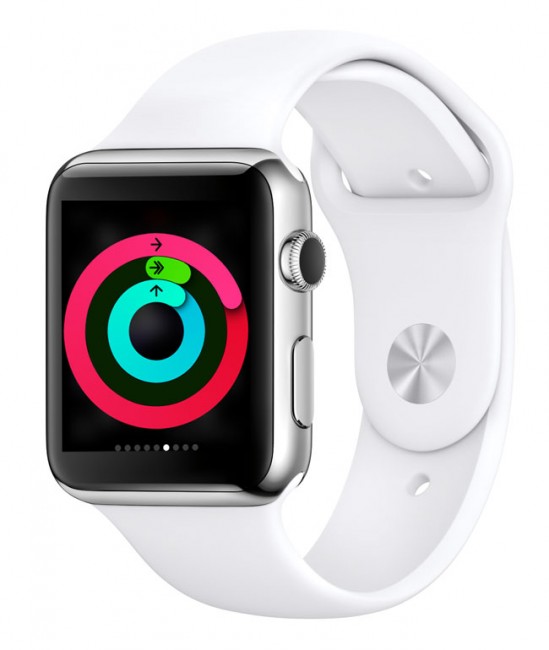
After setting up the perfect watch face display above, the next thing was the Apps themselves. Some were very useful on this trip. I’ll start with the ones that are built-in. I love that Apple Watch shows me incoming calls. This is even more important when traveling abroad as calls can be costly. At a glance I could see who was calling and even better, if it was a call that I didn’t want to take I could just cup my hand naturally over the Watch to silence the incoming call and send it . This is a pretty sweet feature. The next one that was extremely nice was the Activity monitor. I did a LOT of walking around on this trip and it was great hitting/exceeding my daily Move and Stand goals. I used to wear a Nike+ Fuelband on one arm and sometimes a nice Marc Jacobs watch on the other. Now I have Apple Watch that gives me both a nice watch and fitness tracker in one. Speaking of it being a watch, people seem to be really impressed when I raise my arm to see what time it is and the Watch displays the time. This is what bugged me about using all other digital watches (including the Nike+ Fuelband) in the past is that you had to use your other hand to press a button to activate the display. There is no button to press thanks to the built-in accelerometer.

applewatchface-timer

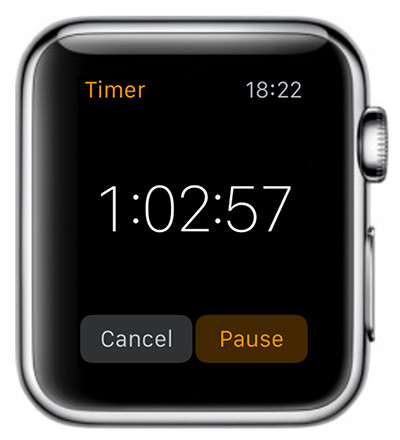
The Timer was awesome to use. This was a work trip and I had presentations to do in each city. Normally I’d use a presentation timer on my iPhone, but more and more I’m using my iPhone as part of the demo to show mobile Apps. This lead to my using an iPod touch for music and to run my timer apps. I didn’t take the iPod touch out of my bag one time on this trip. The watch made a great timer. At a glance I could see how much time I had left and if I got carried away the taptic feel of the timer tapping my wrist when my time was up was PERFECT. Although I didn’t have slides to present during this trip, I have also used the Keynote App on Apple Watch as a wireless remote to advance my slides from my wrist. It was great to use the timer for the flight home. This way I was able to see how many hours I had left at a glance.

Notifications are killer! Not having to pull out my iPhone for every little thing is what I hoped Apple Watch would help with and it has. Having calendar reminders, text messages, and several 3rd party app messages pop up on my Watch instead of having to pull out my iPhone each time was great.

AppleWatch-flighttrack

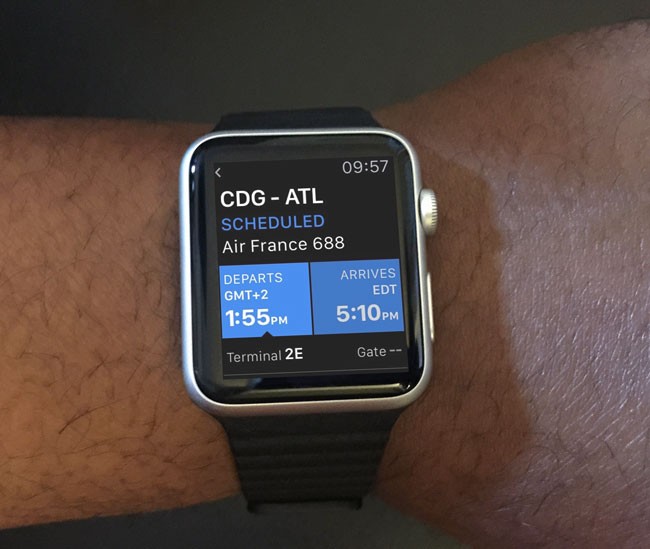
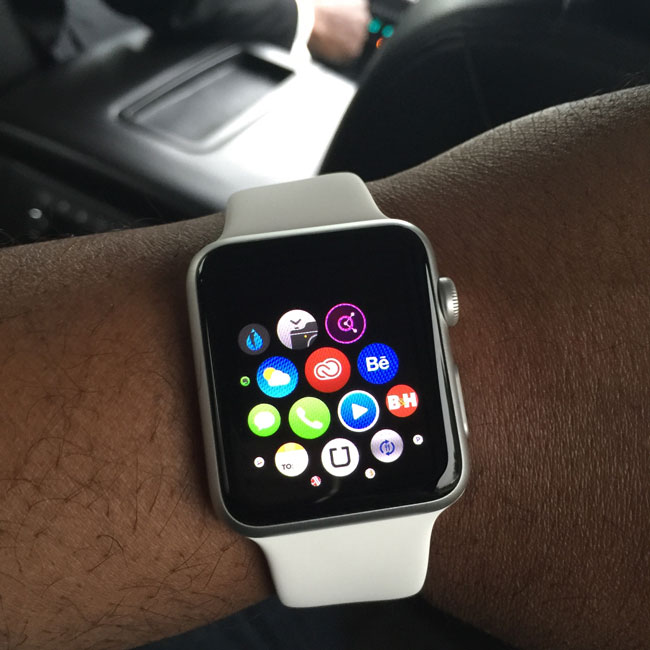
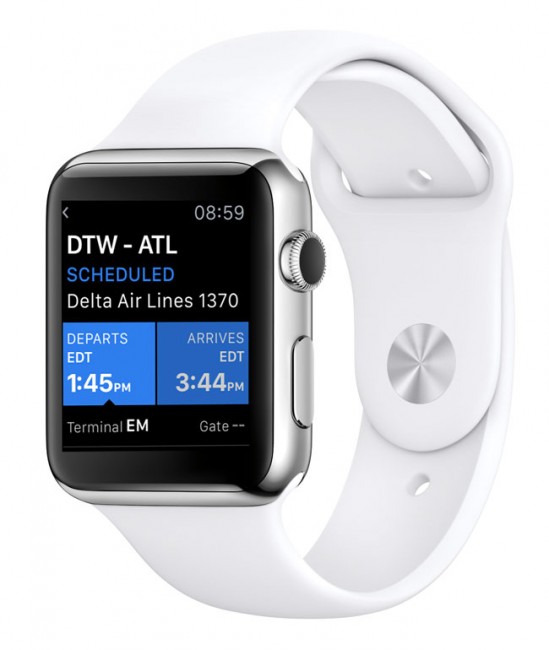
There was one 3rd party app that stood out. If you want to see the 3rd party Apple Watch Apps that I like the most, you can see the full list here. However, the one for travel that was great to have was FlightTrack 5. All of my flights were loaded in via my iPhone 6 Plus and therefore available at a glance on my Apple Watch. I could see any flight updates, delays, times, etc.

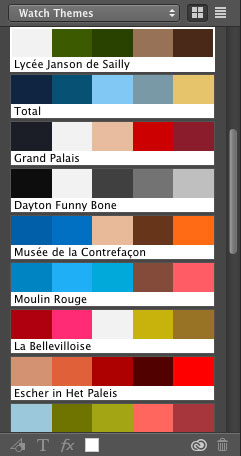
The above color themes were captured with Adobe Color on Apple Watch from the various locations I visited and then sync'd to Creative Cloud and waiting for me on my Desktop the next time I launched Photoshop CC.
The above color themes were captured with Adobe Color on Apple Watch from the various locations I visited and then sync’d to Creative Cloud and waiting for me on my Desktop the next time I launched Photoshop CC.

I also liked using Adobe Color CC to collect the most popular color themes from each city. I’m becoming a fan of ProCamera 8 + HDR and their iPhone app now includes an Apple Watch app that not only gives you a remote shutter release from your Watch, but also a quick review of the images that you just took so that you can stay in place and shoot again if need be.

Apple Pay via Apple Watch came in very handy

Apple Pay on Apple Watch

During my stay in Paris I went to lunch at the underground Mall next to the Louvre. Nice Apple Store there by the way. The food court had a variety of restaurants. I noticed that when I went to pay for my meal, the familiar touchless payment symbol appeared and I thought, why not try it. Two taps of the side button and my Apple Pay was ready. All the cashier kept saying was “wow, wow, wow”. Apparently I was his first Apple Watch paying patron. Or maybe that was all the English he spoke 🙂 .

ApplePay-Paris

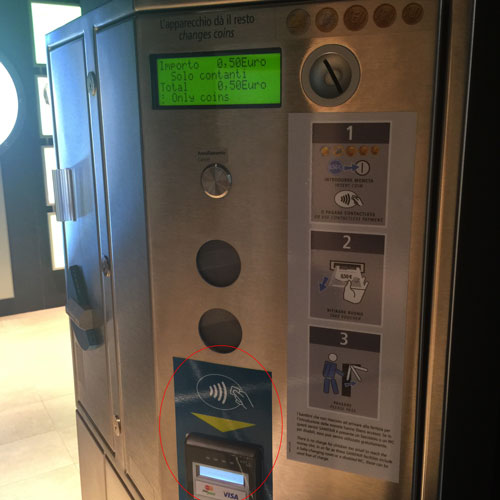
I used Apple Watch in a way that I never would have thought about before this trip. It seems that in several public places in Europe that if you want to use the restroom you actually have to pay € .50.

PayToilet

While that’s not the end of the world, it was frustrating the first time when I didn’t have any change. The next time, I saw one I noticed that it took Apple Pay (contactless payments via NFC in smartphones and Apple Watch). Now Europe just needs to update their train stations to take touchless payments and it would be a lot easier, faster and a more secure way to pay for tickets.


The Bottom Line

wpid14539-TLW1824-HDR_sm.jpg

The Apple Watch is far from perfect, but for what it is right now as a 1.0 product it’s GREAT. It does the things that I bought it for and if I had it to do all over again I’d buy it again. For every day use it has been a natural fit into my lifestyle and for travel it’s been great to have the things I want to know about the most at a glance. I look forward to the 3rd party Apps gaining access to the native functions of the Watch in the upcoming Apple Watch SDK. I have a whole drawer full of traditional watches, but Apple Watch is the one I enjoy the most. Apple Watch is a great product that will only get better over time.

wpid14542-TLW2484-HDR_sm.jpg


Apple Watch Review

apple-Watch-apps

Many of my followers told me that when they saw that I was getting an Apple Watch that they “can’t wait to read your review.” Well here it is… At 3:00 AM ET on April 10th my alarm went off so that I could roll over and place my order for my Apple Watch. I was able to get into the site by 3:05 AM and I placed my order for a 42mm Silver Sport Watch. The Silver Sport only comes bundled with a White Band, Blue Band, Pink Band or Green Band. I’m really not fond of any of those colors, but wanted the Silver watch. Therefore I ordered an extra Black sport band (it’s still on backorder). By 3:10 AM I had rolled over and went back to sleep. Because I got my order in fast enough I was lucky to be in one the first shipments. I got my Apple Watch via UPS at about 2:45pm on April 24th. I had already done some research, read other reviews and watched the videos on Apple’s site. Therefore I knew a lot about the Apple Watch before I broke the seal on the box. I knew that the setup process included a fairly long sync process to sync the Apple Watch Apps from my iPhone. The process took about 10 minutes from start to finish. Of course your mileage will vary based on the number of Apple Watch compatible Apps that you have on your iPhone. Right after I got it setup I recorded this video to give a quick video overview of some of the features:

After A Full Day Of Use…

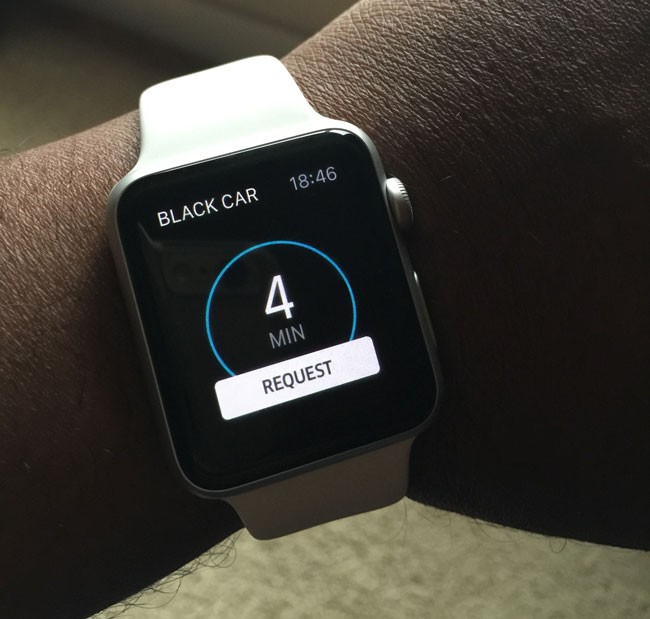
The video above was only after having just setup the Apple Watch. It just so happened that I was traveling on a business trip Friday evening. I got the watch setup in time to head out to the airport and make my flight. The first real world use I got (besides simply seeing the time at a glance – yes it is a watch) was to use the Uber App to summon a car to pick me up and take me to the airport. The next real world use was using the Delta boarding pass that I had received the day before on my iPhone in Passbook. Any of your Passbook passes automatically appear on your Apple Watch. I used it both at the TSA checkpoint and to board the plane at the gate. No problems. I landed and got a notification from the Hertz iPhone app to let me know what stall my rental car was in. I drove to my hotel, checked in and crashed for the night.

Battery Life… The next day (Saturday) I woke up and after showering I put my Apple Watch on. While you’re supposed to be able to shower in the Apple Watch I’m just not ready to take any chances at this point. I’ve seen the video where someone submerged an Apple Watch under water for 15 minutes and it still worked. Apple says it’s not water proof and I’m not ready to push it. I put the watch on at about 9:45am and went on about my day. When I got to my seminar I used the timer app on the Apple Watch to remind me 10 minutes before my end time. The great thing about the Apple Watch timer is that it will give you a taptic response when it goes off. This way I can feel it even if I don’t hear it. I used the Apple Watch as much as I wanted throughout the day and at 9:42pm (about 12 hours later) my battery indicator showed that I had 47% battery left. This was good. I would only be up for a few more hours at the most and this meant that I can easily use the Apple Watch with a single charge each day. As a matter of fact as I write this post on Sunday night and having started earlier today at around 8:30 AM I still have 36% battery life at 12:22AM (Monday morning).

AppleWatch_battery_life

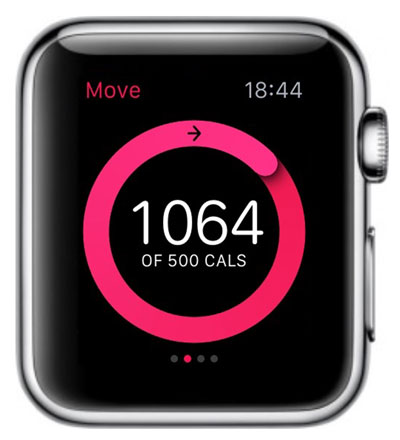
On Sunday I got up a bit earlier and went on a morning walk along the river. I like the Activity monitor and I was looking forward to the Apple Watch replacing my Nike+ Fuelband and it does so nicely. The Apple Watch allows you to track your overall activity/calorie burn, standing for at least one minute every hour for 12 hours throughout the day and getting at least 30 minutes of exercise throughout the day.

AppleWatch-activity

What about the Apps?

Reportedly there were at least 3,000 apps available on April 24th for Apple Watch. I know that I was seeing updates on a daily basis. I have 71 Apple Watch Apps myself.

Requesting an Uber ride from my wrist rocks!
After a couple of days of use I have found some apps to be more useful than others and of course some work better than others. Some are simply useless in their current form while others I couldn’t imagine not having. The best ones I’ve seen so far are: FlightTrack, Uber, Keynote (I remote controlled my slide presentation on Sunday via my Apple Watch), Calcbot, Deliveries, Shazam and Weather Live.

Mobiata made a great Apple Watch App - FlightTrack 5
Mobiata made a great Apple Watch App – FlightTrack 5
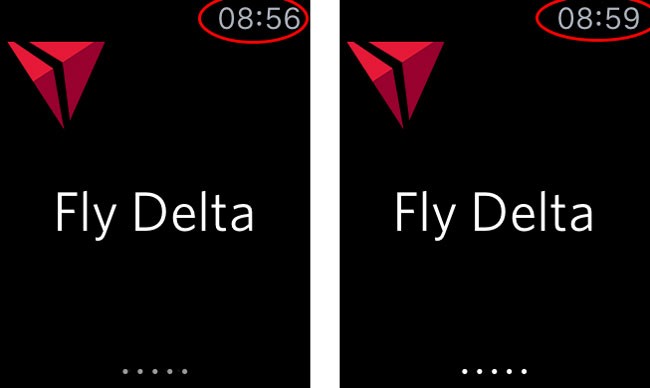
These Apps are Apps on my iPhone, but work well enough on Apple Watch that I don’t have to pull out my iPhone to use them or see the data that they present. On the other hand there are some embarrassing ones too. The two Apps that have given me the worst experiences so far are the Delta Airlines App and the Marriott App. With the Fly Delta App you’re supposed to be able to see information about your flight before you take off and during the flight the status and count down til you land. The problem is that the app takes forever to load. I mean like minutes! My flight attendant noticed that I had an Apple Watch and asked how I liked it? She seemed really interested in it. I decided to start with the Delta App since we were on a Delta plane. We waited, waited and waited and finally she had to go and work the flight. It did eventually launch and displayed the remain flight time.

Hey Delta! 2-3 minutes to load your App? Not worth it.
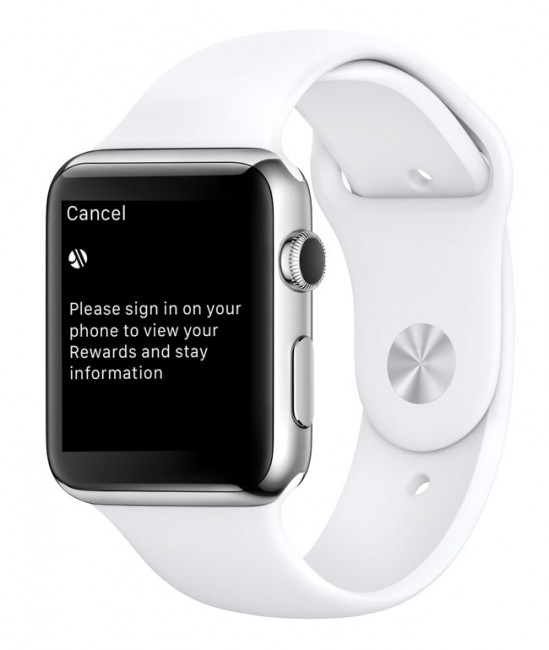
However, the remaining flight time never updated throughout the flight. This App is seriously broken. The problem with the Marriott App is Marriott’s obsession with making you sign-in with your password every time you want to use the App. This was an annoyance on the iPhone (not having a “keep me signed in option”), it’s a deal breaker on the Apple Watch. If I have to pull out my iPhone to sign in, then I might as well continue to use the App on my iPhone.

NOTE: I noticed today that once I opened the Delta app on my iPhone the Apple Watch app opened right away. Like the Marriott app, that defeats the purpose of the Watch app. This needs to be fixed. 

AppleWatch-Marriott
This is unacceptable! The minute you tell me I have to take out my iPhone, your app has failed.
I imagine that the apps will get better now that developers actually can get Apple Watches to test with. I expect this market to continue to grow.

The Built-in Apps are Good

As you might expect the built-in apps are generally better, more stable than the 3rd party Apps. I’m sure Apple’s engineers had complete access to the hardware to play. I really like the Messages App, Passbook, Weather,  the Phone app, and the Timer (I used the timer as a presentation timer on Saturday and really appreciated the tap on my wrist letting me know I only had 10 more minutes left).

It’s all about “Glances”

I’m finding that while you can have up to 20 Apps with “Glances” that fewer “Glances” are better. By the time you have to swipe left or right 10 times to find the Glance you want you could have just as easily found and opened the App itself. Today I removed all but the few glances that I will use the most. By the way a “glance” is when you swipe up from the bottom to get to things like battery life, current stock price of your favorite stock, current weather etc. When you swipe up you see the last glance you used. To switch to a different glance you either swipe left or right to navigate them. Having too many will defeat the convenience of glances.

Apple Pay is the Killer App

One of the things I was looking forward to with Apple Watch is actually Apple Pay. The idea of not only not having to take out my wallet at the register, but not having to take out my iPhone 6 Plus is very appealing. I’m happy to report that Apple Pay rocks on Apple Watch and is definitely the fastest way to pay for things. See it in action in this short video I made:

The Bottom Line

Every time I mention Apple Watch I always have at least one person questioning why anyone would need it? Apple Watch is an extension of your iPhone on your wrist. There isn’t anything that you can do on Apple Watch that you couldn’t do on your iPhone. I remember the same arguments that surfaced when the iPad was released. There was nothing that you could do on iPad that you couldn’t do on your laptop. If you’re in that mindset then you’re right Apple Watch is probably not for you. For me it’s about seeing information at a “glance” and not having to always pull out my iPhone 6 Plus. The same way the iPhone allowed me to do things without always having to pull out my MacBook Pro. If the Apple Watch did nothing but displayed the time, weather, date, another time zone of my choosing, gave me my Passbook passes and Apple Pay it would have already been all that I wanted. However, the Apple Watch offers so much more. For a 1.0 product the hardware seems solid. I would like to see more watch faces as it seems like the iPod nano had more watch faces than the Apple Watch, but I’m sure that will happen in time with software updates. Once the 3rd party apps are refined a bit, Apple will have another healthy new product line on their hands. I’m happy with my purchase and look forward to continued updates, apps and other 3rd party accessories.


I have Gogo Wi-Fi on my Long Haul International Flight – Finally!


I’m headed back to Atlanta from Amsterdam today. The flight time is just over 9 hours. I did my usual downloads from my TiVo DVR the night before so that I would have some shows to watch and of course I have my MacBook Pro so that I can get some writing done. The last thing I expected on this Delta flight was to have WiFi internet all the way home! Sure I get my hopes up each time I board an international flight by looking for the familiar WiFi stickers found on 99% of all Delta domestic flights and like always there were no stickers present on this flight. However, once we got up to 10,000 feet I noticed that my phone was asking me to login to my corporate IPASS account (a roaming partner of Gogo). I just figured someone on the plane was faking a Gogo hotspot. However, it worked! I was blown away because I figured I wouldn’t see this until at least 2016. I asked the flight attendant just to make sure and she confirmed that “some” planes have it now and that we were “lucky” today. Lucky indeed!


So what does it cost to enjoy this international benefit? Since I have a corporate plan from work that covers Gogo InFlight WiFi I didn’t even think that about a cost difference at first, but as I started writing this I figured my readers would want to know. I went back to the regular logon page and the prices are high indeed. $19.95 for one hour and $39.95 for the whole flight. While I appreciate this  being a work perk, I gotta say that I would gladly pay $39.95 for WiFi on this 9 hour flight. The amount of stuff that I can get done (including this blog post) is worth it to me. The next question is how fast is it? Gogo inlfight wifi in the states uses a celluar system (plane to ground) and from I can see it’s based on 3G technology. When it first came out the speeds were decent, but lately they have been slow to almost unusable. Still slow is better than nothing, so I use it all the time. 


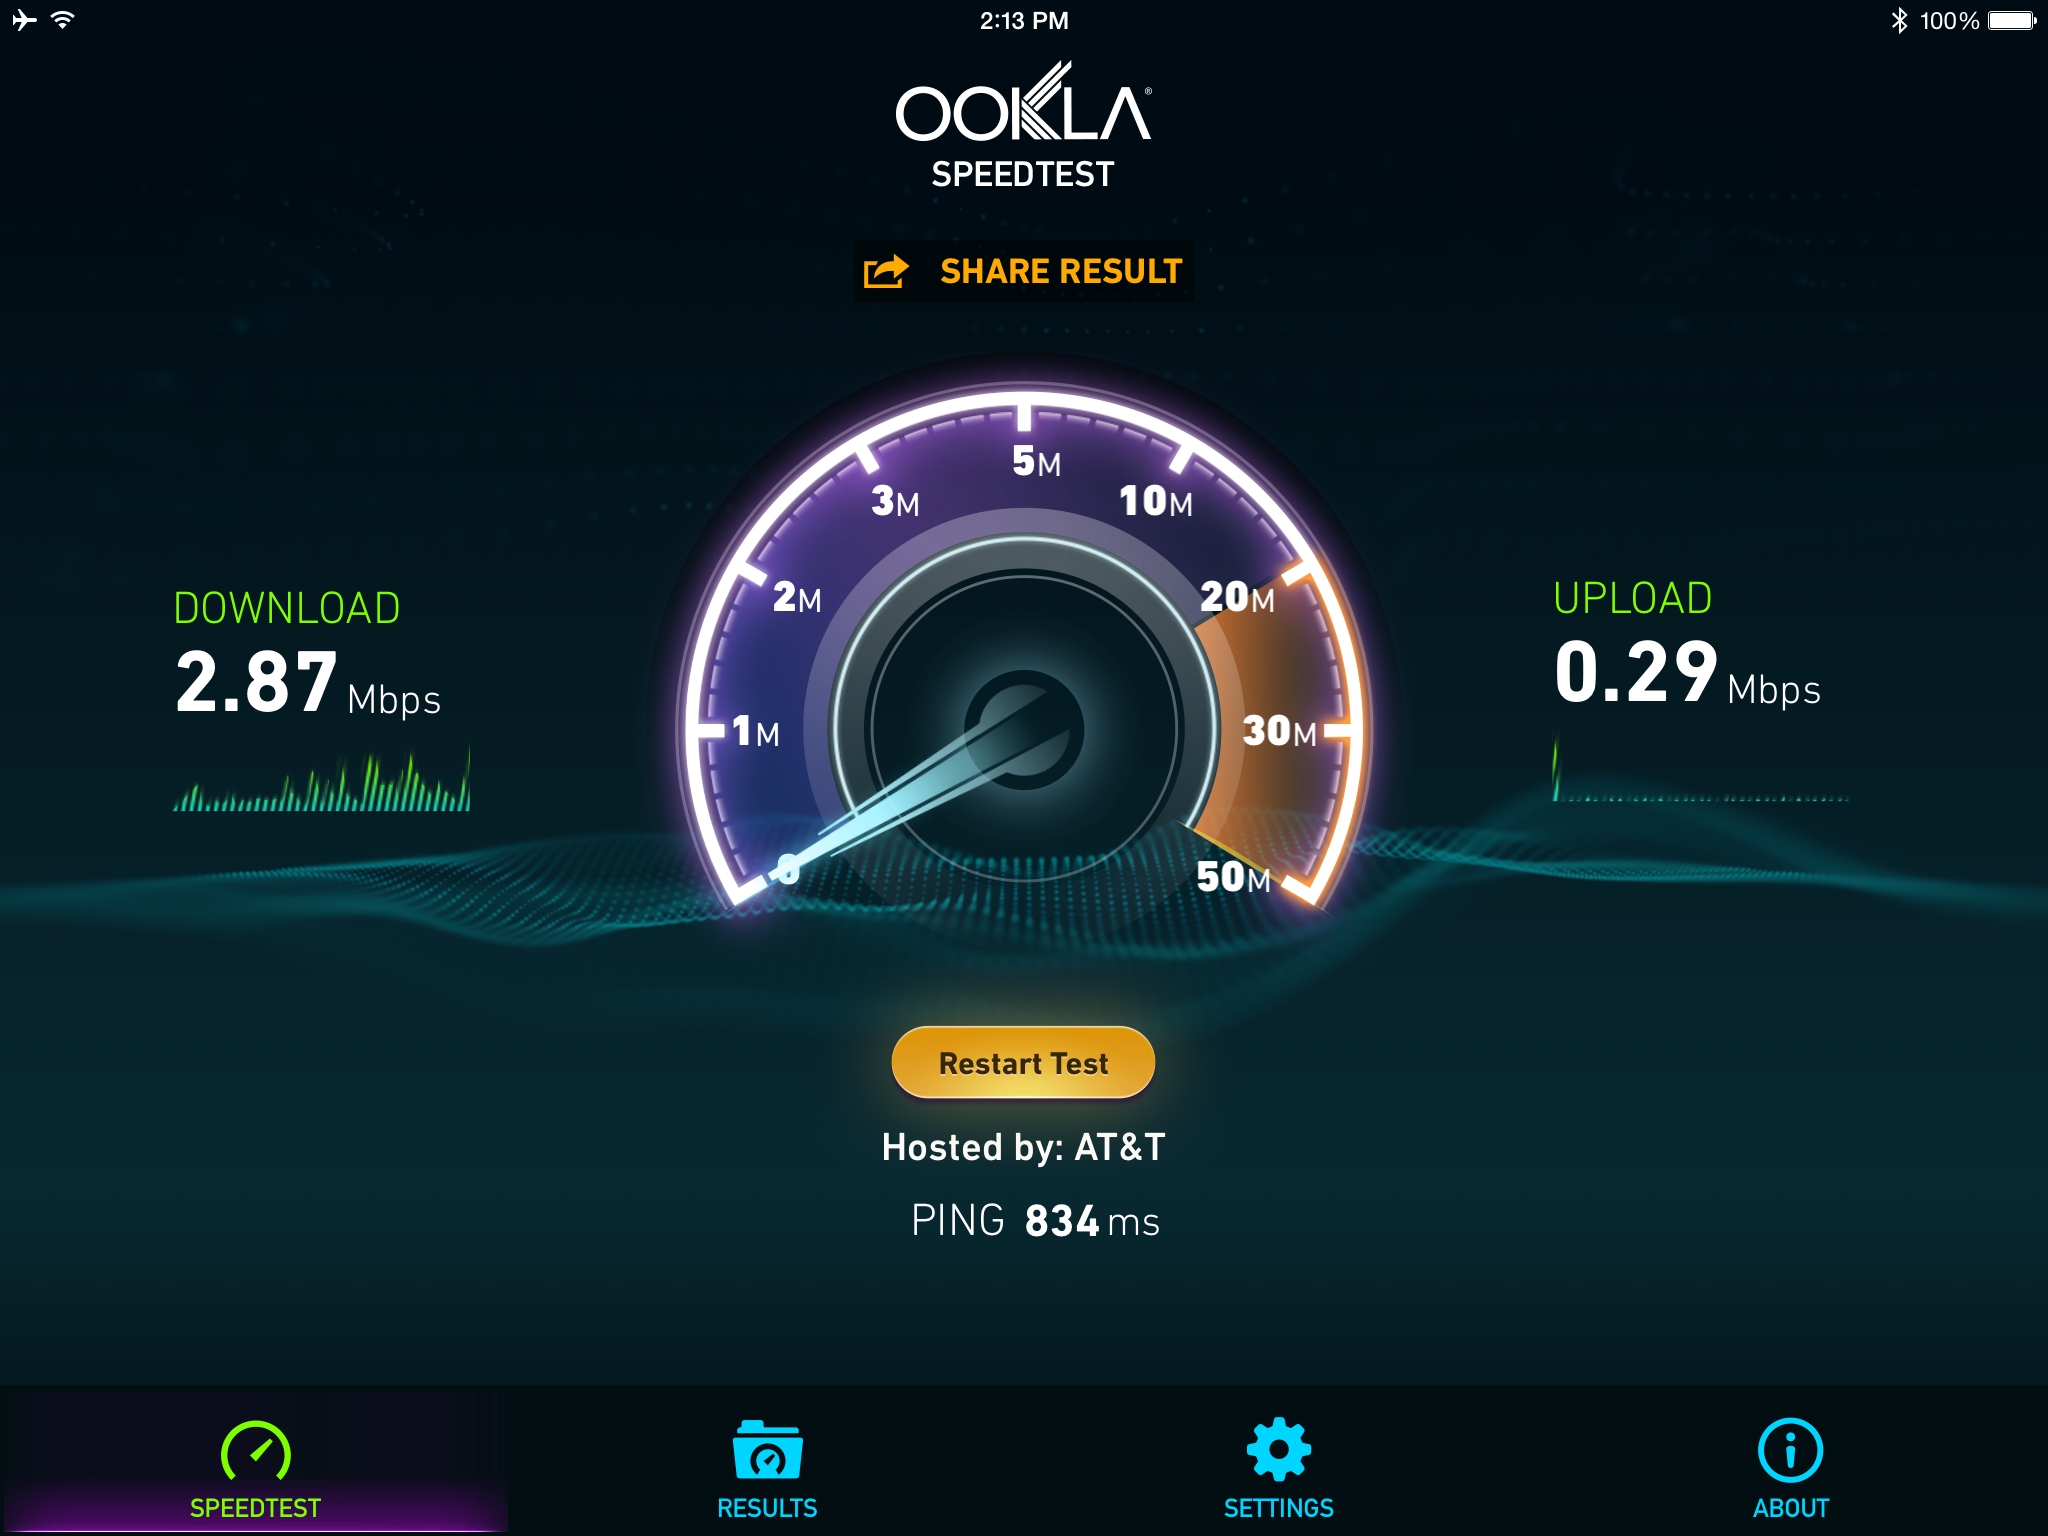
Since connecting to the ground over the ocean is not feasible, any plane offering international service requires satellite connections instead. One of the first thing I did was run 4 consecutive speed tests to get an average speed and while it’s not screaming fast, it’s faster than the domestic service. I’ll take it!


The Bottom Line

I remember wishing for WiFi on long haul flights for years. It almost brings a tear to my eyes to see it finally making its way into my life and I commend Delta for making these investments to make air travel a little less painful. 

See You At Professional Imaging

professional_imaging_2015

Looking forward to seeing many of you at Professional Imaging in the Netherlands this weekend. Should be a lot of fun and a lot of great information passed on from the very talented list of instructors. I’ll be teaching my photography workflow using Lightroom and Photoshop CC. If you attend the show be sure to stop by and say hello. Also if you have any “must shoot” location recommendations be sure to leave a comment below.

You can register here or simply find out more.


Tripod Mount for your Smartphone

arkon-smartphone-tripod-mount

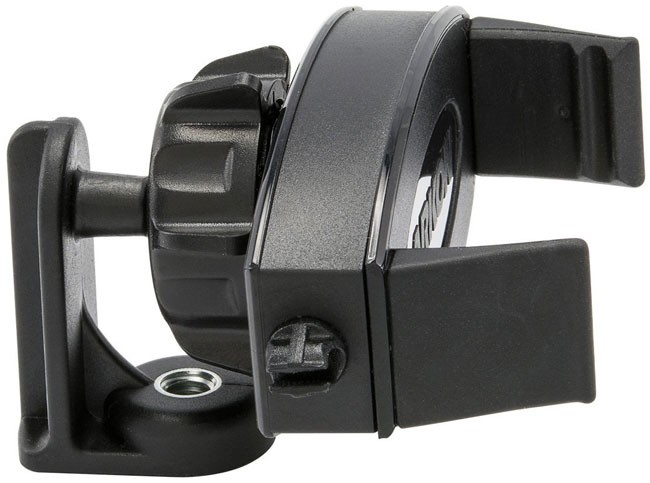
I’ve reviewed tripod mounts for smartphones before, however the good ones I’ve looked at in the past were fine as long as you only wanted to mount your smartphone horizontally. Horizontal mounting is desired by film makers for sure. There are times when you may want a vertical mount especially if you’re shooting stills or time lapse. For this I turned to the good folks over at Arkon (the makers of mounts for just about any device) and sure enough they had one that was exactly what I was looking for. It had to be able to rotate between horizontal and vertical orientation and it had to be big enough to accommodate my iPhone 6 Plus (with my clear case).

arkon-iphone-6-plus-mount

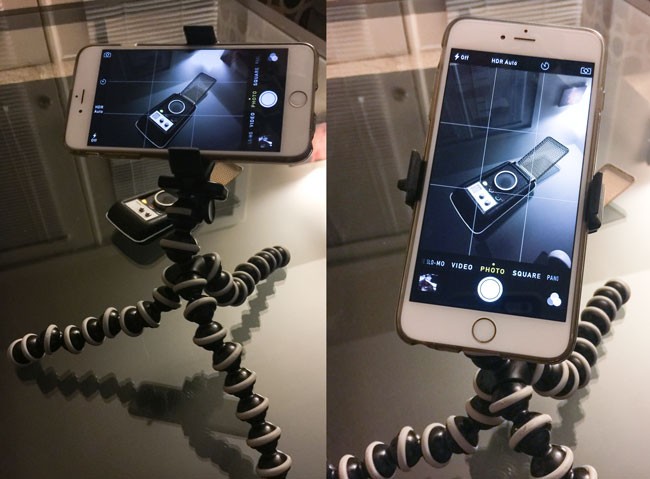
The Arkon Universal Smartphone Holder Tripod Adapter fits the bill nicely. Not only does it rotate between horizontal and vertical orientations, but it also pivots more like a ball head. As you can see in the above photo it also works great if you have a GorillaPod tripod. The Arkon Universal tripod mount for your Smartphone is great option to have in your camera bag or your computer bag because you never know when you want to shoot something that will be difficult to shoot handheld.

iphone_bluetooth-remote

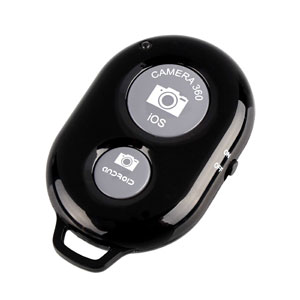
If you’re alone and need a wireless remote for your smartphone, I’ve had good luck with this bluetooth one. Technically all it does on the iPhone is press the up volume button wirelessly which as you probably know snaps a photo.

Get the Arkon Universal Smartphone Holder Tripod Adapter here.

Best Nikon DSLR GPS

di-gpsoncamera.jpg

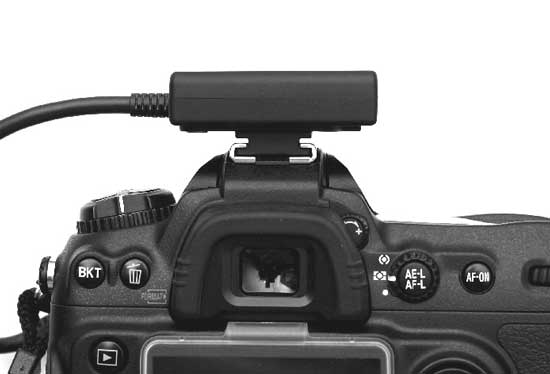
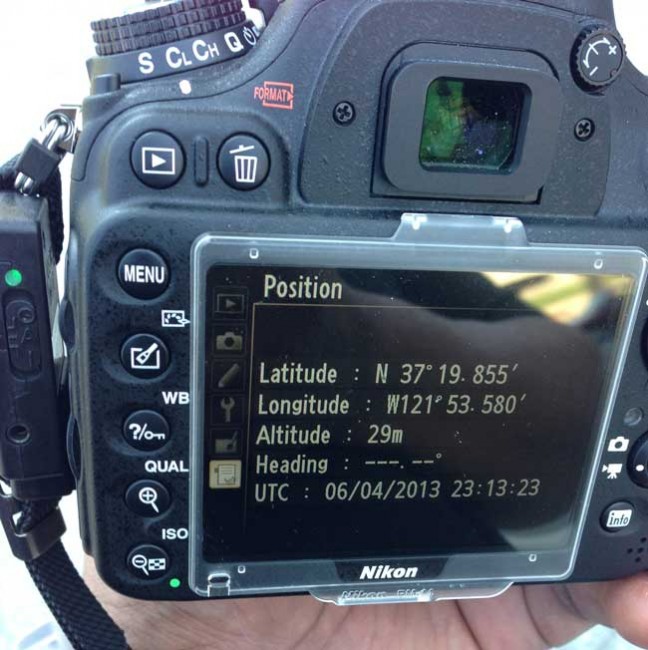
It has been a while since I’ve looked at GPS units for my Nikon DSLRs and yes it’s sad that in 2015 we still have to look at external solutions. However, that is the current state of affairs and the good news is that the prices have come down and the units continue to get better. Recently I was debating going with a NEW Nikon D750 vs a D810. When I was leaning strongly towards the D750 I tested my existing GPS unit (the one on my Nikon D600) and realized that since the GPS port was in a higher spot on the body that my Dawn di-GPS Eco model just wouldn’t work.
di-gps-eco-prosumer

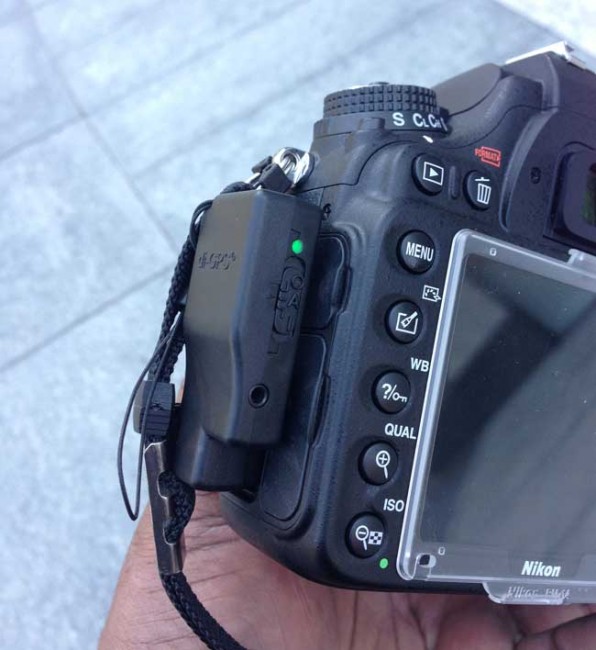
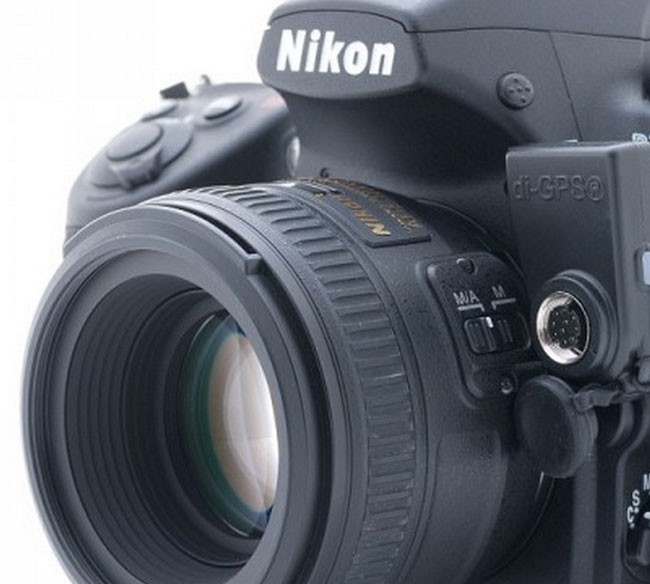
It’s a shame because I really like the flush to the body design of the di-GPS Eco models. I reached out to Dawn Tech to see if there was one on the horizon for the D750 and they informed me that they were working on something, but it wasn’t ready yet. In the mean time I got the UPDATED Mini3 MTK S5. I had worked with the older model in the past and this newer one now includes the “Last Position Memory” function, which is great for those times when you go inside and keep shooting. More importantly it has an even lower power consumption (19mA, less than 1/3 of the current consumption of Nikon’s own GP-1). While it doesn’t have the flush to the body design that I like so much in the di-GPS Eco, it’s very lightweight and can either sit in the hot shoe or attach to the camera strap.

di-gps-eco-pro

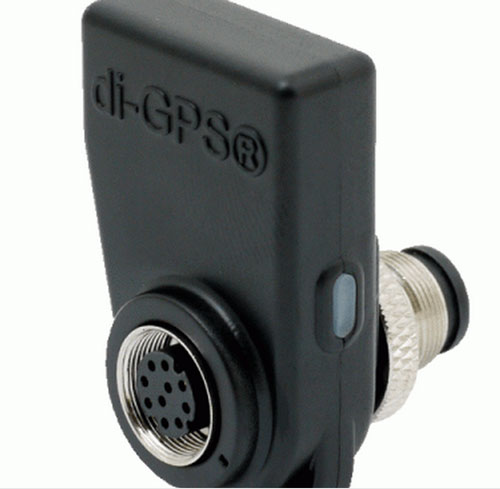
I ultimately decided on and bought the Nikon D810. So this means that I get to use the Eco ProFessional M model. This one has the same “flush” design that I like and it even has the important pass through terminal port so that I can use my cable release or other accessories.

di-gps-eco-pro-detatched

The Bottom Line

di-gps-eco-prosumer-Nikon_d600
Nikon has had GPS support built-in to their DSLRs for years, but still refuses to build the actual GPS receiver in to their DSLR bodies or battery grips.


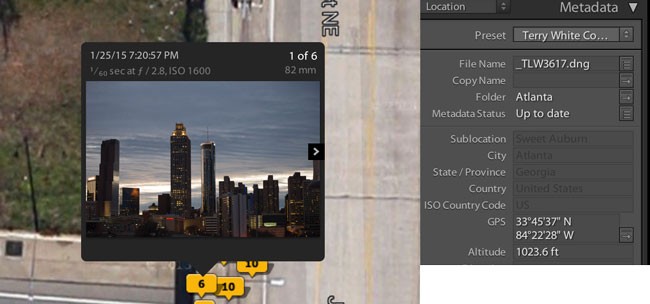
I love geotagging my photos as I take them. I use the Maps module in Lightroom quite a bit for my landscape and travel photos. It’s also easier to answer that “where did you take that shot” question as the galleries on my website also take advantage of this data allowing visitors to see exactly where each shot was taken. Sure there are many solutions and even iPhone apps like this one, but the most accurate and convenient way is to have the GPS data logged right into the metadata of each shot as you take them. While I applaud Nikon for having direct GPS support right in the menu of their DSLRs, it’s a shame that in 2015 we still have to buy “EXTERNAL” modules. As I’ve said many times I’d love to see this either built right in or at least built into an “optional” battery grip. Until that happens The GPS units from Dawn are your best bet.

Lightroom_GPS_Maps_Module
Using the Maps module I can easily see exactly where shots were taken and even copy to GPS data to images that were taken with other cameras that didn’t have GPS.