iPhone 6s Plus Review

iPhone6sPlus-in-my-hand

It’s that time of year again. Once a year at least one new iPhone model comes out and I upgrade to the new model. Ever since the iPhone 3GS Apple has done an incremental update to the iPhone before the next major update. So we’ve had the iPhone 3GS, iPhone 4s, iPhone 5s and now iPhone 6s. Sure we can probably expect and iPhone 7 next year, but the question becomes do you wait or do you upgrade to the 6s or 6s Plus. As usual it really depends on what you have now. If you’re on an older model such as the iPhone 5s or older then the iPhone 6s is a monumental upgrade. If you upgraded to the iPhone 6 or iPhone 6 Plus last year and you’re under a contract then you can probably sit this one out.

iPhone6sPlusBox

What’s New and What’s Cool?

It’s funny when I read comments online proclaiming the iPhone 6s to be EXACTLY the same as the iPhone 6. In other words they claim that there are NO DIFFERENCES. Really? I’m not sure if these are just haters or really uninformed people. While the iPhone 6s and iPhone 6s Plus look pretty much identical to last year’s models, there are significant changes under the hood. Like I said above Apple typically doesn’t change form factor for two models. Look back at the iPhone 3G, iPhone 4, iPhone 5 and iPhone 6. Each one was a significant change in form factor. The “s” models are usual changes all on the inside. The iPhone 6s and iPhone 6s Plus are no different. While they look just like last years models there are some great changes on the inside. Here are a few:

Continue reading “iPhone 6s Plus Review”

The Ultimate Cheat Sheet On Periscope – 10 Killer Tips

periscope-tw-landsape

The latest update to Twitter’s live broadcasting app, Periscope brings the long awaited landscape orientation that it so desperately needed. I have a renewed interest in using Periscope and now have the choice to broadcast in portrait or landscape based on what’s best for the content I’m showing. I’m also noticing more and more people getting on board. That’s why I created this NEW video that goes into detail about How to Get Started on Periscope and it even includes a live Periscope broadcast to show how much fun you can have using Periscope:

I shared some tips in the video, but here are some tips that every Periscope user should know:

Make sure you have sufficient bandwidth. The Periscope app itself does a test before even allowing you to start your broadcast, but I like to know even earlier. So I run the Speedtest App to check my speed. You probably want at least 2mbps upload speed to have a good experience.

Create a compelling title for your broadcast. Remember that you’re competing for the attention of your viewers. If they see an Untitled broadcast or a title that is weak or not very descriptive then they will likely not tap on it to watch. For example I could have titled this post “Periscope tips and tricks”, but “The Ultimate Cheat Sheet On Periscope – 10 Killer Tips” sounds way better. Bonus Tip: Add a few emojis to the title so that it stands out even more.

Time to Break Your Egg. When you first sign up to Twitter or Periscope your profile pic will default to a picture of an egg.

Screenshot 2015-09-13 13.10.05

You need to change it before doing your first broadcast. Unless I know your name, I will likely never tap to watch or follow anyone with an default profile pic. I will dismiss you/it as spam.

Introduce yourself every time you broadcast. This is one that I have to remember to do each time. You might think “why do I need to introduce myself? These are my followers.” That’s true, but what you have to remember is that a lot of people may be watching you for the first time that have not followed you yet. They saw your tweet, they saw someone else’s share, or perhaps they saw your broadcast on the Periscope map. They don’t know you!

Continue reading “The Ultimate Cheat Sheet On Periscope – 10 Killer Tips”

Shooting Time-Lapse with the Nikon D810

nikon_d810_time-lapse_settings

I’m traveling in Asia for the Adobe Create Now/CC Launch tour. My first stop was Auckland New Zealand and my hotel room just happened to have a balcony. Whenever, I have a private balcony that’s an added bonus when it comes to photography because it usually means that I can leave my camera setup for extended periods of time to shoot long exposures and time-lapse scenes. With a beautiful view of the harbor I decided to shoot a time-lapse. Since I don’t shoot time-lapse very often I Googled “best time-lapse settings”. Most of the result offered pretty much the same advice. For your time-lapse to look the best it’s better to use a consistent exposure and shoot in Manual mode as much as possible. This means setting a fixed exposure as well as shooting Manual focus. The reason for this is to keep your camera from changing exposure or focus in each shot, thereby creating a more smooth time-lapse video.

I learned the hard way that this works great except if your scene will change drastically during the shoot. For example, shooting a sunrise means that you will start out shooting in the dark and ending up in the light. The opposite would be the case for shooting a sunset as I attempted above. By keeping the same exposure throughout the scene it went from being properly exposed to completely dark. I salvaged it by combining it with a second one of the same scene after it got dark.

The lesson here is that if the scene is going to change drastically during your time-lapse it’s probably best to shoot it on Aperture Priority mode so that the exposure will be adjusted automatically over time. Learning from this mistake I shot another one in the morning and the results were much better:

The time-lapse above was shot in Aperture Priority and Manual Focus.

Settings and Gear

I took my Nikon D810 on this trip because I knew I’d be traveling to places I’d never been before and wanted to have my best camera with me. I also brought my Gitzo Traveler Tripod and Kirk BH-3 Ballhead. No matter which camera you have, you will definitely need a tripod. The camera will be shooting for several minutes or hours. This also means you’ll want a fresh battery. I wish I had brought my battery grip along to double my shooting time.  If your camera can be plugged into AC that would be best. I used my Nikon 28-300mm lens. I shot using:

  • f/11
  • Aperture Priority
  • Manual Focus
  • 28mm
  • Capturing a frame every 5 seconds
  • Duration 40 minutes to 1 hour 10 minutes depending on how long of a video I wanted at the end.

A note about Time-Lapse on the newer Nikon bodies. Shooting Time-Lapse used to mean shooting hundreds of stills and then putting them together in a video editing program afterwards. Starting with the Nikon D4 the Time-Lapse mode creates a video right in camera. Instead of hundreds of stills on your memory card you’ll have the single video. This is great because it makes the process much much easier and frees up all that space on your memory cards/drives. There was one thing I hadn’t figured on when doing my math. I was figuring video at 30fps. However, I had my D810’s video setting on 1080p 60fps. When I brought my first time-lapse into my computer it was only 8 seconds instead of 15/16 seconds. I scratched my head for a few seconds before it hit me that 60fps means that the time-lapse will be half the time. I stretched duration in Adobe Premiere Pro CC to 15 seconds and the results still looked good.

Here’s one that I shot in Hong Kong during the day. Since the exposure wasn’t going to change I could shoot it all in Manual as originally recommended:

The Bottom Line

Shooting Time Lapse videos can be fun. With newer cameras it’s easier than ever. If you’re in a situation where you can set your camera up for 30 minutes or more on a tripod and shoot a scene you’d be surprised by what takes place during that time. Enjoy!

Going to Photoshop World 2015 in Vegas?

PSW-2015-banner

If so you can SAVE $50 by registering here with the Discount Code: TerryWhite50


Best Tripod for Travel

wpid14561-IMG_8551_sm.jpg

One thing that I’ve learned the hard way more than once is that if you travel to a beautiful location without a tripod, you’re really limiting your potential. If you want to shoot long exposures you need a tripod as they are impossible to shoot handheld. If you want to shoot HDR during the evening or early morning hours you’re going to want a tripod. If you’re going to shoot time lapse then you’re going to want a tripod. I have a GREAT Tripod for travel. I bought it years ago. While I love the fact that it’s carbon fiber and therefore light weight, I wanted to see if there was one that was shorter when folded down? My search lead me to Sirui. I had never heard of them before. However, the specs were what I was looking for:

  • Maximum Height of 56.9″
  • Load Capacity of 26.5 lb
  • 8x Carbon Fiber Legs
  • Forged Aluminum Alloy Chassis
  • Short Center Column for Low-Angle Shots
  • Folds Down to Just 14.6″
  • Weighs Just 2.6 lbs

This one folds down to 14.6″ vs. my Gitzo which folds down to 16.7″. While 2 inches may not sound like much, it actually makes the difference of fitting in my suitcase horizontally instead of diagonally allowing me more room for my clothes and other gear. The maximum height is a little over an inch shorter than my current one, but load capacity is 50% more than my current one. This means it can hold my bigger bodies and lenses. The weight of the Sirui is only .4 lbs more than the Gitzo. Probably the biggest factor to compare is that the Sirui is less than half the price of the Gitzo.

The Sirui T-2205X 5 Section Carbon Fiber Tripod comes with:

  • Short Center Column
  • Padded Travel Bag with Shoulder Strap
  • Allen Keys
  • 6 Year Limited Warranty

The bag is really nice, but it’s really only designed to carry the tripod and the supplied accessories. Like most professional tripods this one does NOT include a ballhead. Once I added my Kirk Ballhead to it, it was a tight fit in the bag, but it did fit.

sirui-tripod

The Bottom Line

There are wide assortment of tripods out there are all different prices and capabilities. If you’re looking for one that is pro level, folds down very compactly and can hold heavy gear, this one will suit you well. This is definitely in the category of Best Tripod for Travel!

You can get the Sirui T-2205X here.

An Affordable Thunderbolt 2 Dock with 4K and Dual Display Support

elgato-thunderbolt2-dock-front

For years now my MacBook Pro has been my primary computer. Now my only desktop computer is my Mac OS X Server. Having a MacBook Pro doesn’t mean that I don’t have a ton of peripherals that I need to connect. The last thing I want to do when I leave or return from a trip is connect a bunch of cables. That’s where a Thunderbolt 2 dock comes in. Although I’ve used a Belkin one for years now, people are always asking for a lower priced alternative. Elgato has created one the fits the bill nicely. For a hundred dollars less than the competition you still get 2 Thunderbolt 2 ports, 3 USB 3.0 ports, 1 HDMI port, 1 Gigabit Ethernet port, and an audio in and audio out port. Really the only thing missing is more USB 3.0 ports and a legacy port like Firewire 800 or eSATA. Since I connect more than 5 USB devices anyway I would still need a USB 3.0 hub. Also most people at this point have probably replaced their older Firewire 800/eSATA devices with newer tech. If you fall into that category then I would save save the hundred bucks and use part of it to buy a USB 3.0 hub.
elgato-thunderbolt2-dock-back

The design is nice and compact and it’s great having the audio ports on the front as well as the 3rd USB 3.0 port capable of charging your mobile device.

elgato_thunderbolt_2_dock_onmydesk

The Bottom Line

If you have a MacBook Pro then having a Thunderbolt 2 dock is a big plus. You’ll enjoy the single Thunderbolt connection and the additional ports. The one thing I wish that these devices offered are more Thunderbolt ports. You really don’t gain any because you have to connect the dock to one of your existing ports taking up a Thunderbolt port on the dock and one on your computer. That leaves you with the same number of Thunderbolt ports that you started with. I would like to see a model with 3 or 4 Thunderbolt ports for true Thunderbolt expansion.

You can get the Elgato Thunderbolt 2 Dock here on sale.

For a few bucks more you can get this one by OWC that has 5 USB 3.o ports and a Firewire 800 port.


Use the Simplicam to monitor your home or office

simplicam

WiFi connected webcams are nothing new. When someone enters this category I quickly look to see if they’re adding anything new or if it’s just a me too product. In most cases there isn’t a whole lot that’s new, but companies do sometimes find a way to improve on an already crowded product category. The Simplicam + Closeli is a standard WiFi connected webcam with a nicer design than most. It has a well thought out base/stand as well as things like a 10 foot “flat” USB cable so that you can more easily hide it in your home. This camera can be monitored from your iPhone, iPad, Android device or web browser.

The setup process is pretty straight forward. Just plug the supplied “short” USB cable into your Simplicam and the other end into your Mac/PC. The software mounts in a volume on your computer that you can run from there. Once you’re in the setup utility you’ll use it to connect the Simplicam to your WiFi network. You’ll also create an account on Closeli.com where you’ll get a year of included cloud recording service. Closeli like others has different plans so that you can go back and review footage from your camera based on motion and sound detection. They also bring “face” detection to the table to distinguish between someone actually entering the room vs. the cat running by. You can get push notifications of any of the aforementioned types of activity. You can also schedule times when notifications need not be received (you’re home) or when the camera should be off. Notifications or not you can see what’s going on in the room on demand by just firing up the Closeli app on your mobile device or logging in with your web browser on your computer. You can export clips or still grabs as need. If you need to talk to the people in the room remotely you have two way audio. Yes there is also night vision.

Here’s a video review of the product.

The Bottom Line

simplicam-Face-Recognition-Manager

While I haven’t reviewed any of the newer cameras in this category lately, I would say that just looking at the specs alone Simplicam brings at least two things to the table over the competition and that’s face detection (a beta feature, which can also be set up to recognize specific faces and can tell you when an unrecognized face enters the room.) and a lower priced cloud storage/recording service. The 720p 107° view camera is also better than my older cameras.

You can get Simplicam HD + Closeli here.

30 Days of Creative Cloud Tutorials – Recap Days 1-8

Adobe_Creative_Cloud

My 30 Days of Creative Cloud Tutorials is off to a great start! If you haven’t been following along, here are the videos you’ve missed:

Day 8 – How to Mask a Moving Object in Your Video with Premiere Pro CC

Day 7 – How to Change the Background in Photoshop CC


Day 6 – How to do an Image Map in Adobe Muse CC


Day 5 – How To Draw in Adobe Illustrator CC with the NEW Pencil Tool


Day 4 – How To Share Files and Folders in Adobe Creative Cloud


Day 3 – How To Place a Photo inside Text in Adobe InDesign CC


Day 2 – How To Rank, Rate and Mark your Photos in Lightroom


Day 1 – How to Do Masking in Adobe Photoshop


Review: Nikon D750 and Nikon 20mm Wide Angle Lens

D750

I must admit that when I first saw the specs for the Nikon D750 I wasn’t really too excited. It fits between the Nikon D610 and D810 both spec wise and price wise. However, I decided to go ahead and take it for a spin if for no other reason than to give my opinion about it to my readers. What I didn’t expect to happen was that I would fall in love with shooting with it.

wpid14192-ATLatNight-Edit_sm.jpg

The Nikon D750 functions pretty much just like my Nikon D600. A few of the controls have been moved around, but certainly nothing you couldn’t get used to very quickly. There is definitely a difference in dynamic range or at least to my eye the D750 does a better job as it should.


Thrilled with the built-in WiFi

D750-wifi-menu

I’ve been complaining for years that DSLRs should have both WiFi and GPS built-in. You can find these features on lower end cameras all day long, but why not the higher end models? My Nikon reps tell me it’s because the alloys used in the pro bodies and I say BS. There has to be a way to have WiFi/GPS AND a metal/weather secure body. It’s not rocket science (we communicate millions of miles with a probe on an asteroid). The D750 answers one of my two wishes. It has built-in WiFi. No need for a small external module. It’s in the camera! Finally! This means that I have a native workflow that I can use to shoot RAW to the 1st card slot and basic JPG to the 2nd card slot. Those small JPGs can be sent to my iPhone or iPad FASTER as I shoot them for review.

D750-shuttersnitch

While this feature works just fine with Nikon’s App, I much prefer ShutterSnitch for iPad and iPhone when I just want to shoot wirelessly to my mobile devices.

Get ShutterSnitch here from the .

Get the Nikon WiFi app here from the .


The camera does a great job with skin tones

wpid14188-UniqueT-0187-Edit_sm.jpg

I shoot a wide range of skin tones in my portrait sessions and I’ve always been happy with the results from my Nikon DSLRs. The D750 continues this tradition giving me great results. The EXPEED 4 sensor is a nice improvement over the EXPEED 3 found in my D600.

wpid14184-UniqueT-0047-Edit_sm.jpg

The colors thus far have been spot on with the D750.

Victoria_Park-0131-Edit


The Nikon 20mm f/1.8 Wide Angle Lens

nikon-20mm

ATL-Hartsfield

I’m sorry that I don’t have a better subject to show off this lens than the airport at night, but the weather here has been kind of sucky for the past few days. Nonetheless, this is a great lens. I already have the Nikon 14-24mm lens, but this one covers the sweet spot for a lot less money. If I didn’t already have a great wide angle lens, I’d get this one in a heart beat!

It’s a fast f/1.8 lens with no distortion that I can see. No fisheye effect, just great wide angle results and great low light performance.


The Bottom Line

d750-back

This camera is a solid upgrade for those looking to step into a 24.3MP full-frame DSLR or those looking for something a little better than the D610. It lists for $1,000 less than the D810. It also has improved video specs now doing 1080p video at 60fps (yes 4K would have been even better, but I’ll take the faster 1080p video for now. My only complaint with this model is that for some reason it seems slow when going into the menu. Normally on all my other Nikon DSLRs the menu comes up the moment you press the button, but for some reason the D750 hesitates for a couple of seconds. I’ve debated going to the Nikon D810 and moving up from my D600, but I think I’ll be taking this intermediate step instead. While I love the more “pro” feel of the D810 and the higher dynamic range, I’m still not thrilled with the 36MP RAW files (or smaller sRAW) file sizes that it produces. For my workflow and the way I shoot the D750 is (as much as I hate to admit it) simply a better fit. Of course that doesn’t mean that I ultimately won’t end up with both bodies 🙂

Get the Nikon D750 Body here.

Get the Nikon 20mm f/1.8 lens here.


Nikon D810 – 1st Impressions

nikon_d810

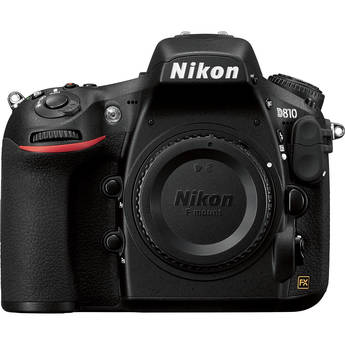
This post is long overdue as I’ve had the Nikon D810 in my hot little hands for a few weeks now. However, I wanted to spend some quality time with it both in studio and out in the field. I must admit that I was a little apprehensive about taking this DSLR for a spin. I already had preconceived notions about how much I would love the image quality, but hate the file size. Nonetheless, I decided to give it a chance and I must say that I’m really impressed and it’s going to be hard to send it back now that my review period has ended.


What’s so cool about the Nikon D810?

wpid13803-KeyanaW-0401_sm.jpg

When the Nikon D800 hit the scene it basically created a new category for Nikon. It wasn’t the D700 replacement that many had hoped for. Instead of was a NEW camera addressing a need that Nikon hadn’t addressed before in a DSLR. It was really targeted to those that needed a higher megapixel camera, but didn’t want to or couldn’t afford a medium format camera. The Nikon D800 and now D810 shoots at 36 megapixels. Wow! Considering that my Nikon D4 only shoots at 16.2MP and my D600 shoots at 24MP, 36MP is 1.5 to 2 times more than what I’m used to. That’s AWESOME on one hand giving me more megapixels to work with especially when cropping is needed, but on the other hand it means that EVERY RAW image I shoot is 1.5 to 2 times larger than I’m used to. This means that memory cards fill up faster, hard drives fill up faster and retouching in Photoshop and cataloging in Lightroom is potentially slower.

Once you get past the pros and cons of the larger RAW files, the next thing that you simply can’t ignore is the incredibly great dynamic range this camera has. This means that highlights that would normally be blown out and shadows that would normally be filled in would actually look better when shot with a Nikon D810. The image quality is STUNNING and noticeably better than that of my other two bodies (although I feel the Nikon D4 performs better in low light).

The next benefit was actually a surprise. My handheld shots are seemingly sharper! Is it possible that this camera performs better when handheld than my other two? It certainly feels that way to me.

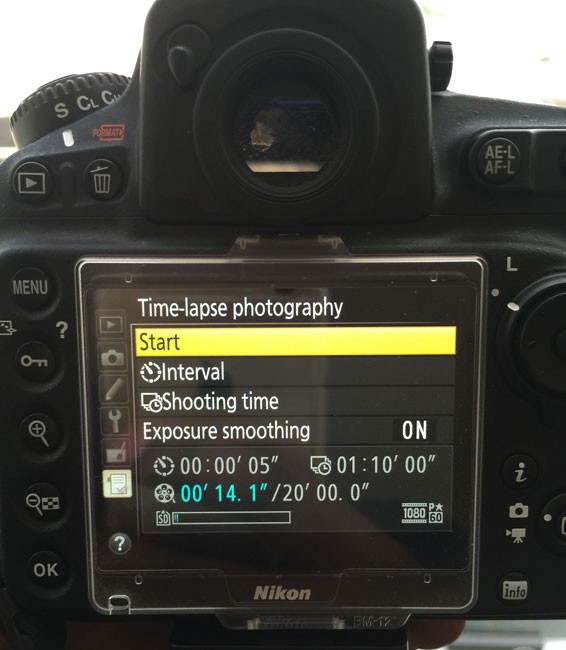
The other benefit of the Nikon D810 that is often overlooked is better DSLR video support. The Nikon D810 can shoot 1080p video at 60 fps. I believe it is the first Nikon DSLR that shoots video at 1080p above 30fps.

Lastly the body itself is solid and feels great, not to mention the distinct quieter shutter sounds.


What wasn’t so cool?

wpid13801-Star_2-0034-Edit_sm.jpg

Sigh, we’re still seeing new bodies like this one from Nikon that don’t include features that I feel should be standard at this point such as WiFi and GPS. I mentioned above that the RAW files are 36MP. They are and there is no way to “dial them down”. This was a showstopper for me with the Nikon D800 and it’s probably the single reason why I wouldn’t sell my D4 and go with a D810. I just don’t want every click of the shutter to be 36MP. When I tested the Nikon D810 in studio I actually used it as a “2nd body”. I got everything dialed in with my D4 and once I liked what I was seeing on the screen, I would pick up the D810 and shoot some shots too. This way I was getting just the shots I wanted with the D810. While I do love the fact that I can now shoot 1080p video at 60fps, it’s probably time for Nikon to start putting 4K video support in their higher end models.

UPDATE: As blog reader Lamont Baker points out in the comments below, the D810 DOES have an sRAW (small RAW) setting.  I overlooked it initially, but then did some testing and found out some interesting facts that still may not make that big of a difference for me. I was bringing in my Nikon D810 images into Lightroom and converting them to DNG format upon import. This was already bringing the file size down significantly. Even when I switched to sRAW I wasn’t seeing much of a difference. So for the sake of this “1st Impression” post, I decided to test the native NEF format and I was shocked at how much bigger they were than what I was already getting with DNG. A native D810 NEF file uncompressed is 73MB in size (7360×4912), that same file as a DNG is only 43.55MB. The D810 ships with the default of COMPRESSED RAW (not sRAW), but smaller. That native NEF file is 46.39MB in size and as a DNG its 41.53MB. They also have compressed LOSSLESS which is 49.40MB as a NEF and 44.76 as a DNG. Lastly I shot an sRAW file (3680×2456) which weighed in at 27.62MB as a NEF and 41.07MB as a DNG! Huh? Yes, a DNG of an sRAW file is actually bigger than the NEF. My guess is that you can compress what’s already compressed.

This has given me some food for thought and an updated Bottom Line below:


The Bottom Line

wpid13805-TLW0022_sm.jpg

It’s hard to go wrong with the Nikon D810. It is the only DSLR that Nikon has released that seriously makes me consider selling my D4 and upgrading/downgrading to it. I’ve said all along that the D4 is overkill for what I do since I don’t need to high fps for what I shoot. However, at the time the D4 was the only body that offered the other features I wanted. Now that the D810 and just announced D750 are here, I could see these two as being my next two new bodies. At least the D750 DOES have built-in WiFi. If you need to print LARGE images, work with challenging lighting conditions, or need a DSLR that rivals medium format cameras, then the D810 is definitely the only body in this game at this price point.

Update: After taking a look at RAW vs sRAW on the D810, it’s even more of a winner. The files even in sRAW (27.62) are still significantly larger than the RAW files of my D4 (15.38MB as DNG), but they are much much much smaller than the original 36MP files of the D800 that kept so many of us away. Having the choice of sRAW definitely makes me want this body even more.

Get the Nikon D810 here.


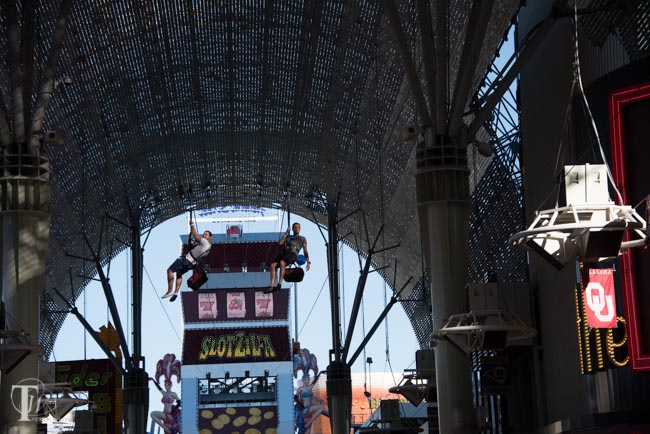
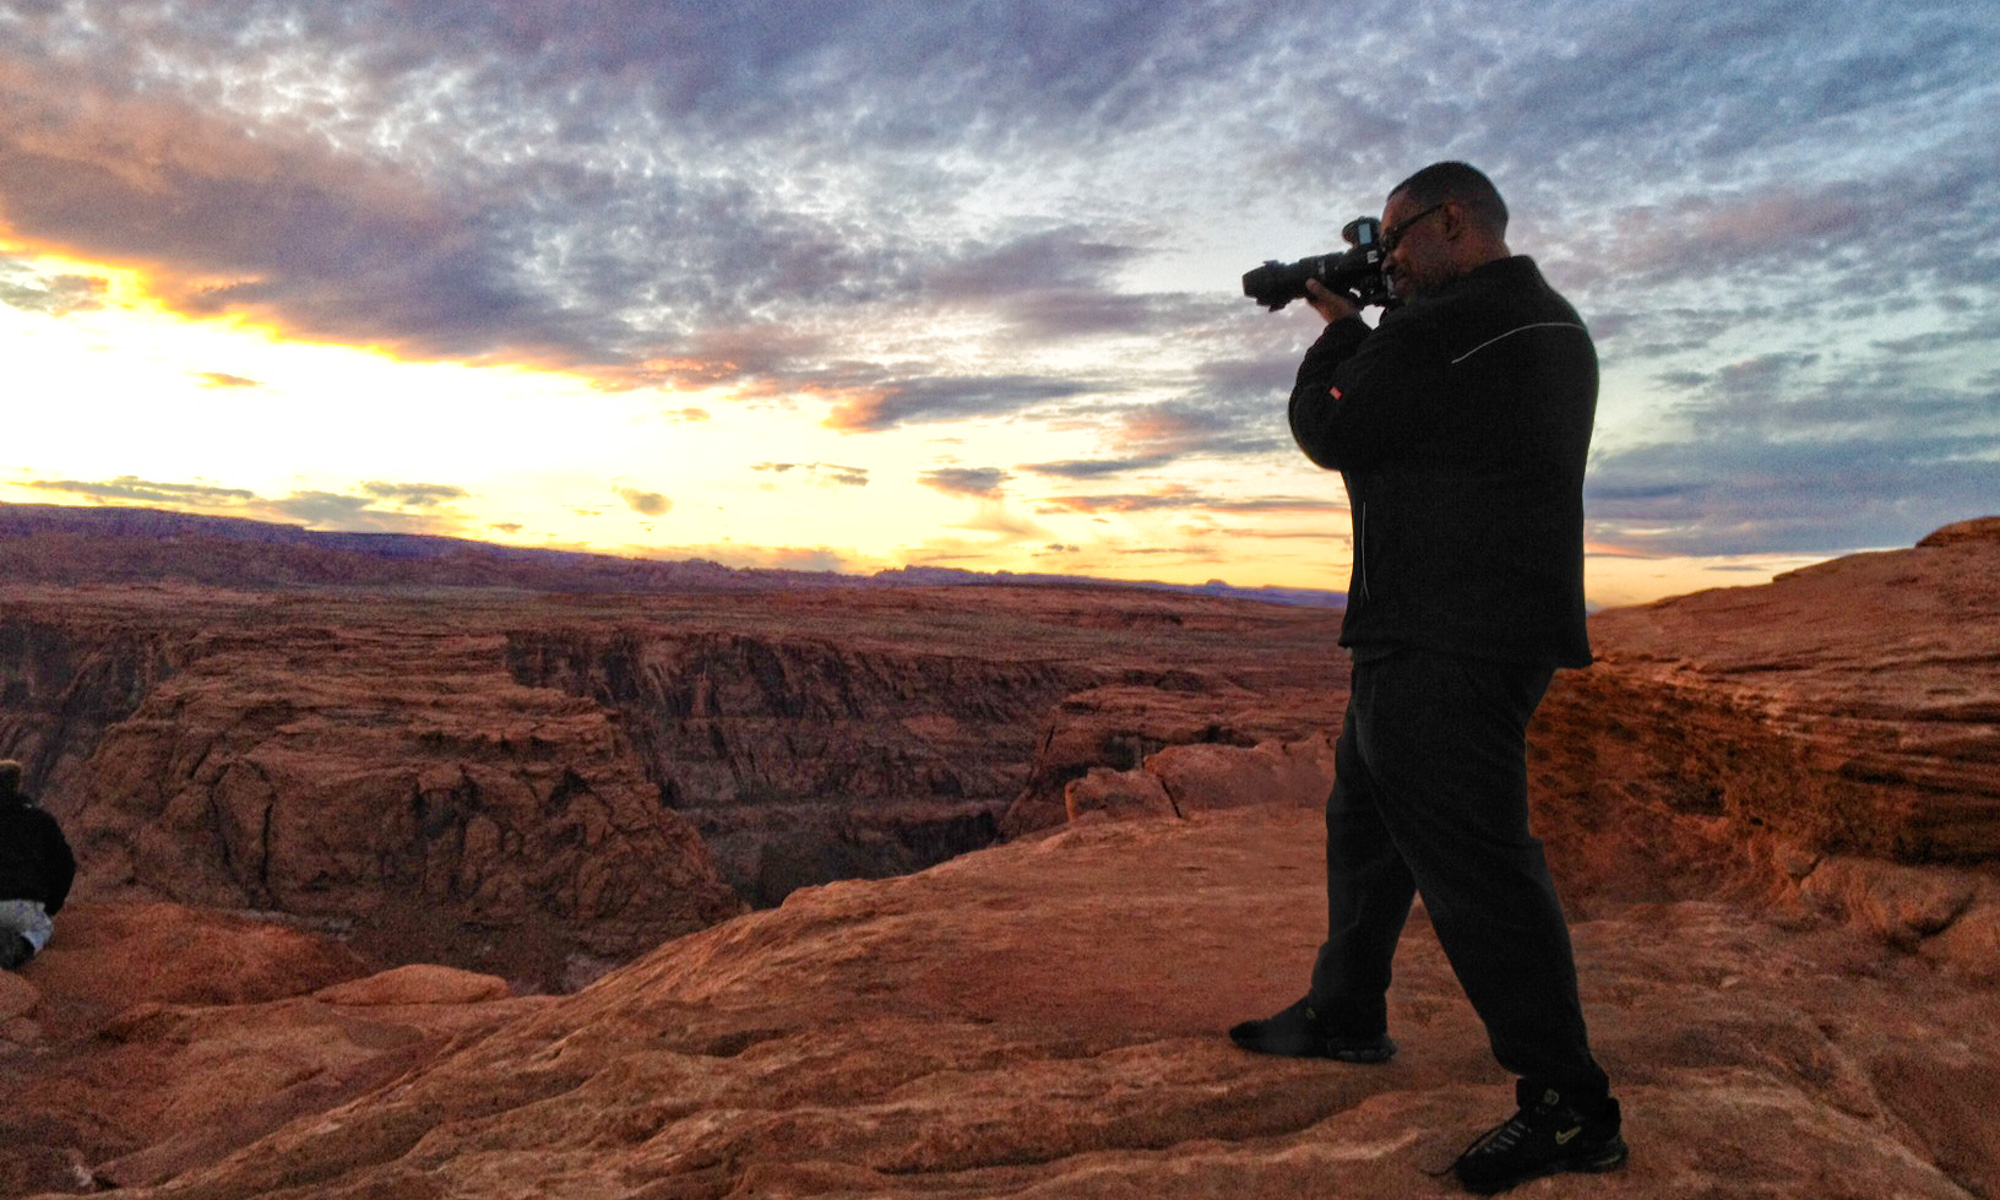
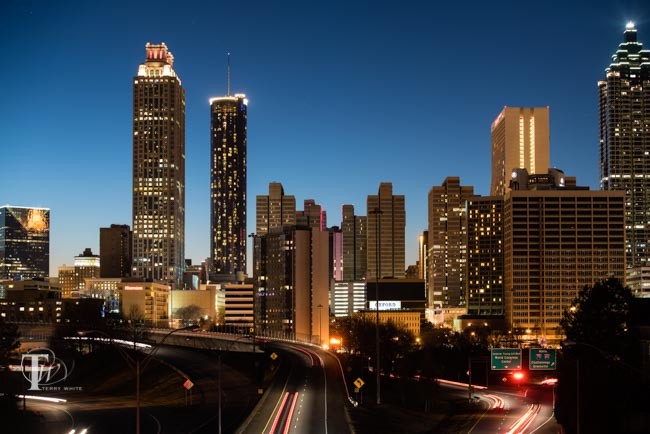
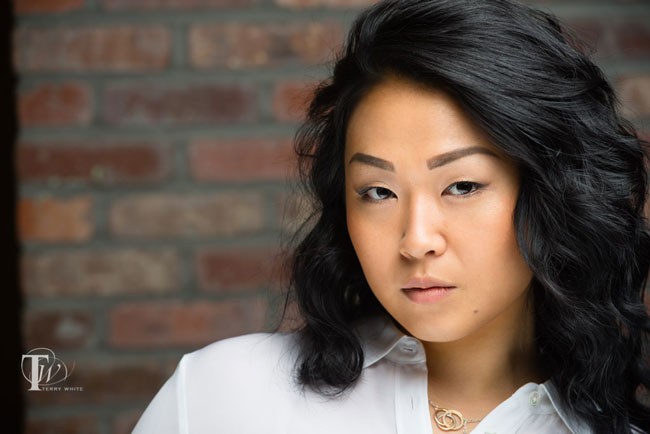
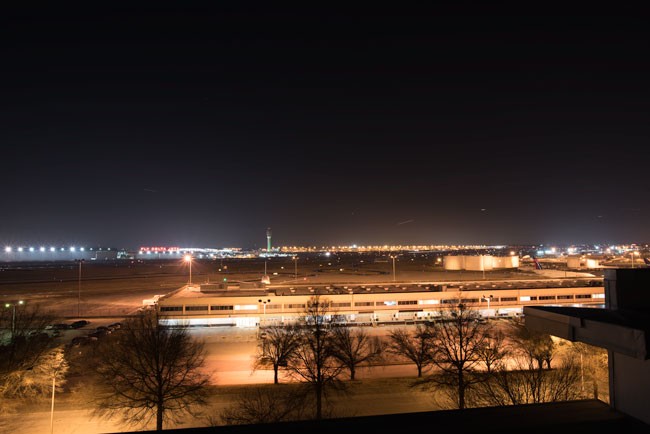
Here are some additional shots (unretouched) from the Nikon D810 to show the dynamic range. Pay attention to the highlights (especially in the Vegas signs) and yet still seeing faces in the shadows under these traditionally bad lighting conditions:

wpid13814-TLW0774_sm.jpg wpid13812-TLW0744_sm.jpg wpid13810-TLW0693_sm.jpg wpid13808-TLW0668_sm.jpg