Nikon D810 – 1st Impressions

nikon_d810

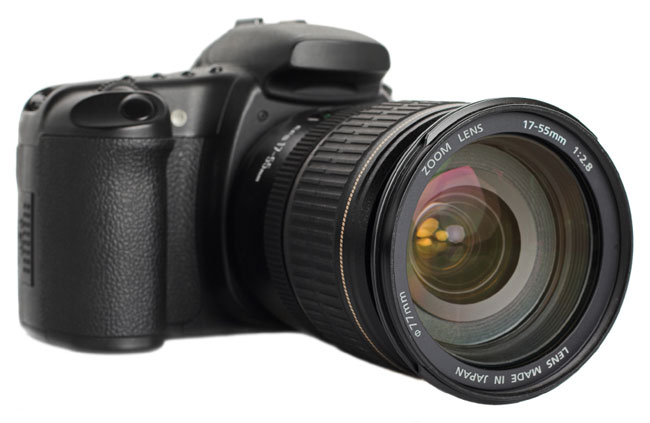
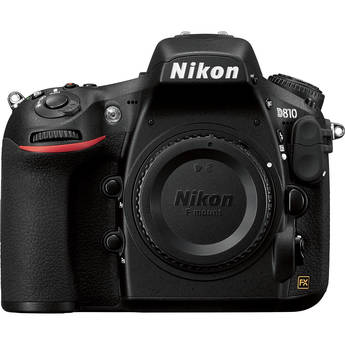
This post is long overdue as I’ve had the Nikon D810 in my hot little hands for a few weeks now. However, I wanted to spend some quality time with it both in studio and out in the field. I must admit that I was a little apprehensive about taking this DSLR for a spin. I already had preconceived notions about how much I would love the image quality, but hate the file size. Nonetheless, I decided to give it a chance and I must say that I’m really impressed and it’s going to be hard to send it back now that my review period has ended.


What’s so cool about the Nikon D810?

wpid13803-KeyanaW-0401_sm.jpg

When the Nikon D800 hit the scene it basically created a new category for Nikon. It wasn’t the D700 replacement that many had hoped for. Instead of was a NEW camera addressing a need that Nikon hadn’t addressed before in a DSLR. It was really targeted to those that needed a higher megapixel camera, but didn’t want to or couldn’t afford a medium format camera. The Nikon D800 and now D810 shoots at 36 megapixels. Wow! Considering that my Nikon D4 only shoots at 16.2MP and my D600 shoots at 24MP, 36MP is 1.5 to 2 times more than what I’m used to. That’s AWESOME on one hand giving me more megapixels to work with especially when cropping is needed, but on the other hand it means that EVERY RAW image I shoot is 1.5 to 2 times larger than I’m used to. This means that memory cards fill up faster, hard drives fill up faster and retouching in Photoshop and cataloging in Lightroom is potentially slower.

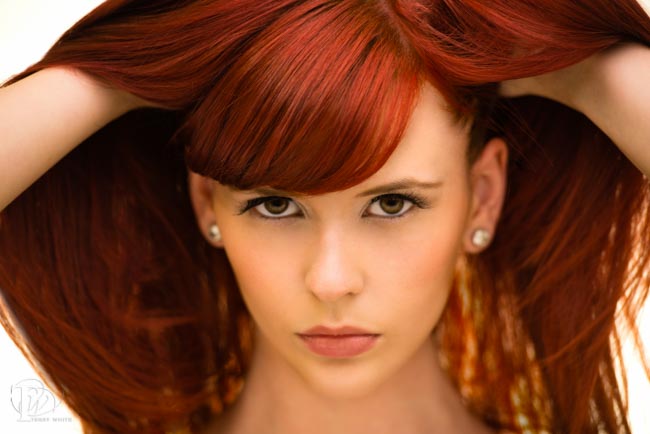
Once you get past the pros and cons of the larger RAW files, the next thing that you simply can’t ignore is the incredibly great dynamic range this camera has. This means that highlights that would normally be blown out and shadows that would normally be filled in would actually look better when shot with a Nikon D810. The image quality is STUNNING and noticeably better than that of my other two bodies (although I feel the Nikon D4 performs better in low light).

The next benefit was actually a surprise. My handheld shots are seemingly sharper! Is it possible that this camera performs better when handheld than my other two? It certainly feels that way to me.

The other benefit of the Nikon D810 that is often overlooked is better DSLR video support. The Nikon D810 can shoot 1080p video at 60 fps. I believe it is the first Nikon DSLR that shoots video at 1080p above 30fps.

Lastly the body itself is solid and feels great, not to mention the distinct quieter shutter sounds.


What wasn’t so cool?

wpid13801-Star_2-0034-Edit_sm.jpg

Sigh, we’re still seeing new bodies like this one from Nikon that don’t include features that I feel should be standard at this point such as WiFi and GPS. I mentioned above that the RAW files are 36MP. They are and there is no way to “dial them down”. This was a showstopper for me with the Nikon D800 and it’s probably the single reason why I wouldn’t sell my D4 and go with a D810. I just don’t want every click of the shutter to be 36MP. When I tested the Nikon D810 in studio I actually used it as a “2nd body”. I got everything dialed in with my D4 and once I liked what I was seeing on the screen, I would pick up the D810 and shoot some shots too. This way I was getting just the shots I wanted with the D810. While I do love the fact that I can now shoot 1080p video at 60fps, it’s probably time for Nikon to start putting 4K video support in their higher end models.

UPDATE: As blog reader Lamont Baker points out in the comments below, the D810 DOES have an sRAW (small RAW) setting.  I overlooked it initially, but then did some testing and found out some interesting facts that still may not make that big of a difference for me. I was bringing in my Nikon D810 images into Lightroom and converting them to DNG format upon import. This was already bringing the file size down significantly. Even when I switched to sRAW I wasn’t seeing much of a difference. So for the sake of this “1st Impression” post, I decided to test the native NEF format and I was shocked at how much bigger they were than what I was already getting with DNG. A native D810 NEF file uncompressed is 73MB in size (7360×4912), that same file as a DNG is only 43.55MB. The D810 ships with the default of COMPRESSED RAW (not sRAW), but smaller. That native NEF file is 46.39MB in size and as a DNG its 41.53MB. They also have compressed LOSSLESS which is 49.40MB as a NEF and 44.76 as a DNG. Lastly I shot an sRAW file (3680×2456) which weighed in at 27.62MB as a NEF and 41.07MB as a DNG! Huh? Yes, a DNG of an sRAW file is actually bigger than the NEF. My guess is that you can compress what’s already compressed.

This has given me some food for thought and an updated Bottom Line below:


The Bottom Line

wpid13805-TLW0022_sm.jpg

It’s hard to go wrong with the Nikon D810. It is the only DSLR that Nikon has released that seriously makes me consider selling my D4 and upgrading/downgrading to it. I’ve said all along that the D4 is overkill for what I do since I don’t need to high fps for what I shoot. However, at the time the D4 was the only body that offered the other features I wanted. Now that the D810 and just announced D750 are here, I could see these two as being my next two new bodies. At least the D750 DOES have built-in WiFi. If you need to print LARGE images, work with challenging lighting conditions, or need a DSLR that rivals medium format cameras, then the D810 is definitely the only body in this game at this price point.

Update: After taking a look at RAW vs sRAW on the D810, it’s even more of a winner. The files even in sRAW (27.62) are still significantly larger than the RAW files of my D4 (15.38MB as DNG), but they are much much much smaller than the original 36MP files of the D800 that kept so many of us away. Having the choice of sRAW definitely makes me want this body even more.

Get the Nikon D810 here.


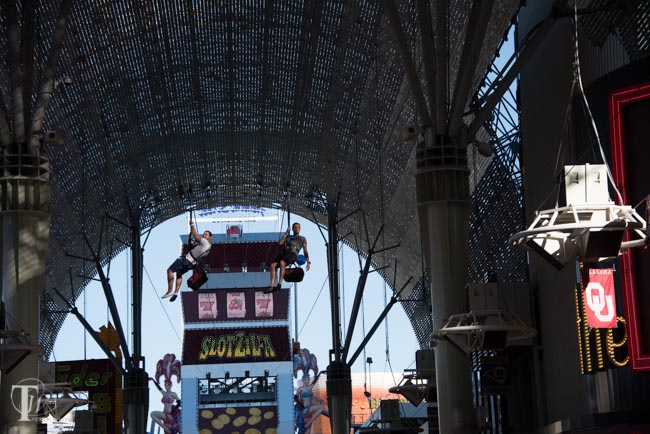
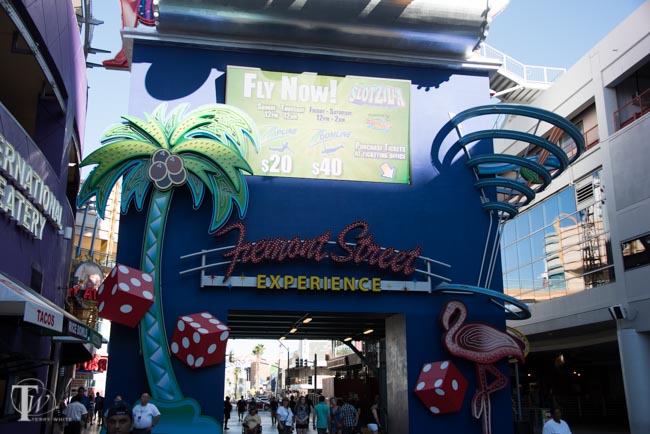
Here are some additional shots (unretouched) from the Nikon D810 to show the dynamic range. Pay attention to the highlights (especially in the Vegas signs) and yet still seeing faces in the shadows under these traditionally bad lighting conditions:

wpid13814-TLW0774_sm.jpg wpid13812-TLW0744_sm.jpg wpid13810-TLW0693_sm.jpg wpid13808-TLW0668_sm.jpg


If you could design a DSLR, what would it have in it?

Image compliments of iStockphoto.com

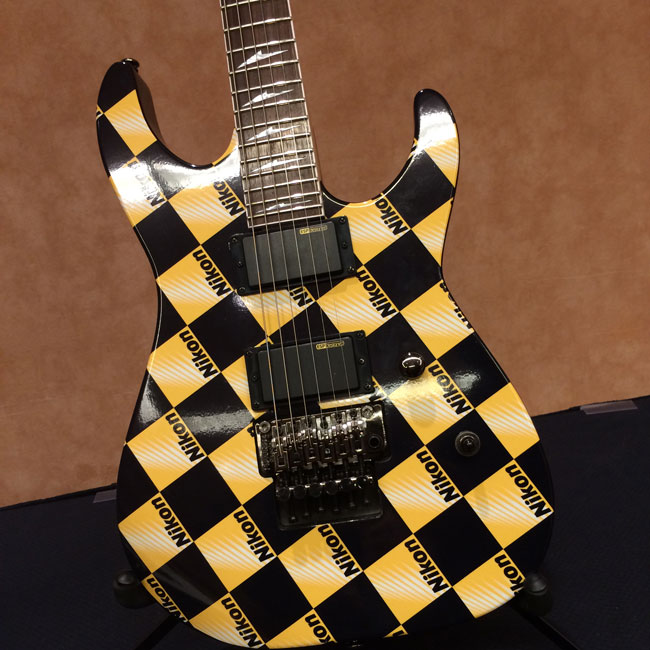
Last week while I was at Photoshop World, I stopped in to drop off my Nikon D600 for cleaning at the Nikon lounge. They offered a GREAT FREE cleaning service to all attendees and cleaned over 400 bodies. While hanging out in the lounge and catching up with my friends from Nikon I took a shot of the one of a kind Nikon guitar that they were giving away.

nikon-guitar

One of the Nikon reps started giving me crap (in fun) about shooting it with my iPhone instead of my Nikon camera. I threw it right back at him and said “well if this $3,300 Nikon D810 had WiFi built in and social sharing, then maybe I would have taken the shot with it instead.” Then we got into a debate about built-in WiFi and why the magnesium (metal) bodies didn’t have it. I said “so you mean to tell me that there’s just no way possible to design a metal body with Wifi? Really?” He couldn’t argue with me anymore. Nonetheless, I used the tool (in this case my iPhone 5s) that would get the job of shooting and sharing a shot on social media most efficiently. This friendly debate and jabbing got me to thinking (once again) about my dream DSLR body and what features it would have in it. Here are just a few of mine:

  • 16-24MP (36MP is GREAT, but only if they let me dial it down to smaller RAW file when I want)
  • Native DNG support
  • Built-in WiFi
  • Built-in GPS
  • Touch screen with customizable menus like a smartphone
  • 4K Video (not that I need that right now, but we are dreaming)
  • Very water resistant if not waterproof
  • Super light weight and rugged
  • Wireless control built-in to trigger from a mobile device and see a Live View

Now I know that many of the features above can be done with add-on accessories, but it’s 2014 and these things should be standard, especially on higher end models. Even for those that would say that they don’t want or need all of those things and therefore don’t want to have to pay for them by default, then I say at least build them all into an optional battery grip. That I buy the grip that adds ALL the modern features to my DSLR.

So I ask you, what would your list have?


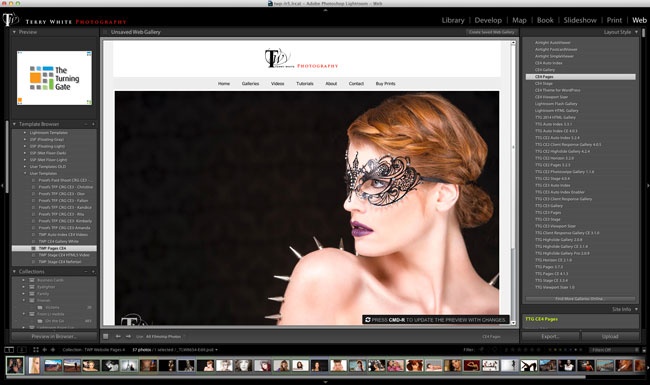
I Built My Photography Website with Lightroom and TTG

twp-ttg-ce4-web-publishing-Lightroom

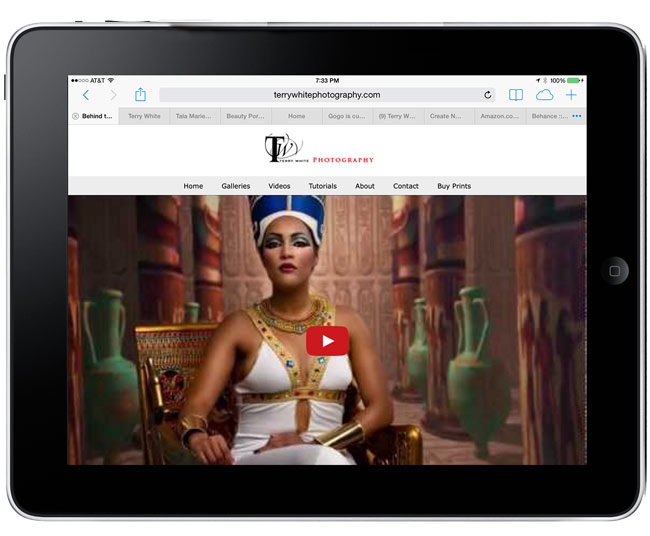
As much as I love using Adobe Muse CC to create websites like macgroup.org, I have one website that was better to build using Lightroom 5 and the NEW CE4 Web Publishing Suite from The Turning Gate. My terrywhitephotography.com site is built 100% from Lightroom and the plug-ins from The Turning Gate. While I can certainly have a more customized site using Adobe Muse CC, the one thing that makes it better to do this site in Lightroom is the ease of updating it when I have new photos and videos.

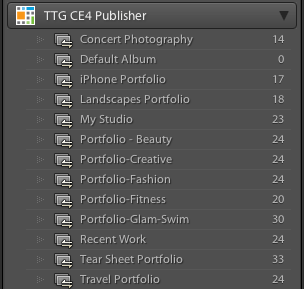
It starts with Collections

TTG-collections-publisher

Each of my Portfolios are Collections in Lightroom and from there I can sort images, add, and remove images at any time. My website has a slideshow on the home page and again that’s simply controlled by another collection that I can change at any time. One of the BEST features of the CE4 Web Publishing Suite is the “Publisher” plug-in. Once you set this up all you have to do to update your website is add/remove images from the Collection and hit the Publish button. Behind the scenes the images are uploaded to your hosting provider and put right into your galleries. I can’t believe how easy and fast it is to update my website at any time. This is the main reason why I prefer Lightroom for this site instead of Muse. I’m constantly changing my “Recent Work” gallery and it’s so easy to do it with the collection in Lightroom and hit the Publish button as opposed to manually exporting the images and having to update a slideshow in Muse. Again I LOVE Adobe Muse CC, but this workflow rocks in Lightroom!


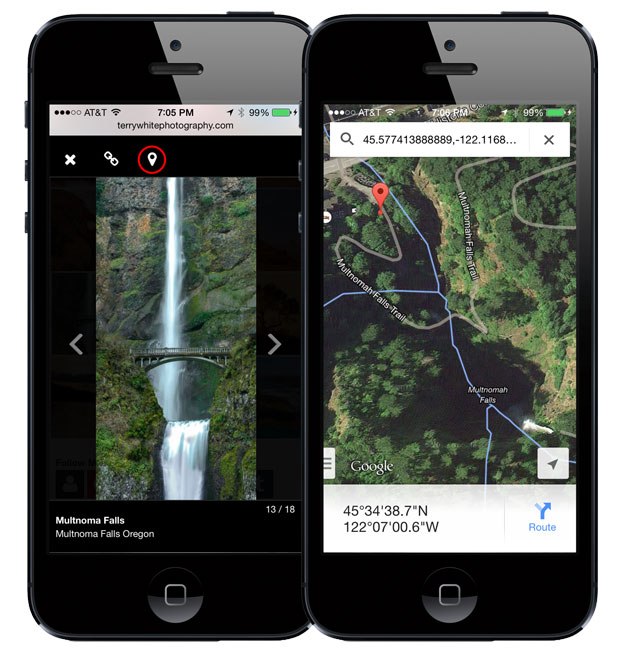
Yep it’s Responsive

twp-landscapes-iphone

All of the modules/plug-ins used in the CE4 Web Publishing Suite use modern web technologies such as Responsive web design/CSS that looks good on desktops, tablets and mobile phones. This way I know that visitors to my site will see my work the way I intend them to no matter what device they view it on. My photos and videos playback great on all platforms. Even my landscapes will show the location where they were shot if the use taps/clicks on the location icon.


It works with Videos too

twp-video-ipad

The CEW Web Publishing Suite supports HTML 5 video that you host on your site or videos from YouTube and Vimeo. You can even mix them as I have some in HTML 5 and one from YouTube. Again using the Publisher plug-in I can add new videos with ease.

Watch me do a LIVE update to my site in this short clip


A GREAT Client Response Gallery

TTG-CRG-chrome-mac

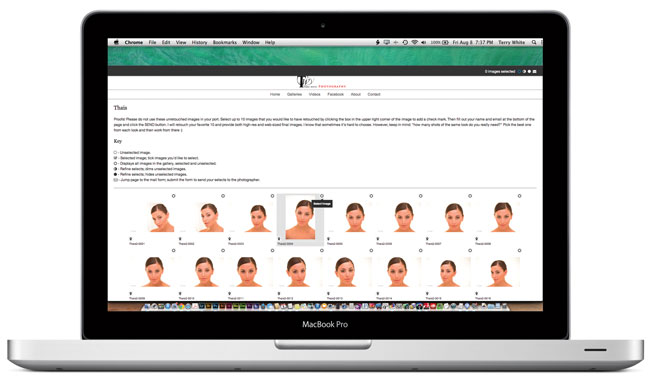
Although it’s not a part of my main site, another one of The Turning Gate plug-ins that I couldn’t imagine life without is the Client Response Gallery. This is the one that I use when I want to send a client their proofs and have them make their choices/selections on the web and send them back to me from the site. Even if you’re not going to build your website with the CE4 Web Publishing Suite, you should still check out the Client Response Gallery Plug-in for Lightroom.


The Bottom Line

My photography is my hobby and my way to express my creativity. Since I don’t have a staff or web team I have to do everything myself. The CE4 Web Publishing Suite from The Turning Gate makes my life so much easier and as I always say, “If a website is easy to update you will update it more often, if it’s not you won’t!” My photography website is always up to date because I manage all my photos with Lightroom and updating my website is as easy as clicking a button.

Learn more about The Turning Gate CE4 Web Publishing Suite here.


Great hosting matters too

I’m going to do a separate post on my recent move to Bluehost.com, but they totally ROCK! I moved all my main sites there and haven’t had a single problem. It’s such a relief knowing that my sites are UP and that if there is a problem they have 24/7 phone support with people located here in the U.S. Highly Recommended!


Adobe Lightroom 5.6 and Adobe Camera RAW 8.6 are here with Nikon D810 support and more

nikon_d810

I actually have a Nikon D810 on loan for review and I’ll be posting my initial impressions of it soon. One of the things that’s going to make it much easier for my to take the D810 through its paces is having Nikon D810 native RAW support in both Lightroom 5 and Adobe Camera RAW (ACR). Well that wait is over as they are now available. Here are the release notes from the team:

Lightroom 5.6

Lightroom_totem

is now available as a final release on Adobe.com and through the update mechanism in Lightroom 5. The goal of this release is to provide support for additional camera raw support, lens profile support and address bugs that were introduced in previous releases of Lightroom.

Release Notes

New Camera Support in Lightroom 5.6

  • Nikon D810 (Yay!)
  • Panasonic LUMIX AG-GH4
  • Panasonic LUMIX DMC-FZ1000

New Lens Profile Support in Lightroom 5.6


 Mount  Name
 Canon  CanonEF-S10-18mmf/4.5-5.6ISSTM
 Canon  CanonEF16-35mmf/4LISUSM
 Canon  Tamron28-300mmf/3.5-6.3DiVCPZDA010E
 Canon  Tamron18-200f/3.5-6.3DiIIIVCB011EM
 Nikon  Nikon1NIKKORVR70-300mmf/4.5-5.6
 Nikon  Tamon28-300mmf/3.5-6.3DiVCPZDA010N
 Pentax  Sigma18-35mmf/1.8DCHSMA013
 PhaseOneA/S  SchneiderKreuznachLS40-80mmf/4.0-5.6
 SonyAlpha  Sigma18-35mmf/1.8DCHSMA013
 SonyAlpha  Sony28mmf/2.8
 SonyAlpha  Sony16mmf/2.8Fisheye
 SonyAlpha  Sony100mmf/2.8MACRO
 SonyAlpha  SonyDT16-105mmf/3.5-5.6 
 SonyAlpha  SonyDT18-200mmf/3.5-6.3
 SonyAlpha  SonyDT18-250mmf/3.5-6.3
 SonyAlpha  Sony70-200mmf/2.8G
 SonyAlpha  Sony70-300mmf/4.5-5.6GSSM
 SonyAlpha  Sony70-400mmf/4-5.6GSSM
 SonyAlpha  Sony70-400mmf/4-5.6GSSMII
 SonyAlpha  Sony135mmf/2.8[T4.5]STF
 SonyAlpha  Sony300mmf/2.8GSSMII
 SonyE  ZeissTouit2.8/50M

Please note – the profile for the newly added Canon EF 16-35mm f/4L IS USM lens is not automatically located when applying lens profile corrections. This is a bug and we will fix it in an future release. The workaround is to:

– Manually select the profile and choose “Save New Lens Profile Defaults” in the Setup menu on the Profile tab. From then on, the lens should automatically select when the profile is enabled.

Bugs Corrected in Lightroom 5.6

  • Collections with a custom sort order would sometimes not properly sync with Lightroom mobile.
  • Updated the “Adobe Standard” color profile for the Nikon D810. Please note that this only impacts customers who used Camera Raw 8.6 or DNG Converter 8.6 to convert NEF raw files from the D810 to DNG
  • Star ratings set in Lightroom mobile did not properly sync to Lightroom desktop. Please note that this only occurred on images that were added to Lightroom mobile from the camera roll
  • Resolved the issues causing the persistent “Syncing … images” state that some of our customers have reported.”
  • Star ratings would sometimes not sync from Lightroom desktop to Lightroom mobile. Please note that this only occurred when attempting to sync a Collection that contained more than 100 photos that already contained star ratings.
  • Added information to the “System Info” dialogue to help designate if the customer installed Lightroom from the Creative Cloud.
  • Unable to open sRaw files from the Nikon D810. Please note that this only impacted customers that converted D810 sRaw files to DNG in either Camera Raw 8.6 RC or DNG Converter 8.6 RC.
  • Images with invalid GPS coordinates would not properly sync with Lightroom mobile
  • Lightroom occasionally crashed when changing image selection on Windows. Please note that this only occurred on the Windows platform.
  • JPEG files exported from Lightroom would not open or be available to edit within Canon Digital Photo Professional application software.
  • Lightroom would run in reduced functionality mode when it should not.

Download Links:
Lightroom 5.6:
Mac | Win

Camera RAW 8.6

Adobe Camera RAW 8.6 has the same camera support and lens profile support listed above that Lightroom 5.6 has. Camera Raw 8.6 is now available as a final candidate on Adobe Labs for Photoshop CS6 and Photoshop CC. This release improves performance when batch processing images, both through the Save button in Camera Raw and when converting images to DNG in the DNG Converter. DNG Converter 8.6 is provided for customers using versions of Photoshop older than Photoshop CS6. As mentioned here, updates to Camera Raw 8 for Photoshop CS6 only include new camera support, lens profile support, and bug fixes. The new features listed in the release notes are only available in Photoshop CC.

Camera Raw 8.6 adds camera matching color profiles for the following camera models:

Sony DSC-RX100 III

Sony A7S (ILCE-7S)

Sony Alpha SLT-A77 II (ILCA-77M2)

Camera Raw 8.6 introduces the following new features for Photoshop CC customers:

– Improved performance when batch processing images via the Save button (in Camera Raw) and when converting images to DNG (in DNG Converter). The performance improvements are available only on 64 bit systems.

Bug Fixes:

Fixed crash on launch in some cases on Hi DPI (Retina) systems.

Fixed crash when opening some Sigma SD9 raw files.

Fixed issue with JPEG images saved by Camera Raw not readable in some external applications.

Fixed automatic lens profile selection for Leica M (Typ 240) when using most recent firmware version.

Fixed issue with some Hasselblad H5D-50c and H5D-60 3FR raw images appearing slightly too dark. Unfortunately, this fix may affect the appearance of existing images captured with this combination of settings. It is recommended that you (1) purge the Camera Raw cache via the Camera Raw Preferences dialog, and (2) review previously captured images for unexpected brightness changes.

Fixed bug with converting Nikon D810 and Nikon D4S sRaw files to DNG.

Tweaked and updated the Adobe Standard color profile for the Nikon D810. Please note that this only impacts customers that used Camera Raw 8.6 RC with the Nikon D810.

Please note – If you have trouble updating to the latest ACR update via the Creative Cloud application, please refer to the following plugin installation:

Download Links

DNG Converter 8.6

Mac |  Win

Thank You


How To Shoot Tethered to Lightroom Mobile

wpid13647-14_0014_KandiceTurnbough1-121_sm.jpg

Lightroom has allowed for USB tethered capture from popular Nikon and Canon cameras for several years now. However, I can’t tell you how many people have asked me about tethering directly to an iPad pretty much since the 1st shipped in 2010. Four years later, while there are several shoot to iPad solutions out there, there still isn’t a way to plug your camera directly into an iPad and shoot tethered like you do with your computer and Lightroom.

wpid11042-TripodClamps-4

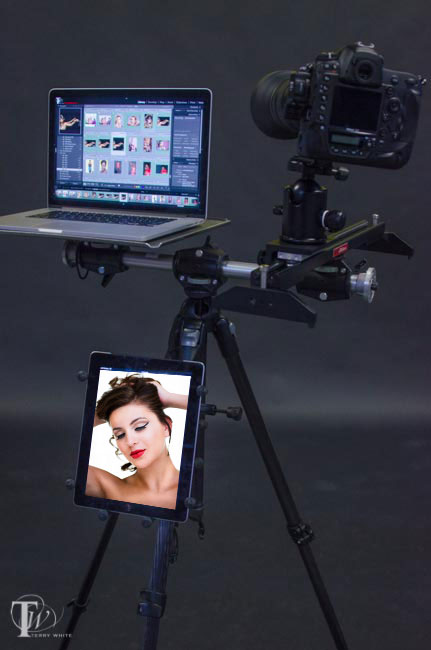
Here’s what’s in my Tripod Rig Setup Above

I personally use an Eye-Fi card when I’m out in the field and my iPad then becomes a nice big 10″ display to preview my shots. The Eye-Fi cards create their own ad-hoc network and therefore no hotspot is required. The images wirelessly transfer from my camera to my iPad. Now that Lightroom mobile is here, the question becomes can I shoot tethered into Lightroom mobile and the answer is yes! However, even though the answer is yes, it still involves your computer as there is still no way to connect your camera directly to your iPad via a USB cable and shoot tethered like you do with your computer. In studio I’m shooting either tethered directly to Lightroom via a USB cable, to my computer from my Nikon D4 via Ethernet or via the Nikon WT-5A Wireless Transmitter to a folder where the images are auto imported into Lightroom. There are two ways to shoot tethered to Lightroom mobile:

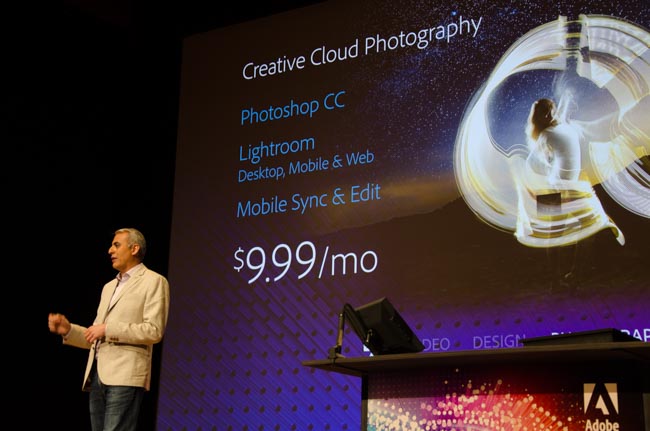
Before we get into the methods you’re going to need Lightroom 5.5 and a Creative Cloud membership. The Creative Cloud Photography program is affordable at only $9.99/month and includes Photoshop CC, Lightroom, and unlimited syncing to Lightroom mobile.

You can download Lightroom for iPad here:

.

I call the first method “Selective Tethering”

lightroom-set-target-collection

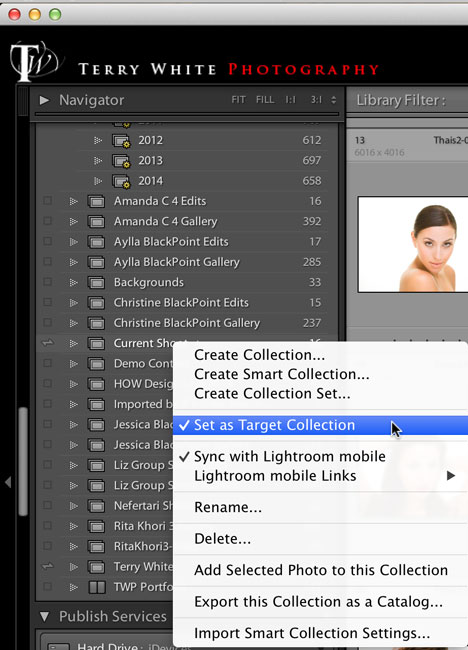
Recently Scott Kelby did a post “My First Studio Shoot Using Lightroom Mobile” during this shoot he was shooting tethered from his DSLR to his computer running Lightroom 5.5 desktop. However, he did a very clever thing. He had a collection marked to sync with Lightroom mobile and his creative director was holding his iPad. He made that collection the “target collection” (a Lightroom feature) so that as he saw images coming in from his camera that he really liked all he had to do was hit the letter “b” on his keyboard to add those images to the collection that was sync’d to Lightroom Mobile. Now the creative director could see the images on the iPad from any location and help direct the shoot, make changes to the wardrobe, etc. Since Lightroom mobile is a two-way communication between the iPad and the desktop version of Lightroom she could also flag or star rate images on the iPad and those flags and ratings would appear in Lightroom on the desktop for Scott to look at further and tweak if needed. This is an awesome way to work and it allows you to show only the BEST images to your client, director, assistant, etc. However, it does require more interaction on your part as you have to hit “b” for each image you want to be added to the collection. I had never thought of using the Target Collection in this way and it makes total sense. This got me to thinking if perhaps there was a way to automate this so that each image would just go into a collection as they come in to Lightroom via tethering? Currently Lightroom mobile doesn’t support Lightroom’s Smart Collections. So I began to look at 3rd party plugins….


The next method “Tethering to Lightroom mobile”

LRm-iPad-Thais

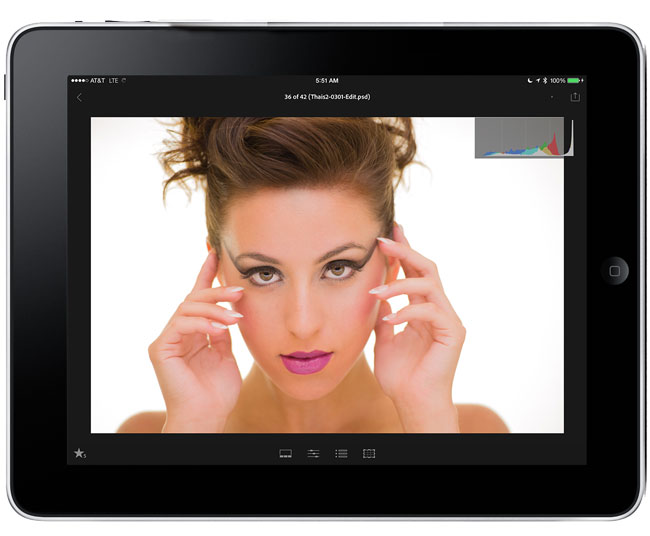
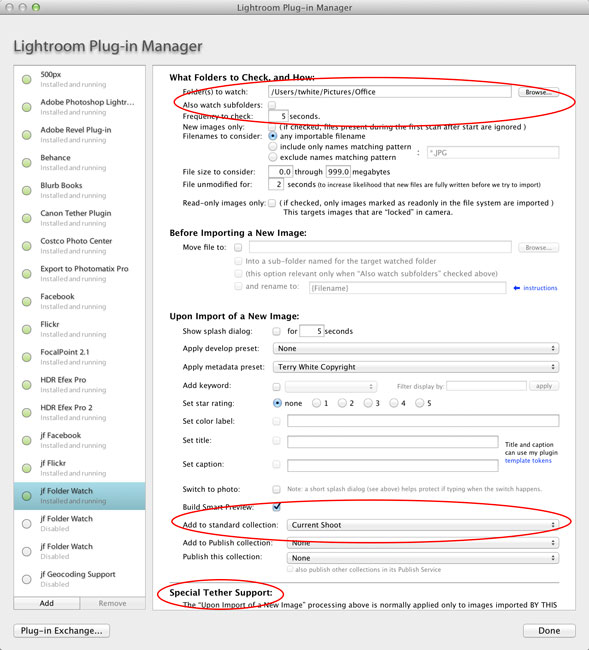
Like I said above, I wanted a way to bring in all the images I’m shooting so I wouldn’t have to touch the keyboard every time I wanted an image added to the iPad/Lightroom mobile. After looking at Scott’s method above this definitely has some downsides to it. As you know not every shot is good. Sometimes the strobe doesn’t fire or the image is out of focus. Sometimes the model isn’t ready or you capture an awkward frame. Chances are you don’t want your client seeing this frames. If that’s the case you’re better off using the “Selective Tethering” method above. However, if it’s you and say an assistant or other person on set that needs to be able to see what you’re shooting via the iPad then you probably don’t care as much if a few bad ones get in. As a matter of fact if it’s an assistant they could be helping by “rejecting” the bad ones for you! My search for a 3rd party solution started and ended with Jeffrey Friedl’s “Folder Watch” plug-in.

watchfolder-lr

This plug-in was originally designed as a more full featured alternative to Lightroom’s Auto Import (what we used before native Tethering) feature. Sadly after I downloaded it I realized it wouldn’t work with Lightroom’s Tether Capture feature because it needed to do the import before it could add the images to a collection.I reached out to Jeffrey and told him what I wanted it to do and guess what? He immediately added the feature for me! Now with this “donationware” plugin you can shoot tethered into Lightroom as you always do and designate a collection to add the images to as you shoot. All you do once you create the collection is sync it to Lightroom mobile.


Share with REMOTE viewers too. On ANY platform!

lightroom-web

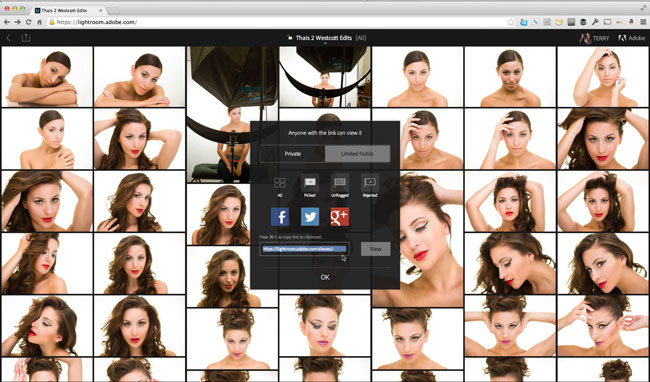
One of Lightroom mobile’s best kept secrets is that it’s not just for iPad and iPhone. There’s also a web component. If you head to lightroom.adobe.com and sign in with your Adobe ID you can all of your Lightroom mobile collection right in a web browser. You can click on any of your collections and grab the link for it and share it with whomever you want to be able to view that collection. This means that you can have a large audience watching your shoot and they will see your new images as you take them (by hitting refresh in the browser) pretty much on ANY platform.

Lastly don’t forget that Lightroom is also on iPhone now

.

See my video here:


Convert Your Aperture Library to Lightroom with this FREE Utility

Aperture3

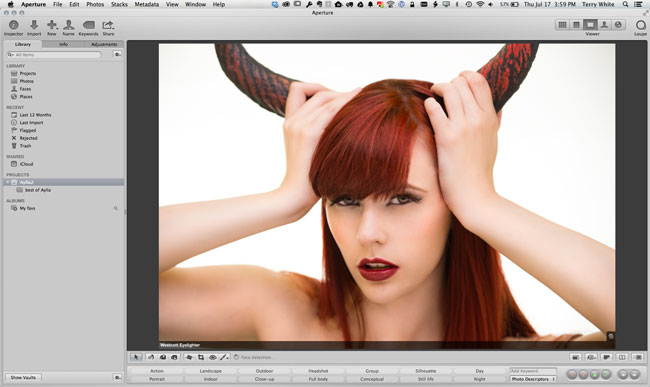
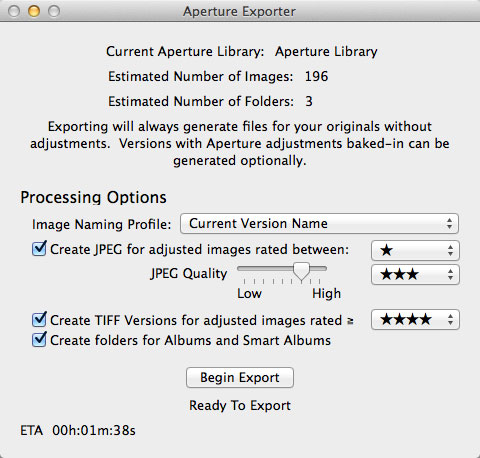
Apple recently announced that they will no longer develop Aperture. While there have been no official plans announced to move Aperture users over to Lightroom, there is a developer (7822383 Canada Ltd) that has released a “beta” utility called Aperture Exporter to help you out. First you have to realize that there is no real way to transfer/translate the adjustments you made  to your images in Aperture to the Lightroom and have the images look exactly the same. So the next best thing is to bring over as much of your Aperture Library structure as possible over to Lightroom and render out adjusted files so that they do look the same in Lightroom (or anywhere else). I think this company has done a good job and took a logical approach in doing it and sense it doesn’t harm your original Aperture Library (make a backup anyway!) it’s worth a try.

Aperture-ExporterScreen
I tested it on an Aperture library and the results were as advertised. I created a sample Aperture Library and imported images my into it. Then I made adjustments, flagged, keyworded, star rated, labeled, organized, etc. the images. Next I fired up the Aperture Exporter and did the export. Before clicking the “Begin Export” button I went back and star rated my adjusted images as it uses star ratings to determine if your adjusted images should be exported as TIF or JPG with the adjustments rendered in. Once it was done I had folders and subfolders representing the structure I created in Aperture.

Lightroom5
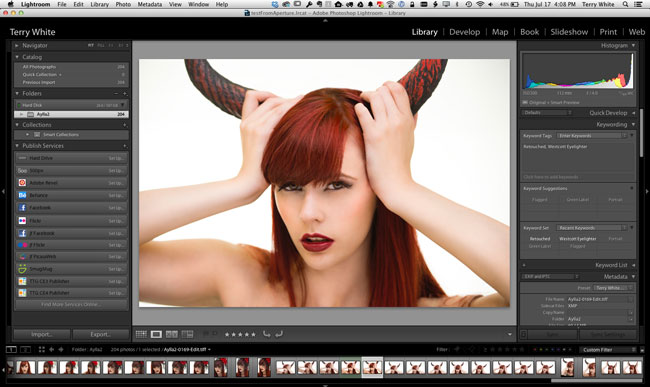
Then it was time to import those folders into Lightroom. No issues there. The images came in with the metadata intact. Now keep in mind things like color labels don’t translate. So instead the utility takes any Aperture color labels and adds the appropriate keyword to the images ie. “GreenLabel”. Once in Lightroom it’s easy to filter on these keywords, select all and then actually apply the corresponding Lightroom color label. So yes there is some clean up necessary once you’re in Lightroom, but overall the this utility takes the major work out of moving your Aperture Library to Lightroom.
If you’re looking to make the conversion from Aperture to Lightroom sooner rather than later, you should head over and grab the FREE download here.

Also don’t forget that you can get the NEW Creative Cloud Photography Program which includes Photoshop CC, Lightroom 5 and Lightroom Mobile for only $9.99/month.


11 Things You Didn’t Know About Adobe Creative Cloud

creative_cloud_2014

IIn this episode of Adobe Creative Cloud TV, Terry White walks you through how to get started with the 2014 release of Adobe Creative Cloud as well as 11 things you probably didn’t know about Creative Cloud.

Are you missing out on my Bonus Content?

See more of my Adobe Creative Cloud Videos on my Adobe Creative Cloud TV and get the App below. It features EXCLUSIVE CONTENT that no one else gets to see. My iOS App is a Universal App for iPhone, iPad and iPod touch. I also have an Android version on the Amazon App Store:

.


Before and After the Westcott Eyelighter

wpid13605-Aylla2-0125-Edit_sm.jpg

When I initially gave a first look at the NEW Westcott Eyelighter a couple of weeks ago (here), one thing I failed to do was to show a before and after comparison

wpid13599-Thais2-0204-Edit_sm.jpg

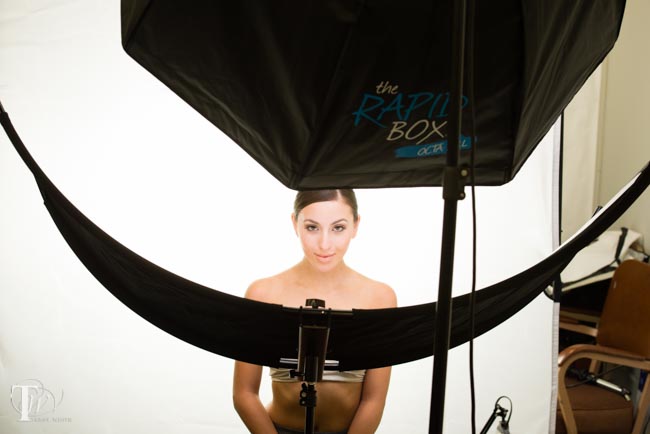
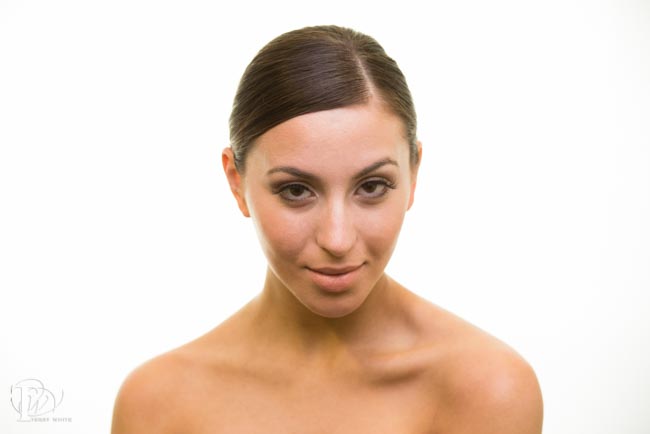
So I took some time away from my vacation last week and setup a beauty shoot with a few models to really give you an idea of what the Eyelighter really does beyond providing interesting catchlights in the eyes. In the two shots above you can see the affect of the Eyelighter not only in the eyes of my subjects but also under the chin.

wpid13601-Thais2-0205-Edit_sm.jpg

What a difference an Eyelighter makes. The shot above is the same model under the same Westcott Skylux and XXL RapidBox 48″ octa softbox, but without the Eyelighter.

wpid13593-Thais2-0064-Edit_sm.jpg

The shot above is a production shot showing the Eyelighter setup just in front of the subject with the Skylux LED light above subject.

wpid13595-Thais2-0074-Edit_sm.jpg

The results are AWESOME and pretty much night and day.

wpid13597-Thais2-0075-Edit_sm.jpg

Again here’s another look without the Eyelighter using the exact same main light, subject and camera settings.

But what about the background?

wpid13608-IMG_2362_sm.jpg

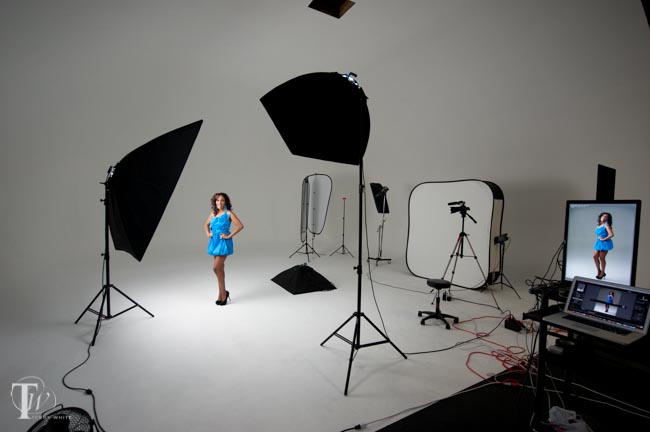
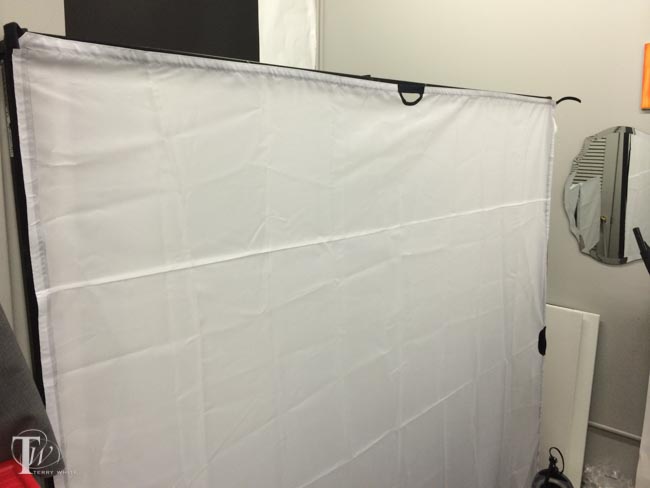
The background was lit using two lights shining through the Westcott Scrim Jim. This gave me the High Key look that I wanted by providing a nice big soft light source directly behind the subject that wrapped around the subject with beautiful rim lighting.


The Bottom Line

wpid13611-Thais2-0084-Edit_sm.jpg

I’ve always been a fan of this clamshell beauty look and the Westcott Eyelighter makes it much much easier to do now with one light. Adding another light or two behind with the Scrim Jim makes this accessory useful for in studio work as well as on location work. All of the images above were shot with my Nikon D600 and 70-200mm f/2.8 VRII lens.


3 Tips for Shooting Tethered into Lightroom 5

Lightroom_totem

In this episode of Adobe Creative Cloud TV, I’ll share at least 3 tips that will make your life easier while shooting tethered with Lightroom 5. Get a long USB tethering cable here.

Are you missing out on my Bonus Content?

See more of my Adobe Creative Cloud Videos on my Adobe Creative Cloud TV and get the App below. It features EXCLUSIVE CONTENT that no one else gets to see. This episode has a BONUS CLIP that is available only in the App! My iOS App is a Universal App for iPhone, iPad and iPod touch. I also have an Android version on the Amazon App Store:

.


Photoshop for Photographers Program

photo by Victoria Pavlov

One of the things you may have overlooked in the midst of all the Creative Cloud announcements on June 18th was the fact that the Photoshop for Photographers Program, which was a limited time offer that kept getting extended has now spawned a permanent offer (now called Creative Cloud Photography). That’s right, even if you never owned a license to Photoshop or Lightroom, you can get:

  • Adobe Photoshop CC
  • Adobe Photoshop Lightroom 5
  • Lightroom Mobile and Web with unlimited photo syncing
  • 2 GB of Cloud Storage to optionally to use anyway you want (LR mobile doesn’t use this storage).

for only $9.99 a month. This means you also get access to all the feature updates along the way at no additional cost. The original offer was such a success that it kept getting extended and Adobe just decided to go ahead and make it a regular plan of Creative Cloud.

You can learn more or sign up here.

Watch the Keynote for the 2014 Release of Creative Cloud