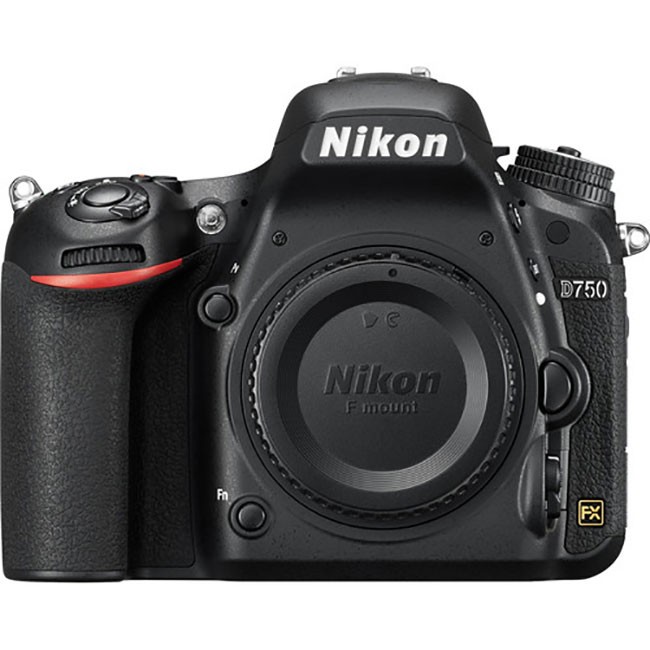
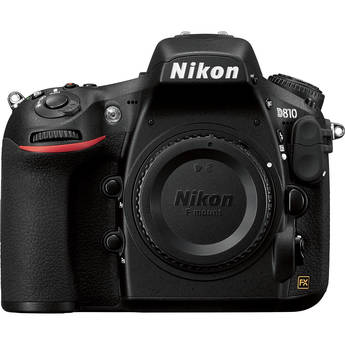
I must admit that when I first saw the specs for the Nikon D750 I wasn’t really too excited. It fits between the Nikon D610 and D810 both spec wise and price wise. However, I decided to go ahead and take it for a spin if for no other reason than to give my opinion about it to my readers. What I didn’t expect to happen was that I would fall in love with shooting with it.
The Nikon D750 functions pretty much just like my Nikon D600. A few of the controls have been moved around, but certainly nothing you couldn’t get used to very quickly. There is definitely a difference in dynamic range or at least to my eye the D750 does a better job as it should.
Thrilled with the built-in WiFi
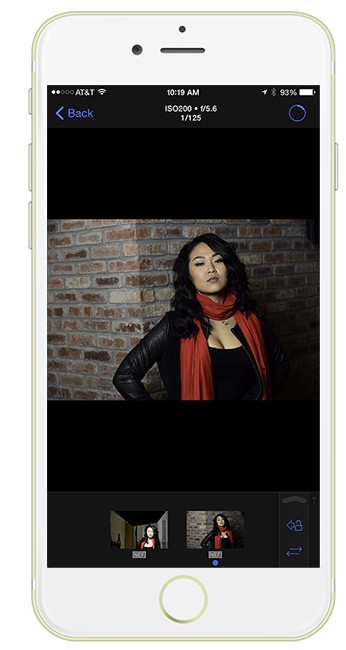
I’ve been complaining for years that DSLRs should have both WiFi and GPS built-in. You can find these features on lower end cameras all day long, but why not the higher end models? My Nikon reps tell me it’s because the alloys used in the pro bodies and I say BS. There has to be a way to have WiFi/GPS AND a metal/weather secure body. It’s not rocket science (we communicate millions of miles with a probe on an asteroid). The D750 answers one of my two wishes. It has built-in WiFi. No need for a small external module. It’s in the camera! Finally! This means that I have a native workflow that I can use to shoot RAW to the 1st card slot and basic JPG to the 2nd card slot. Those small JPGs can be sent to my iPhone or iPad FASTER as I shoot them for review.
While this feature works just fine with Nikon’s App, I much prefer ShutterSnitch for iPad and iPhone when I just want to shoot wirelessly to my mobile devices.
I shoot a wide range of skin tones in my portrait sessions and I’ve always been happy with the results from my Nikon DSLRs. The D750 continues this tradition giving me great results. The EXPEED 4 sensor is a nice improvement over the EXPEED 3 found in my D600.
The colors thus far have been spot on with the D750.
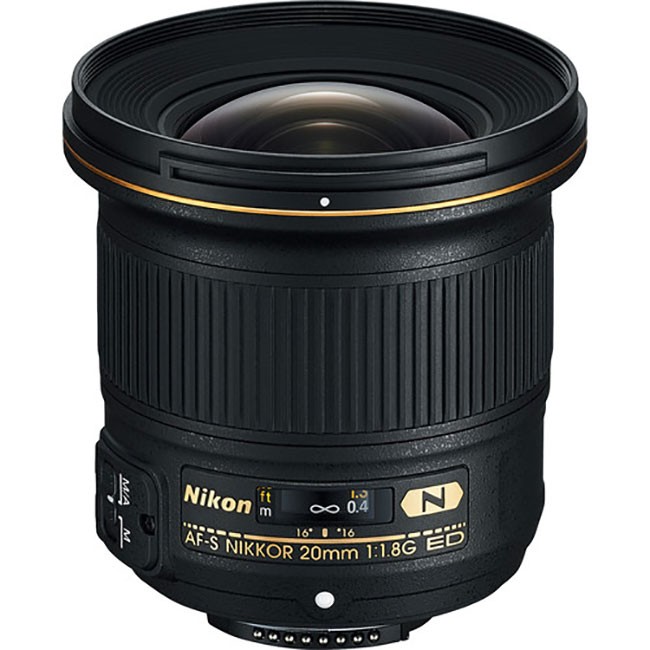
The Nikon 20mm f/1.8 Wide Angle Lens
I’m sorry that I don’t have a better subject to show off this lens than the airport at night, but the weather here has been kind of sucky for the past few days. Nonetheless, this is a great lens. I already have the Nikon 14-24mm lens, but this one covers the sweet spot for a lot less money. If I didn’t already have a great wide angle lens, I’d get this one in a heart beat!
It’s a fast f/1.8 lens with no distortion that I can see. No fisheye effect, just great wide angle results and great low light performance.
The Bottom Line
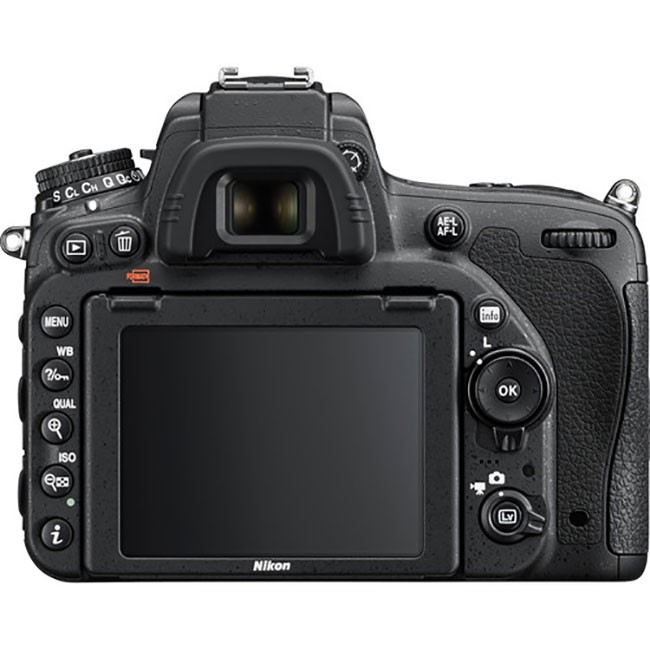
This camera is a solid upgrade for those looking to step into a 24.3MP full-frame DSLR or those looking for something a little better than the D610. It lists for $1,000 less than the D810. It also has improved video specs now doing 1080p video at 60fps (yes 4K would have been even better, but I’ll take the faster 1080p video for now. My only complaint with this model is that for some reason it seems slow when going into the menu. Normally on all my other Nikon DSLRs the menu comes up the moment you press the button, but for some reason the D750 hesitates for a couple of seconds. I’ve debated going to the Nikon D810 and moving up from my D600, but I think I’ll be taking this intermediate step instead. While I love the more “pro” feel of the D810 and the higher dynamic range, I’m still not thrilled with the 36MP RAW files (or smaller sRAW) file sizes that it produces. For my workflow and the way I shoot the D750 is (as much as I hate to admit it) simply a better fit. Of course that doesn’t mean that I ultimately won’t end up with both bodies 🙂
I haven’t met a photographer yet that has everything they want. It’s getting down to the wire, but there’s still time. If you have a photographer on your holiday gift list, I’ve hand picked 5 gifts that he or she will love. Best of all they are all under $500 (some below $200). So in no particular order let’s get to it:
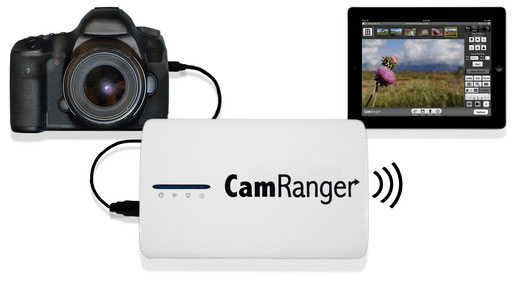
CamRanger
CamRanger is a wireless/WiFi control system for the most popular Nikon and Canon DSLRs out there. Once your photographer has CamRanger setup they can wirelessly control their camera from a mobile device such as an iPad as well as see the images their taking as they take them wirelessly on the same mobile device.
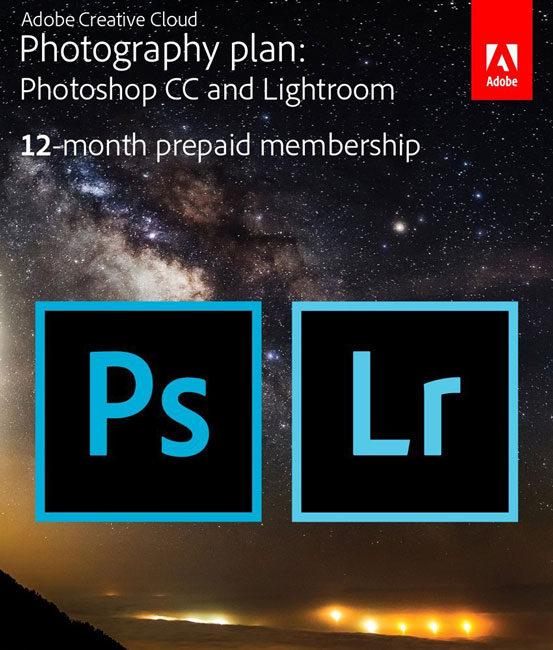
If you have a photographer on your list then they will certainly appreciate always having the latest versions of Photoshop CC and Lightroom. Even if they are already Creative Cloud Photography Plan members, this card will give them another full year of membership.
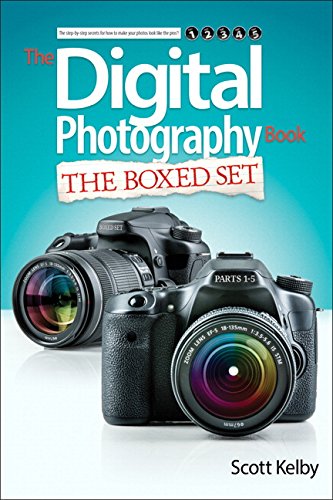
Get the photographer on your list a wealth of knowledge from the world’s best selling photography book author, Scott Kelby.
You get all 5 books for one low price here. Also don’t forget to check out his NEW Photoshop CC Book for Digital Photographers here.
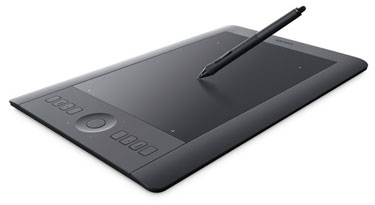
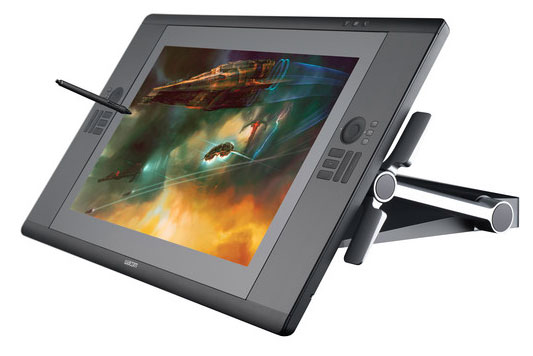
Wacom Intuos Pro Medium Tablet
I can’t imagine retouching a photo without a Wacom tablet. I just would rather wait until I got home or back to the office. This is why there’s one on my desk and one in my bag.
For a limited time and the first time you can get $300 off the Nikon D810 here. Also the Nikon D610 drops another $100 (a steal) here. These price drops only last until December 13, 2014.
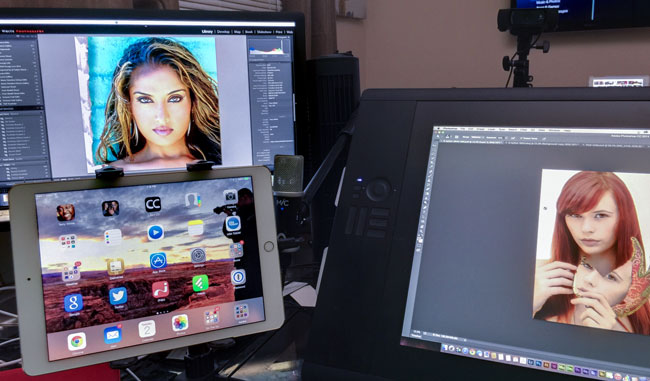
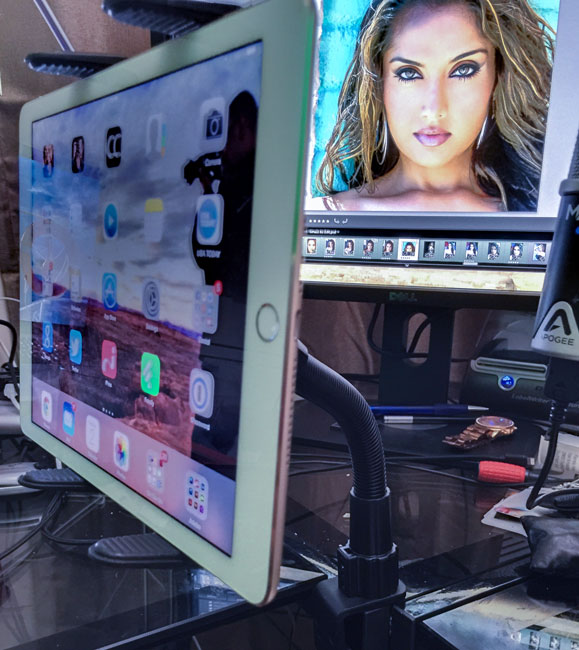
At my desk I work with three displays and usually my iPad Air 2 is within arm’s length. The problem is that when I want to use it I have to either turn away from my main display or pick it up and put it on my lap as there is little available desk space left in front of me. What if my iPad could just “float” in midair almost at eye level and always be there when I need it? That’s what the Arkon solutions provide me. Arkon makes a variety of mounts for your smartphones, tablets and cameras. Many pieces within their product line work together to allow you to build the right system for you.
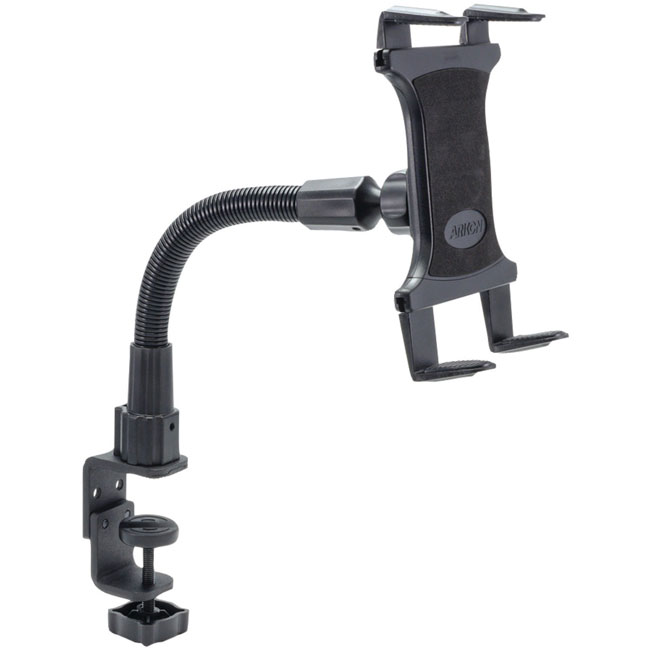
This holder comes with different “feet” to allow you to configure it for any full size iPad or Galaxy Tab. It comes with a Heavy Duty Gooseneck arm.
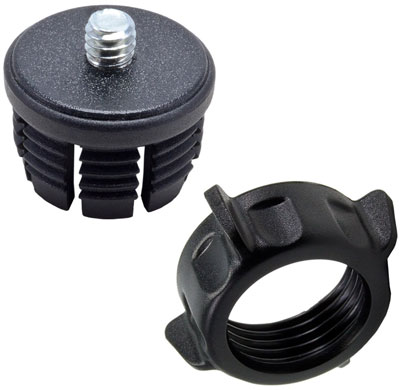
This thing feels as if it can hold up a car. Once you put it in the position you want, don’t worry it won’t move! Now keep in mind that this gooseneck can be used for more than just holding your tablet. If you add their low cost Camera Head Adapter kit it will hold your camera too. Yes even your heavy DSLR!
CORRECTION: I was told by Arkon that the camera mount I listed above is too small for this gooseneck. So if you want to use this for a camera then you should order this model instead.
The Bottom Line
Arkon makes mounts to mount just about anything on anything. However, this is definitely one of my favorite solutions for mounting stuff in my office or home. If you’re looking for the best iPad mount, this is it!
In this episode of Adobe Creative Cloud TV, I’ll show you how to use Lightroom Mobile to get client feedback on your photos. Find out which photos your clients like and perhaps want to purchase.
Lightroom 5.7 and Adobe Camera RAW 8.7 Released Today!
I cover the new features of Lightroom 5.7 as they relate to Lightroom Mobile in the video above. However, there are some more things you should know:
Integrated a utility to import images from Apple Aperture and Apple iPhoto libraries into Lightroom:
Previously available as a separate and downloadable plug-in, this utility has now been integrated into Lightroom 5.7
New Camera Support in Lightroom 5.7
Canon EOS 7D Mark II
Canon PowerShot G7 X
Canon PowerShot SX60 HS
Casio EX-100PRO
Fujifilm X30
Fujifilm X100T
Fujifilm X-T1 Graphite Silver
Leaf Credo 50
Leica D-Lux (Typ 109)
Leica M-P
Leica V-Lux (Typ 114)
Leica X (Typ 113)
Nikon D750
Olympus PEN E-PL7
Olympus STYLUS 1s
Panasonic DMC-CM1
Panasonic DMC-GM1S
Panasonic DMC-GM5
Panasonic DMC-LX
Pentax K-S1
Pentax QS-1
Samsung NX1
Sony ILCE-5100
Sony ILCE-QX1
Newly supported cameras for Tethered Capture in Lightroom 5.7
Nikon D4S
Nikon D810
New Lens Profile Support in Lightroom 5.7
Apple iPhone 6
Apple iPhone 6 Plus
Canon EF SIGMA 18-300mm F3.5-6.3 DC MACRO OS HSM C014
Canon EF SIGMA 150-600mm F5-6.3 DG OS HSM S014
Canon EF Tokina AT-X 116 PRO DX-II 11-16mm f/2.8
Canon EF Zeiss Otus 1.4/85 ZE
Fujifilm X Fujifilm X100T
Fujifilm X HandeVision IBELUX 40mm F0.85
GoPro Hero
GoPro Hero4 Black Edition
GoPro Hero4 Silver Edition
Leica M Leica SUMMARIT-M 35 mm f/2.4 ASPH
Leica M Leica SUMMARIT-M 50 mm f/2.4
Leica M Leica SUMMARIT-M 75 mm f/2.4
Leica M Leica SUMMARIT-M 90 mm f/2.4
Leica M SLR Magic 50mm T0.95 Hyperprime Cine Lens
Leica M Voigtlander VM 12mm F5.6 Ultra Wide Heliar ASPH.
Leica M Voigtlander VM 15mm F4.5 Super Wide Heliar II ASPH.
Leica M Voigtlander VM 21mm F1.8 Ultron ASPH.
Leica M Voigtlander VM 21mm F4 Color Skopar
Leica M Voigtlander VM 25mm F4 Color Skopar
Leica M Voigtlander VM 28mm F2 Ultron
Leica M Voigtlander VM 35mm F1.2 Nokton II ASPH.
Leica M Voigtlander VM 35mm F1.4 Nokton Classic
Leica M Voigtlander VM 35mm F2.5 Color Skopar
Leica M Voigtlander VM 40mm F1.4 Nokton Classic
Leica M Voigtlander VM 50mm F1.1 Nokton
Leica M Voigtlander VM 50mm F1.5 Nokton
Leica M Voigtlander VM 75mm F1.8 Heliar
Leica S Leica SUMMICRON-S 100 mm f/2 ASPH.
Nikon F Nikon AF-S NIKKOR 20mm f/1.8G ED
Nikon F Nikon AF-S NIKKOR 400mm f2.8E FL ED VR
Nikon F SIGMA 18-300mm F3.5-6.3 DC MACRO OS HSM C014
Nikon F SIGMA 150-600mm F5-6.3 DG OS HSM S014
Nikon F Tokina AT-X 116 PRO DX-II 11-16mm f/2.8
Nikon F Voigtlander SL 40mm F2 Ultron ASPHERICAL
Nikon F Voigtlander SL 40mm F2 Ultron ASPHERICAL Close-up Lens
Nikon F Zeiss Otus 1.4/85 ZF.2
Pentax HD PENTAX-DA 645 28-45mm F4.5 ED AW SR
Pentax HD PENTAX-DA 16-85mm F3.5-5.6 ED DC WR
Pentax HD PENTAX-DA 20-40mm F2.8-4 Limited
Sigma SIGMA 18-300mm F3.5-6.3 DC MACRO OS HSM C014
Sigma SIGMA 150-600mm F5-6.3 DG OS HSM S014
Sony Alpha SIGMA 18-300mm F3.5-6.3 DC MACRO OS HSM C014
Sony Alpha SIGMA 24-105mm F4 DG OS HSM A013
Sony Alpha Sony DT 18-55mm F3.5-5.6 SAM
Sony Alpha Sony DT 18-70mm F3.5-5.6
Sony Alpha Sony DT 55-200mm F4-5.6
Sony Alpha Sony 75-300mm F4.5-5.6
Sony Alpha Sony 300mm F2.8 G SSM
Sony Alpha Sony 500mm F4 G SSM
Sony E HandeVision IBELUX 40mm F0.85
Sony E SLR Magic 50mm F0.95 Hyperprime Lens
Sony E Sony FE 16-35mm F4 ZA OSS
Sony E Sony FE PZ 28-135mm F4 G OSS
Sony E Zeiss Loxia Biogon T* 2/35
Sony E Zeiss Loxia Planar T* 2/50
Bugs Corrected in Lightroom 5.7
The crop overlay displayed an intermediate step when progressing through images in the filmstrip with overlay displayed.
The lens profile for the Canon EF 16-35mm f/4 would not auto-select when using Lens Profile Corrections.
ICC profiles resulted in incorrectly clipped shadows and blacks in Lightroom. Note that this is related to the issue identified here and only occurs on Mac OSX 10.9 and later
Fixed crash when rapidly adding corrections with the Spot Removal tool.
Fixed bug that prevented the Filter Brush cursor from displaying while changing brush size when the Graduated and Radial Filter overlay is turned off.
Improved quality of Camera Matching color profiles for the Nikon D810. Fixes visible banding issues with the Camera Standard, Camera Vivid, Camera Landscape, and Camera Monochrome profiles.
ACR 8.7 now supports HiDPI displays on Windows. Please use the following steps to enabled HiDPI on Windows:
Go to Photoshop -> Preferences -> Experimental Features
Click on “Scaled UI 200% for high-density displays”
Bug Fixes:
Fixed crash when rapidly adding corrections with the Spot Removal tool.
Fixed bug that prevented the Filter Brush cursor from displaying while changing brush size when the Graduated and Radial Filter overlay is turned off.
Improved quality of Camera Matching color profiles for the Nikon D810. Fixes visible banding issues with the Camera Standard, Camera Vivid, Camera Landscape, and Camera Monochrome profiles.
Please note – If you have trouble updating to the latest ACR update via the Creative Cloud application, please refer to this installation note.
See more of my Adobe Creative Cloud Videos on my Adobe Creative Cloud TV and get the App below. It features EXCLUSIVE CONTENT that no one else gets to see. My iOS App is a Universal App for iPhone, iPad and iPod touch. I also have an Android version on the Amazon App Store:
Earlier this year in May I did a post called “Photographers: iMac or Mac Pro?” It was a post that was meant to really ask the question that as a photographer would you benefit from the faster and more expensive Mac Pro over say a nicely equipped iMac (or in my case MacBook Pro)? There was only one problem with that post. I didn’t actually have an iMac to compare. I ran all my tests using my high-end Mid 2012 MacBook Pro Retina Display. I noted that although my MacBook Pro fared quite well against the Mac Pro for common “photography workflow” tasks, that an iMac would probably do even better! Well now I have a NEW iMac Retina 5k Mac to test/review and I think you’ll be pleasantly surprised by the results. I was a little blown away!
The same game rules apply!
If you don’t like Macs/Apple or don’t want a Mac for whatever your reasons are, you can pretty much stop here and find something else to do with your time. I find it entertaining when people feel compelled to tell you/me how much they don’t want the thing you’re reviewing or writing about because they use something else. This is not a Mac vs. _______ post. If you’re happy with a Windows PC or Linux PC, or anything else, I’m happy for you. If you can build your own PC cheaper, that’s awesome!
If you’re reading the rest of this post then I’ll assume that you’re a Mac user or thinking of becoming one.
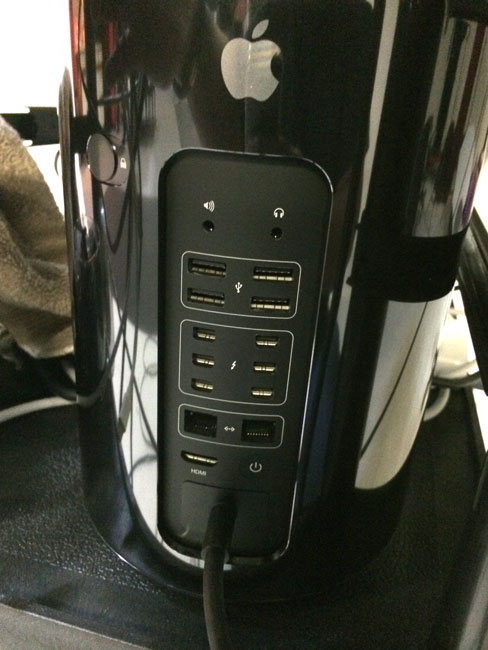
The next thing I’d like to get out of the way is that if you’re looking for a Mac Pro review that tells you this new Mac Pro is better than the previous Mac Pro with all the benchmarks to back it up, then you’d probably be better served by other reviewers who have targeted the performance of the new model vs. the older model. I’m doing this review/comparison simply to answer the question, “as a photographer would I be better off spending my money on the NEW iMac Retina 5K Display or a Mac Pro?” If you’re a videographer and you’re a Mac user then you probably already have the new Mac Pro because you demanded the fastest Mac you could get to render your videos on a daily basis.
Updated: Introduction
When I saw the rumors that Apple was going to release a radically different design for the Mac Pro, to be quite honest I was only mildly interested. As I stated above, I realized with my last Mac Pro that I wasn’t really a Mac Pro customer. Sure I appreciate the faster performance, but I found myself only using my Mac Pro when I knew a process was going to take a long time to complete. Otherwise I was quite happy just using my MacBook Pro simply because I could use it in any room at any time. I could take it with me on the road. However, I said to myself perhaps if the performance (for what I do) is significantly better and the price point for an entry model was $2,500 or less, I’d consider getting one. Well we know the latter didn’t happen, so now it was time to test the performance. I got the opportunity to test a Mac Pro standard configuration in my studio for a few weeks. I loaded the latest version of my Adobe Creative Cloud applications on it as well as a few utilities that I use such as ScreenFlow. Next, I began running side-by-side tests of the things that I do daily that take more than a few seconds. My assumption was that the Mac Pro would certainly be at least twice as fast at everything I threw at it than my 2012 MacBook Pro Retina Display Mac. Actually I was wrong! Now fast forward to November and I have brand new iMac Retina 5k here to review and test. At the time I did the tests back in May, I really wasn’t expecting to run these tests again. Therefore I didn’t really hold on to the test files that I used. Luckily I was able to reassemble most of them with a couple minor exceptions that I will outline below:
When will a Mac Pro significantly outperform any other Mac?
As I said above, I was wrong in my assumption that the Mac Pro would be at least twice as fast at everything. Actually it is faster at (almost) everything! Just not by a margin of two. On every test I threw at it the Mac Pro outperformed my now two-year-old MacBook Pro, but in some cases it was only slightly faster. With the new iMac Retina 5k there was even less of a difference. This is when I realized that in order to see significant speed improvements the software you’re testing not only needs to be optimized for the faster processors, but also it would need to take advantage of the multiple cores. Even then, the iMac and MacBook Pro are no slouch. They’ve got multiple cores too. Where I saw the biggest differences was in (no surprise) video rendering and processes that take longer than a minute or so anyway. At this point I now have a new iMac Retina 5K Display to compare as well. The differences in speed were less dramatic as I expected. However, even doing video tasks the iMac held its own and really started bringing into question “when would I ever want a Mac Pro?” When I ran the tests in May the Mac Pro was significantly faster at video tasks than my two year old MacBook Pro. However, I not only now have a new Mid 2014 MacBook Pro Retina that is faster than my old one, but I also have a base model iMac Retina 5k to compare too.
UPDATED TEST RESULTS
What I do as a photographer
As a photographer I spend most of my time in Adobe Lightroom 5 and Adobe Photoshop CC. Photoshop CC definitely takes advantage of multiple cores and now has Open CL support. So filters will run faster on the new Mac Pro. All of these applications are 64bit native and that means that they’ll take advantage of additional RAM.
My first test was one of the things I do after every shoot. I convert my RAW files into .DNG (Digital Negative) format. This is one of the few times that I see a progress bar in Lightroom because it does take time to do it. I converted 435 16MP Nikon .NEF RAW files into DNG format.
First on the MacBook Pro it took 14 minutes 35 seconds
On the Mac Pro the same conversion took 12 minutes 12 seconds.
OK, ready for this? On the NEW iMac Retina 5K a 435 16MP conversion took 11 minutes 39 seconds. Huh! What? Wait a minute! It was actually slightly (less than a second) faster than the Mac Pro. This of course left me scratching my head, but I have a couple of caveats to bring up. First off this is 6 months later and we’re on a newer operating system, Mac OS X 10.10 Yosemite, which in theory could be faster than Mavericks. The only caveat as I mentioned in the introduction was that I didn’t have all the same exact files from the May test. Yes I converted 435 16.2 MP files from my Nikon D4, but they weren’t the same exact images. I can’t see where that would make too big of a difference though. They are from the same camera and a similar portrait shoot, just not the same exact images as before. We can argue this one more, but just for kicks I ran the same test on my NEW Mid 2014 MacBook Pro Retina with a Core i7 Haswell processor and SSD drive (the iMac has a Fusion drive) and it was even faster at 9 minutes 56 seconds. This we can probably say is faster on the MacBook Pro over the iMac because it’s a faster processor and faster drive, but it doesn’t really explain why it would be faster than the Mac Pro. Since they aren’t the same exact images, let’s move on to the other test where the files ARE THE SAME!
HDR Test
The next test was a simple HDR (High Dynamic Range) conversion in Photoshop CC using three RAW files. This is a two-part process. The first part is simply combining the three (or more) images together and aligning them. Then the second part of the process is applying whatever settings you want to control how your HDR looks.
The first part on the 2012 MacBook Pro took 12.70 seconds and on the Mac Pro it took 9.10 seconds
The second part on the 2012 MacBook Pro took 13.00 seconds and on the Mac Pro it took 11.13 seconds.
What about the iMac Retina 5K?
Since I had the exact same RAW files for this test I ran it on the iMac:
The first part on the iMac took 10.75 seconds and the second part took 10.75 seconds. This makes it only 1.5 seconds slower than the Mac Pro for this test.
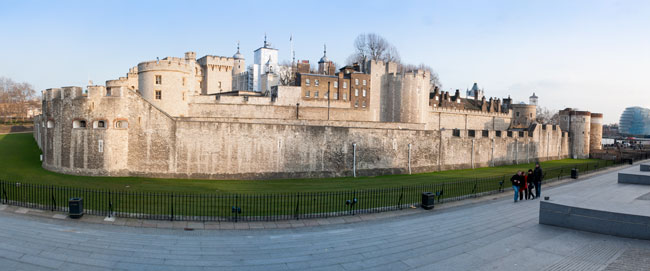
Pano Stitch
The next test was stitching a Panorama together using Photoshop CC and 10 RAW files
On the 2012 MacBook Pro this process took 1 minute 12 seconds
On the Mac Pro this process took 51 seconds.
On the iMac Retina 5K Display this process took 1 minute (9 seconds slower than the Mac Pro)
I could have gone on running other tests and other filters, but these are the things I do on a regular basis. If it was faster at something that I rarely do, then I really don’t care as much. As you can see from the results above, the Mac Pro wins on every test as you would expect it to, but the results (even if it was twice as fast in every case) may not justify the difference in cost. We’ll get to that at the end.
Next it was time to look at what I do as a Photographer when it comes to video
I use video in a couple of different ways. The first as a photographer is to tell my story. This means capturing video with my DLSR, GoPro, iPhone, etc. I use Adobe Premiere Pro CC to assemble those videos and then output them to share (usually on YouTube). The next way that I use video and probably the way that I use video the most often is to record my Creative Cloud TV video podcasts. These screen recordings are done with ScreenFlow and since the editing I do is pretty simple I can edit these right in ScreenFlow. Of course I need to export those videos out and this can take a while depending on the length of the video. I had no doubts that this is where the Mac Pro would really shine. After all these are the kind of processor and resource intensive tasks that the Mac Pro was built for. I was not disappointed.
The first test I ran was an export of an hour-long edited video out of ScreenFlow.
On the MacBook Pro this export took 60 minutes
On the Mac Pro this export took 33 minutes.
On the iMac Retina 5K this export took 35 minutes.
It gets better in Adobe Premiere Pro CC and the Adobe Media Encoder CC. I needed to convert this video into a different format using the Adobe Media Encoder CC.
On the MacBook Pro this conversion/export took 34 minutes 36 seconds
On the Mac Pro this conversion/export took only 12 minutes 36 seconds
On the iMac Retina 5K this conversion/export took 19 minutes 26 seconds
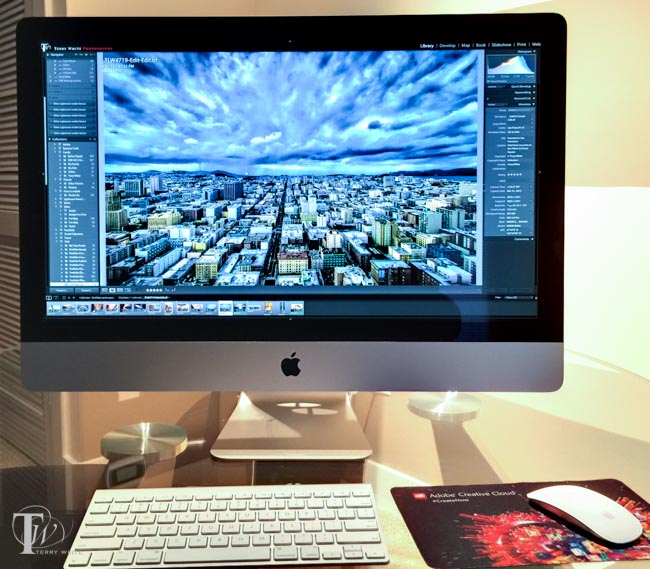
What about that beautiful 5K Retina Display?
No photograph can do this display justice. You have to see it in person with your own eyes to appreciate it!
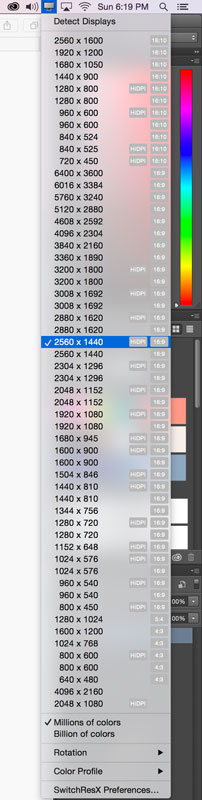
One the biggest reasons I would recommend an iMac over a Mac Pro to a photographer beside the money saved, is the fact that you’re getting a 27″ 5K Hi-DPI (Retina) display! Your images are going to look amazing on this display. I was blown away by the sharpness and the detail. Besides the obvious sharpness and detail, the other benefit is being able to work at high resolutions in programs like Photoshop. If you set the display resolution higher (I use SwitchResX for complete control of this) you can actually see more of your images as you work. No more having to zoom in to 100%. You can actually see them at 100% if you want. As it stands today, you won’t find a better display to see your images on. If you do, it will likely cost more!
The Bottom Line
I’m sure if we just ran processor and benchmark test that The NEW Mac Pro is the fastest Mac that Apple has ever created. The question you have to ask yourself is, “Do I run benchmark tests or do I use applications on a day to day basis that I’m waiting for tasks to complete?” For me the answer is no. Sure if I spent my days rendering video all day every day, I’d already have the Mac Pro. There would be no question. However, as a photographer I can’t justify the difference in price. Now that the iMac has a Retina 5k display it’s even a more compelling choice for photographers.
The Mac Pro model and configuration that I tested above is here. (Now keep in mind that if I was going to buy one I’d start with this configuration and I’d go with a bigger internal drive and more RAM)
Believe it or not the iMac Retina 5k that I tested was this base model. The results above were achieved with only 8GB of RAM and a 1TB Fusion Drive. If I were to buy an iMac I would get this model and I would buy this 32GB RAM upgrade and put it in myself. This configuration would give me a faster processor, an internal 512GB SSD, 32GB of RAM a 5k Retina Display, Keyboard and Mouse for less than the price of the Mac Pro that I tested.
Why an iMac? Although I don’t use one (I’ll have to send this one back if I don’t want to buy it), an iMac makes sense because you’re getting a fast Mac with a nice big 27″ 5k display all in one. You can’t really get a better display for this price and it includes a computer 🙂
Why a MacBook Pro? For me the MacBook Pro makes the most sense because when I’m at my desk I have connected to a nice 24″ HD Wacom Cintiq display/tablet. When I get ready to go I disconnect it and go. I have a computer with a nice 15″ Retina display when I’m on the road. If I didn’t travel for a living then I would absolutely have an iMac. Since I travel a lot, a MacBook Pro makes more sense. With that said, if I had never used a Cintiq AND I had seen the iMac 5k with my work on it as I have with this test unit I would be hard pressed not to buy one and just use an Intuos Pro tablet instead.
If you want the fastest Mac and you don’t mind spending $3,000-$4,000 (or more) on it plus having to buy a display, keyboard and mouse, then definitely go with a Mac Pro. Almost everything you do will likely be faster than the Mac you’re currently using. At the end of the day I realize that computers have become “fast enough” and that I don’t spend a lot of time waiting these days. Even when a process such as a video render/export is going to take a few minutes I can toss it to the background and work on other things in the foreground. My last Mac Pro once configured set me back over $5,000 and while it was a beast, I found that I wasn’t really using it as much as I had hoped I would, so I sold it. The new Mac Pro is faster, but is it $4,000 + display, keyboard and mouse faster? For me it’s not. The NEW iMac Retina 5k and MacBook Pro Retina 15″ will definitely hold their own against a Mac Pro for the kinds of tasks that photographers do.
In this episode of Adobe Creative Cloud TV, I’ll show you two ways to move your Lightroom photos to another hard drive/NAS. This is one the questions I get most and I decided to dedicate a video to it and share some tips as well.
Are you missing out on my Bonus Content?
See more of my Adobe Creative Cloud Videos on my Adobe Creative Cloud TV and get the App below. It features EXCLUSIVE CONTENT that no one else gets to see. My iOS App is a Universal App for iPhone, iPad and iPod touch. I also have an Android version on the Amazon App Store:
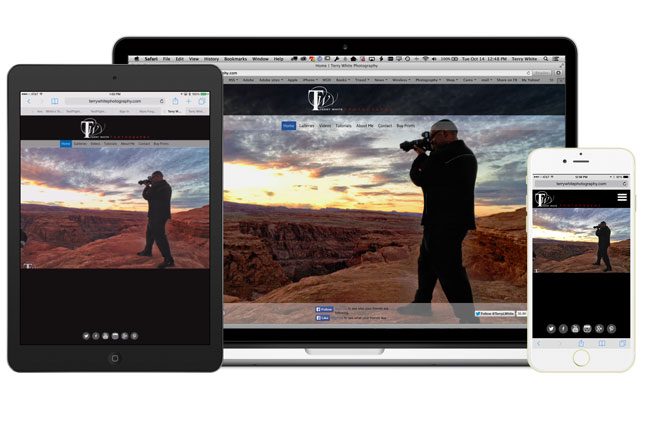
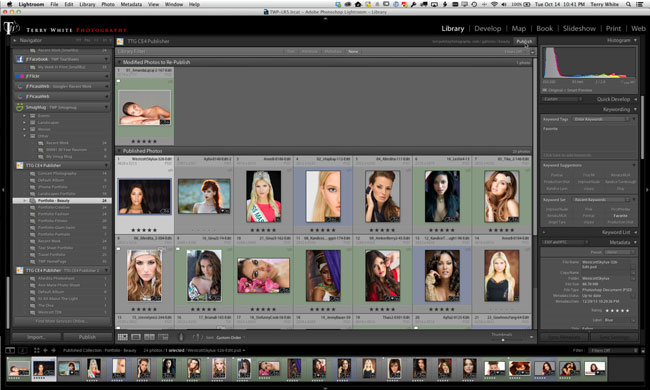
After posting my last update about how I had built my photography website with Adobe Lightroom and plug-ins from The Turning Gate, I started getting questions like: “Could you build your site with Adobe Muse CC?” Of course the answer was always “yes I could, but…” There was a big reason that I built this particular site with Lightroom instead of Muse. I’m always updating my photography galleries with new photos and removing older photos. I manage all of my portfolios and this process with Collections in Lightroom. With the Web Publishing Bundle from The Turning Gate I’m able to update those galleries at any time with the click of the “Publish” button right in Lightroom. However, on the other hand Adobe Muse would allow me to customize the look and feel of the site more easily and basically do anything I wanted on any page at any time without having to write code or CSS.
Hmmmm, why not use them both?
The more I thought about it the more I figured I could have my cake and eat it too. I could build all the non-gallery pages (Home, About me, Contact, etc.) using Adobe Muse and use Lightroom and The Turning Gate plug-ins to continue to update the galleries. It would take a little more setup up front, but once the work was completed I would have the ease of updating the galleries anytime that I like right from Lightroom AND the ease of customization for the rest of the site using Adobe Muse.
Using Adobe Muse CC I customized the look of the site and navigation
I set out to complete this task this past weekend and I put the new site up (terrywhitephotography.com) on Monday. As with any new site I’m still tweaking things here and there, but I’m LOVING IT so far! I built a standard Adobe Muse site with all three layouts (Desktop, Tablet and Phone) and I also made sure to include the pages that would need to be in the menu, but not actually built in Muse (Galleries, Videos, Tutorials and Buy Prints). Using the trick of Excluding those Pages from the menu allowed me to put custom links in to the Galleries and Videos pages produced by Lightroom/The Turning Gate. I also had to modify my Lightroom produced pages to point back to the main site when someone clicks on home, about and contact.
Using Lightroom and the CE4 Web Publishing System from The Turning Gate I can publish my galleries to my website.
I’ve anticipated at least some of the questions you may have, so here we go:
FAQ
Q. What did Muse let you do that you couldn’t have done with The Turning Gate?
A. The first one was I’ve always wanted a full screen slideshow on the homepage of the desktop layout. It was so easy to do this with the Widgets in Muse and I’m not sure if there was an effective way to do this in The Turning Gate AND have the slideshow work the way I liked.
Q. Your older site was “responsive” and currently Muse isn’t. How did that work out with this website makeover?
A. Well the pages from Lightroom/The Turning Gate are still responsive and therefore when you click on my Galleries page on a mobile device you still get that experience. However, for the rest of the pages made with Muse I was able to optimize the content for Desktop, Tablet and Phone just the way I wanted. So it works out fine.
Q. If you had to do this from scratch, which Turning Gate Plug-ins would you need?
A. Since you’re going to need at least 3 of their plug-ins (Gallery, Auto-Index and Publisher) you’re still better off going with the CE4 Web Publishing Bundle as it will include everything you need for one price.
Q. Will Adobe Muse ever be “Responsive”
A. I get that question a lot and Adobe Muse improves rapidly with new features. Since “ever” is a long time, I would guess that you’ll see the features that people demand the most at some point! (how’s that for a non-committal, keep my job kinda answer?)
Q. Since you’re using Adobe Muse to create the home page and the full screen slideshow, what happens when you want to update it?
A. I did give up the ability to update the homepage slideshow with Lightroom automatically, but since I don’t update it as often I’m ok with exporting images from Lightroom manually when I want to update that one slideshow.
Q. What if I want to add music to my Muse site, HTML 5 video (like you did with the Turning Gate) or even have a template to get started with, what can I do?
A. I have really been impressed with MuseThemes.com. They make a variety of add-ons for Muse including widgets and templates that take Muse beyond the standard set of functionality. They (like most 3rd party add-ons) fill in the gaps.
Q. Will you be adding more Muse features to your site?
A. Yep, now that the hard part (which wasn’t so hard) is out of the way, I can add more features from Muse and use this site to showcase what can be done with Adobe Muse over time. I’ve already take advantage of the full screen slideshow, full width slideshow, SVG support, contact forms, social widgets, composition widget (for my phone menu), menus, TypeKit fonts, custom hyperlink colors, transparency and of course some gratuitous use of scroll effects 🙂 .
One more thing…
Your site is only as good as the web hosting that serves it up to your visitors. So far I couldn’t be happier with Bluehost.com. I was originally turned on to them by The Turning Gate and now they now host all my websites.
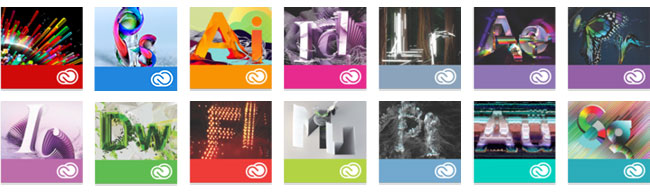
Hot off the heels of the big release for 2014 of Creative Cloud, the engineers have been hard at work delivering more value to Creative Cloud members. I’m here to show you the top new features for the October 2014 update to Adobe Creative Cloud.
See What’s New In the October 2014 Update to Photoshop CC
See What’s New In the October 2014 Update to Adobe Illustrator CC
See What’s New In the October 2014 Update to Adobe InDesign CC
See What’s New In the October 2014 Update to Adobe Muse CC
Also check out the NEW Mobile Apps:
Adobe Photoshop Mix (now on iPhone as well as iPad)
In this episode of Adobe Creative Cloud TV, I’ll show you how to retouch a photo in Photoshop for a more mature audience.
Are you missing out on my Bonus Content?
See more of my Adobe Creative Cloud Videos on my Adobe Creative Cloud TV and get the App below. It features EXCLUSIVE CONTENT that no one else gets to see. This episode has a BONUS CLIP that is available only in the App! My iOS App is a Universal App for iPhone, iPad and iPod touch. I also have an Android version on the Amazon App Store: