How To Retouch Eyes Using Adobe Photoshop CS6

In this episode of the Adobe Creative Suite Podcast Terry White shows How to Retouch Eyes using Adobe Photoshop CS6. If you photograph people, then you’re going to want to watch this tutorial on how to make the eyes of your subjects look better.

Are you missing out on my Bonus Content?

See more of my Adobe Creative Suite Videos on my Adobe Creative Suite Podcast and get the App here. It features EXCLUSIVE CONTENT that no one else gets to see. This episode has a BONUS CLIP that is available only in the App! My iOS App is a Universal App for iPhone, iPad and iPod touch. I also have an Android version:

Learn Adobe Creative Suite with Terry White - Wizzard Media

Review: Rogue Grid for Your Speedlight

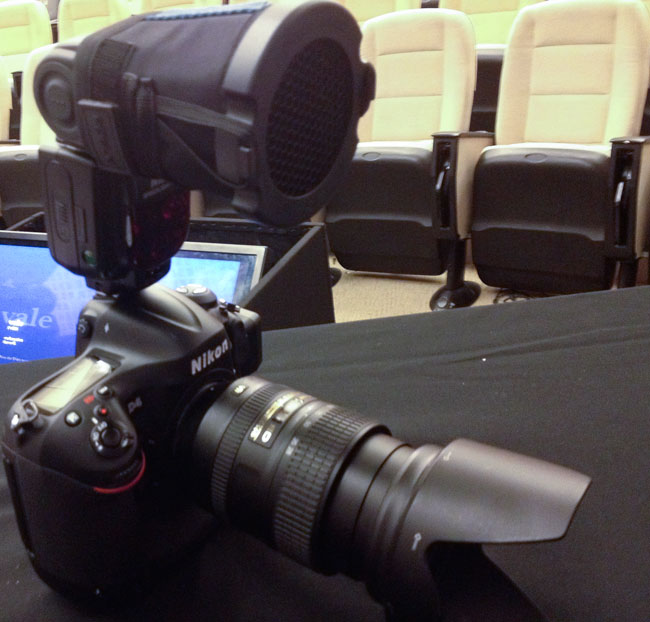
Most of you know that I’m not really a fan of on camera flash. If I use a speed light, then chances are it’s on a stand. When I do use a speed light I usually use a modifier of some type. The one that I usually always have with me is the Rogue FlashBenders. Since I like the FlashBenders so much I decided to take the Rogue Grid for a spin. This is not my first attempt with this product. I received a review unit when it first came out and quite honestly I found the strap to attach it to your speed light so cumbersome that I never actually used it. I gave up. I let the folks at Expo Imaging know and they listened. They completely redesigned the Rogue Grid and made it MUCH EASIER to attach. I took it with me to South Africa and decided to take a couple of candid shots with it.

Focusing your light

The point of a spot grid is to focus your light to a more narrow beam. The Rogue Grid does this task with your speed light. I started with my colleague Jason Levine.

First without the speed light at all
Then with my Nikon SB 900 and the Rogue Grid

Although I saw some potential, it wasn’t quite right yet. The I adjusted the power settings on my SB 900 and took another shot of one of the hostesses at our event.

On this shot and subsequent shots, the Rogue Grid really started to shine

The light was good and not to harsh.

The Bottom Line

I still like the FlashBenders best, but I can definitely see some use for the Rogue Grid too.  Next up I’ll give the Rogue Diffusion Panels a shot.

You can get the Rogue Grid here: B&H or Amazon.


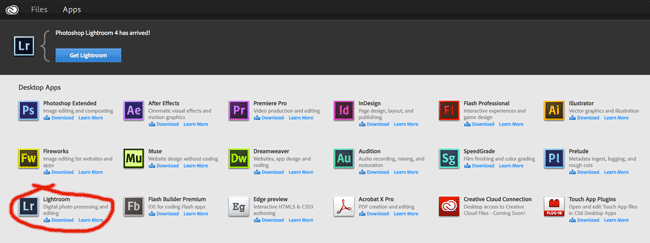
Adobe Lightroom 4 is Now Part of Your Creative Cloud Membership

Since the launch of Adobe Creative Cloud, my readers have been asking “When will Lightroom 4 be available to Creative Cloud Members?” The answer to that question is TODAY! That’s right, if you are a current Creative Cloud Member or you sign up from today forward, you can now also get Lightroom 4 in addition to all the other services.

Creative Cloud will go for $49.99/month (with a 1 year commitment), but remember from now though August 2012 (time is running out) you can get your first year for only $29.99 if you’re an existing Creative Suite customer. This membership gets you access to all the Apps of Creative Suite Master Collection, Adobe Muse, Adobe Edge, Business Catalyst web hosting and now Lightroom 4.

Check it out here.

It won’t stop there! Creative Cloud members will continue to get additional benefits all year long.

Nikon Safari – Photographing the Big 5 in Sabi Sabi South Africa

One way to end a ten week international tour is to simply take a 16-18 hour flight home from Johannesburg, South Africa. Another way to end it is to have Nikon South Africa sponsor you on an African Safari at Sabi Sabi before that flight home! I was fortunate enough to have the latter.

I just came back from an Amazing week finishing off the international portion of our Adobe CS6 and Creative Cloud World Tour. The last two international stops were Johannesburg and Cape Town (see my earlier post). After leaving Cape Town we flew to Nelspurit and then drove on to Sabi Sabi (a private game preserve). This was my second safari in South Africa and it was a pleasure to be back.

I put together this photo book using Adobe Lightroom 4.

It was great photographing this magnificent creatures in the wild! It was even better doing so with a Nikon 200-400mm f/4 lens. Didn’t want to get too physically close 🙂

Continue reading “Nikon Safari – Photographing the Big 5 in Sabi Sabi South Africa”

Who Owns The Shot?

Image compliments of iStockphoto.com

Nothing sparks passion and debate like a good ole’ fashion copyright discussion. I’m sure this question has been asked before and probably answered, but I thought I’d ask it here and see what my readers feel…

If someone picks up your camera and snaps a photo, who owns it?

Yes technically it’s your camera and you physically have possession of the shot, but whose copyright is it? Does it matter if you gave permission to use your camera or not?

Sound off in the comment section…

iStockphoto Integrates with Adobe Creative Suite 6

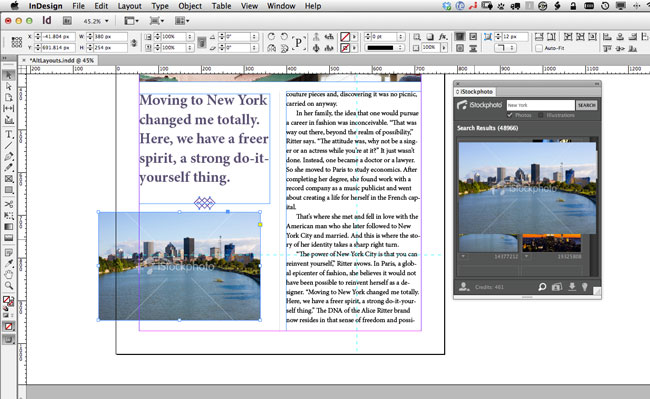
iStockphoto panel showing in InDesign CS6 and a drag and drop of a comp image right into the layout.

I use images (and now video and audio) from iStockphoto all the time. In many cases the images I’m using are for blog posts, however there are times when I’ll use stock photography for layouts too. iStockphoto is my service of choice and needless to say I couldn’t be more excited to find out that they now have plug-ins/Extensions for both Photoshop and InDesign.

With the iStockphoto Extension installed I can do searches right inside Photoshop, Illustrator or InDesign for the images I may want to use. I can even drag and drop comps right from the panel into my documents. Since I’m logged in with my same iStockphoto account I can keep a check on my available credits as well as buy royalty free images right there on the spot to use.

There is no charge for the Extension. You can download it here. Once you install it, you can grab the panel from the Window-Extensions menu in either Photoshop, Illustrator or InDesign.

Thanks iStockphoto for making the design process a little easier!

How To Create Photo Slideshows for Your Website With Adobe Muse

In this episode of the Adobe Creative Suite Podcast Terry White shows How to Create A Photo Slideshow For Your Website With Adobe Muse. Whether you’re a photographer or just someone who wants to put a photo gallery on the web, it couldn’t be easier than the steps you’ll see in this tutorial.

Are you missing out on my Bonus Content?

See more of my Adobe Creative Suite Videos on my Adobe Creative Suite Podcast and get the App here. It features EXCLUSIVE CONTENT that no one else gets to see. This episode has a BONUS CLIP that is available only in the App! My iOS App is a Universal App for iPhone, iPad and iPod touch. I also have an Android version:

Learn Adobe Creative Suite with Terry White - Wizzard Media

M.I.C. Outs a New 4-in-1 Camera Connection Kit for iPad

If your camera uses SD memory cards then you have probably had no issues importing images into your iPad using the Apple Camera Connection Kit. However, if your camera shoots Compact Flash then it gets a little more challenging. Apple doesn’t make a kit or adapter to allow you to import your images from your Compact Flash cards directly. However, M.I.C. does!
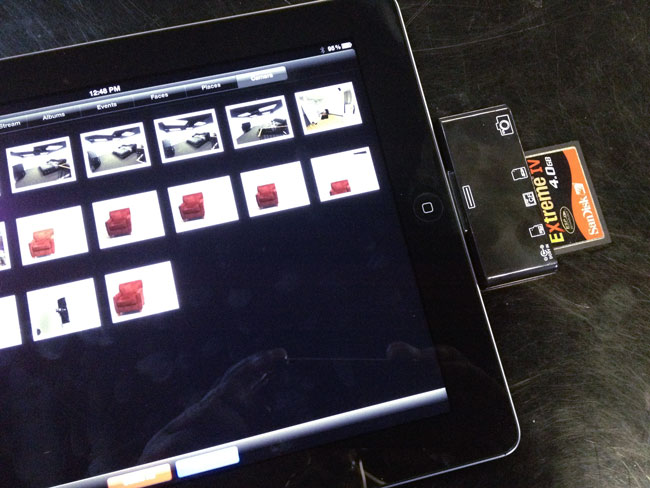
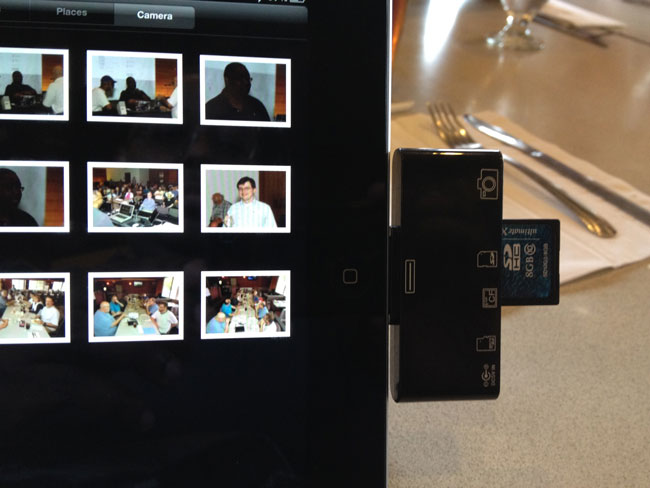
Camera Connection Kit 4-in-1 for iPad, iPad 2 and The NEW iPad

I’ve been using the original M.I.C. reader for over a year. Recently I either lost one of the two I own or I misplaced it. This lead me to go to their site and order a new one. That’s when I discovered that they had replaced the one I had with a newer, better one. This NEW Camera Connection Kit not only handles Compact Flash (CF) cards, but it also handles SD, MicroSD and a direct USB connection to your camera. This effectively eliminates the need to carry both the M.I.C and the Apple one as it will import images from both my SD and CF cards.

One of the hurdles in supporting CF cards is that the higher speed ones use more power. A while back Apple purposely dialed down the amount of power available via the iPad dock connector as they didn’t want people connecting all the peripherals they were starting to connect to it (I can only guess they did this to eliminate all the support calls for what people might connect to an iPad). M.I.C originally said that they wouldn’t support cards over 400x in speed, but this new Connection Kit also comes with a USB power cable to the adapter. If you have a card that draws more power than the iPad will handle you can plug in this cord to the adapter and your USB wall charger and get more juice.

How well does it work?

Over the weekend I was at a meeting where a photographer was taking pictures. He handed me his SD card and I imported his Canon RAW shots right into my iPad. No problem. Yesterday, I decided to try it with the CF cards from my Nikon D4. This is where I discovered that although M.I.C. includes a power solution, you can still have cards that won’t work. For example, my SanDisk Extreme IV cards worked fine, but my newer Transcend 32GB 400x CF cards wouldn’t work at all. Even when I plugged in the power cord, the card wouldn’t mount on the iPad.

The Bottom Line

There are lots of knock off 3-in-1 and 4-in-1 readers for the iPad that are cheaper than the M.I.C. solution. However, most of them don’t work on the New iPad at all! Although the M.I.C. 4-in-1 Connection Kit worked fine on my New iPad, there was still at least one particular CF card that it couldn’t read. Therefore I would recommend that you test your cards before heading out on your trip with your camera and iPad only. Lastly, the New Photosmith 2.0 App makes the sorting, flagging and metadata process on the iPad much nicer especially if you’re a Lightroom user. When you get back with your iPad you can simply sync all your RAWs, JPGs, and Collections to Lightroom wirelessly!

You can order the M.I.C Camera Connection Kit 4-in-1 here.

Gelaskins: The Terry White Collection :)

I’ve been using Gelaskins for a couple of years now to customize my various devices. As a photographer I’m always looking for ways to display my work. Put the two together and now my “Creative Portfolio” is on my MacBook Pro, iPad and iPhone.

P.S. I love it when the TSA agents are so busy looking at my photos that they forget to make me take off my belt! 😉

Check out Gelaskins here. You can buy existing designs or upload your own!

Adobe Lightroom 4 Now Available in the Mac App Store

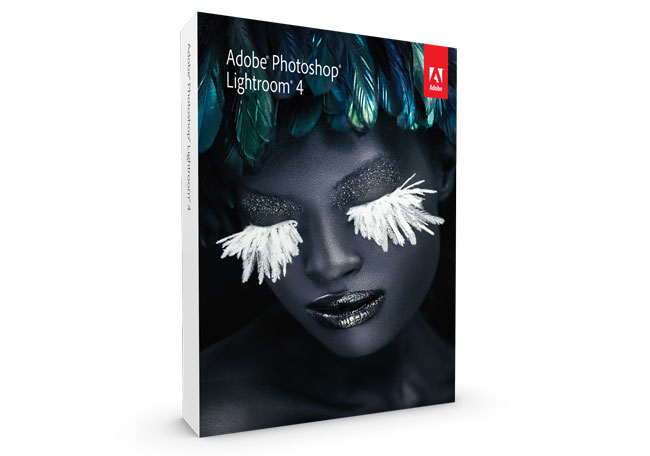
Adobe Photoshop Lightroom 4 is now available in the Mac App Store! This is good news for those of you who haven’t bought Lightroom yet. As with most things there are some pluses and minuses:

  • This is a single platform license for Mac only. (The boxed version and the ESD offering on Adobe.com can be installed on Mac or Windows)
  • Updates will take place through the Mac App Store, not via Adobe.com for this version of Lightroom. When we update Lightroom for new camera support(about 4 times per year), the Mac App Store version may be released at a different time than the update on Adobe.com
  • There is no upgrade pricing available on the Mac App Store for Lightroom customers who own Lightroom 1, 2 or 3.
  • Because there is no upgrade pricing or upgrade validation currently available on the Mac App Store, there is no guarantee that upgrade pricing will be available to Mac App Store Lightroom 4 customers when Lightroom 5 and future versions of Lightroom are released.
  • Lightroom 4 is available on the Mac App Store in North America only
However, like all Mac App Store purchases you can install this version of Lightroom on as many Macs as you own.

Adobe Photoshop Lightroom 4 - Adobe Systems Incorporated