I have been telling photographers for years to always have at least three copies of your images/videos. This also applies to traveling photographers. I have also said for many years that “there are two types of computer users: those who have lost data and those who will.” With this in mind you would probably think that I’d be one of the last people to lose some of my precious images/video, but that’s exactly what happened. I didn’t follow my own advice and it’s no one’s fault but my own. I can’t blame the hardware. I can’t blame anyone else. It was all me. I knew better!
I’m telling you my sad story so that hopefully it won’t happen to you.
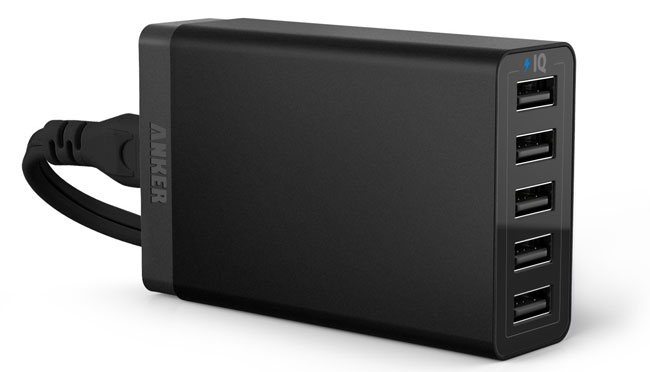
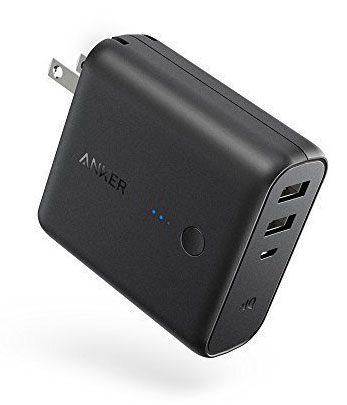
Last year I standardized on Anker for all my mobile device charging needs. Their products are top notch and so far their Lightning cables have outlasted all other brands I’ve tried. I’ve used several of their backup batteries, but this new one is a great idea! Normally you’d carry a phone charger when you travel so that you could charge your phone at night or when you’re going to be in one spot for a while. You’d probably carry a backup battery too. This way you could charge your smartphone ore tablet on the go when you’re not near a plug. Now imagine if you could have one portable charger that served both purposes.
The NEW Anker PowerCore Fusion 5000 replaces two things in my backpack
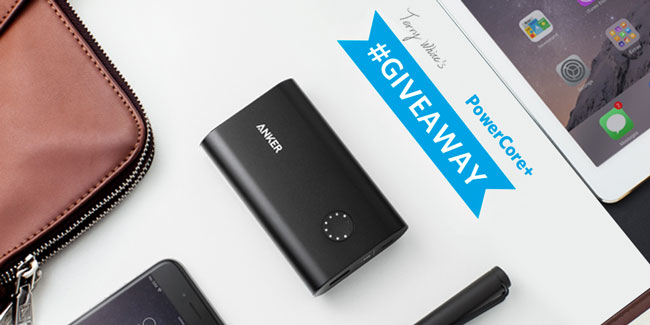
I am a fan of Anker’s battery backup products and cables. I worked out a giveaway with them that will allow me to giveaway their NEW PowerCore+ 10050 battery backup for your mobile devices. To enter all you have to do is follow me on Twitter here and retweet this tweet. On Sunday, September 20th 2015 I will pick a US or UK based follower that retweeted the tweet.
Having just returned from 3 weeks in the Asia Pacific region and a week in Europe a month ago I definitely have some new tips for travelers and those that travel with electronic gear or camera gear. The first thing that most travelers with tech will be concerned about is charging your devices in route and charging them once you get to your destination.
Charging in the air
More and more long haul flights are providing USB power at every seat. If you’re in an Economy Plus seat you may even have a regular AC outlet as well which would be great for charging a laptop or tablet. It goes without saying that Business Class/First Class seats almost always have both regular AC power and USB power ports at every seat. Before you get too happy about the USB power port be aware that it is more than likely a 5v port and therefore may not charge a tablet (ie. iPad).
What if you don’t have power at your seat?
If you are on an older aircraft or crappy airline then chances are you’re not going to have power at your seat. This is where you’ll probably rely on bringing a backup battery. There are dozens and dozens of different backup battery models out there. I have recently standardized on Anker products for my charging needs. Their products are quality built and reasonably priced. I have a couple of their models.
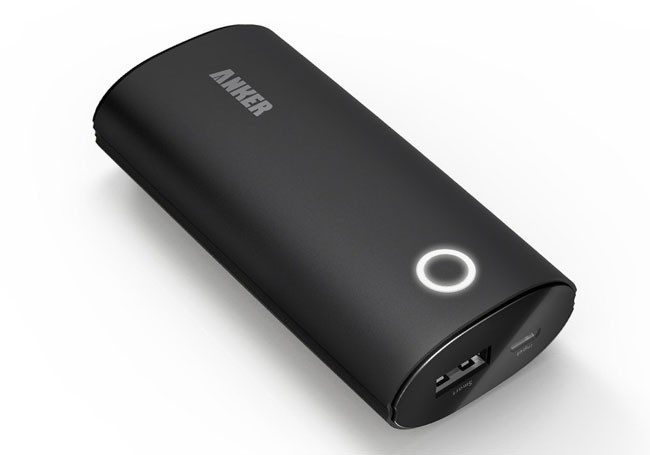
The one I now carry on my person is the Anker 2nd Generation Astro 6400 mAh portable charger. This one can charge my iPhone 6 Plus almost two times on a single charge. I love how it has round edges and no external buttons. This makes it great for a pocket without having to worry about accidentally turning it on.
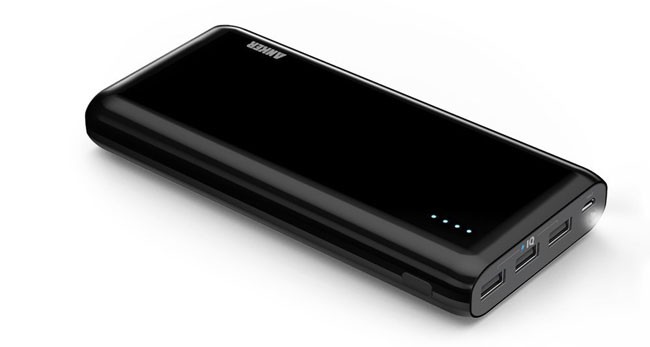
The one that I carry in my bag is the Anker Astro E7. This is the mother of all backup batteries for your mobile devices. It has a whopping 25600 mAh battery capacity with 3 ports 4A. It can charge an iPhone 6 Plus or Galaxy S6 over 6 times. An iPad twice. This means that I can use this battery for several days before needing to charge it.
It’s 2015 and while Delta has the largest WiFi equipped fleet it’s still pretty rare to find a long haul (over the ocean) flight with WiFi. As a matter of fact I was coming back from Amsterdam earlier this year on a Delta 747 and I was shocked to see that I had access to GoGo Inflight WiFi for the entire 10 hour trip! Unfortunately this is more of an exception than a rule. Delta is ahead with half of their long haul flights equipped with fast (much faster than domestic 3G speeds) satellite WiFi. When it comes to other airlines like Qantas, Air New Zealand, AirFrance, Singapore Airlines, etc. WiFi isn’t something that they are aggressively adding. In fact when I had a Twitter exchange with Qantas they said they did a trial 3 years ago and there wasn’t much interest. Keep in mind that it was 3 years ago and they were charging by the kilobyte. I would imagine that there wasn’t much interest at that time with something that was likely way overpriced. No one wants to pay by the kilobyte/megabyte. GoGo has the right approach in charging a flat fee for an hour or the entire flight.
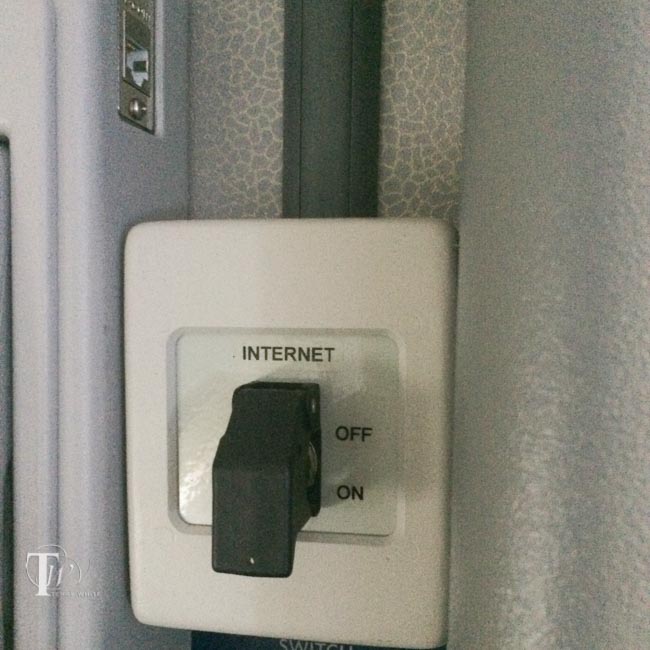
I found the switch that controls the entire internet! 🙂
I was way more productive with 10 hours of WiFi than my last flight coming home, a combined 18 hours of flight time without WiFi. If you’re expecting to get work done on a long flight be sure you’re doing things that don’t require an internet connection. With that said I can also settle the online debate of watching an iTunes rented movie with no internet connection in the air. If you rent AND download an iTunes rental on an iOS device BEFORE you board the flight. You CAN start and watch the movie WITHOUT an internet connection in the air. This wasn’t the case when iTunes rentals first hit the scene. They required a brief connection to the internet when you hit the play button to authorize the movie. Thankfully that wasn’t the case with the movie I watched on my iPad. While you can certainly watch/listen to entertainment, things like social media are out of the question without a connection.
International Power
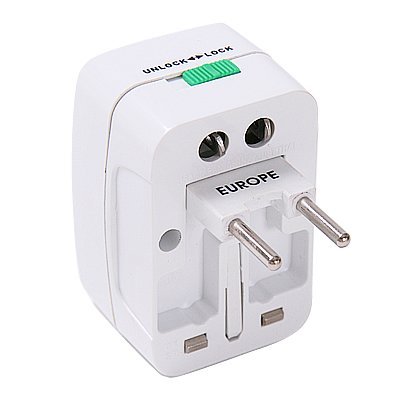
Once you land and get to your hotel or place you’re staying at you’re probably going to want to plug stuff in and charge. Luckily most if not all modern day electronics have power supplies that handle the higher voltage of international outlets (220-240v). The main issue will be adapting the plug to the wall outlet. I used to be a fan of universal adapters that allowed one adapter to plug into multiple kinds of outlets. This used to be my favorite:
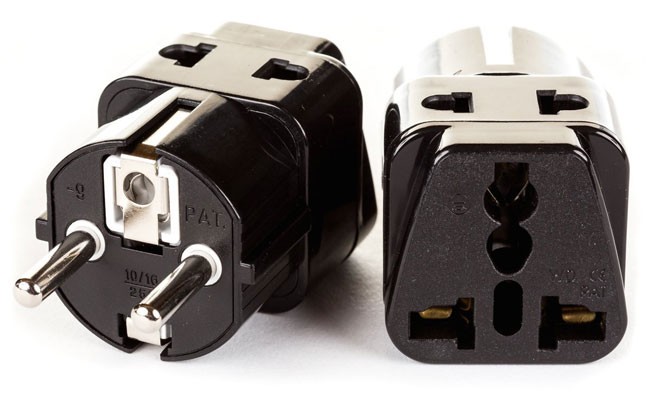
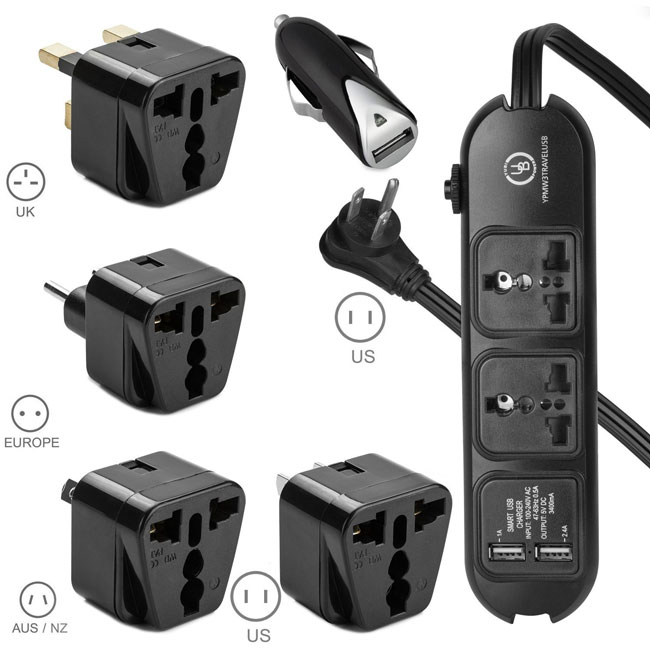
However, I’ve been frustrated in some cases with older outlets. These large universal adapters often are simply too heavy and fall out of older, looser wall sockets. On my last trip I used specific adapters for each country. In most cases you will only need three of these:
What I like out these single adapters is that they are much more reliable in just about any situation (older wall socket, power strips, etc.) and the newer design allows you to plug in two things.
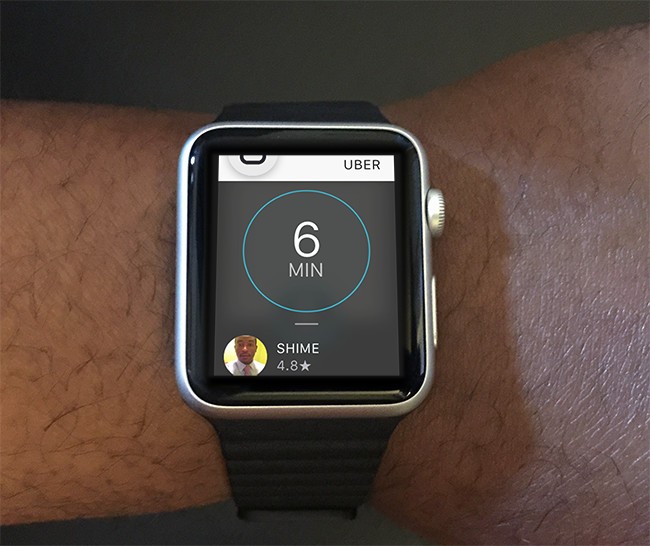
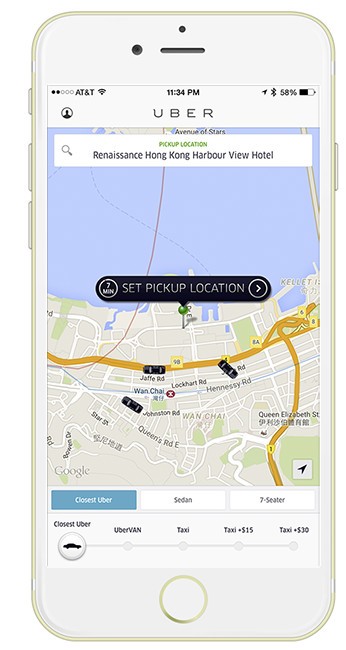
Most countries have taxis, buses, subways and trains or least some combination of them. If I’m new to the area I’m rarely brave enough to take the train/subway because I fear getting lost. Believe it or not I’m very directionally challenged. I did use the subway in Milan to get to the EXPO because it was a single train and a direct shot. Most of the time I’d normally rely on taxis. However, with a taxi there are issues of either having enough cash in the local currency or having a compatible credit card. In some places all the taxis take cards and in others like Hong Kong they look at you like you’re crazy if you try to pay with a card. This is why I’ve gained a new respect and love for Uber. Uber was available in every country/city I visited and it took the pain out of getting around. Now I had one app on my iPhone that allowed me to summon a car whenever I wanted to. The service was consistent and since your credit card is on file with Uber there are no awkward payment issues at the end of the ride. Uber worked great everywhere I went. The only odd thing was that in Hong Kong even though I would enter the destination in the App they would always ask me where I wanted to go. I could see it on the map on their smartphone on the dashboard, but I still had to restated it each time. Speaking of putting the destination in the Uber App this also cuts down on the potential language barrier. Often in Paris the driver barely spoke English and having the destination in the Uber App made it much easier to get to where I was going.
Using ATMs and Credit Cards
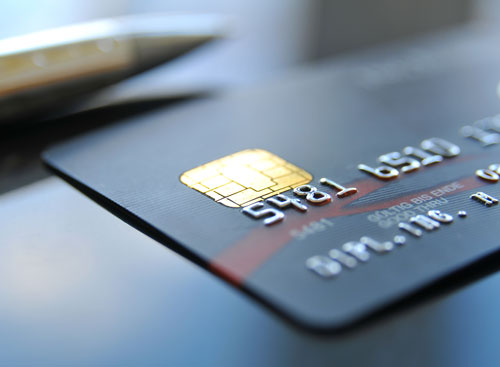
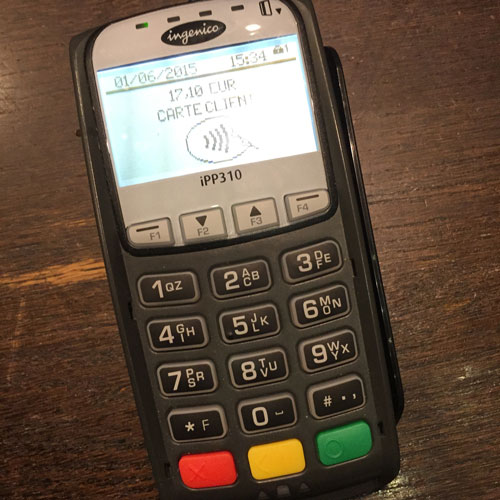
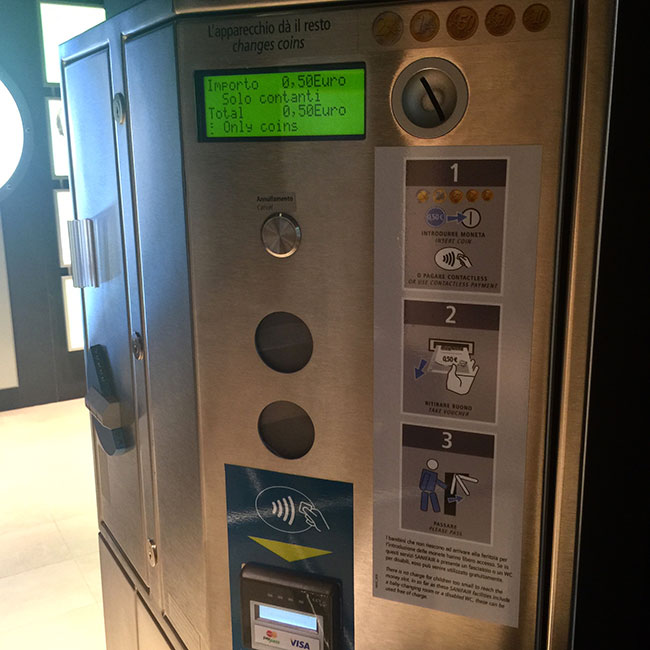
My corporate card for expenses is an American Express card. While this is pretty much accepted everywhere in the US these days, it’s hit or miss in other countries and especially at smaller merchants. Hotels, no problem, but trying to use American Express at shops and cafe’s will usually result in you pulling out a different card. Visa and Master Card are accepted everywhere that cards are accepted, but you should make sure that your card is a newer one outfitted with a “chip”. The EMV chip that you’re probably seeing on all your new credit cards is pretty standard outside the US and will be a standard here by the end of the year. Some of the overseas merchants can’t process your card if it doesn’t have the chip. This is for your protection too as cards with chips are less likely to be spoofed/hacked. This will be even more the case for automated payment systems such as parking garages and train stations. My ATM Debit card doesn’t have the chip yet but I’ve yet to have a problem withdrawing money at BANK ATM machines. It’s also a good idea to alert your bank that you’re going to be out of the country so they don’t flag your transactions as fraud.
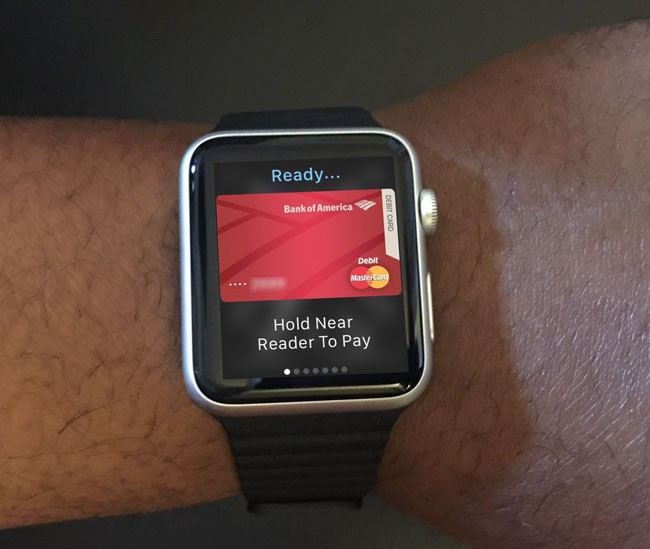
Yes Apple Pay works too in many places, but not all. I was able to use Apple Pay in most places in Paris.
As a matter of fact I never realized how happy I’d be to use Apple Pay until I had to use the rest room in Milan and it was a pay toilet. I had no change!
Lastly while we’re on the subject of credit cards, it’s a good idea to remove any cards that you know you’re not going to use abroad before you leave home. Only take the credit cards that you know you’re going to use, your driver’s license, health insurance card and of course you’ll need your Passport. This way if your wallet is stolen the damage will be minimized.
Making calls and texting
International roaming is notoriously expensive. While I’m grandfathered in to an old AT&T plan for unlimited international data (I know right!), calls by the minute are still expensive and international SMS (text) messages are crazy expensive. I rarely make calls on my iPhone when I’m traveling but when I do I do it using data instead. In iOS if I’m calling another iOS user I can simply use FaceTime Audio. If not I can use either Vonage or Skype. Of course FaceTime and Skype can also be used for video calls. iMessage uses data instead of cellular for text messages between iOS users. When I want to text non-iOS users I typically use WhatsApp Messenger. This cross platform App lets you text, send photos, etc, just like SMS/MMS messages without using your expensive international text messaging rates. If you find a WiFi hotspot to use then all of the above can be done for free.
Getting through airport security with your gear
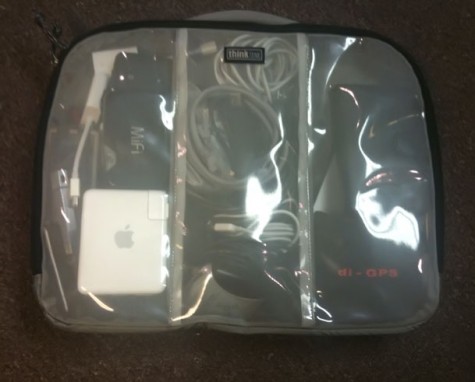
I get really frustrated by international airport security. If you think TSA is a hassle in the US, wait the you go abroad. On the plus side you’ll likely be able to keep your shoes on in most places, but when it comes to your belt and electronics be prepared to pretty much empty your bag. Things that can usually stay in your bag in the US like your iPad and camera, almost always have to come out at international airports. If the xray operator sees anything resembling a gadget or wad of cables you will be taking that stuff out and sending your bag back through. You can also forget leaving your laptop in a TSA approved bag. It will need to come out. Your camera and more often than not even your lenses will need to come out too. Empty your pockets. If you walk in prepared to do all of this then you will get through faster.
Pictured above is my older ThinkTank cable management bag. I now travel with this smaller one. If I take it out and put it in a bin I get through faster.
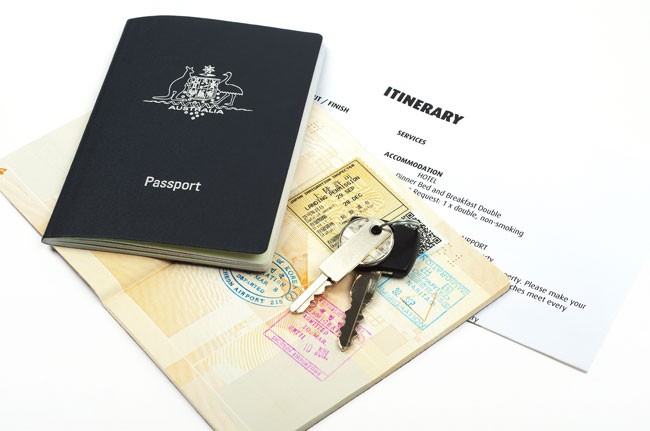
Print your itinerary
In this day of online checkin and electronic boarding passes one of the last things you’ll probably think about is having a printed itinerary. I know I didn’t used to think about having any printed documents until the one time I was coming back from India and the armed airport guard wasn’t going to let me into the airport without one. After much pleading I was able to convince him to look at the one on my iPhone. I knew from that point on to have a printed itinerary for every international trip. While you’re at it make a copy of the picture page of your passport and put it in every piece of luggage you have.
The 5 Most Useful Apps When Traveling Internationally
These are the 5 Apps that were the most useful during my travels:
FlightTrack 5
FlightTrack 5 is my favorite flight management tool. I loaded all my flights in before heading out and the app kept me updated on delays and more importantly for international travel which terminal I’d be departing from in each country.
As I mentioned above I used Uber in every city in every country I visited for a consistent convenient easy way to get around as needed including rides to and from the airport.
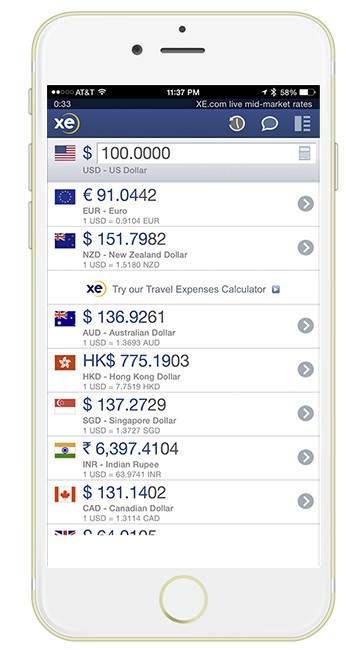
When you’re in a different country then chances are the prices you see in stores, restaurants, etc. will be in the local currency. XE Currency provides a great view of multiple currencies all at once. You can easily swap between any currency you want to be the main currency.
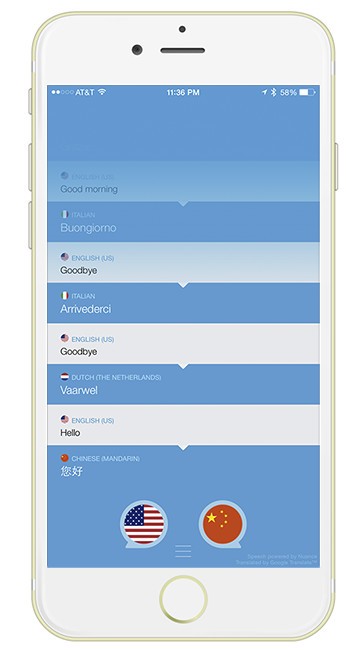
Unless you’re bi-lingual you will probably encounter someone you need to communicate with that speaks very little of your native tongue. Speak & Translate is hands down the best audible language translator app that I’ve seen to date.
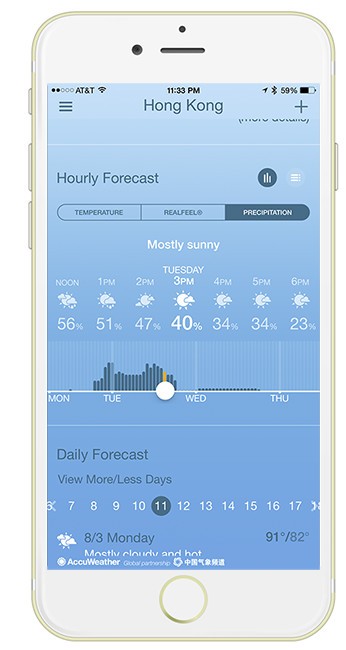
When I was in Hong Kong it was raining most of the time. The standard built-in iOS weather app just wasn’t accurate enough to let me know what time the rain would clear for me to go out and shoot. On the other hand Accuweather was very very accurate giving me the most accurate times of day when there would be no rain.
Travel is constantly evolving. It’s fun going to new places and seeing different cultures. Once you solve the typical connectivity issues I addressed above then you can concentrate on having a good time and enjoying the trip. I would also recommend keeping a pen on your person especially on flight days to fill out customs forms and a small travel umbrella is a must have depending on where you’re headed. Every hotel I stayed in had in-room safes that are free to use. I recommend that you store any valuables and gear that you’re not going to be using before you head out sightseeing. Safe travels and sound off in the comments if you’ve got any questions. I hope my tips for traveling internationally help you out.
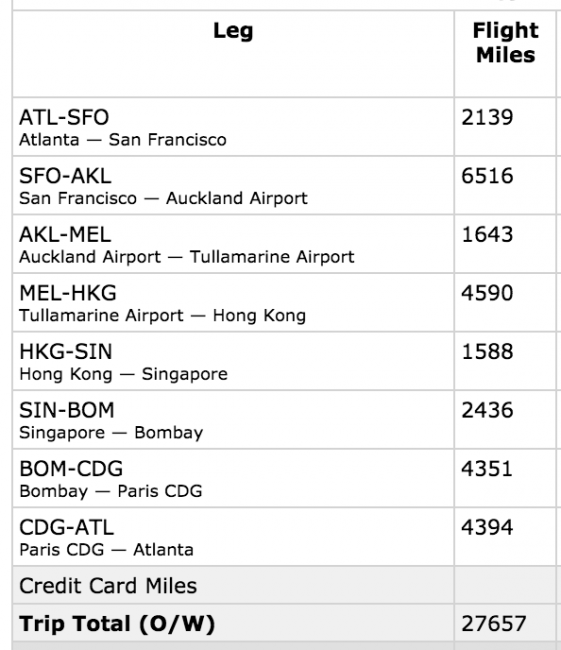
Another complete circle around the globe!
Going to Photoshop World 2015 in Vegas next week?
If so you can SAVE $50 by registering here with the Discount Code: TerryWhite50
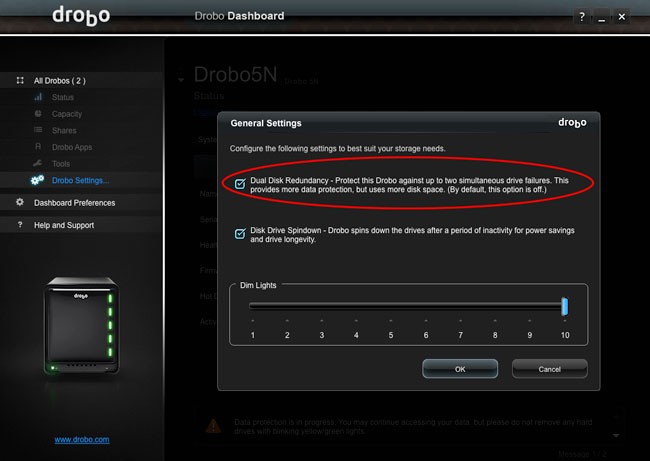
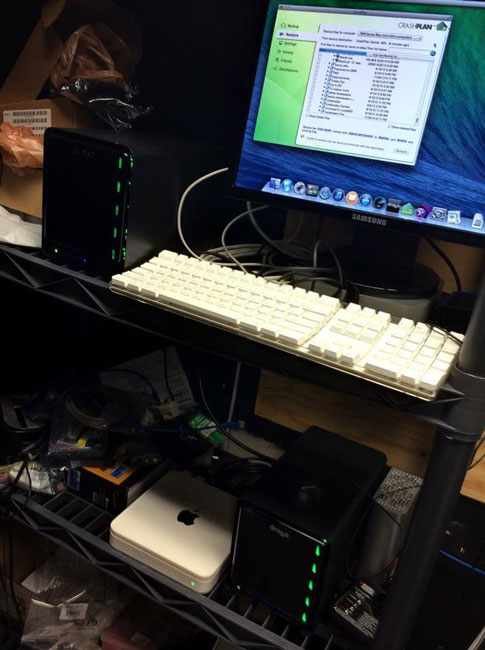
Like you, my data is very important to me. I have several backups and offsite cloud backups too. In my home office I use a Drobo 5D connected to my Mac OS X Server as well as a second Drobo 5N to backup the Drobo 5D. The whole reason to have a Drobo is so that if one of your hard drives fail your data will be protected and you can just keep working. You’ll probably replace the failed drive with a larger one since larger drives come out every year. The one thing we don’t really think about is what happens if two drives fail at the same time? Normally this means you’re screwed and it would be time to restore from a backup (after replacing the two failed drives). The last time I had a Seagate 3TB drive die in my Drobo 5N, I not only replaced it with a WD 4TB NAS drive, but I also enabled Drobo’s dual redundancy feature in the settings.
With this feature enabled now two drives could fail at the same time and I’d still be protected.
C’mon how likely is it that two drives would fail at the same time?
I hear ya! However, before I tell you what happened on my other Drobo (5N), think about it. When you setup your Drobo (RAID), chances are you bought multiple drives at the same time. So if one fails (especially as they get older), then it’s likely that another one bought around the same time could fail shortly thereafter. As a matter of fact I now know this can happen. Although I had turned on Dual Redundancy on my Drobo 5D, I had not yet turned it on my Drobo 5N. While traveling on business I received an email alert that one of my drives had failed (an older 2TB Seagate). No big deal as my data was protected. However, by the time I got home several days later a second 2TB Seagate drive had failed. That’s it. Game over. It wasn’t a huge deal since this Drobo served as a backup to my main Drobo. I didn’t lose anything other than Time Machine history.
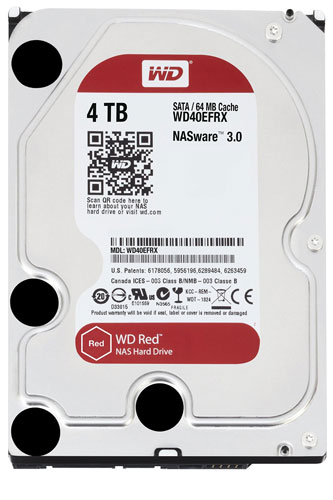
I replaced both drives with new 4TB WD NAS drives and during the setup process I enabled Dual Redundancy. My Drobo 5N still has two of the 2TB Seagates and a 3TB Seagate (which have been failing on my pretty regularly and it’s why I’m kinda done with Seagate) in it. Now I’m a little less worried if two of the older drives bite the dust at the same time. Keep in mind that I just put two 4TB drives in my Drobo 5N at the same time. Chances are if they die in a few years (no premature failures) under normal wear and tear, they’ll probably die around the same time.
What’s the downside to enabling Dual Redundancy?
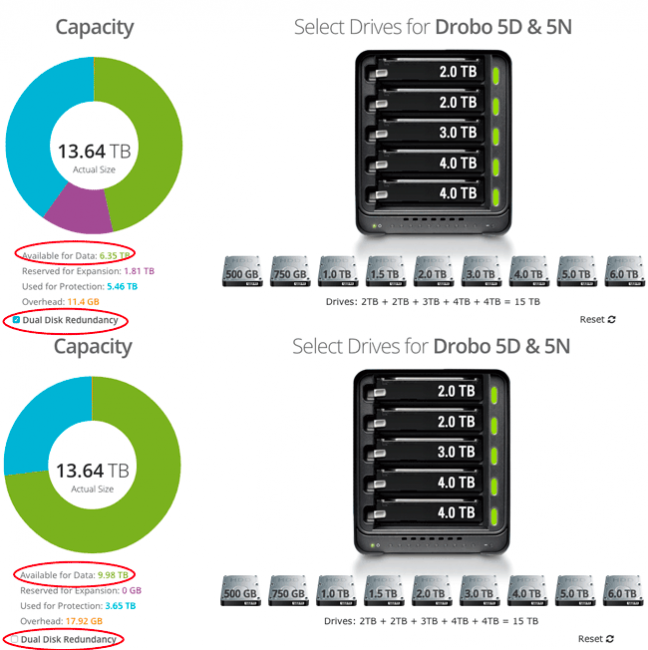
There is a downside otherwise this option would be on by default. By enabling Dual Redundancy your Drobo will have less usable space. You can figure out how much storage space you’ll have by using the Drobo Capacity Calculator on their website.
The Bottom Line
Yes two drives can fail at the same time or back to back. While enabling Dual Redundancy does give you less storage space, drives are relatively cheap and it’s better safe than sorry.
While having dinner with friends the conversation came up about running out of space on a laptop. I asked my friend who is retired and travels for pleasure most of the time, how he backs up his photos? He told me at first that he had merely moved some photos onto a “USB stick”. I dug a little deeper (knowing that my friend knows a lot about computers) and found out that he does have a backup strategy that involves multiple drives and offsite backup. Whew!! However, that got me thinking about the question I get a lot from new photographers, “how do you backup your photos?” Unlike your regular documents, chances are you have photos “everywhere”. You have photos on your memory cards. You have photos on your hard drive. You have photos on your “other” hard drive. You have photos on your smartphone. You have photos on your tablet. You have photos online. Worst yet the problem will continue to grow as you take more photos every day and you acquire more devices. There is nothing else you have electronically that will likely be in so many places and continue to grow. Music and videos can be a mess too, but generally you’re shooting more photos than you are videos and acquiring new music.
How to Backup Your Photos
This post is really not about a specific piece of hardware or software. Sure I will share the specific hardware and software that I use, but I really want you to focus on a simple rule first: “Always have your photos in at least three places with one of those places being offsite.” No matter what software, hardware or even cloud based solution you have, the worst mistake you can make is relying on ANY one thing/service. No matter what hard drive you buy, computer you use, service you backup to, etc., they are ALL SUBJECT TO FAIL! Nothing manmade will last forever. So don’t rely on any one thing to be the sole location for your precious memories. If you follow the simple rule above, you’ll be in a lot safer position than the average person out there.
What’s my workflow and how do I backup my photos?
Since this is a question I get on a regular basis I’ll share with you exactly what I do and how I backup. Keeping the rule in the previous paragraph in mind I know that my photos need to be in at least three places with one of those places being offsite. In that case let’s walk through one of my shoots:
Location #1
I either shoot on location to a memory card(s) or in studio tethered directly to my MacBook Pro. In the case of being on location the images are captured to the memory card first and that’s the first (temporary) location of my images by default. When I shoot tethered my images go directly to my laptop hard drive (yes you can use an external, but I don’t since they won’t be there for long.)
Location #2
If I shot on location then I import the images into a folder on my MacBook Pro drive and from there into Adobe Lightroom 5. Since the images are still on the card this becomes location #2 by default. However, if I shot tethered then the photos are already in a folder on my drive. Since I’m on the Mac, I have TWO Time Machine Backups setup that AUTOMATICALLY alternate backing up every hour. This is the real location #2 (Location #1 = MacBook Pro and Location #2 one of two Time Machine Backup drives on the network).
Location #3a
This one doesn’t really count as Location #3 because the photos are ultimately “moved” from my MacBook Pro onto a Drobo 5D which is attached to my Mac OS X Server (Mac mini). In other words the photos from my recent shoot are on the MacBook Pro hard drive while I work on them, retouch them and then finally deliver them. Once I’m done with them I move that folder from my MacBook Pro hard drive to my Drobo hard drive. So technically this is still location #2 as the photos will either be on the MacBook Pro OR the Drobo, but not both. I put this location in because it is part of the workflow.
Location #3b
Not only were my photos being backed up to my TWO Time Machine backups within 1 to 2 hours after being on my home network, they are also being backed up OFFSITE to CrashPlan.com. CrashPlan works in the background and immediately starts backing up any new files added to my pictures folder on my MacBook Pro. However, let’s say for the sake of argument that I move them to the Drobo before CrashPlan has a chance to back them all up. What happens then? You guessed it, the Mac mini connected to the Drobo is also backing up to Crashplan.com. In either case the photos will either get backed up offsite from the MacBook Pro or from the Mac mini if not both.
Location #1 AGAIN
It’s important to note that the Mac OS X Server (Mac mini with the Drobo 5D) ultimately becomes my archive. It’s where ALL of my photos eventually end up. It’s where my Lightroom catalogs point to for photos taken in years past. This means that the Mac mini/Drobo 5D technically becomes location #1 at some point in the digital life of my photos. So what now?
Location #2 AGAIN
The Mac OS X Server is backed up via Time Machine to ANOTHER Drobo. A networked Drobo 5N. This ultimately becomes location #2.
Location #3 is still Location #3
The Mac OS X Server is backed up offsite AUTOMATICALLY via CrashPlan.com. I could even setup CrashPlan as an App on the Drobo 5N so that it’s backs up the backup offsite.
Bonus Backup Locations
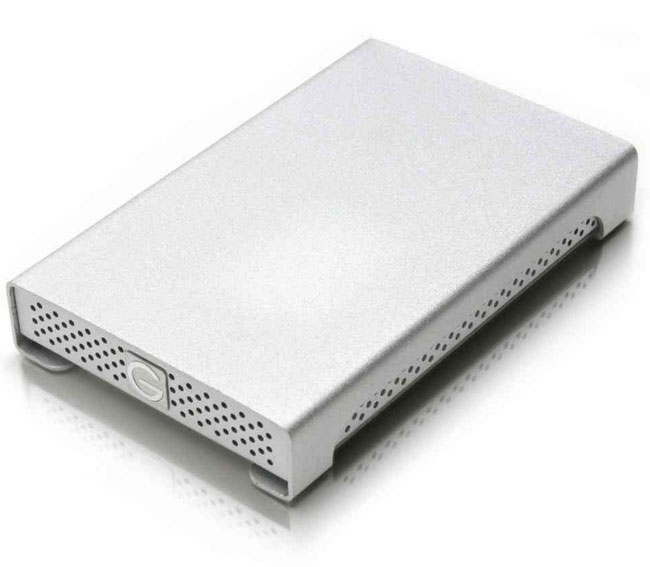
If all I had was the above strategy/workflow I’d feel “pretty” comfortable, but I’m a paranoid kinda guy when it comes to my data. So I have some bonus backups. Since Time Machine can backup automatically to as many drives as you add to it (automatically alternating between them), I backup on the go to small WD 2TB My Passport Wireless Drive. This one is the one that I travel with. Since I shoot out of town from time to time I can’t chance that my photos won’t be backed up before I get home. Therefore the memory cards become Location #1, the MacBook Pro hard drive becomes Location #2 and the WD My Passport Wireless Time Machine backup becomes location #3 on the road. Not to mention that if my internet connection is fast enough that CrashPlan is doing it’s thing in the background too. As far as just my data goes in general I have yet another backup of my entire drive. A “clone” backup (using either SuperDuper! or Carbon Copy Cloner) to another 1TB G-Drive Thunderbolt/USB 3.0 portable drive. This backup is less about photos and more about the day that my computer or OS gets hosed and I need to boot immediately and continue with my presentation/work. In other words for those scenarios when I don’t have time to do a Time Machine restore.
Since I now have a 2TB WD My Passport Wireless Drive with a built-in SD slot. I can make a backup of the card(s) in the field before I even get back to my computer.
The Never Ending Need for More Storage
Like I said in the opening, you’re going to be taking photos from here on out for the rest of your life. This means that you will always be ADDING files to your hard drives. Most users think that once their “main” drive fills up, just go buy an external drive. Yes, that works but it’s something you’re always going to need to do. Sure you can buy a bigger drive next time and copy everything from the first external onto the new external and that’s what I used to do. That was until copying everything got to the point that it was taking 18-24 hours to copy.
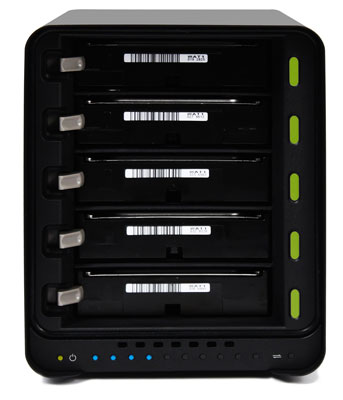
I knew years ago that I was going to need an “scalable” storage system and that’s why I went with Drobo way back then. They’re Beyond RAID technology allows me to swap out/or add a drive in my Drobo with a larger one without having to stop working or even reboot. As I need more space I just put in more/larger drives. If one (or even two drives fail at the same time) fails my data is protected. This doesn’t mean that I don’t need to backup. Remember what I said about everything manmade will eventually FAIL? Drobo or any other RAID system can fail at any time. However, I must say that to date I’ve had no major issues with my Drobo hardware and it has protected me on more than one occasion from drives that have died.
One day I came home to an email alert from my Drobo letting me know that one of the drives had failed. It safely protected the data with no data loss. I replaced the drive and kept right on working! Also feeling at ease knowing that I had a BACKUP!
I know that Drobo (or any other storage solution) can and will fail at some point, but that’s why I backup! That’s why I never depend on ANY one thing being the sole location of my precious data/photos.
Q&A
Q. Do I have to do what you do?
A. Nope, you can do whatever you want. They’re your photos.
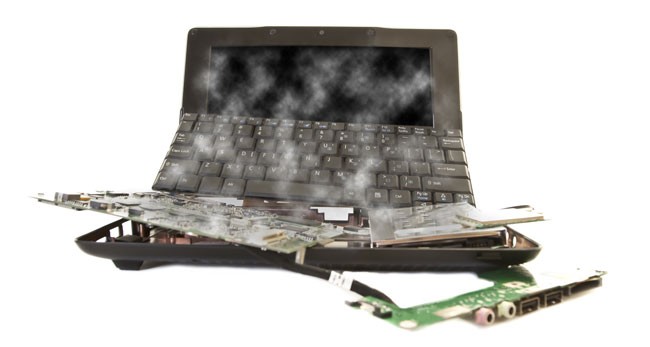
Q. What about SSD drives? Aren’t they crash proof?
A. A common misconception about Solid State Drives (SSD) is that since they have no moving parts, they won’t crash. While I would agree that this makes them “less” crash prone, it doesn’t mean that they can’t die or have an issue that results in the loss of data. As a matter of fact I have first hand experience with losing data that was on a NEW SSD. See that story here.
Q. I don’t trust cloud services. Do I have to use CrashPlan?
A. Nope! The main thing is that you have at least one copy of your data OFFSITE. What good is a backup that sits right next to your computer if someone breaks in and steals the computer AND the backup drive or if you have a fire, flood or other major loss? I know many people that simply have two or more backup drives that they rotate between a friend/relative’s house or a safe deposit box at the bank. As a matter of fact this was my method for offsite backup before I started using CrashPlan. My server would do a clone backup to an external drive each night. I would take the drive to the bank and swap it about once a week. That’s how it started anyway. Then once a week became twice a month. Twice a month became once a month. Once a month became “I can’t remember the last time I swapped backups.” I use CrashPlan because it’s one less thing I have to think about. It works in the background and backs my photos/data up to their servers without having to think about it. It has already come in handy. Also on a side note you can still use CrashPlan without backing up to their servers! That’s right, you can download their software for free and set it up so that it backs up your computer to another computer (say at a friend’s or relative’s house) over the internet. You still have an offsite backup that’s automatic, but you control the location of the data. Provided you trust your friends or relatives 🙂
Q. CrashPlan sounds great! Why not just use that (or a similar service)?
A. You still want a local backup for a few reasons. #1 if something does happen it’s a whole lot faster to restore from a local backup then it is from the cloud. #2 CrashPlan doesn’t backup their servers! That’s right, they openly state that their servers are NOT backed up. Why? Because they know that they are your only backup.
Q. What do you get out of telling us all this?
A. What I hope to get is the peace of mind knowing that I helped at least one person protect their data and I will not have to hear one more person’s story about how they lost everything because of hardware failure or a virus. Drives are SO CHEAP now that there is NO REASON not to have multiple backups.
Q. I upload my photos to Facebook, Flickr, 500px, Smugmug, etc., is that a backup?
A. When you share your photos on social media it’s usually designed to be a one way trip. In other words most sites are not designed to share the original quality of the photo, store it and let your download it again. When you upload a photo to Facebook, that version is highly compressed and looks worse than the original. While having your photos online is better than nothing, it’s not a backup and there is no guarantee that the online entity will allow you to keep them there forever or even be around forever.
Q. You mentioned smartphones. Yes I have photos there that aren’t anywhere else. How are you handling those photos?
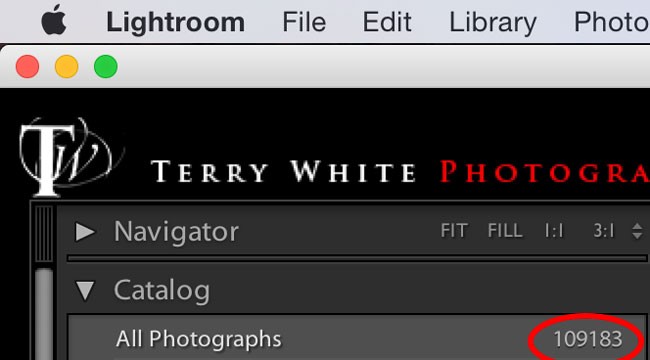
A. I look at my iPhone as another camera. I shoot with it and it’s true I don’t always download them to my computer right away, I do want them backed up. Luckily Apple let’s you do this for FREE. iCloud backup is free (5GB of YOUR data) and built-in to iOS. My iPhone 6 Plus gets backed up every night automatically. I also use Lightroom Mobile. I have a Collection in Lightroom Mobile on my iPhone and my iPad set to “Auto Import”. As soon as I launch Lightroom Mobile on my iPhone it imports any new pictures from my camera roll and syncs them to the cloud. These photos appear in Lightroom on my desktop (MacBook Pro) right along side my other photos. My MacBook Pro is being backed up as outlined above. Lightroom is the center of my photo universe. If it’s an important photo to me then it’s in my Lightroom catalog and the actual digital file (RAW or JPG) is in a folder on my server and two other places.
The Bottom Line
My goal is to always have my photos in at least three places! As you can see from the above workflow I’m cover 99% of the time. Even with what I do above there are still chances for loss. For example, a memory card can go bad before the pictures are ever transferred to the computer or copied to another card in the camera. If recovery software/services can’t retrieve them, they’re gone! What if all your camera equipment is stolen while you’re still out of town? There’s no way to be 100% safe, but at least with a workflow like the one above you’d be covered for the most common situations.
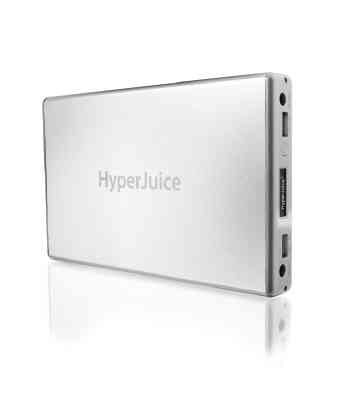
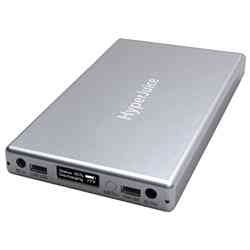
There I am at my desk at 5PM on a Sunday and I can hear the rain outside. Next I hear the wind really whipping by and bam, there go the lights. After a few seconds the lights came back on and then after a few more seconds they went off for good! Sure my APS UPS Systems kept my Server and Internet Router going for a while before they eventually ran out of juice. Since I was headed out of town the next morning I just decided to relax and take it easy for the rest of the evening. However, the one thing that I definitely wanted to keep charged and running the entire night was my iPhone. I have a battery that I keep in my backpack which is good for a couple of charges, but I had never tried to go all night with it. Also while I was sitting at my desk I hadn’t plugged my phone in so it was already down to around 40% battery left. That’s when I remembered my HyperJuice battery that was also in my office and fully charged!
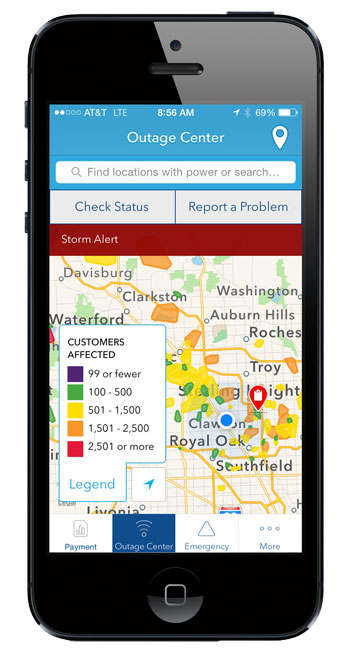
I commend DTE Energy for having a nice App to not only report the outage, but get status updates and see what other areas are affected:
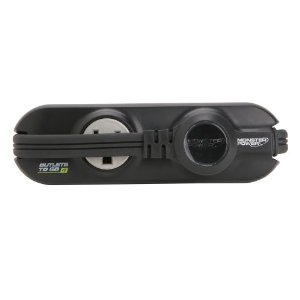
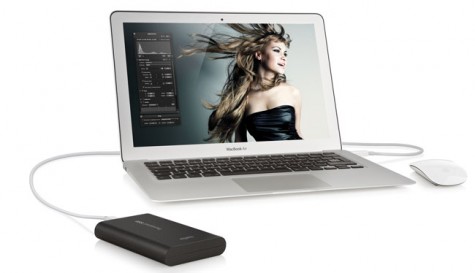
This battery is really designed to power your MacBook for long periods of time when AC power isn’t readily available. However, it also has a USB port for charging/powering phones and tablets. I plugged my iPhone into the USB port and not only did I wake up fully charged 8 hours later, but the HyperJuice still had plenty of juice to top off my MacBook Pro as well! When I originally bought this battery it was for long flights and being at seminars where there were no plugs nearby. I hadn’t carried it in a while and never thought that I’d be using it to get me through the night because of a power outage.
Last week I started a contest to give away a FREE Year of CrashPlan.com Family Plan for offsite cloud backups. Last night I picked a winner at random from the comments left on the original post.
That winner is:
Cynthia Blanton
Congratulations to Cynthia!
Get the iPhone/iPad app that I used to pick the random number here:
As many of you know I’ve been a fan of CrashPlan.com for a few years now. It’s a major part of my backup strategy and gives me an offsite backup in addition to my onsite Time Machine backups. Recently I had Code 42 (the company behind CrashPlan) speak at my local user’s group and I learned even more about how cool their services are. Thanks to the good folks at Code 42 I’m able to give away a full year of the CrashPlan Family Plan (up to 10 computers) to one of my lucky readers.
It’s easy to enter this contest. All you have to do is write a comment below about why you think backups and offsite backups are important to you. The deadline for comments is Sunday, May 18, 2014 at 9PM ET.
I’ll select a winner from the comments below at random and announce the winner one week from today (Monday, May 19th, 2014).
People are always asking me about backup strategies and while I usually discuss my home/studio backups I rarely discuss my “on the road” backups. My MacBook Pro has a 768GB SSD internal drive. While SSDs tend to be more reliable than old school rotating platters, I’m still as paranoid as I’ve always been. I don’t back it up any less than I did before SSD. I’ve had two major data scares while traveling on business. The 1st was on a trip to Toronto several years ago to do a seminar. I was the main/only presenter and I had an audience of about 400 people. My presentation was going to start at 10AM and I was in the hotel connected to the event hall. I woke up that morning and did some work on my laptop before heading over to the hall. I closed my laptop and headed over giving myself just enough time to get there and plug in to the projector. I got there, plugged in and opened my laptop to a “blue screen”. I immediately thought “oh my God, if this thing doesn’t come up I’m screwed!” Although I had my files and fonts on a drive at the time and I could have used a colleague’s computer it would have taken no less than 30 minutes to get everything loaded and setup. It could have easily taken an hour or more if they didn’t have the right applications loaded. Luckily everything came back after a forced reboot. But what if it hadn’t?
After my experience above in Toronto I realized that simply having a backup of the data was not good enough. I need to be able to be up and running in 5 minutes or less in the event of a total drive failure. From that day forward I started carrying an external portable hard drive that was an exact clone of my internal drive. I update this clone before heading out on each trip. I use SuperDuper!, which is a fantastic utility to clone your drive from one to another. In the case of a blue screen or total drive failure I could plug in the clone backup drive and reboot directly from that drive. Since it’s a recent clone it would have all of my applications and demo/data files. Continue reading “Why I Carry 3 Portable Hard Drives When I Travel”


 .
.