Skooba Design Outs a New Skooba Tablet Messenger v.3

The more I travel, the more I see people using iPads (and to a much smaller degree Android tablets) in lieu of laptops. This is especially true on planes.

On my recent flights I’m seeing iPads out number laptops by about 5 to 1

In some cases I myself have gone on short trips and used just my iPad instead of my laptop. With more and more useful iPad Apps coming to market each day, I find that I don’t require a laptop nearly as much as I used to for day to day communications and social media activities. The iPad may never replace my need for a “work” laptop, but it certainly goes a long way towards reducing that need for things like email, web, expense reports, blogging, etc. That being the case I can see times where carrying just my iPad in my laptop bag is overkill.

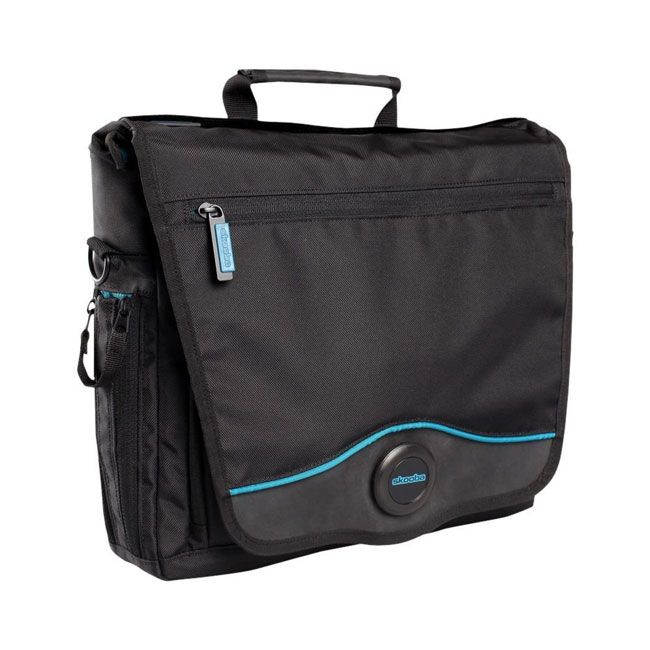
Skooba Design has the answer with their New Skooba Tablet Messenger v.3

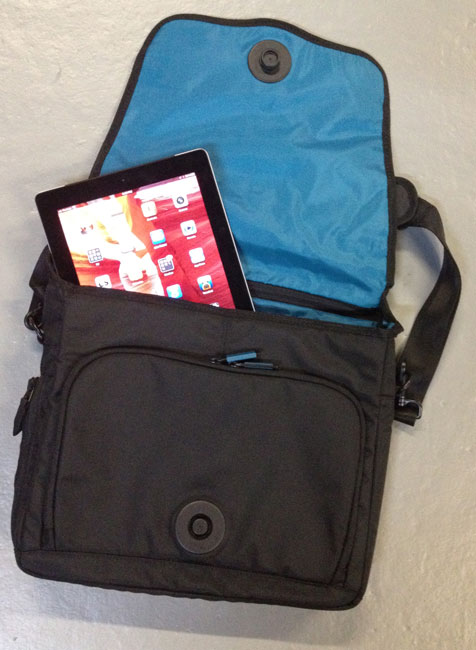
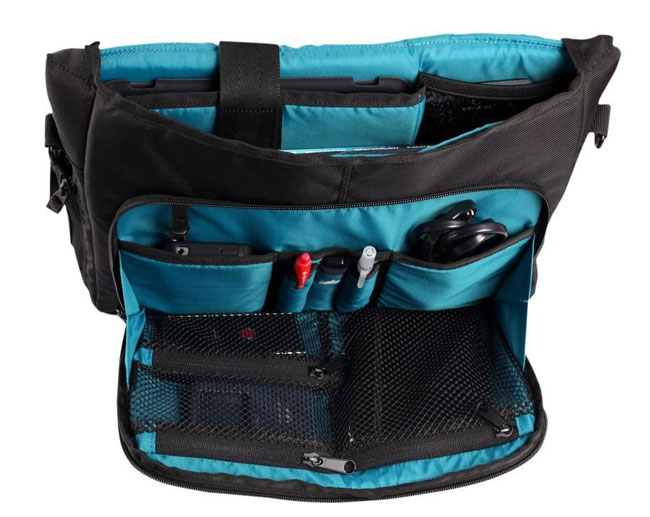
This new bag is designed from the ground up to be a tablet bag, not a laptop bag. It has a special pocket inside for a 10″ tablet.

It has plenty of room for the tablet and accessories such as a charger, sync cables, headphones, keyboard, Jambox speaker, etc. I was also pleased to see that it was large enough to also accomodate a 13″ MacBook Air. This makes it a great bag for me because I can really go light with just the iPad or if I think I may need a computer, I can still bring my MacBook Air without totally weighing it down. Since most TSA checkpoints don’t require that you remove your tablet from your bag, you can just send the whole bag through the x-ray machine.

I would say the only disadvantage that this bag has over my Skooba TSA Friendly Backpack is that it’s not large enough to carry my DSLR, but that’s OK because it’s so small that I can still carry a small camera bag and fit both under the seat in front of me.

Can you get by with just an iPad on a trip?

This question comes up all the time and my buddy Calvin Carson had a great suggestion: Before going on your trip, try using just your iPad for a day or two while you’re still at home. Do the same things that you would do on your trip. Then you’ll have a pretty good idea of whether or not you can get by without your laptop.

You can get the Skooba Tablet Messenger v.3 here for about $40 below list price.

Also check out my FAVORITE iPad Keyboard!

Review: The 2012 AirPort Express – I love it, I hate it!

One of my favorite road warrior gadgets is the AirPort Express. I have several of them for AirPlay streaming around the house and studio as well as at least one with me at all times when I travel (it lives in my bag). See “What’s In My Laptop Bag.” I never had an issue with the design of it. I actually appreciated the simplicity of it being a compact self-contained router with flip out prongs to plug it into a wall outlet for power. It was fast, easy to setup and it just worked. Now that I not only have to demo cloud services for living, but also mobile Apps, I really appreciate being able to setup my own WiFi network on stage as well as my hotel rooms. The previous generation AirPort Express had 802.11n support as well as AirPlay and supported up to 10 devices simultaneously connected. It even supports connecting a USB printer for easy wireless printing. Yep, it was just about perfect what it was.


Apple changed it!

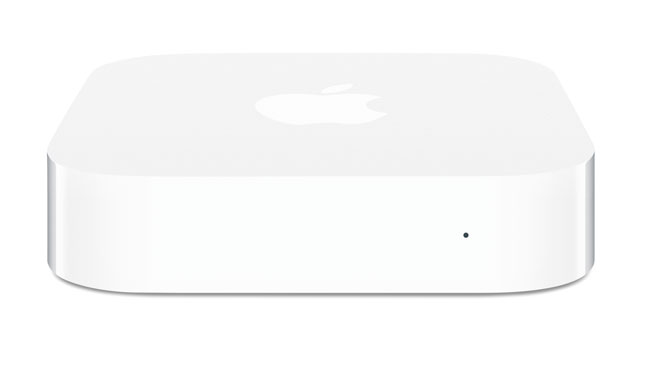
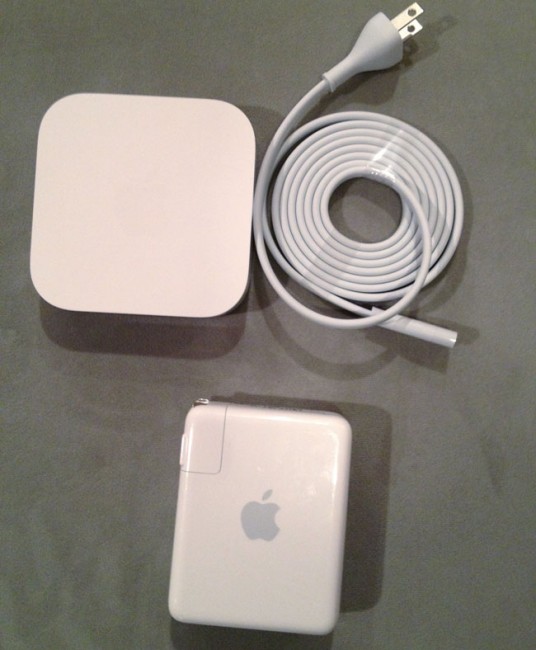
The new AirPort Express on top now comes with a freakin’ cord! Noooooooooo!


Apple quietly introduced a brand new AirPort Express model on Monday at the WWDC (along with new MacBooks and iOS 6 – yeah there was a speed bump to the Mac Pro too – sad that it’s virtually the same chassis as the Power Mac G5 and got no Thunderbolt or USB 3 love…). Although I was most excited about the new MacBook line up, I was quick to take a look at the New AirPort Express too. While the specs looked great, I cringed when I saw the back of it. Apple has gone away from the all-in-one design to one that is almost identical of the Apple TV. By that I mean that it now requires a power cord. This may not seem like a big deal and maybe it isn’t (I’ll be on the road with it next week), but I certainly will miss just flipping out the prongs and plugging it in!

The new one is slightly wider, but also slightly thinner.

On the plus side Apple added a second Ethernet jack so that you can connect not only the ethernet cable to your internet connection, but also plug in a device via ethernet for speed. Sadly though these still aren’t gigabit ethernet ports. Not sure how much I’ll need that second port on the road, but it’s nice to have. The new AirPort Express is also dual band (like the AirPort Extreme) simultaneously supporting 5Ghz and 2.4Ghz WiFi connected devices. It still has AirPlay and a USB port for printers as well as support now for up to 50 devices. It’s that last one that pushed me over the edge. While I personally don’t need more than 10 connections on the road, there are times when I’m using the AirPort Express on stage and sharing it with other presenters and perhaps a colleague or two in the audience. With laptops, tablets and phones connecting to it, it’s much easier to go past 10 devices than it was back in the day.

Setup

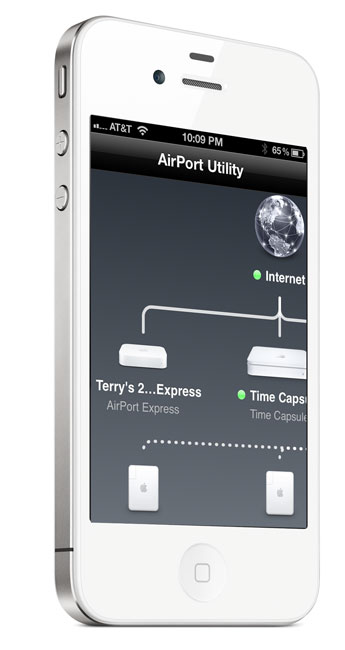
The setup is a piece of cake as usual with the AirPort Utility. You can even do the setup from your iPhone, iPad or iPod touch with the iOS version of the AirPort Utility. Now you can even setup a guest network like you can on the AirPort Extreme granting those users just internet access instead of access to your entire network.

AirPort Utility - Apple

The Bottom Line

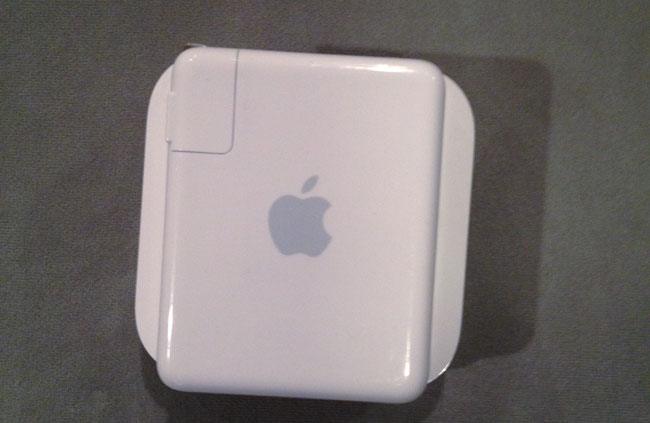
New AirPort Express on the Left, Old AirPort Express on the right.

The 2012 AirPort Express is overall a nice upgrade at the same price as the old one. It’s about the same size as the old one being a little thinner, but a little bigger overall. I wished they had kept an all-in-one design as I don’t want to have to have one more cord to carry, but I’m sure I’ll be able to adjust. If you have a recent 802.11n model then there probably isn’t much of a reason to upgrade. However, if you’re on an older 802.11b/g model or you use one at home as your primary router, then you’ll want the new stuff in this one.

You can get it here for $99 or here for about $99.


UPDATE

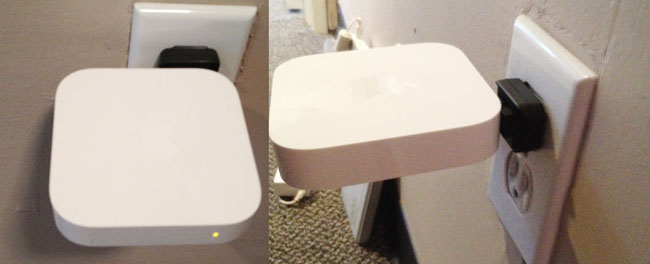
Leave it to my buddy Scott Diussa from Nikon to give me an option. Apparently the plug adapter for the Nikon D7000 battery charger will fit the New AirPort Express and work in a pinch. It’s not elegant. It’s not pretty, but it does work. Now if it were only white. 🙂

Update #2 While the Nikon plug does fit (so does the original Apple one), it slightly blocks the WAN port making it a non-starter. 🙁

M.I.C. Outs a New 4-in-1 Camera Connection Kit for iPad

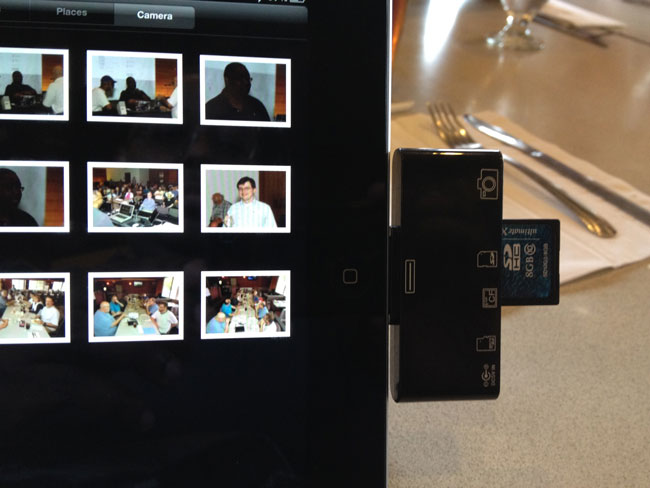
If your camera uses SD memory cards then you have probably had no issues importing images into your iPad using the Apple Camera Connection Kit. However, if your camera shoots Compact Flash then it gets a little more challenging. Apple doesn’t make a kit or adapter to allow you to import your images from your Compact Flash cards directly. However, M.I.C. does!

Camera Connection Kit 4-in-1 for iPad, iPad 2 and The NEW iPad

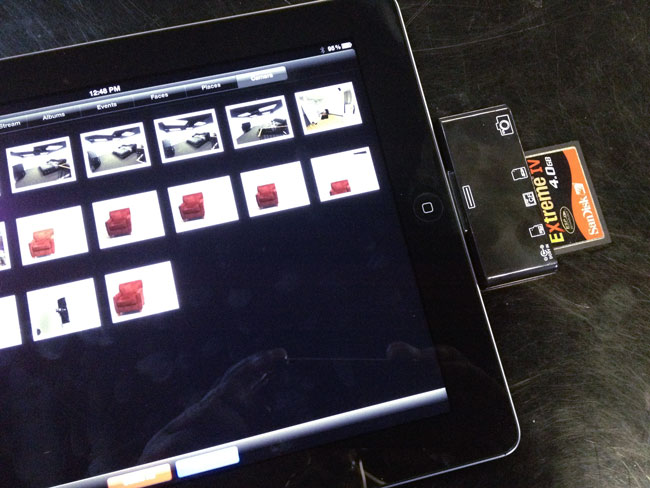
I’ve been using the original M.I.C. reader for over a year. Recently I either lost one of the two I own or I misplaced it. This lead me to go to their site and order a new one. That’s when I discovered that they had replaced the one I had with a newer, better one. This NEW Camera Connection Kit not only handles Compact Flash (CF) cards, but it also handles SD, MicroSD and a direct USB connection to your camera. This effectively eliminates the need to carry both the M.I.C and the Apple one as it will import images from both my SD and CF cards.

One of the hurdles in supporting CF cards is that the higher speed ones use more power. A while back Apple purposely dialed down the amount of power available via the iPad dock connector as they didn’t want people connecting all the peripherals they were starting to connect to it (I can only guess they did this to eliminate all the support calls for what people might connect to an iPad). M.I.C originally said that they wouldn’t support cards over 400x in speed, but this new Connection Kit also comes with a USB power cable to the adapter. If you have a card that draws more power than the iPad will handle you can plug in this cord to the adapter and your USB wall charger and get more juice.

How well does it work?

Over the weekend I was at a meeting where a photographer was taking pictures. He handed me his SD card and I imported his Canon RAW shots right into my iPad. No problem. Yesterday, I decided to try it with the CF cards from my Nikon D4. This is where I discovered that although M.I.C. includes a power solution, you can still have cards that won’t work. For example, my SanDisk Extreme IV cards worked fine, but my newer Transcend 32GB 400x CF cards wouldn’t work at all. Even when I plugged in the power cord, the card wouldn’t mount on the iPad.

The Bottom Line

There are lots of knock off 3-in-1 and 4-in-1 readers for the iPad that are cheaper than the M.I.C. solution. However, most of them don’t work on the New iPad at all! Although the M.I.C. 4-in-1 Connection Kit worked fine on my New iPad, there was still at least one particular CF card that it couldn’t read. Therefore I would recommend that you test your cards before heading out on your trip with your camera and iPad only. Lastly, the New Photosmith 2.0 App makes the sorting, flagging and metadata process on the iPad much nicer especially if you’re a Lightroom user. When you get back with your iPad you can simply sync all your RAWs, JPGs, and Collections to Lightroom wirelessly!

You can order the M.I.C Camera Connection Kit 4-in-1 here.

Gelaskins: The Terry White Collection :)

I’ve been using Gelaskins for a couple of years now to customize my various devices. As a photographer I’m always looking for ways to display my work. Put the two together and now my “Creative Portfolio” is on my MacBook Pro, iPad and iPhone.

P.S. I love it when the TSA agents are so busy looking at my photos that they forget to make me take off my belt! 😉

Check out Gelaskins here. You can buy existing designs or upload your own!

Review – The Logitech Ultrathin Keyboard Cover for iPad 2 and the New iPad

Sometimes I get comments here, jokingly about how much money I just cost you because I reviewed something cool that now you must have. Well you’ll take pleasure in knowing that it just happened to me too. My colleague and gadget buddy Dave Helmly just showed me his latest gadget and in about 3 seconds I knew I’d have to have one.

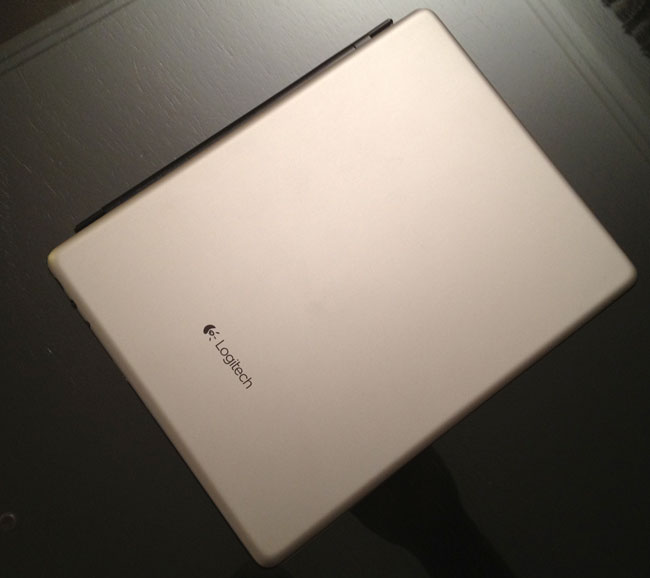
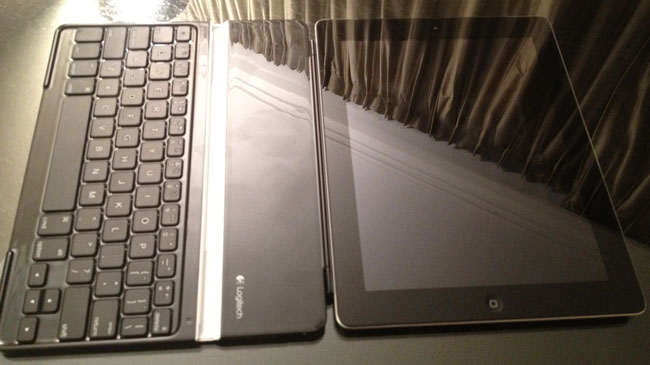
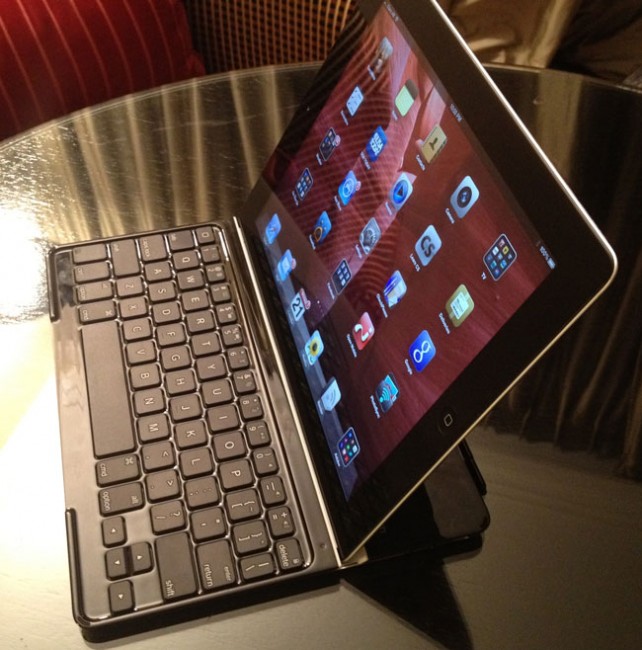
The Logitech Ultrathin Keyboard Cover for iPad 2 and the New iPad

I’ve tried other iPad keyboards and while they work, I usually just ended up carrying my Apple Bluetooth Keyboard. The problem I had with the ones that are designed to be a case for the iPad is that they typically added more weight and bulk to the iPad than what I was willing to carry. At that point I figured I might as well carry my MacBook Air. That all changed when I saw the Logitech Ultrathin Keyboard Cover! First of all the “ultrathin” part is key. I use Apple Smart Covers now and I don’t want any cover that’s much thicker than those. Logitech brilliantly designed their Keyboard Cover as a “Smart Cover”. That’s right, it magnetically snaps on to the iPad 2 and the New iPad just like Apple’s Smart covers do. Just snap it on and close it. It maintains a very low profile and is very thin when attached. The next smart thing they did was they made a magnetic slot to dock the iPad in to prop it up either vertically or horizontally while you use the keyboard.

The keyboard is bluetooth as you would expect and rechargeable via a standard USB micro cable. Speaking of the keyboard itself, the first key I looked for was the import Shift Key on the left side! The other keyboard I tried (Brookstone) didn’t have a Shift Key on both sides and that really bothered me. Typing on this keyboard seems very natural. I can’t speak to battery life yet as I’ve only spent a few hours playing with Dave’s, but I’ve already ordered one for myself. Damn you Dave you just cost me money (again)! 🙂

You can get the Logitech Ultrathink Keyboard Cover for iPad 2 and the New iPad here for about $99.

CloudFTP Lets You Share a Hard Drive Wirelessly with Your Devices, even your iPad

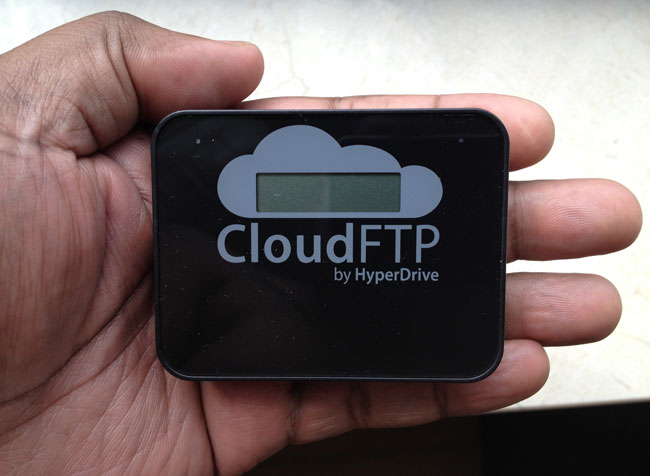
I ordered this little gadget before heading out on my current tour and got a chance to try it out in the hotel lounge with one of my colleagues. CloudFTP for all intents and purposes is a little adhoc access point with a USB port on it. Technically you should be able to hook up just about any storage device to it and share the content on that device wirelessly with your devices (computers and iOS/Android devices).

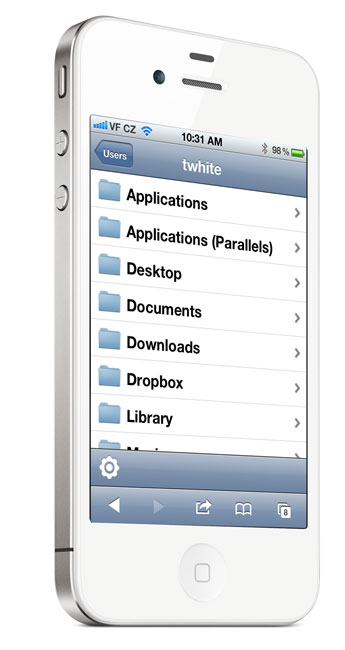
I figured I’d give it a real world test and time for a CloudFTP review. I took it out of the box, read the little manual that comes with it (so I could figure out how to access it), plugged in my LaCie Rugged Firewire 800/USB 2 backup drive into and fired it up. After a few moments it was up and ready to go. I then went to the web browser on my iPhone, keyed in the URL and there it was!

My hard drives directory structure. I could access any file and if the file was iOS compatible such as a PDF or movie I could see it right then and there. Speaking of movies, I get asked all the time about plugging in hard drives or other external drives into an iPad or iPhone to carry movies around and up until now I never really had a good answer. This would do the trick nicely. The first movie I tried wasn’t in a format that iOS liked (it was an AVI file) and therefore it copied the movie to the iPhone and then I was able to open it in the VLC App and it played just fine.

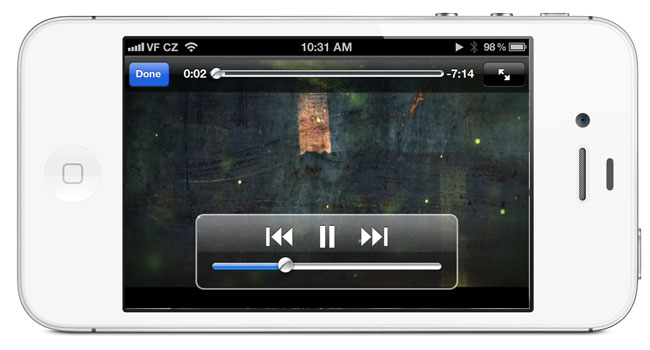
The movie playing above is streaming wirelessly from my LaCie hard drive to my iPhone 4s via the CloudFTP

I tested another movie that was in the proper .MP4 format and it streamed. However, I will note that about halfway through the movie the video froze and the sound kept going. Not sure if that will be an ongoing issue or not. I was also impress that the built-in USB port had enough power to run the drive without the drive or the CloudFTP being plugged into a power source. The second thing that impressed me even more was that it didn’t seem to matter what format the drive was in. My hard drive was Mac formatted and it still showed up as the “C” drive with all the directories (folders) showing.

Battery life is up to five hours and you can share documents, music or photos with up to 8 users at a time or movies with up to three users. It creates a WiFi network for your devices to join but keep in mind it’s not a WiFi Internet Router and therefore there is not internet connectivity while you’re connected to it. However, you can configure it to join your existing network if you like.

The Bottom Line

I don’t know how much use I will get out of this. I primarily got it as a method to quickly share files between computers and multiple users. I don’t run into those situations often, but when I do this device should come in real handy. The small size is also a plus as I can just keep it in the ThinkTank Cable Management 30 accessory bag that I carry in my laptop bag. The only thing I don’t really like about it is that while it does charge via USB, it comes with it’s own proprietary charging cable and that means having to keep up with more more cable as opposed to using a standard USB micro cable to charge. Other than that it works as advertised.

You can check out CloudFTP here for $99.95 and it comes in either Black or White

Best App Site Gets a Make Over

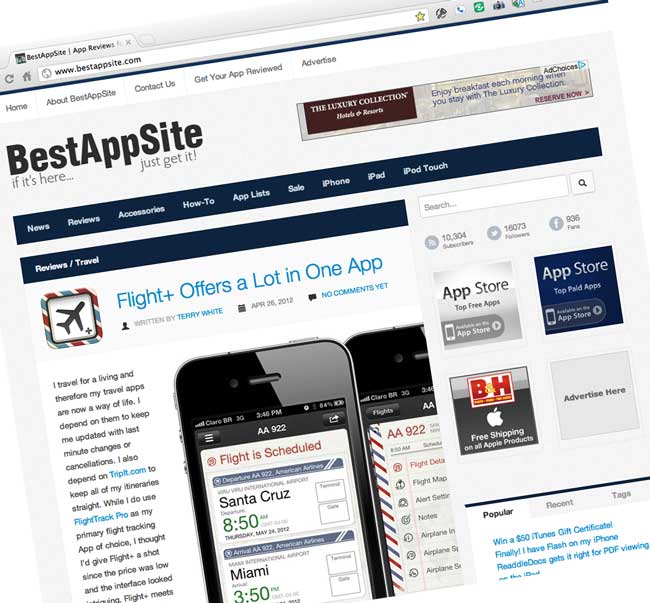
Along with reviewing technology and gadgets, I also review mobile apps. When the App Store came out a few years ago I started doing an “App of the Week” here on my blog. However, I realized that one iOS App per week just wouldn’t cut it seeing how there there hundreds if not thousands of Apps being released every week. So I decided to setup a dedicated site Best App Site so that App reviews could happen more regularly and also not tie up space here for reviews that some may have no interest in. One of Best App Site’s co-authors and web designer Erik Bernskiold just overhauled the site with a new look and feel. Aside from making the site more appealing to the eye, Erik also did quite a bit a work on the backend to make it easier for us to post reviews and to make it easier for visitors to find the reviews they want. The New Best App Site also is even more mobile friendly with a fluid design that quickly adapts to tablets and smartphones.

A big thanks to Erik and I hope that all of you enjoy the new site as much as I do! Head over to bestappsite.com and check it out.

AR.Drone 2.0 – My In Studio Test Flight

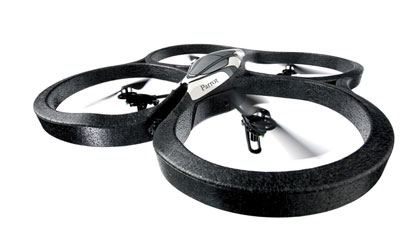
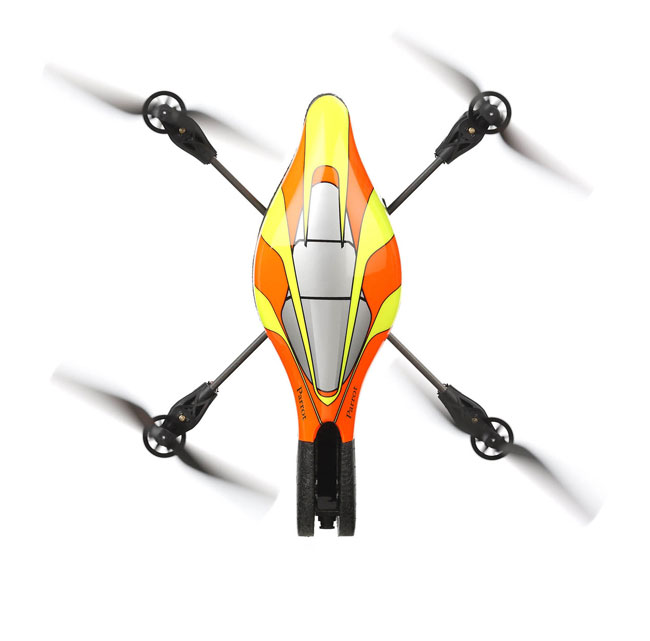
When the original AR.Drone came out I have to admit that I immediately dismissed it as a “toy” and I had very little interest in it. Sure, like any toy it would be fun to play with for a while. However, like many other toys you could quickly lose interest. Therefore I never bought one. Not even for the “cool (aka geek) factor”.  Then the AR Drone 2.0 came along and it added something that I thought would be useful. The AR Drone 2.0 adds a better camera that does video at 720p HD. Yes, this raised an eyebrow and I decided to take a look. I did a pre-order and my AR.Drone showed up a couple of days ago. I figured I might have a use for this on set, especially on location shoots to do fly arounds of the set and the area that I’m photographing.

What’s Great…

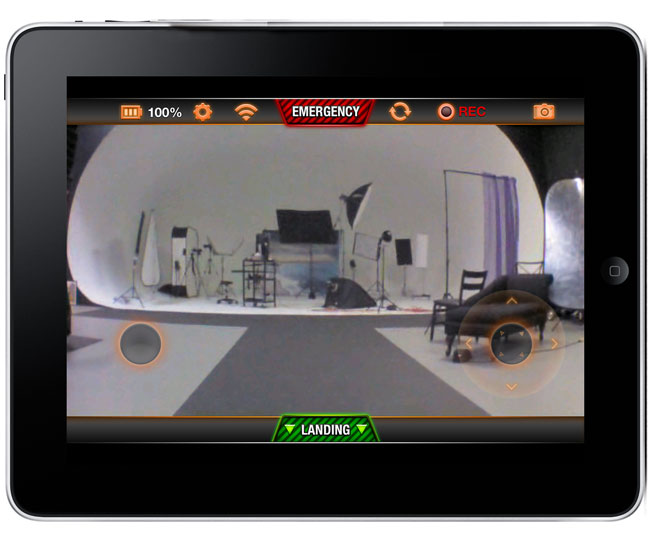
The great thing about this little drone is that it’s light weight and very easy to fly. It doesn’t come with a remote control! You actually fly it from your mobile device (iOS or Android). I downloaded the App on my iPad and iPhone. The AR Drone 2.0 has it’s own built-in WiFi network. Once you charge the battery and pop it in, it powers up and starts broadcasting a network. You connect to this adhoc network from your device and then launch the AR Drone App (a free download). You see what the AR Drone sees right on your device. Using the accelerometers in your iPad, iPhone, etc. you tilt the device to control direction. There’s an on screen joystick to turn the drone. If you suddenly lose control, just take your fingers off the screen and the Drone will hover in place.

Since the built-in camera is always running you can tap the record button within the App and start recording/streaming video from the AR Drone right to your mobile device. Very Cool! The App even allows sharing directly to YouTube.

Here’s a sample video I did flying around my photography studio while a friend also video’d the AR.Drone 2.0 itself using my iPhone 4s:

What’s not so great…

Battery life is still relatively SHORT! You get one rechargeable battery and charger and the battery last for about 10 minutes of flying. Then you’ll need about 90 minutes to charge it back up. Unless you plan to do really short flights/videos, you’ll definitely want to have a couple of charged batteries on hand (about $35 each). It’s light weight and while that’s a good thing for travel, it means that a strong wind will take it away. Since it works via WiFi you’ll also have limited range. Like most small cheap HD cameras, this one doesn’t do well in low light. With a small lens/sensor comes lower quality video in low light. However, with enough light the video is more than acceptable for my needs.

The Bottom Line

The AR.Drone 2.0 is an improvement over the original! Adding 720p Video Recording makes it useful as a tool. On a calm day I can really see some great outdoor uses for it.

You can get the AR.Drone 2.0 for about $299 here.

You can get the AR.Drone Free Flight iOS App here from the iTunes

Lightroom to InDesign to iPad: Interactive Portfolios for Photographers

In this episode of the Adobe Creative Suite Podcast Terry White shows how to use a Lightroom Web Gallery from The Turning Gate in InDesign to make an Interactive Portfolio for your iPad or Android Tablet.

Grab the Photoswipe Gallery Plug-in that I used in the video here.

Are you missing out on my Bonus Content?

See more of my Adobe Creative Suite Videos on my Adobe Creative Suite Podcast and get the App here. It features EXCLUSIVE CONTENT that no one else gets to see. This episode has a BONUS CLIP that is available only in the App! My iOS App is a Universal App for iPhone, iPad and iPod touch. I also have an Android version:

Learn Adobe Creative Suite with Terry White - Wizzard Media

Homeworks Internet Controllable Radio Thermostat

Programmable thermostats are certainly not a new thing. I’ve had one in my home for several years. They allow you to lower your energy costs by turning the temperature up/down automatically at times throughout the day/night where you’re either not home or wouldn’t notice as much because you’re asleep. You can set these times and days of the week to match your daily routine/schedule. While that’s all well and good, it doesn’t help much in a situation where you don’t have a daily routine. For example, in my studio I’m not there on any kind of regular schedule. Some days I could be there every day for several days in a row and other times I could be gone for weeks at a time. In the past I would simply put the thermostat on the lowest setting before I leave and turn it back up when I arrive. There have also been times where I’ve forgotten to turn it down and the heat was going for no reason for a day or two with no one there. I started looking for a better solution.

The Homeworks Radio Thermostat was the answer

This thermostat is programmable like all the others, but it also allows you to control it via an App on your smartphone or tablet over the internet or locally via WiFi! With the App I can see the current temperature of the studio AND adjust the thermostat remotely at any time. If I forget to adjust it when I leave, no problem as I can now adjust it from anywhere in the world. If I want to turn the air conditioning on to cool it down before I arrive, I just pull out my iPhone and adjust the thermostat on my way in. So far this device and App have worked really well.

Installation – While I have installed thermostats myself in the past, I decided to let my electrician do it since I had him out working on other things anyway. It didn’t take him long to wire it up. Once It was installed all I had to do was set it up via the iOS App (works on Android too) and connect it to my WiFi network and pair to my account. From that point I could control it from my iPhone or iPad inside the building or via the internet from anywhere. The only thing that I can’t seem to figure out how to do is to switch it from Heat to Cool or to Auto from the App. I can do this from the panel itself, but not remotely. Otherwise, I have the control I need from the App.

You can get the Homeworks Radio Thermostat here for about $107.

You can get the App for free here from the iTunes