httpv://www.youtube.com/watch?v=LAhP-yLJJ9s
Hope you're enjoying your weekend!
httpv://www.youtube.com/watch?v=LAhP-yLJJ9s
Hope you're enjoying your weekend!
httpv://www.youtube.com/watch?v=1je3ZPU3lSM
In this episode of the Adobe Creative Suite Video Podcast I'll show you how to use the NEW Digital Publishing Suite Tools to take your interactive InDesign publication from start to finish fron InDesign CS 5.5 to your iPad (or Android tablet) wirelessly. This is my first look at the NEW .FOLIO builder tools that are now integrated directly inside InDesign. You'll need to grab the latest tools for your copy of InDesign CS5 or CS 5.5 here (Mac | Win).
Note: in the video I show how you can rearrange your articles online via digitalpublishing.acrobat.com. If your Acrobat.com account is NOT provisioned by Adobe to access the Digital Publishing Suite you can simply skip that part of the process and go straight to the iPad.
See more of my Adobe Creative Suite Videos on my Adobe Creative Suite Podcast and get the App here. It features EXCLUSIVE CONTENT that no one else gets to see. This episode has a BONUS CLIP that is available only in the App:
by Larry Becker

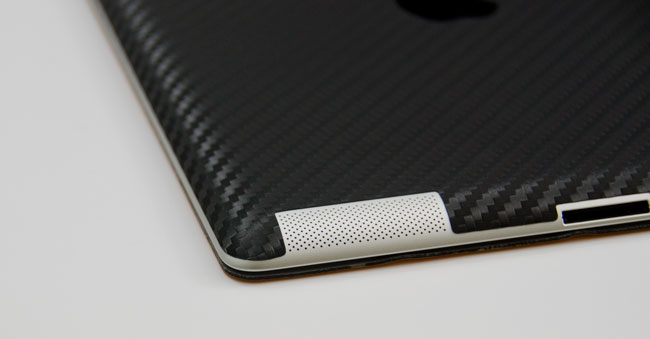
When I bought my iPad 2 recently I looked around at the dozens of case offerings and skin options. I bought an Apple Smart Cover as part of my original device purchase, but I wanted to protect the back surface as well. Even though there were dozens of case options, back cover protection that was also compatible with my Smart Cover, limited my choices quite a bit. The iPad 2 was already so darn slim, and the Smart Cover added so little to the bulk of the unit, that it seemed a shame to weigh the thing down in a bulky, book-like binder cover. I wanted slim, so I started looking at skins.
Top of my list was the Zagg Invisible Shield because I love the crystal clear, durable protection. The problem is that the application is a wet process and the iPad is so much bigger than the little devices I've covered with it in the past, I was envisioning getting moisture all over the place in my precious new iPad and fighting a war with bubbles under the film. The local mall has a Zagg kiosk with a professional installer and that comes with a lifetime guarantee, but with the installation fee and taxes, it was going to be over fifty bucks! And after the $50 installation I'd have a beautiful, crystal-clear cover that still had tiny seams at the corners so the film would fit the shape of the iPad's curved back. Most skin options don't even have corners covered at all. That's one of the reasons I opted for iCarbons. The big reason though, was that they had a great installation video and their application is a dry process. It doesn't hurt that it was half the cost of the Zagg (just $26 shipped).
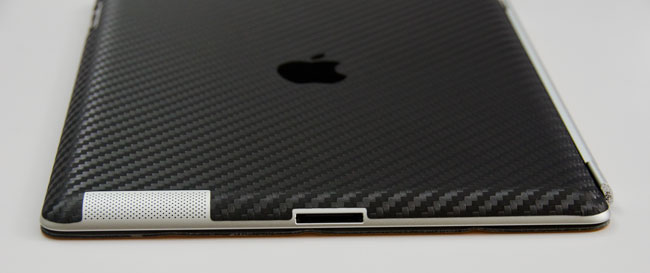
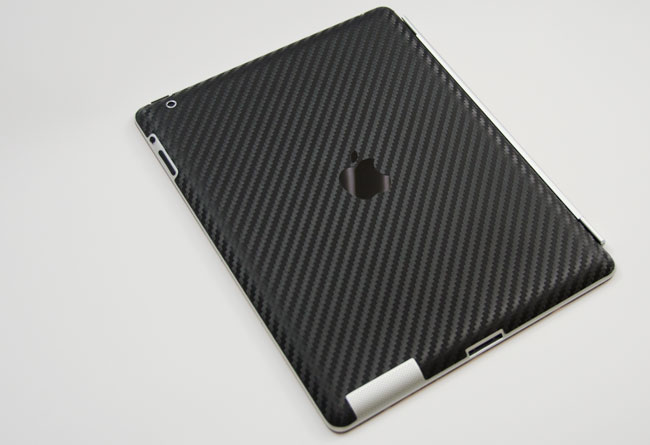
iCarbons offers a light and a dark woodgrain option as well as a black or white simulated carbon fiber skin. I opted for the black and it was just as easy to install as their video shows. It was easy because it's a dry process and there were zero bubbles. What you can't see until you have the skin in hand, is that the weight of the material is thicker than you might expect, and the embossed texture of the carbon fiber weave is relatively deep. It looks great on the iPad and it smoothly covers the corners as advertised. The only thing I don't love is the white carbon fiber Apple logo they supply to cover the logo cutout in the middle. I just left mine off so the black Apple logo is what you see.
While some people like keeping the carbon fiber skin theme going all the way around to the front, I wasn't interested in the front frame protector. That just seems a little over-the-top to me, because the Smart Cover does the job on the front. And speaking of the Smart Cover, the magnetic strength seems just as strong through the iCarbons skin as it did on the bare metal of the iPad. No need to cut a notch out of the skin for the smart cover spine like I was considering. If I could change anything, I'd make the skin just a tiny, tiny bit bigger to cover more closely to the edge. Of course, I'm not an engineer, so that extra little bit of coverage might cause the corners to not cover smoothly or it might cause the edges of the skin to peel over time. Maybe this is the best possible coverage after all. It’s also worth noting that this skin is not especially grippy. It’s better than the naked aluminum, but not much. I think GelaSkins and Zagg wins in the grippy category.
In my opinion, considering price, quality, ease of installation, Smart Cover compatibility, looks, and scratch protection, iCarbons is the best skin option for me.
If you missed Photoshop World Orlando, you missed the Adobe Keynote where Photoshop Product Manager Brian O'neil Hughes showed some sneak peeks of some up and coming Photoshop Technologies being worked on in the labs at Adobe. Check out the video above to see what you missed! Was there really a Photoshop for iPad shown? 😉
See more of my Adobe Creative Suite Videos on my Adobe Creative Suite Podcast and get the App here:
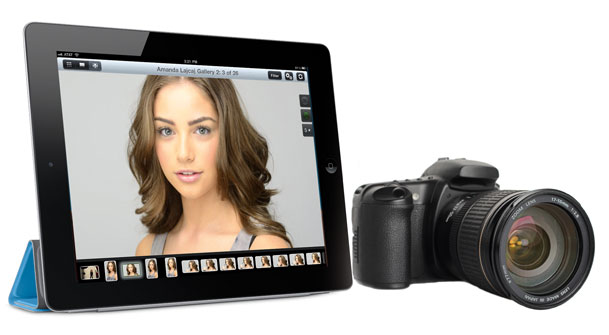
Last week when I was on The Grid, I got asked to describe how the iPad would fit into a photographer’s workflow and I promised to do a post on it…
The iPad is definitely a revolutionary product that has disrupted the status quo. While I absolutely enjoy using an iPad, I don’t find it to be the end all be all replacement for a desktop/laptop computer. At least not full-time. The iPad didn’t replace my phone, nor did it replace my laptop. It’s another device that I use when it’s more convenient to use than either of the other two devices. With that said the question has been asked “How does the iPad fit in a photography workflow?” Last week my buddy Scott Kelby wrote a post about what he’d like to see in a “real Photoshop for iPad.” Adobe demonstrated some Photoshop technologies for iPad at Photoshop World in Orlando. There are several image editing and image viewing Apps for the iPad. So the question becomes does the iPad fit in a Photographer’s workflow and if so how?
Here are the ways that I use my iPad in my day-to-day photography workflow:
Getting ready for the shoot
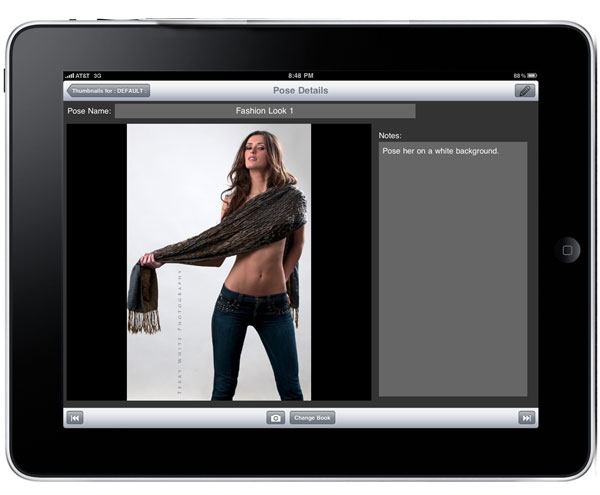
If i’m doing a model shoot, then I use the PosePad App to plan out my shoot with photos and notes to pull up right there on the spot and walk them over to the model. This is my digital shot list. This has worked extremely well even on location shoots outside the studio.
PosePad for iPad
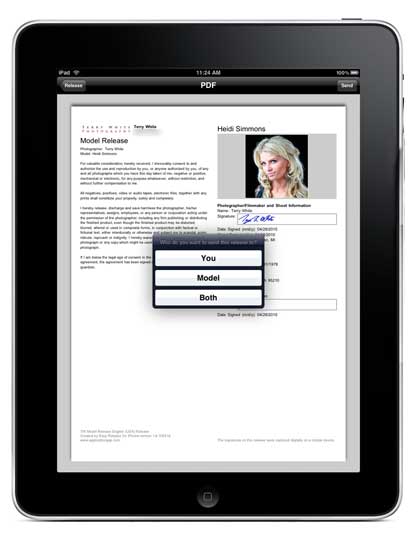
I stopped carrying paper releases over a year ago. There are two fantastic Apps for doing CUSTOM (yes, YOUR text) release forms for both Model and Property releases. I prefer the look and feel of the release forms in Easy Release, but I absolutely love the exhaustive number of available custom fields in the Contract Maker Pro. My recommendation: For a basic release only requiring a few fields and your custom text that looks great, go with Easy Release. If your release forms are more complicated or multiple pages go with Contract Maker Pro. Both Apps are GREAT!
Easy Release
Contract Maker Pro
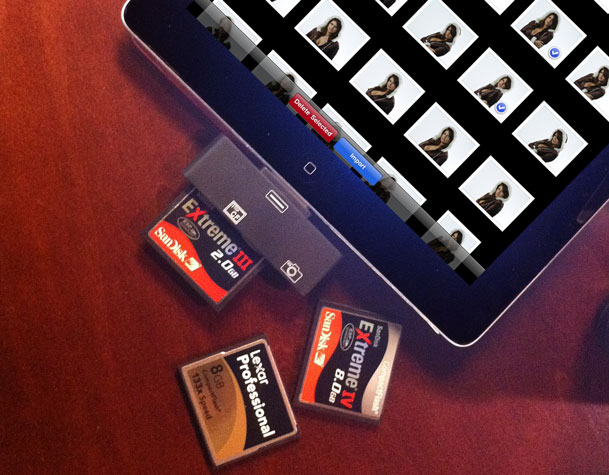
When you’re out and on the go chances are you’re going to be shooting and you’ll want to do two things. You’ll want to backup your images and review them. Let’s start with getting them in. There are 3 popular choices. The first is Apple’s own Camera Connection Kit. It works great with SD cards or via a USB cable to your camera. It will bring in your pics (JPG or RAW or both) as well as your videos. However, it will not work with Compact Flash cards. Apple turned down the power of the port via a software update and therefore card readers don’t work anymore connected to the Camera Connection Kit. That brings me to a NEW option: M.i.C. has shipped a CF reader for the iPad. Lastly and probably my favorite method is to shoot wirelessly into the iPad via the Eye-Fi card.
Continue reading “How the iPad fits into a Photography Workflow”

I reviewed Apple's Camera Connection Kit when it first came out. The Apple kit is two adapters. One is an SD reader and the other is a USB port designed to connect your camera directly to your iPad for image import. The one glaring omission is the lack of a way to bring in images directly from a Compact Flash (CF) card. During my review, I showed how you could attach a standard (San Disk) reader to the Camera Connection Kit and bring images in directly from your CF Cards. However, shortly after I did the review Apple released an iPad software update that basically reduced the amount of power that the dock connector outputs making it virtually impossible to power a card reader. I guess they didn't like people plugging in all the things (keyboard, drives, etc.) they were plugging in to the Camera Connection Kit on their magical devices. That left us with the only option being to use a USB cable and connect the camera directly to the iPad. While this works, it's slow and will drain the cameras battery during long transfers.
This Hong Kong based company has developed a CF Reader that attaches directly to your iPad and allows you to import your CF cards (up to 400x speed cards) right into your iPad. Of course I ordered a couple of these immediately and mine just arrived this past Friday. I was hopeful and doubtful at the same time. I just couldn't figure out how they would get around the power problem. Well, they did! I plugged in my standard SanDisk 8GB Extreme IV card and it showed up just like the Apple Camera Connection Kit does. I imported my RAW (.NEF) files with no problems.
Hallelujah!
You can order the M.I.C CF Reader here. They are back logged (as you might expect), so give it a couple of weeks.
I would normally do a video of such a gadget in action. However, they already had a video that shows it in action and I concur with the results shown. So here it is:
httpv://www.youtube.com/watch?v=CIQc22RoTyg
Oh happy day! I'm pleased to announce that my "Learn The Adobe Creative Suite with Terry White" App has just been updated to be a Universal iOS App, which means that you now get to see the videos in all the iPad 10" glory without having to screen double them. The App is now available on the App Store and is of course a FREE update to anyone who already had it.
If you're new to the App, the advantage here my regular podcast is that many of the episodes have Exclusive Bonus Clips. These clips can only be seen in the App and aren't published anywhere else. Often the Bonus Content includes additional tips and techniques or expands in an area where the regular episode left off. On the iPad these Bonus Clips are highlighted right below the regular episode so you'll more easily be able to identify the episodes that have Bonus Content.
There are literally hundreds of videos available on the various Creative Suite Apps all the way back to CS2. Thankfully the App has a built-in Search feature as well as the ability to Star your favorite episodes and download the ones you want to be able to watch offline.
I want to personally thank you for your support in my podcast as well as my App!
See more of my Adobe Creative Suite Videos on my Adobe Creative Suite Podcast and get the App here for $1.99:
Continue reading “Learn the Adobe Creative Suite with Terry White on your iPad”
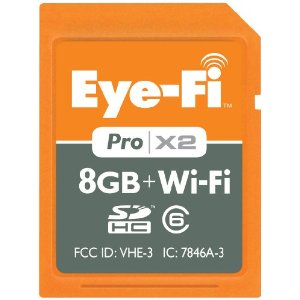
In case you haven't been following me on this story you can start with my "Shoot Tethered (wirelessly) to an iPad" from a couple of weeks ago here. Back then I decided to try out the Eye-Fi Pro X2 Card in my D7000 shooting wirelessly to an iPad 2 via my MiFi mobile hotspot and I was pleased with the overall workflow. Today Eye-Fi just announced a new card (yeah that happens in technology, deal with it!), the Eye-Fi Mobile X2 which is a cheaper card that offers Direct to iOS (iPhone, iPad, iPod touch) and Android mobile device shooting WITHOUT the need for a WiFi hotspot. Removing the WiFi hotspot requirement and going direct in an AdHoc fashion makes this solution even better. However, don't fret if you bought the Pro X2 card like I did. They are going to release a firmware update to the existing cards next week. Keep in mind that the Pro X2 card does handle RAW and Geotagging. The new card does not.
This should open up a whole new world for people that want to shoot with a decent camera and share those images even with some minor retouching/adjustments, from a tablet device directly. I'll be shooting RAW to my regular SD card in slot 1 and BASIC JPG to my Eye-Fi card in Slot 2 on my D7000. Life just got a little more fun.
If you don't have an Eye-Fi card yet, you can get the NEW Mobile X2 8GB card with the Direct Mode love built-in here.
Sorry, still not Compact Flash joy.
As soon as I have the yet to be released iOS App and an updated card you expect a review here.
Promo Video:
httpv://www.youtube.com/watch?v=zN8ZRzXLG_I

Adobe InDesign CS 5.5 improves in the areas of Digital Publishing to devices. It addresses the number one request from our ePUB authors and that is the ability to embed video in your exported ePUBs and yes those videos play on the iPad (or any other ePUB 3.0 standards compatible device). We've also made some improvements on allowing you to layout your publications for print, but also dictate the order in which elements are exported to ePUB using the new Articles Panel. Another major improvement is the ability to either have InDesign generate your ePUB cover from the 1st page of your document or linking to a specific image that is optimized for a small size "bookshelf" on a device such as the iPad's iBooks App. Here's a video on how some of these features work:
httpv://www.youtube.com/watch?v=5bBNrMoKz0Q
The video below walks you through some of the enhancements to the Digital Publishing Suite in InDesign CS5.
httpv://www.youtube.com/watch?v=4HR_LdlM31s
See Greg Rewis' post on what's new in Dreamweaver CS5.5 for HTML 5 and Mobile Authoring here.
See Jason Levine's post on what's new in Production Premium CS5.5 here.
See Paul Trani's post on what's new in Flash Professional and Mobile App development here.
Learn more about Creative Suite 5.5 including a New Subscription pricing option for those that don't want to or need to "buy" Creative Suite Products here.
Also see more CS 5.5 videos on Adobe TV. In case you missed it, Adobe TV can now be viewed on your iPad.
As you know Creative Suite apps have typically reved every 18-24 months. The world is moving faster than that and many of our publishing customers need solutions for publishing to new devices and in new formats sooner. Now you will see Adobe introduce a major milestone release ever 24 months and a mid-cycle release every 12 months. Johnny L is here to tell us all about it:
httpv://www.youtube.com/watch?v=niE9VT8Yjbo
We will be hosting a live Q&A Today (4/11/2011) on Facebook at 12:00 noon EDT (GMT -4). Join me and the other Adobe Creative Suite Evangelists, Jason Levine, Greg Rewis, Paul Trani for an hour to answer your Creative Suite questions.
Here's the link for the live Q&A

I'm about to head off on the CS5 Evolution Tour with my Adobe Evangelist colleagues!
Details here.
Schedule:

If you’re a photographer and you own an iPad you probably already know the benefits of showing off your photos on that nice 10″ display. However, chances are at some point you also had a wish to get your images to your iPad either directly from your camera (tethering) or from your computer wirelessly (not having to sync them over via iTunes – even typing it sounds so outdated). There are ways to do it! I’m at Photoshop World this week and I got a chance to try a new combination (new to me anyway) of the latest Eye-Fi Pro X2 SD card and a cool App called Shuttersnitch for iOS. I reviewed the first Eye-Fi a little over 3 years ago. While the technology worked backed then, and like I said in my review at the time, I really didn’t have any use for it. Back then the idea was this card would wirelessly and automatically transfer your images to your computer or a photo sharing site. First of all I have no interest in uploading images to a photo sharing site directly from my camera without some post processing. Secondly even the transfer to the computer was way too slow. You might as well just pop the card in your card reader and transfer them over in a fraction of the time. Lastly back then the card didn’t support RAW files. Yep, it was a non-starter for me. After I did the review I never touched the card again.
As with most technologies, they tend to improve over time. While I still have very little interest in the Eye-Fi cards for wireless transfer to my computer (still a bit too slow) or uploading directly to a photo sharing site, I’m intrigued by the thought of shooing wirelessly into my iPad. While there are other tethering solutions for the iPad out there, they tend to all involve using a computer in the middle of the process to tether your camera to and then transmit the images via WiFi to your iPad. This solution doesn’t require a computer beyond the initial setup of the Eye-Fi Card itself.
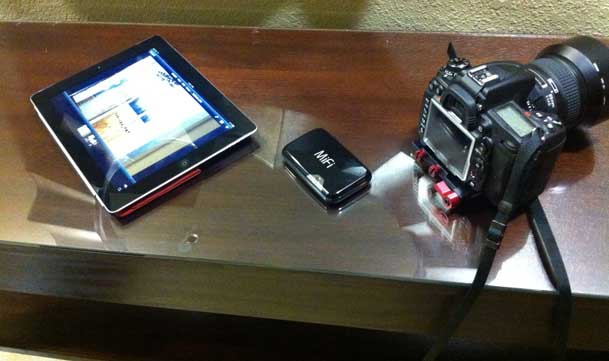
First you need an Eye-Fi Card. I went with the Eye-Fi Pro X2 8GB card because it’s the only that does support RAW files. If you don’t care about shooting in RAW then you can use one of the less expensive cards. The card comes with a card reader and the software you’ll need to install for your Mac/PC to set the card up. The Eye-Fi card has its own built-in WiFi chip and this latest model supports 802.11n which helps out a lot on the speed! After configuring the card to join your wireless network, you need to disable all other image transfer options. In other words, just setup the card to join your hotspot, but NOT to transfer images to your computer. I shot with my Nikon D7000. For a mobile hotspot, I used my UNLOCKED GSM MiFi 2372 hotspot. It should work with just about any WiFi network as long as both the card and iPad are on the same network. It also should work with the Personal Hotspot feature of the iPhone.
UPDATE: Eye-Fi Cards now support Direct Mode. No need for a hotspot!
The Shuttersnitch App is the App you’ll need on your iPad to talk with your Eye-Fi card. While this App does have native Eye-Fi support built-in, it’s not limited to Eye-Fi cards. It will work with other wireless camera solutions. I hear that David Ziser and his sidekick Damie Tepe are running around here at Photoshop World somewhere showing this with the Canon Wireless Transmitter (instead of the Eye-Fi Card) and getting some SPEEDY transfers (like 1.4 seconds of FINE JPGs) directly, sans the mobile hotspot (probably in an AdHoc mode). I’ve got to check him out and see how he’s doing this?
Once you log into your Eye-Fi account via the App it sends the secret signal over to your selected Eye-Fi card to pair the two together. Now when both your iPad and your Eye-Fi card in your camera are on the same network, your images will automatically transfer over to the Shuttersnitch App so that you can view them right on your iOS device.
See my Shuttersnitch review here or you can just go ahead and buy the App here from the
This was the big question I had that I couldn’t seem to find an answer on, so of course I had to try it myself. It’s good, but not great! As you might expect RAW files are going to be slowest. It could take anywhere from 20-30 seconds to transfer a 14MP RAW file from my D7000. The story gets much better if you shoot JPEG. When I shoot JPEG I get anywhere from 9-13 seconds depending on the JPEG quality setting I use. Also keep in mind that the images are still on the card too for transferring to your computer later. An even better workflow for my Nikon D7000 is to shoot JPEG BASIC to the Eye-Fi card for the fastest transfer to the iPad and RAW to the second SD card slot. Finally! A reason for me to like RAW+JPEG shooting. LOL, Thanks Jason for the idea.
Here’s an idea of how it works:
Eye-Fi cards have always been aimed at consumers and like it or not SD is the predominant format in consumer cameras. However, don’t fret my CF shooting pro friends. With this adapter you can can stick an SD Eye-Fi card in your CF based camera. NOTE: This Adapter does NOT work with the newest X2 cards and also keep in mind that this is NOT officially supported. You do so at your own risk!
If you’ve got an iPad and an SD based camera, the Eye-Fi Pro X2 card plus the Shuttersnitch App is a nice way to go. If you have a CF based DSLR camera, then you might want to consider other wireless transmitter options.