Best USB 3.0 Hub for Travel

Satechi-USB3.0-hub

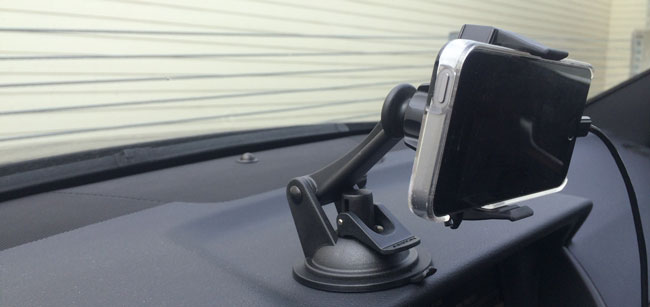
Back in 2012 I did a review of what I consider to this day to be The Best USB 3.0 Hub. I still have this hub on my desk to this date with zero problems with it. It just works! While this USB 3.0 hub is great, it’s a bit too large for my travel tastes. Yes they do make this 4 port version but it’s still larger than I wanted for travel. The big decision you have to make when going with a travel USB 3.0 Hub is whether or not you want/need a powered hub or not. Obviously a powered hub is the way to go when you have the ability to plug it in to a power supply and you don’t mind carrying yet one more power supply in your bag. However, USB 3.0 offers more juice than USB 2.0 does. Therefore you may be able to get by with a self powered hub especially for occasional use during travel. When I’m using my MacBook Pro or MacBook Air on the road, I’m usually in need of one extra port. I usually have my Wacom Intuos Pro tablet plugged in and an external USB 3.0 hard drive. At that point I may need to plug in a document camera/scanner or a Lightning cable to sync/copy something from my iPhone or iPad.  Or I could simply need to plug in a thumb/flash drive to copy a quick file. These are the kinds of things I need to do via USB 3.0 on the road from time to time. The hard drive can be plugged into Thunderbolt. That frees up the USB port if needed, but not all of my portable external drives are Thunderbolt equipped.

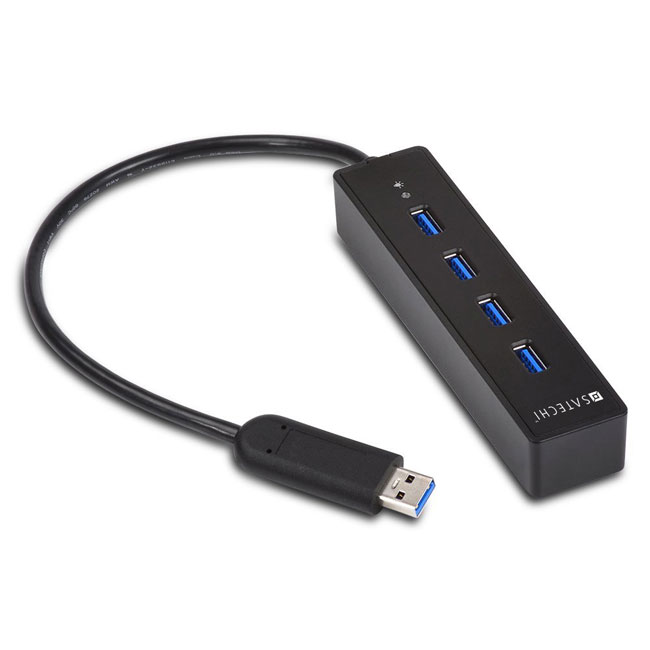
I went with this portable USB 3.0 Hub

satechi-USB_3.0_hub_with_harddrive

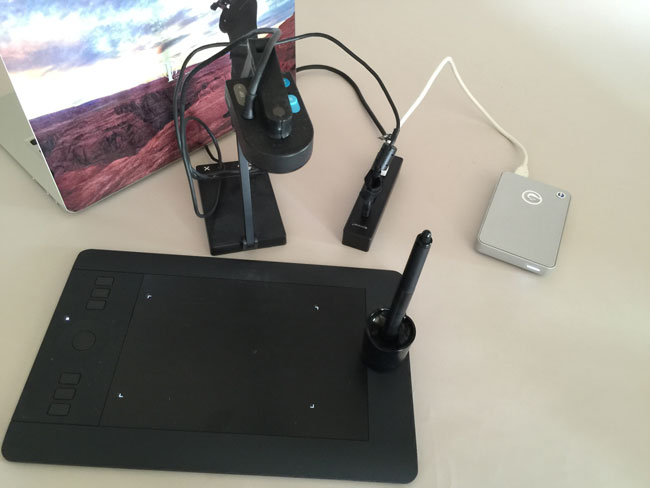
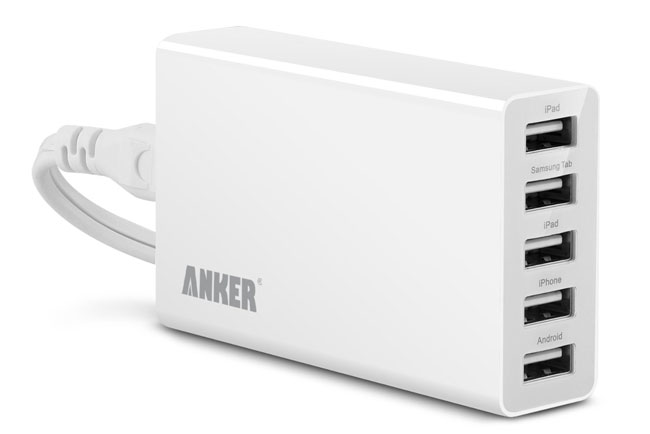
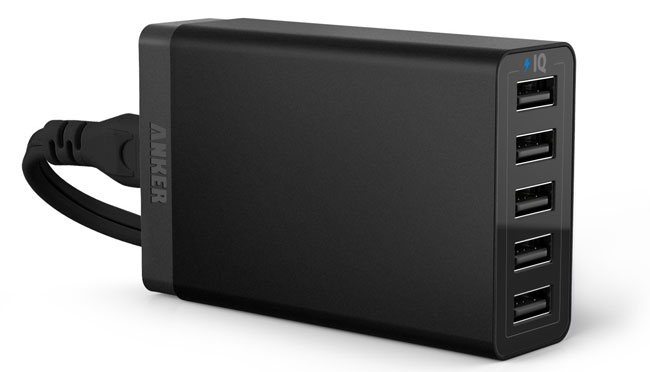
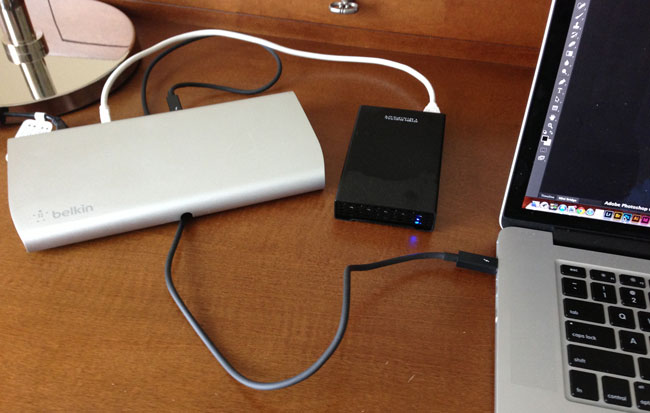
Although Anker makes this 4 port USB 3.0 Hub, I went with this Satechi 4 port USB 3.0 Hub. It seemed to have high ratings across the board on multiple sites. I havent’ been disappointed as the Satechi 4 Port USB 3.0 Hub has been GREAT!. It performs as advertised as long as you keep in mind that it’s NOT a powered hub. So let’s get the rules of using a bus powered hub out of the way. First off if you plug in too many devices that require USB power you will likely run into issues where the devices may not work or may not work at their top USB 3.0 speed. So when I want to use a bus powered USB 3.0 hard drive I plug the hub into my computer first and then I plug in the hard drive. Lastly I plug in any slower devices. If you stick to these rules (plug in the hub first, and the most power hungry devices next) then you’ll be more successful. I was able to easily plug in my USB 3.0 G-Tech hard drive, and my Wacom wireless module and lastly my Ziggy document camera with one port on the hub to spare. This is likely more than I will actually use on a regular basis, but I wanted to test my worst case scenario. Also keep in mind that I have one more available USB 3.0 powered port on my MacBook Pro/Air. With this Hub I could easily have two external bus powered hard drives  (one in the USB 3.0 hub and the other in the built-in port) and still have other ports available for less power hungry devices. Since I only travel with three external hard drives on a regular basis, this is exactly what I needed as I never need to plug in more than two at a time and If for some strange reason I need all three, I can plug at least one of them in via Thunderbolt.

The Bottom Line

If you need a powered USB 3.0 Hub for travel, then you should probably get this one. However, if you’re looking for a smaller one that can be used even if you don’t have an available AC power port nearby or you don’t want to carry one more power brick, then you could go with this Satechi 4 Port USB 3.0 Hub and get the extra ports you need.


The Best, Fastest Car Charger for your Phone and Tablet

schosche_dual_12watt_car_charger

Every time I turn around there seems to be a new, better car charger than the one I’ve been using. I actually started with this Scosche Dual Charger over a year ago. It worked great, but the thing that I didn’t like about it was that only one of the ports charged at the faster 2.1A speed. Then I discovered this one by Lenmar. It gave me what I wanted, TWO ports both charging at 2.1 AMP/10 watts each. Perfect! Well it was perfect until I discovered that Schosche released a dual 12 watt charger! If you have a newer iPad 4th generation or iPad Air you might have noticed that Apple now includes a 12 watt wall charger instead of the 10 watt charger included with previous models. Now you can charge your iPad Air in car at full speed or speed charge a smartphone. Since we usually aren’t in our cars for hours at a time each day, speed matters. You might be able to get back up to a full charge faster on a shorter commute. I also figure why have just one port when you can have two? This way you can charge your phone and another device such as a tablet or a passenger’s phone.

schosche_dual_12watt_car_charger_in_car

I also like the low profile fit. The original Schosche I used back in the day stuck out of the socket quite a bit. This one almost fits flush with the 12V socket. Even if your car has a built-in USB port I’m going to go out on a limb and say that it doesn’t provide 12 watts of power. In most cases it’s probably a 5v 1A USB port.  As far as I can tell this is one of the fastest car chargers on the market.

You can get the Schosche 12 Watt USB Car Charger here.


Great Car Mount for your New iPhone 6 or iPhone 6 Plus

Arkon Mobile Grip 2

I know that many of you have the iPhone 6 or iPhone 6 Plus on order. Also many of you have large Android phones. Even if you don’t have a large smartphone, chances are whichever smartphone you have, you have it in a case. There, that should cover 99% of my readers 🙂

Time to take a look at a new car mount for your smartphone! The Arkon Mobile Grip 2 may be the answer to all your smartphone car mounting needs. This “sticky” suction mount has been on my dashboard now for about a week and a half and unlike all suction mounts I’ve tried in the past it shows no signs of falling off. This is probably due to the combination of both a good suction mount AND the “tacky” substance that comes standard on the suction cup. It can be dash mounted or mounted on a windshield. Like my favorite vent mount, it offers a “one-handed” mounting and unmountng of your smartphone and its spring loaded design means that you can mount just about any sized device WITHOUT having to remove your case. However, unlike vent mounts, you can not only mount it on your dash or windshield, but it’s more adjustable for better viewing angles. You can also mount your phone in the vertical or horizontal orientation.

arkon_mobile-mobile2-mount_iPhone5s

I was surprised at how much I liked this mount as I really don’t care for suction cup styled mounts, but this one addresses my biggest pet-peeve because it doesn’t fall off the surface you have it mounted to.


The Bottom Line

I’m anxiously awaiting my iPhone 6 Plus and now I know I have an easy to use secure mount to put it in in my car. You can get the Arkon Mobile-Grip 2 Mount here.

arkon_mobile-mobile2-mount_iPhone5s-2


Charge up to 5 USB devices at once

anker_5_port_USB

Charging USB devices at home is no big deal as I have charges around the studio, office, bedroom, etc. and even USB wall plates. However, on the road it’s bit more challenging as there are limited AC outlets in hotels and on stage during presentations. Once again I sought out a USB charger that could not only charge multiple devices, but also charge at least 2 iPads, which require a little more juice (2.1A). My search led me to the Anker® 25W 5-Port Family-Sized Desktop USB Charger Travel Power Adapter. This relatively small charger can handle charging up to 5 of your USB devices including 2 iPads at full speed. While I don’t travel with 2 iPads, I do want to be able to charge one iPad and my iPhone at the faster 2.1A speed as well as 2-3 other devices at the same time. If you’re an Android user you’ll even have a dedicated Samsung Tab port as well. Even if you don’t have the specific devices labeled on each port you can charge ANY 5 USB devices at the same time. Speaking of labeled ports that’s another thing I love about this charger. Many of the smaller chargers that have only 2 ports with one of them being high speed don’t always label which one in particular is the high speed one. Lastly another reason I really like this model over previous multiple port chargers that I’ve used is that it has a regular detachable AC cord on the other end with a decent length of 5 feet. This means that I can plug in the one cord into a power strip on stage or outlet behind a night stand and put the charger itself on the table top to connect all the cords too. I used it in LA this week at my event and it worked perfectly and to my surprise it also didn’t get warm to the touch like other charger tend to do.

anker_5_port_inmyhand

If you’re looking to charge 3-5 USB devices at the same time, this is your charger. You can get the Anker® 25W 5-Port Family-Sized Desktop USB Charger Travel Power Adapter here. Charge up to 5 USB devices at once.

Or get an even better model

anker_40w_USB

You could also go with the NEWER 40W version that had intelligent port charging! No need to plug specific devices in specific ports!

Low Cost Speedlight Softbox Option


wpid13077-Jimmy-Ward-Sr-0083_sm.jpg

Whenever I review a product it’s usually one that I use. I usually try to buy the best gear that I can. As we all know photography gear can range in price and it can be expensive getting the “best” gear. However, that doesn’t mean that you can’t get good results with gear that costs less. So I thought I’d take this opportunity to review a “lower cost” speedlight softbox. Impact makes some decent gear, typically at lower cost than the competition. Now keep in mind that you get what you pay for in most cases, but if you’re on a budget and not making a living from your photography then low-cost options may work out best.

Impact Quikbox

wpid13075-Jimmy-Ward-Sr-0082_sm.jpg

The Impact Quikbox is a 24″x24″ softbox for speedlights. B&H sells it in a kit complete with an Impact 8-foot stand and tilting bracket. The Quikbox is easy to set up. Just pop it open and put the inner baffle in and then the diffusion cloth on the end of it. Lastly mount the supplied speedlight bracket to it and you’re all set. The only thing I don’t like about their bracket is that it doesn’t tilt. This is why B&H includes an additional bracket that allows you to tilt the light. The 8-foot stand is very light — almost too light for the softbox setup. You may have to put a sandbag on it to keep it from falling over.

Putting it to the test

Impact-softbox-overhead

I had a regular commercial shoot this past weekend and decided to give the Impact kit a real world test. I mounted my Nikon SB 910 speedlight on it with a PocketWizard Plus X trigger.


wpid13079-RochelleJackson-0196-Edit_sm.jpg

I had the model hold a reflector to bounce a bit of light underneath her chin and I was pleased with the results and quality of light. With the size of this box, inner baffle and diffusion panel, the light was soft enough for my taste.

wpid13081-RochelleJackson-0472-Edit_sm.jpg


The Bottom Line

This Impact setup works as good as more expensive setups that I’ve used in the past. The quality of the materials used in the box is good. The only thing I don’t really like about it is that it doesn’t fold down nearly as small as my other boxes. So for travel this would not be my first choice. However, if you’re on a budget you can get this kit with stand and tilting bracket for less than others sell their boxes alone for.

You can get the Impact Quikbox Kit here from B&H Photo.


Bonus Deal

85mm-1.8

While you’re in the mood to save some $$$, you can save up to $400 on Nikon lenses now through 3/1/2014 here.

Review: Westcott Speedlite ProGrip

westcott-progrip

Just about any photographer will tell you that you’ll get better results from getting your speedlight up and off your camera. There are all kinds of ways to do it including full blown solutions like my “Westcott Terry White Travel Portrait Kit.” It seems that Westscott has done it again with a handheld solution that can also be mounted on a stand. The Westcott Speedlite ProGrip shows that someone was thinking about this problem and came up with a way to not just accommodate your speedlight, but also a modifier such as a softbox or umbrella and even a second shoe for your trigger. It’s also nicely angled downward to give you better results if you simply hold it straight up.  In the picture above I have the Westcott Speedlite ProGrip PocketBox Kit. I have a Nikon SB 910 Speedlight on it as well as a PocketWizard Plus X trigger. Of course the speedlight and pocketwizard are not included. I’ll be the first to tell you that while I think this is a great solution that I’m not accustomed to holding up a speedlight for my shoots. If I use a speedlight I’ll more than likely mount it on a stand or some other mount. The other thing you probably wont see me do very often is use such a small modifier because I typically like the much softer light achieved by using larger softboxes. However, I wanted to give this solution a shot since it’s so portable and even smaller and easier to travel with than my RapidBox. I was already doing a portrait shoot in studio over the weekend with my full sized regular strobes, but I decided to take a couple of shots with the ProGrip and supplied PocketBox. I handheld the ProGrip in my left hand while shooting the Nikon D4 with my right hand. Here are my results:

wpid13038-Kimberly_Brown-0248-Edit_sm.jpg
f/5.6, 125th sec, 28-70mm f/2.8 lens, ISO 200 and Nikon D4


I took a few shots to get the power just right. I ended up at 1/8th power on the SB 910 and probably could have taken it down a bit more to control the hotspots a little better.

wpid13036-Kimberly_Brown-0235-Edit_sm.jpg
f/5.6, 125th sec, 28-70mm f/2.8 lens, ISO 200 and Nikon D4

The Bottom Line

The Westcott Speedlite ProGrip has a great feel to it and solves a real problem by letting you either easily handhold a speedlight, modifier, and trigger or by letting you mount it all on a stand. It’s very lightweight and small enough to put in just about any bag. The sell these in three flavors. You can get just the Speedlite ProGrip Handle without any modifiers or you can get the Westcott Speedlite ProGrip PocketBox Kit or Westcott ProGrip Umbrella Kit.

progrip-umbrella


20140127-132513.jpg


Logitech Ultrathin Keyboard Cover for iPad Air Review

logitech_ultrathin_ipad_air

Hands down the Logitech Ultrathin Keyboard Cover has been my choice for iPad keyboards. I had one on my 3rd generation iPad and even one on my iPad mini. When the iPad Air came out I decided it was time to upgrade and of course replace the iPad 3rd generation. The one piece I had already begun to miss was my keyboard. Don’t get me wrong, the iPad’s onscreen keyboard is fine for typing quick, short things. However, I often use my iPad during travel and in flight instead of my MacBook Pro. This usually means I’m responding to email and writing. For these longer sessions, I’m spoiled by a physical keyboard. Logitech wasted no time in getting out the Logitech Ultrathin Keyboard Cover for iPad Air. Just like the previous models it connects wirelessly via bluetooth, but it’s also a smart cover that magnetically attaches to the iPad itself. Once you disconnect the iPad from the keyboard you can stand the iPad Air up in the keyboard in either horizontal or vertical orientation.

logitech_ultrathin_ipad_air_h

Logitech made some refinements from the original model that I had. The first one is that they got rid of the shinny plastic on top. It now has a more matte feel/look to it that will definitely not be as much of a fingerprint magnet. On the bottom they’ve attached very small rubber feet that should help prevent the back from getting scratched up so easily. Unfortunately the cover isn’t any thinner. This means that it will add some thickness to your nice thin iPad Air. It pretty much doubles the thickness when attached and closed.

logitech_ultrathin_ipad_air_v

Overall I’m quite happy with this new version and glad to have a physical keyboard again. I did read some of the other reviews out there that complained about things like the magnet not being strong enough and I’ve no issues so far. As a matter of fact the magnet seems stronger than the previous model I had. My 3rd generation iPad would easily slide apart from the keyboard in my bag, but this one seems to stay in place. The battery life of the keyboard is insane. You can easily go weeks if not months between charges. It’s the best keyboard for iPad period.

You can get the Logitech Ultrathin Keyboard Cover in Black/White for iPad Air Here.

You can get the Logitech Ultrathin Keyboard Cover in Black/White for iPad 2, 3 and 4 Here.

You can get the Logitech Ultrathin Keyboard Cover in Black/White for iPad mini Here.

I found the perfect smartphone car mount

airframe_iphone5
iPhone 5 mounted to the air vent via the Kenu Airframe and running Navigon North America turn-by-turn GPS App.

I have been searching for the perfect car mount for my iPhone 5. All the ones I’ve seen or used to date were either too big or too cumbersome. Let me first explain that I also want a mount that I can travel with and use in rental cars. Most mounts fall into four categories. They either attach to the windshield, dashboard, cup holder or air vent. While the air vent ones I’ve used fit the bill for the most part they usually don’t travel well because they are too delicate or have too many pieces or are simply too big. I like air vent mounts and dashboard mounts best as they position the phone at a comfortable eye level to minimize distraction.

The Kenu Airframe is exactly what I was looking for

Kenu-Airframe

1. It mounts my iPhone 5 on the air vent. 2. It accommodates most phones even with their cases on. 3. It’s easy to clip the phone onto it and remove it (spring loaded). 4. It rotates to either vertical or horizontal. 5. It works on just about any vent style (round, rectangle, horizontal vents or vertical vents). 6. It slides right onto the vent in 2 seconds. 7. It’s small and very easy to travel with.

It reminds me of my favorite smartphone tripod mount, the iStabilizer.

airframe_2_iphone5

You can order the Kenu Airframe here.


You’re gonna want one of these too

Get it here.

Long and Short Lightning Cables

monoprice_black_lightning

Ever since I upgraded to the iPhone 5 and got an iPad mini I’ve been slowly but surely replacing my old 3o pin iDevice cables with newer Lightning cables. While the price of Apple’s Lightning cables are a bit on the expensive side, what bugs me more is being limited to a fixed 1m length. While 3rd party 30 pin iDevice cables are a dime a dozen and can be found in many different lengths and configurations, 3rd party Lightning cables are just now starting to become widely available. There were some really cheap knockoffs that appeared early on and as the saying goes you get what you pay for. I tried a few of the different cables and found that either they didn’t work at all, didn’t work reliably or stopped working after a while. One problem is that many of the cheap ones aren’t “reversible.” That’s one of the main benefits of Lighting cables is that there is no front/back up or down. You can plug it in either way and it just works. Many of the cheap ones only worked one way. I did find some 10 foot cheap 3rd party ones that worked properly. However, over time one by one they simply stopped working or started acting very flaky. I decided to wait until some of the trusted brands I’d used in the past. I wanted both shorter cables and longer ones than the 1m Lighting cables that Apple sells.

6 foot and 10 foot Lightning Cables

monoprice_lightningcables

One of my favorite sources for low price, quality cables and gear is Monoprice.com. Monoprice has listed both 6 foot and 10 foot Lightning cables for a while now, but they recently started shipping. Before these cables became available I was using USB extension cables to make my Apple cables longer, but I prefer to have a single cable that’s long enough. I bought a few of each length and as I expected they work perfectly. You can get them in either white or black here.


Very short Lightning Cables

LL-situational__34560_zoom

CableJive is known for selling a variety of different specialty cables and as I had hoped they just started selling pocket sized 12cm Lighting cables. This cables are short for a variety of different uses when you don’t want a long cable that you’d have to coil up. They are a bit pricey for the length, but they fit the bill for always having a Lightning cable for charging my devices, in my pocket.

Amazon has them here.


Lastly a lower priced 1m Lightning Cable

Amazon has their own brand of cables and they are offering a 1m Lighting Cable for less than Apple sells them for here. Monoprice also has some 1m cables cheaper too, here.

Belkin Thunderbolt Express Dock Review

belkin_thunderbolt_express_dock

For the last few years I’ve used a MacBook Pro as my primary computer. I even sold my Mac Pro tower a few months ago as I just couldn’t justify hanging on to it for the few times I used it to do heavy duty video rendering. Sure it was faster than my notebook, but I just found that I was using my notebook more often than heading over to the Mac Pro. Now that I’m on the MacBook Pro most of the time, when I’m at my desk I want to connect all my peripherals. I’ve got a Wacom Cintiq 24HD display, Gigabit Ethernet drop, a 7 port USB 3.0 hub with a Logitech C920 webcam, Rode Podcaster Mic, Bose Speakers, Apple Wireless Keyboard, wireless Magic Mouse and an occasional external hard drive to transfer data from here and there.

What is the Belkin Thunderbolt Express Dock?

belkin_thunderbolt_express_back

It’s an external piece of hardware that sits on your desk and connects to your Thunderbolt port on your computer. Once connected it adds 1 Gigabit Ethernet, 1 Firewire 800 port, an additional Thunderbolt port, an audio in and audio out port, and 3 high speed USB 3.o ports.

Before the Belkin Thunderbolt Express Dock I would have to plug in the power and four cables before waking my MacBook Pro up. The beauty of a dock is that it can give you not only the convenience of having all your peripherals plugged into one device so that you can just plug in one cable, but it also can give you ports that you didn’t have. For example, on the MacBook Pro 15″ Retina Display Apple has eliminated Firewire and Ethernet ports. While I have the Thunderbolt Adapters to add these ports back in, the Belkin Thunderbolt Express Dock has them built-in plus one that I don’t have an adapter for and that is a standard 3.5mm audio in jack.

The design of the dock is appealing to my eyes and it has all of the connections in the back with a pass through to the front for the Thunderbolt cable (which is not included). I was a little disappointed by the rather large power brick, but then I reminded myself that I won’t likely be traveling with this dock. It’s designed to sit on your desk with everything connected to it so that I just plug in the Thuderbolt cable to my MacBook Pro when I get to my office.

I’ve connected a couple of hard drives to it for testing and  noticed no difference in speed. The other ports seem to work as expected.

The Bottom Line

This dock has been a long time coming. For a MacBook Pro owner it’s nice to have. For a MacBook Air owner it becomes an even better accessory since MacBook Airs have even fewer ports built-in to them. I would have loved to have seen one more Thunderbolt port and for the price I feel that it should have included a Thunderbolt cable. Otherwise it’s a solid piece of gear that will make my MacBook Pro feel even more like a desktop computer when I’m at my desk.

You can get the Belkin Thunderbolt Express Dock here.

You can get the needed Thunderbolt Cable here.