Logitech Ultrathin Keyboard mini Review

logitech_ultrathin_mini_stand

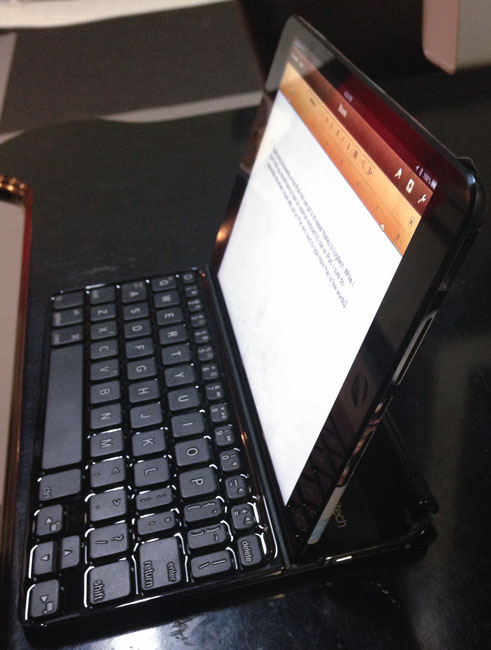
If I think about my favorite iPad accessories, there’s no question that the Logitech Ultrathin Keyboard Cover is my favorite. The iPad is great and the on screen keyboard is fine for typing short messages or replies. However, when it comes to heavy text input or writing blog posts like this one, nothing beats a physical keyboard. The Logitech Ultrathin Keyboard Cover is the best one on market IMHO. It attaches magnetically and works just like an Apple Smart Cover. Read my original review here.


A physical keyboard for the iPad mini?
logitech_ultrathin_mini

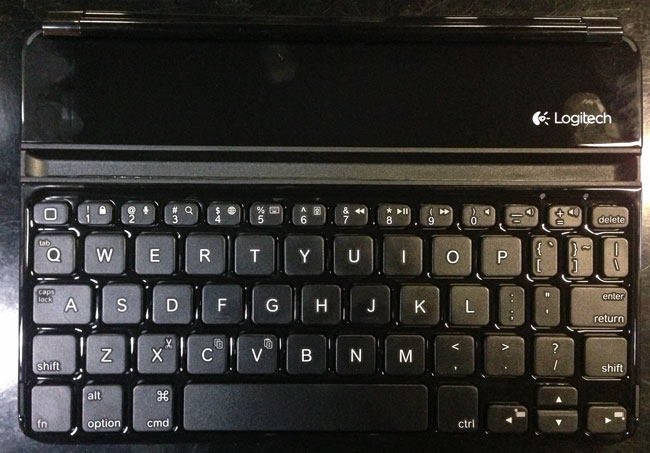
When I saw that Logitech introduced an Ultrathin Keyboard mini for the iPad mini, the first thing I thought was “no way! It’s going to be too small.” The thing I like best about the original Ultrathin Keyboard Cover for the full size iPads is that it doesn’t feel cramped. It feels like a full-sized keyboard. I figured that the iPad mini was just too small and that if someone made a keyboard, it probably wouldn’t be a good experience. Nevertheless I was tempted and had to try the new Logitech Ultrathin Keyboard mini. The first thing I did when I took it out of the box was put my fingers on the home row.

logitech_ultrathin_mini_my_hands

I was amazed! It felt fine. Sure it was a little smaller, but not bad at all. I was also pleasantly surprised to see Shift keys on both sides. Other keyboards I’ve tried for the 10″ iPads sometimes remove one of the Shift keys to make the layout fit better. I NEED BOTH SHIFT KEYS! However, Logitech did make a couple of compromises. The Caps Lock key shares the same key as the “A” key and you use the Function key to activate it. The Tab key also shares the same key as the letter “Q”. These were much smarter compromises than eliminating a Shift Key.


Great smart cover like design
logitech_ultrathin_mini_cover

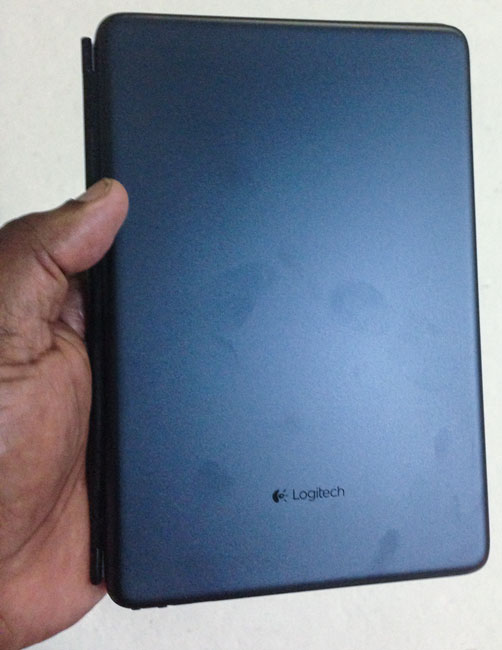
Like the regular Ultrathin Keyboard Cover, the Ultrathin Keyboard mini works as a smart cover and a stand for your iPad mini. As you can see in the photo, it shows off finger prints quite well too. It also has a “home” key that works like the home button on your iPad. Not to mention other iPad specific keys like volume controls, find, slideshow and text selection buttons. The Ultrathin Keyboard mini connects via Bluetooth and has a built-in rechargeable battery that lasts about 3 months between charges assuming you’d use it 2 hours per day!


The Bottom Line
logitech_ultrathin_mini_stand_in_my_hand

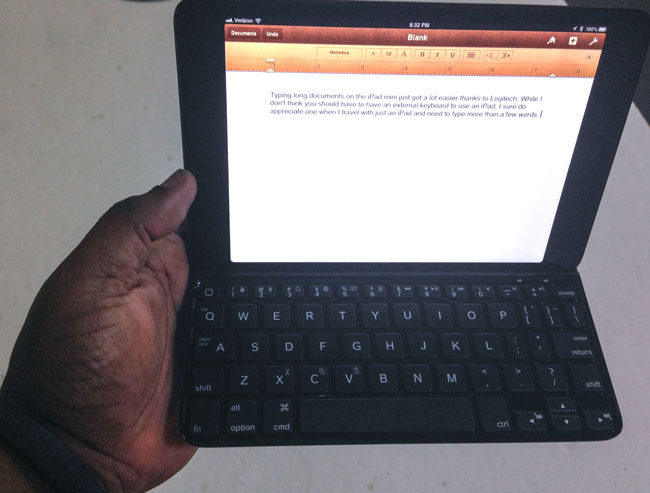
Many will jump to tell me that “If you use an iPad there is no need for a physical keyboard or a stylus” and to those people I would say that you’re right. “Need” is a strong word, but I would also say that while the iPad and iPad mini work perfectly with your fingers, that doesn’t mean that there aren’t times where a physical keyboard wouldn’t make things easier. Not to mention that only the Sith deal in absolutes 😉 The Logitech Ultrathin Keyboard mini and Logitech Ultrathin Keyboard Cover are great for those that want to travel with just an iPad/iPad mini and still get a lot of work done.

You can get the Logitech Ultrathin mini for iPad mini here in black or directly from Logitech in black or white.

You can get the Logitech Ultrathin Keyboard Cover for iPad 2 and higher here in black or white

Finally! A 1TB 7200rpm 2.5″ Drive

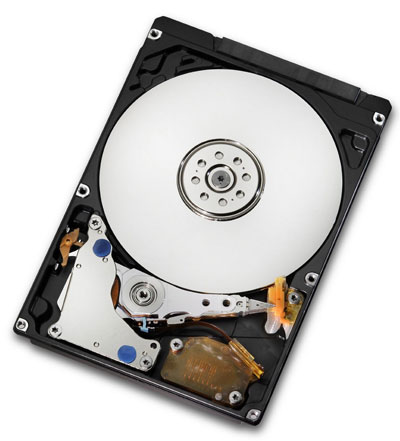
1tb_7200rpm_travelstar_bare

Last August I wrote a post and created a video showing the speed difference between USB 3 and Firewire 800 and while that was fine, what I realized was that the real bottleneck was the drive itself. I typically buy 1TB portable drives for on the road backup and emergency use. Until now all 1TB 2.5″ drives were only rated at 5400 rpm. In other words, slow! This means that the interfaces like Firewire 800, USB 3 and Thunderbolt really didn’t matter much if they all outpaced the speed of the drive itself. I bought a Buffalo Tech 1TB Thunderbolt/USB 3 portable drive. I couldn’t wait to see how “fast” this new drive would be? I was disappointed as it was no faster than my Firewire 800 or USB 3 drives. The problem wasn’t Thunderbolt or something that Buffalo Tech did wrong, the problem was that 1TB drives didn’t spin any faster than 5400 RPMs.

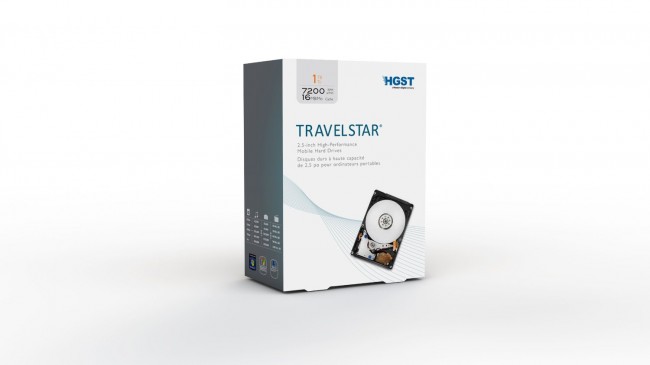
HGST shipped a 1TB 7200RPM Travelstar 2.5″ Drive!

1tb_7200rpm_travelstar

I noticed that I was seeing NEW Drives from OWC and G-Tech that stated that the drives were 1TB 7200 RPMs. This meant that there had to be a NEW 7200 RPM 1TB internal drive that I wasn’t aware of. I did some research and found that HGST (a Western Digital company) had in fact shipped a 1TB 7200RPM 2.5″ drive.


Upgrading my existing drives

Rather than run out and buy a couple new drives, I decided that there was nothing wrong with my enclosures. I figured I could just buy the new bare drive and swap out the slower drive in the enclosures that I already owned. Great idea, but it really depends on the enclosure. Some enclosures are really easy to open and others aren’t. Almost in ALL cases you’re going to void your warranty on the original drive/enclosure.

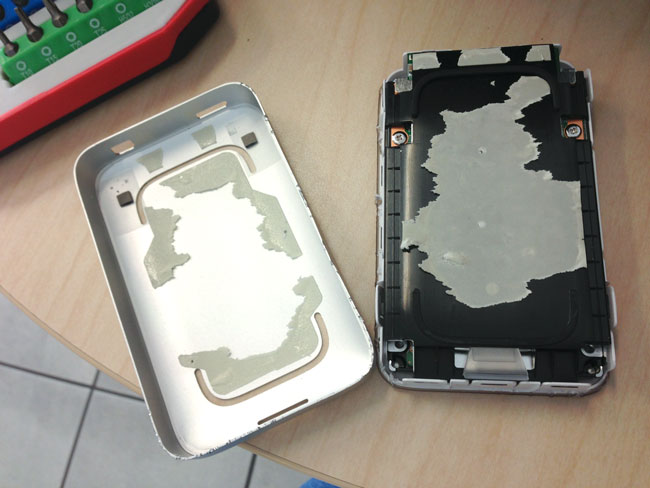
buffalo_tech_opened

It was clear that the Buffalo Ministation Thunderbolt/USB 3 enclosure was NEVER intended to be opened by the consumer. This is probably one of the hardest cases I’ve ever had to open. You pretty much have to “pry” it open to get to the drive and it won’t look pretty when you’re done. Not only is the case secured by internal tabs, but the internal drive tray is “glued” in place. That makes it even harder to open because the glue is fighting against you to. I was determined to swap this drive out and I wasn’t concerned about the cosmetic appearance of the case once I was done. If you want it to still look pretty, don’t try to open this case. You will leave pry marks no matter what.

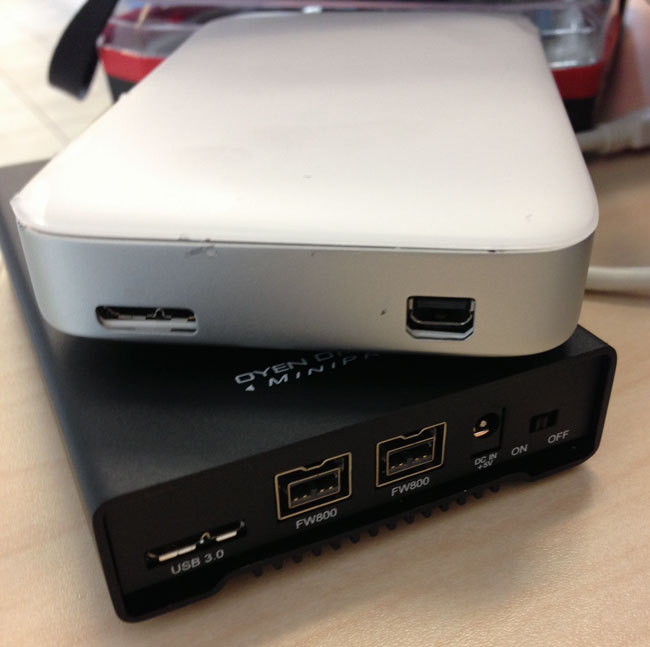
after_1tb_7200rpm_drive_install

On the other hand my Oyen Digital Firewire 800/USB 3 case opened up very easily by simply removing the screws on the bottom and sides of the drive. I swapped out the drive and it went back together just as easily.


The Speed Tests

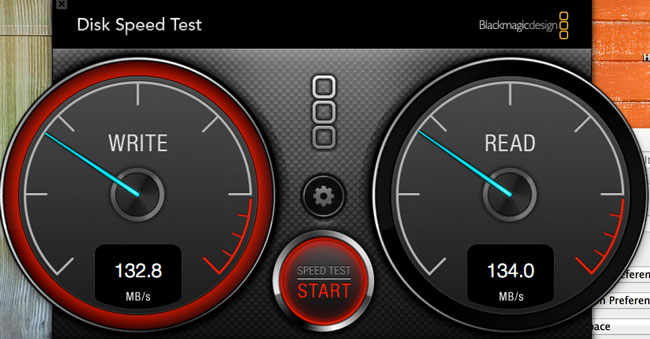
1tb_7200rpm_drive_speedtest
1TB 7200 RPM Drive Speed Test via USB 3

As I suspected, the new 7200 RPM drive was MUCH FASTER than the 5400 RPM ones. There was still virtually no difference in speed between the Thunderbolt and USB 3 interfaces. This could be due to several factors, but in all cases both drive enclosures tested faster than they did with the slower drives.

1tb_5400rpm_drive_speedtest
1TB 5400 RPM Speed Test via USB 3


The Bottom Line

Until SSD drives go up in capacity and come way down in price, these traditional hard drives are still going to be useful for backups and transporting large amounts of data. Now that this drive is out I expect all the drive manufacturers to start making it available in their enclosures. If you’re not a do-it-yourself kinda person, then I would either wait for the Buffalo Minstation to get an upgrade or I’d go with this G-Technology 1TB G-DRIVE mini Portable USB 3, Firewire 800 Drive. If all you need is USB 3, then you’re better off just ordering the bare HGST 1TB 7200 RPM drive and low cost portable enclosure like this one.

Video Review: Pogo Connect Pressure Sensitive Stylus with Photoshop Touch on iPad

pogoconnect

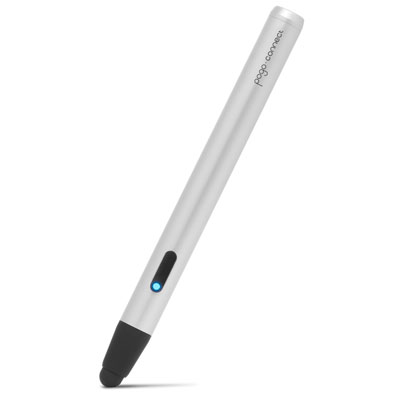
What could make Photoshop Touch on an iPad even better? Pressure Sensitivity! I wouldn’t dare retouch a photo on my computer without a Wacom tablet or Cintiq. Needless to say that means that up until now I haven’t done a lot of work in Photoshop Touch on my iPad. However, that may all change with the new Pressure Sensitive Stylus support now in Photoshop Touch and the Pogo Connect by Ten1Design.

Adobe Photoshop Touch - Adobe

See my video review here:

Wear your Nano with the Loop Band or The Clip

tw-loopband

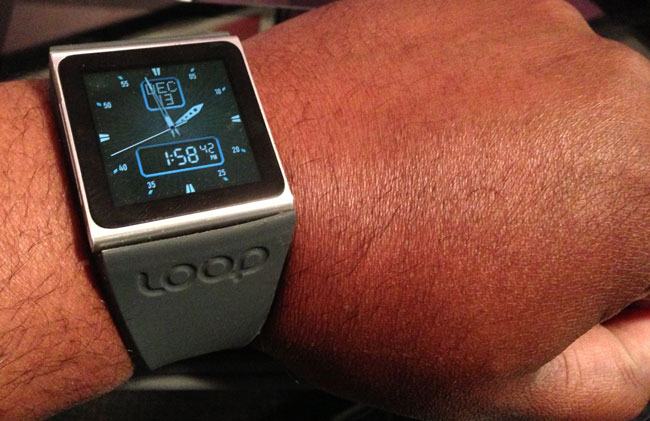
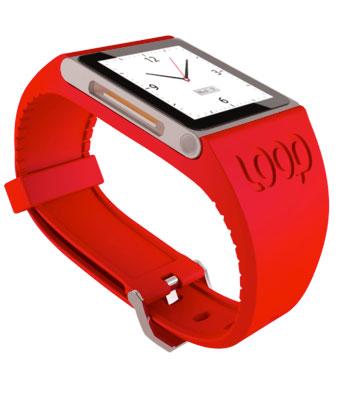
As many of you know, my watch is actually an 6th gen iPod nano. When I first started wearing it there were only a couple of different bands available. Now there are a  lot more. I like the Loop Band as my “sports” band. If I’m doing anything where I’m active the Loop Band is perfect as it won’t scratch or scuff.

Get the Loop Band here.

The iPod nano was updated with a redesign, now what?

theclip

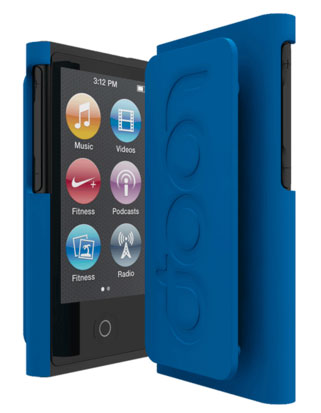
Apple totally revamped their iPod lineup including a redesign of the iPod nano. This basically means no longer wearing it on my wrist as a watch. I no plans to get the new nano. I don’t need another music player. However, Loop Attachments has developed and will be shipping soon The Clip. The Clip is designed to make the new iPod nano more like the previous generation and gives you the option to clip it onto your clothing and wear it.

Both these options come in multiple colors and they also carry other solutions for iPhones, etc.  You can check them out here.

loopband

Using Tether Tools in a way they never intended

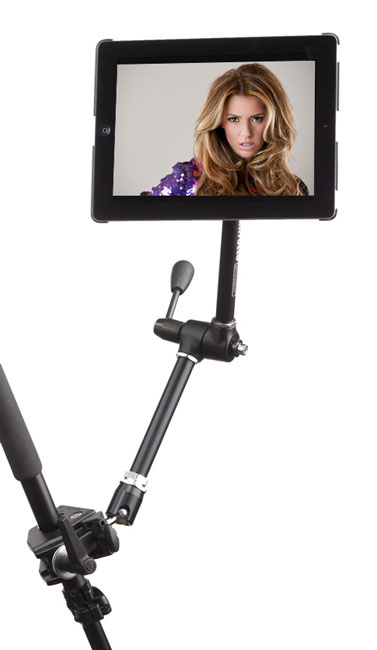
Anyone that follows me and follows my photography knows that I’m a fan of shooting tethered. Last week I had the good fortune of meeting with a TetherTools rep. She showed me some samples of their newer products for mounting iPads to various things such as tripods and tables. As you know I recently reviewed the clamps from TripodClamps.com. A product that I’m quite pleased with. However, I try not to put on blinders and I’m usually willing to look at other solutions. I’ve followed TetherTools for some time now as they relate to Digital Photography, but it was neat to check out their iPad products too. I left that meeting with a few samples: Wallee iPad Case for iPad 3 – Black, Wallee iPad Connect Bracket, Wallee Connect Lite Bracket Rock Solid Mini ProClamp Rock Solid Articulating Arm with Center Lock 7″ and the Handstrap. Now keep in mind that a couple of these pieces have overlapping functionality. For example you wouldn’t use the Handstrap and Articulating Arm at the same time. Nor would you use the Connect Bracket and the Connect Lite Bracket at the same time. I left with solutions for mounting an iPad in a variety of different situations.

Using Tether Tools in a way that they hadn’t thought of

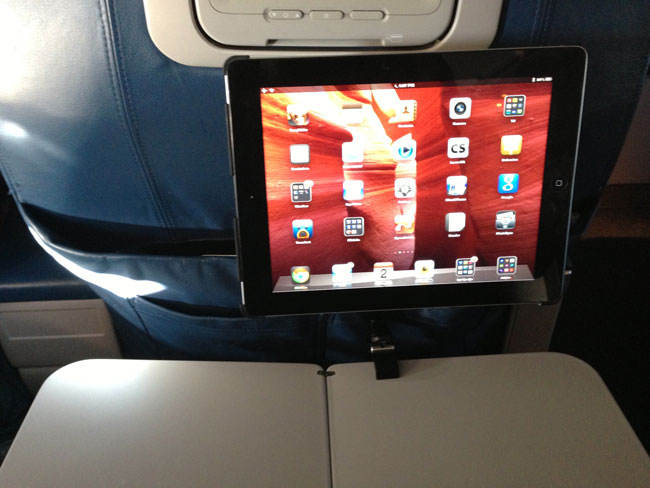
On the flight home I decided to test a theory that RC, Brad, Pete and I had during the meeting. I decided to use the Tether Tools Wallee iPad Case, Wallee Connect Lite Bracket, Rock Solid Mini ProClamp and Rock Solid Articulating Arm to mount my iPad on my tray table. The idea was to get the iPad up and at a comfortable viewing angle and freeing up the table for the in flight meal. It worked great! As a matter of fact, had I had these for sale the flight attendant would have bought one from me on the spot. Actually that brings me to the problem with using it this way. If you’re buying this gear as a professional photographer and plan to mount your iPad as part of your digital photography workflow, then this makes a great solution. However, if you were buying this just to mount your iPad for inflight use then it would be a tad bit pricy and cumbersome to travel with. This solution could work very well for mounting your iPad as an inflight entertainment system, but it would need to be streamlined a bit. It would need to be sold at a lower price and as perhaps a single kit. There’s no doubt that you could use this solution in a variety of settings. Just last week I used it to record the video on the Pocket Socket generator that I reviewed. Yep, that was an iPad video with the iPad mounted to my desk. However, for the personal looking for a single solution for iPad travel then it would be overkill unless Tether Tools repackages it for that audience.

Be sure to check out Tether Tools’ other solutions for digital photography and iPad mounting here at tethertools.com.

Charge Your Cellphone During a Power Outage

One of the lessons that Hurricane Sandy taught us is that Mother Nature can strike at any time and as a result you could be without power for days. My heart and prayers go out to those affected by the hurricane. To make matters worse another storm is bearing down on the northeast. While generators are great, there could be situations where there is no gas to run them. In those cases you are probably going to want to at least keep your cellphone going at a minimum.

K-TOR Pocket Socket Hand Generator Can Save The Day

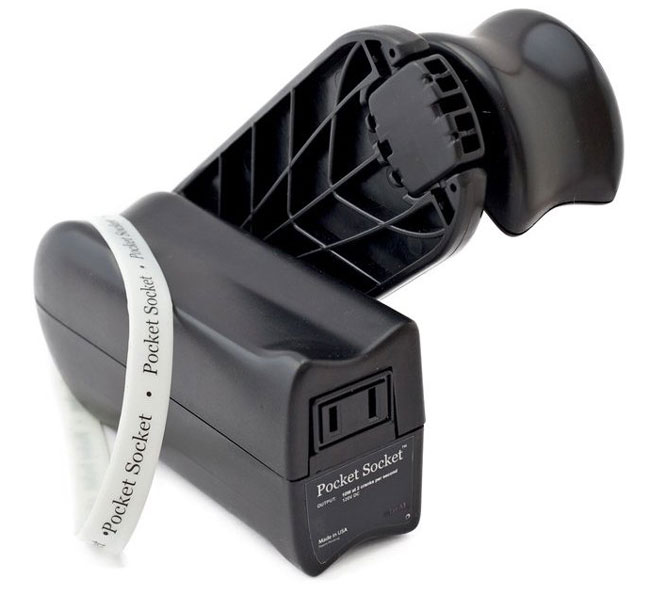
Having a portable hand crank generator may be the difference between a charged cellphone battery and a dead one. The concept is simple. Plug in your USB charger in to the standard AC outlet on the Pocket Socket and plug in your phone. Then start cranking. Unfortunately there is no free lunch. If you stop cranking the handle, then you stop generating electricity and therefore you stop charging. You will definitely get a good workout for the time it takes to charge your battery, but I’d be willing to bet there were some folks out there that had no power and therefore a dead phone who would have had no problem cranking this handle for as long as it took to charge up there devices.

The K-TOR Pocket Socket generates 10W 120v DC at 2 cranks per second. How long does it take to charge your phone? The answer is the same amount of time it takes to charge your phone now. If you can get a decent charge in 10 minutes, then you will have to crank for 10 minutes.

You should definitely make one of these part of your emergency preparedness kit!

You can get the K-TOR Hand Crank Generator here.

I also keep one of these charged for shorter power outages.

UPDATE

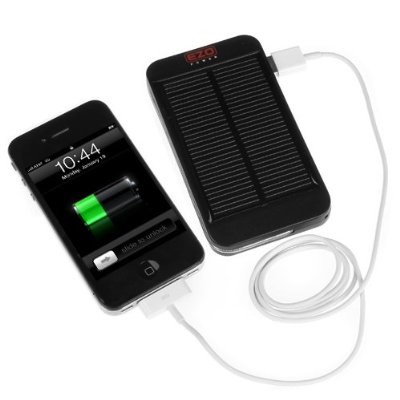
Some of my readers were asking about or suggesting solar options. A solar charger is a great way to go too as long as you’ve got access to the sun 🙂 The nice part about this particular one is that you can charge it during the daylight and charge your phone each evening even if the sun has gone down.

Get a great one here.

iStabilizer Mount for Smartphones

There is no doubt in my mind that smartphone photography is here to stay and in particular iPhone photography has become a category in and of itself. With that said, people are always asking me about various mounts to mount their iPhones and other smartphones to tripods. I’ve reviewed different ones here in the past and with each one there were pros and cons. In the past the problem was that in order to have a really good mount you really needed one that your iPhone would go into like a case. However, the downside to this is that if you already have a case you would have to take your case off in order to put your iPhone into the mount-case. The other problem is that the iPhone changes form factor every couple of years. The iPhone is different from the iPhone 3G/3GS is different from the iPhone 4/4S and different from the iPhone 5.

iStabilizer is more universal

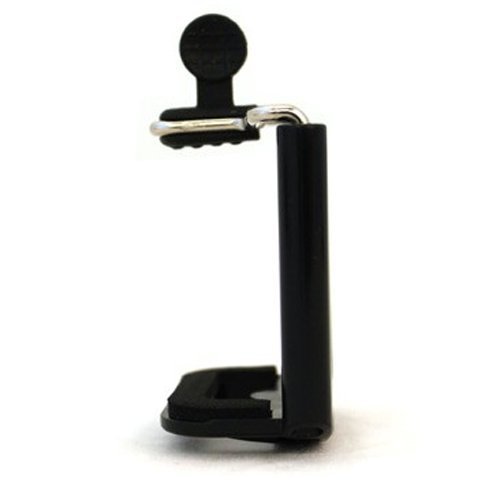
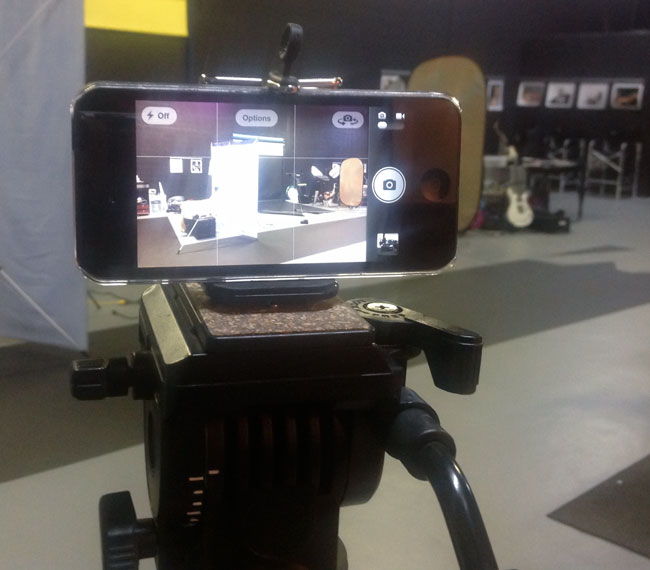
The iStabilizer Mount isn’t designed for a specific type of smartphone. Instead it’s more like a universal clamp that holds your iPhone or other smartphone in place. It’s spring loaded. Just pull the top up, slide your smartphone in and gently release it.  The great part about this mount is that you can leave your smartphone in its case. Another great thing is that it’s fast. No need to put your smartphone in a special case or holder first before mounting. It has a standard tripod mount on the bottom. Below is a pic of my iPhone 5 in the Caze 0.5mm clear case mounted on my Sony tripod.

What’s the downside?

The only downside to this mount is that it doesn’t allow for vertical mounting. The clamp isn’t tall enough to mount a smartphone in the portrait position. However, since it does hold the smartphone very firmly in place if your tripod head can tilt then you could potentially take portraits by simply rotating the tripod itself. It’s now a permanent fixture in my laptop/travel bag.

You can get the iStabilizer mount here.

If you doubt that iPhone photography is real, check out this cover of Time Magazine that was shot with an iPhone by photographer Ben Lowy. See the story here:

Best USB 3.0 Hub

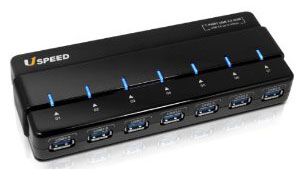
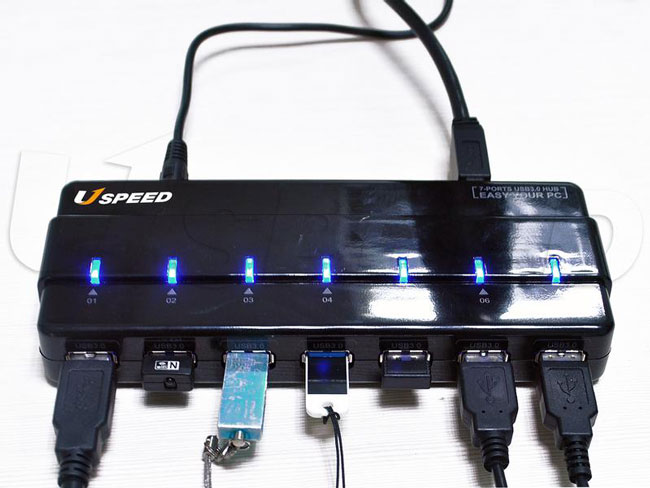
Now that I have a mix of USB 3.0 and 2.0 peripherals I began the search for the best USB 3.0 Hub. I was interested in a 7 port model and most of all it had to be able to mix both USB 2.0 and USB 3.0 devices. What I mean by this is that USB 3.0 devices shouldn’t suffer slow downs when you plug USB 2.0 devices into the same hub. My search led me to the Uspeed USB 3.0 7 Port Hub.

Setup and testing

Setup was easy and straight forward. It came with a power supply that in my opinion has a relatively short cord. It didn’t reach my power strip under my desk that my previous hub’s power supply did. Otherwise it came with everything needed to set it up and plug it into my MacBook Pro Retina Display. I plugged in my USB 2.0 and USB 3.0 devices. However, before hand I ran a speed test on one of my hard drives plugged directly into my computer and then I ran the same test with the drive plugged into the hub while USB 2.0 devices were also plugged in and I got the exact same speed results. So it passed my biggest test/concern.

Design

All of the USB ports are on one side, which is both good and bad. It’s good for cable management since all the USB cables go in one side. However, the power cable and host USB cable are on the other side, so you’re going to have cables coming off both sides no matter what. There are blue LED lights that confirm if a port is in use or not.

The Bottom Line

While this may not be the prettiest design, it is very functional and meets my needs quite nicely. If you’re looking for a 7 port USB 3.0 hub to plug in both USB 3.0 and USB 2.0 devices, then this is probably one of if not the best one on the market.

You can get the Uspeed USB 3.0 7 Port Hub here.

iCarbons Protects My Logitech Ultrathin Keyboard Cover for iPad

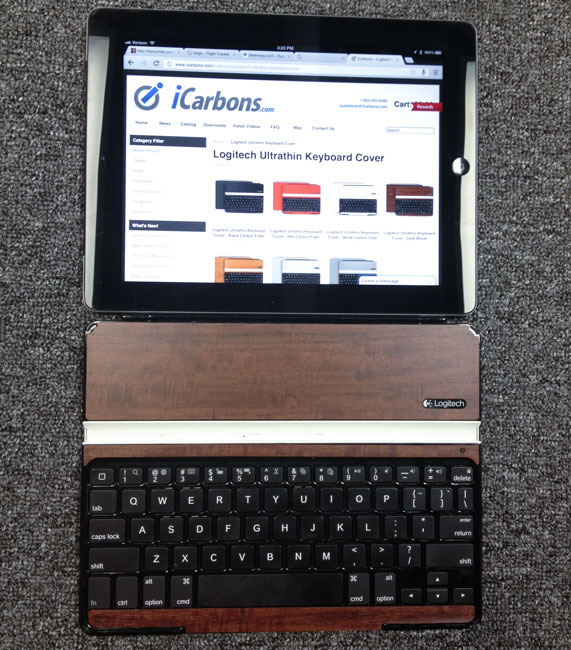
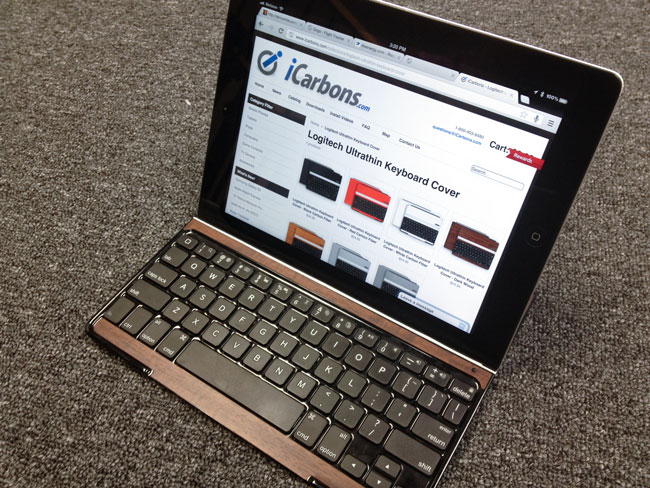
Hands down, my favorite iPad Keyboard/Smart Cover is the Logitech Ultrathin Keyboard Cover. However, the one problem with it is the back (the surface that will be on the table/desk) is susceptible to scratches and the front really shows off fingerprints.

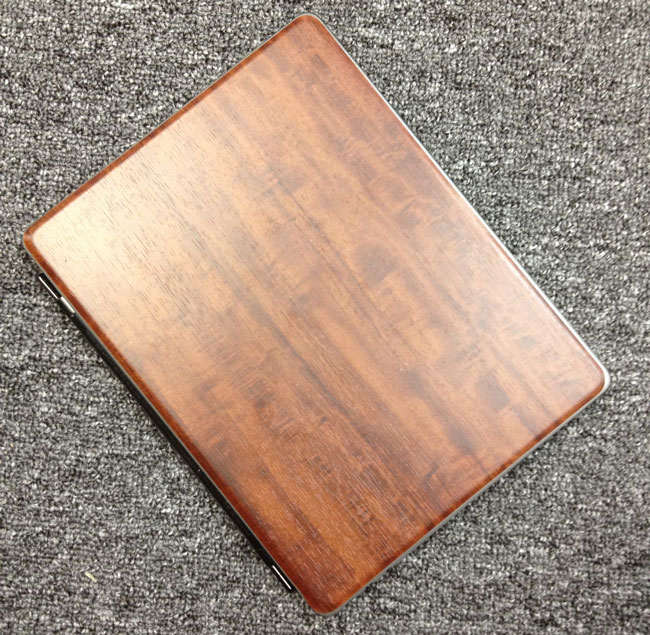
iCarbons.com answered my call and designed skins to cover both the front and back of the Logitech Ultrathin Keyboard Cover. You have a choice of colors and even a couple of simulated wood tones. I went with the dark wood and it works great. These skins are not permanent and can easily be taken off or repositioned as needed.

They also make skins for the iPad itself. Thanks iCarbons for answering my needs here and being the 1st to market with a cover for my favorite iPad accessory.

Monoprice: So much more than low cost cables


Over the years I’ve published posts about spending too much money on cables. When you go to retail store to buy your electronics those stores typically lower the cost of the gadgets themselves to remain competitive (otherwise you’d just buy online or down the street). However, they tend to recoup that lost revenue in other areas and services such as cables. I’ve lost count of how many times I’ve seen a sells rep bring out a $100+ Monster HDMI cable explaining to the customer how much they really need a “quality” cable. I agree! You should have a quality cable. The problem is that it doesn’t have to cost an arm and a leg. I’ve got some really low cost HDMI and Ethernet cables over the years that are still in operation to this day without any problems.

Whenever I bring up the topic of low cost cables, someone enviably calls out monoprice.com. Monoprice has become my goto source for low cost/high quality cables of all types. Especially HDMI, USB and Ethernet. The prices are almost too good to be true and the quality of the cables is outstanding!

The point of today’s post is that Monoprice is more than just cables. I wanted to mount a 32″ HDTV on the wall in my office. What I didn’t want to do was pay an arm and a leg for the mounting bracket. This is another source of revenue for retailers. These brackets can easily cost $100 or more. A quick search on Monoprice.com revealed that not only could I get the bracket I needed a fraction of the cost, but it even offered a nifty built-in level. I ordered my bracket, installed my HDTV and I couldn’t be happier. It came with everything to mount the bracket to the wall/studs as well as the necessary screws to attach the TV to the bracket. It came with a variety of different screws for all kinds of wall materials and different TVs.


The next time you want to save money on cables and accessories, check them out!