I travel a LOT for my job. I usually either stay at a Hilton property or a Marriott property as they are on my company’s approved list of hotels in most places. However, since I started doing more worldwide travel a few years ago I switched my preference back then from Marriott to Hilton. Hilton simply had more properties in the places that I traveled to the most. Now I don’t travel worldwide as much as I used to. I do still travel quite a bit here in the US.
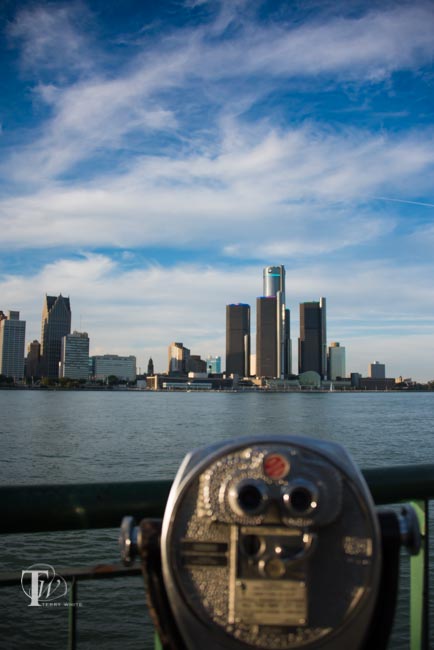
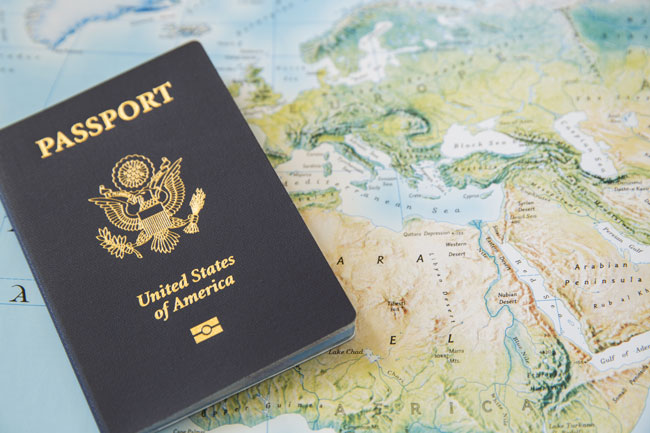
As many of you know I was born and raised in Detroit, Michigan. I’ve been across the river to Canada more times than I can remember. However, in all my years of going to Canada I’ve never gone solely for the purpose of photographing the Detroit skyline. I now live in Atlanta and came back to Detroit for a business trip (come to my event on Tuesday 9/22).Before heading to the Atlanta airport to fly to Detroit I reached in my desk drawer and grabbed my passport.
I got to the ATL airport and figured since my passport was right in pocked I’d use it as my ID to go through TSA security. I handed the officer my passport and used the boarding pass on my Apple Watch to go through. No problem. Once I landed in DTW and on the way to my hotel I couldn’t help but notice how awesome the sky was. It was a perfect day to shoot! I checked in, worked for a few hours before getting in my rental car and heading to the Tunnel to Canada. I paid the toll, drove through and got to the Canadian customs booth. I handed the officer my passport answered the standard questions and I was on my way to the park to shoot.
What a great sunset and amazing clouds. I used my Nikon D810 with my Nikon 28-300mm lens. I even Periscoped from that spot although my Periscope connection wasn’t great. Since Periscope wasn’t working well, I switched to Facebook Mentions Live and broadcasted to my Facebook Page instead. It worked GREAT!
I was shooting there for about 2 hours altogether. I was a great night despite all the mosquito bites. Everyone on the Canadian side was enjoying the moment. Lot’s of people walking and riding up and down the boardwalk.
After capturing all the angles I wanted, it was time to hop back in the car and head back across the border to the US/Detroit. I went back through the tunnel as it was closer than the Ambassador Bridge.
Once I got to the US Customs Border Patrol booth I handed the officer my passport answered his initial questions and then he asked me something that sent a chill down my spine. He asked “why is your passport expired?” In that moment I realized that I must have grabbed the wrong passport from the drawer. “Oh crap” (to myself). I explained, that I must have grabbed my older passport instead of my current one. Now of course I’m thinking to myself “how was I able to go through TSA and through Canada with no one noticing this?” After some more questions (keeping in mind I had nothing to hide) I was directed to pull over to the side. I figured that they were going to do one of those insane car searches where they rip everything apart for 2 hours. Instead I was asked to leave the keys and my cellphone in the car, take my money/wallet and head into the building. I entered and sat in a waiting room for about 20 minutes before being called up.
I went up to the desk and the officer asked me what was going on? I explained it to him and he seemed a bit puzzled as to why I was there. He even asked “did the other officer say anything else? did he seem angry?” I said, no but he did seem annoyed. He shook his head and then asked me to go back to my car and grab my camera to show him the pics.
I did and as he was reviewing them he said “ooh, I like that one” showing it to his buddy. After a few more minutes I was on my way. I can only assume that they have the ability to look up my current info in their system and can see that I do in fact have a valid passport. I even offered to give them the current number at both locations and they didn’t want it. They were implying that the both agent didn’t really have to have me detained as apparently he looked up my info before having me pull over. Also my car was not searched.
The Bottom Line
You better believe that I will never grab the wrong passport again. It’s scary to think that I boarded a plane and went to another country with an expired passport. It also shows that the technology is at their fingertips to verify your info and that some people can put you through unnecessary steps in a process because they are perhaps having a bad day, want to teach you a lesson or simply don’t like the way you look. I’m happy that I was able to come back into the US and that the delay wasn’t hours and that it was only a delay and not something worse!
For many people their smartphone is their main or only camera. I’m finding that I use my iPhone 6 Plus to take more and more pictures when I’m out and about. I have no problems with the quality of the images that the iPhone produces, however the one thing that keeps me from using it when it really matters is the lens. Your smartphone has a relatively small lens and sensor. Sure there are some lens attachments out there, but nothing I’ve seen that rivals the quality of my Nikon glass while still maintaining the convenience of a camera that’s in my pocket at all times.
The DxO Labs ONE hopes to solve this problem
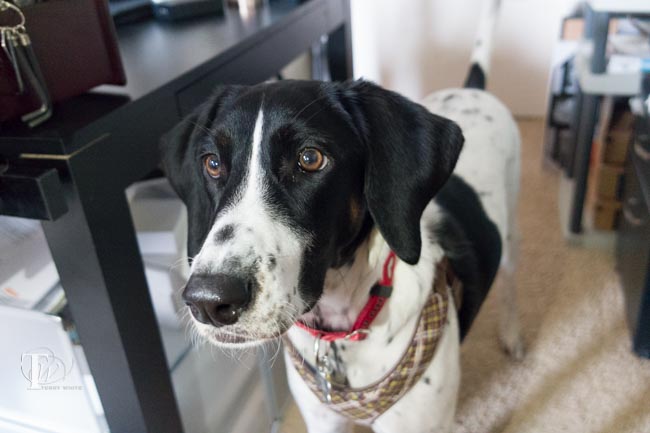
The very first image I took with my DxO ONE
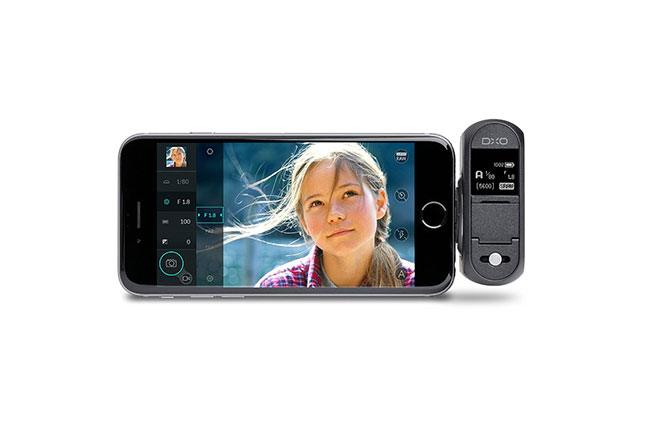
The DxO ONE is a 20MP digital camera with a 1″ sensor that has its own storage and battery. Unlike other solutions in this category that connect wirelessly and therefore slowly, the DxO ONE has a built-in Lightning connector that attaches directly to your iPhone or iPad. This effectively turns your iPhone/iPad display into a touch screen view finder. Because of this direct connection there is virtually no lag. Once in you’re in the Universal DxO ONE app you can control all the settings on the camera including switching between RAW, Super RAW or JPEG as well as Auto mode, Aperture Priority, Shutter Priority, or fully Manual Mode. You can also switch between taking stills and video.
Sometimes showing is easier than writing. Check out this video review I did:
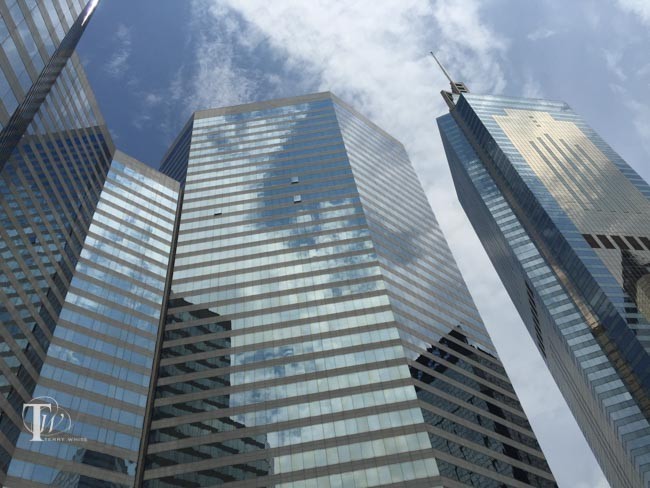
As a portrait and fashion photographer I rarely have to worry about weather because I’m usually shooting in studio and controlling the lighting and environment. However, when I travel I become a travel/landscape photographer and just let me admit that it’s way way way more challenging. The 3rd stop on my Adobe tour took me to Hong Kong. Since it was my first trip to Hong Kong and I had plenty of time (a week) I was in no rush to go out shooting on day one. I arrived late Friday evening and on Saturday it looked like the shot above.
I went out for lunch and captured the above shot with my iPhone 6 Plus. Nothing special, just looking up and snapping a pic. I enjoyed lunch by the pool an thought, “wow! what a great weekend!” Well it all came to an end on Sunday. On Sunday it started raining and well it never really stopped.
I booked a city tour for Monday morning and it rained the entire time. That’s when I realized that:
Don’t procrastinate. If you can get out and shoot on a good day, DO IT! Had I gone out on the same tour on Saturday I would have had a fantastic day for capturing the city.
You have to make the most of shooting in crappy weather. If the weather is not going to change by the time you leave an iconic location, then you have to do your best to get some good shots.
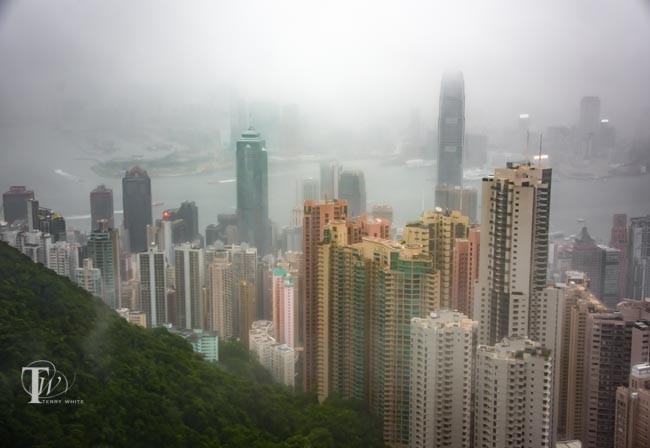
In my case I figured I can’t make it stop raining, so therefore I would shoot things that are supposed to be wet. My tour took me to “The Peak” first and quite frankly it was a disaster for shooting with pouring rain conditions:
This is the shot I got from The Peak while it was pouring rain.
While the NEW Dehaze feature in Lightroom CC does wonders and with a few adjustments I was able to get something that was somewhat usable, it was clearly not my best work and didn’t do the scene justice.
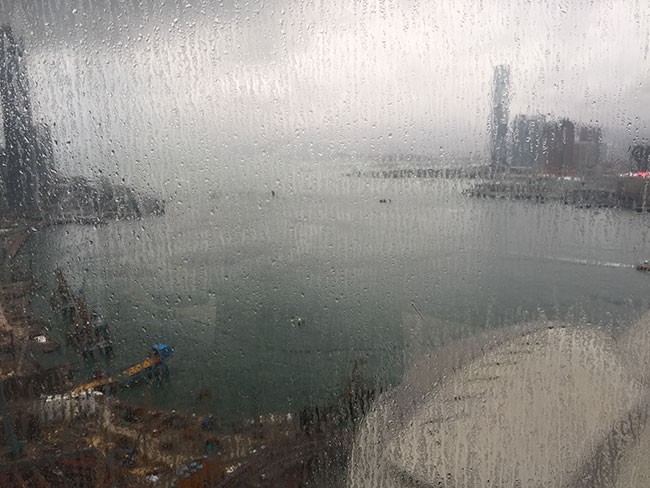
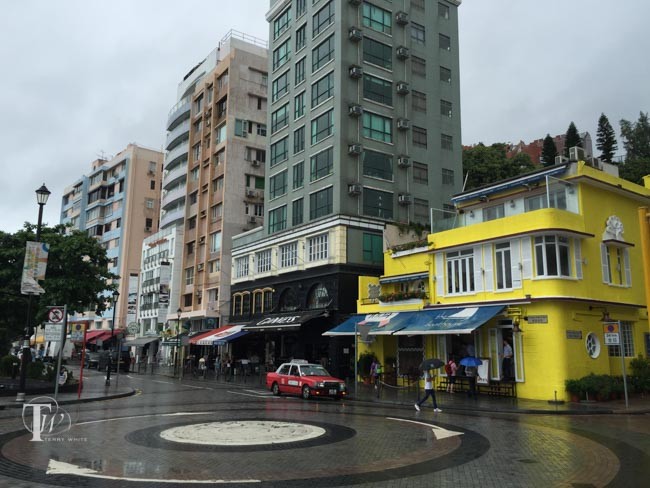
Later in the tour we went to fishing villages and that’s when I applied my theory of shooting things that are ok if they’re wet. I got one of my favorite shots above.
Take the opportunity to shoot the local community interacting with the elements. In the case of rain perhaps target a sea of umbrellas in an urban setting, the cars going by and splashing puddles of water. Had I brought my macro lens I probably would have focused in on the drops of water on the leaves.
Luckily the weather did clear up for a few hours on Tuesday and I didn’t hesitate to go back to The Peak as well as taking the Star ferry over to Kowloon to capture Hong Kong from the other side.
The Bottom Line
If you’re going to shoot, shoot! Don’t take chances that the weather will be just as good tomorrow as it is today. If you are just stuck with bad weather, think of creative ways to shoot outside your comfort zone. Work the weather to your advantage.
Going to Photoshop World 2015 in Vegas?
If so you can SAVE $50 by registering here with the Discount Code: TerryWhite50
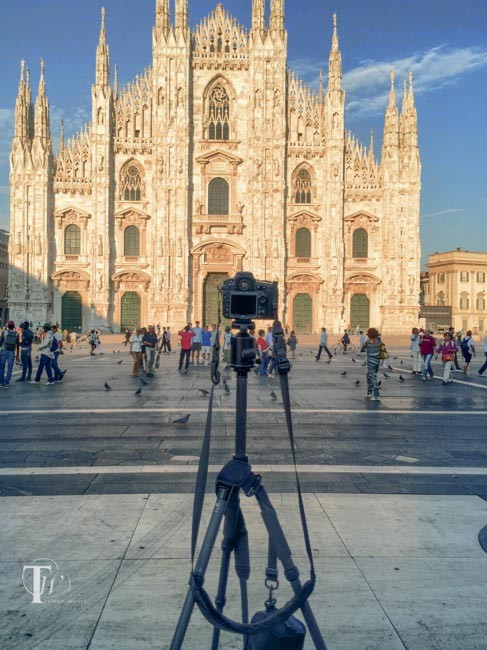
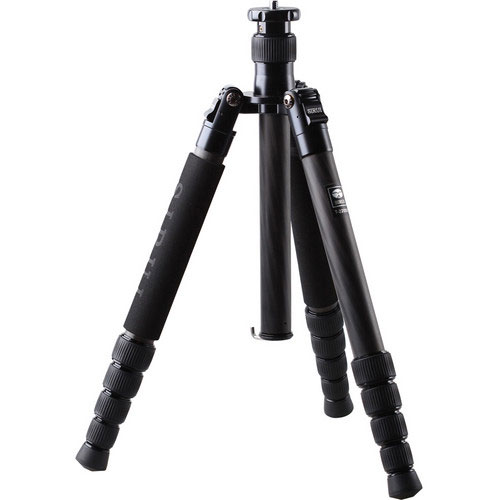
One thing that I’ve learned the hard way more than once is that if you travel to a beautiful location without a tripod, you’re really limiting your potential. If you want to shoot long exposures you need a tripod as they are impossible to shoot handheld. If you want to shoot HDR during the evening or early morning hours you’re going to want a tripod. If you’re going to shoot time lapse then you’re going to want a tripod. I have a GREAT Tripod for travel. I bought it years ago. While I love the fact that it’s carbon fiber and therefore light weight, I wanted to see if there was one that was shorter when folded down? My search lead me to Sirui. I had never heard of them before. However, the specs were what I was looking for:
Maximum Height of 56.9″
Load Capacity of 26.5 lb
8x Carbon Fiber Legs
Forged Aluminum Alloy Chassis
Short Center Column for Low-Angle Shots
Folds Down to Just 14.6″
Weighs Just 2.6 lbs
This one folds down to 14.6″ vs. my Gitzo which folds down to 16.7″. While 2 inches may not sound like much, it actually makes the difference of fitting in my suitcase horizontally instead of diagonally allowing me more room for my clothes and other gear. The maximum height is a little over an inch shorter than my current one, but load capacity is 50% more than my current one. This means it can hold my bigger bodies and lenses. The weight of the Sirui is only .4 lbs more than the Gitzo. Probably the biggest factor to compare is that the Sirui is less than half the price of the Gitzo.
The Sirui T-2205X 5 Section Carbon Fiber Tripod comes with:
Short Center Column
Padded Travel Bag with Shoulder Strap
Allen Keys
6 Year Limited Warranty
The bag is really nice, but it’s really only designed to carry the tripod and the supplied accessories. Like most professional tripods this one does NOT include a ballhead. Once I added my Kirk Ballhead to it, it was a tight fit in the bag, but it did fit.
The Bottom Line
There are wide assortment of tripods out there are all different prices and capabilities. If you’re looking for one that is pro level, folds down very compactly and can hold heavy gear, this one will suit you well. This is definitely in the category of Best Tripod for Travel!
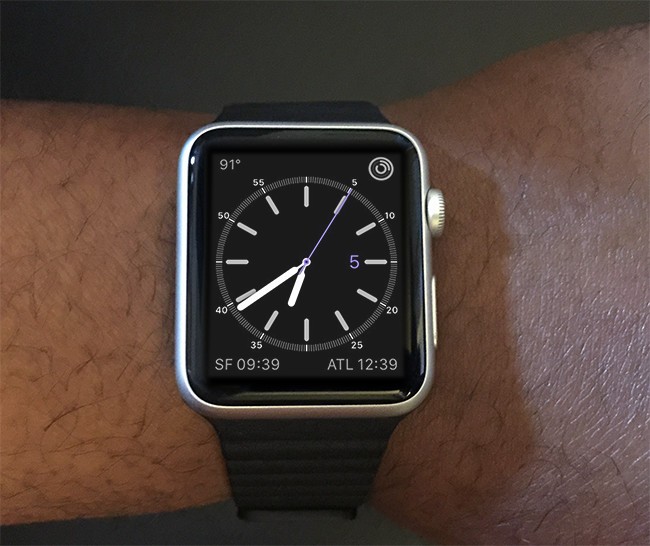
Whenever a stranger notices that I’m wearing an Apple Watch, the 1st thing they usually ask is “do you like it?” I always find this question to be a bit awkward because I guess if there was something as personal as a watch or other wearable item that I didn’t like, I probably wouldn’t be wearing it. It’s like saying, hey those shoes you’re wearing, do you like them? However, I get it. It’s a hot new tech gadget with a lot of hype that they’ve heard something about or perhaps are interested in possibly getting one and it’s probably the first question that comes to mind. To answer the question for the record, YES, I love it! Now with that said, it’s a 1st generation Apple product and as history has always shown us it will get better with each iteration. Think back to iPhone 1.0 in 2007 and iPad 1.0 in 2010. I loved those products too, but could never imagine going back to those first models now that the newer ones are in hand. I expect to have the same feeling about Apple Watch 1.0 in a few years. But for now I’m very happy with it.
The next question I get and this is another odd one for me to answer is “Is it worth it?” Again, it feels kinda personal. I usually answer with the truth “yes, it’s worth it to me!” I can’t answer if it will be worth it for you or not? I have no idea what you consider to be of value and what your limits are? Some things that you would spend money on I would probably find not to be worth it to me. However, for the record the answer is YES!, it’s worth it (to me). My #1 measure for answering this question is, if something were to happen to it or if I could go back in time knowing what I know now, would I buy it again? hmmmm, Yes! My only debate would be would I buy the Sport model again or would I step up to the stainless steel model. I chose not to go with the more expensive models knowing that this is a first generation 1.0 product and that when 2.0 comes out then I would spend more on the sure to be thinner model with all kinds of new bells and whistles. I do want a stainless steel one and I’ve had to close my browser window a couple of times when I was tempted to just go ahead and order one, but I’ll wait.
Probably the least expected moment when someone asked me about Apple Watch…
The city of Milan Italy from the roof of the Milan Cathedral
I would have to say that I was a bit frustrated when one of my viewers on Periscope (follow me @TerryLWhite) asked me about Apple Watch during a live broadcast from Milan Italy last week. I know that the viewer didn’t mean anything wrong by the question, but I was a bit taken back by the question during that particular moment because I was showing this beautiful scene from the top of the Milan Cathedral. The beauty, the history, the architecture, the wow factor and out of the blue “has the Apple Watch benefited you on this trip?” Huh? Really? You want to talk Apple Watch now? Right now? Are you seeing this? So I was a bit snippy with my response and for that I apologize. He didn’t deserve that and his curiosity was genuine. There was nothing wrong with the question. I actually felt bad afterwards. For that reason, I thought why not answer the question in detail with this blog post?
Using Apple Watch on my trip to Europe
Although I had traveled with Apple Watch from day one, this was my first trip abroad with it. I would say that the first thing I like about traveling with Apple Watch is that it changes the time based on where you are just like your iPhone. So I never ever have to set it. Last week I went to the Netherlands, Paris and Milan. The first thing I thought about was what information would I want to see at a glance every time I looked at my Watch? Apple calls the 4 customizable corners of Apple Watch “Complications”, not sure I would have used that term, but that’s what they are called. Also my buddy Jack just pointed out to me that Complications is the common term used for describing features of clocks beyond the time display. Learn something new everyday. My daily 4 complications were Weather, Battery Status, Activity (like a fitness band) and the Central Europe Time Zone (Paris time). I customized it by replacing Battery Status with Pacific Time and changed Paris time to Eastern Time (my home time zone – Atlanta). I also set the default to 24 hour (military time) since that’s what the rest of the world uses.
Speaking of Battery Life…I no longer display the battery status on my watch because since day one battery has NEVER been a problem for me. Not one time in 45 days have I run out of juice. I think the lowest the battery has been when I put it on the charger at night was 30% left. It actually averages between 40%-60% left each day. Since battery life has never been an issue for me, I figured why waste the space displaying the status at all times? I can always use the battery “glance” if I’m ever curious to how much juice I have left. While Apple states that you’ll get 18 hours of battery I have actually gone over that for the 1st time on this trip. I put my watch on at 8:00 am the day I left and didn’t take it off till the next afternoon in the Netherlands at 1PM, 23 hours later! I also kept it active on the 7.5 hour flight because the Delta 747 that I was on had WiFi. No need to go into Airplane mode. Apple Watch battery life is much better than expected!
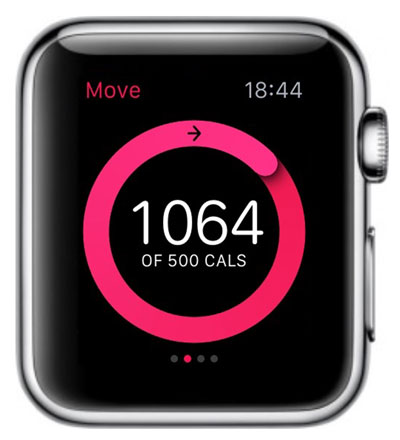
After setting up the perfect watch face display above, the next thing was the Apps themselves. Some were very useful on this trip. I’ll start with the ones that are built-in. I love that Apple Watch shows me incoming calls. This is even more important when traveling abroad as calls can be costly. At a glance I could see who was calling and even better, if it was a call that I didn’t want to take I could just cup my hand naturally over the Watch to silence the incoming call and send it . This is a pretty sweet feature. The next one that was extremely nice was the Activity monitor. I did a LOT of walking around on this trip and it was great hitting/exceeding my daily Move and Stand goals. I used to wear a Nike+ Fuelband on one arm and sometimes a nice Marc Jacobs watch on the other. Now I have Apple Watch that gives me both a nice watch and fitness tracker in one. Speaking of it being a watch, people seem to be really impressed when I raise my arm to see what time it is and the Watch displays the time. This is what bugged me about using all other digital watches (including the Nike+ Fuelband) in the past is that you had to use your other hand to press a button to activate the display. There is no button to press thanks to the built-in accelerometer.
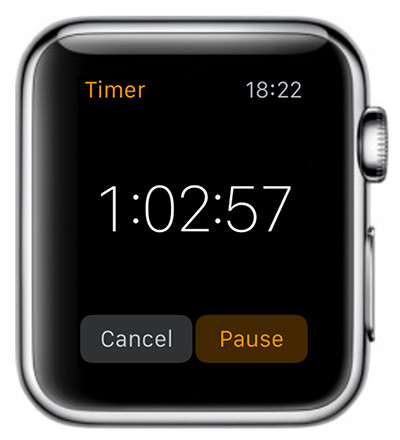
The Timer was awesome to use. This was a work trip and I had presentations to do in each city. Normally I’d use a presentation timer on my iPhone, but more and more I’m using my iPhone as part of the demo to show mobile Apps. This lead to my using an iPod touch for music and to run my timer apps. I didn’t take the iPod touch out of my bag one time on this trip. The watch made a great timer. At a glance I could see how much time I had left and if I got carried away the taptic feel of the timer tapping my wrist when my time was up was PERFECT. Although I didn’t have slides to present during this trip, I have also used the Keynote App on Apple Watch as a wireless remote to advance my slides from my wrist. It was great to use the timer for the flight home. This way I was able to see how many hours I had left at a glance.
Notifications are killer! Not having to pull out my iPhone for every little thing is what I hoped Apple Watch would help with and it has. Having calendar reminders, text messages, and several 3rd party app messages pop up on my Watch instead of having to pull out my iPhone each time was great.
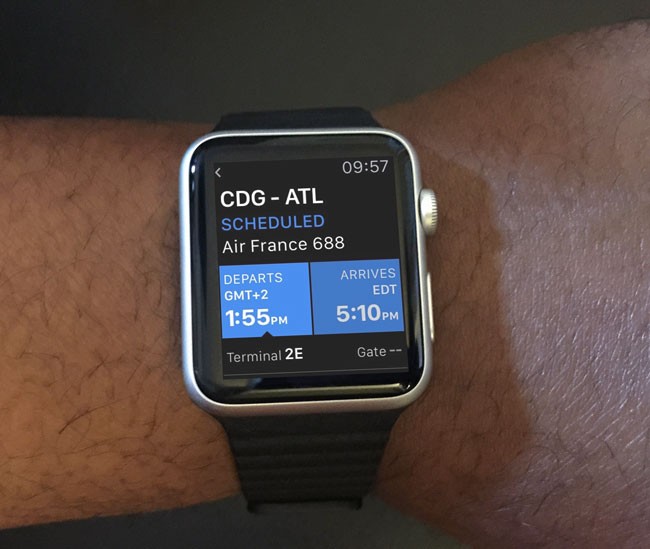
There was one 3rd party app that stood out. If you want to see the 3rd party Apple Watch Apps that I like the most, you can see the full list here. However, the one for travel that was great to have was FlightTrack 5. All of my flights were loaded in via my iPhone 6 Plus and therefore available at a glance on my Apple Watch. I could see any flight updates, delays, times, etc.
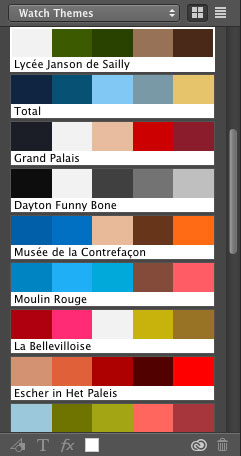
The above color themes were captured with Adobe Color on Apple Watch from the various locations I visited and then sync’d to Creative Cloud and waiting for me on my Desktop the next time I launched Photoshop CC.
I also liked using Adobe Color CC to collect the most popular color themes from each city. I’m becoming a fan of ProCamera 8 + HDR and their iPhone app now includes an Apple Watch app that not only gives you a remote shutter release from your Watch, but also a quick review of the images that you just took so that you can stay in place and shoot again if need be.
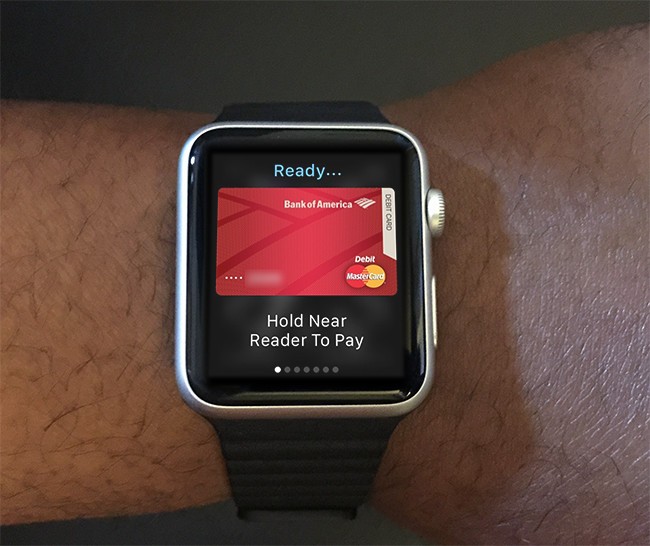
Apple Pay via Apple Watch came in very handy
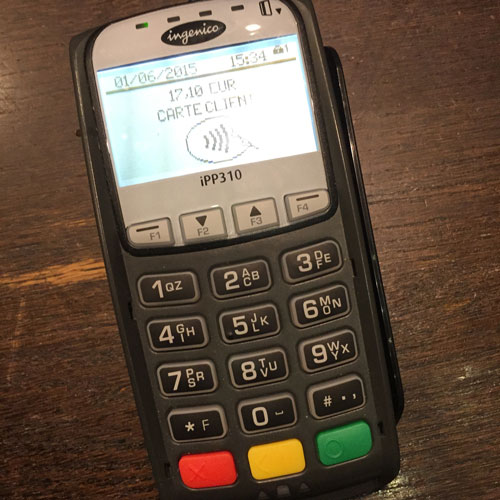
During my stay in Paris I went to lunch at the underground Mall next to the Louvre. Nice Apple Store there by the way. The food court had a variety of restaurants. I noticed that when I went to pay for my meal, the familiar touchless payment symbol appeared and I thought, why not try it. Two taps of the side button and my Apple Pay was ready. All the cashier kept saying was “wow, wow, wow”. Apparently I was his first Apple Watch paying patron. Or maybe that was all the English he spoke 🙂 .
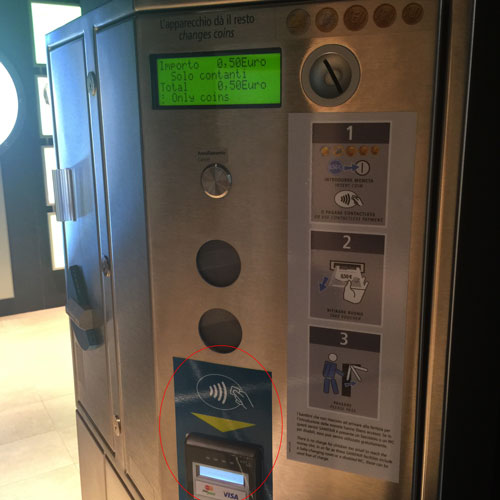
I used Apple Watch in a way that I never would have thought about before this trip. It seems that in several public places in Europe that if you want to use the restroom you actually have to pay € .50.
While that’s not the end of the world, it was frustrating the first time when I didn’t have any change. The next time, I saw one I noticed that it took Apple Pay (contactless payments via NFC in smartphones and Apple Watch). Now Europe just needs to update their train stations to take touchless payments and it would be a lot easier, faster and a more secure way to pay for tickets.
The Bottom Line
The Apple Watch is far from perfect, but for what it is right now as a 1.0 product it’s GREAT. It does the things that I bought it for and if I had it to do all over again I’d buy it again. For every day use it has been a natural fit into my lifestyle and for travel it’s been great to have the things I want to know about the most at a glance. I look forward to the 3rd party Apps gaining access to the native functions of the Watch in the upcoming Apple Watch SDK. I have a whole drawer full of traditional watches, but Apple Watch is the one I enjoy the most. Apple Watch is a great product that will only get better over time.
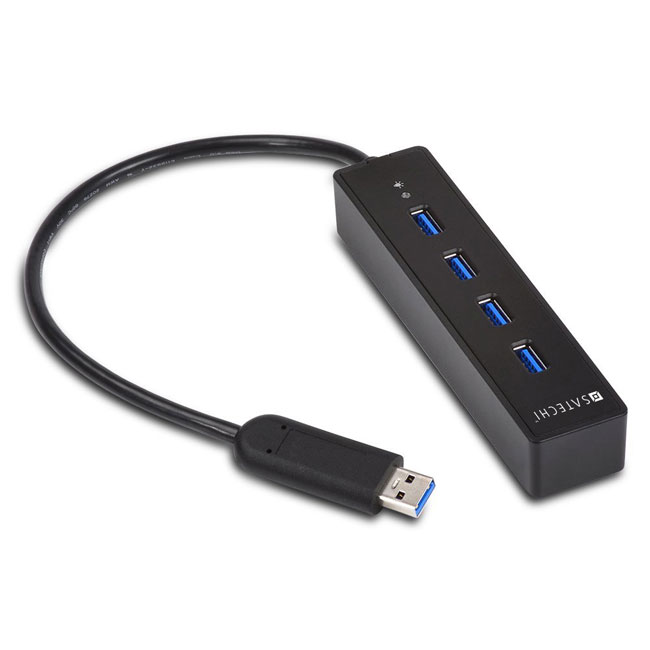
Back in 2012 I did a review of what I consider to this day to be The Best USB 3.0 Hub. I still have this hub on my desk to this date with zero problems with it. It just works! While this USB 3.0 hub is great, it’s a bit too large for my travel tastes. Yes they do make this 4 port version but it’s still larger than I wanted for travel. The big decision you have to make when going with a travel USB 3.0 Hub is whether or not you want/need a powered hub or not. Obviously a powered hub is the way to go when you have the ability to plug it in to a power supply and you don’t mind carrying yet one more power supply in your bag. However, USB 3.0 offers more juice than USB 2.0 does. Therefore you may be able to get by with a self powered hub especially for occasional use during travel. When I’m using my MacBook Pro or MacBook Air on the road, I’m usually in need of one extra port. I usually have my Wacom Intuos Pro tablet plugged in and an external USB 3.0 hard drive. At that point I may need to plug in a document camera/scanner or a Lightning cable to sync/copy something from my iPhone or iPad. Or I could simply need to plug in a thumb/flash drive to copy a quick file. These are the kinds of things I need to do via USB 3.0 on the road from time to time. The hard drive can be plugged into Thunderbolt. That frees up the USB port if needed, but not all of my portable external drives are Thunderbolt equipped.
I went with this portable USB 3.0 Hub
Although Anker makes this 4 port USB 3.0 Hub, I went with this Satechi 4 port USB 3.0 Hub. It seemed to have high ratings across the board on multiple sites. I havent’ been disappointed as the Satechi 4 Port USB 3.0 Hub has been GREAT!. It performs as advertised as long as you keep in mind that it’s NOT a powered hub. So let’s get the rules of using a bus powered hub out of the way. First off if you plug in too many devices that require USB power you will likely run into issues where the devices may not work or may not work at their top USB 3.0 speed. So when I want to use a bus powered USB 3.0 hard drive I plug the hub into my computer first and then I plug in the hard drive. Lastly I plug in any slower devices. If you stick to these rules (plug in the hub first, and the most power hungry devices next) then you’ll be more successful. I was able to easily plug in my USB 3.0 G-Tech hard drive, and my Wacom wireless module and lastly my Ziggy document camera with one port on the hub to spare. This is likely more than I will actually use on a regular basis, but I wanted to test my worst case scenario. Also keep in mind that I have one more available USB 3.0 powered port on my MacBook Pro/Air. With this Hub I could easily have two external bus powered hard drives (one in the USB 3.0 hub and the other in the built-in port) and still have other ports available for less power hungry devices. Since I only travel with three external hard drives on a regular basis, this is exactly what I needed as I never need to plug in more than two at a time and If for some strange reason I need all three, I can plug at least one of them in via Thunderbolt.
The Bottom Line
If you need a powered USB 3.0 Hub for travel, then you should probably get this one. However, if you’re looking for a smaller one that can be used even if you don’t have an available AC power port nearby or you don’t want to carry one more power brick, then you could go with this Satechi 4 Port USB 3.0 Hub and get the extra ports you need.
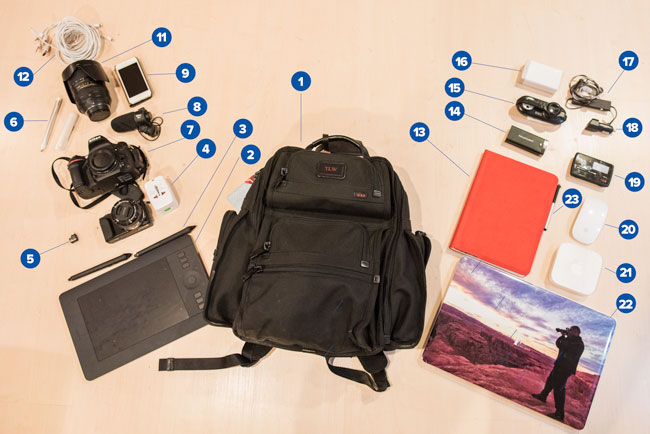
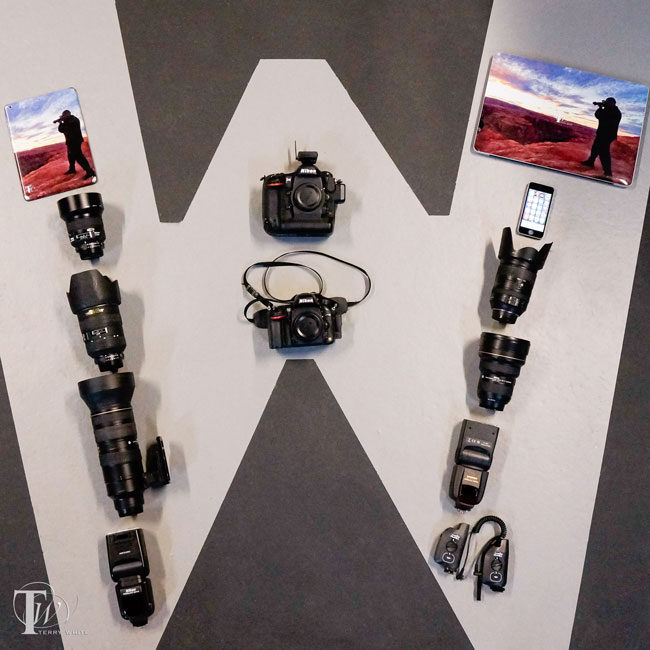
The good folks over a shotkit.com recently featured me on their site and the contents of my camera bag. You can see all the other photography gear that I use here. People are always asking what kind of gear I shoot with. On the flip side of that coin when I’m out on tour people are always asking about the gear I use on stage to do my presentations. So I thought it was time for a “What’s in my bag?” update. My backpack weighs a ton. Every now and then I take everything out and try to only put back in the things that I’m using on a regular basis. That time has come again and this past weekend while everything was out I decided to photograph it and detail it here:
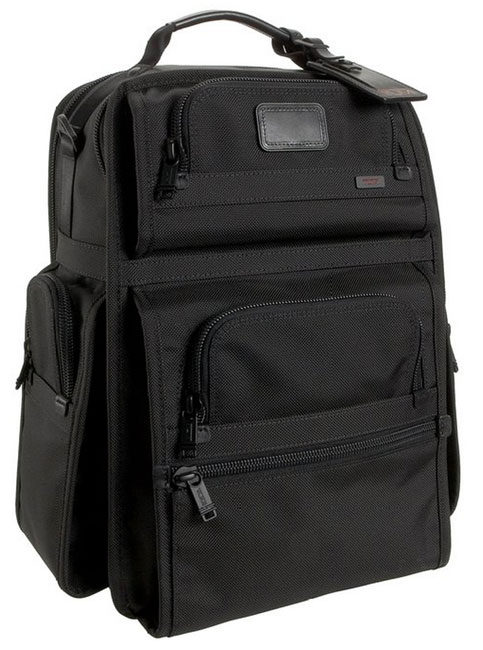
Let’s start with the bag itself. My FAVORITE computer backpack is the Tumi Alpha T-Pass. This backpack has really held up well with the load I put on it and shows no signs of wear. I was going through backpacks about once a year before this one. While it’s more expensive than I’m used to, it’s been worth it thus far. Also can beat the T-Pass feature for TSA checks at the airport. It unzips in half so that you don’t have to take out your laptop. Get it here.
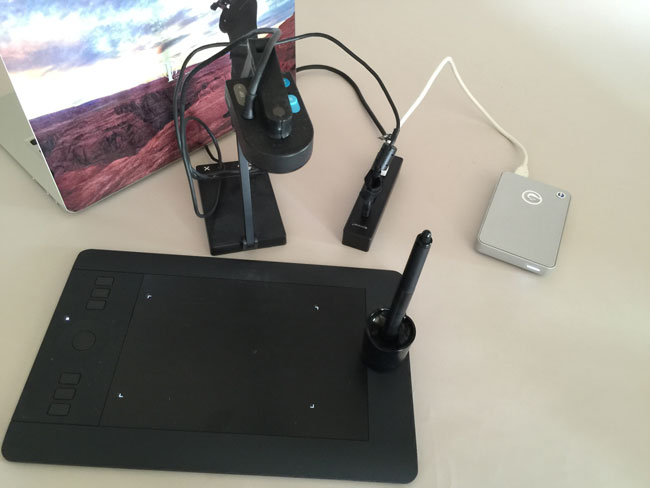
I shoot on the road and that means I need to retouch on the road. I couldn’t imagine retouching a picture in Photoshop without my Wacom Intuos Pro Small tablet. Get it here.
In addition to the regular pen that comes with the Intuos Pro I have the Wacom 6D Art Pen for drawing in Illustrator. Get it here.
My favorite international travel adapter. It covers most countries and has a smart design. Get it here.
Nikon WU-1b Wireless Mobile Adapter. This allows me to transfer images from my Nikon D600/D610 to my iPhone or iPad wirelessly. Get it here.
Adobe Ink & Slide – Pressure sensitive pen and digital ruler for drawing on the iPad. Get it here.
Nikon D600 – I travel with either my Nikon D600 DSLR or my smaller Sony NEX 3 mirrorless camera. I love them both, but the DSLR is considerably bigger and heavier. Get the Nikon D610 here. Get the Sony Alpha NEX 6 here.
Nikon ME-1 Stereo Micophone – You can’t have good video without good audio. The built-in microphone just doesn’t cut it. Therefore I use this one for those on the go interviews and recordings. Get it here.
iPod touch – Although I have an iPhone and an iPad. I still prefer having a dedicated device on stage to play music and to run my presentation timer app. I’m usually using the iPhone and iPad in my demos. This way I have a dedicated device to do the tasks I need. Get it here.
Oops – I left out #10. So let’s move on to number 11. 🙂
Nikon 28-300mm lens. This is my main travel lens and while I do have better lenses, this one covers a nice range and it has a good quality. Perfect for travel. Get it here.
I have to charge all these devices. My main cables are the 6 foot Lightning cable by Apple – Get it here and the nice and short Lightning cable by CableJive. Get it here.
iPad Air with Logitech Ultrathin Keyboard Folio. I use my iPad Air all the time and now on stage to demo mobile apps. Get it here. I couldn’t imagine not having my Logitech ultrathin Keyboard Folio. Get it here.
RavPower Battery – Sometimes my iPhone doesn’t make it through a long day of heavy use without another charge. I’m not always near an outlet. This RAVpower Battery can easily charge it twice. Get it here.
I gave up fighting for additional outlets in hotel rooms and airports. Now I just bring this ultra compact 3 outlet powerstrip with me. Get it here.
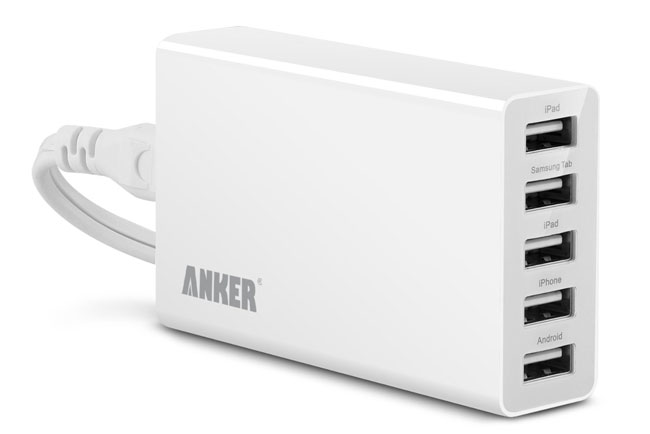
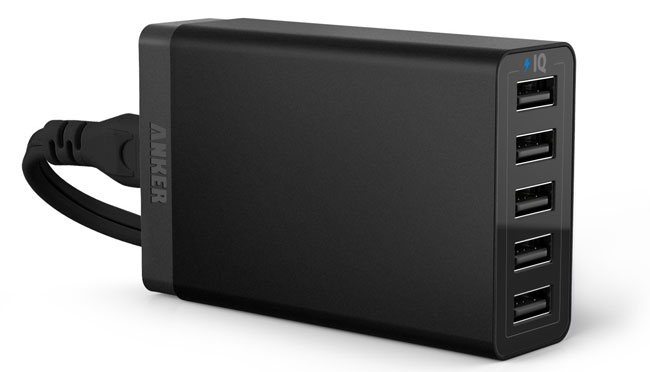
Charge 5 USB Devices at Once (including 2 tablets) with this slick 40w Anker 5 port charger. Get it here.
Bose QuietComfort 20i Noise Cancelling Headphones. These need no explanation other than I gave up the full size pair for these because they do just as good of a job and take up a fraction of the space in my bag. Get them here.
If I rent a car I want to be able to charge my iPhone and possible my iPad while I drive. This car charger gives me 4.2 Amps on BOTH USB ports. Get it here.
Verizon 4G LTE Hotspot. I’m grandfathered into an unlimited data plan with AT&T on my iPhone and the only way to get the mobile hotspot feature on my phone is to give up that plan. I refuse to do that, so I have a separate hotspot to give me WiFi access in places where there is none or hotels where their internet is soooo slow that it’s unusable. Get it here.
Apple Magic Mouse. It’s low profile, bluetooth, has a touch pad on it for smooth scrolling and gestures. It works. Get it here.
Apple AirPort Express. I love creating my own WiFi network. This makes it easier to share a single connection on stage or in a hotel room and easily allows all my devices to talk to each other on the same subnet. Get it here.
Apple MacBook Pro 15″ Retina Display Mid 2014 – This is probably the most important item in my bag. It’s my main work computer and it has enough power to handle everything I do. Get it here. The skin on top is a custom skin from Gelaskins. Make yours here.
Wacom Bamboo Stylus Pen for writing and digital signatures on mobile devices. Get it here.
Not Pictured (forgot that these items were on my desk when I cleaned out my bag)!
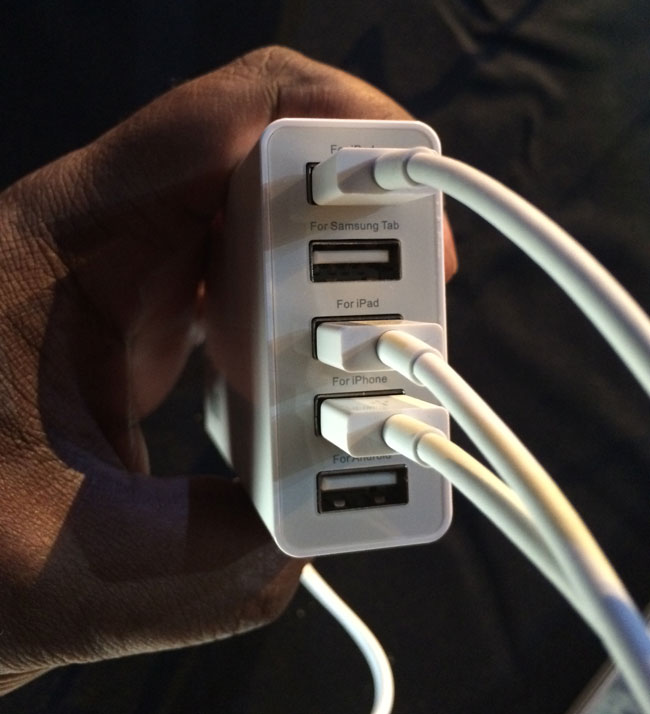
Charging USB devices at home is no big deal as I have charges around the studio, office, bedroom, etc. and even USB wall plates. However, on the road it’s bit more challenging as there are limited AC outlets in hotels and on stage during presentations. Once again I sought out a USB charger that could not only charge multiple devices, but also charge at least 2 iPads, which require a little more juice (2.1A). My search led me to the Anker® 25W 5-Port Family-Sized Desktop USB Charger Travel Power Adapter. This relatively small charger can handle charging up to 5 of your USB devices including 2 iPads at full speed. While I don’t travel with 2 iPads, I do want to be able to charge one iPad and my iPhone at the faster 2.1A speed as well as 2-3 other devices at the same time. If you’re an Android user you’ll even have a dedicated Samsung Tab port as well. Even if you don’t have the specific devices labeled on each port you can charge ANY 5 USB devices at the same time. Speaking of labeled ports that’s another thing I love about this charger. Many of the smaller chargers that have only 2 ports with one of them being high speed don’t always label which one in particular is the high speed one. Lastly another reason I really like this model over previous multiple port chargers that I’ve used is that it has a regular detachable AC cord on the other end with a decent length of 5 feet. This means that I can plug in the one cord into a power strip on stage or outlet behind a night stand and put the charger itself on the table top to connect all the cords too. I used it in LA this week at my event and it worked perfectly and to my surprise it also didn’t get warm to the touch like other charger tend to do.
Recently a fellow photographer asked me about flying with her camera gear and what was allowed and what wasn’t? Since I fly for a living and I usually have at least one camera with me I’m pretty familiar with the rules and thought I’d share some tips here. First I have to give you a disclaimer in that TSA can decide to search any of your baggage at anytime and ask you to take out every single item one-by-one for inspection. I’ve had it happen! Now with that out of the way luckily this is not the norm. Let’s go over some quick tips on carry-on vs. checked luggage. I absolutely HATE checking my luggage and only do so if I have no choice. This means that I want to carry both a camera bag AND a computer bag on board and therefore I will check the 3rd piece of luggage containing my clothes. Under no circumstances am I ever ever ever going to check my camera or computer gear. It’s like waving good-bye to it as I feel like I’d never see it again. If I have to check my camera gear, then I’m not going! Most airlines allow you one piece of carry-on luggage such as a roller-board suitcase and a personal item such as a backpack, briefcase or purse. For me that means a backpack.
A Quick FAQ
Q. Do I have to take my cameras out of the bag when going through TSA security?
A. Typically NO, but TSA at any time can ask you to take ANYTHING and EVERYTHING out of your bag. With that said I can’t remember the last time they asked to take my cameras out. It’s been years. This of course goes out the window outside the US. Foreign airport security is a lot less forgiving. Give yourself time as you will likely need to take out each piece of gear and put it in a bin.
Q. Should I just check my camera gear under the plane to save the time and hassle.
A. NO! You may never see it again if you do and the airline will NOT replace it.
Q. What about tripods/monopods?
A. I have been known to travel with a tripod from time to time and I put it in my larger roller-board suitcase with my clothes. This however, is a grey area. Some TSA checkpoints will let it go and others will require that you check it as a tripod could be used as a club/weapon. So be prepared with extra time if you’re traveling with a tripod and have it in a bag that you don’t mind checking (not with the rest of your camera gear).
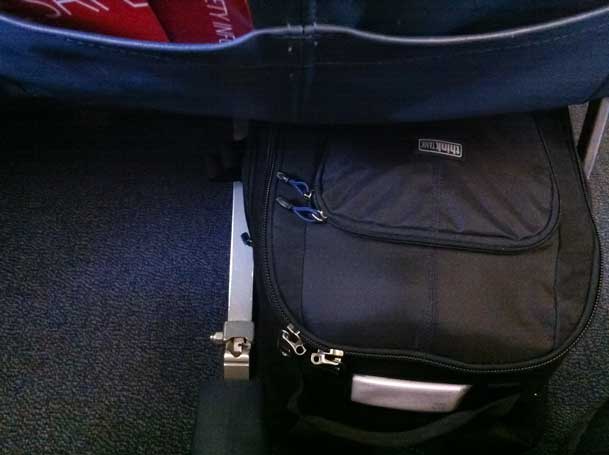
The backpack pictured above is my BIG ThinkTank “Street Walker Hard Drive” Backpack. This is the one I carry when I’m going on a trip specifically to shoot and I’m going to carry a LOT of camera gear. This one backpack also holds my MacBook Pro 15″ Retina notebook and iPad Air. It weighs a freaking ton once I have I have it loaded, but it still fits under the seat in front of me on a plane and therefore allows me to carry a rollerboard on with my clothes (and tripod) in it.
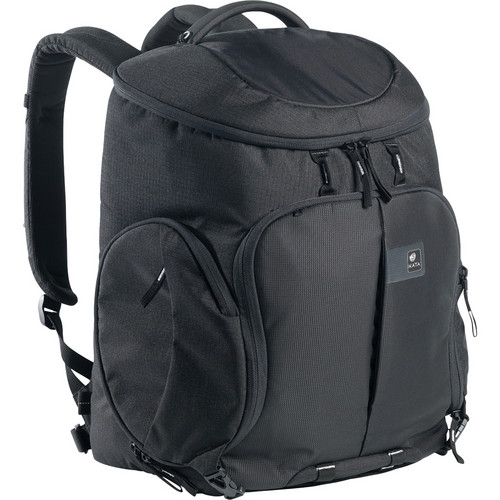
On trips where I’m carrying less photographic gear but still more than two lenses then I carry my smaller “Kata” backpack:
This one will still hold one camera body and 2-3 lenses plus my MacBook Pro. Also since it’s smaller you’ll be less likely to load a ton of gear in it and therefore it will be lighter to carry and manage.
Although both backpacks above are great for those photo specific trips I go on, neither of them are my “regular” backpacks. Since most of my trips are not photo specific I’m usually carrying only one camera body (my Nikon D600) and one lens (my Nikon 28-300mm) or my even smaller Sony Alpha NEX-3N. My daily/weekly travel backpack is actually my Tumi Alpha T-Pass Laptop Backpack.
I really like this backpack A LOT! The T-Pass stands for “TSA Friendly” in that the back containing your laptop can unzip so that you can lay the bag flat (open) without having to remove your laptop saving you time. Tumi bags are expensive, but they come with a 5 year warranty and are very very very well constructed. I use this bag daily and it shows no signs of wear after one year so far. There is plenty of room in it for my laptop, iPad, camera stuff and just a ton of other little items that I carry. It weighs a ton once I load it up, but it handles the load very well.
The Bottom Line
For the most part you should be fine traveling by plane with your camera gear and carrying it on as long as your carry-on bag meets the size restrictions for the overhead bin or under the seat. TSA sees cameras everyday and while they still require you to take your laptop out and put it in a separate bin (unless you are TSA Pre-Check or you have a bag like my Tumi above), they tend to not ask you to take your camera gear out. The only other thing they can be uptight about is carrying a lot of batteries. So keep your extra batteries to a minimum and spread them across multiple carry-on bags as best you can.


 is a 20MP digital camera with a 1″ sensor that has its own storage and battery. Unlike other solutions in this category that connect wirelessly and therefore slowly, the
  has a built-in Lightning connector that attaches directly to your iPhone or iPad. This effectively turns your iPhone/iPad display into a touch screen view finder. Because of this direct connection there is virtually no lag. Once in you’re in the