Facebook Live from my Desktop

facebooklive

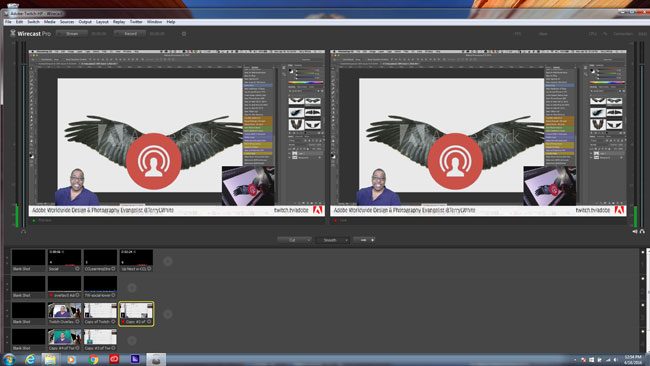
Facebook just up’d the ante for Live Streaming by releasing a developer API for their Live Streaming feature. This means that any developer can now take advantage of this by adding Live Streaming to their Apps or Devices. One of the first companies to take advantage of this is Telestream. Telestream makes my favorite screen recording software (Screenflow) and they make a professional level streaming application called Wirecast. Wirecast 6.0.7 came out on the same day and allows you to add Facebook Live as a streaming option.

wirecastSS

Continue reading “Facebook Live from my Desktop”

This is an AWESOME Keyboard for Your Computer AND Your Mobile Devices

IMG_0014

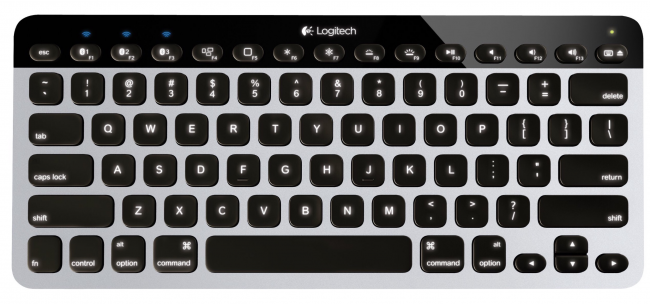
This Logitech keyboard rocks! When I received my iPad Pro last week one of things that was missing from the order was the New Apple Smart Cover Keyboard for the iPad Pro. It’s backordered and while I hope to get it this week or next, I kinda wanted to use a keyboard in the meantime. My good friend Larry Becker, turned me on to this Logitech keyboard and I couldn’t be happier with it. This Logitech keyboard has a feature that I hadn’t seen on other wireless keyboard before…

Continue reading “This is an AWESOME Keyboard for Your Computer AND Your Mobile Devices”

Adobe Photoshop Turns 25

Photoshop_1.0_splash

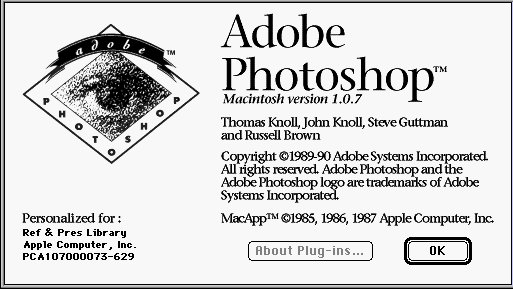
Happy Birthday Adobe Photoshop! That’s right folks, it was 25 years today (February 19, 1990) that Adobe released Photoshop 1.0. It’s hard to imagine that what started out as a product that most people at the time didn’t even understand why we’d need it, would become such a phenomenon that entire industries have been built upon. I of course like many of you begin to think back to the first version of Photoshop that I ever used. For me it was Photoshop 2.0. I only used 2.0 for a short time before getting the Photoshop 2.5 upgrade. I guess I was like most people at the time. I’ll admit that I really didn’t get it at first. I was spending most of my time back then in PageMaker and using clip art. It really wasn’t feasible to use digital photos yet simply because there were limited ways of getting the photos into the computer at a decent resolution. There were no consumer digital cameras! Nope, NONE. No cellphone cameras because there were no cellphones. There were scanners, but they were very expensive if you wanted a good one and even if you paid to have a scan done to your “floppy” disc and brought it home, you’d be hard pressed to have enough memory to do any major work on it in Photoshop. Nonetheless, Photoshop did evolve to the point of becoming a verb “I Photoshopped that” in popular culture. Most designers couldn’t imagine doing their jobs without having Photoshop and as a photographer I haven’t seen or taken a photo that couldn’t be improved in someway by Photoshop.

wpid14363-DSC2048_sm.jpg
Thomas and John Knoll, the inventors of Photoshop

I was thinking of ways I could show people just how far Photoshop had come. After all there are many users that use Photoshop that are 25 years or younger as well as users who were babies or kids when Photoshop was released. That’s when it hit me: why not show people what it was like to use Photoshop 1.0 back in 1990? Imagine using Photoshop without layers, with only one undo, and no camera RAW. Also this may be hard to wrap your head around, but Photoshop 1.0 was released two years before there was a standard called JPEG. That’s right. There was no JPEG when Photoshop came out. On your Mac you typically worked with either PICT files or TIFF files. Let’s take a look at what it was like to do editing and compositing:


It’s hard to believe that Photoshop 1.0 originally shipped on an 800k floppy disc. There was no installer. You either ran it from the floppy or copied it to your hard drive.

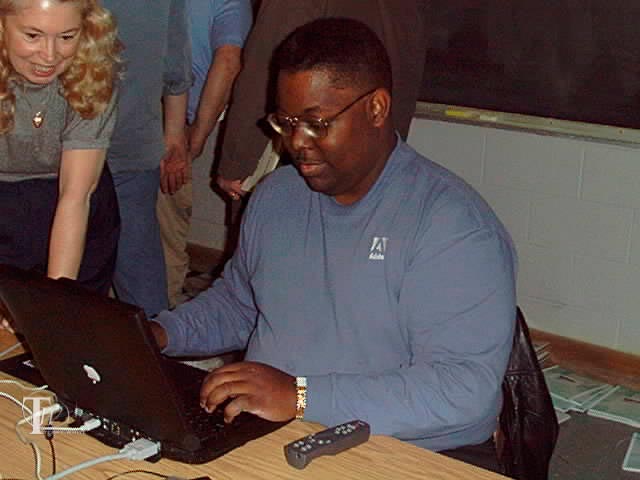
Terry-at-work

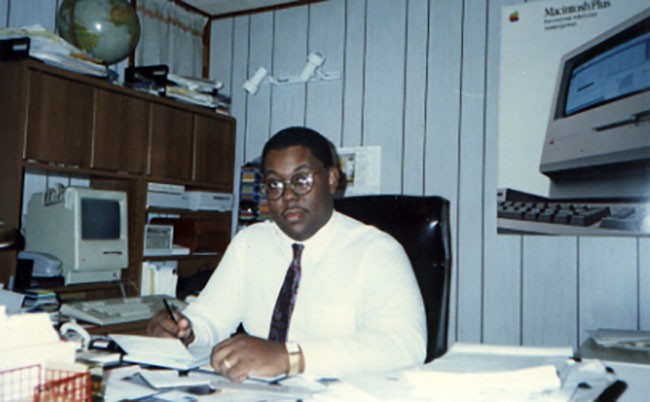
While Photoshop did work in color it would be another couple of years for me before I upgraded from a Mac Plus to a Mac LC with color monitor.

wpid14373-Terry-presenting-at-DMA_sm.jpg

When I joined Adobe in 1996 it was more than a thrill to be working for the company whose products were constantly evolving. Those were exciting times to say the least.

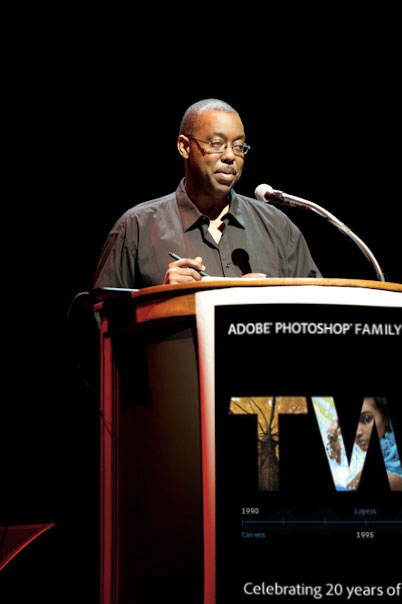
TW-PS20th_anniversary
Terry White presenting at the Photoshop 20th Anniversary Celebration

I’ll be celebrating my 19th year at Adobe this July and it has been a pleasure and an honor to be a part of company and history that has brought so much creative freedom to the world.

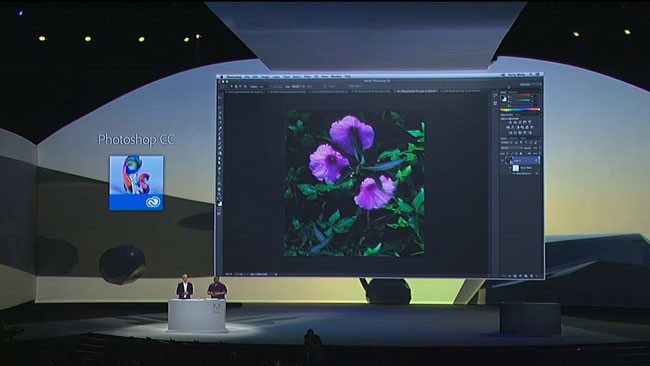
tw-on-stage-adobe-max-PSCC
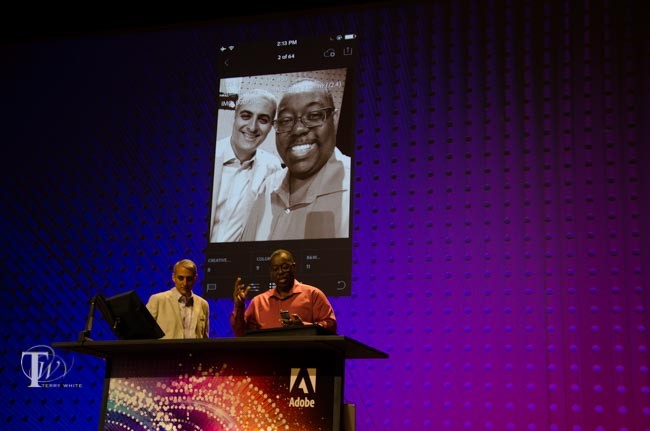
Terry White along side David Wadhwani introducing Photoshop CC to the world


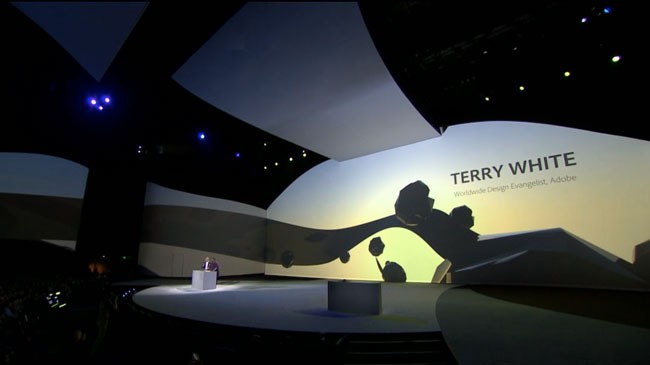
One of the highlights of my career was getting the chance to be on stage at Adobe MAX 2013 and introducing Photoshop CC to the world.

tw-on-stage-adobe-max-2013

I would like to once again thank all the engineers that spend so many hours, nights and weekends pushing Photoshop to the limits and giving us the tools to make our visions a reality. Most of all Thank YOU. Without our customers we wouldn’t be where we are today.

A look back…

Take a look at this video from the early days and also watch Russell Brown, Thomas Knoll and John Knoll discuss how far Photoshop has come (20th Anniversary Video interview).

And while we’re looking back on this 25th Photoshop Anniversary, let’s take a look at my 1st Photoshop episode of my Creative Suite podcast. This episode first aired on February 15, 2006.

Happy Birthday Photoshop! I’m looking forward to the next 25 years of innovation. As a side note and bit of trivia today is also Adobe Photoshop Lightroom’s 8th Anniversary.

wpid14387-DSC_8859_sm.jpg
Terry White along side David Wadhwani introducing Lightroom Mobile iPhone to the world.


ccpp


Take advantage of the Creative Cloud Photography Plan which includes Adobe Photoshop CC, Lightroom 5 and Lightroom mobile for only $9.99/month.

wpid14380-MIM-Idont_sm.jpg


An AWESOME Microphone for your Mac, iPad and iPhone – Apogee Mic 96k

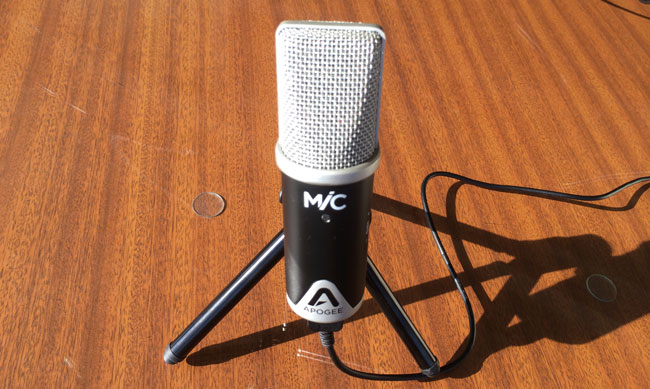
apogee_mic96k

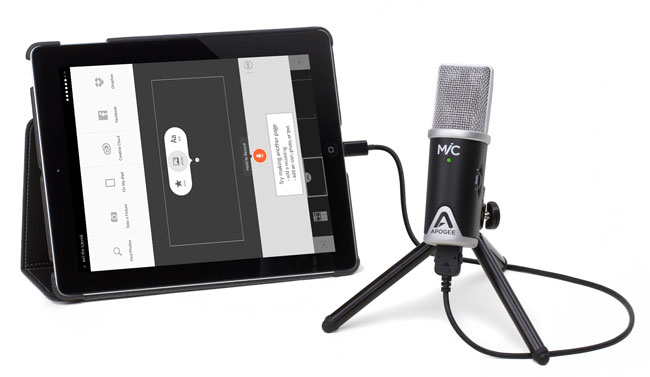
I’m on the road and I realized that I’m going to be doing more tutorials for my YouTube channel and Creative Cloud TV.  While I have a great microphone in my studio, I really didn’t have a good one that’s small enough to travel with. I was in the Apple Store in San Francisco and decided to check out their selection. I was with my colleague and musician Jason Levine. I picked up a small microphone by Apogee and Jason immediately recognized the name and said “you can’t go wrong with them.” Apparently they are well known for professional audio equipment. He saw that it was 24-bit and was again very impressed. Since I trust Jason’s opinion when it comes to audio gear I knew I was holding the best one. I was also intrigued to see that this particular microphone not only had GREAT specs, but it was designed to work with a Mac, iPad, or iPhone! That made this a win-win purchase. I could have a great quality mic for recording on any of my devices.


Setting up the Mic 96k

One concern I had before leaving the store was that it was unclear if it included the stand that was pictured on the box. It stated that it included a “mic adapter” (which it does). The Apple Store rep didn’t know either. I was pleasantly surprised to see that once I opened the box it not only included the little tabletop stand, but also three cables. I expected to have a USB cable for the Mac and one for the Lightning connector on the iPad/iPhone, but it even included the older cable with the 30pin connector for older iOS devices. Setting up the Mic 96 is really easy. Just attach the appropriate cable for your device and plug it in. That’s it. No software to install. The light will go on blue at first. This lets you know that it’s on but not ready. It will then turn green when it’s ready and red if your gain is too high.

I screwed up my first recording

mic96k_MacBook_Pro
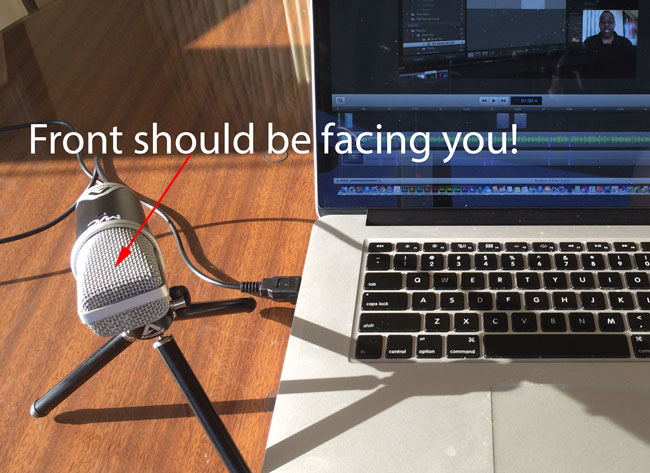
I mistakenly positioned the capsule up instead of facing me.

OK sometimes I’m an idiot when it comes to things like this. I didn’t pay attention to the capsule location so I had the mic pointing at me like a singer would hold a mic instead of straight up and down. It worked, but boy what a difference it made once I put it in the proper orientation. I did a quick test into Screenflow and the sound quality was outstanding. Sadly it was too late to re-record my latest episode as it was already posted.

Testing on the iPad Air

MiC96k_iPad

Since I blew my chance to get a real world recording for this week’s episode, I decided to do a quick test on the iPad using Adobe Voice. You can hear the results below or here:

The Bottom Line

Overall I’m very happy with the quality of the hardware itself as well as the audio quality. My only complaint is that for the price I feel it should have come with a carrying case, especially since they tout it as a solution for iPad/iPhone. This means that they expect people to carry it. Other than that I love it!

You can get the Apogee Mic 96k here or here

You can get the Apogee Mic carrying case here.

You can get Adobe Voice for iPad here and tell your story for free:

.

Have Another Look At Adobe Revel

adobe_revel_iPad

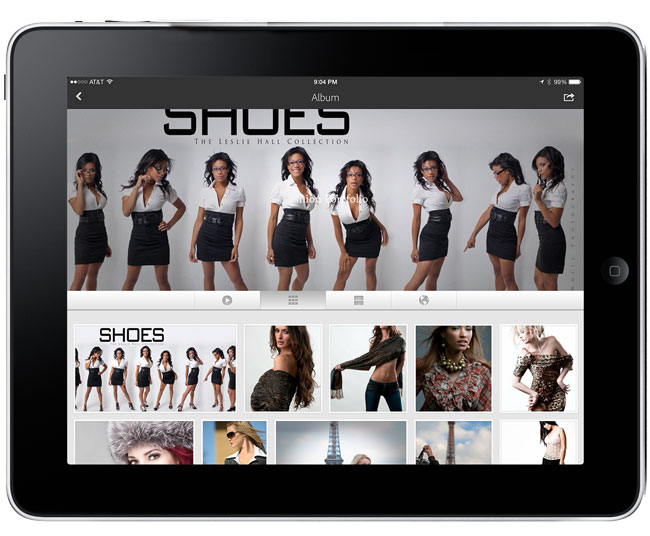
Adobe Revel (originally known as Carousel) got off to a shaky start. There were features missing that many saw as a show-stopper and originally the only way to use the service was to pay for it. A LOT has changed since then. First off, what is Adobe Revel? Adobe Revel is a photo sharing and storage service. Imagine having access to all of your photos no matter if you’re on your computer or your iPhone or iPad. With Adobe Revel you can upload an unlimited number of photos to the cloud. You can share them with others and have shared albums with family members and friends. Best of all (at least for me) you can use the Adobe Revel iPhone/iPad app to show your photos off.

How do I get my photos into Adobe Revel?

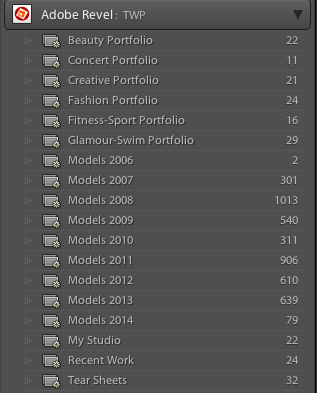
There are a couple of ways to do it. You can import photos using the Adobe Revel desktop App. You can import photos using the iPhone and iPad app or you can upload to Adobe Revel directly from Lightroom 4 or 5 using the Adobe Revel publish service (the method I use).

How many photos can I store on Adobe Revel?

adobe_revel_mac

Unlike other services, Adobe Revel doesn’t have a photo limit. You can upload as many as you want. This is important and makes Adobe Revel better than many other services because your photo library is only going to get larger, not smaller.

Once my photos have been uploaded to Adobe Revel how do I view them?

You can view your photos in the desktop app, iPhone App, iPad App or via the web. Since you’re logging in to each app and the web with the same Adobe ID, your photos are instantly available on all your devices.

What if I’m offline, can I still view my photos on my computer or iPad?

Yes, Adobe Revel caches your photos to your device and they are available even if you’re offline.

Terry, why do you like Revel so much?

adobe_revel_publish

Adobe Revel gives me the thing I’ve always wanted. An easy way to have my portfolios with me and always up to date. Once I hit the publish button in Lightroom 5 on any of my published collections, I don’t have to think about it anymore. The next time I fire up Adobe Revel on my iPhone or iPad those photos are there. Sure there are more full featured portfolio apps out there, but all of them are a pain in the butt to keep photos updated in. Also the Revel team did a great job in redesigning the iPad App. It looks very elegant now.

If I share an album with others can they add photos/videos to it?

Yes, if you share albums with others they can add photos/videos from their devices. This is great for families on vacations or event photos.

Sounds too good; this must cost a fortune right?

This is why I said it’s time to take another look at Adobe Revel. You can start off with a 30-day trial and during those 30 days you can upload as many pics as you want. After that you can keep using Adobe Revel for free and have a limit of 50 new uploads a month. However, if you want to continue to have unlimited uploads it’s only $5.99/month for Revel Premium.

OK how much are the iPhone and iPad Apps?

They’re free to download. Actually it’s a Universal App and you can get it here:

iTunes.

OK, I want to try it. Where do I sign up?

You can try out Adobe Revel here.

20 Last Minute Mac and Apple Accessory Deals At B&H

mbp13

50% Off Apple Care & Free Software (up to a $59.99 value) on All Macs

MacBook Pro 13″ Core i5 2.5GHz

MacBook Pro 13″ Core i5 1.8GHz

MacBook Pro 13″ Core i7 2.9GHz


MacBook Pro 13″ Retina Display <-HOT

MacBook Pro 15.4″ Core i7 2.4GHz $300 INSTANT SAVINGS

MacBook Pro 15.4″ Retina Display


Macbook Pro 15.4″ Retina Display <-The configuration that I use

MacBook Air 13″


MacBook Air 13″ <-The configuration that I use

MacBook Air 11.6″

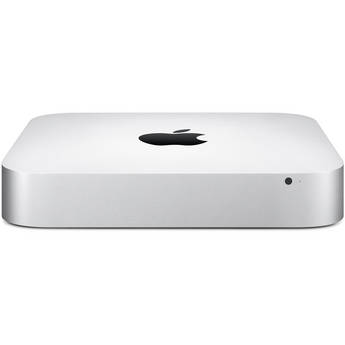
mac_mini

Lowest prices on Mac minis

Mac mini Desktop 2.5GHz Core i5

Mac mini Desktop 2.3GHz Core i7

Mac mini Desktop 2.3GHz Core i7 Server

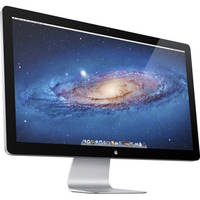
apple-tb

Apple 27″ Thunderbolt Display


Apple TV 1080p $94.99

Apple Thunderbolt Cable $44.99

Apple Magic Trackpad $59.99

Apple Wireless Keyboard $62.24

Apple Magic Mouse $64.46

Apple AirPort Express Base Station <-the new one $96.99


See their full line of Apple Products Here.


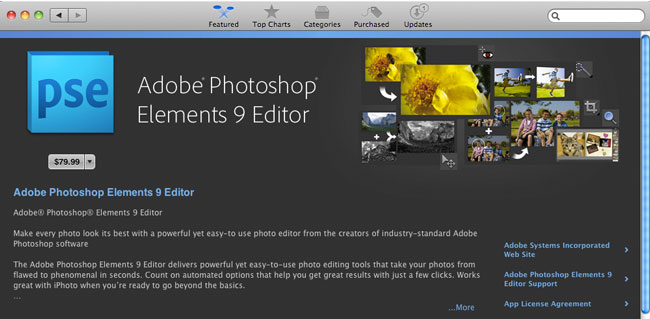
Photoshop Elements 9 on the Mac App Store

Aside from already being a great bargain, there's is a side benefit to having Adobe Photoshop Elements 9 on the Mac App Store. Like all Apps from the Mac App Store, you'll now be able to install Photoshop Elements on as many Macs as you own for the one price. That may not mean much for some, but for those that found the license  limit of two computers a bit too limiting, you'll now be able to install Photoshop Elements on each of your Macs. Of course this only applies to newly purchased copies via the Mac App Store and not existing shrink wrap licenses. 

You can get your copy of Photoshop Elements 9 for $79.99 here from the iTunes


Already own Elements?

Here are several free videos on how to use Adobe Photoshop Elements.

5 Things That Got My Attention at Macworld Expo 2011

It's been two years since I attended Macworld Expo. I missed last year due to being out of the country. I also have to admit that I didn't really expect the show to last after Apple pulled out two years ago. However, to my pleasant surprise the show is still strong.  It's hard to gauge the show's actual success because trade shows in general are down. With the economy, internet and live webcasts of press briefings people don't feel the need to go to trade shows as much as they use to. I was asked to speak at this year's conference on "Digital Publishing from InDesign to the iPad." My class was on the last day, Saturday afternoon and while the class wasn't overflowing, there were a good number of attendees that were very interested in the topic. So much so that even though I ran over about 10 minutes, no one moved. Everyone stayed til the very end and many participated in a good Q&A session. I was happy with the class overall and have no complaints.


What about the show floor?

Macworld is both a Conference and an Expo. The show floor was open throughout the entire show. Walking the show floor is always a treat for me because I always find at least one product that I'm very interested in and had no idea it existed. It also gives me a chance to meet with developers/vendors face to face that I've corresponded with over the months/years. I can't compare this year's show to last year's show because I wasn't there last year, but this year's show was definitely up beat. On some days it was actually hard to get through the aisles because of all the people. 


Isn't it just iPhone/iPad Case World now?

There have been many jokes made about Macworld becoming "iPhone Case World". I certainly have felt that way in the past as in years past there were a ton of vendors on the show floor selling nothing but cases for iPhones and iPods. While there were certainly several options to get a case or holder for your iDevice this year too, it didn't feel like one big case tradeshow. There was a good mix of solutions for the Mac and for iDevices too. While most of the big companies don't exhibit anymore, HP was there with a sizable presence showing off their printer line including their AirPrint capable printers


5 Cool Things

Whenever two Macworld attendees meetup the question usually comes up "did you see anything cool?" While there wasn't anything that totally blew me away, there were lots of little things. I look at this show as the show you would goto to get "accessories" for your Apple product or iDevice. In other words without Apple you won't be learning about the NEW Apple ________, but you will see many nice add ons in terms of hardware and software. In no particular order, here are 5 things that I saw that got my attention:


Dolly Drive
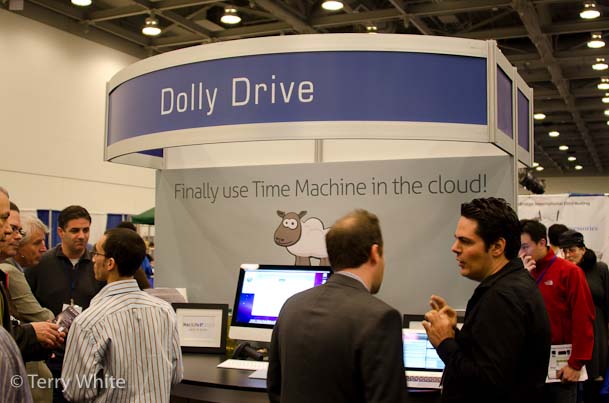
There was a lot of buzz online and in person about a new Cloud based backup service called Dolly Drive. What makes Dolly Drive unique is that they have figured out a way to allow you to use Mac OS X's Time Machine backup feature to the cloud. Now you can do your hourly backups offsite. There are of course a lot of questions that come to mind and the company is new. I spoke with them and will be working with them on testing and reviewing the service. Stay tuned for that. However, it does look promising for those looking for a way to be able to backup and restore files while on the road.

Learn more at their site here.


LensPen for your Laptop or Mobile device
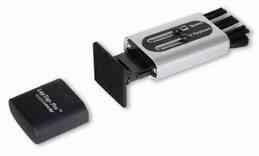
I was already a fan of LensPen for my camera lenses. However, I had no idea that they offered solutions for cleaning my laptop and mobile device displays. I picked up a Laptop Pro and ScreenKlean

See their products here.


iFusion
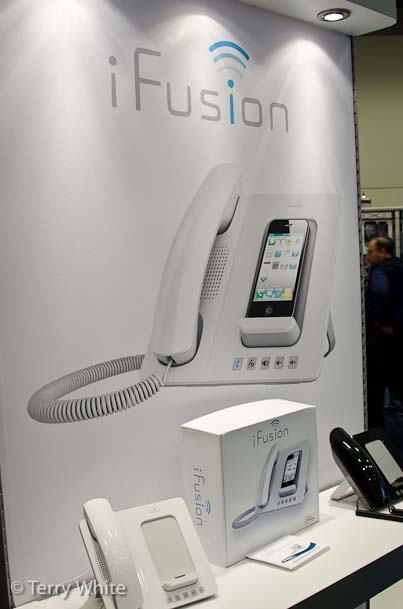
More and more people are giving up their landlines and just using their mobile phones. Certainly this is not the first product of its kind, but I liked the aesthetics of it. iFusion lets you dock your iPhone and use a standard handset while you're at your desk to make/receive calls. It's unclear how well this will work or not work, but It caught my eye. I also pinged them about a multiple handset wireless solution to replace what I have now.

Learn more here.


OWC SSD Solutions
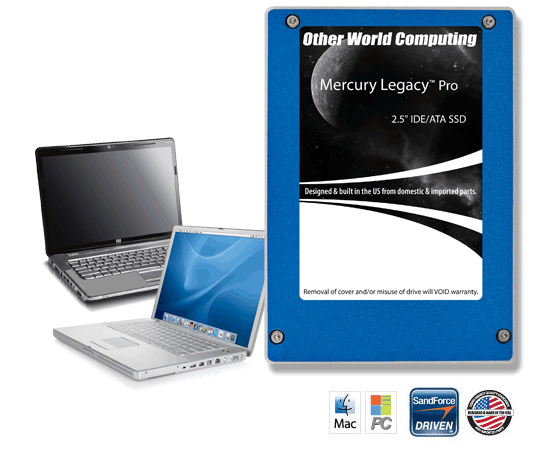
Other World Computing was on hand with a fairly large presence and while they sell a lot of things that I'm already familiar with this was the first time that I got a chance to check out their SSD replacement hard drive solutions. The one that caught my eye is Data Doubler solution that replaces the optical drive in your MacBook Pro with a second hard drive such as an SSD. With a Solid State Drive you could use it to load your operating system and applications while keeping your original drive for the bulk of your data. This would drastically reduce boot times and application start times.

Learn more here.

Check out their shootout here:

httpv://www.youtube.com/watch?v=shVhpKnzfp4


iGrill

Whenever I see devices hooked up to (fake) raw meat I have to stop and look. 🙂 The iGrill aims to provide a temperature monitor for you food that has a bluetooth connection to your iDevice/App to let you know when your meat is done or needs to be turned over. Wow! OK, um  I guess. I have no interest in this product as I don't grill, but I gotta give 'em credit for providing the ultimate geek device for the home. The iPod toilet paper dispenser looks on with envy 🙂

You can learn more about iGrill here.

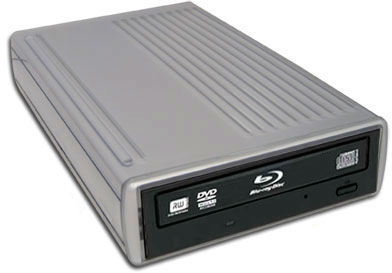
OWC Mercury Pro Blu-ray Burner: Rip/Burn Blu-rays on a Mac

It's pretty clear to me at this point that Apple has no plans of offering a Blu-ray drive built-in to the Mac. Sure I could be wrong, but they have made no mention of Blu-rays in quite a while. After all, they sell and rent movies on iTunes and in a way Blu-ray movies are competition to that download/streaming model. Although there aren't many options to watch a Blu-ray movie on a Mac, there are still some reasons why you might want a Blu-ray drive on a Mac. First off, having a Blu-ray burner means that you could burn your own Blu-ray movie and data discs. Blu-ray discs hold up to 25 GBs of data per disc. That's a lot when it comes to archiving and transferring lots of information. Also since just about every digital camcorder being produced today has the option of recording in HD, it gives you a way to make High Def home movie blu-ray discs. I just got a brand new 12 core Mac Pro and I started looking at Blu-ray options for it.


OWC Does both External and Internal Blu-ray Drives

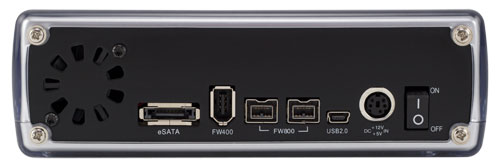
I'm starting off with a Mercury Pro External Blu-ray Quad-interface Drive review unit. This drive can connect via Firewire 800, 400, USB 2 and eSATA.

That pretty much covers all the connectivity options that I would care about.  The drive was very simple to setup. Take it out of the box, plug in the power and an interface cable and turn it on. That's it! Although the Mac OS doesn't provide the necessary support to play a Blu-ray movie, it does provide the necessary support to see the drive as a standard storage device for both reading discs and burning them. I popped in my copy of Avatar on Blu-ray and it showed up on the Desktop like any other disc. 


Ripping Blu-rays


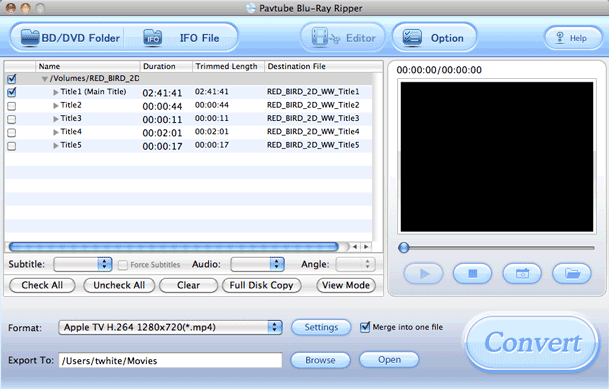
The next question many will have is what does it take to rip a Blu-ray disc? First off, you need to read up on copyright and know that I'm not a lawyer and nor am I'm sanctioning violation of any copyright laws. However, as far as I can tell (my interpretation) you are within your right to "backup" a movie disc that you PURCHASED (not rented) for your OWN PERSONAL USE.  With that said, I wanted the option of Ripping a Blu-ray disc to take with me on the go or to watch via Apple TV if I choose to. Avatar is a perfect example! While this movie is available on iTunes and even includes a Digital Copy with the Blu-ray disc, both the iTunes version and Digital Copy are NOT high def. If I want to watch this movie via high definition without having to load the disc, the only way to do so is to Rip it. In the past I've used Handbrake to rip my entire DVD collection. Handbrake doesn't yet Rip Blu-ray movies, so I had to find another solution. The first application I came across is a commercial one called Pavtube Blu-Ray Ripper. There may be free ones or even better ones out there, but this one seems to do everything I want and has an interface that I like. 

It's easy. Just put your Blu-ray disc in the drive and fire up Pavtube. Choose the Blu-ray disc using the BD/DVD Folder button and then choose your output destination and preset. All the usual suspects are there including iPhone/iPod, Apple TV HD and even iPad HD. Yep, Android is there too along with several other presets.

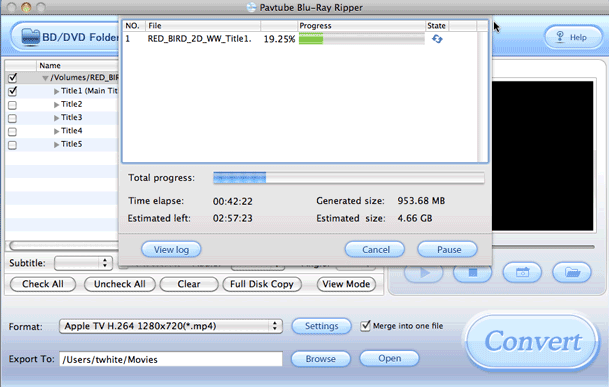
Then you just click the Convert button and be prepared to wait! Ripping a Blu-ray is no trivial task in terms of system resources. Even on my 12 core Mac, the 2 hour 42 minute movie is going to take over 3 hours to rip in Apple TV H.264 1280×720 resolution. Also the estimated file size for this movie is going to be a 4.66GB .MP4 file. Of course depending on the length of the movie, the preset you choose and the speed of your system, your mileage will vary. 

Continue reading “OWC Mercury Pro Blu-ray Burner: Rip/Burn Blu-rays on a Mac”

Adobe Audition for Mac: Technology “Sneak” Preview

To all my Audio loving Mac buddies, Adobe's Worldwide Creative Suite Evangelist – Jason Levine gives us a special Technology "Sneak" Preview of Adobe Audition for Mac. Check out these two videos:

httpv://www.youtube.com/watch?v=aRc49EKb9VY


httpv://www.youtube.com/watch?v=N1AblAwOpSA


Signup to be notified of the Public Beta here.