A Great Sounding Portable Bluetooth Speaker That Doesn’t Break the Bank


I’ve reviewed portable speakers here before. I usually find one that I like. It sounds pretty good. It travels well and I use it until something better comes along. However, this time I don’t really need a new travel speaker as much as I just want a portable speaker that I can use at home in my office, move around from room to room, use out on the patio and yes even travel with it if needed. I have been a fan of Bose products for a long long time. I have been eyeing the Bose Soundlink Mini II as the “I’m going to get that speaker one day”, next on my buy list. However, at the $199 asking price, I just never got around to buying it. My buddy Jason Levine has one and swears by it. Jason is a musician and an audiophile, so I would definitely believe in his recommendations on speakers and audio gear. I’m not an audiophile and I just want something that sounds really good. At $199 though, something always comes up that I’d rather have when I’m ready to buy.

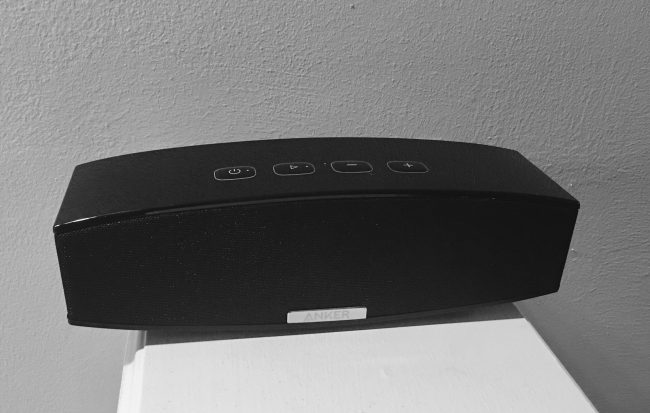
Many of you know that I’m also a big fan of Anker products and while I have been paying attention mostly to their portable backup batteries and USB chargers, one day I noticed that they also sold something called the “Anker Premium Stereo Bluetooth Speaker.” I noticed that this speaker bears a striking resemblance to the Bose speaker (many do). The one thing that was definitely different was the asking price! It’s only $59.99 (here)! At $60 bucks it was definitely worth a shot. I got one, and was immediately impressed by the build quality and packaging. It didn’t feel cheap. It felt every bit as good as a more expensive speaker, but the big question was “how does it sound?” I paired it with my iPhone 6s Plus and went to my iTunes app. I fell back in my chair when I heard the music and my first response was WHOA! I can feel the bass! Most portable speakers (especially in this price range) don’t have a lot of bass response and while I’m not an audiophile it sounds every bit as good as the Bose speaker. Even if you’re an audiophile and you tell me “Terry, the Bose speaker does sound better.” My response would be, “Does it sound $140 better?” It doesn’t.

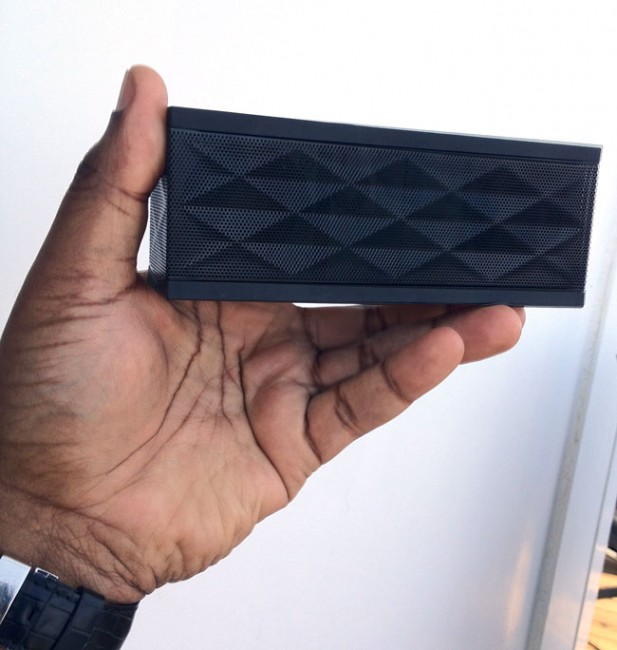
It has everything I was looking for. It’s a little bigger than my Jambox and works over Bluetooth, but still has an AUX in port to connect other sources. It comes with a USB cable for charging and even an audio cable to use with the AUX in port. The only thing that it doesn’t come with that I wish it did was a carrying case or pouch to put it in for travel. The speaker charges via USB and is rated to give you 8 hours of music playback on a single charge. You can also just leave it plugged in if you’re going to be in one spot near a USB charger (not included). It also doesn’t come with a remote control, but these are omissions that I don’t mind at this price. It comes in black or white and you can order one here. You have to hear it to believe it at that price.

7_18_16_adobe_special

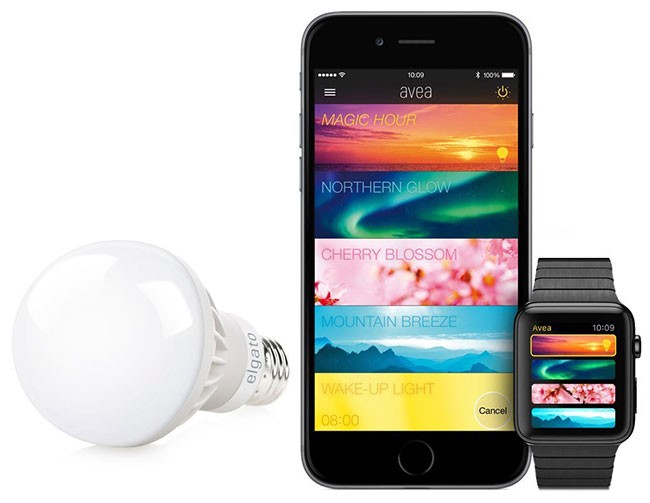
Review: Elgato Avea iPhone, iPad & Apple Watch Controlled LED Lightbulb

elgato_avea_bulb_iPhone_applewatch

I love home automation products. My first X10 remote controlled lights date back to the early 1980’s. Long before smartphones and bluetooth wireless. I always thought it was cool to be able to remote control several lights, appliances, etc. all from one control pad or timer module. I haven’t looked that the advancements that closely over the years, but when the Elgato Avea came across my review desk I was excited. The Avea Dynamic Mood Light is a 7W bluetooth controlled LED lightbulb. Unlike other products on the market this one doesn’t require a network connection or any other hardware to drive it other than your iPhone or iPad. Once you take it out of the box you merely screw it in to any standard light socket and set it up with the App on your iPhone. Rather than go into more detail via text, check out this video of how it works:

I was so happy with the review unit that I immediately ordered another one for another room. I was also pleasantly surprised to see and use the Apple Watch support. Being able to turn lights on and off as you walk around from your wrist adds another level of convenience and cool factor. I was also pleased to see that the lights can be controlled from either device at any time. When it comes to the iPhone vs. iPad vs. other iPhone, whoever opens the App first has control. This eliminates the pain of having to constantly unpair and pair differing mobile devices. My only two complaints are that I wish they offered a higher watt (brighter) version and that they made the app easier to control different lights than it is now. While the bulbs are plenty bright when using the “white” color setting, they colored settings/moods can be a bit dim. The App does allow you to turn on a mood for one or more lights at the same time, it seems like that control is buried another level deeper in the mood presets. I would like to see this setting moved up in the UI. My gripes are very minor. I’m very pleased with this product and will probably order more of them.

You can get the Elgato Avea on sale here.

Harmony Smart Control Review

harmony_smart_control

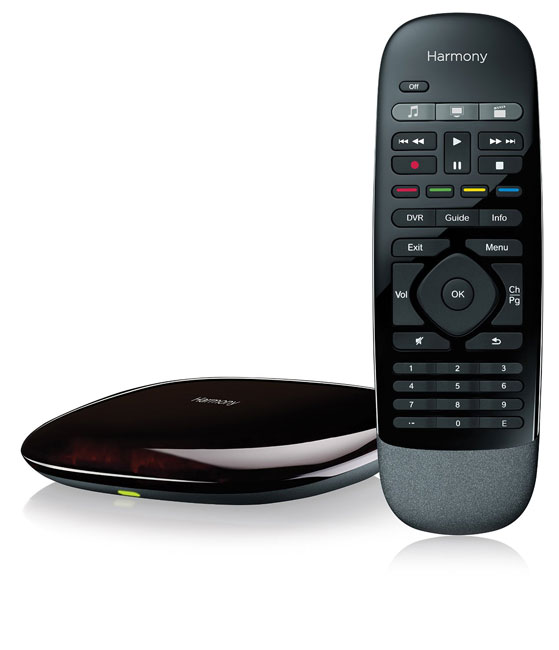
It has been a while since I’ve looked at smart universal remotes. I’ve been happily using my Harmony One for years. However, it was time to setup a new room with HDTV, Apple TV and TiVo Mini. This means either using 2-3 remotes or just ONE! However, I didn’t want to go with another high-end Harmony, yet I wanted something that was still very good. This lead me to check out the Harmony Smart Control. This setup offers the best of both worlds. You get a regular remote control with physical buttons as well as a “hub” that allows you to control everything with your iOS or Android based smartphone or tablet. While I’ve used this hub before, I like the option of having a physical remote for those times when my iPhone is in use or not handy.


How to set it up

The setup was pretty straight forward. You plug in the hub to AC power and then download the Harmony Control app. Since there are no controls on the hub you first have to get it on your WiFi network either via your computer via a USB connection to the Hub or wirelessly to your smartphone via bluetooth. I opted to set it up via my iPhone 5s. The App found the hub and allowed me to key in the password to my WiFi network. Once it was setup on the network the App continued to allow me to set it up. The setup was very typical to Harmony remotes. You simply enter the brand and model names/numbers of the devices you wish to control. Believe it or not, that’s the hard part. Who remembers the model number of their TV? Once I tracked down the info I needed to enter, it was easily able to control each device. Then I setup “Activities” such as “Watch TV” and “Watch Apple TV”. Activities allow you one button options to turn on all the appropriate devices and switch to the appropriate inputs on your TV or receiver. Lastly I added my “Favorite” channels.


How does it work?

harmony_smart_hub

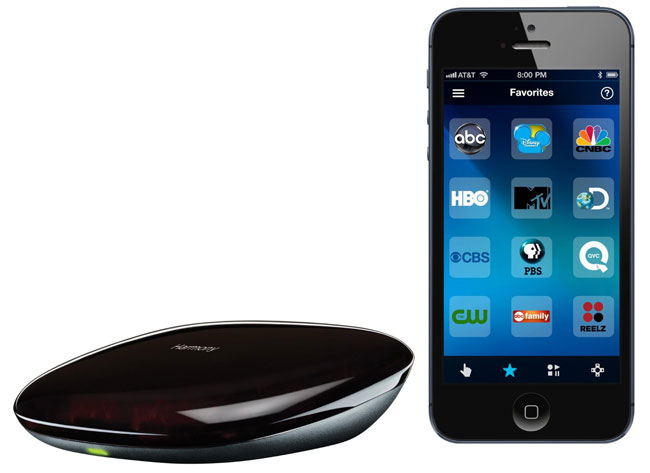
Once I set up the Harmony Smart Control, I now have the option of controlling my TV and components via the supplied physical remote OR via my iPhone or iPad using the Harmony Control App. It definitely beats having to have the TiVo remote, TV remote (to properly switch inputs) and the Apple TV remote. Either the App on my iPhone or Harmony remote can control it all. The App is pretty slick too. Not only do you have multiple screens for various controls, you even have a “gesture” screen that allows you to swipe up or down to control TV volume or left or right to change channels. I also like the one touch access to my favorite channels.


The Bottom Line

Logitech has hit the right combination of hardware and software with this combo. You have a physical remote that anyone can use AND the ability to use your mobile device to control it via WiFi from any room. I’m happy with this setup and I’m considering getting another one for another room of gear.

You can get the Harmony Smart Control here

You can also just go with the Harmony Ultimate Hub if you just want to use your mobile device.


The New Smaller 2014 Jawbone Era Bluetooth Headset

Jawbone_Era_2014_TW

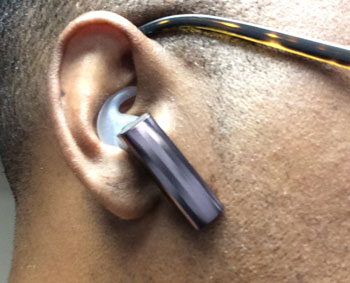
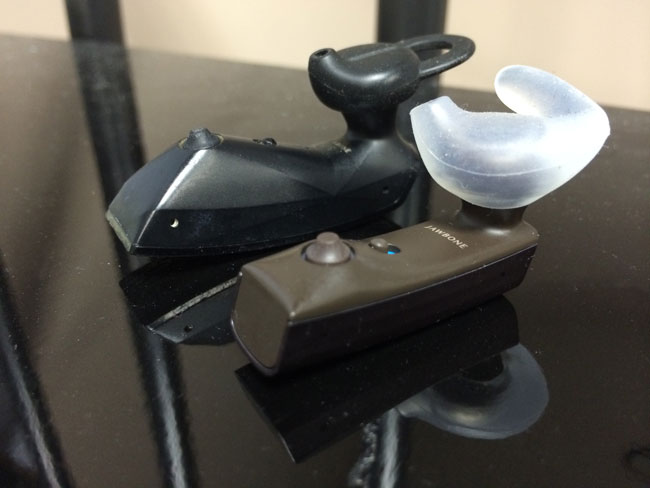
It’s been a while since I looked at Bluetooth headsets. After all my Jawbone ICON has been working just fine. However, I ordered the new 2014 Era by Jawbone because I thought I had lost my older model. I keep my Jawbone along with a couple of misc. adapters and wired Apple EarPods in a small vinyl pouch that I carry in my pocket. That pouch went missing for a week.  I couldn’t find it in all the usual spots that I normally leave it or drop it in. I figured that it was gone for good and that I had to replace the contents. I ordered the NEW 2014 Era by Jawbone. Although I hate buying things to replace lost, stolen or broken things, I wasn’t going to go without one any longer. When the new Era arrived I was immediately taken aback by how small it was. Oh by the way, I found the pouch containing my old gear one day after I placed the order for the replacement gear. It was at the cleaners, probably in one of my pants pockets. They returned it to me with all the contents intact. Anyway, I now have this new Jawbone Era (yes I could have returned it, but then you wouldn’t be getting this review 😉 ) and like I said, I was really taken aback by how small it was compared to almost all other headsets I had used. The only other small one that came to mind like that was the Apple Bluetooth Headset. Yes, Apple made their own for a while and then quietly discontinued it. The new Era is very sleek looking. Jawbone did away with the former cheese grate design and this one has smooth lines. It comes in four colors and rather than going with my default (black), I decided to live a little and get the bronze one.

Jawbone_era_vs_Era_2014
Jawbone Era 2014 (Bronze) next to my Jawbone ICON

Setting it up

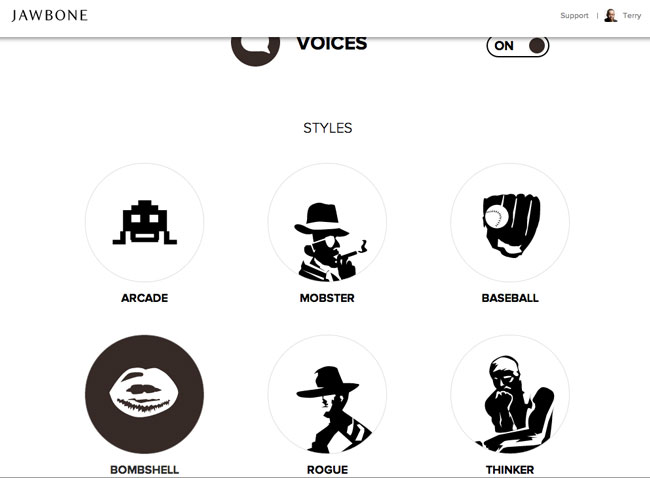
It came with four ear gels. You get  left and right small and medium size ones. I like to wear it on the right side and the small size was the best fit. After the initial charge I then made sure I had the latest version of the Jawbone updater on my MacBook. The software integration is what really sets the Jawbone headsets apart from the competition. Not only was there a firmware update waiting, but I also configured it with the more sexy “Bombshell” voice as well as set up about 14 out of my 20 allowed caller ID names. If you add in the names and numbers of up to 20 contacts your Era will announce their name in your ear when your phone rings. These are the kinds of bonus features that make using the Era fun and more elegant.

jawbone_voices

Sound Quality and Battery Life

This is what really counts with any Bluetooth headset. If you can’t hear your callers or if your callers can’t hear you then what’s the point? I have yet to use any Bluetooth headset that made me say “wow” when it comes to sound quality. In most cases the quality is “good” or as expected. For me the new Era is “good”. The Jawbone Noise Assassin is designed to help cut down or eliminate background noise and it does a good job of it. As far as battery life goes the smaller size means a smaller battery. Therefore your battery life will be about 3-4 hours of talk time. For many that may be a step down from the larger units. My older, larger Era got 4-5 hours of talk time. If you talk a lot throughout the day you will either want one of two things. You’ll either want the new Era charging case, which extends the battery life up to 10 hours of talk time, or you’ll want a different headset. I didn’t go with the charging case because I simply don’t spend that much time talking on the phone throughout the day. If I ever find that my talking on the phone is increasing I could always order the charging case separately.

Apple’s Siri and Google Now Integration

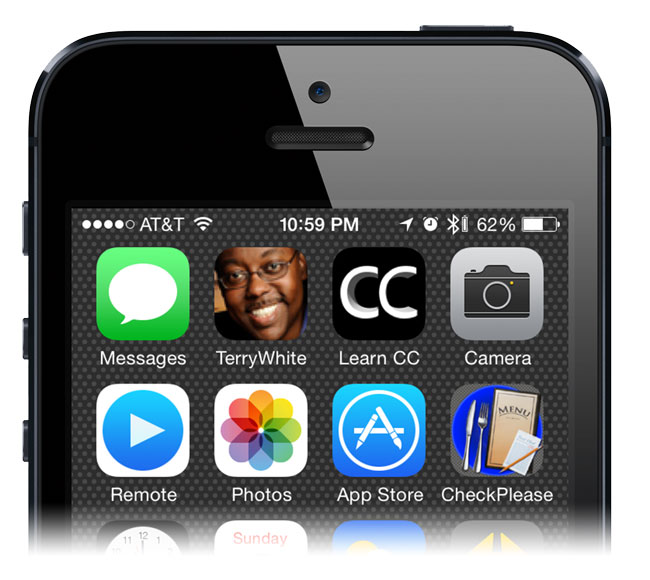
There are only two controls on the Jawbone Era. There is the physical on/off switch and the multifunction button on the end. When your phone rings you press the multifunction button once to answer the call. Press it again when it’s time to end the call. While the headset is idle and you’re not on a call you can press it once to hear the remaining battery time/status. However, if you press and hold it will activate Siri on the iPhone and Google Now on select Android devices. This is pretty cool as it gives you a more discrete conversation with Siri. I enjoy using Siri this way without having to physically pick up my iPhone to hold down the home button. Speaking of iPhone integration, you’ll also like the fact that the Jawbone Era’s battery indicator shows up next to the iPhone’s battery indicator on the iPhone display.

Jawbone_battery-iPhone5

The Bottom Line

If you looking for the smallest, arguably the most stylish Bluetooth headset then look no further, the New 2014 Jawbone Era will fit the bill nicely. If you can live with the relatively short talk time of 3-4 hours then I would say save $30 and go with just the Jawbone Era here. However, if you want a full day of hands-free conversation, then go with the Jawbone Era with Charging Case here.

Review: Jambox Portable Bluetooth Speaker

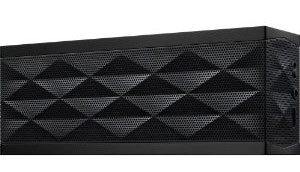
It seems that I’m always on the look out for the ultimate portable travel speaker and I’ve reviewed quite a few here. With each one I think I’ve found the right one, that is until I find the next one. The Jambox is not a new product. However, for some reason I resisted it until recently. I was in my local Apple Store picking up something else and I saw the Jambox on the rack. I was immediately drawn in by the compact size. It’s much smaller than I thought it would be. Next thing you know I was doing the self check out using the Apple Store App on my iPhone and I was out the door.

I got back to my office and charged it up. One thing I appreciated right off the bat over previous speakers that I’ve reviewed here was the minimal amount of cords/cables. Other speakers that I’ve tried that separate and have a cable attached between them kinda bother me. The Jambox comes with a thin stereo cable to attach to your computer, mobile device or other music source. However, since this is a Bluetooth speaker that cable is totally optional. The only other cable is the standard micro USB cable for charging. Once you charge it up and disconnect the USB cable there are no other cables required to listen to your tunes wirelessly.

How does it sound?

I expected the sound to be good and it was. However, the bass was better than I expected for such a small box. I had no problem pairing it with my iPhone and iPad and the music playback from the Music app and Pandora app was flawless. No skips or drop outs.

Speaker phone bonus

If you do pair it with your smartphone you can also use it as a bluetooth speakerphone. There’s a dedicated answer call button right on the top of the Jambox. My iPhone 4s rang while the music was playing. It paused the music and I just tapped the button on top to answer the call via the built-in speaker phone. Nice!

The Bottom Line

I know I’ve said this before, but this time I really mean it (until I find a better one 🙂 ), this is hands down my favorite portable speaker for travel. It’s small, sounds good, charges via USB, works wirelessly, and can be used for my conference calls.

You can get the Jambox here in Black, Red, Blue or Grey for $179.43 ($199.99 list price)

Review: IPEVO Tubular Wireless Speakers


I've been watching the Bluetooth Wireless Speaker revolution from the sidelines now for several months. I've reviewed a few different sets of travel speakers in the past but they were all wired. While I have wanted to try out some of the new bluetooth wireless options such as the Jawbone Jambox, I couldn't get past the asking price of $199 retail ($179 street) for a speaker that would spend the bulk of its time in my suitcase. Don't get me wrong, I'm sure the Jambox is fantastic, sounds great and is worth the money if you plan to use it regularly. I also certainly don't have a problem spending money on something of good quality. It's just that my need for a travel speaker is for those occasions when I'm traveling and want to hear my music, videos, etc. on something better than the speakers in my laptop or iPad. 


IPEVO Tubular Doesn't Break The Bank

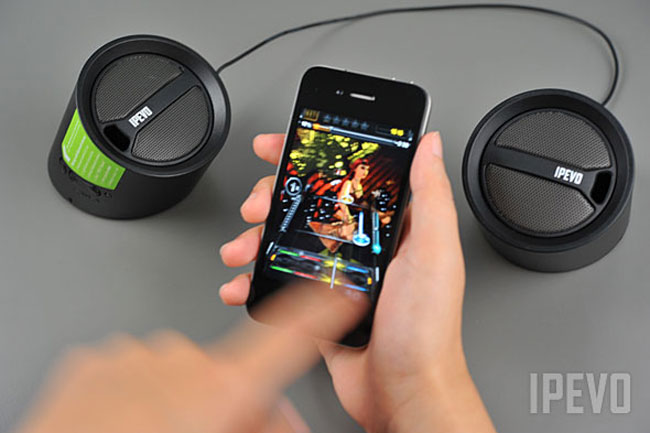
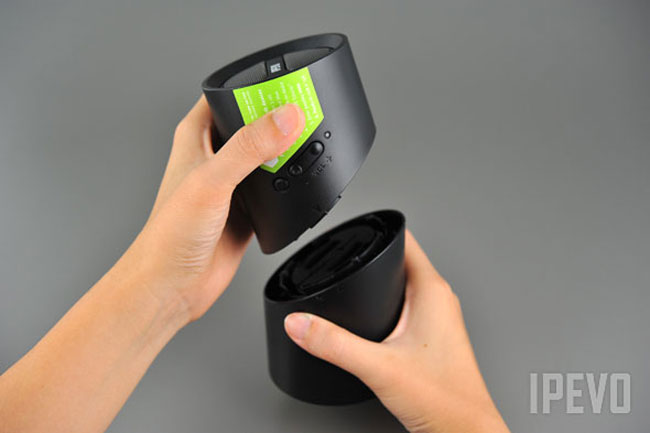
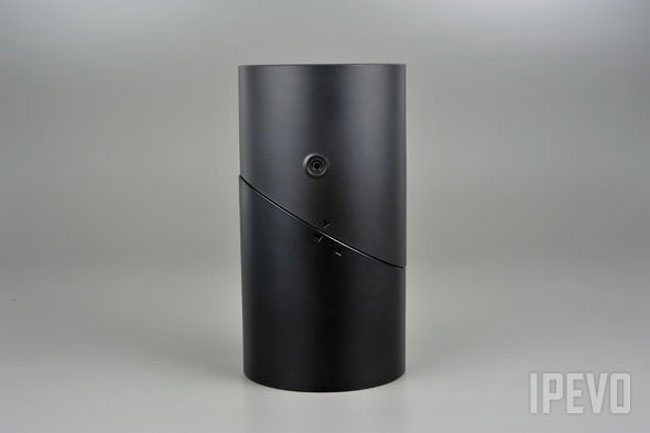
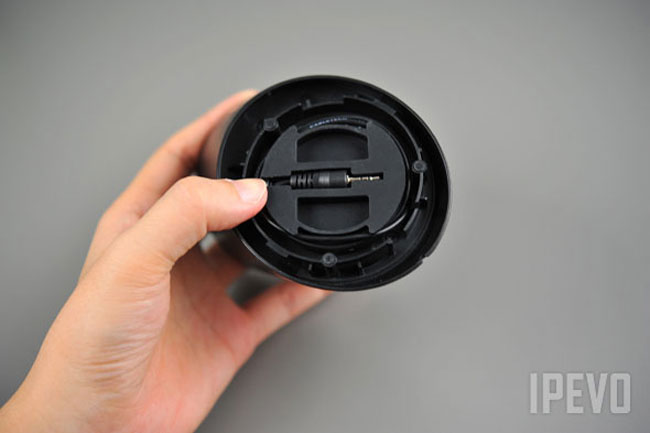
This is actually my second IPEVO product. You might remember my review of the IPEVO P2V webcam for doing mobile device demos. Again, it's a product that solves a specific need that I have at a reasonable price. The IPEVO Tubular Speakers are exactly what I was looking for. They are small enough to stick in a suitcase or laptop bag, yet the sound good enough to compete with most "small shelf" speakers. They are designed for travel. The two speakers connect together in a "tube" fashion when not in use. When you're ready to use them you untwist the tube to separate them out. They connect to each other via a single built-in cable. That's the only "wire" you have to deal with during normal operation. You can play your music to them via Bluetooth. iOS 4.x supports stereo bluetooth music playback. So your iPod touch, iPhone or iPad can stream music to these speakers wirelessly. I also had no problem pairing them to my MacBook Pro. They showed up immediately after pairing as a an Sound Output Device. 

There is a power button and volume control right on the speaker itself. Not to mention a small LED status indicator to let you know that they are on or in pairing mode.


How are they powered?

This is both a plus and a minus. The speakers have their own built-in rechargeable battery. There's a USB connector on the bottom of the main speaker that you can plug into any USB power source. It takes 2 hours to charge for 6 to 8 hours of playback. While it's great having a built-in battery, it also means that if you forget to charge them you can't simply pop in a set of AA's. 


Room for improvement

The speakers work and sound great. I've had zero problems with connectivity or playback. My only issue is that the cable under the speaker for connecting to the second speaker simply wraps around a circular section in the base of the speaker. I would have preferred this to be a retractable cable as it sometimes takes 2-3 tries to get it wrapped around just right so that the end of the cable fits in the holder for storage. Otherwise I have no complaints.


The Bottom Line

These speakers are a great alternative to the more expensive options out there. While they perform well, the best part is the price. The IPEVO Tubular Wireless Speakers go for a mere $59.95 (list price $79.99). That's less than half the price of other speakers in the category and they sound as good if not better than any other travel speakers I've tried.

Unleashed GPS Bluetooth Geotagging Solution for Nikon DSLRs

I've spent quite a bit of time reviewing GPS based Geotagging solutions for my Nikon DSLR cameras. You might remember my most recent review of the blueSLR solution, which involves attaching a bluetooth module to your Nikon DSLR and using your iOS device to run their App. The folks over at Foolography saw that review and asked if I would take a look at their solution. Since I have a passion (or geeky interest) in this area I jumped at the chance.


The Unleased Dx000 is the smallest one I've seen to date
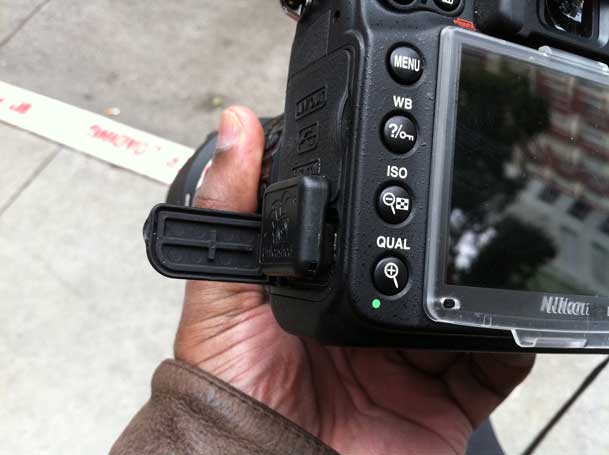
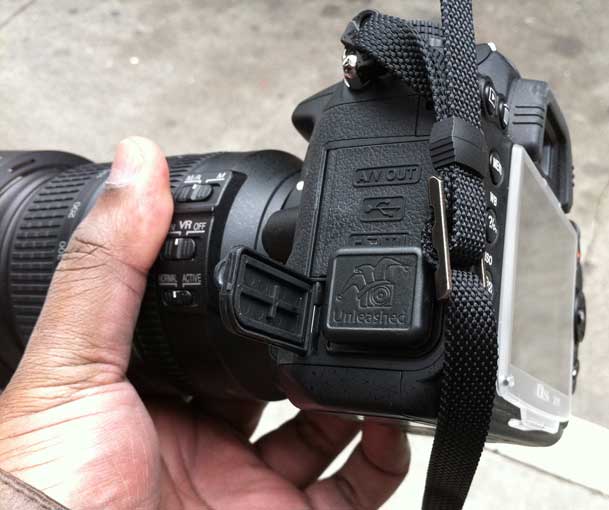
One of the issues with a GPS device on your Nikon DSLR is that it's not built-in. This means that you either have a module that attaches to the 10 pin terminal port (on the higher end DSLRs) or the GPS port on the side of the body (yes you can have one that doesn't attach and do it later in post, but I hate those solutions). These modules either attach via a cable, which means the module itself has to either sit on the hotshoe (not electronically, just for placement) or on the strap. The potential problem with these types is that as you walk around you're going to bump it and either knock it around or even possibly break the cable/port going into the module (I've done that). The Unleased Dx000 as you can see in the picture above fits very snuggly against the camera body. The only problem in the case of the D7000 is the port door hangs open.

When I first saw this product I almost jumped out of my chair until I realized that this was only one half of the solution….


The Unleashed Modules Require a Bluetooth GPS Receiver
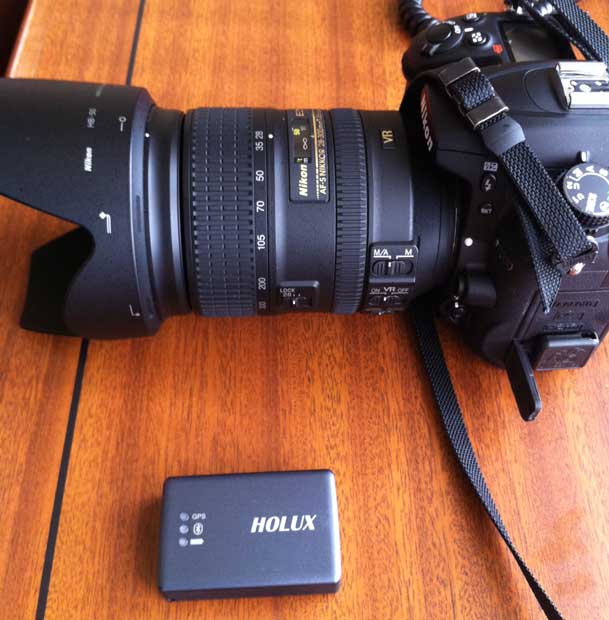
While the module that plugs into your DSLR is in fact the smallest I've seen, there is another piece you need to actually Geotag your photos as you take them. You need a compatible Bluetooth GPS receiver.  Luckily there are quite a few to choose from. I received the Holux M-1000C for review. This (Holux M-1000C) module is the actual GPS receiver. It pairs with the Unleashed Dx000 wirelessly via Bluetooth. 


How does it work?
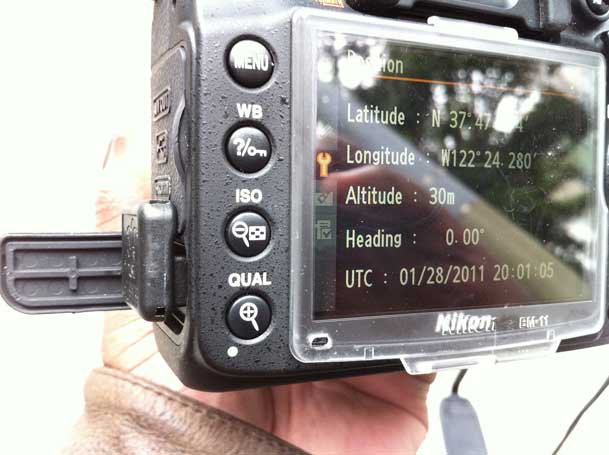
Once you pair the Unleashed Dx000 with your Bluetooth enabled GPS receiver, you then just turn on the GPS receiver and your camera. Mine came already paired and ready to go. I charged the Holux via USB and took it out to test it. Per the instructions I turned on the Holux and my D7000 with the Unleashed Dx000 attached. Once the Holux M-1000C locked on to a satellite the Nikon D7000 picked up the location from it wirelessly. At this point I put the Holux unit in my jacket pocket and started shooting. 


The Bottom Line

Click the above photo in Lightroom to see where this shot was taken/geotagged on Google Maps


This solution worked as advertised. The accuracy seemed a bit off but that may very well be to the placement of the Holux device in my pocket instead of out in the open. For example, when I took the shot above I was outside on the sidewalk across the street. However, when you click the shot above to see it on Google Maps you'll see that it places me (the green arrow) just inside the building. For this reason you're probably going to want the GPS module more out in the open. It would be nice if someone developed a GPS bluetooth hat 🙂

When I went inside the convention hall the module continued to transmit my last known location to the camera. However, this doesn't work indefinitely. After so long the GPS module will no longer transmit your location if it doesn't get an update. It's hard to say when it stopped, but my guess is about an hour inside. This is fine if you're ducking in and out of locations, monuments while shooting, but it's not suitable for prolonged indoor geotagging.

Battery life was great on both units. I kept the Holux on the entire day and the battery was still going strong until I turned it off for the evening. Also there was no significant drain on the D7000, which I did turn on and off as needed throughout the day.
Yes you can also attach a compatible shutter release for those long exposure shots.


Which one should you get?

There isn't a Nikon compatible GPS that I flat out don't recommend (although the Nikon branded GP-1 would be on the bottom of my list in terms of features). They all do what they say they do. It really boils down to the features you're looking for and form factors. I look at each solution as having a place depending on the kind of shooting you're going to be doing most. So here are my recommendations:

For the all day landscape shooter

If you're out and about all day then battery life will be a concern. While these newer bluetooth units offer better form factors they do pose a potential concern for the additional battery life you'll need in your iPhone/iDevice or your Bluetooth GPS receiver. So if you're out and about from sun up to sun down I would still recommend the Solmeta N2. It's my favorite all around unit that works with all of my Nikon bodies.

For the on location shooter

This is the person that will be shooting both inside and outside, but they will be shooting inside a lot! Monuments, museums, and other buildings where there isn't a clear view of the sky. For this shooter I would go with the blueSLR solution. Because it gets its GPS location data from your iPhone it stands the biggest chance of geotagging shots that the other solutions will miss! Also with the blueSLR solution you get the benefit of a wireless shutter release from your iPhone including time lapse photography.

For the photowalk photographer

If you are doing a lot of walking with your camera, say on a photowalk and you don't want to have to worry about constantly looking out for the GPS attached to your camera body, then hands down I would go with the Unleashed solution. I like the fact that you turn this on and forget about it. The flush mount design is awesome and again it's smallest on camera solution that I've seen. Prices start at 125 Euros for the Unleashed module and about 63 Euros for the Holux GPS receiver. 


The good news is that you can't go wrong with any of the solutions above. Pick the one that's right for you!
24 Hours Without Using My Laptop

When I got my iPad back in April I questioned whether I could get by sometimes with just using my iPad instead of my MacBook Pro. Since that time a lot more Apps have come out and a lot more functionality is there. I don't see the iPad replacing my laptop any time in the near future, but I could certainly see using it solo on short (non business) trips where running my full range of Creative Suite desktop apps is not needed. Last week I took a pleasure trip to New York for a day. Before I left I thought about what I would be doing on this trip and figured that there was technically nothing that I would "need" my laptop for. I knew I would be checking email, social networking, responding to blog comments, browsing the web, reading my RSS feeds, etc. I couldn't think of a single thing that I would "need" to do that I couldn't do on the iPad. So I decided to force myself to use just the iPad the entire, albeit short trip. Just in case: I did bring my MacBook Pro too. However, my goal was to never take it out of the bag. 


I did it

I got through the entire trip without touching the MacBook Pro. I have the WiFi-3G version and I was able to be connected anywhere I went. However, AT&T service in the Times Square hotel I stayed in was horrible. For this reason I pulled out my AirPort Express and connected it to the room's ethernet cable. This gave me much better wireless internet in the room. The only time I was tempted to pull out my MacBook Pro was when I need to type large amounts of text in responding to an email. While I can use the onscreen iPad keyboard just fine, I don't enjoy using it for more than a few words at a time. I was thinking that I should have brought along my keyboard dock.


The next thing I bought

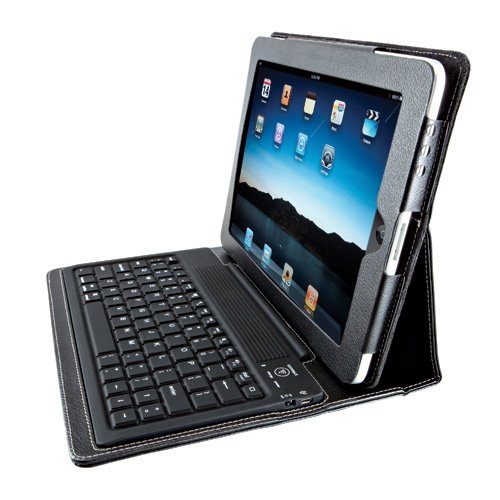
Although this little experiment was a complete success, I saw the immediate need for a keyboard. While I already own the Apple Keyboard Dock, it's not really designed for travel. Then I remembered a Bluetooth Keyboard/Case that a buddy (Mike) showed me and I thought, this is the one I would want to use on my next trip.

I bought it in the airport Brookstone (yes I paid too much) on the way home! They even offered to sell me one that was charged up. I declined as I wasn't going to use it right then and there, but that is a great thing that you do for your customers. Kudos!

I didn't test it until I got home and charged it up. It connected/paired as advertised. However, I hit an immediate snag on the very first thing I typed. I went to repsond to a Twitter comment with "Thank You" and I noticed right then and there that there is no Shift Key on the right side of the keyboard. I thought, "you've got to be kidding me?" Sure enough there are arrow keys, a return key and all the other keys you would expect, but no right side Shift Key. I happened to be on the phone with Scott Kelby (a popular writer/author) and I thought for sure he would share in my shock and frustration and he said "I never use the right Shift key." That floored me! I wondered was I the only one using both Shift Keys on a standard keyboard? Anyway, I can certainly train myself to use just the one on the left, but I thought it was an odd sacrifice for space. Otherwise the keyboard is comfortable and easy to type on. It rocks an impressive 90 hour battery life on a single charge! 

While this case/keyboard is GREAT, it does add a little extra weight onto the already slightly heavy iPad. This will not be my day-to-day case. It will definitely become my travel case!

Brookstone charges $99 for their version of this keyboard/case, but you can get it here for only $69.

Wireless Speakers: Bluetooth vs. AirPlay

We're on the verge of seeing several new wireless speakers enter the market place. The question though is which wireless technology is going to be right for you? The two formats that will likely be competing for our attention (and dollars) are Bluetooth and Apple's New AirPlay technology found in iDevices running iOS 4.2.

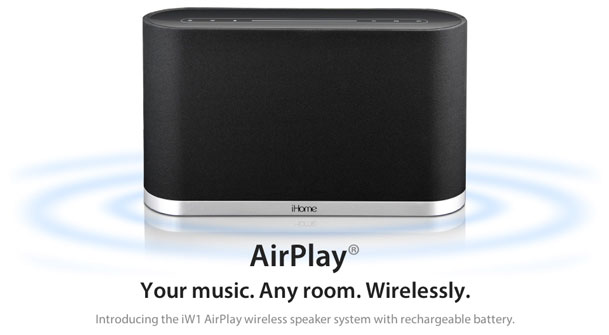
When AirPlay was first announced iHome teased us with a pre-announcement of an AirPlay speaker iW1 they were going to release. No real details were given at the time. So we continue to wait.

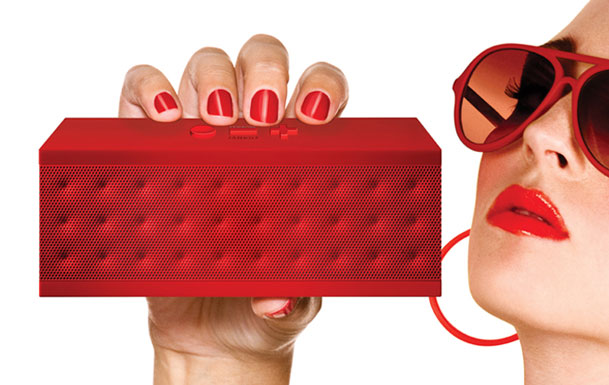
In the meantime Jawbone just announced their new Jambox Bluetooth wireless speaker. This one got my attention because in the iOS 4 Apple finally brought "full" Bluetooth Stereo support to iOS. You might remember my review of the Sony Bluetooth Stereo headset and using it with the iPhone. Back then I was able to use it to listen to music and make/receive calls, but the skip forward/back buttons on the headset were non-functional with the iPhone. Now they work fine with the latest iOS.
 

Advantages of Bluetooth Speakers

Bluetooth has been around a lot longer and is built-in to lots of devices. If you get a Bluetooth Speaker chances are you'll be able to use it with more than just your Apple gear. Bluetooth is also peer to peer which means you don't have to be on a network to use it. Once your device is paired to the speaker you can just use the speaker wirelessly anytime you're within 30 feet of it regardless of whether or not a Wi-Fi network is within range.
 

Advantages of AirPlay

AirPlay is new so the performance is yet to be seen. However, seeing how it's built on AirTunes that has been around for a while I'm not expecting any major issues. Video performance will be the only unknown factor at this point. AirPlay has the advantage of distance. While Bluetooth has a limited range of about 30 feet, AirPlay is based on Wi-Fi and therefore can go several hundred feet. You could fire up your iPad that is docked in the living room and pump music out to a speaker on the deck. AirPlay is also not limited to just audio. With AirPlay in theory someone could build a speaker with an LCD in it to be able to watch video content on, in addition to listening to audio content. I don't think we'll see a lot of devices in this category because in order to make sense the device would have to be the size of a TV. However, that does beg the question: will we see big screen TV's with AirPlay built-in? Now that would be cool! Lastly AirPlay has the advantage of being able to stream audio to more than one AirPlay speaker at a time. With AirTunes the current limitation is 3 devices. I use this ability now all the time by sending music from an iMac to the stereo in the living room and the Bose speaker in the Kitchen.


The Bottom Line

While I'm tempted to get the new Jawbone Jambox Speaker just to play, the $199 price tag is a bit of a show stopper for me. While I'm sure it sounds great, I just don't have enough of a need for a "Bluetooth" wireless speaker to drop $200 on it. However, if an AirPlay speaker hits the market soon I'd be more willing to spend the money on it to replace my current setup in the kitchen (a Bose SoundDock connected to an AirPort Express). While the Bose SoundDock has amazing sound, I'd replace it for something that was self contained. (Bose are you listening?) The only reason I have an AirPort Express in that room is to drive that speaker. We should also see some Wi-Fi to Wi-Fi devices in the coming months that will allow streaming without the need of a Wi-Fi hotspot. Ultimately this technology may surpass Bluetooth if it catches on because of the increased range. Things are going to heat up soon and you're going to have lots of choices. Stay tuned!

Wacom Intuos 4 Wireless: Video Review

When I'm in Photoshop and I don't have my Wacom Tablet I feel naked! I've become so used to it that I won't retouch a photo without one. One of the things I've always wanted was a WIRELESS Version. As a matter of fact during my part of the Adobe Creative Suite 5 launch I was walking around with a Cintiq 12wx.

It was really wired to a Mac Pro, they green screened it out to give the allusion of it being wireless. Although we're probably still a ways off from having enough wireless bandwidth to do a wireless Cintq, we are at a time where we can have a wireless Intuos 4! Here's just a few minutes of video featuring the Intuos 4 Wireless Edition:


httpv://www.youtube.com/watch?v=X8AytkRxFJc


The Particulars

The tablet is using Bluetooth and therefore it's Mac and PC compatible. I'm using it above in the video with a NEW MacBook Pro 15" and Photoshop CS5. Most of the Creative Suite design tools support pressure sensitivity. It has 2048 levels of pressure and an 18 hour battery life per charge. It charges over USB with the same supplied cable that can also be used for a wired connection if the battery dies. The Battery is user replaceable. The wireless range is 10 meters. More specs here.

Continue reading “Wacom Intuos 4 Wireless: Video Review”