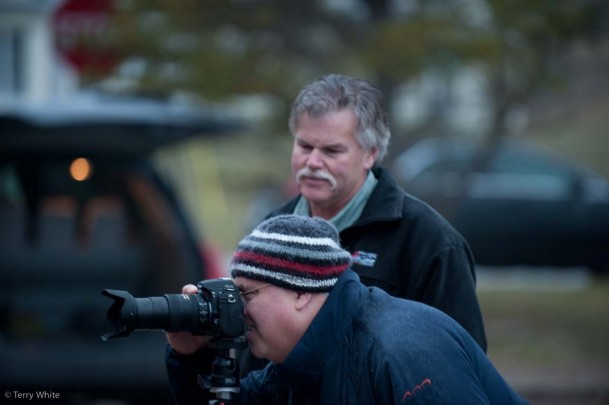
24 Hours Without Using My Laptop

When I got my iPad back in April I questioned whether I could get by sometimes with just using my iPad instead of my MacBook Pro. Since that time a lot more Apps have come out and a lot more functionality is there. I don't see the iPad replacing my laptop any time in the near future, but I could certainly see using it solo on short (non business) trips where running my full range of Creative Suite desktop apps is not needed. Last week I took a pleasure trip to New York for a day. Before I left I thought about what I would be doing on this trip and figured that there was technically nothing that I would "need" my laptop for. I knew I would be checking email, social networking, responding to blog comments, browsing the web, reading my RSS feeds, etc. I couldn't think of a single thing that I would "need" to do that I couldn't do on the iPad. So I decided to force myself to use just the iPad the entire, albeit short trip. Just in case: I did bring my MacBook Pro too. However, my goal was to never take it out of the bag. 


I did it

I got through the entire trip without touching the MacBook Pro. I have the WiFi-3G version and I was able to be connected anywhere I went. However, AT&T service in the Times Square hotel I stayed in was horrible. For this reason I pulled out my AirPort Express and connected it to the room's ethernet cable. This gave me much better wireless internet in the room. The only time I was tempted to pull out my MacBook Pro was when I need to type large amounts of text in responding to an email. While I can use the onscreen iPad keyboard just fine, I don't enjoy using it for more than a few words at a time. I was thinking that I should have brought along my keyboard dock.


The next thing I bought

Although this little experiment was a complete success, I saw the immediate need for a keyboard. While I already own the Apple Keyboard Dock, it's not really designed for travel. Then I remembered a Bluetooth Keyboard/Case that a buddy (Mike) showed me and I thought, this is the one I would want to use on my next trip.

I bought it in the airport Brookstone (yes I paid too much) on the way home! They even offered to sell me one that was charged up. I declined as I wasn't going to use it right then and there, but that is a great thing that you do for your customers. Kudos!

I didn't test it until I got home and charged it up. It connected/paired as advertised. However, I hit an immediate snag on the very first thing I typed. I went to repsond to a Twitter comment with "Thank You" and I noticed right then and there that there is no Shift Key on the right side of the keyboard. I thought, "you've got to be kidding me?" Sure enough there are arrow keys, a return key and all the other keys you would expect, but no right side Shift Key. I happened to be on the phone with Scott Kelby (a popular writer/author) and I thought for sure he would share in my shock and frustration and he said "I never use the right Shift key." That floored me! I wondered was I the only one using both Shift Keys on a standard keyboard? Anyway, I can certainly train myself to use just the one on the left, but I thought it was an odd sacrifice for space. Otherwise the keyboard is comfortable and easy to type on. It rocks an impressive 90 hour battery life on a single charge! 

While this case/keyboard is GREAT, it does add a little extra weight onto the already slightly heavy iPad. This will not be my day-to-day case. It will definitely become my travel case!

Brookstone charges $99 for their version of this keyboard/case, but you can get it here for only $69.

Downsizing My Carry On Laptop Bag

I do a fair amount of Travel for work. I hit Delta's Diamond Elite status by the end of June this year. I typically travel with two carry ons. One is  standard Swiss Gear 20" rollerbag (that happens to have a laptop compartment) and the other is my favorite laptop bag of all time. It's the Skooba TSA Friendly Check-through rollerbag.

While this combination has worked great for me and my travels all over the world, it looks like I'm going to have to give up my Skooba rollerbag for now. The bag is great. The problem is having less space under the seat in front of me these days. Delta Airlines (I live in a hub city) has given us a mixed blessing. On the one hand I applaud them and THANK Delta for the swift move to outfitting the vast majority of their domestic fleet with Gogo inflight Wi-Fi. I use it all the time when I fly domestically and now I pretty much expect to see it when I board my flight. While this is great, Delta has also been busy upgrading their fleet with an in-flight entertainment system. This upgrade hasn't been getting much press and even Delta seems to be pretty quiet about it. 

The new system gives each passenger an LCD on the seatback in front of them and access to movies, TV shows, satellite TV, music, games, etc. AWESOME! Great, what's the downside? The downside to this upgrade is that the electronics for this system at each seat is being housed under the seat itself, significantly reducing the storage space under the seat for carryons. With my last few flights I've had to resort to putting both of my bags in the overhead bin because my laptop bag simply just won't fit under the seat anymore. So far I haven't been yelled at. However, I want to be fair to my fellow passengers and put my second bag under the seat as everyone should. Unfortunately for me this means going with a smaller bag. 


Time for a NEW Skooba TSA Friendly Bag!

Luckily Skooba does make a smaller TSA Friendly Laptop case. I swore I would never carry a shoulder bag again. I still don't want to and the good news is this bag is designed to slip over the handle of your rollerbag. You can still carry it with the supplied shoulder strap or the built-in handle. Although this bag is about half as thick as the Skooba rollerbag, I should still be able to carry my usual amount of gear give or take a DSLR body/lens. 

The beauty of these bags is NOT having to take your laptop out when going through a TSA checkpoint. I could never go back now after zipping right through for a year!

You can get the Skooba Checkthrough Executive Brief Small (for 15/16" or smaller laptops) here on sale for under $100 or

You can get the Skooba Checkthrough Executive Brief Large (for 17" laptops) here on sale for for about $105.

You should also check out the ThinkTank 50 Cable Management Bag for all that little stuff that causes you to get a "bag check" by TSA.

The LIFE Guide to Digital Photography – Everything You Need To Shoot Like The Pros

When Joe McNally sends me an email saying that he wants to send me his latest book, I tend to stop whatever I'm doing and respond to that email. Joe is one of my FAVORITE PHOTOGRAPHERS and he inspires me. Every photographer I know has someone that they look up to and hope to be like some day. For me, Joe McNally is one of those photographers that inspires me to try to do better. Of course I like Joe's photography and lighting skills, but I'm also inspired by the way Joe works with subjects. He is masterful in getting what he wants out of the subject in front of his camera. Every time I'm with him on a shoot or in a class I say "Wow, why can't I do that?"


This really is a book about learning how to shoot like the Pros

One of the things that actually surprised me was that this book is exactly as the title describes it. Don't get me wrong I think Joe is an excellent instructor, but in his other books Joe talks about photography through his life stories and pretty pictures. While there is certainly nothing wrong with that (I DO LEARN from Joe's stories) and I'm in awe of his shots, this book jumps right in and starts teaching you stuff. Go figure 🙂  The first chapter is called "Part One: Light". It starts off with a basic explanation of how the camera processes light, Exposure and camera settings. Then Joe jumps right in with tips and how and more importantly WHEN to capture the best light. He covers it all. Shooting on a sunny day, sunsets, a beach, a snowy day, etc. etc. and that's just chapter one! Joe then goes on to talk about the lens, Design Elements (I can't wait to finish this one!), Color, Composition and some last minute tips. Wow! This puppy is PACKED with great info and I can't wait to finish it over my holiday break.


The Bottom Line

No matter where you are in your photography skills, you can probably learn something from others. If I was 1/10th as good as Joe I'd be ecstatic, so I'm glad that I can learn from him and others. This is a great read. I'm only half way through it and loving what I'm learning. Thanks Joe for the opportunity to learn from you! I'm forever grateful. 

You can order The LIFE Guide to Digital Photography – Everything You Need To Shoot Like The Pros here on sale.


I Shall Call Him Mini Bridge

httpv://www.youtube.com/watch?v=QjFLCAcfvH4


Every now and then it's much easier to show someone than to try to explain it to them. After a few emails from Beau about how to use Mini Bridge? I just decided to make it the topic of this week's Creative Suite Podcast.


See more of my Adobe Creative Suite Videos on my Adobe Creative Suite Podcast

and get the App here. It features EXCLUSIVE CONTENT that no one else gets to see:

Learn Adobe Creative Suite with Terry White - Wizzard Media


Stuff I’m Selling On Ebay This Month

I upgrade my gear on a fairly regular basis. People ask me all the time "what are going to do with your old ________?" Normally I pass the equipment down to a family member or sell it locally to a friend. When there is no one to pass it down to or no local friends that are interested I turn to Ebay next. When I upgraded to the Nikon 28-300mm lens many of you asked about my 18-200mm VR lens that I was selling. I finally got around to getting it up on Ebay and along with some other items

They are all listed here.

Review: The XShot iPhone 4 Case Tripod Adapter

I love it when a company puts a lot of thought into a problem and then comes up with a solution that is so simple you smack your forehead and say "why didn't I think of that?" I've reviewed various iPhone tripod adapters in the past. When XShot asked to send me their new one, my 1st thought was "ok, whatever. sure." I was already in the mindset of "been there, done that." That all changed the minute I opened the box. XShot not only designed the iPhone 4 adapter that many of you have asked me for (one that works both vertically AND horizontally" but they did it in a stealthy way that I didn't even get at first glance. The first thing I thought was "cool". Just put your iPhone 4 in and you can attach it to your tripod in either orientation. I thought that was going to be the end of the review. Problem solved. Moving on… Then it really hit me as to what they did. They didn't just design an iPhone 4 tripod adapter. They designed an iPhone 4 CASE that can be attached to a tripod. 

It's a case stupid

I truly had a "duh" moment. I was thinking that while the adapter was nice I'd have to take my iPhone 4 out of my existing case and put into this "adapter" each time I wanted to use it. It's better than that. This was designed to be an iPhone 4 case first. It's a hard case offering protection to your iPhone 4 and the very necessary cover over the exposed antenna gap. There are two low profile slots on the bottom and the size that allow you to slide on the supplied tripod mount "quick release" clip. AWESOME! You get two clips in the package. This also means speedy changes from portrait to landscape by leaving the clip on the tripod and just sliding the iPhone on or off in the orientation you want. 

Well done XShot! You really were thinking on this one.

You can get the XShot iPhone 4 Case here.

The Online Lighting Diagram Creator

I'm terrible when it comes to documenting how I lit a shot. My lighting setups are not that complex, but when someone asks me how did you light that shot the first thing that comes mind is "very well, thank you." Of course I'm totally kidding here, but I do cringe when I think about trying to explain it to them. Luckily there are a couple of solutions out there now that will make it much easier for me and you to explain the setups that we use to someone visually. 


The Online Lighting Diagram Creator

is a website that gives you drag and drop items from a range of categories to build your diagram right there on the spot. You can then export the image out and send it to someone. This site is free to use for your personal use. If you have a commercial use (you're writing a book or teaching a paid class, etc.) then you should contact them to work out how best to compensate them for use of their technology. The images you export will have their copy right info on the bottom, which I don't have a problem with.

You can try out LIVE below or on their site: The Online Lighting Diagram Creator here.


Strobox for your iPhone


Strobox is another Free solution for your iOS device. Like the solution above it has built-in popular lighting pieces that you can drag around on your display and then save. You can either email the diagram you create directly from the App or save it to your camera roll.

You can get Strobox for FREE here from the Strobox - Janis Lanka


I Just Became An UPstrap Fan

I recently talked about the OPTECH strap that I was using and a few of my photographer buddies suggested that I also look at the UPstrap, so I did. I ordered an UPstrap and finally got a chance to try it out. I gotta say that I was a little skeptical about any strap claiming to not slide off your shoulder. I've heard those claims before. However, I have to say that the UPstrap lives up to its claims. I put it on my Nikon D7000 and no matter what I did (jumping, dancing around, running, etc.) it stayed in place. Wow! While it's not the prettiest strap out there (it's really plain and rubbery looking), it's now my new favorite! Can't wait to do my next photowalk with this one.


Check out the UPstrap here.

Photoshop CS5, Adobe Camera RAW & Lightroom 3 Updates

Adobe just released updates for Photoshop CS5 (bug fixes), Camera RAW and Lightroom 3


Adobe Photoshop CS5 12.0.2 update

December 7, 2010
The Adobe Photoshop 12.0.2 update fixes a number of high priority bugs including painting performance and type-related issues. The most significant fixes in the Photoshop 12.0.2 update include the following:

  • A number of potential security vulnerabilities have been addressed
  • Top type and font crashers found in the field have been addressed
  • A number of performance issues have been addressed
  • Crash opening 3D layers has been addressed
  • Color Engine crash has been resolved
  • Intermittent file format issues addressed
  • Shift scrolling bug fixed
  • Sharpen crasher fixed
  • Marching ants not seen at certain zoom levels fixed
  • Metadata focus distance issue addressed
  • File info bug addressed for Orphea Studio jpg's
  • TWAIN crashers fixed
  • Brush cursor bug fixed
  • Histogram progress bar issue fixed
  • Droplet issues addressed

Multiple languages: Windows | Macintosh

TWAIN Plug-in update

December 7, 2010
The TWAIN plug-in update includes fixes for multiple document scanning and a crasher when attempting a second scan.

Camera Raw 6.3 Update

December 7, 2010
This new version of the Camera Raw plug-in replaces the original one that was installed with Adobe Photoshop CS5, Adobe Photoshop Elements 9 and Adobe Premiere Elements 9 software. Visit the Camera Raw page for a complete list of supported cameras.

English: Windows | Macintosh

Lightroom 3.3 update

December 7, 2010
The Adobe Photoshop Lightroom 3.3 update includes these enhancements:

  • Additional camera support for several new camera models including the Canon PowerShot 95, Nikon D7000, Olympus E-5.
  • Corrections for issues introduced in previous versions of Lightroom 3
English: Windows | Macintosh

Review: Upgrading to a TiVo Premiere XL

For years TiVo has been my favorite set-top box! There's no question about it I'm a TiVo fan. However, even as a TiVo fan that doesn't mean I like upgrading just for the sake of upgrading. When I upgrade ANYTHING I weigh the pros and cons and decide if the upgrade is necessary or will benefit me. I encourage EVERYONE to do that!  When TiVo introduced the TiVo Premiere I looked at it and decided that there wasn't really anything there to justify an upgrade for me. My TiVo HD's were (are) working just fine and although for anyone NEW to TiVo the Premiere is a great choice, it just didn't offer "enough" things for me to spend the money. As a matter of fact the only real advantage for me would be the larger hard drive (which I could do to my existing units). See TiVo's own comparison here. If you look at that comparison you'll see that most of the differences between the new Premiere boxes and the HD boxes revolve around the user interface and searching. The New TiVo Premiere definitely has better searching and suggestion features than the older model. However, I'm not usually trying to discover "new" shows.


So what changed my mind?

You're going to laugh! Actually I replaced one of my TiVo HD XLs with a TiVo Premiere XL because I was forced to! No I'm kidding. No one can "force" you to upgrade. However, there was something that TiVo announced that I've been wanting and waiting for for years and that's…here it comes…an iPad App!

httpv://www.youtube.com/watch?v=s6w3RUE8mhY

I was both excited and ticked off at the same time when I saw their announcement (and cool video by the way) of their upcoming TiVo iPad App. I've been beating up TiVo for a while now for not having an iOS App for scheduling, remote control, account management, etc. and when they finally announced it I cheered until I saw that it will only support the TiVo Premiere and Premiere XL. ARGGGHHHHHHHHH! While it's easy for me or anyone else to say c'mon! Really? You can't make that app work with the thousands of TiVo HD's out there? I know how these things go from a development standpoint. You want this really slick experience that takes complete advantage of your new UI on your new box, that will take twice as long and twice the development effort to make work with a box that you don't even sell anymore. Anyone who has been using a computer for more than a couple of years has faced this already. Some new OS or piece of software you want won't work on your older hardware. If you want those capabilities you "have to upgrade". So here we are! I want those capabilities and "I" decided to upgrade ONE TiVo HD to get them. 


Two Upgrades for the Price of One

After I got over the emotional part of upgrading something that was working fine, I decided to plan a box swap. I have an existing TiVo HD XL with a larger drive in my theater. The XL has the larger drive which means it can hold more shows without having to delete as often. I decided to move that one to the living room (which is always running out of storage space) and eBay the TiVo HD from the living room. The New TiVo Premiere XL would go in the theater. This plan made me feel a "little" better about it as I would be solving two problems with one purchase. I would also recoup some of my money on selling the perfectly working TiVo HD. That brings me to another point. TiVo.com offers UPGRADE pricing to existing customers. This means that you don't lose out on your Lifetime subscription and you get a bit of a price break. I'm feeling even better now. 


The Comcast CableCARD Factor

The other thing that always makes me think twice about a TiVo upgrade is the fact that I have to get Comcast involved. Since Comcast is my cable provider I have to get a CableCARD from them to go inside the TiVo. My experience with CableCARDs has been hit or miss. Sometimes everything works on the first try. Other times I've had to have the tech come back multiple times before it worked. The problem is that they don't deal with them often and not many reps know how to configure them on your account. I planned and scheduled my appointment for one day after the TiVo Premiere XL was to arrive and in typical (sorry but I have to say it) Comcast fashion they screwed up the appointment. Let's just say they went to the wrong house! As they called to apologize and reschedule it dawned on me that I had a CableCARD sitting in my hands. I had the one from the old (now factory reset) TiVo HD that I was going to turn in. I figured I could just swap them myself, but I've had bad experiences trying that in the past. The CableCARD must first be UNPAIRED before putting it into a different TiVo. I know that now after having to send two TiVos back in the past. Luckily since I went through the factory reset process I saw on screen where it said that it was going to unpair the cableCARD during the process. This made me feel a little safer in suggesting to the Comcast rep on the phone, "well I have a card from the old one can someone just configure this one over the phone and then you won't have to send anyone out?" She informed me that she could and away I went to the Premiere XL to plug the card in. The result: A happy ending! It WORKED! No problems whatsoever. She knew what she was doing (rare when dealing with Comcast and CableCARDs). I was up and running without having to have a tech/contractor come out . Rant alert: By the way (Comcast if you're reading this) I never understood and still don't understand why Comcast has to come out for this anyway. Why can't I pick up a CableCARD from the office? When you order a CableCARD the tech comes out and plugs it in! That's all he/she can do anyway. This brings up a dialog on screen with the necessary ID numbers. The rest has to be done over the phone anyway (by anyone that can read off numbers!) I can go to my local Comcast office and pick up a Cable Modem or Comcast DVR but not a CableCARD , which is the EASIEST thing to install. You just PLUG IT IN and READ OFF NUMBERS. End of Rant. 


Online Season Pass Manager: Gotcha!

One of the recent additions to TiVo.com is the new online Season Pass Manager. One of the things that TiVo brags about during the upgrade process. They say you'll be able to easily copy over all your Season Passes (show scheduling) from the old TiVo to the NEW one. Great! Except for one problem. When I ordered the new Premiere, it was done as an upgrade. Therefore replacing one on my account. TiVo in their infinite wisdom replaces the box on your account with the New one even before it arrives at your door. When I logged into my account the new one was there and the old one (along with its Season Passes) was GONE! When I called TiVo to complain about this to their credit the tech rep was able to temporarily put the old TiVo back on my account long enough for me to copy over the Season Passes. I will admit that this feature definitely makes it much easier to upgrade, but TiVo you should think about upgraders and the way your process works now. The old TiVo should go in an inactive state so that the user can grab the info they need for the new one!


Now that I have it and it works, how is it?

The TiVo Premiere XL has a much more modern looking interface! It's hands down easier on the eyes than the previous UI (user interface). Being a visual guy, I love the movie poster art all over the place. TiVo HD already had integration with Netflix, Amazon Ondemand, YouTube and Blockbuster, but the TiVo Premiere interface brings that content closer to the surface and makes it easier to get to. I still think that the new Apple TV has the best Netflix integration, but the TiVo Netflix integration works just fine.

The "old" TiVo HD interface

A couple less ports. The Premiere drops the S-video out port, which probably won't be a big loss to many. It still has Component, HDMI, Optical audio and Composite, which are all active at the same time. There is also only one cableCARD slot so you'll definitely have to get a Multistream CableCARD. Again not a problem as there probably aren't very many single stream cards being handed out these day by the cable companies. 

1080p is here! Another nice update is that the Premiere goes up from 1080i to 1080p. I'm happy to see this for sure, but not sure how often I'll see it in use. My cable service still maxes out currently at 1080i. Perhaps some of the online ondemand content will stream at 1080p at some point if not now. My old TiVo HD XL was THX certified and so is the NEW Premiere XL. This new one even comes with a set of glasses to allow you to tweak your TV for optimum THX performance during the setup process. I love the THX trailer that plays at the end! They even suggest that you "crank up your sound system" before it plays. Nice! Lastly I like the smaller physical footprint of the Premiere. The case is noticeably smaller than the HD and leaves me more room on the stand I have it on.

It is very smart! As you know famous actor/comedian Leslie Nielson recently passed away. One of the "finds" at the top of my TiVo Premiere Screen was the "The Best of Leslie Nielson". It's basically a list of every movie that he has been in. While you could go through and choose individual favorites to buy or search for recording, my favorite feature in this case was a ONE BUTTON add all to my To Do List. In other words if ANY of these movies come on TV in the future TiVo will now automatically record them. Now that is freakin' sweet!


Why not just get a DVR from your service provider?

Continue reading “Review: Upgrading to a TiVo Premiere XL”