Review: The 2012 AirPort Express – I love it, I hate it!

One of my favorite road warrior gadgets is the AirPort Express. I have several of them for AirPlay streaming around the house and studio as well as at least one with me at all times when I travel (it lives in my bag). See “What’s In My Laptop Bag.” I never had an issue with the design of it. I actually appreciated the simplicity of it being a compact self-contained router with flip out prongs to plug it into a wall outlet for power. It was fast, easy to setup and it just worked. Now that I not only have to demo cloud services for living, but also mobile Apps, I really appreciate being able to setup my own WiFi network on stage as well as my hotel rooms. The previous generation AirPort Express had 802.11n support as well as AirPlay and supported up to 10 devices simultaneously connected. It even supports connecting a USB printer for easy wireless printing. Yep, it was just about perfect what it was.


Apple changed it!
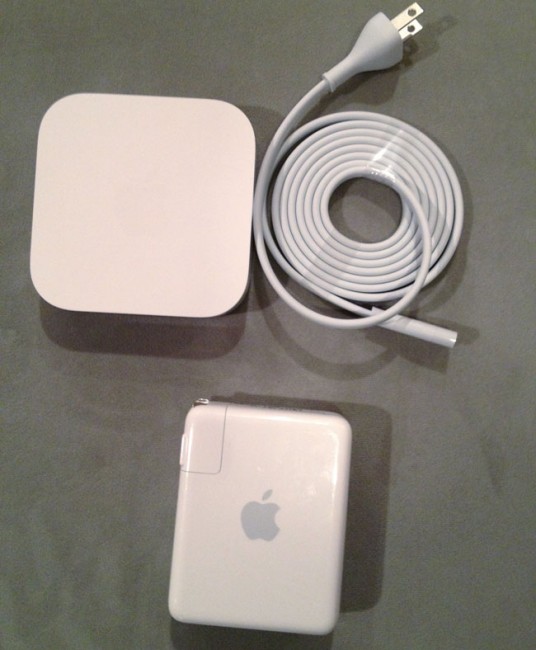
The new AirPort Express on top now comes with a freakin’ cord! Noooooooooo!


Apple quietly introduced a brand new AirPort Express model on Monday at the WWDC (along with new MacBooks and iOS 6 – yeah there was a speed bump to the Mac Pro too – sad that it’s virtually the same chassis as the Power Mac G5 and got no Thunderbolt or USB 3 love…). Although I was most excited about the new MacBook line up, I was quick to take a look at the New AirPort Express too. While the specs looked great, I cringed when I saw the back of it. Apple has gone away from the all-in-one design to one that is almost identical of the Apple TV. By that I mean that it now requires a power cord. This may not seem like a big deal and maybe it isn’t (I’ll be on the road with it next week), but I certainly will miss just flipping out the prongs and plugging it in!
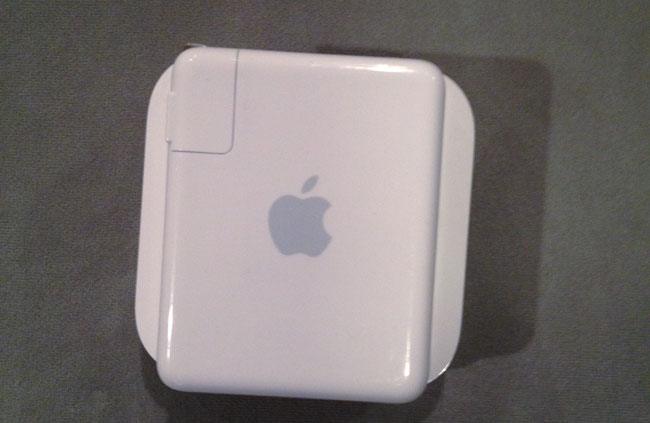
The new one is slightly wider, but also slightly thinner.

On the plus side Apple added a second Ethernet jack so that you can connect not only the ethernet cable to your internet connection, but also plug in a device via ethernet for speed. Sadly though these still aren’t gigabit ethernet ports. Not sure how much I’ll need that second port on the road, but it’s nice to have. The new AirPort Express is also dual band (like the AirPort Extreme) simultaneously supporting 5Ghz and 2.4Ghz WiFi connected devices. It still has AirPlay and a USB port for printers as well as support now for up to 50 devices. It’s that last one that pushed me over the edge. While I personally don’t need more than 10 connections on the road, there are times when I’m using the AirPort Express on stage and sharing it with other presenters and perhaps a colleague or two in the audience. With laptops, tablets and phones connecting to it, it’s much easier to go past 10 devices than it was back in the day.

Setup
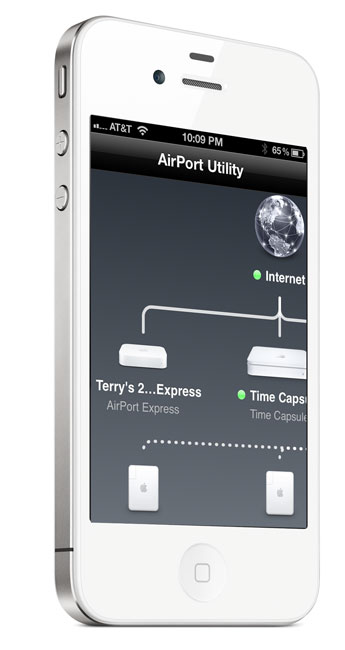
The setup is a piece of cake as usual with the AirPort Utility. You can even do the setup from your iPhone, iPad or iPod touch with the iOS version of the AirPort Utility. Now you can even setup a guest network like you can on the AirPort Extreme granting those users just internet access instead of access to your entire network.

AirPort Utility - Apple

The Bottom Line

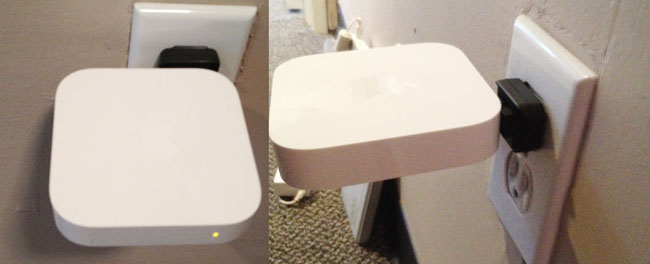
New AirPort Express on the Left, Old AirPort Express on the right.

The 2012 AirPort Express is overall a nice upgrade at the same price as the old one. It’s about the same size as the old one being a little thinner, but a little bigger overall. I wished they had kept an all-in-one design as I don’t want to have to have one more cord to carry, but I’m sure I’ll be able to adjust. If you have a recent 802.11n model then there probably isn’t much of a reason to upgrade. However, if you’re on an older 802.11b/g model or you use one at home as your primary router, then you’ll want the new stuff in this one.

You can get it here for $99 or here for about $99.


UPDATE

Leave it to my buddy Scott Diussa from Nikon to give me an option. Apparently the plug adapter for the Nikon D7000 battery charger will fit the New AirPort Express and work in a pinch. It’s not elegant. It’s not pretty, but it does work. Now if it were only white. 🙂

Update #2 While the Nikon plug does fit (so does the original Apple one), it slightly blocks the WAN port making it a non-starter. 🙁
iStockphoto Integrates with Adobe Creative Suite 6

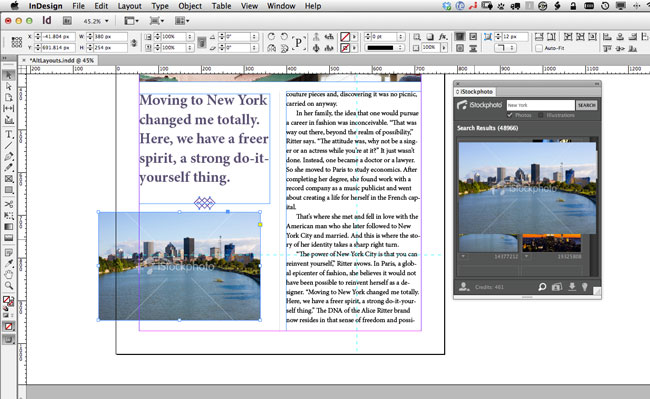
iStockphoto panel showing in InDesign CS6 and a drag and drop of a comp image right into the layout.

I use images (and now video and audio) from iStockphoto all the time. In many cases the images I’m using are for blog posts, however there are times when I’ll use stock photography for layouts too. iStockphoto is my service of choice and needless to say I couldn’t be more excited to find out that they now have plug-ins/Extensions for both Photoshop and InDesign.

With the iStockphoto Extension installed I can do searches right inside Photoshop, Illustrator or InDesign for the images I may want to use. I can even drag and drop comps right from the panel into my documents. Since I’m logged in with my same iStockphoto account I can keep a check on my available credits as well as buy royalty free images right there on the spot to use.

There is no charge for the Extension. You can download it here. Once you install it, you can grab the panel from the Window-Extensions menu in either Photoshop, Illustrator or InDesign.

Thanks iStockphoto for making the design process a little easier!

CS6 Tour: Thank You Buenos Aires, Santiago and Lima!

Last week we wrapped up the South America leg of the Adobe Creative Suite 6 Tour. We kicked things off in Buenos Aires with a slightly smaller crowd, but the CS6 enthusiasm was in the air nonetheless.

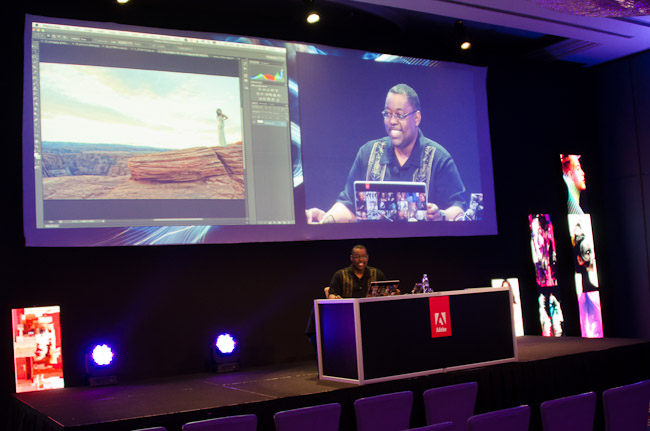
Then we moved on to Santiago Chile for a capacity crowd and probably one of the best stage setups that I’ve seen on the tour to date!

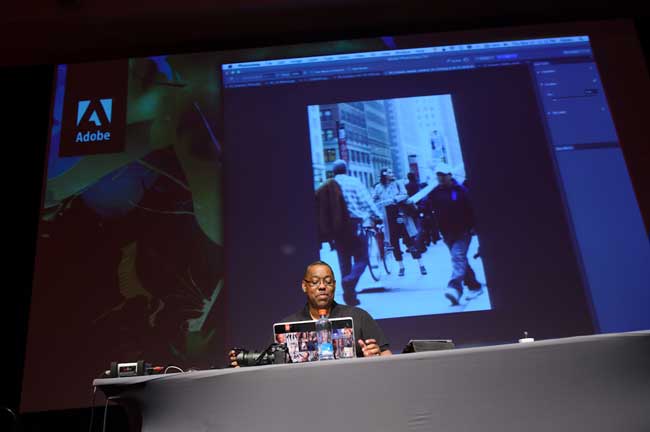
This giant projection wall accommodated multiple projectors for a seamless video wall experience.

The last stop in South America was Lima Peru. The first thought that came to mind was “we’re gonna need a bigger boat”.

I was overwhelmed by the attendance at this venue. Not only was the main presentation room full to capacity, but even the overflow room was shoulder to shoulder.

Lima is a beautiful city as well as Santiago and Buenos Aires! Can’t wait to go back…

Thanks everyone for attending and I hope to see you again soon! You can follow the tour here at the CS6 Tour Site (built with Adobe Muse).

Review: Gear4 AirZone Series 1 AirPlay Speaker

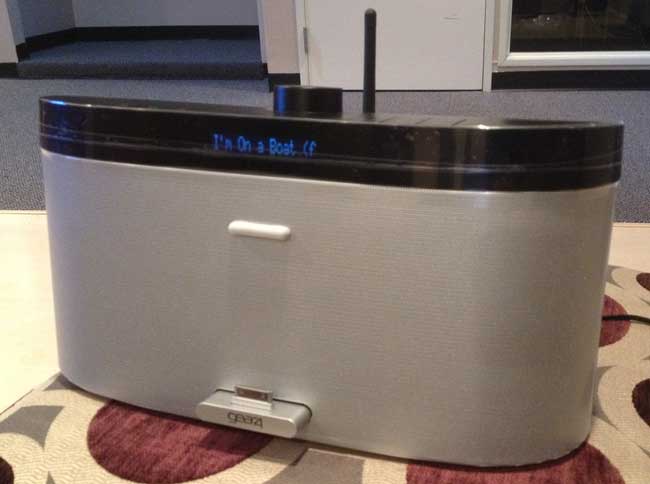
I’m a fan of AirPlay Speaker Systems. To date my favorites are the Bowers & Wilkins Zeppelin Air and the iHome AW1. Just recently the Gear4 AirZone Series 1 crossed my desk. I decided to give it a try. I grade AirPlay speakers on 3 criteria: Ease of setup, No skipping and of course sound quality. Let’s get started:

The out of the box experience

The AirZone Series 1 offers a decent out of the box experience. Much easier than the Zeppelin Air, but not nearly as easy as the iHome’s Setup App. With the AirZone you simply turn it on and navigate to the WiFi menu using the wireless remote. From there you can scroll through the available networks and then hit the enter button on the one you want to connect to. Sadly to enter your network password you have to scroll through the alphabet letter by letter like many game console onscreen setups. Fortunately this is the most difficult part of the setup. After I entered my password, the AirZone connected to my WiFi network and showed up immediately on my iDevices and iTunes.

No Skipping

So far, I haven’t had a single skip. The music has been continuous. This is probably due to the fact that the AirZone has a physical external antenna for the WiFi connection. I hate AirPlay speakers that skip or have dropouts due to weak connections.

Sound

The sound is as good as the iHome iW1, but not as good as the more expensive Zeppelin Air. In other words you get what you pay for. I do however appreciate the fact that the AirZone does have a built-in EQ.

The Bottom Line

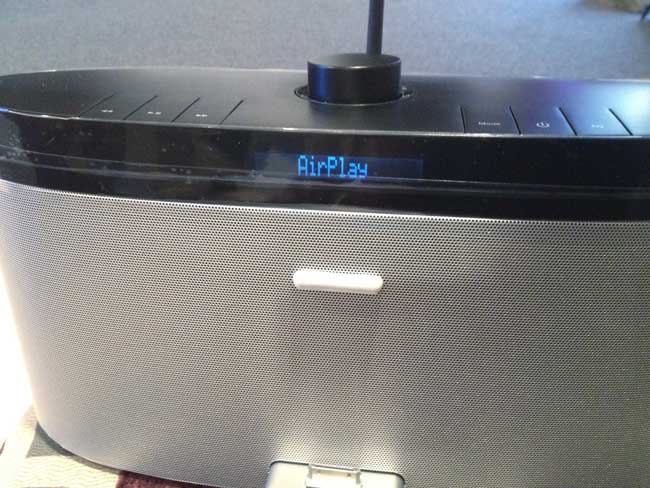
The AirZone offers decent competition in this $200-$300 range of AirPlay speakers. It also offers a built-in dock, AM-FM radio and Audio In port so that you can listen to other sources besides those on AirPlay.  I also appreciate the fact that the AirZone displays the name of the current track on the LCD.

You can get the Gear4 AirZone Series 1 AirPlay Speaker here.

Innergie 3-in-1 Magic Cable: The only USB Cable You’ll Need In Your Bag

Because I travel for a living, I’m always looking for ways to consolidate and have smaller peripherals and gadgets. I carry a bunch of cables because I never know what I might need. This also includes a variety of USB cables. I carry iOS Device Sync/Charge Cables, USB Micro cables for charging things like my Jawbone BT headset and a USB mini cable for connecting hard drives.

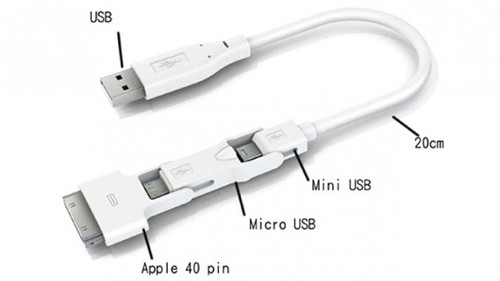
The Innergie 3-in-1 Cable does it all

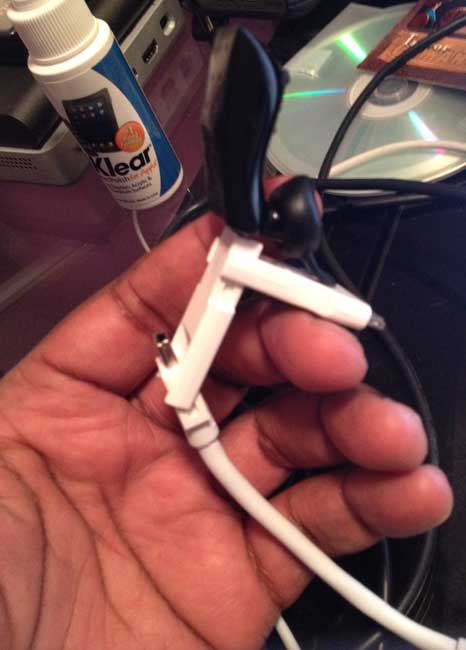
This one cable allows me to connect or charge the vast majority of devices that I carry. I can use it to charge/sync my iPhone or iPad. I can use it to connect a USB hard drive and I can use it to charge a variety of my USB peripherals such as my Logitech Ultrathin iPad Keyboard, Jawbone BT Era Headset or Jambox. The design is pretty cool. All 3 connectors are available by simply unplugging down to the one you need. If you need the iDevice 30 pin connector, then simply plug all 3 together. If you need one either the USB micro or mini just unplug the connector above it and pivot out the one you need.

My only complaint with this cable is that it’s very short (20cm). It’s fine for connecting to your computer, but if you’re going to plug something into a wall charger then you’re probably going to want it to be longer. You can use an extension cable like this one. The only other downside is that you can only use one type of connector at a time. This means that you’ll still need to carry multiple cables if you want to charge multiple devices at once.

I got a couple of these to keep in each of my bags. Now I know I’ll always have the right USB cable.

You can get the Innergie 3-in-1 Cable here.

Play LevelUp for Photoshop and win!

Download a Photoshop extension that not only makes it fun to learn image editing but may even earn you Amazon gift cards or a year’s subscription to the Creative Cloud.

LevelUp for Photoshop is a game of missions that help you learn basic Adobe Photoshop skills. You complete missions to get points and badges. The more you interact with the game and learn about Photoshop, the more points you earn!

Starting on June 15, 2012, every 400 points gives you an entry in a weekly drawing to win a $100 Amazon.com gift card. One lucky person will win our grand prize, a year’s subscription to Adobe’s Creative Cloud.

You can download the extension here. The contest will run from June 15 through July 15, 2012.

Playing the Game

Once you download LevelUp for Photoshop and install it, go to Window>Extension>Level Up for Photoshop to launch the game panel. The game begins with a mission to correct red eye. You can use the supplied image or one of your own. Accomplish the task in fewer steps to rack up higher points. You also earn points by sharing your progress on Facebook and Twitter, passing quizzes, and more.

There are many other missions, including removing unwanted objects, turning a photo into an oil painting, and replacing colors.

You’ll need Photoshop CS6 or CS6 to play. If you don’t own CS6, you can download the free trial version here .

For more about the contest, see the game’s Facebook page and the game’s microsite. The LevelUp for Photoshop hashtag is #levelupforPS.


How To Create Photo Slideshows for Your Website With Adobe Muse

In this episode of the Adobe Creative Suite Podcast Terry White shows How to Create A Photo Slideshow For Your Website With Adobe Muse. Whether you’re a photographer or just someone who wants to put a photo gallery on the web, it couldn’t be easier than the steps you’ll see in this tutorial.

Are you missing out on my Bonus Content?

See more of my Adobe Creative Suite Videos on my Adobe Creative Suite Podcast and get the App here. It features EXCLUSIVE CONTENT that no one else gets to see. This episode has a BONUS CLIP that is available only in the App! My iOS App is a Universal App for iPhone, iPad and iPod touch. I also have an Android version:

Learn Adobe Creative Suite with Terry White - Wizzard Media

From Roller to Shoulder Bag to Backpack – Still Skooba

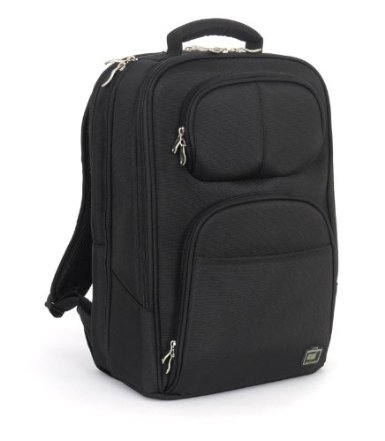
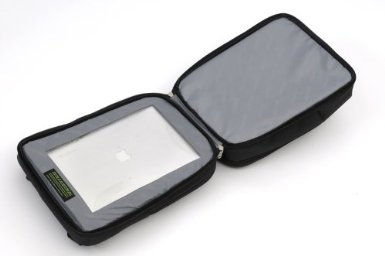
I’ve now come full circle with my laptop bag of choice. I’m a fan of the Skooba line of TSA friendly bags and I’ve reviewed them here before starting with the rollar bag. Although I liked the rollar bag for the sheer amount of stuff that I could carry in it, it started becoming a problem making it fit under the seat in front of me on planes equipped with in-seat entertainment systems. I switched to the shoulder bag version (which I still use when traveling with my MacBook Air), but found I didn’t like the weight on the one shoulder constantly. I gave up and went with their Backpack. Like most backpacks the weight is distributed. I get to carry a good amount of gear still including my 15″ MacBook Pro, accessories in my ThinkTank 30 Cable Management Bag, my iPad and Wacom Intuos 5 Small Tablet. I can even fit my Nikon D7000 and 28-300mm Lens in there too. Best of all I almost never have to remove my laptop from the bag due to the nice TSA friendly design.

I still clip this monster to my rolling suitcase whenever I can, but if I have to carry it, it’s not bad either.

You can get the Skooba Checkthrough TSA Friendly Backpack here

You can also see what I carry in my laptop bag here.

Adobe Lightroom 4.1, Camera RAW 7.1, DNG Converter 7.1 Now Available

Lightroom 4.1 is now available as a final release on Adobe.com and through the update mechanism in Lightroom 4.  The goal of this release is to provide additional camera raw support, lens profile support and address bugs that were introduced in previous releases of Lightroom. In addition, Lightroom 4.1 introduces the following new features:

  • The ability to process HDR TIFF files.  (16, 24 or 32-bit TIFF files)  This can be useful if you have merged multiple exposures into a single 32-bit image using Photoshop’s HDR Pro.  Using the new basic panel controls can be a very effective and straightforward method of achieving an overall balance across the tonal range.
  • Additional Color Fringing corrections to help address chromatic aberration.  Click here to learn more
  • Save photobooks created in the Book Module as JPEG files
  • Publishing photos to Adobe Revel is now accessible via a Publish plugin

Bugs Corrected in Lightroom 4.1

The following bugs that were part the Lightroom 4 releases have been corrected. The team appreciates the very detailed feedback the community has provided on Lightroom 4 and we’re excited to correct a number of issues experienced by our customers. These issues have been FIXED:

  • Point Curve adjustments made in Lightroom 3 have been restored.
  • Edit-in functionality has been restored to external applications including Adobe Photoshop and Nik plugins
  • Addressed performance issues in Lightroom 4, particularly when loading GPS track logs, using a secondary monitor, and the controls within the Develop module.
  • Ability to update DNG previews and metadata for more than 100 photos has been restored.
  • This update allows for improved viewing of subfolders and stacks in folders with a large number of photos.
  • It was possible that a layout of a saved book could be lost after quitting Lightroom 4.
  • Adjustments made in the Develop module were not properly being reflected to photos that have been laid out in the Book Module
  • Postscript Type 1 Fonts do not appear in the Font menu within the Book module.
  • Clarity adds grey tinting to 100% white tones.

Known Issues in Lightroom 4.1:

  • Double byte fonts such as those found in Chinese and Japanese characters are not being exported to PDF or when published to Blurb.
  • The Revel Publish Service will delete photos from a carousel. This occurs when the customer asks Lightroom to delete the carousel and then cancels out of the confirmation dialogue box.

New Camera Support in Lightroom 4.1

  • Canon EOS 1D X
  • Canon EOS 5D Mark III
  • Canon EOS 60Da
  • Canon PowerShot G1 X
  • Fuji FinePix F505EXR
  • Fuji FinePix F605EXR
  • Fuji FinePix F770EXR
  • Fuji FinePix F775EXR
  • Fuji FinePix HS30EXR
  • Fuji FinePix HS33EXR
  • Fuji X-Pro1
  • Leaf Credo 80
  • Leica M Monochrom
  • Leica X2
  • Nikon D4
  • Nikon D800
  • Nikon D800E
  • Olympus OM-D E-M5
  • Panasonic Lumix DMC-GF5
  • Pentax K-01
  • RICOH LENS A16 24-85mm F3.5-5.5
  • Samsung NX20
  • Samsung NX210
  • Samsung NX1000
  • Sony Alpha NEX-F3
  • Sony Alpha NEX-VG20
  • Sony Alpha SLT-A37
  • Sony Alpha SLT-A57

New Lens Profile Support in Lightroom 4.1

Lens Mount Lens Name
Canon Canon EF 35mm f/2
Canon Sigma APO 50-150mm F2.8 EX DC OS HSM
Canon Tokina AT-X 107 AF DX Fish-Eye 10-17mm f/3.5-4.5
Canon Tokina AT-X PRO FX 16-28mm f/2.8
Canon Tokina AT-X PRO FX 17-35mm f/4
Leica LEICA APO-SUMMICRON-M 50 mm f/2 ASPH.
Nikon Nikon AF-S Micro NIKKOR 60mm f/2.8G ED
Nikon Nikon AF Micro-NIKKOR 60mm f/2.8D
Nikon Nikon AF-S NIKKOR 28mm f/1.8G
Nikon Tokina AT-X 107 AF DX Fish-Eye 10-17mm f/3.5-4.5
Nikon Tokina AT-X PRO FX 16-28mm f/2.8
Nikon Tokina AT-X PRO FX 17-35mm f/4
Nikon Sigma APO 50-150mm F2.8 EX DC OS HSM
Nikon Sigma 85mm F1.4 EX DG HSM
Olympus Sigma 19mm F2.8 EX DN
Olympus Sigma 30mm F2.8 EX DN
Pentax Sigma 18-200mm F3.5-6.3 II DC OS HSM
Pentax Sigma 17-50mm EX DC HSM
Sigma Sigma APO 50-150mm F2.8 EX DC OS HSM
Sony Sigma 12-24mm F4.5-5.6 DG HSM II
Sony Sigma 18-200mm F3.5-6.3 II DC OS HSM
Sony Sigma 19mm F2.8 EX DN
Sony Sigma 30mm F2.8 EX DN
Sony Sigma 150mm F2.8 EX DG OS HSM APO Macro

Thank You

A big thanks to everyone who submitted bug reports, posted entries in the U2U forums and blogged their issues so that we could improve the Lightroom 4 experience in this update. Thank you.

Download Lightroom 4.1 here – WindowsMac


Camera Raw 7.1 is now available on Adobe.com and through the update mechanism in Adobe Photoshop CS6. Camera Raw 7.1 adds new Defringe controls to help address chromatic aberration. Defringe is available as part of the Lens Correction panel. Camera Raw can also now read 16-bit, 24-bit, and 32-bit HDR files. Supported HDR formats are TIFF and DNG.  Photoshop CS6 customers can upgrade to Camera Raw 7.1.  Customers of previous versions of Photoshop can utilize DNG Converter 7.1 for raw file support for newly added cameras.

New Camera Support in Camera Raw 7.1

  • Canon EOS 1D X*
  • Canon EOS 5D Mark III*
  • Canon EOS 60Da
  • Canon PowerShot G1 X*
  • Fuji FinePix F505EXR*
  • Fuji FinePix F605EXR*
  • Fuji FinePix F770EXR*
  • Fuji FinePix F775EXR*
  • Fuji FinePix HS30EXR*
  • Fuji FinePix HS33EXR*
  • Fuji X-Pro1
  • Leaf Credo 80
  • Leica M Monochrom
  • Leica X2
  • Nikon D4*
  • Nikon D800*
  • Nikon D800E*
  • Olympus OM-D E-M5*
  • Panasonic Lumix DMC-GF5
  • Pentax K-01*
  • RICOH LENS A16 24-85mm F3.5-5.5
  • Samsung NX20*
  • Samsung NX210*
  • Samsung NX1000*
  • Sony Alpha NEX-F3
  • Sony Alpha NEX-VG20*
  • Sony Alpha SLT-A37
  • Sony SLT-A57*

* denotes that the camera model was supported in DNG Converter 6.7

New Lens Profile Support in Camera Raw 7.1

Lens Mount Lens Name
Canon Canon EF 35mm f/2
Canon Sigma APO 50-150mm F2.8 EX DC OS HSM
Canon Tokina AT-X 107 AF DX Fish-Eye 10-17mm f/3.5-4.5
Canon Tokina AT-X PRO FX 16-28mm f/2.8
Canon Tokina AT-X PRO FX 17-35mm f/4
Leica LEICA APO-SUMMICRON-M 50 mm f/2 ASPH.
Nikon Nikon AF-S Micro NIKKOR 60mm f/2.8G ED
Nikon Nikon AF Micro-NIKKOR 60mm f/2.8D
Nikon Nikon AF-S NIKKOR 28mm f/1.8G
Nikon Tokina AT-X 107 AF DX Fish-Eye 10-17mm f/3.5-4.5
Nikon Tokina AT-X PRO FX 16-28mm f/2.8
Nikon Tokina AT-X PRO FX 17-35mm f/4
Nikon Sigma APO 50-150mm F2.8 EX DC OS HSM
Nikon Sigma 85mm F1.4 EX DG HSM
Olympus Sigma 19mm F2.8 EX DN
Olympus Sigma 30mm F2.8 EX DN
Pentax Sigma 18-200mm F3.5-6.3 II DC OS HSM
Pentax Sigma 17-50mm EX DC HSM
Sigma Sigma APO 50-150mm F2.8 EX DC OS HSM
Sony Sigma 12-24mm F4.5-5.6 DG HSM II
Sony Sigma 18-200mm F3.5-6.3 II DC OS HSM
Sony Sigma 19mm F2.8 EX DN
Sony Sigma 30mm F2.8 EX DN
Sony Sigma 150mm F2.8 EX DG OS HSM APO Macro

Camera Raw 7.1 Release Notes

These items have been FIXED in Camera Raw 7.1:

  • Keyboard shortcuts for the point curve channel on Windows were not functional.
  • Local corrections are not refreshing after applying lens corrections. This occurs on both TIFF and JPEG files with noise reduction disabled.
  • Point curve adjustments made to a single R,G, or B channels in the Tone Curve tab can be reset a channel curve is adjusted.
  • Photoshop and Bridge show different values for the image resolution in certain images. Photoshop and Bridge are not changing the image resolution, but displaying different values.
  • Applying keywords to multiple files can sometimes cause errors when writing the keyword metadata to file. This can occur when the “Save Image Settings in” preference within Camera Raw is set to the Camera Raw database.

Download Links:

Camera Raw 7.1 – WindowsMac

DNG Converter 7.1 – WindowsMac

M.I.C. Outs a New 4-in-1 Camera Connection Kit for iPad

If your camera uses SD memory cards then you have probably had no issues importing images into your iPad using the Apple Camera Connection Kit. However, if your camera shoots Compact Flash then it gets a little more challenging. Apple doesn’t make a kit or adapter to allow you to import your images from your Compact Flash cards directly. However, M.I.C. does!

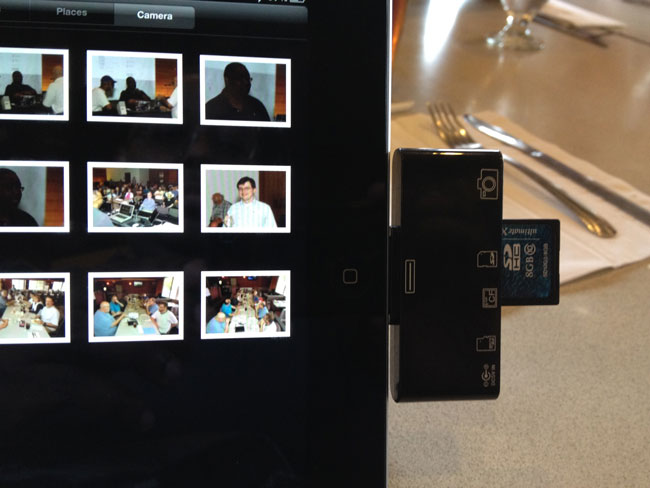
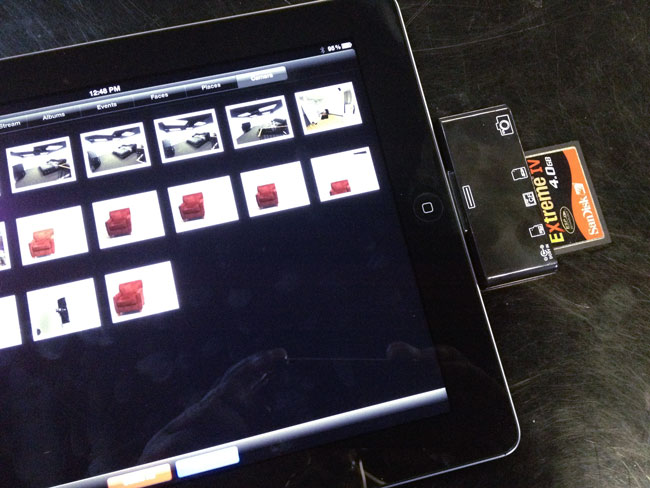
Camera Connection Kit 4-in-1 for iPad, iPad 2 and The NEW iPad

I’ve been using the original M.I.C. reader for over a year. Recently I either lost one of the two I own or I misplaced it. This lead me to go to their site and order a new one. That’s when I discovered that they had replaced the one I had with a newer, better one. This NEW Camera Connection Kit not only handles Compact Flash (CF) cards, but it also handles SD, MicroSD and a direct USB connection to your camera. This effectively eliminates the need to carry both the M.I.C and the Apple one as it will import images from both my SD and CF cards.

One of the hurdles in supporting CF cards is that the higher speed ones use more power. A while back Apple purposely dialed down the amount of power available via the iPad dock connector as they didn’t want people connecting all the peripherals they were starting to connect to it (I can only guess they did this to eliminate all the support calls for what people might connect to an iPad). M.I.C originally said that they wouldn’t support cards over 400x in speed, but this new Connection Kit also comes with a USB power cable to the adapter. If you have a card that draws more power than the iPad will handle you can plug in this cord to the adapter and your USB wall charger and get more juice.

How well does it work?

Over the weekend I was at a meeting where a photographer was taking pictures. He handed me his SD card and I imported his Canon RAW shots right into my iPad. No problem. Yesterday, I decided to try it with the CF cards from my Nikon D4. This is where I discovered that although M.I.C. includes a power solution, you can still have cards that won’t work. For example, my SanDisk Extreme IV cards worked fine, but my newer Transcend 32GB 400x CF cards wouldn’t work at all. Even when I plugged in the power cord, the card wouldn’t mount on the iPad.

The Bottom Line

There are lots of knock off 3-in-1 and 4-in-1 readers for the iPad that are cheaper than the M.I.C. solution. However, most of them don’t work on the New iPad at all! Although the M.I.C. 4-in-1 Connection Kit worked fine on my New iPad, there was still at least one particular CF card that it couldn’t read. Therefore I would recommend that you test your cards before heading out on your trip with your camera and iPad only. Lastly, the New Photosmith 2.0 App makes the sorting, flagging and metadata process on the iPad much nicer especially if you’re a Lightroom user. When you get back with your iPad you can simply sync all your RAWs, JPGs, and Collections to Lightroom wirelessly!

You can order the M.I.C Camera Connection Kit 4-in-1 here.