CLEAR vs TSA Pre

As a very frequent flier I was pleased to no end when the “trusted traveler” Clear Program came on to the scene. I got to use them quite a bit before they went bankrupt in 2009 when the economy crashed. I was saddened by the loss of this service, but life went on. In the last several months TSA has been rolling out their own program that is now branded TSA Pre and this “pres-screening”service offers the benefit of zipping through a TSA checkpoint without having to take off your shoes, belt, liquids or electronics out of you bag. Best of all it’s FREE. Although it totally rocks, it’s not a guarantee. You are “randomly” selected each time you check in at an airport to either go through the TSA Pre line or the regular line. It’s also only for domestic travel. If any part of your itinerary is international you won’t be selected for TSA Pre. My luck so far has been about 90% of the time I get to go through the TSA Pre line and it’s been GREAT!

CLEAR is back!

A while back Clear announced new ownership and that they were making a come back. I for whatever reason, kept my CLEAR card. I guess it was just such a cool looking card that I didn’t want to shred it. When they announced that they were re-opening CLEAR lines, I put the card back in my wallet. Just last night when leaving SFO I got to use the CLEAR line. So far they have only re-opened at MCO, DFW and now SFO.

CLEAR vs TSA Pre

You might be asking yourself at this point “do I even need CLEAR anymore?” My answer to that question is “it depends.” It seems that CLEAR is open at airports that don’t yet have TSA Pre. Also remember that TSA Pre is not guaranteed for every check-in. With that said, my CLEAR membership is good through November 2013 and TSA Pre is at all but a few of the airports I travel through most often. I would be hard pressed to renew it in 2013 and PAY again. While TSA Pre isn’t everywhere yet, it most likely will be by 11/2013. It’s FREE and even with CLEAR you still have to go through the regular screening like everyone else. CLEAR just gets you to the front of the line. There was one trip that I was leaving MCO (Orland0) and MCO doesn’t have a frequent flyer line (or at least they didn’t back then). There were no less than 2 million people in line (OK, maybe more like 200) when I was running a little late for my flight. I remembered that MCO had a CLEAR lane, I ran up to it, got escorted right to the front of the line (sorry 200 people) and had no problem making my flight. So the advantage is “CLEAR” when it’s an airport that doesn’t have TSA Pre or a priority line, but the number of those airports is far and few between.

My prediction is that we may see CLEAR shut down again in a year or so unless they can find more ways to differentiate their services over the FREE TSA Pre program and frequent flyer lines. They have a long way to go in terms of opening up and staffing lanes at all the airports they used to be in vs. all the airports period. It’s now $179/year and I would have paid that without batting an eye before, where as now I definitely question the value. If you fly out of MCO, DFW or SFO regularly then it’s probably worth it for at least this year. After that we’ll have to see.

Last night when I went through the CLEAR lane, it didn’t seem any faster than going through the Delta Sky Priority line, which only had a couple of people in it at the time. However, had the Sky Priority line been packed, the CLEAR would have been better as it’s almost never that busy.  My recommendation to CLEAR is to work it out with TSA so that CLEAR members can also skip the strip down and body scanners!

How Many Shots Have You Taken With Your Nikon DSLR? Photoshop Can Tell You!

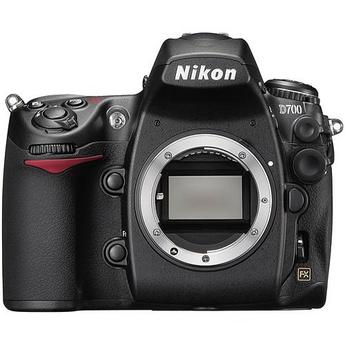
Every time you fire the shutter of your Nikon DSLR there is a built-in counter that keeps track of these actuations. Most people go on about their daily photography lives shooting away and never really thinking about this count. After all why would you care? As long as the camera is still working you just keep shooting. The only time that this count really comes into question is when you’re selling your camera. I had never heard of an “Actuation Count” until I sold my Nikon D300 way back when on eBay. The perspective buyer asked me for the count and of course I had no idea how to determine it as it’s not really displayed in any of the menus (go figure). I did some research back then and found a Windows only utility that would display the count. I was quite pleased to give the buyer the info he wanted and the transaction proceeded nicely.

No special utility required

This Actuation Count is not only stored in the bows of the camera’s electronics, but it’s also embedded in the metadata of every RAW file you shoot! Since it’s in the metadata that means that Photoshop can see it.

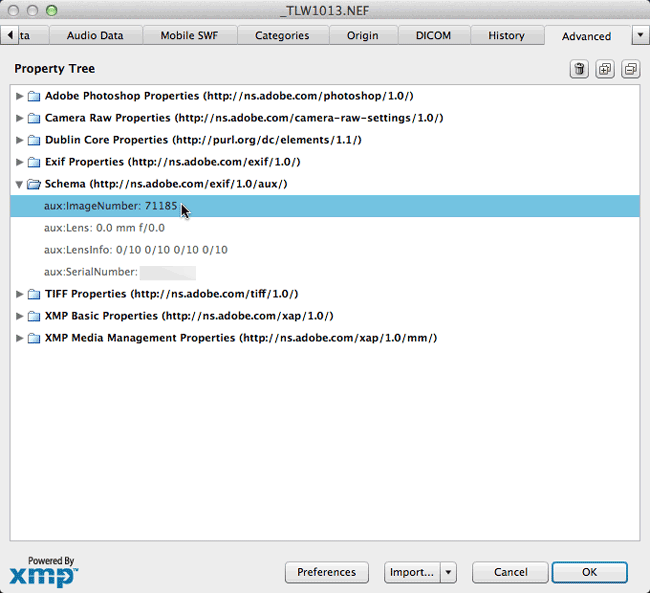
All you need to do is shoot one RAW file (sorry it’s not stored in JPGs according to the stuff I read on the interwebs). Set your Nikon DSLR to RAW, take one shot of anything. I did it with no lens and the body cap on. The image is irrelevant. Transfer the .NEF file to your computer and open it in Photoshop (or Bridge). Do a File Info on it and head all the way over to the Advance Tab. Twirl down the “Schema” folder and you will see your Nikon Actuation Count aka “Image Number”.

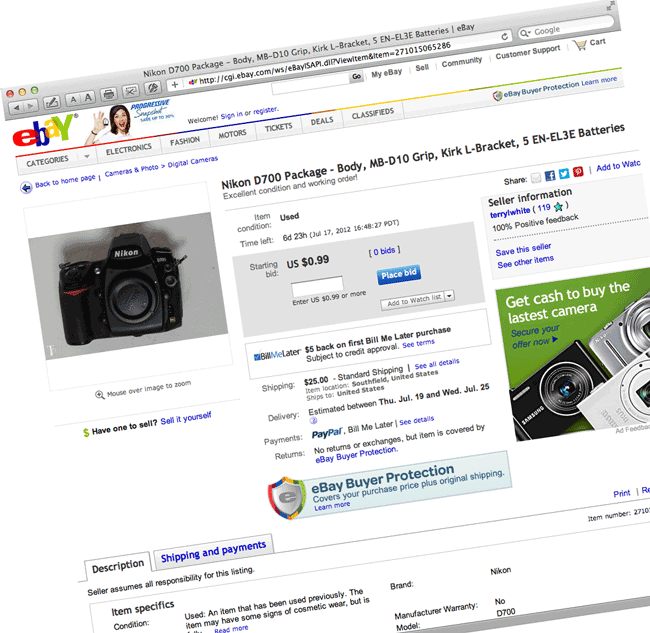
I’m selling my Nikon D700 here on eBay and now you know it has 71, 185 actuations 🙂

How To Retouch Eyes Using Adobe Photoshop CS6

In this episode of the Adobe Creative Suite Podcast Terry White shows How to Retouch Eyes using Adobe Photoshop CS6. If you photograph people, then you’re going to want to watch this tutorial on how to make the eyes of your subjects look better.

Are you missing out on my Bonus Content?

See more of my Adobe Creative Suite Videos on my Adobe Creative Suite Podcast and get the App here. It features EXCLUSIVE CONTENT that no one else gets to see. This episode has a BONUS CLIP that is available only in the App! My iOS App is a Universal App for iPhone, iPad and iPod touch. I also have an Android version:

Learn Adobe Creative Suite with Terry White - Wizzard Media

Shooting Tethered with the Nikon D4 via Ethernet

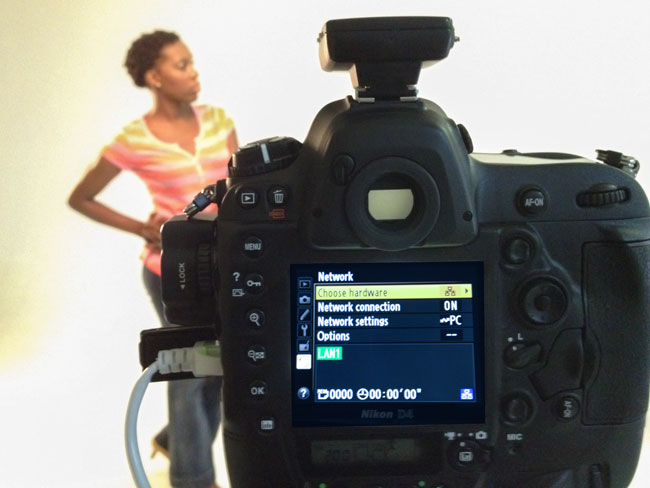
I’ve done posts here in the past showing various ways to shoot tethered to a computer or to an iPad. When I got my Nikon D4 I popped for the WT-5A Wireless Transmitter too. While it works perfectly, it’s not as fast as a wired connection. Since the D4 has a 10/100 baseT Ethernet Port built-in I decided to give it a shot and shoot tethered via Ethernet.

Understanding the difference…

Most Nikon and Canon DSLRs are supported natively by programs like Adobe Lightroom for USB tethering. That means you just connect the camera via a long USB cable and the software can bring in the images as you shoot automatically. However, when it comes to non-USB connections such as WiFi or Ethernet, this support is usually NOT built-in. Nikon’s Wireless Transmitter Utility will enable you to bring the images into a folder as you shoot, but then in order to get them in Lightroom you have to use the Auto Import feature in Lightroom. Keep in mind that this adds a second or two to each image import vs. native USB support. However, with that said Ethernet is still faster! With USB tethering my 16.2 MB RAW files typically take about 6-8 seconds to come in via USB. When shooting via Ethernet, they actually come in in batches of about 6-7 images within a few seconds. My guess is that there is some overhead from the time files get dumped into folder before Lightroom sees something new and then imports them all at once. Also the Ethernet connection is a lot less fragile than the USB connection I’ve used in the past. 😉

The D4 allows you to switch between a wired or wireless connection via the Network menu. This means that I can disconnect the 100′ Ethernet cable that I bought and go wireless via the WT-5A module without skipping a beat. Wired or wireless, the images are going to the same Watched folder that Lightroom is looking at.

The Bottom Line

If you use the D4 in a studio environment and you shoot tethered, you definitely want to give Ethernet a try. Rather than going through a switch/router, I have the ethernet cable plugged directly into my MacBook Pro for the fastest possible connection. It would have been nice to see a Gigabit Ethernet port considering what the D4 costs, but the 10/100 baseT connection is still pretty fast.

How To Create A Facebook Cover Photo Using Photoshop CS6

In this episode of the Adobe Creative Suite Podcast Terry White shows How to Create A Facebook Cover Photo Using Photoshop CS6. Using the New Crop Tool and a couple of tips and tricks.

Are you missing out on my Bonus Content?

See more of my Adobe Creative Suite Videos on my Adobe Creative Suite Podcast and get the App here. It features EXCLUSIVE CONTENT that no one else gets to see. This episode has a BONUS CLIP that is available only in the App! My iOS App is a Universal App for iPhone, iPad and iPod touch. I also have an Android version:

Learn Adobe Creative Suite with Terry White - Wizzard Media

Review: Rogue Grid for Your Speedlight

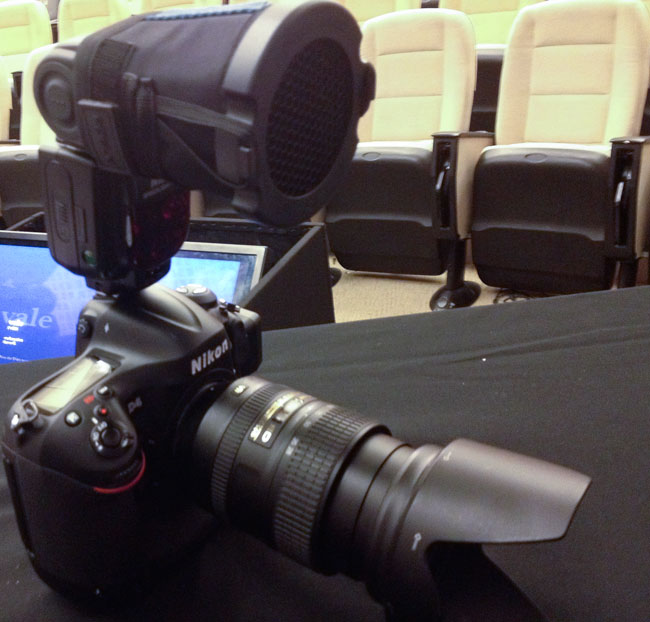
Most of you know that I’m not really a fan of on camera flash. If I use a speed light, then chances are it’s on a stand. When I do use a speed light I usually use a modifier of some type. The one that I usually always have with me is the Rogue FlashBenders. Since I like the FlashBenders so much I decided to take the Rogue Grid for a spin. This is not my first attempt with this product. I received a review unit when it first came out and quite honestly I found the strap to attach it to your speed light so cumbersome that I never actually used it. I gave up. I let the folks at Expo Imaging know and they listened. They completely redesigned the Rogue Grid and made it MUCH EASIER to attach. I took it with me to South Africa and decided to take a couple of candid shots with it.

Focusing your light

The point of a spot grid is to focus your light to a more narrow beam. The Rogue Grid does this task with your speed light. I started with my colleague Jason Levine.

First without the speed light at all
Then with my Nikon SB 900 and the Rogue Grid

Although I saw some potential, it wasn’t quite right yet. The I adjusted the power settings on my SB 900 and took another shot of one of the hostesses at our event.

On this shot and subsequent shots, the Rogue Grid really started to shine

The light was good and not to harsh.

The Bottom Line

I still like the FlashBenders best, but I can definitely see some use for the Rogue Grid too.  Next up I’ll give the Rogue Diffusion Panels a shot.

You can get the Rogue Grid here: B&H or Amazon.


Skooba Design Outs a New Skooba Tablet Messenger v.3

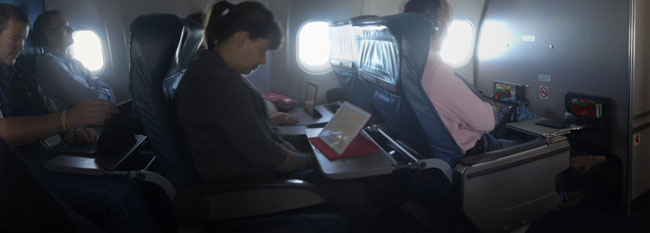
The more I travel, the more I see people using iPads (and to a much smaller degree Android tablets) in lieu of laptops. This is especially true on planes.

On my recent flights I’m seeing iPads out number laptops by about 5 to 1

In some cases I myself have gone on short trips and used just my iPad instead of my laptop. With more and more useful iPad Apps coming to market each day, I find that I don’t require a laptop nearly as much as I used to for day to day communications and social media activities. The iPad may never replace my need for a “work” laptop, but it certainly goes a long way towards reducing that need for things like email, web, expense reports, blogging, etc. That being the case I can see times where carrying just my iPad in my laptop bag is overkill.

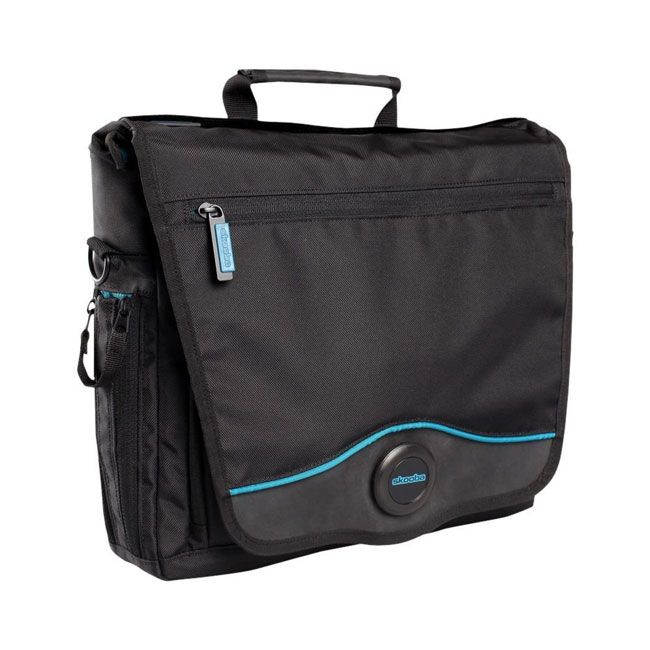
Skooba Design has the answer with their New Skooba Tablet Messenger v.3

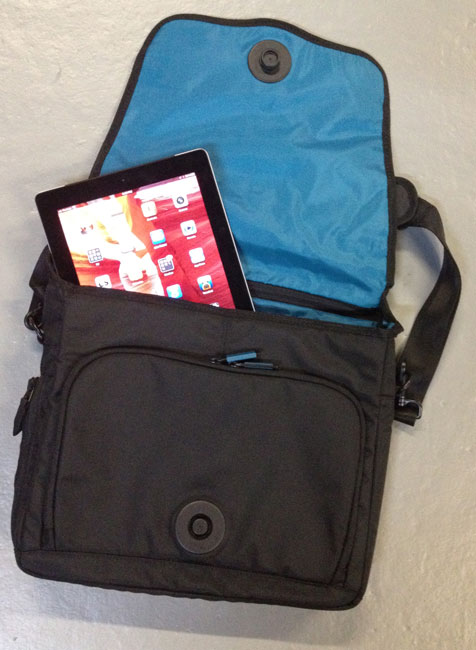
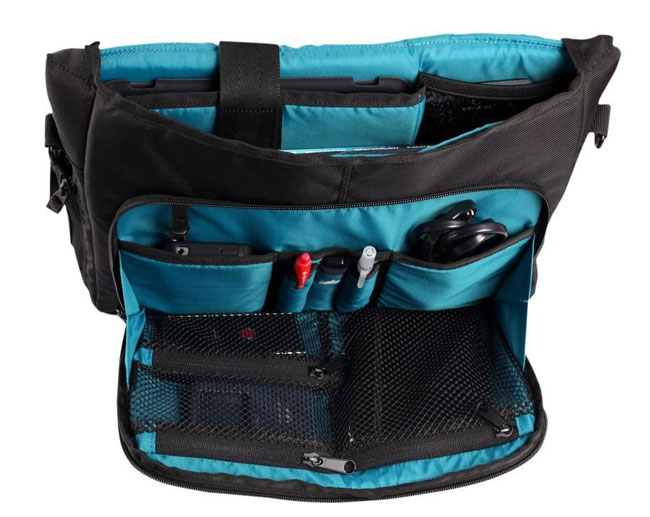
This new bag is designed from the ground up to be a tablet bag, not a laptop bag. It has a special pocket inside for a 10″ tablet.

It has plenty of room for the tablet and accessories such as a charger, sync cables, headphones, keyboard, Jambox speaker, etc. I was also pleased to see that it was large enough to also accomodate a 13″ MacBook Air. This makes it a great bag for me because I can really go light with just the iPad or if I think I may need a computer, I can still bring my MacBook Air without totally weighing it down. Since most TSA checkpoints don’t require that you remove your tablet from your bag, you can just send the whole bag through the x-ray machine.

I would say the only disadvantage that this bag has over my Skooba TSA Friendly Backpack is that it’s not large enough to carry my DSLR, but that’s OK because it’s so small that I can still carry a small camera bag and fit both under the seat in front of me.

Can you get by with just an iPad on a trip?

This question comes up all the time and my buddy Calvin Carson had a great suggestion: Before going on your trip, try using just your iPad for a day or two while you’re still at home. Do the same things that you would do on your trip. Then you’ll have a pretty good idea of whether or not you can get by without your laptop.

You can get the Skooba Tablet Messenger v.3 here for about $40 below list price.

Also check out my FAVORITE iPad Keyboard!

Adobe Lightroom 4 is Now Part of Your Creative Cloud Membership

Since the launch of Adobe Creative Cloud, my readers have been asking “When will Lightroom 4 be available to Creative Cloud Members?” The answer to that question is TODAY! That’s right, if you are a current Creative Cloud Member or you sign up from today forward, you can now also get Lightroom 4 in addition to all the other services.

Creative Cloud will go for $49.99/month (with a 1 year commitment), but remember from now though August 2012 (time is running out) you can get your first year for only $29.99 if you’re an existing Creative Suite customer. This membership gets you access to all the Apps of Creative Suite Master Collection, Adobe Muse, Adobe Edge, Business Catalyst web hosting and now Lightroom 4.

Check it out here.

It won’t stop there! Creative Cloud members will continue to get additional benefits all year long.

Nikon Safari – Photographing the Big 5 in Sabi Sabi South Africa

One way to end a ten week international tour is to simply take a 16-18 hour flight home from Johannesburg, South Africa. Another way to end it is to have Nikon South Africa sponsor you on an African Safari at Sabi Sabi before that flight home! I was fortunate enough to have the latter.

I just came back from an Amazing week finishing off the international portion of our Adobe CS6 and Creative Cloud World Tour. The last two international stops were Johannesburg and Cape Town (see my earlier post). After leaving Cape Town we flew to Nelspurit and then drove on to Sabi Sabi (a private game preserve). This was my second safari in South Africa and it was a pleasure to be back.

I put together this photo book using Adobe Lightroom 4.

It was great photographing this magnificent creatures in the wild! It was even better doing so with a Nikon 200-400mm f/4 lens. Didn’t want to get too physically close 🙂

Continue reading “Nikon Safari – Photographing the Big 5 in Sabi Sabi South Africa”