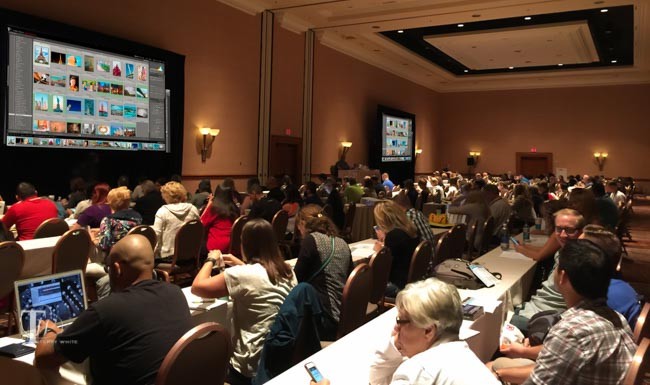
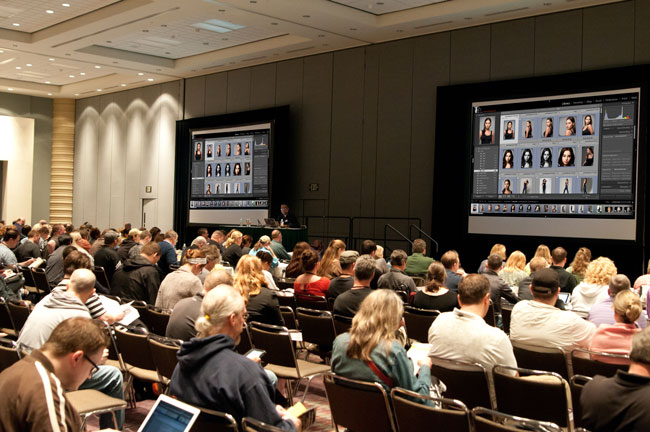
I just wanted to take a moment to thank all of you who attended my classes, sat in on my Adobe booth demos, and came up to me and said hello. I was especially happy to see the number educators that came up to me to thank me for my videos and to tell me that they use them in their classrooms. Wow! What an honor. Photoshop World is definitely my favorite show to work.
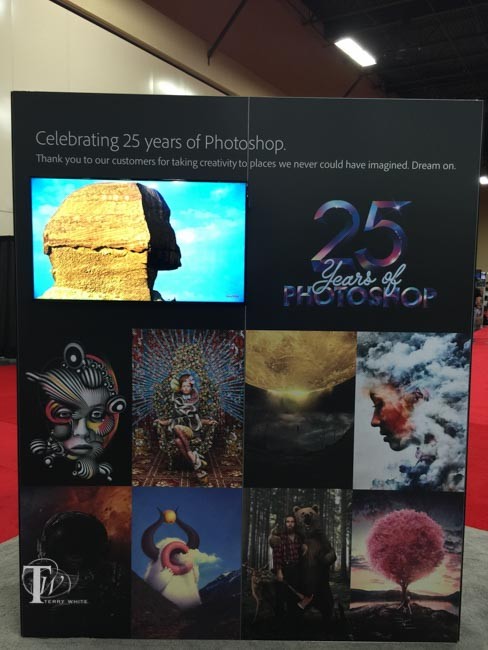
There’s so much inspiration and creativity happening and Photoshop World and I always leave with a list of things that I want to come home and try. I was also honored to see my work on display on the Photoshop 25th Anniversary display in the Adobe Booth. The work on display here was awe inspiring.
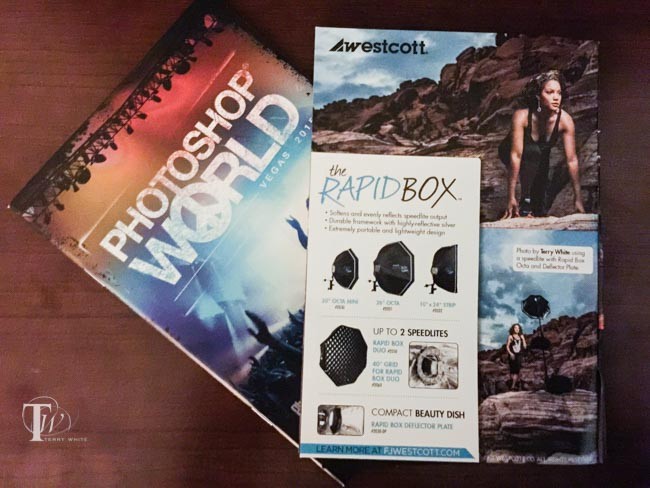
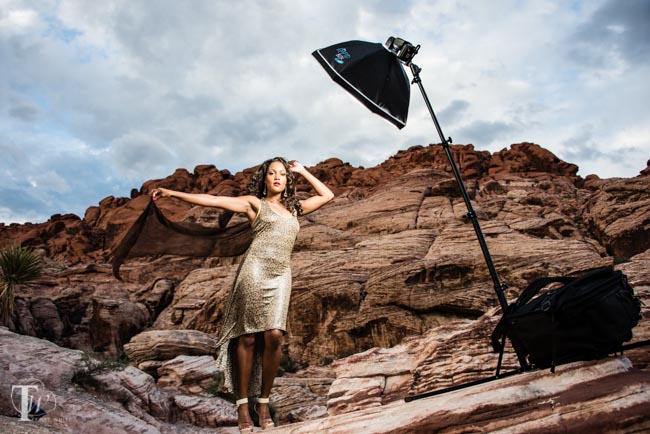
Not only was my work on display in the Adobe booth, but I happened to be flipping through the Photoshop World show guide and caught the F.J. Westcott Lighting add featuring my work with their Rapid Box 26″ Octa.
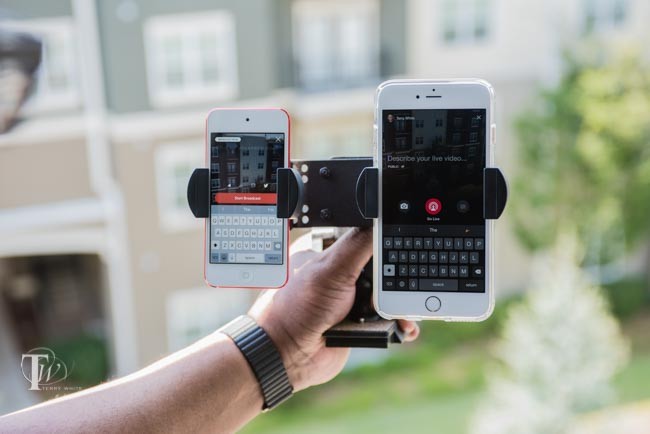
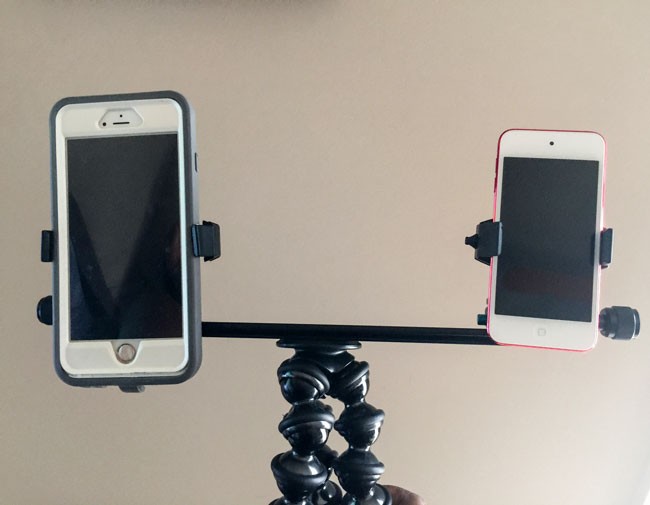
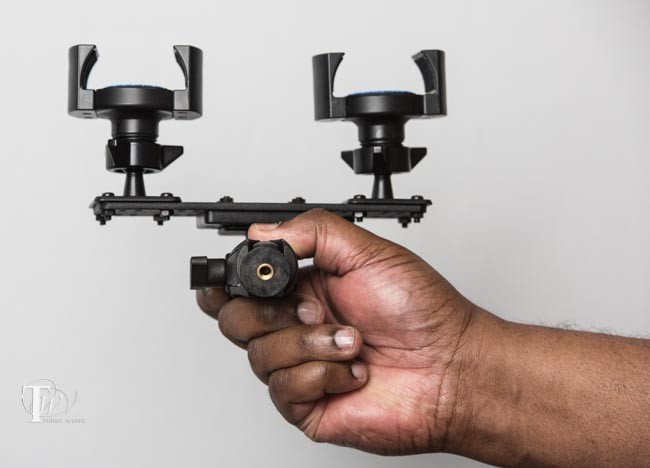
You might remember my post a couple of weeks ago comparing the NEW Live from Facebook Mentions to Periscope. After doing a few more broadcasts to both services I quickly realized that I usually have a larger number of views on Facebook. I thought that it would be great to be able to stream to both services simultaneously. That way I could finally address both my large Twitter/Periscope following as well as my large Facebook following at the same time. This would of course require streaming from two devices. I could use my iPhone 6 Plus and an iPod touch. The real question was, how would I hold both devices at the same time and keep them steady? I went in search of a “dual tripod head mount” and I found this one on Amazon. I ordered it, but when it arrived I wasn’t that happy with it. For one it was bigger and heavier than I hoped and the bigger problem was that the devices were spaced out too far apart for broadcasting the same thing up close.
That’s when I challenged my friends over at Arkon Mounts to make something better! Not only did they accept the challenge, they showed a mock up the very next day.
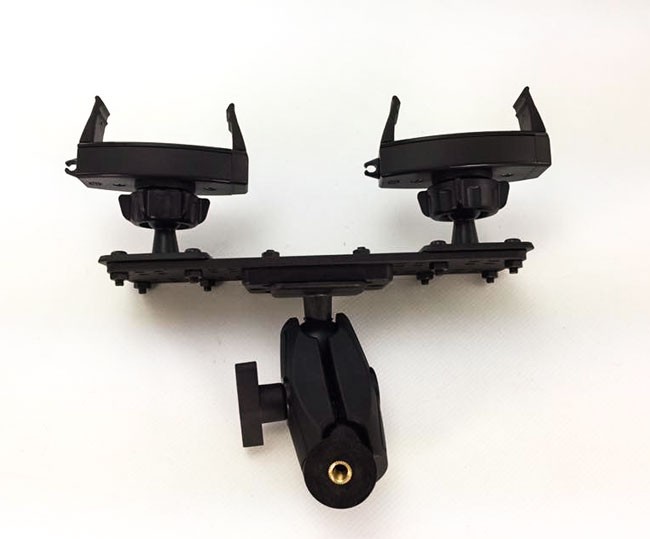
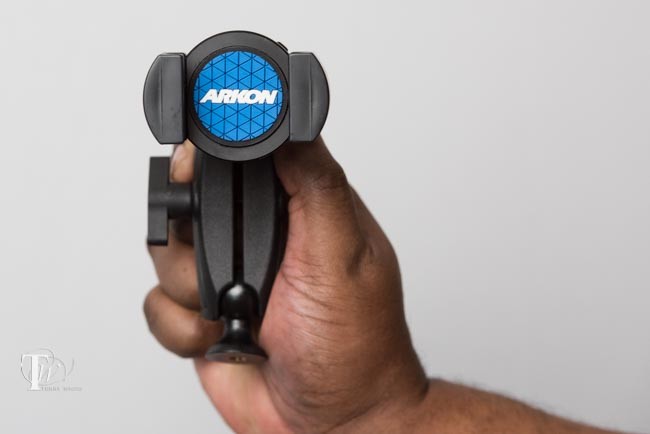
The mock up was night and day better than the one that I had put together and even better they would bring it to Photoshop World and hand it to me to try. After I used it for a day I was thrilled with it. It was everything I wanted, but that wasn’t good enough for Aaron. Aaron was concerned that the devices could possibly pop out. He had his company overnight their better smartphone grips (the ones used on their motorcycle mounts) and replaced the ones on mine with the stronger ones.
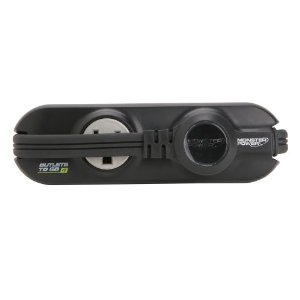
The TW Broadcaster Pro was born
Check out this video review that I recorded over the weekend:
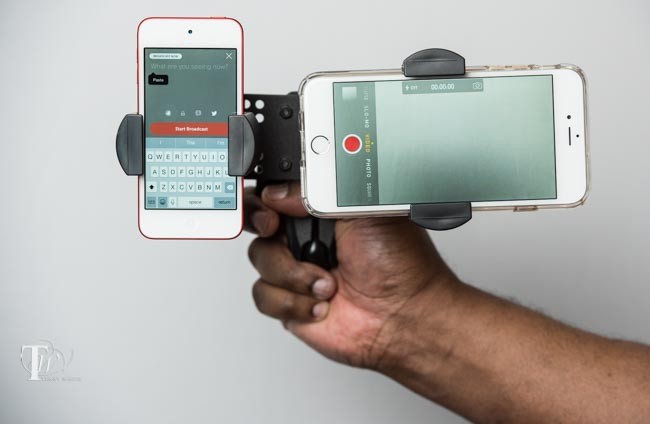
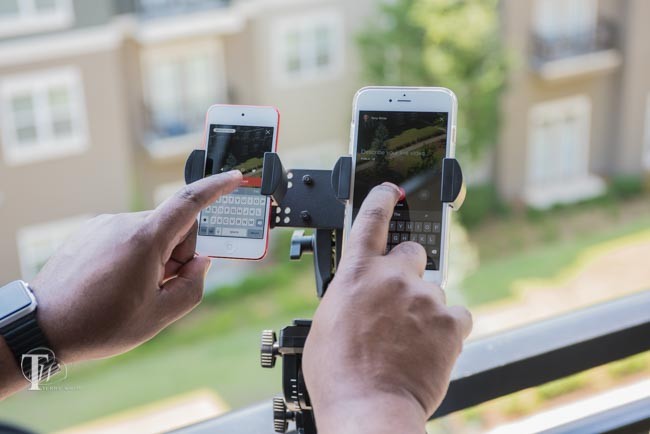
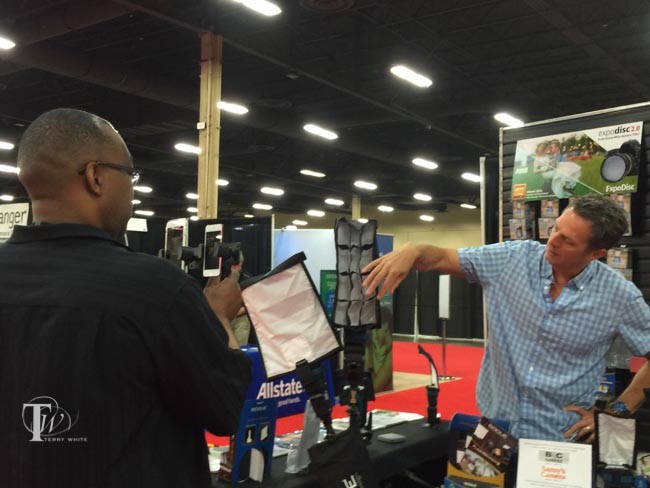
I did several simultaneous live broadcasts to Periscope and Facebook Mentions Live. As I was walking around the show I got lots of double takes as people assumed I must be shooting 3D video.
Even if I wasn’t streaming to both Periscope and Facebook at the same time, I’d still use this to broadcast to Periscope in it’s current vertical video format and use the second device to record standard 16:9 wide video.
This mount is just freaking awesome with lots of uses. Of course it can be mounted on a tripod too.
It’s also versatile enough to be converted into a single mount (the TW Broadcaster) for those times when you only need to mount one mobile device.
The Bottom Line
I’m thrilled to have this new product which perfectly fits my broadcasting and recording needs. I’m deeply honored to have it named after me as well. Even if you’re not interested in this particular solution you should definitely check out the mounting solutions at www.arkon.com. If you have a need to mount a mobile device, camera, etc, on to something they’ve likely already built a solution for you. If you are interested in the TW Broadcaster Pro you can order it here. Or if you’re interested in the single mount (also great for selfies) TW Broadcaster model you can order it here. You can even take 10% off anything you order from their site with my discount code “twhite”.
Apple recently stated that they had over 11 million users doing the 3 month trial for Apple Music. I’m one of those 11 million folks. I wasn’t sold on the concept of Apple Music, but I wanted to give it a fare shot before I did my review. I wanted to try it for at least a month before deciding if it’s a good fit for me or not.
Let’s start with how I enjoyed music before Apple Music
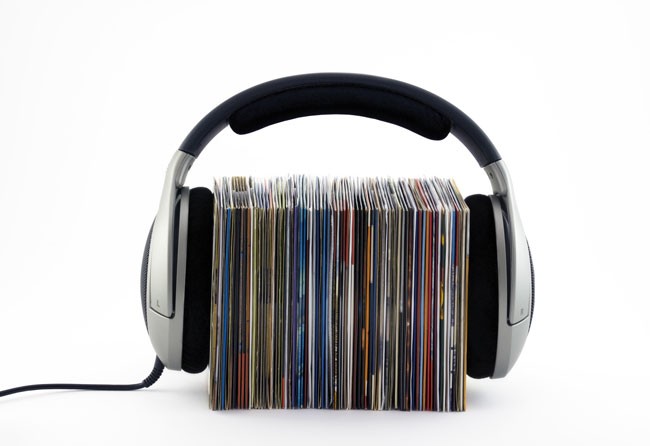
I used to buy singles (45’s as a kid). If you don’t know what a 45 is then you are probably more likely to be a candidate for Apple Music 🙂 As I got older and had more money I continued buying vinyl in the form of LPs. I then moved to 8-track, then to cassettes, then CD’s and finally to digital downloads. Whenever a new song/album comes out that I like, I buy it on iTunes. But I definitely don’t spend $9.99 a month on new music. I pretty much have all the music that I’ve ever wanted and in many cases I bought that music multiple times just to get it on the newer formats. When it comes to hearing new music I rely on Pandora Radio. It gives me a nice mix of stuff I already have/like and new musicI actually have a paid account at $3.99/month just not to hear the ads and to be able to skip more songs if I want. Even with the Pandora account it’s rare that I spend $10 on music in a month unless a new album comes out that I want. I have a Spotify account too, but it’s the free one. I never could bring myself to pay for it because I already have all the music I would be listening to regularly. Also thanks to iTunes Match I access to ALL of my music on all of my devices. Now that you know a little about my music needs, let’s get to Apple Music.
What’s Apple Music?
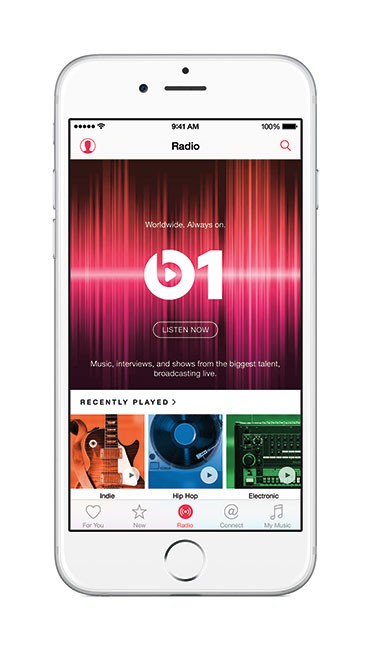
Apple Music is Apple’s new music subscription service that allows you to listen to just about every song on the iTunes Store for one price. $9.99/month. You can listen to any song, album, artist anytime you want as much as you want with no limits. You an even add songs to playlists and make them available OFFLINE so that you can listen to them on your devices when you don’t have an internet connection. Apple Music also includes currated playlists so tha you can listen to playlists put together by others. Lastly there’s Beats 1 radio. This 24/7 radio station has a real DJ and it’s the latest, hottest tracks playing anytime you want to listen.
Who is Apple Music for?
In my opinion Apple Music is for people that don’t have a huge investment in their own music. It’s for people that listen to music often and want to always be able to listen to what’s new from a variety of artists. If you’re the kind of person that LOVES music and always want to listen to either a lot of music or new/different music that you don’t own then you’ll likely love Apple Music.
I’m just not that guy
Apple Music is ok. It’s just not for me. Sure I like new music, but not enough to justify the monthly cost. Like I said, if I hear something new that I want, I just buy it and rarely does it cost me more than a few bucks a month.
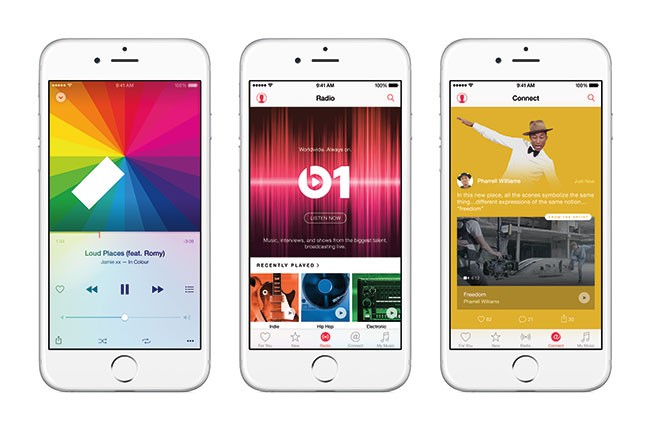
The interface leaves little to be desired
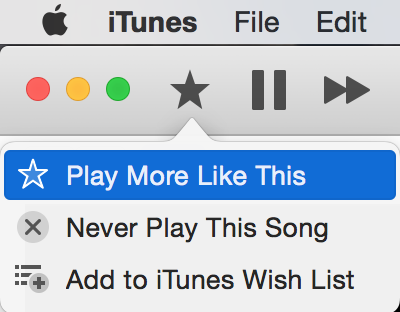
Why is this so complicated? Simple Thumbs up or down would be more Apple like.
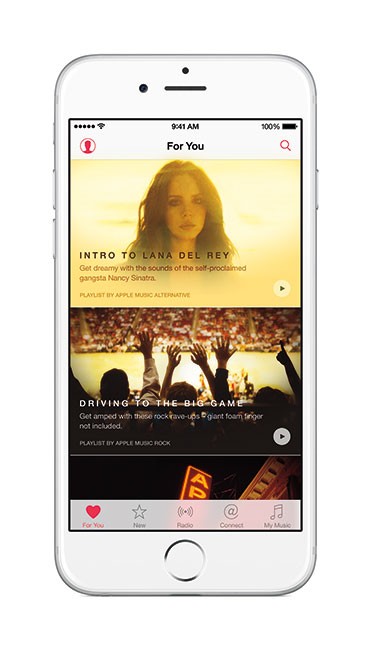
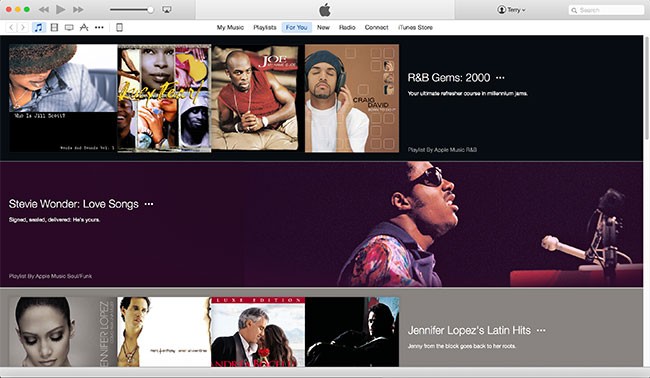
One thing I’ve always loved about Apple products is that there was a certain elegance about them. The Apple Music internace wasn’t as strait forward as I had hoped. I’m used to it now, but it just seemed a little weird at first. The For You tab contains the curated playlists based on the artists you said you liked during the setup. These playlists are usually good, just not long enough for me. This means that I either have to add the songs to an existing playlist (which in most cases I already own these songs) or I have to combine them together to get playlist that’s long enough for my drive/commute. The New tab is where you would discover new music. Radio is where you’d listen to Beats 1 or your own radio stations, Connect is Apples new attempt at connecting you with your favorite artists. Playlists is where your playlists are stored and My Music is of course my music. Since I listen to music mostly on my iPhone these days the interface is a little tighter and sometimes there’s a lot going on on the screen at the same time. Also since you can now mix Apple Music tracks in playlists with the songs you own it’s not real obvious which tracks are yours and which ones are rented.
Goodbye iTunes Radio and Good Riddance
When iTunes Radio first hit the scene I was really excited to try it. I was already an iTunes Match customer and that meant that I could enjoy iTunes Radio ad free. I was hoping that I would be able to cancel my Pandora Radio account and just use iTunes Radio. However, iTunes Radio was a disaster. So much so that I ended up going back to Pandora. If I added a station based on an artist it would rarely play songs from that artist. If I added a station based on a song, I would NEVER hear that song again. I would find myself skipping several (unrelated – not even close to what I would want to hear) songs in a row just to get to one that I’d want to listen to. It was just weird the way it worked. Apple quietly changed iTunes Radio to Radio in Apple Music. At first I just avoided this option figuring that it was the same old iTunes Radio that I hated. However, one day I decided to listen to one of my stations just to see if it had improved and I was pleasantly surprised to notice that I wasn’t skipping songs. It was playing songs that I actually wanted to hear. After doing a little digging online I found that lots of former iTunes Radio users were complaining that their stations were now gone in Apple Music. Sure enough I noticed the same thing. There is a Recent Station feature but it only lists a few of the ones that I had created and only the ones based on a single artist/song. The old iTunes Radio allowed you to build a station based on multiple artists. That feature is now gone. You can only build a station based on a single song or single artist. I’ll gladly forgive them for that since it now actually creates stations that I’d listen to. Sadly Apple still as the cumbersome “Star” button that when you tap it it gives you a choice of “Play more like this” or “Play less like this”. Why can’t we simply have a separate thumbs up and thumbs down button? The NEW and IMPROVED Radio is by far my favorite Apple Music feature.
The Bottom Line
Is Apple Music worth it? The answer to that question will definitely depend on you and where you are with your purchased music and how much new music you like to listen to each month. Is it worth it to me? At this point I would say that I probably would not continue with Apple Music if it were just me. At $9.99/month I’d actually be spending more than I do now. However, what will likely make me keep it after the trial is the very smart thing that Apple did by creating a “Family Plan”. At $14.99 not only can I enjoy Apple Music, but so can 5 of my family members. I can add my two daughters and my sister for example and then it becomes a no brainer. My daughters are in their 20’s and listen to new music all the time. The new Apple Music Radio is now good enough that I’ve suspended my subscription to Pandora Radio saving $3.99/month. So while I don’t love Apple Music, I can justify it with the family option.
On a side note: iTunes on the desktop is long overdue for a complete rewrite. Every time they add something new to iTunes it becomes that much more of a pain in the ass to use. If you look at iOS you can see that Apple has separated out many functions into separate apps. You have the Music app for music, the iTunes app to buy/rent new content, the Podcasts app for Podcasts, the iBooks app for books, and the Videos App for movies and TV shows. Yet on the desktop the Mac/PC version tries to do everything in one Application. Since we rarely connect our devices up to our computers anymore to sync, there is a less of a need to have this all in one approach. Apple kept the Mac App Store separate and there’s no reason now not to separate out the iOS App Store and many of the other things that iTunes does now. They could then focus on building a killer Music app that would be the showcase for Apple Music. By the way, stop hidding the sidebar. We actually like it and use it!
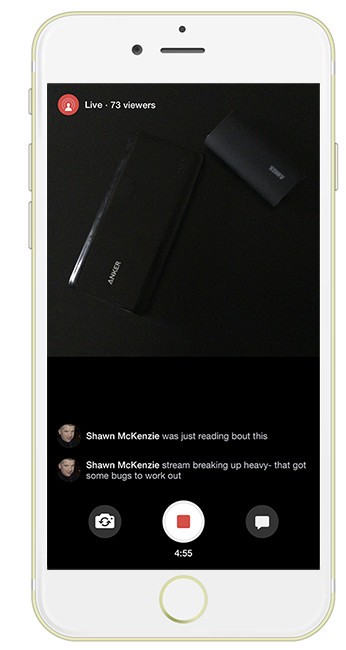
You didn’t think Facebook would sit idly by while Twitter did LIVE streaming via its Periscope App did you? Early yesterday evening I got an App update to the Facebook Mentions App announcing that it now has a feature called “Live from Facebook Mentions.”
What’s Facebook Mentions – Live?
Facebook Mentions is Facebook’s dedicated App for those of us who are Public Figures and have a “verified” Page on Facebook.
While I was certainly honored that Facebook verified my page without any action on my part and the fact that they even created this separate celebrity app, I really didn’t find that it was all that useful compared to the regular Facebook Pages Manager App. Well that all changed yesterday. Now I can bring up the Facebook Mentions App on my iPhone and start a live broadcast at any time. People that have previously “Liked” my Page will get a notification and they can watch the broadcast and make comments via text in the broadcast itself. The best part compared is that after the broadcast is over it appears as a regular video post on my Page for anyone to view after the fact. I also like that this post can be edited so that I can add links, additional information to the items or sites that I mentioned in the broadcast.
What’s Periscope?
Periscope is Twitter’s Live broadcasting service. Like Twitter it’s free to use. You can download the iOS or Android version and start broadcasting immediately. When you start a new broadcast the app sends a tweet to your Twitter followers as well as a push notification to any of your Periscope followers. People can watch the broadcast either in the Periscope App or on the web in a browser. People can also make comments via text in the App that you can respond to verbally and they can also tap the screen to give you “hearts” (their version of Likes). The idea behind Periscope is to be able to show the world what you’re seeing in realtime. After the broadcast is over it will be available for replay by anyone that follows you in the App or has the link for up to 24 hours. After that it automatically self destructs forever.
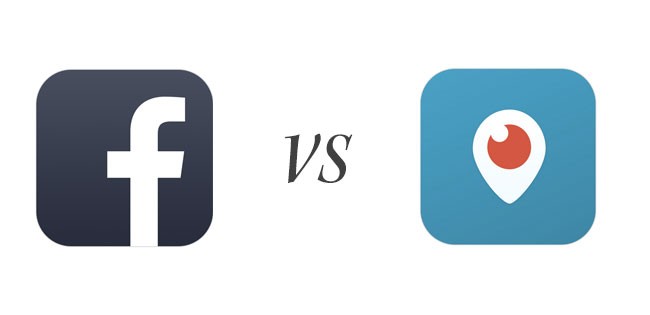
Facebook Mentions Live vs. Periscope
Obviously Facebook Mentions Live (FML <- LOL) is the new kid on the block and will come at a disadvantage to Periscope that has now been out for 5 months. Periscope has had several App updates to address user feedback and finally released their Android version. FML is only iOS at this point and currently limited to only those with a Verified Public Figure Facebook Page.
Video format
Periscope’s video format is portrait. This pisses off most people not viewing the video in the app and while Periscope has promised to deliver landscape video it hasn’t made it on the scene as of this post. FML on the other hand is a square aspect ratio. This makes it less frustrating to view, but means that they may never deliver landscape video. As you might expect the quality of the video/audio to your viewers will depend on the strength and speed of your data connection. When I’m on WiFi at home both Periscope and FML look awesome. On slower cellular data connections Periscope can be sketchy.
Your potential viewing audience
Here’s where it gets interesting. While your Periscope broadcasts automatically announce to your Twitter followers that you’re LIVE, it can be missed if someone is viewing your tweets in the moment. Unless your followers are diligent about scrolling their timelines and viewing your tweets, your broadcasts will only be seen by a fraction of your followers. Periscope does have the advantage that people can follow you on Periscope separately from Twitter, but from what I see the average number of Periscope followers to Twitter followers is usually a small fraction. For example, I have over 43,000 followers on Twitter, but only 3,227 followers on Periscope. My buddy Scott Kelby has over 288,000 followers on Twitter and only 10,830 followers on Periscope. I think that the lower number of Periscope followers is largely due to the fact that people can only follow you on Periscope from the iOS App or recently released Android App. There’s also no way currently to give someone a link to follow you. You can only give them your user name (ie. @TerryLWhite <- yes follow me please).
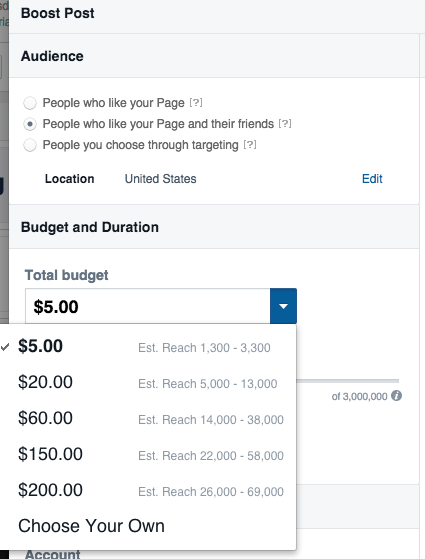
On the FML side you already have an audience on your Facebook Page. I have 39,736 Likes on my Page. That’s my potential audience each time I do a broadcast. Facebook does play games though when it comes to showing your post to your followers. Look at the graphic above and you’ll see that last night the post had only reached 1,725 of my audience. The more popular your post is the more people that Liked your page will see it. So with that being said not all 39,736 people were notified when I did my 1st broadcast. There’s no way to control who gets notified and who doesn’t.
If you want more people to see your post/broadcast you can click the Boost Post button and PAY to have to promoted to more people. It’s a shame that people ask to follow you by clicking the Like button on your Page, but unless they manually visit your page regularly they may not see many or any of your posts via notifications or in their timeline unless you pay for them to see it. Let’s face it that while social media is free, Facebook and Twitter make their money from advertising.
Comments and adorations
Both Periscope and FML allow people to make comments during the broadcast. in the case of Periscope the comments appear superimposed over the video and some find that distracting. FML on the other hand displays the comments at the bottom of the screen below the square video. With Periscope if your viewers like what they are seeing they can tap anywhere on the screen to give you hearts (adorations). I haven’t seen anything like that yet in FML. However, I did see at the end of the broadcast that I had “Likes” not sure how I got them at this point?
Replays
Both Periscope and FML offer the ability for people that missed your live broadcast to see it after the fact. With Periscope your broadcast remains active for up to 24 hours in the feed of everyone that follows you. Anyone that got the tweet when you went live can still click it to watch after the fact. Recently Periscope was updated to allow you share a link to anyone. The obvious downside is that if you send the link to someone and they don’t watch it within 24 hours, the link won’t work afterwards. Periscope also offers the option to save the raw video to your device after the broadcast. This means that you can post the video anywhere you want afterwards but note that it will be a vertical video. FML on the other hand puts the raw video of your broadcast on your Facebook Page immediately after the broadcast ends. That’s VERY COOL because there’s not expiration date. It also means that I can edit the post after the fact and add more info and links to the things I was talking about during the broadcast. Also since it’s a regular Facebook Post you can share it with others on Facebook that aren’t on your page. If you right click the video on your page you can copy the URL and share it anywhere like here.
Why not broadcast to both at the same time?
I came up with an idea to broadcast to both Periscope and Life from Facebook Mentions at the same time. It became a product from Arkon called the TW Broadcaster Pro. Check out my video below:
The Bottom Line
Periscope is cool and I use it regularly. However, I’ve always felt that many of my fans were missing out if they’re not on Twitter or don’t follow me on Periscope. I’ve posted links to the Periscope replay on Facebook afterwards but again the replay is only available for 24 hours. If Facebook opens up Live streaming to the regular Facebook app, Facebook Pages app and Facebook Groups App I think they would ultimately win as there are more people on Facebook than there are on Twitter. Twitter should open up Periscope a little more by offering direct links to follow people even on the web and they should give the option of allowing replays to last longer than 24 hours. If Facebook wanted to “own” the Live Streaming social media world they certainly have the base to do it. Live from Facebook Mentions Live may be just the beginning of their strategy!
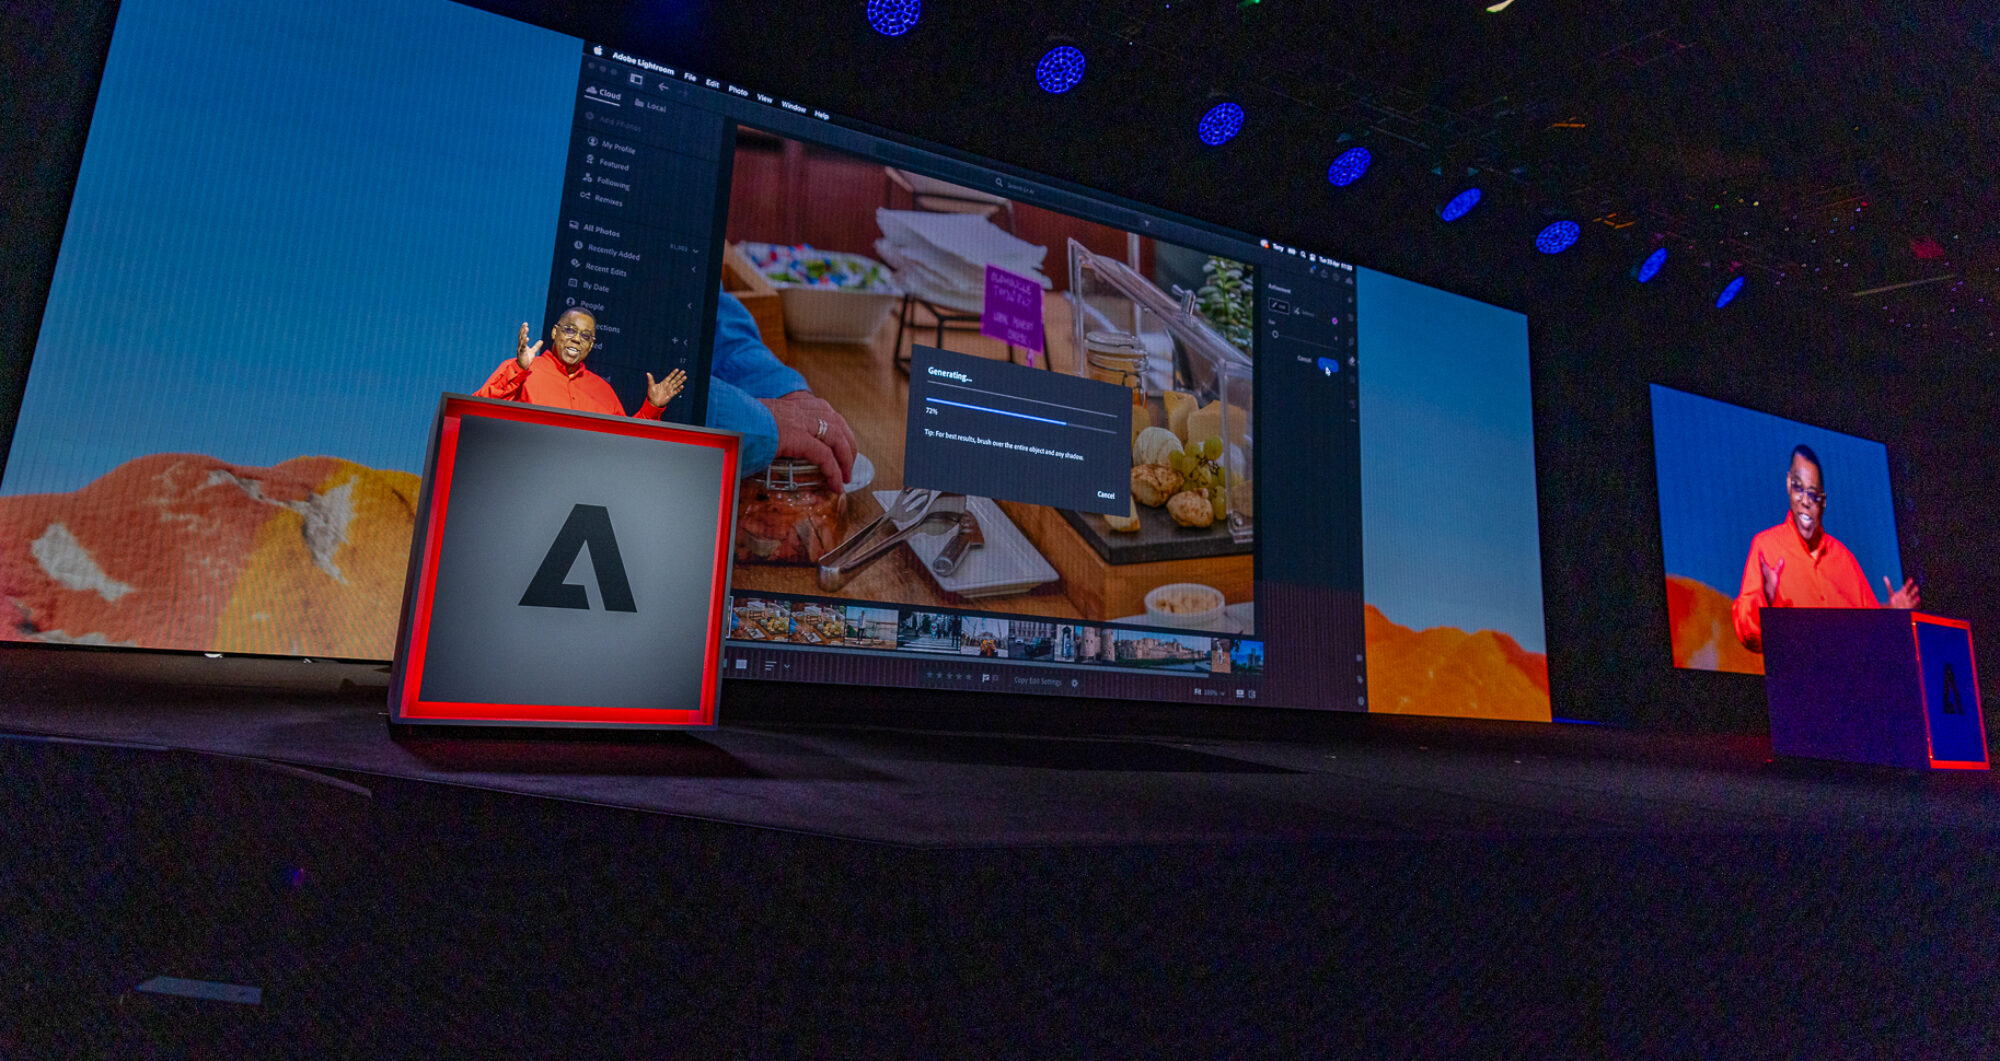
It’s that time once again! Next week I’m headed to my favorite conference (Photoshop World) to teach and I’m excited about my new classes! I’ll be teaching the regular favorites on Lightroom and Adobe Muse CC and my popular Adobe Premiere Pro CC for Photographers class. However, this year I’m adding a 2nd Lightroom Class as well as a NEW class on “Using Type to Make Your Designs Pop”. I’ll also be at the Adobe Booth doing sessions on “Adding Effects to Images”, “New Tools for Design” and I’m doing a session on the show floor in the Kelby Theater on “Creating a Successful Stock Photography Business”
I’m looking forward to seeing you all there!
Be sure to follow me on Periscope as I will be doing LIVE broadcasts from the conference!
@TerryLWhite
Want to go to Photoshop World 2015 in Vegas?
If so you can SAVE $50 by registering here with the Discount Code: TerryWhite50
Join me tomorrow for a FREE Webinar
Whether you’re going to Photoshop World or not be sure to join me tomorrow for a FREE Photoshop CC and Lightroom Webinar sponsored by SanDisk
Having just returned from 3 weeks in the Asia Pacific region and a week in Europe a month ago I definitely have some new tips for travelers and those that travel with electronic gear or camera gear. The first thing that most travelers with tech will be concerned about is charging your devices in route and charging them once you get to your destination.
Charging in the air
More and more long haul flights are providing USB power at every seat. If you’re in an Economy Plus seat you may even have a regular AC outlet as well which would be great for charging a laptop or tablet. It goes without saying that Business Class/First Class seats almost always have both regular AC power and USB power ports at every seat. Before you get too happy about the USB power port be aware that it is more than likely a 5v port and therefore may not charge a tablet (ie. iPad).
What if you don’t have power at your seat?
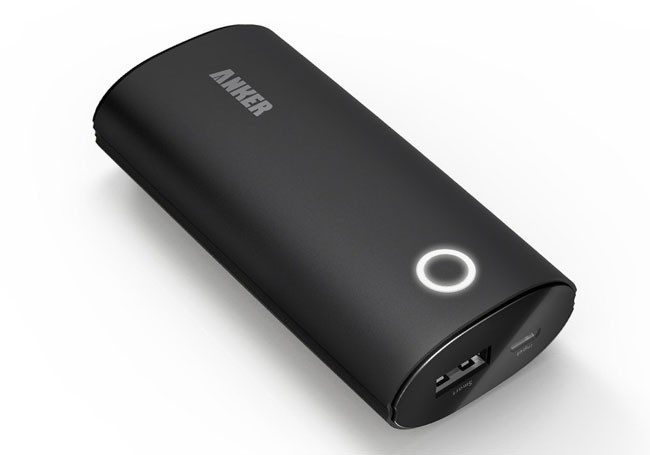
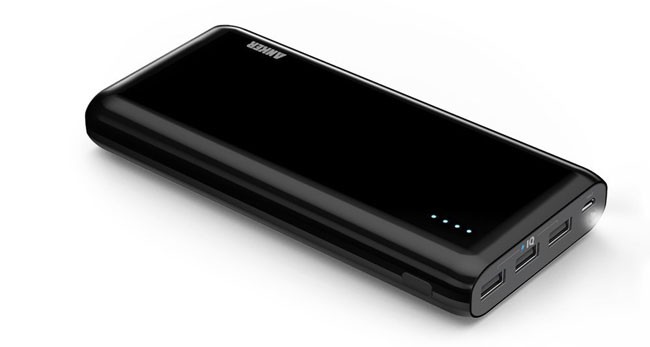
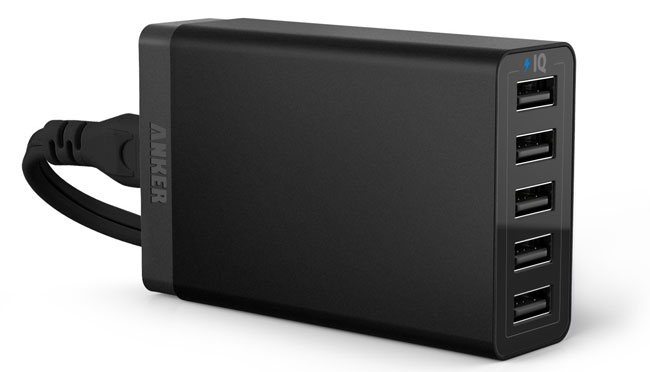
If you are on an older aircraft or crappy airline then chances are you’re not going to have power at your seat. This is where you’ll probably rely on bringing a backup battery. There are dozens and dozens of different backup battery models out there. I have recently standardized on Anker products for my charging needs. Their products are quality built and reasonably priced. I have a couple of their models.
The one I now carry on my person is the Anker 2nd Generation Astro 6400 mAh portable charger. This one can charge my iPhone 6 Plus almost two times on a single charge. I love how it has round edges and no external buttons. This makes it great for a pocket without having to worry about accidentally turning it on.
The one that I carry in my bag is the Anker Astro E7. This is the mother of all backup batteries for your mobile devices. It has a whopping 25600 mAh battery capacity with 3 ports 4A. It can charge an iPhone 6 Plus or Galaxy S6 over 6 times. An iPad twice. This means that I can use this battery for several days before needing to charge it.
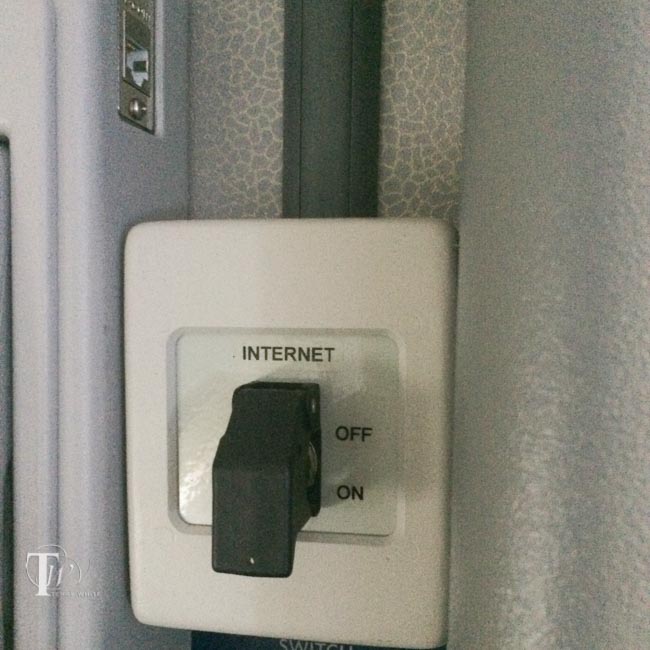
It’s 2015 and while Delta has the largest WiFi equipped fleet it’s still pretty rare to find a long haul (over the ocean) flight with WiFi. As a matter of fact I was coming back from Amsterdam earlier this year on a Delta 747 and I was shocked to see that I had access to GoGo Inflight WiFi for the entire 10 hour trip! Unfortunately this is more of an exception than a rule. Delta is ahead with half of their long haul flights equipped with fast (much faster than domestic 3G speeds) satellite WiFi. When it comes to other airlines like Qantas, Air New Zealand, AirFrance, Singapore Airlines, etc. WiFi isn’t something that they are aggressively adding. In fact when I had a Twitter exchange with Qantas they said they did a trial 3 years ago and there wasn’t much interest. Keep in mind that it was 3 years ago and they were charging by the kilobyte. I would imagine that there wasn’t much interest at that time with something that was likely way overpriced. No one wants to pay by the kilobyte/megabyte. GoGo has the right approach in charging a flat fee for an hour or the entire flight.
I found the switch that controls the entire internet! 🙂
I was way more productive with 10 hours of WiFi than my last flight coming home, a combined 18 hours of flight time without WiFi. If you’re expecting to get work done on a long flight be sure you’re doing things that don’t require an internet connection. With that said I can also settle the online debate of watching an iTunes rented movie with no internet connection in the air. If you rent AND download an iTunes rental on an iOS device BEFORE you board the flight. You CAN start and watch the movie WITHOUT an internet connection in the air. This wasn’t the case when iTunes rentals first hit the scene. They required a brief connection to the internet when you hit the play button to authorize the movie. Thankfully that wasn’t the case with the movie I watched on my iPad. While you can certainly watch/listen to entertainment, things like social media are out of the question without a connection.
International Power
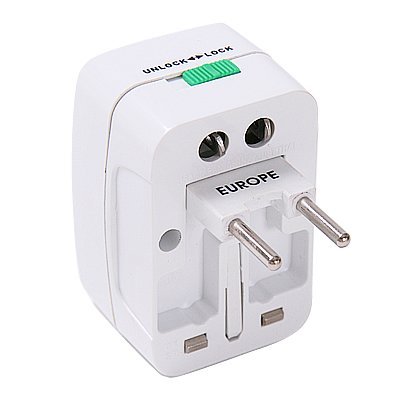
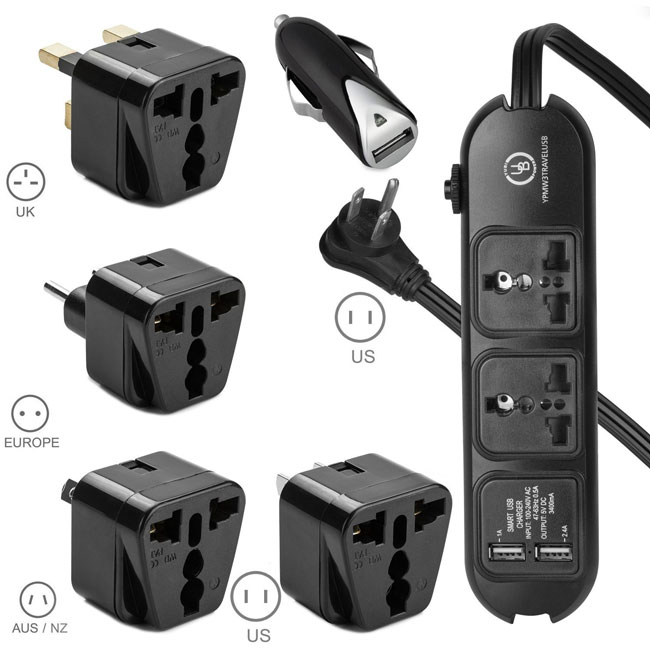
Once you land and get to your hotel or place you’re staying at you’re probably going to want to plug stuff in and charge. Luckily most if not all modern day electronics have power supplies that handle the higher voltage of international outlets (220-240v). The main issue will be adapting the plug to the wall outlet. I used to be a fan of universal adapters that allowed one adapter to plug into multiple kinds of outlets. This used to be my favorite:
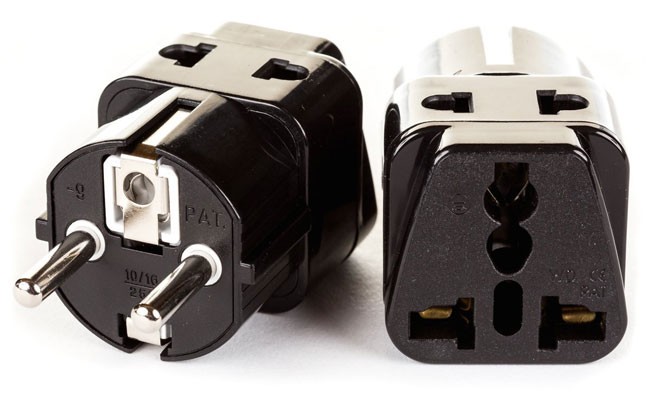
However, I’ve been frustrated in some cases with older outlets. These large universal adapters often are simply too heavy and fall out of older, looser wall sockets. On my last trip I used specific adapters for each country. In most cases you will only need three of these:
What I like out these single adapters is that they are much more reliable in just about any situation (older wall socket, power strips, etc.) and the newer design allows you to plug in two things.
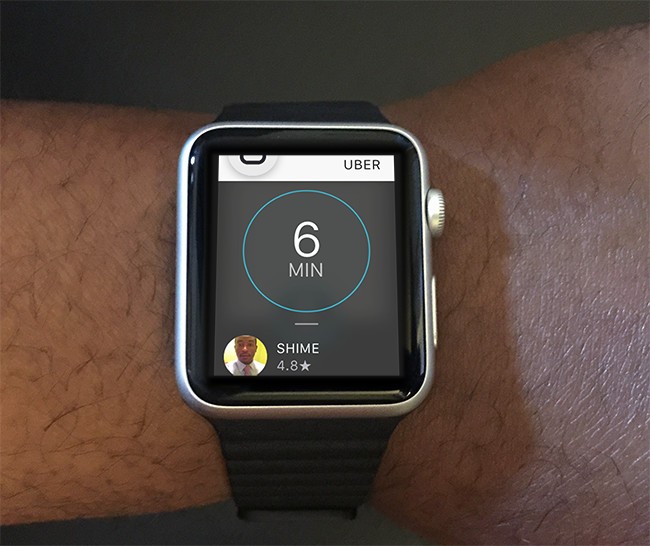
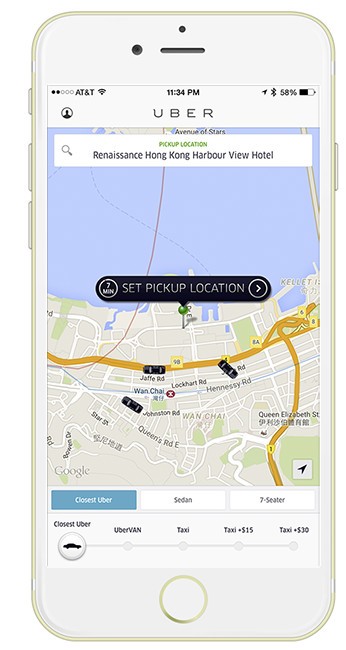
Most countries have taxis, buses, subways and trains or least some combination of them. If I’m new to the area I’m rarely brave enough to take the train/subway because I fear getting lost. Believe it or not I’m very directionally challenged. I did use the subway in Milan to get to the EXPO because it was a single train and a direct shot. Most of the time I’d normally rely on taxis. However, with a taxi there are issues of either having enough cash in the local currency or having a compatible credit card. In some places all the taxis take cards and in others like Hong Kong they look at you like you’re crazy if you try to pay with a card. This is why I’ve gained a new respect and love for Uber. Uber was available in every country/city I visited and it took the pain out of getting around. Now I had one app on my iPhone that allowed me to summon a car whenever I wanted to. The service was consistent and since your credit card is on file with Uber there are no awkward payment issues at the end of the ride. Uber worked great everywhere I went. The only odd thing was that in Hong Kong even though I would enter the destination in the App they would always ask me where I wanted to go. I could see it on the map on their smartphone on the dashboard, but I still had to restated it each time. Speaking of putting the destination in the Uber App this also cuts down on the potential language barrier. Often in Paris the driver barely spoke English and having the destination in the Uber App made it much easier to get to where I was going.
Using ATMs and Credit Cards
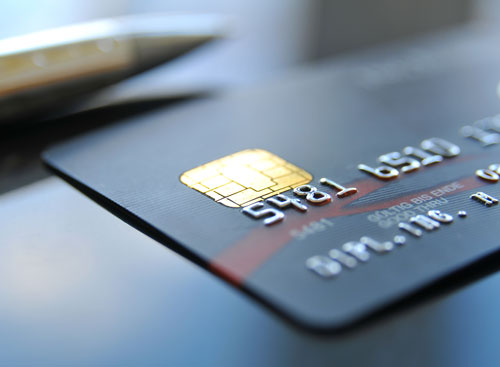
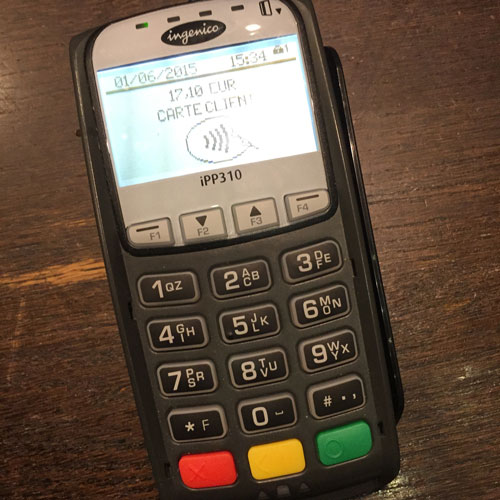
My corporate card for expenses is an American Express card. While this is pretty much accepted everywhere in the US these days, it’s hit or miss in other countries and especially at smaller merchants. Hotels, no problem, but trying to use American Express at shops and cafe’s will usually result in you pulling out a different card. Visa and Master Card are accepted everywhere that cards are accepted, but you should make sure that your card is a newer one outfitted with a “chip”. The EMV chip that you’re probably seeing on all your new credit cards is pretty standard outside the US and will be a standard here by the end of the year. Some of the overseas merchants can’t process your card if it doesn’t have the chip. This is for your protection too as cards with chips are less likely to be spoofed/hacked. This will be even more the case for automated payment systems such as parking garages and train stations. My ATM Debit card doesn’t have the chip yet but I’ve yet to have a problem withdrawing money at BANK ATM machines. It’s also a good idea to alert your bank that you’re going to be out of the country so they don’t flag your transactions as fraud.
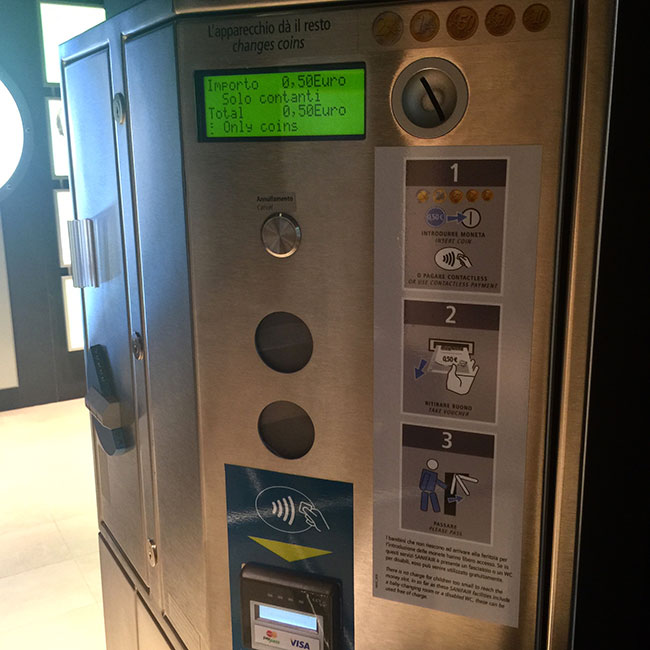
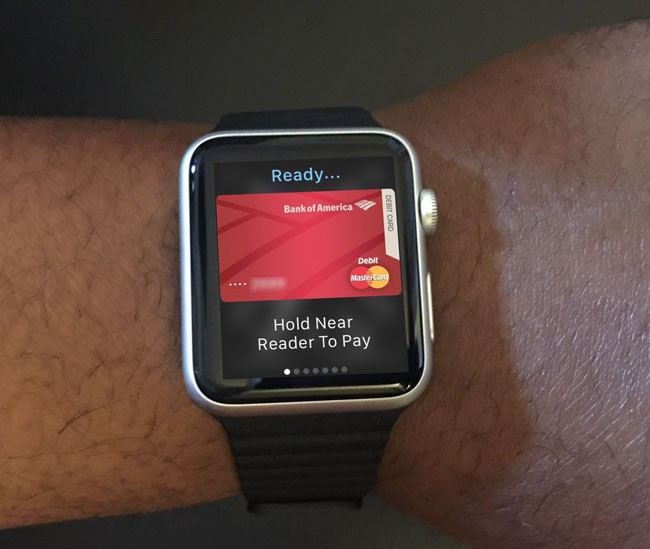
Yes Apple Pay works too in many places, but not all. I was able to use Apple Pay in most places in Paris.
As a matter of fact I never realized how happy I’d be to use Apple Pay until I had to use the rest room in Milan and it was a pay toilet. I had no change!
Lastly while we’re on the subject of credit cards, it’s a good idea to remove any cards that you know you’re not going to use abroad before you leave home. Only take the credit cards that you know you’re going to use, your driver’s license, health insurance card and of course you’ll need your Passport. This way if your wallet is stolen the damage will be minimized.
Making calls and texting
International roaming is notoriously expensive. While I’m grandfathered in to an old AT&T plan for unlimited international data (I know right!), calls by the minute are still expensive and international SMS (text) messages are crazy expensive. I rarely make calls on my iPhone when I’m traveling but when I do I do it using data instead. In iOS if I’m calling another iOS user I can simply use FaceTime Audio. If not I can use either Vonage or Skype. Of course FaceTime and Skype can also be used for video calls. iMessage uses data instead of cellular for text messages between iOS users. When I want to text non-iOS users I typically use WhatsApp Messenger. This cross platform App lets you text, send photos, etc, just like SMS/MMS messages without using your expensive international text messaging rates. If you find a WiFi hotspot to use then all of the above can be done for free.
Getting through airport security with your gear
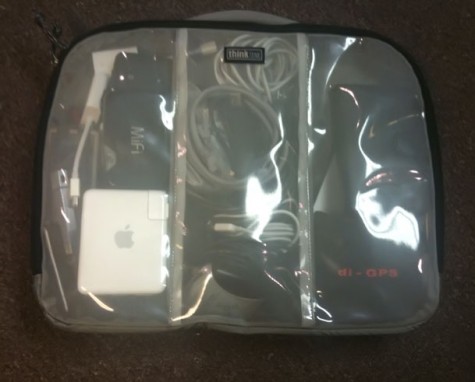
I get really frustrated by international airport security. If you think TSA is a hassle in the US, wait the you go abroad. On the plus side you’ll likely be able to keep your shoes on in most places, but when it comes to your belt and electronics be prepared to pretty much empty your bag. Things that can usually stay in your bag in the US like your iPad and camera, almost always have to come out at international airports. If the xray operator sees anything resembling a gadget or wad of cables you will be taking that stuff out and sending your bag back through. You can also forget leaving your laptop in a TSA approved bag. It will need to come out. Your camera and more often than not even your lenses will need to come out too. Empty your pockets. If you walk in prepared to do all of this then you will get through faster.
Pictured above is my older ThinkTank cable management bag. I now travel with this smaller one. If I take it out and put it in a bin I get through faster.
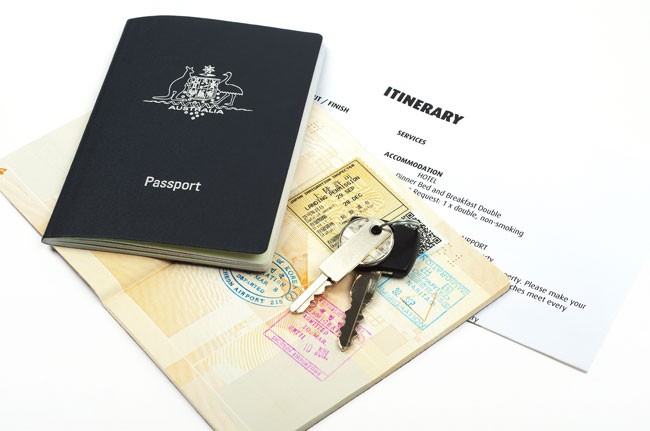
Print your itinerary
In this day of online checkin and electronic boarding passes one of the last things you’ll probably think about is having a printed itinerary. I know I didn’t used to think about having any printed documents until the one time I was coming back from India and the armed airport guard wasn’t going to let me into the airport without one. After much pleading I was able to convince him to look at the one on my iPhone. I knew from that point on to have a printed itinerary for every international trip. While you’re at it make a copy of the picture page of your passport and put it in every piece of luggage you have.
The 5 Most Useful Apps When Traveling Internationally
These are the 5 Apps that were the most useful during my travels:
FlightTrack 5
FlightTrack 5 is my favorite flight management tool. I loaded all my flights in before heading out and the app kept me updated on delays and more importantly for international travel which terminal I’d be departing from in each country.
As I mentioned above I used Uber in every city in every country I visited for a consistent convenient easy way to get around as needed including rides to and from the airport.
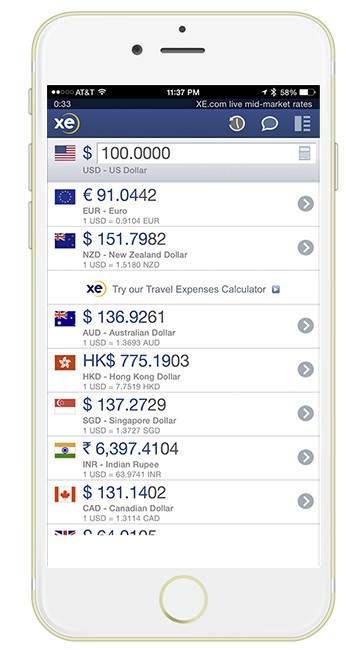
When you’re in a different country then chances are the prices you see in stores, restaurants, etc. will be in the local currency. XE Currency provides a great view of multiple currencies all at once. You can easily swap between any currency you want to be the main currency.
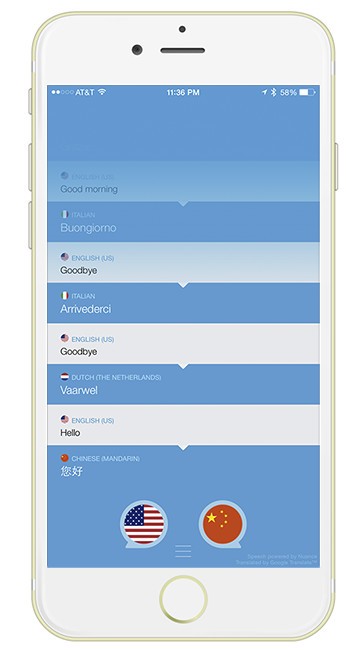
Unless you’re bi-lingual you will probably encounter someone you need to communicate with that speaks very little of your native tongue. Speak & Translate is hands down the best audible language translator app that I’ve seen to date.
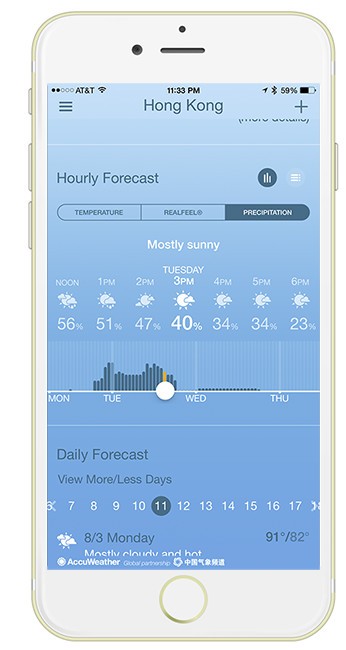
When I was in Hong Kong it was raining most of the time. The standard built-in iOS weather app just wasn’t accurate enough to let me know what time the rain would clear for me to go out and shoot. On the other hand Accuweather was very very accurate giving me the most accurate times of day when there would be no rain.
Travel is constantly evolving. It’s fun going to new places and seeing different cultures. Once you solve the typical connectivity issues I addressed above then you can concentrate on having a good time and enjoying the trip. I would also recommend keeping a pen on your person especially on flight days to fill out customs forms and a small travel umbrella is a must have depending on where you’re headed. Every hotel I stayed in had in-room safes that are free to use. I recommend that you store any valuables and gear that you’re not going to be using before you head out sightseeing. Safe travels and sound off in the comments if you’ve got any questions. I hope my tips for traveling internationally help you out.
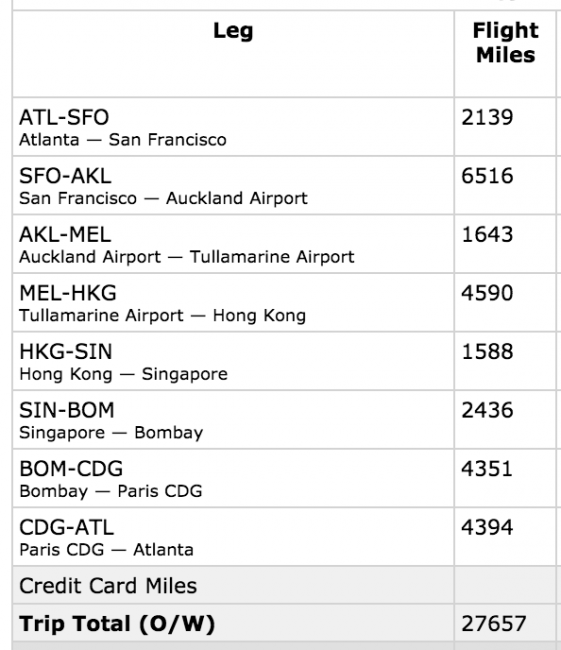
Another complete circle around the globe!
Going to Photoshop World 2015 in Vegas next week?
If so you can SAVE $50 by registering here with the Discount Code: TerryWhite50
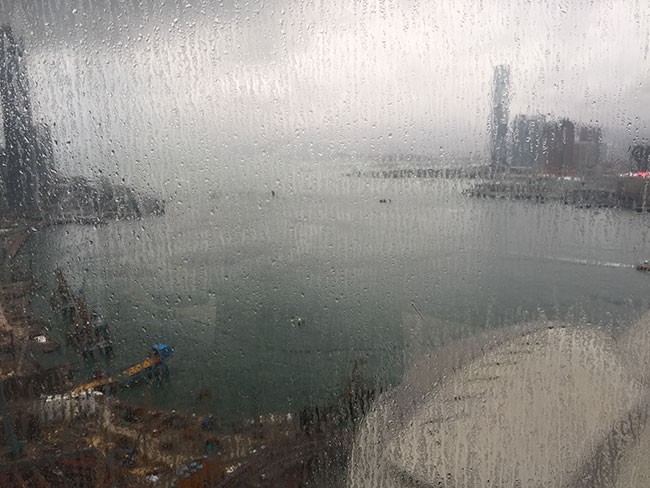
As a portrait and fashion photographer I rarely have to worry about weather because I’m usually shooting in studio and controlling the lighting and environment. However, when I travel I become a travel/landscape photographer and just let me admit that it’s way way way more challenging. The 3rd stop on my Adobe tour took me to Hong Kong. Since it was my first trip to Hong Kong and I had plenty of time (a week) I was in no rush to go out shooting on day one. I arrived late Friday evening and on Saturday it looked like the shot above.
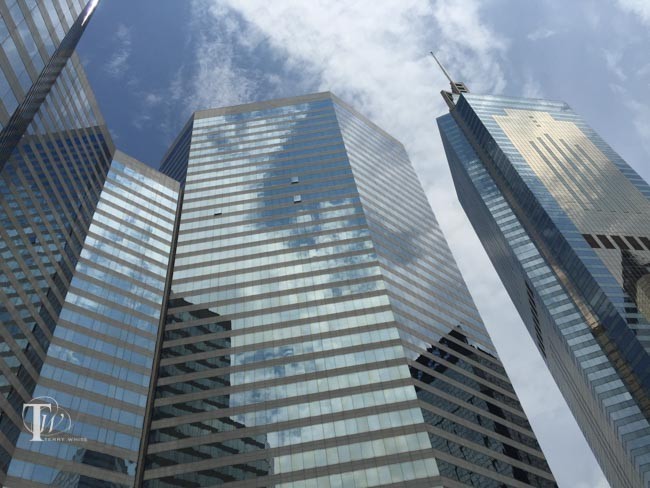
I went out for lunch and captured the above shot with my iPhone 6 Plus. Nothing special, just looking up and snapping a pic. I enjoyed lunch by the pool an thought, “wow! what a great weekend!” Well it all came to an end on Sunday. On Sunday it started raining and well it never really stopped.
I booked a city tour for Monday morning and it rained the entire time. That’s when I realized that:
Don’t procrastinate. If you can get out and shoot on a good day, DO IT! Had I gone out on the same tour on Saturday I would have had a fantastic day for capturing the city.
You have to make the most of shooting in crappy weather. If the weather is not going to change by the time you leave an iconic location, then you have to do your best to get some good shots.
In my case I figured I can’t make it stop raining, so therefore I would shoot things that are supposed to be wet. My tour took me to “The Peak” first and quite frankly it was a disaster for shooting with pouring rain conditions:
This is the shot I got from The Peak while it was pouring rain.
While the NEW Dehaze feature in Lightroom CC does wonders and with a few adjustments I was able to get something that was somewhat usable, it was clearly not my best work and didn’t do the scene justice.
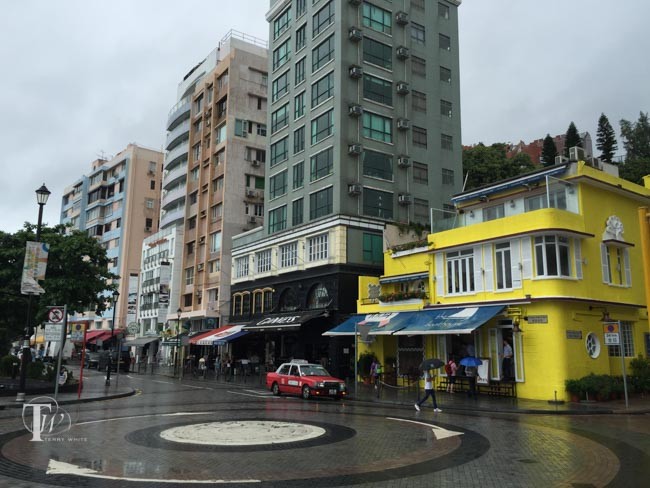
Later in the tour we went to fishing villages and that’s when I applied my theory of shooting things that are ok if they’re wet. I got one of my favorite shots above.
Take the opportunity to shoot the local community interacting with the elements. In the case of rain perhaps target a sea of umbrellas in an urban setting, the cars going by and splashing puddles of water. Had I brought my macro lens I probably would have focused in on the drops of water on the leaves.
Luckily the weather did clear up for a few hours on Tuesday and I didn’t hesitate to go back to The Peak as well as taking the Star ferry over to Kowloon to capture Hong Kong from the other side.
The Bottom Line
If you’re going to shoot, shoot! Don’t take chances that the weather will be just as good tomorrow as it is today. If you are just stuck with bad weather, think of creative ways to shoot outside your comfort zone. Work the weather to your advantage.
Going to Photoshop World 2015 in Vegas?
If so you can SAVE $50 by registering here with the Discount Code: TerryWhite50
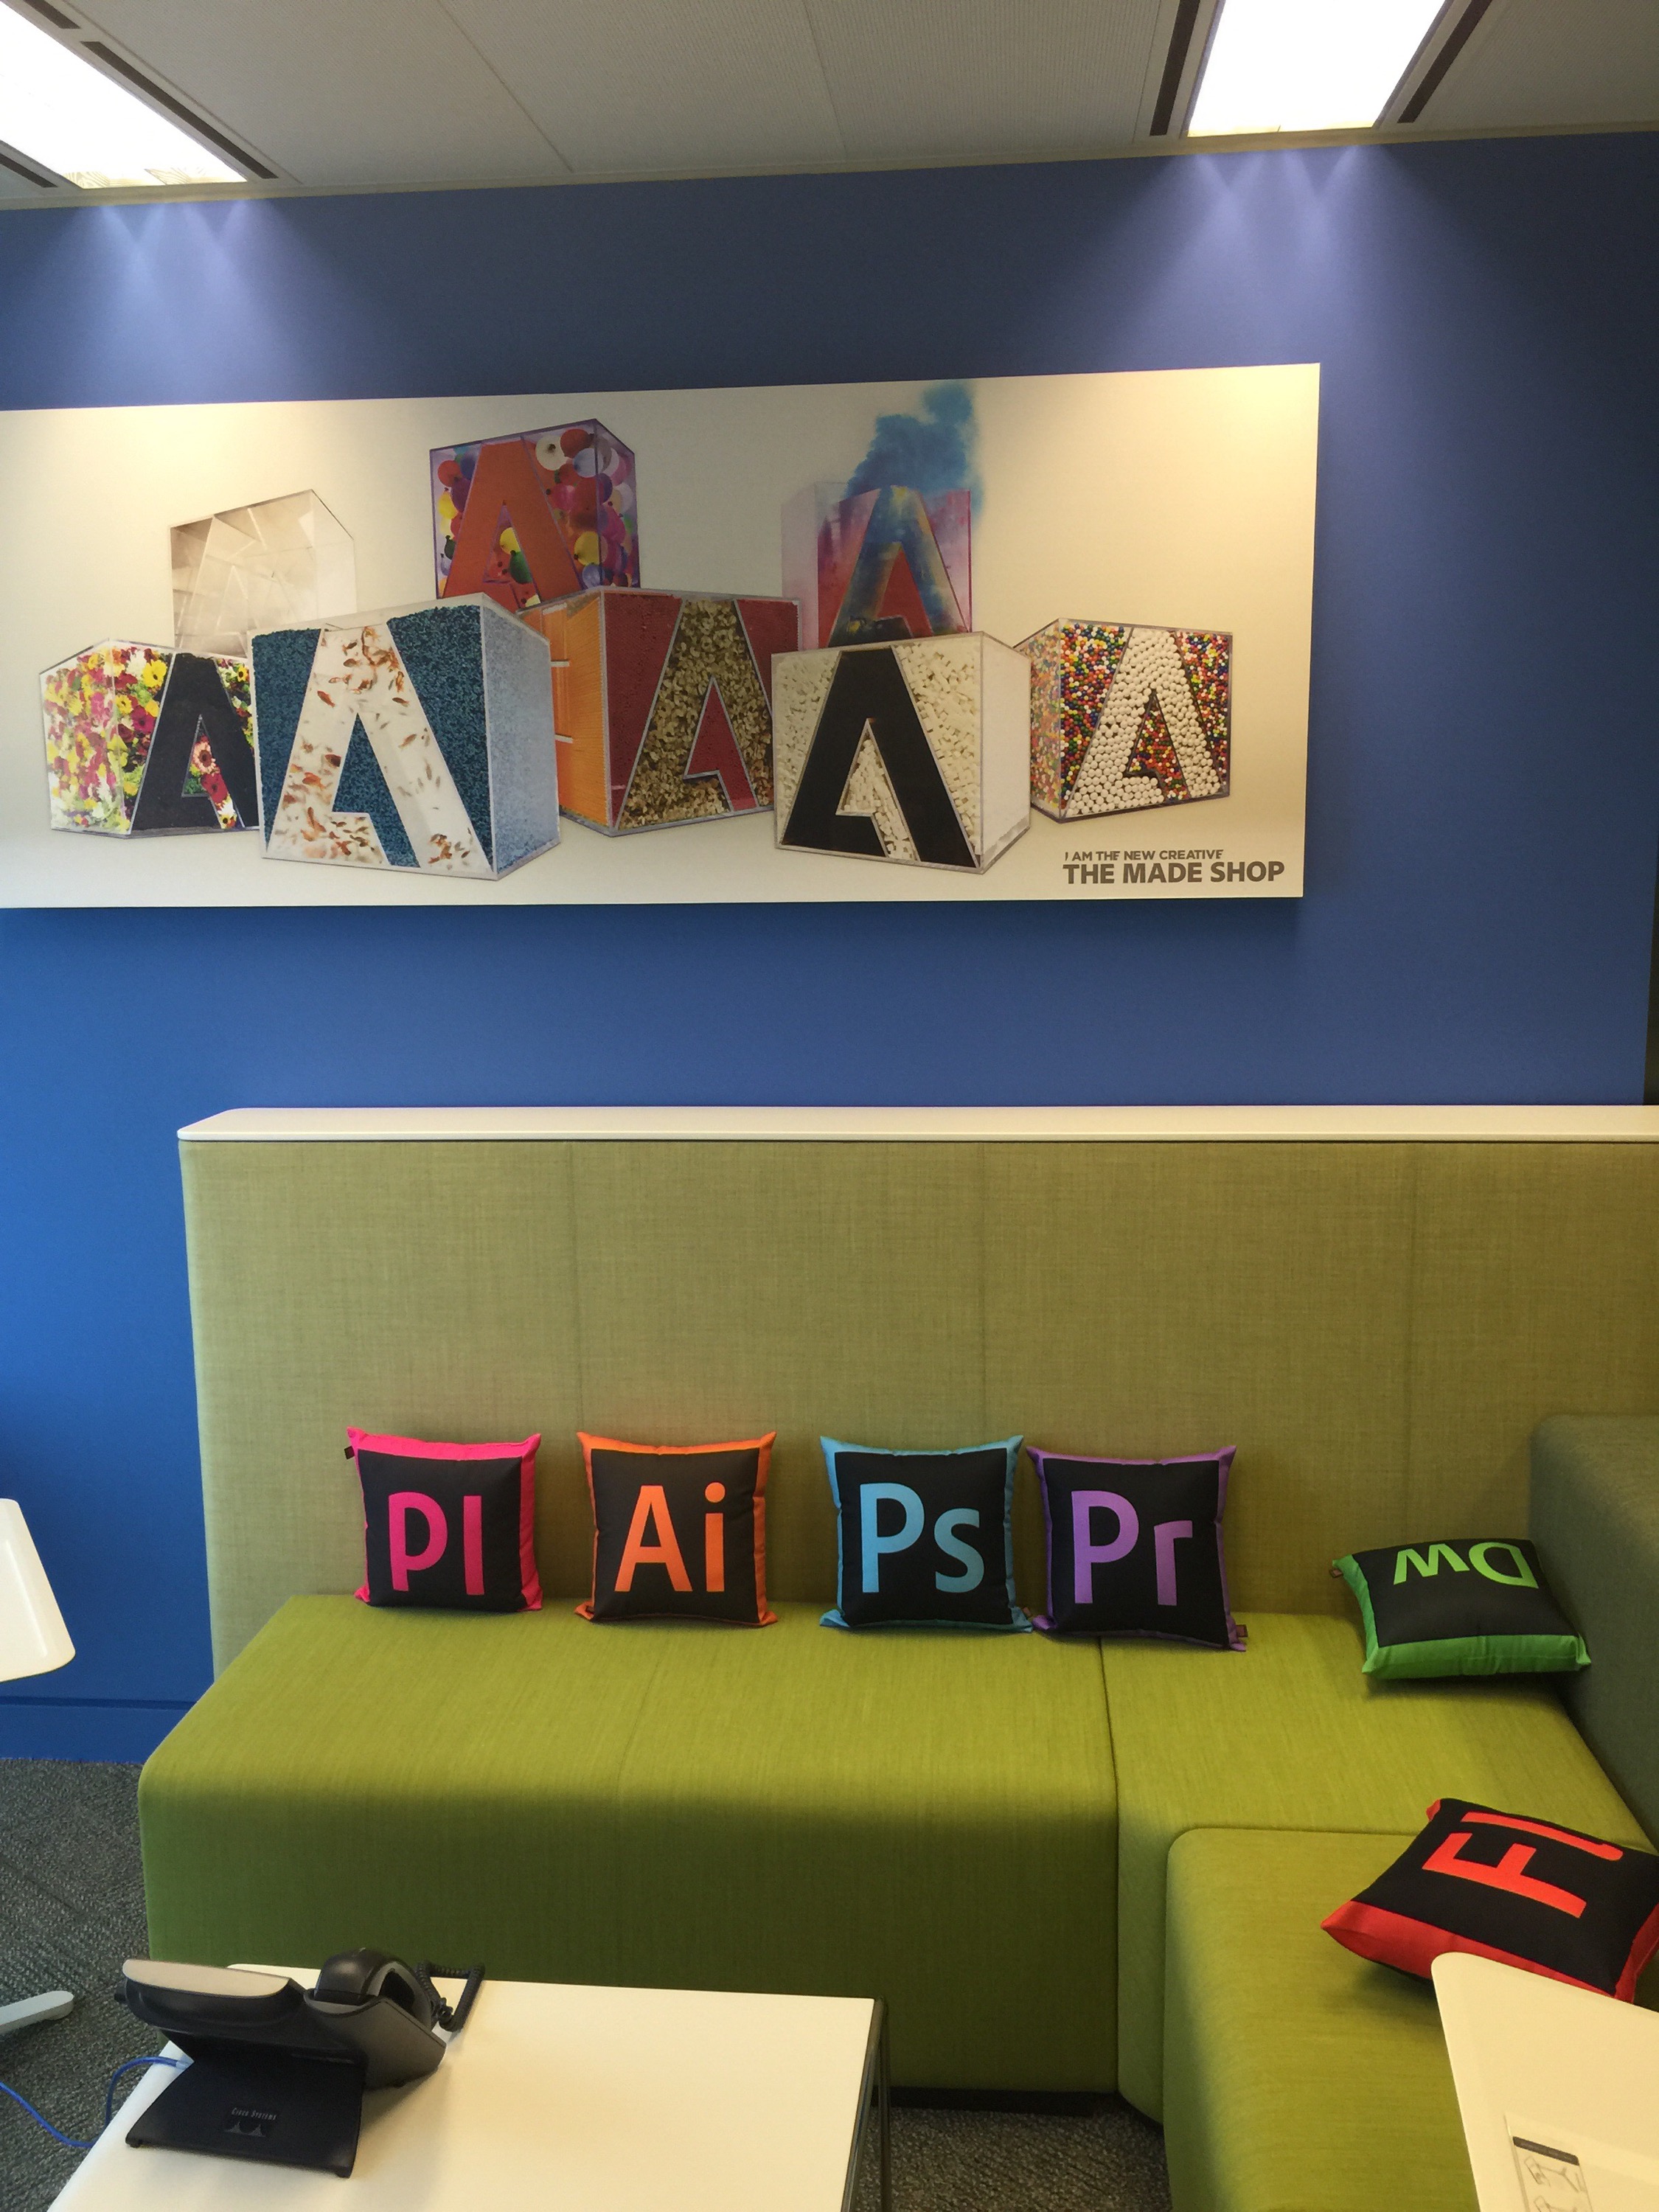
Every time I show a shot of an Adobe office (like the Hong Kong office above – sorry for the upside down ID Pillow on the left) I get a flurry of questions on social media asking where can I get those?
I’m traveling in Asia for the Adobe Create Now/CC Launch tour. My first stop was Auckland New Zealand and my hotel room just happened to have a balcony. Whenever, I have a private balcony that’s an added bonus when it comes to photography because it usually means that I can leave my camera setup for extended periods of time to shoot long exposures and time-lapse scenes. With a beautiful view of the harbor I decided to shoot a time-lapse. Since I don’t shoot time-lapse very often I Googled “best time-lapse settings”. Most of the result offered pretty much the same advice. For your time-lapse to look the best it’s better to use a consistent exposure and shoot in Manual mode as much as possible. This means setting a fixed exposure as well as shooting Manual focus. The reason for this is to keep your camera from changing exposure or focus in each shot, thereby creating a more smooth time-lapse video.
I learned the hard way that this works great except if your scene will change drastically during the shoot. For example, shooting a sunrise means that you will start out shooting in the dark and ending up in the light. The opposite would be the case for shooting a sunset as I attempted above. By keeping the same exposure throughout the scene it went from being properly exposed to completely dark. I salvaged it by combining it with a second one of the same scene after it got dark.
The lesson here is that if the scene is going to change drastically during your time-lapse it’s probably best to shoot it on Aperture Priority mode so that the exposure will be adjusted automatically over time. Learning from this mistake I shot another one in the morning and the results were much better:
The time-lapse above was shot in Aperture Priority and Manual Focus.
Settings and Gear
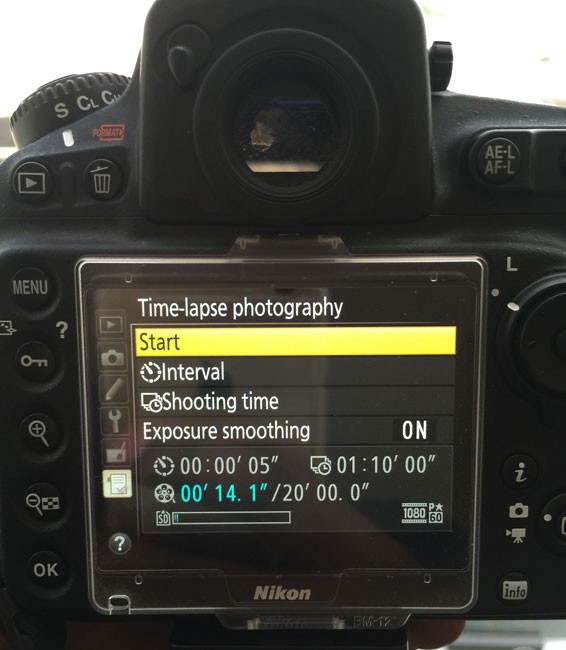
I took my Nikon D810 on this trip because I knew I’d be traveling to places I’d never been before and wanted to have my best camera with me. I also brought my Gitzo Traveler Tripod and Kirk BH-3 Ballhead. No matter which camera you have, you will definitely need a tripod. The camera will be shooting for several minutes or hours. This also means you’ll want a fresh battery. I wish I had brought my battery grip along to double my shooting time. If your camera can be plugged into AC that would be best. I used my Nikon 28-300mm lens. I shot using:
f/11
Aperture Priority
Manual Focus
28mm
Capturing a frame every 5 seconds
Duration 40 minutes to 1 hour 10 minutes depending on how long of a video I wanted at the end.
A note about Time-Lapse on the newer Nikon bodies. Shooting Time-Lapse used to mean shooting hundreds of stills and then putting them together in a video editing program afterwards. Starting with the Nikon D4 the Time-Lapse mode creates a video right in camera. Instead of hundreds of stills on your memory card you’ll have the single video. This is great because it makes the process much much easier and frees up all that space on your memory cards/drives. There was one thing I hadn’t figured on when doing my math. I was figuring video at 30fps. However, I had my D810’s video setting on 1080p 60fps. When I brought my first time-lapse into my computer it was only 8 seconds instead of 15/16 seconds. I scratched my head for a few seconds before it hit me that 60fps means that the time-lapse will be half the time. I stretched duration in Adobe Premiere Pro CC to 15 seconds and the results still looked good.
Here’s one that I shot in Hong Kong during the day. Since the exposure wasn’t going to change I could shoot it all in Manual as originally recommended:
The Bottom Line
Shooting Time Lapse videos can be fun. With newer cameras it’s easier than ever. If you’re in a situation where you can set your camera up for 30 minutes or more on a tripod and shoot a scene you’d be surprised by what takes place during that time. Enjoy!
Going to Photoshop World 2015 in Vegas?
If so you can SAVE $50 by registering here with the Discount Code: TerryWhite50
In case you hadn’t heard Amazon is have a huge ONE DAY SALE dubbed as “Amazon Prime Day”. They’re claiming more deals than Black Friday which is pretty cool. So if you’re an Amazon Prime member (and there’s really no reason why you shouldn’t be), today’s your lucky day!