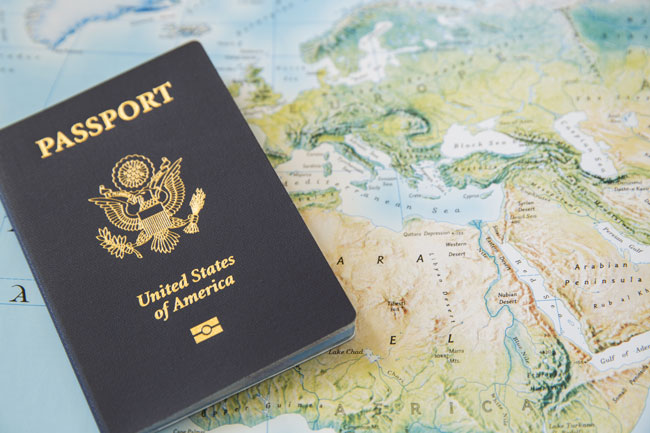
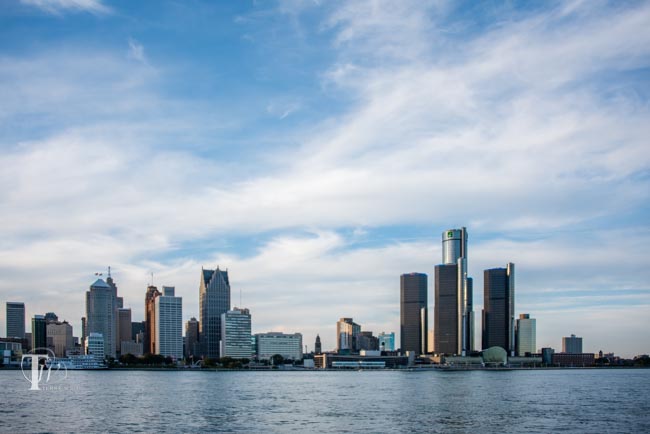
As many of you know I was born and raised in Detroit, Michigan. I’ve been across the river to Canada more times than I can remember. However, in all my years of going to Canada I’ve never gone solely for the purpose of photographing the Detroit skyline. I now live in Atlanta and came back to Detroit for a business trip (come to my event on Tuesday 9/22).Before heading to the Atlanta airport to fly to Detroit I reached in my desk drawer and grabbed my passport.
I got to the ATL airport and figured since my passport was right in pocked I’d use it as my ID to go through TSA security. I handed the officer my passport and used the boarding pass on my Apple Watch to go through. No problem. Once I landed in DTW and on the way to my hotel I couldn’t help but notice how awesome the sky was. It was a perfect day to shoot! I checked in, worked for a few hours before getting in my rental car and heading to the Tunnel to Canada. I paid the toll, drove through and got to the Canadian customs booth. I handed the officer my passport answered the standard questions and I was on my way to the park to shoot.
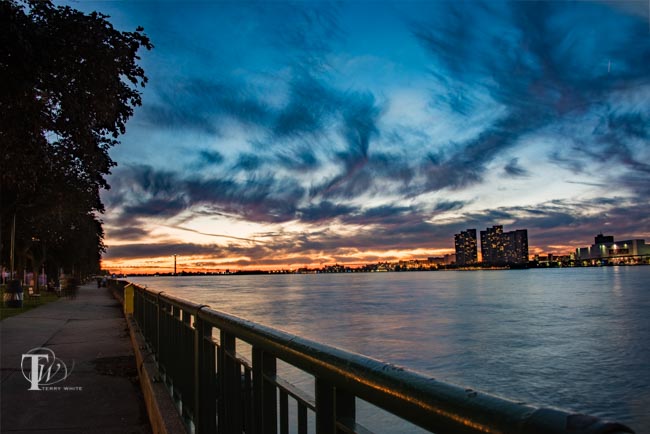
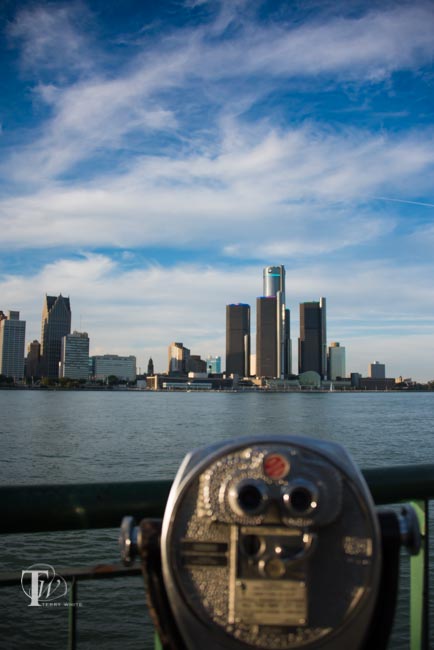
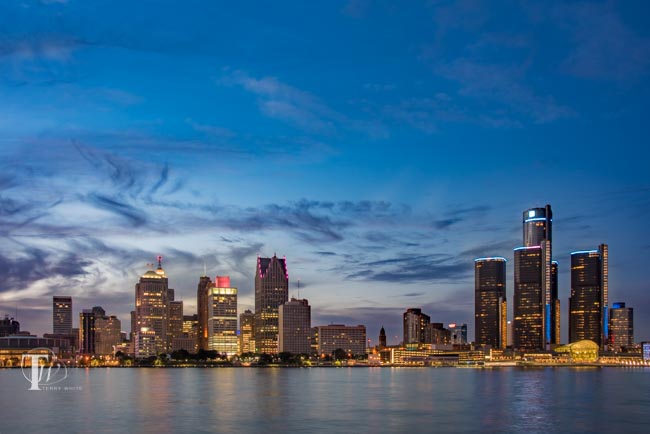
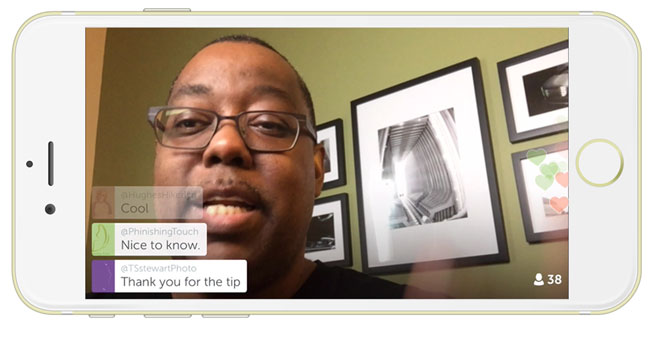
What a great sunset and amazing clouds. I used my Nikon D810 with my Nikon 28-300mm lens. I even Periscoped from that spot although my Periscope connection wasn’t great. Since Periscope wasn’t working well, I switched to Facebook Mentions Live and broadcasted to my Facebook Page instead. It worked GREAT!
I was shooting there for about 2 hours altogether. I was a great night despite all the mosquito bites. Everyone on the Canadian side was enjoying the moment. Lot’s of people walking and riding up and down the boardwalk.
After capturing all the angles I wanted, it was time to hop back in the car and head back across the border to the US/Detroit. I went back through the tunnel as it was closer than the Ambassador Bridge.

Once I got to the US Customs Border Patrol booth I handed the officer my passport answered his initial questions and then he asked me something that sent a chill down my spine. He asked “why is your passport expired?” In that moment I realized that I must have grabbed the wrong passport from the drawer. “Oh crap” (to myself). I explained, that I must have grabbed my older passport instead of my current one. Now of course I’m thinking to myself “how was I able to go through TSA and through Canada with no one noticing this?” After some more questions (keeping in mind I had nothing to hide) I was directed to pull over to the side. I figured that they were going to do one of those insane car searches where they rip everything apart for 2 hours. Instead I was asked to leave the keys and my cellphone in the car, take my money/wallet and head into the building. I entered and sat in a waiting room for about 20 minutes before being called up.
I went up to the desk and the officer asked me what was going on? I explained it to him and he seemed a bit puzzled as to why I was there. He even asked “did the other officer say anything else? did he seem angry?” I said, no but he did seem annoyed. He shook his head and then asked me to go back to my car and grab my camera to show him the pics.

I did and as he was reviewing them he said “ooh, I like that one” showing it to his buddy. After a few more minutes I was on my way. I can only assume that they have the ability to look up my current info in their system and can see that I do in fact have a valid passport. I even offered to give them the current number at both locations and they didn’t want it. They were implying that the both agent didn’t really have to have me detained as apparently he looked up my info before having me pull over. Also my car was not searched.
The Bottom Line
You better believe that I will never grab the wrong passport again. It’s scary to think that I boarded a plane and went to another country with an expired passport. It also shows that the technology is at their fingertips to verify your info and that some people can put you through unnecessary steps in a process because they are perhaps having a bad day, want to teach you a lesson or simply don’t like the way you look. I’m happy that I was able to come back into the US and that the delay wasn’t hours and that it was only a delay and not something worse!

 .
.


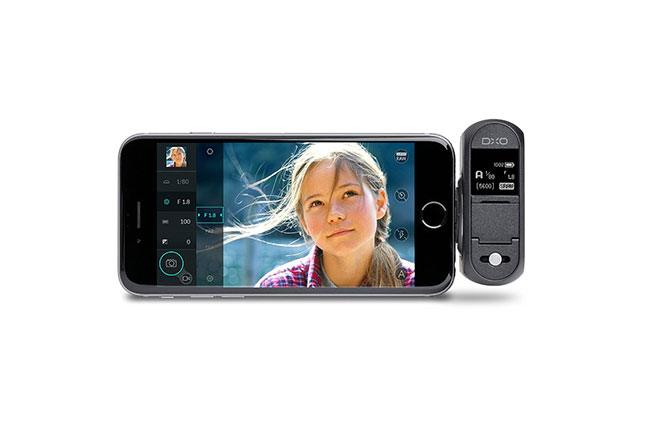
 is a 20MP digital camera with a 1″ sensor that has its own storage and battery. Unlike other solutions in this category that connect wirelessly and therefore slowly, the
  has a built-in Lightning connector that attaches directly to your iPhone or iPad. This effectively turns your iPhone/iPad display into a touch screen view finder. Because of this direct connection there is virtually no lag. Once in you’re in the