Adobe Project ROME is here! All-in-one Content Creation & Publishing Tool

httpv://www.youtube.com/watch?v=mtm3Ahx_paY

In case you missed the announcement over the weekend Adobe released a public beta of Project ROME. Project ROME is unlike any other app out there in that it's an all-in-one content creation tool for vector/raster images, video and animations as well as web sites. On the surface ROME appears to be a simple easy to use basic program and that's a good thing. This product is aimed at casual users. However, unlike most basic programs, ROME allows you to go deep if you need to. I was floored with the number of options available.

You can download your copy of ROME here or just use it in your browser! That's the beauty of ROME, it was built entirely as an AIR app.


To get you started I recorded these 5 very short videos:


Working with Vectors

httpv://www.youtube.com/watch?v=-LRoEBV9NAY


Working with Photos

httpv://www.youtube.com/watch?v=Tcm55I0ZWYo

Continue reading “Adobe Project ROME is here! All-in-one Content Creation & Publishing Tool”

Adobe Launches Its Digital Publishing Suite: InDesign CS5 to iPad

It's been talked about since the release of the Wired iPad App, and now it's here for you to see and explore. Adobe is taking the wraps off the Adobe Digital Publishing Solution today that will allow Magazine publishers to publish electronic versions of their publications as iPad Apps/Issues. Rather than talk about it, I recorded this video to walk you through the process:

httpv://www.youtube.com/watch?v=HlxqsN7HZyU


You find out more as well as download the necessary components for InDesign CS5 to get started here.

Download the Adobe Preview Tool for iPad for Free here from the Adobe

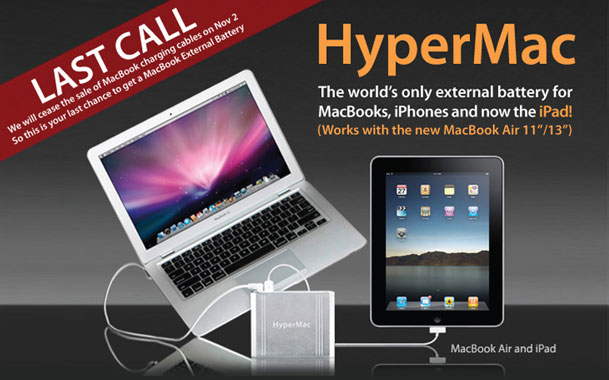
Last Call for HyperMac MacBook Charging Cables

You may remember my review of the HyperMac Battery for the MacBooks here. Well it seems that a good thing has come to an end. The way I understand the story (and NO I'm not a lawyer, so this is just my opinion/interpretation) is that HyperMac guys were buying Apple's external MacBook (Pro/Air) chargers (legitmately) and then retrofitting the cable to their external batteries and selling them. That was until Apple's legal team came down on them and basically forced them to stop. I don't know the legal precedence here, but it seems sad that this vendor, who was providing a benefit to MacBook users is now being forced to stop. As you may know Apple no longer allows you to swap out your own batteries. All current model MacBooks have sealed batteries. So if you run out of juice on a trip, you're just out of luck until you can get to a wall plug. I've used my HyperMac batteries on many trips and it was great arriving with fully charged MacBook Pro and iPhone batteries. I plan to use it on my trip to LA next week for Adobe MAX. I haven't heard of any issues with the batteries or any incidents of MacBook failures as a result. Since Apple doesn't sell any external batteries of their own I don't see a competitive threat either. Lastly, you would think that Apple would license the MagSafe adapter to those wishing to build MacBook peripherals like the popular iGO chargers. 

If you're interested in a HyperMac Battery or Cable for your existing one, you have until November 2nd, 2010 to order. See them here. I may buy another just to eBay at a profit down the road 😉 Oops, did I say that out loud? Actually they'll probably still sell the batteries, just not the cables for Apple's MacBook line.


P.S. HyperMac wasn't the only game in town. I wonder how long these guys will be selling theirs?

Photographers: MacBook Air vs. iPad

When the iPad arrived in April I had high hopes (I still do) for it to become a great tool for photographers and in many ways it has. More photographers showed their portfolios at Photoshop World this past September electronically than they did in print. Just recently I published my list of 8 Must Have iPad Apps for Photographers. Yes, progress is being made, but yesterday Apple released the long awaited update to the MacBook Air and the more I looked the specs the more it made me think about this new MacBook as a better choice for photographers in the field. 


The iPad appeal

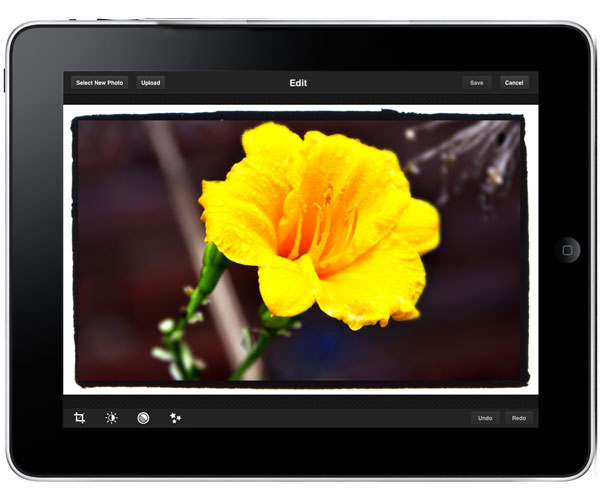
The iPad is/was appealing because it was small, lightweight, has a relatively long battery life, relatively large display and is capable of importing images via the Camera Connection Kit. It can do moderate photo editing on the go. Also the instant on and not having to manage a file system are pluses in many ways.


The NEW MacBook Air offers so much more for not much more money

The most fair comparison I can make is to compare the 64GB iPad Wi-Fi model ($699) with the new 64GB 11.6" MacBook Air ($999). Yes, the MacBook Air is $300 more and weighs 0.7 lbs. more. The MacBook Air is also a few inches bigger.


MacBook Air iPad

Size and weight

Height:
0.11-0.68 inch (0.3-1.7 cm)
Width:
11.8 inches (29.95 cm)
Depth:
7.56 inches (19.2 cm)
Weight:
2.3 pounds (1.06 kg)1

Size and weight1

Height:
9.56 inches (242.8 mm)
Width:
7.47 inches (189.7 mm)
Depth:
0.5 inch (13.4 mm)
Weight:
1.5 pounds (0.68 kg) Wi-Fi model;


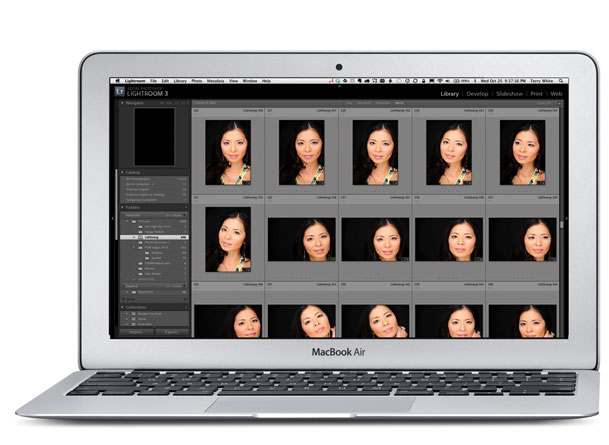
Once you get past the slightly larger size and weight of the MacBook Air, you can then start to justify it for what it offers over the iPad. The MacBook Air (MBA) has the ability to run your standard Mac applications (or even Windows Applications using Parallels or other Virtualization apps). So instead of trying to find replacement Apps on the iPad, it can actually fun Adobe Photoshop Lightroom 3 and Photoshop CS5. Instead of having to use the Camera Connection Kit with low power/speed CF Cards/Readers, you can plug in any standard USB Card Reader and Import photos from any memory cards. With the MBA you can also more easily offload your images onto another hard drive just by plugging it in to the USB port and doing a standard file copy. Also since many photographers publish their websites using Adobe Flash, you can view those sites on the MacBook Air by installing the latest Flash Player if you choose to. Lastly, and probably one the biggest reasons is that the you can shoot tethered to a MacBook Air and see your images on the nice big 11.6" display. Lightroom 3 already does native tethering and that means that the MBA can already do this. Yes, the MBA is $300 more, but you get a much more capable device for that $300.


What I would have liked to have seen

There are two things that I would have liked to have seen on the MacBook Air. The first is a built-in option for 3G connectivity. That's one of the things I love about my iPad is that I can take it out of my bag and get online pretty much anywhere. Sure I can use my MiFi or a 3G USB Stick, but a contract free 3G option built-in the MBA would have been killer. The next thing I would have loved to have seen is a TRUE HYBRID between these two devices. Imagine a MBA in the same form factor, but if you open the lid and flip it over it becomes an iPad and can run iOS Apps. While it's true that a touch screen on a vertical display would be a pain, there's no reason that the display has to stay vertical if it swiveled and reversed. That would have truly been the best of both worlds!


What will I do now?

Believe it or not I have no plans to get a MacBook Air pretty much for the same reasons that I didn't buy myself the first model. When I travel for business I need the most full featured and powerful MacBook Pro available and the MacBook Air just isn't enough muscle for what I do. Since it's not going to replace my current MacBook Pro I see no need to travel with TWO laptops. A MacBook Pro and iPad will continue to be my tools of choice. However, if you're a photographer that doesn't demo software for a living like I do, then the MacBook Air might be a GREAT tool for you! If I didn't need the power of a MacBook Pro, I would seriously consider the Air!

OWC Mercury Pro Blu-ray Burner: Rip/Burn Blu-rays on a Mac

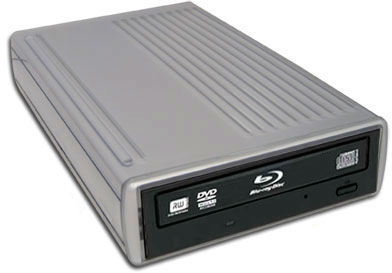
It's pretty clear to me at this point that Apple has no plans of offering a Blu-ray drive built-in to the Mac. Sure I could be wrong, but they have made no mention of Blu-rays in quite a while. After all, they sell and rent movies on iTunes and in a way Blu-ray movies are competition to that download/streaming model. Although there aren't many options to watch a Blu-ray movie on a Mac, there are still some reasons why you might want a Blu-ray drive on a Mac. First off, having a Blu-ray burner means that you could burn your own Blu-ray movie and data discs. Blu-ray discs hold up to 25 GBs of data per disc. That's a lot when it comes to archiving and transferring lots of information. Also since just about every digital camcorder being produced today has the option of recording in HD, it gives you a way to make High Def home movie blu-ray discs. I just got a brand new 12 core Mac Pro and I started looking at Blu-ray options for it.


OWC Does both External and Internal Blu-ray Drives

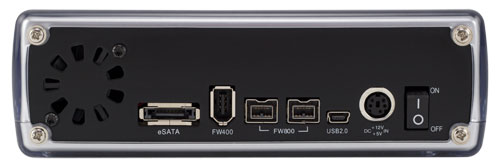
I'm starting off with a Mercury Pro External Blu-ray Quad-interface Drive review unit. This drive can connect via Firewire 800, 400, USB 2 and eSATA.

That pretty much covers all the connectivity options that I would care about.  The drive was very simple to setup. Take it out of the box, plug in the power and an interface cable and turn it on. That's it! Although the Mac OS doesn't provide the necessary support to play a Blu-ray movie, it does provide the necessary support to see the drive as a standard storage device for both reading discs and burning them. I popped in my copy of Avatar on Blu-ray and it showed up on the Desktop like any other disc. 


Ripping Blu-rays


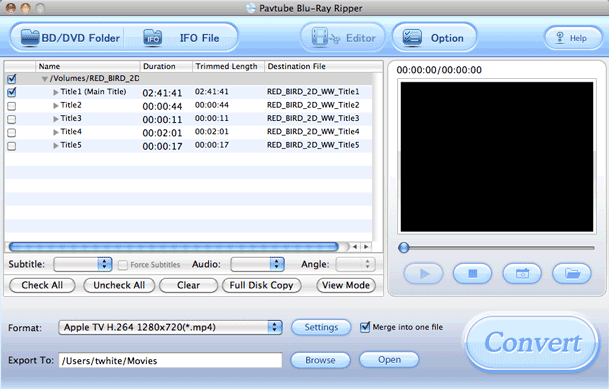
The next question many will have is what does it take to rip a Blu-ray disc? First off, you need to read up on copyright and know that I'm not a lawyer and nor am I'm sanctioning violation of any copyright laws. However, as far as I can tell (my interpretation) you are within your right to "backup" a movie disc that you PURCHASED (not rented) for your OWN PERSONAL USE.  With that said, I wanted the option of Ripping a Blu-ray disc to take with me on the go or to watch via Apple TV if I choose to. Avatar is a perfect example! While this movie is available on iTunes and even includes a Digital Copy with the Blu-ray disc, both the iTunes version and Digital Copy are NOT high def. If I want to watch this movie via high definition without having to load the disc, the only way to do so is to Rip it. In the past I've used Handbrake to rip my entire DVD collection. Handbrake doesn't yet Rip Blu-ray movies, so I had to find another solution. The first application I came across is a commercial one called Pavtube Blu-Ray Ripper. There may be free ones or even better ones out there, but this one seems to do everything I want and has an interface that I like. 

It's easy. Just put your Blu-ray disc in the drive and fire up Pavtube. Choose the Blu-ray disc using the BD/DVD Folder button and then choose your output destination and preset. All the usual suspects are there including iPhone/iPod, Apple TV HD and even iPad HD. Yep, Android is there too along with several other presets.

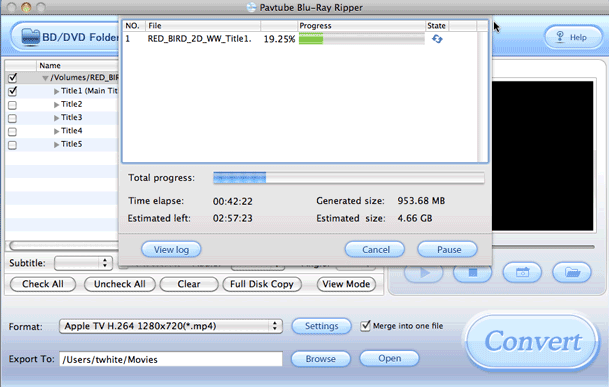
Then you just click the Convert button and be prepared to wait! Ripping a Blu-ray is no trivial task in terms of system resources. Even on my 12 core Mac, the 2 hour 42 minute movie is going to take over 3 hours to rip in Apple TV H.264 1280×720 resolution. Also the estimated file size for this movie is going to be a 4.66GB .MP4 file. Of course depending on the length of the movie, the preset you choose and the speed of your system, your mileage will vary. 

Continue reading “OWC Mercury Pro Blu-ray Burner: Rip/Burn Blu-rays on a Mac”

What a Fantastic Week in the Nordics!

photo by Jason Levine

i'm on the road and literally on the go in the airport. However, I wanted to take a moment to thank the thousands of you that came out to our Adobe Creative Suite 5 tour in Helsinki, Stockholm, Oslo and of course the beautiful Copenhagen! I had a blast presenting the latest tips and techniques including a sneak peek at our NEW Digital Publishing solution featuring the iPad. 😉

photo by Jason Levine


It was also fun having Julieanne Kost on the tour with myself, Jason Levine and Greg Rewis.

The crowds were amazing and when I walked into the Cinemaxx in Copenhagen I literally said "whoa!". It was PACKED!


Thanks again and I'm looking forward to coming back to the region soon.

My Web Gallery for Client Image Selection

click the image above to enlarge

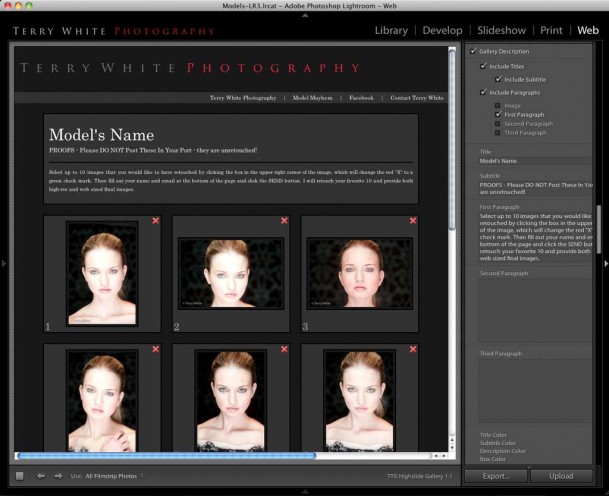
It's no secret that I manage my photos using Adobe Photoshop Lightroom 3. Whenever I do a model or client shoot whether I'm shooting tethered into Lightroom in the studio or shooting to a memory card in the field and importing the shots later, they end up in Lightroom. I do my non-destructive adjustments using Lightroom's Develop Module. Before I do any compositing and further retouching using Photoshop CS5 Extended those initial images are posted online in a private gallery for the model/client to review and make their selections. 

While Lightroom has had built-in web galleries since day one, none of the ones that come with Lightroom automate the process for receiving the client picks. A couple of years ago I discovered a really cool Lightroom Web Gallery Template/Plugin by The Turning Gate and I haven't looked back.

The Turning Gate Highslide Gallery

I'm so used to using this template that I often forget when I'm presenting Lightroom, that it doesn't come with Lightroom. Once you download this plug-in and install it, it shows up in Lightroom alongside all the rest of your Web galleries. You can customize the look and feel of your gallery pretty extensively. You can then either upload your gallery to your FTP space directly (hosting is NOT included with the plugin) from Lightroom or Export a folder of your web gallery and upload it via any other method that you use to get files to your space.

The one caveat is that your web server/space has to allow you to be able to run PHP scripts. Luckily most web hosting packages do! This FormToMail script is necessary to process the form that the client uses for their selections to send back to you via email. It's very transparent on the clients end. They basically see a web page with all the images that you provided. They can click to make them larger (again sizes you specify) and they can check off the ones they want. At the bottom of the web page is a spot for them to enter their name, email address and comments. At that point they hit the submit button and you get an email (to the address you configured in the plug-in/script) containing the choices they made. 

You can get the Turning Gate Highslide Gallery here for $25. They also make a pretty cool Client Response Gallery with less features for $10 here.

I couldn't imagine using Lightroom without this plugin!

10 Random Adobe Illustrator & InDesign Tips

10 Random Tips for InDesign Users – Part One

httpv://www.youtube.com/watch?v=8FQ-syUYIZw


10 Random Tips for InDesign Users – Part Two

httpv://www.youtube.com/watch?v=pnrHOmFwgoA


10 Random Tips for Illustrator Users

httpv://www.youtube.com/watch?v=XlfYELj_-ec


Check out more of my Tips and Techniques at CreativeSuitePodcast.com and from my App "Learn the Creative Suite with Terry White" on the Learn

LaCie Rugged goes 1TB

It still amazes me when I think about the fact that we've reached a point where we can carry around 1TB drives in our pockets. I typically carry an external drive or two in my laptop bag for carrying extra files, Windows 7 Images for Parallels, bootable backups and to backup my shots after my shoots before I leave the studio. Until the 1TB 2.5" drives came out this meant carrying two or three drives to accomplish this. Now I can carry one! I got the LaCie Rugged 1TB to put to the test. I wanted one drive that I could partition into three partitions and of course I wanted one that was bus powered over Firewire 800 (and USB when needed).

The LaCie Rugged meets those requirements. It has a triple interface with Firewire 800, 400 and USB 2 ports on back. Although it's bus powered, they even supply a USB to power cable for those situations when your single USB port isn't providing enough power, you can plug this cable into a second USB port to power the drive. They also provide FireWire 800, 400 and USB 2 cables.
Although the bright orange color stands out (you'll have no problem seeing it in your bag or maybe even a dark room), I ordered the optional 3 pack of sleeves to change the color of the drive.

You get black, silver and purple in the sleeve pack. Even the purple/blue is a little more subdued than the orange.
 

So far so good

In my short time of using this drive it seems fast (5400 rpm speeds) and quiet. I had no problems cloning my boot drive to one of the partitions that I made and loading up the other two partitions with the files I need to carry. Also they call this drive "rugged" for a reason. It's meant to be traveled with. It has a rubber outer case (the sleeves) and it's one of the only drives I've ever seen that advertises a maximum "drop distance" although they clearly state that you should avoid dropping it while it's running (duh!).


Maximum Drop Height :  up to 2.2 meters in non-operating mode (dropping is not recommended in operating mode)

While this is not the first LaCie Rugged drive I've purchased (I got my daughter one for her Time Machine backups when she went off to college), it's the first one that I've gotten for me.

You can get the 1TB LaCie Rugged here for $199

You can get the 3 optional sleeves in Black, Grey, Purple here for about $17