
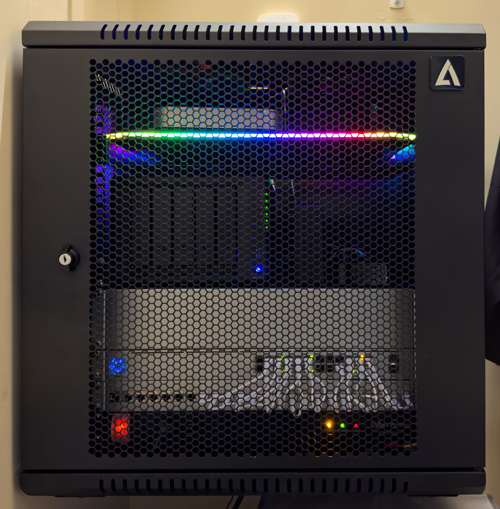
Now that my network upgrade is complete (see my Networking gear guide here to see every item I put into my new server racks), it’s time to focus on something I’ve been putting off for way too long. It was time to replace my 2012 Mac mini Server and Drobo 5D. During the COVID-19 pandemic Drobo went M.I.A. They had no products in stock, and it was reported that calls were largely unanswered.
While my Drobo and Mac mini running Mac OS X Server Sierra 10.12 was working fine, I knew I was living on borrowed time. I feared that getting a replacement would be difficult or impossible if my Drobo had some mechanical failure.
Time to upgrade to a NAS (Network Attached Storage)
I had been researching solutions from Synology and QNAP. As much as I pride myself on being tech-savvy, it wasn’t easy trying to distinguish which one was better and which product in their respective product lines would be best for me.
Synology seemed to be the favorite of others that I follow and respect, so I looked at Synology. I wanted to go with a NAS instead of another RAID that would directly connect to a computer. Since my Mac mini was over a decade old, I didn’t want to have to buy a new one and still need a new RAID too. In theory, a Synology NAS would be all that I needed.
Synology has its own operating system and even an App Store like experience for installing applications that run on it for a variety of different “server” purposes. Out of the box, once you put your drives in and set it up, it’s a network file server. However, if you want a media server, web server, mail server, calendar server, etc., it can do all of those things too.
Luckily I only needed file serving, and later I decided to install Plex to serve up my home movie collection.
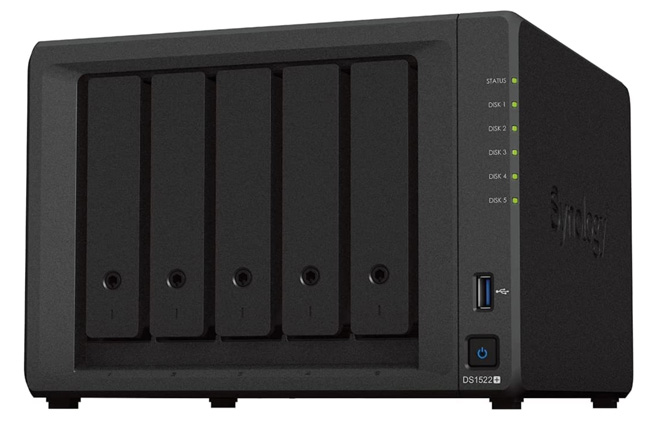
I went with the Synology DS1522+
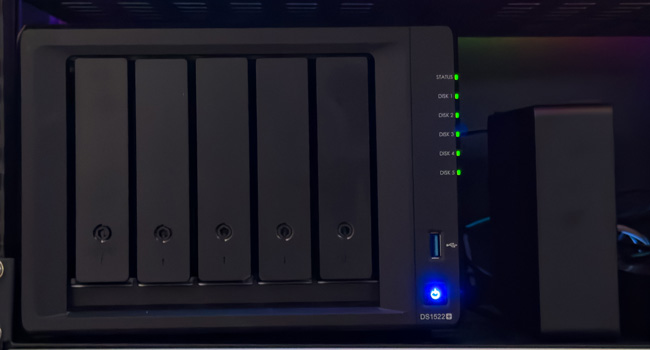
I settled on the 5-bay Synology DiskStation DS1522+ as it seemed capable of doing all the things I would need and allowed for the kind of storage I was getting with the Drobo as it has the same number of drive bays.
How I upgraded to Synology
Here are the steps I took to get the Synology DS1522+ setup and transfer everything from the Drobo over to it.
Step 1 – The first problem in moving from a Drobo or any other large drive to a new NAS is that you need enough storage on the new NAS to copy everything over. This kinda sucks because I have drives in the Drobo that would work fine in the Synology, but I couldn’t remove them from the Drobo until everything was copied off them. I could have used my 18TB backup drive to get this done (more on this drive later), but I also decided that I didn’t want to chance putting older drives in my new NAS. Therefore, I bought three 10TB Seagate IronWolf 7,200 RPM Hard Drives to start with.
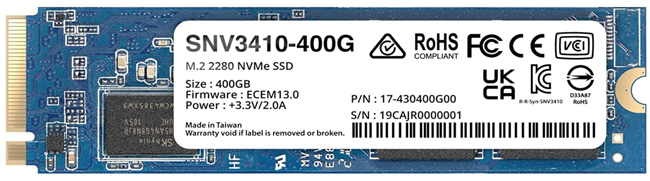
Step 2 – The Synology DS1522+ also has two slots where you can install NVMe SSDs to act as a fast cache for copying files as they will be written to/read from the SSD first is much faster than the drives. I bought one 400GB card and will likely buy the second one for the second slot.
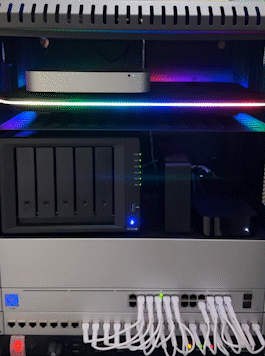
Step 3 – After putting the three 10TB drives in the first three bays and installing the SSD for the cache, I connected the Synology DS1522+ to my network via all four available Ethernet ports on the back (more on this in a minute).
Step 4 – I turned it on, went to my laptop, opened my web browser, entered the default URL find.synology.com to locate it on my network, and logged in with the default username and password. It walked me through downloading the latest version of the Synology OS to it, and then it was time to create my storage pool.
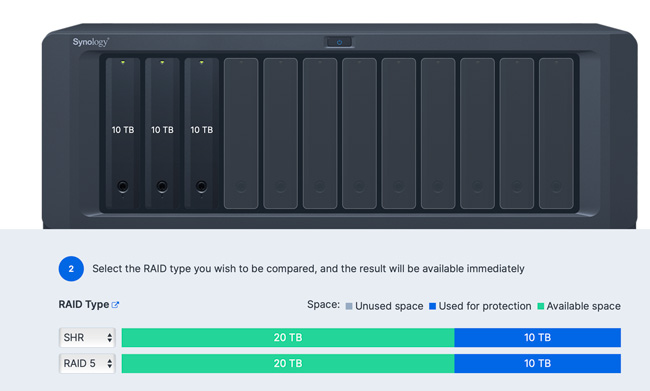
Step 5 – you have multiple options for how you want to configure and format the installed hard drives. The two most common methods are RAID 5 and SHR (Synology Hybrid Raid). I went with SHR as it would be the method that would closely match the benefits I had with Drobo’s proprietary “Beyond RAID.” The drives were formatted properly, and because a RAID always uses one drive for data protection (not a backup), I ended up with a little less than 20TB of usable storage.
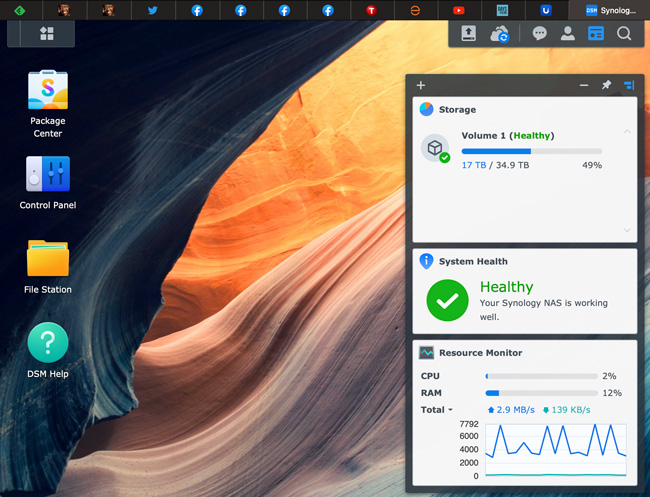
Step 6 – Everything on Synology is managed via a very nice web interface. I set up my user account and the shared folders with the permissions that I wanted.
Step 7 – I had to get used to switching from mounting my server using AFP (Apple File Protocol) to SMB (Server Message Block). Functionally there is no difference to the end user. Just use the Finder (on Mac OS), hit Command-K (Connect to Server), key in smb://the IP address of your NAS, and connect. I had already created my own user account in the setup process and disabled the default “admin” account to cut down on hacks.

Step 8 – You might remember that I said that I connected all four gigabit Ethernet ports to my Unifi 24 port switch. This is a nice feature of both Synology and Unifi in that you can bond/aggregate multiple ports together to provide Link Aggregation, which increases the bandwidth of your Synology NAS by aggregating multiple network interfaces and provides traffic failover to maintain network connection in case the connection goes down. Your network switch would have to be smart/managed to provide this feature.
Step 8 – With both the old server (Mac mini and Drobo) and the Synology NAS mounted on my desktop, I copied the data from one to the other. Copying about 17TBs of data took about three days.
Step 9 – I added more storage. Although the three 10TB drives were enough to copy everything over, it left very little free space, which potentially negatively affects performance. I added a 16TB IronWolf Pro 7,200 RPM Hard Drive, pulled one of the 10TB drives from the Drobo, and put it in the Synology. This gives me about 35TB of usable space.
As I need more storage capacity in the future or if a drive crashes, I would replace the 10TB drives with 16TB or larger drives.
Using Lightroom Classic and a NAS
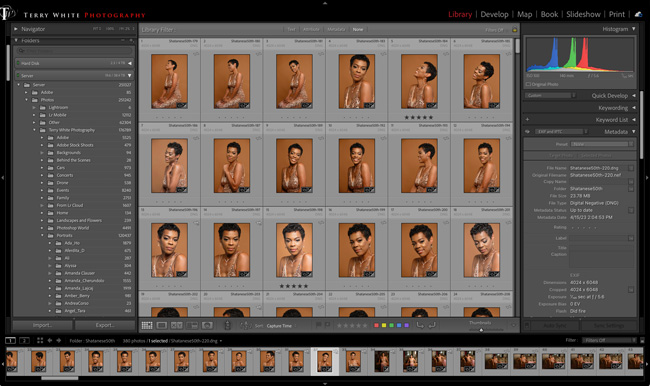
While Lightroom Classic doesn’t allow you to run your catalog over the network, you can store your photos on a NAS. After I’m done working with the photos in a recent photo shoot, I use Lightroom Classic to move that folder from my local laptop drive to the Synology NAS. I just drag and drop it into my Photos folder and the proper subfolder in the Lightroom Classic Folders panel. That physically moves the folder from my local hard drive to the Synology NAS while updating and maintaining them in Lightroom.
By moving the folder to the Synology NAS, I’m also ensuring that it will be backed up locally and to the cloud.
Synology Photos
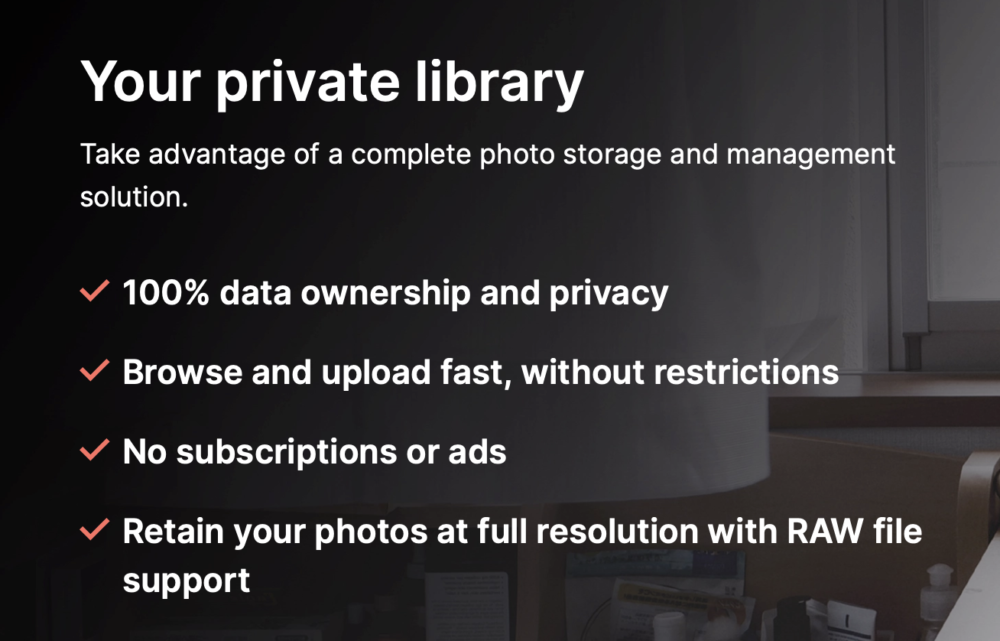
Although I use Lightroom Classic and Lightroom on Mobile, I would be remiss if I didn’t mention Synology Photos. Synology Photos can be installed natively on your Synology NAS. You can download the Synology Photos app for your iOS and Android devices. You can then use the apps to back up photos/videos from your phone directly to your Synology NAS, as well as view the photos already stored there. You view your Synology Photos on your computer via a web browser. Think of it as your own private photo library that doesn’t go to the cloud. You can use it to organize and browse your photos/videos at no additional cost. Each user of your Synology NAS gets their own Synology Photos library.
Back it up! Your data should always be in at least three places.
As I mentioned above, a RAID is NOT a backup! A RAID simply protects you from a drive failure. If one of the five drives crashes, I’d be able to replace it without losing any data. However, if files are corrupted or accidentally deleted, a RAID does NOTHING TO PROTECT YOU in those cases. Years ago, one of my Drobos suffered from a corrupted directory, meaning the operating system no longer knew which files were on the drive and which weren’t. Had I not had a backup, I would have been screwed.
I prefer a local backup AND an offsite cloud backup.

I took the 18TB Seagate External USB drive that was connected to my Mac mini and backing up my Drobo and plugged it into the rear USB port on the Synology DS1522+. Using the Synology control panel, I was able to reformat this drive, and using the native Hyper Backup application, I set up a nightly backup.
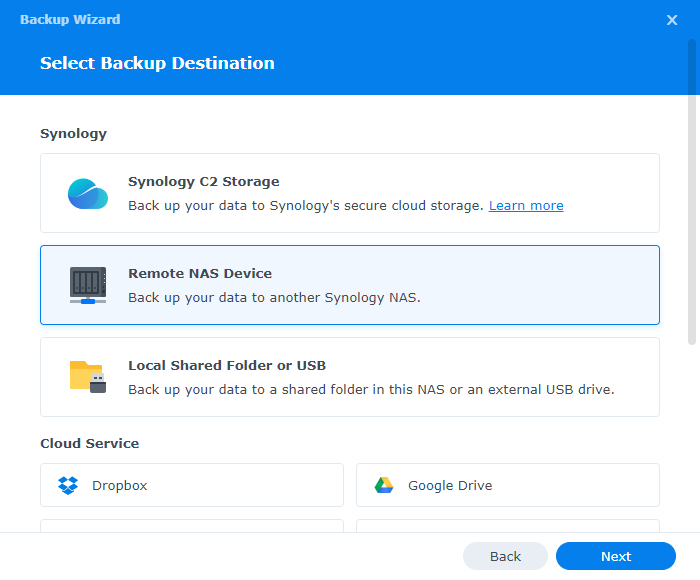
With the local backup in place, it was now time to figure out a cloud backup. Backing up a computer to the cloud is easy and inexpensive with sites like Backblaze.com. However, backing up a NAS is a little more complicated and expensive. Luckily it’s not hard to set up using either Hyper Backup or the native Cloud Sync app. All the major backup sites will walk you through the setup, and even Synology offers its own cloud backup, which I would recommend if you want something simple and built-in. However, Synology and Backblaze NAS backups are expensive. Both charge by the terabyte.
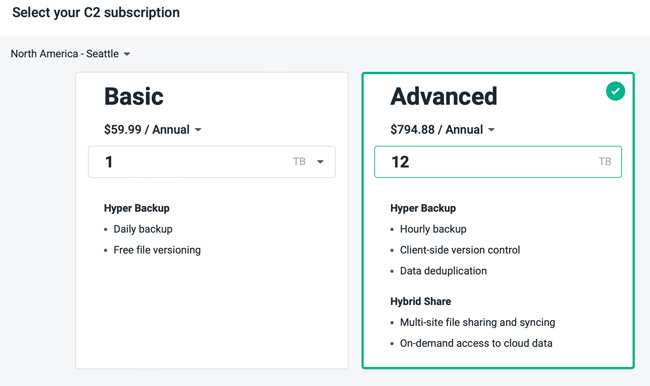
For example, just to back up 12TB to Synology would cost about $80/month! Backblaze costs a little less but is close in price. My friend Greg turned me onto Google and Amazon (AWS) cloud backup. I went with Google, and it’s much cheaper. For 12TB, it would cost $14.40/month. Note: this is another reason to consider converting your raw files to DNG as DNG files usually take up less space. Just a thought since you’d be paying to store more data. Considering that I would only need to restore from the cloud in a very bad/disastrous situation, I’m not that concerned that they charge more to restore the data. To back up my entire NAS (currently 17TB) would be $20.40/month. I wouldn’t need to do this as I’ve separated my essential data (photos, documents that can’t be replaced) from stuff that is nice to have, but if I lost wouldn’t be the end of the world. No need to pay to back up the latter. That folder can be backed up locally, and that’s fine.
An alternative to monthly cloud storage/backup fees
If the thought of paying monthly for cloud storage doesn’t make you feel warm and fuzzy, there is another option. For an offsite backup, you could buy a second Synology NAS. You could then do your initial backup to it while it’s in your home/office. Then you could move it offsite to a family member, friend’s home, or even your photography studio building. Once you connect it to the network in the other location, you could continue the backups to it remotely. There would be a larger upfront cost buying the 2nd Synology and drives, but no monthly costs. Here’s a tech doc on how to set it up.
An Added Bonus That I Wasn’t Expecting
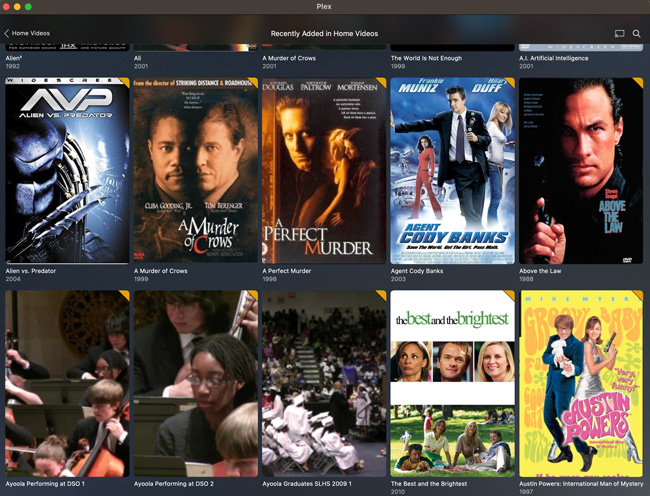
For years I’ve heard people talk about Plex. Plex is a media server you can install locally to stream your movies and music to your own devices. They make Plex apps for iOS and Apple TV. Years ago, I ripped my DVD collection to my Drobo, and now this collection is on the Synology DS1522+ and served up via the native Plex app for free. Now I get what the hype is about. It’s so cool to watch my old DVD collection and home movies that I’ve recorded over the years right on the big screen with my Apple TV.
Now that the Mac mini is no longer a file server, I went ahead and updated the OS to the most it could take, Mac OS 10.15 Catalina. I installed Homebridge, a local speed test server, and Apple Music as a music server.
I’ll probably eBay the Drobo, as there is probably someone out there looking for a replacement for theirs.
The Bottom Line
Had I known that the upgrade process would have been this smooth, I would have done it a couple of years ago. The Synology is faster and gives me more capabilities. The Synology DiskStation DS1522+ is a solid solution. If you’re still on a Drobo, it’s time to move off of it. If you’re storing your photos on a bunch of different hard drives then it’s time to consider a NAS. NOTE: there are less expensive Synology models if you don’t need as many drive bays. I put together this Networking gear guide with links to everything I put into my new network rack and server closet.
Join me at the Lightroom Conference