I have Gogo Wi-Fi on my Long Haul International Flight – Finally!


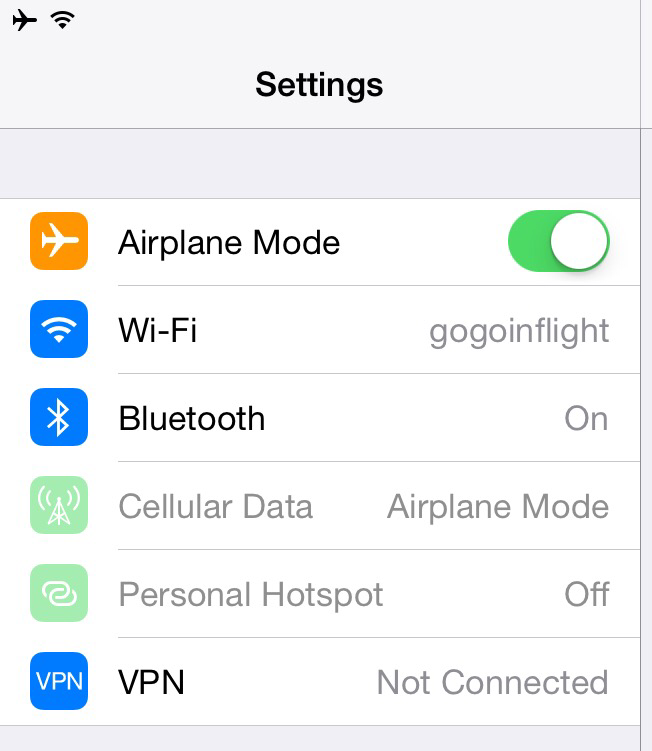
I’m headed back to Atlanta from Amsterdam today. The flight time is just over 9 hours. I did my usual downloads from my TiVo DVR the night before so that I would have some shows to watch and of course I have my MacBook Pro so that I can get some writing done. The last thing I expected on this Delta flight was to have WiFi internet all the way home! Sure I get my hopes up each time I board an international flight by looking for the familiar WiFi stickers found on 99% of all Delta domestic flights and like always there were no stickers present on this flight. However, once we got up to 10,000 feet I noticed that my phone was asking me to login to my corporate IPASS account (a roaming partner of Gogo). I just figured someone on the plane was faking a Gogo hotspot. However, it worked! I was blown away because I figured I wouldn’t see this until at least 2016. I asked the flight attendant just to make sure and she confirmed that “some” planes have it now and that we were “lucky” today. Lucky indeed!


So what does it cost to enjoy this international benefit? Since I have a corporate plan from work that covers Gogo InFlight WiFi I didn’t even think that about a cost difference at first, but as I started writing this I figured my readers would want to know. I went back to the regular logon page and the prices are high indeed. $19.95 for one hour and $39.95 for the whole flight. While I appreciate this  being a work perk, I gotta say that I would gladly pay $39.95 for WiFi on this 9 hour flight. The amount of stuff that I can get done (including this blog post) is worth it to me. The next question is how fast is it? Gogo inlfight wifi in the states uses a celluar system (plane to ground) and from I can see it’s based on 3G technology. When it first came out the speeds were decent, but lately they have been slow to almost unusable. Still slow is better than nothing, so I use it all the time. 
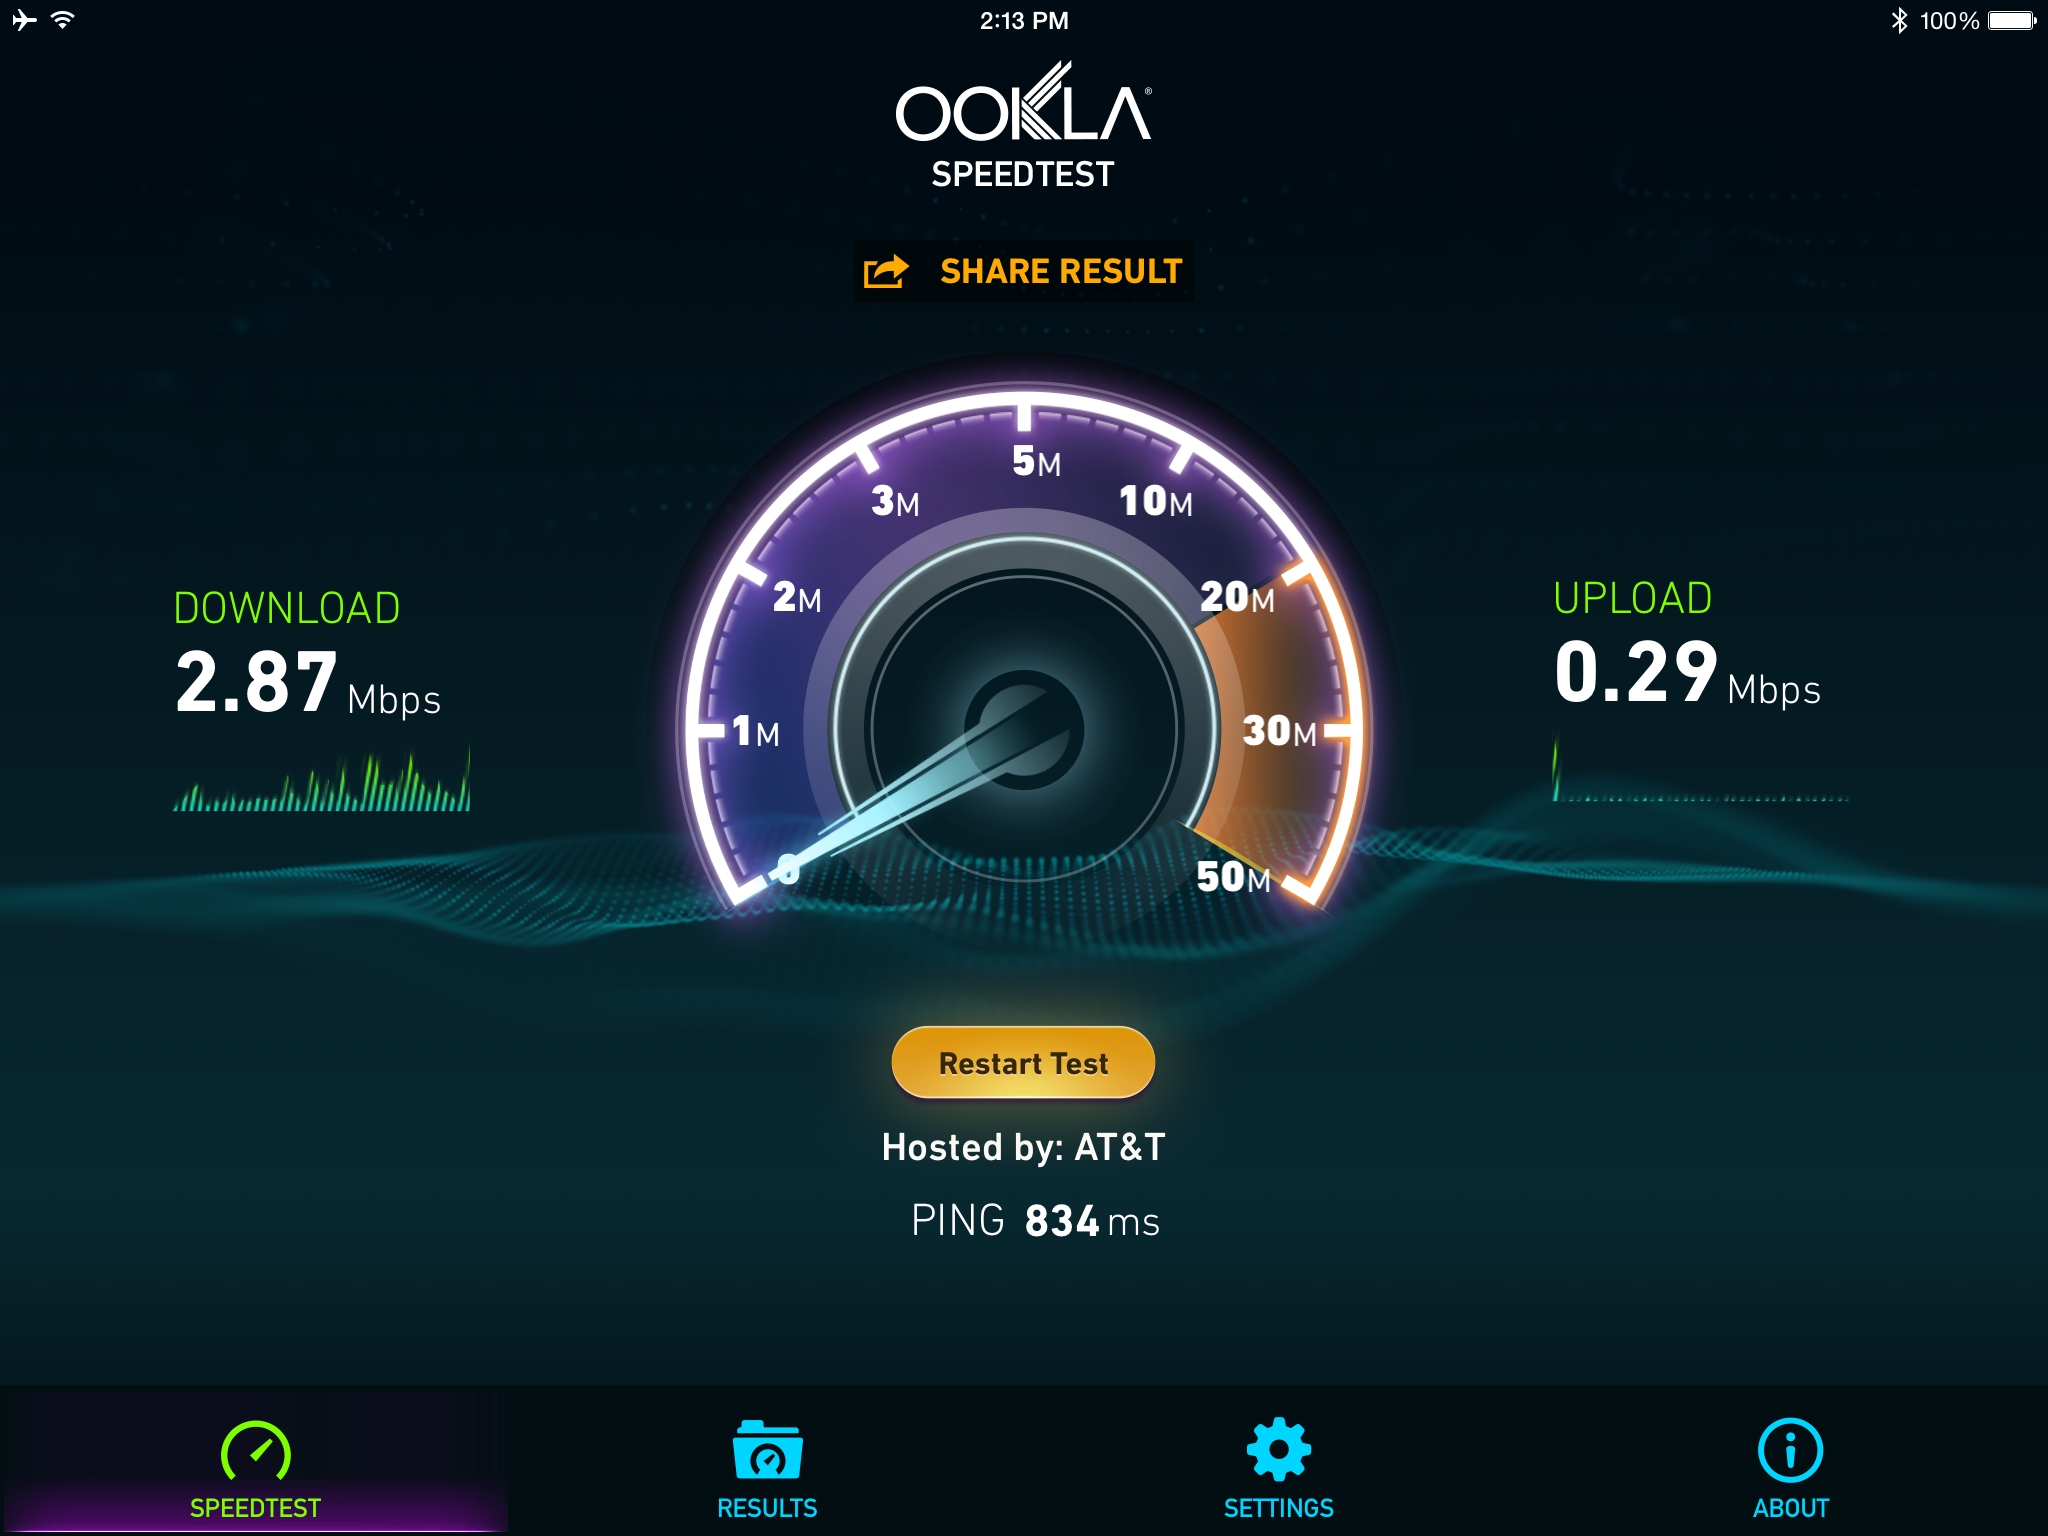
 

Since connecting to the ground over the ocean is not feasible, any plane offering international service requires satellite connections instead. One of the first thing I did was run 4 consecutive speed tests to get an average speed and while it’s not screaming fast, it’s faster than the domestic service. I’ll take it!


The Bottom Line

I remember wishing for WiFi on long haul flights for years. It almost brings a tear to my eyes to see it finally making its way into my life and I commend Delta for making these investments to make air travel a little less painful. 

My New Favorite Travel WiFi Router

wpid14051-IMG_3946_sm.jpg

I’ve traveled religiously with an Apple AirPort Express Base Station for years. It’s portable, it’s fast, and pain free in terms of setup. It just works. However, there’s one thing that made me look for a new solution. More and more hotel rooms and locations that I’m in on the road are now WiFi Only, meaning that newer hotel rooms are no longer equipped with wired ethernet jacks. Even those rooms that do have the wired ethernet ports are often disconnected. Sure I could just connect my devices to the WiFi network offered but that offers a set of challenges that I was avoiding by bringing my own router in the 1st place. When you connect to the hotel WiFi (free or paid) chances are each device has to go through a sign-in, login, accept the terms process. Usually this login is only good on average for up to 24 hours before having to repeat the process for each device each day. On the other hand if I connect my own WiFi router (hotspot) then I use one device to sign on/login etc. and all the other devices on my network can surf freely without the need to have to sign on/login individually.

Why the AirPort Express is no longer the solution

The AirPort Express is great and even the newer form factor has grown on me, however the AirPort Express requires a wired connection to the internet in order to work. If I’m in a hotel with WiFi only the AirPort Express has to go back in my bag. Sure the AirPort Express can be used to extend an existing “AirPort network”, but I have yet to see a hotel equipped with AirPort Base Stations, let alone the access needed to make that kind of configuration work.

Netgear built the WiFi Travel Router I was looking for

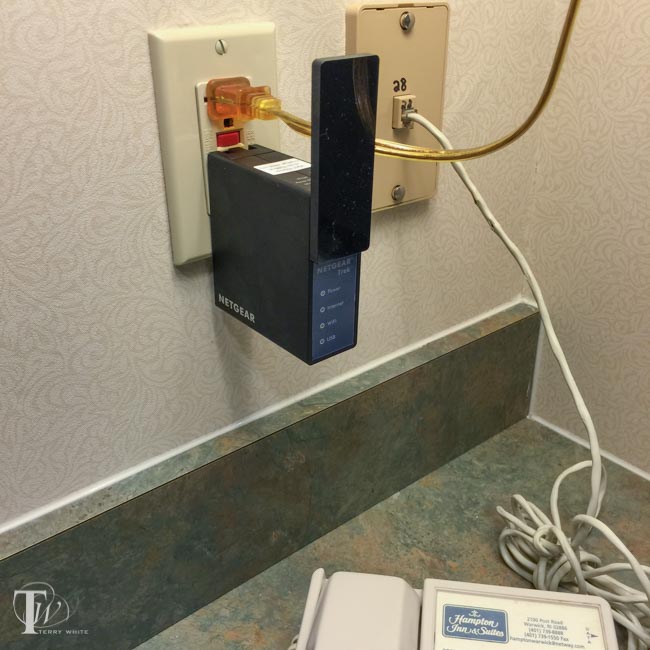
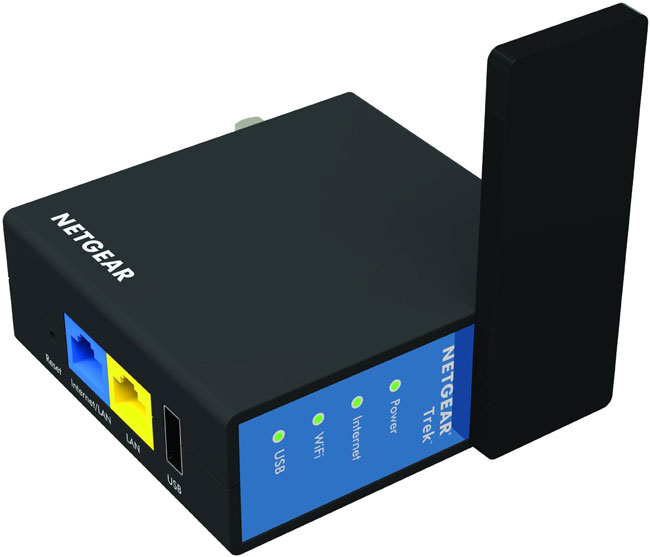
The Netgear Trek  N300 does the one extra thing I need. It allows you to connect to an existing WiFi network and then share that connection via the WiFi network that it creates. Having my cake and eating it too. It can work in either a wired or wireless setup. If there is an Ethernet jack in the room then the Netgear Trek N300 can plug into it and route it just like the AirPort Express. However, if there is only a WiFi network you can have the Trek N300 join it and share it creating your own private password protected WiFi hotspot for the rest of your devices/guests.

How does it work?

As you might expect the setup requires a couple of extra steps when connecting it to an existing WiFi network. The first thing you’ll do is simply configure it with a web browser to set up the wireless network for your devices to connect to. Let’s say for example you want to create a network called “Get off my LAN”. Once you set that up with a password you’re all set to travel. Once you get to your hotel room or other public WiFi area, just power the Trek N300 up using the built-in foldout plug or plug in a standard micro USB cable (it comes with it) and power it via USB. This is a very nice touch because I don’t have to have an extra free wall outlet available. I can power it using my Anker 40w 5 port USB charger/power source.
netgear_wifi_page

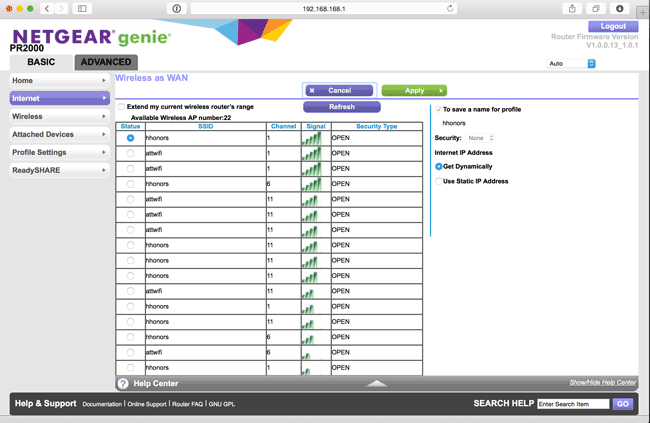
Now simply connect to it from any of your devices. Bring up your web browser and enter the address of your Trek N300. Signin with your admin password and from there you will see a list of the visible WiFi networks to choose from. Choose the public network that you wish to connect to and you will likely be prompted by the public WiFi’s login page. Login as you normally would if you were connecting to this network directly, but you are actually connecting the Trek N300 to it. Once you’ve successfully logged in or paid your Netgear Trek N300 will be online and able to route that WiFi connection to your private WiFi network “Get off my LAN” for all your other devices/guests to connect to.

This Router/Range Extender works GREAT, especially after I upgraded it to the latest firmware. Unfortunately it won’t speed up a painfully slow hotel WiFi connection, but it will make it less painful for you to use by eliminating device limits and multiple device logins. Also it will give you one more layer of security because all of your devices will be behind the Netgear firewall and not visible to the public WiFi network.

The Bottom Line

netgear_trek_n300

The Netgear Trek N300 didn’t disappoint. I’m using it this week on the road as I write this post from my room at a Hampton Inn. There are no ethernet ports here in the rooms and without the Trek N300 I would have had to connect each device to the hotel public WiFi and sign in each device separately. You get an extra Ethernet port on it to connect wired devices too.

Also when you compare the price to the AirPort Express it’s a no brainer.

You can get the Netgear Trek N300 on sale here.

They also have an iOS App to manage it that you can download here for iPhone:

.

Or here for iPad:

.


I went with this color laser printer

brother-HL3170CDW

A few weeks ago I posted on my Facebook page asking for recommendations for a new printer. The requirement was that it had to be color and be ready to print when I’m ready to print. In other words I print very infrequently and my frustration with inkjet printers is that some models dry up when not used regularly and take lots of ink just to get the nozzles clean and printing again. My previous office printers had all been Xerox Phaser (dry ink) printers. While these printers have always served me well, it was going to be overkill to get another one as I just don’t print that often anymore. When it comes to photo printing I usually send them out (Mpix, Costco, etc.) So in house high quality photo printing was not a requirement either. I got lots of different recommendations about Canon inkjets, HP laserjets and others. I decided that for the cost of consumables and again the infrequent use, I would be better off this time with color laser. The other requirement was that it had to be wireless. I did look at the Xerox color laser printers, but it seems that Xerox just doesn’t get it when it comes to wireless. In order to go wireless with Xerox I’d have to go with their midrange Phaser 6600, which lists for $499 and still requires a $99 wireless add-on to do WiFi?? WTH! Really Xerox? Wake up! It’s 2014!

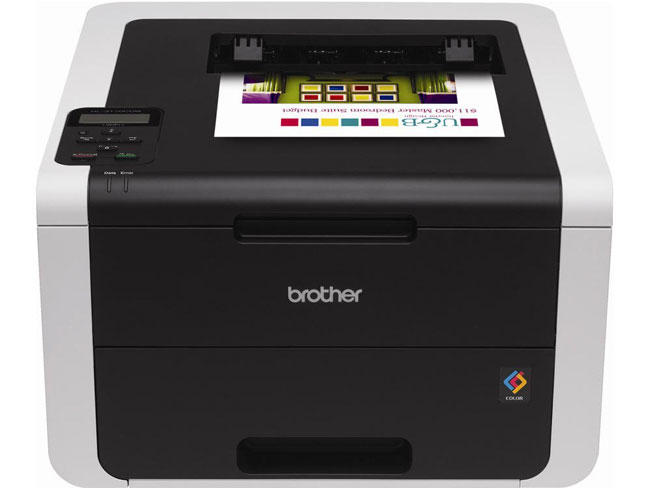
My research led me to the Brother HL3170CDW

Not only did this printer meet all of my requirements:

  • Color laser
  • Wireless (WiFi – AirPrint – Google Cloud Print)
  • Automatic Duplex (2-sided) printing
  • Low cost & low cost consumables
  • Quiet
  • Small

But it excelled at all of my requirements as well. Setup went perfectly because I never had to plug in a single cable besides the power cable. The first thing I did after installing the 4 supplied toner cartridges was to power it up and join my WiFi network from the built-in control panel. Next I added it wirelessly to my MacBook Pro and MacBook Air. Finally I did a print test from my iPad and iPhone, which both saw it over AirPrint. Yes, this was the out of the box “it just works”, experience that I was looking for. The print quality is good as well. No problems to date.

What’s the downside?

I would say the only downside is that it’s not as fast as I’m used to with my Xerox printers. When I’m talking speed, I’m talking from the time I hit print til the time the printer wakes up, receives the job and prints it. After that it prints at a speedy 23ppm. My only other concern was that while reading other reviews for this printer, people complained that once it goes into “deep sleep” that it falls off the wireless network for AirPrint. In other words you would have to walk over and hit a button to wake it up to print or print from a computer. I’m happy to report that I have not had this issue at all. As a matter of fact I’ve not printed for two days now and it still shows up and ready to print from my iOS devices via AirPrint. It says “deep sleep” on the LCD. Now there is an option to let it power itself OFF after a user defined interval. At that point I would assume that you would have to press a button to turn it back on and that wouldn’t bother me. However, that option is off by default and the deep sleep conserves power (using less than 1 watt of power). I will turn it off when I’m away on business.


The Bottom Line

If you’re looking for a good quality, color laser printer that supports all the latest and greatest wireless protocols as well as printing via USB, then this printer is definitely worth consideration. It fit the bill for what I was looking for at less than half the cost of a Xerox printer with similar features. It’s also less costly to run than typical inkjets.

You can get the Brother HL3170CDW Color Laser Printer here.


Chromecast – Stream web content to your HDTV wirelessly

chromecast-dongle

If you’ve followed my reviews you probably already know that I’m a fan of TiVo and Apple TV. Between the two devices I pretty much have all my TV watching needs covered. TiVo is definitely the best DVR experience for recording and watching TV shows and Apple TV is great for streaming all my media content, watching Netflix, YouTube, HBO Go, iTunes rentals, podcasts, etc. With Apple TV I can even stream/mirror any content from my iOS devices OR my Macs. The latest Macs and Mac OS X has AirPlay built-in. Even with all these capabilities I was intrigued by Chromecast. The low $35 entry price was low enough to give it a shot.

What’s Chromecast?

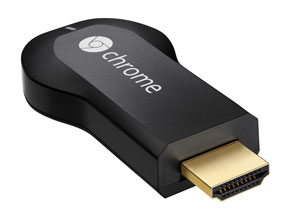
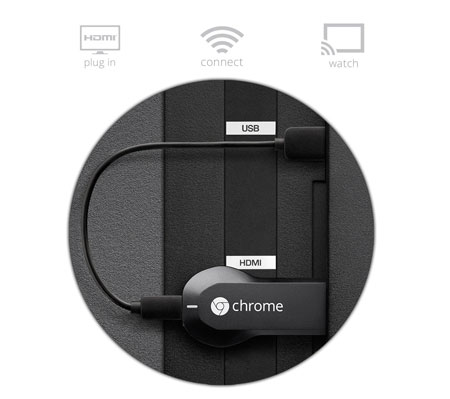
Chromecast is a small “dongle” that attaches to your TV via HDMI. However, don’t let the picture deceive you as it did me. You not only connect it to your TV via HDMI, but you also need to supply power to it. You can either use the supplied power adapter and plug it into the wall or you can use the USB cable and plug into an available USB port on or near your TV for power. This freaked me out at first because my TV is on the wall and I didn’t want any wires hanging down. However, I was lucky to have a USB port on my TV right next to the HDMI ports in the back. I was able to plug in the Chromecast and power it right off the USB port on the TV as well. No visible wires!

chromecast-setup

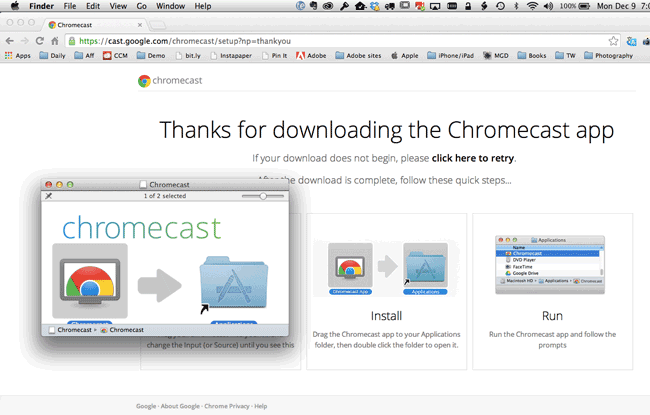
Once it’s plugged in and you turn your TV on to that HDMI input you’ll be presented with a setup screen. Head over to your computer and download the setup app. You computer should see the Chromecast wirelessly. During the setup process you’ll give it access to your WiFi network and enter your WiFi password. Mine needed to download a firmware update then I was up and running. After the Chromecast install on the TV, you’ll need to download (Google Chrome if you don’t already use it) the Chromecast extension for Chrome. This extension lets you broadcast from any browser tab you have open in Google Chrome to your TV.

settingupchromecast

How is this better or worse than Apple TV?

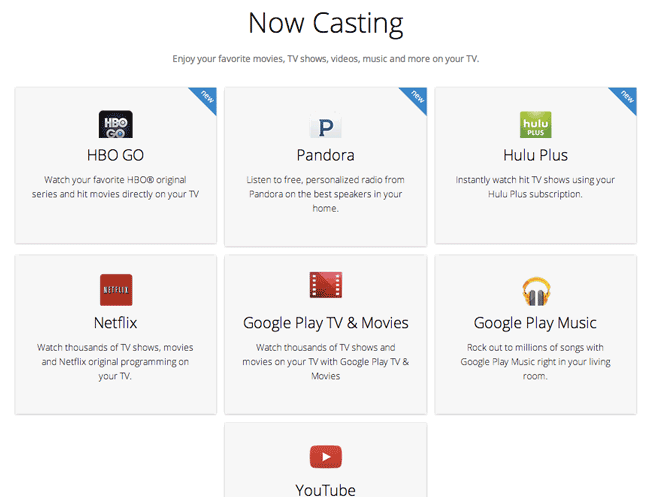
First off it’s not direct competition to Apple TV. Apple TV does way more and costs more. Chromecast only works with whatever you can display in Google Chrome or from a Chromecast compatible app on your computer or mobile device. So no streaming of other things on your computer unless they are Chomecast aware. However, that’s probably the one thing I like about it over Apple TV. While I can use AirPlay to stream ANYTHING from my MacBook Pro to my Apple TV, it’s a direct mirror. I cant’ say stream a slideshow in Lightroom and then go work on another photo in Photoshop. It’s a mirror of whatever I’m doing on the computer. (UPDATE – with Mac OS X 10.9 Mavericks you can AirPlay to an Apple TV and use the Apple TV as a second display/extended desktop and NOT mirror.) However, with Chromecast I can stream content from one browser tab and go work on anything else while that browser content is streaming in the background. That’s what I like about it most and I think that’s what people that are trying to cut the cable/satellite bills out of their lives will like too. You can stream Netflix, HBO Go, YouTube or any other site to your TV while not tying up your whole computer. There are times that I watch my Slingbox via my web browser. Now I’ll be able to stream that content to my TV.

What about audio? This is the tricky part. If your content is either Flash based or coming from an App that is compatible with Chromecast then your audio will also stream to your TV. However, if the content is not Flash based then the audio will play through your computer.

The Bottom Line

If you want to stream content from the web to your TV, this is your easiest most cost effective way to do it wirelessly. The playback rate is “decent”, not great or perfect, but certainly watchable without dropping too many frames. The picture quality was very good. It’s a one time cost with no monthly fees. I’m tempted to get another one for travel/hotel room use.  You can get one here for $32.88. If you want to MORE, then I’d still recommend getting an Apple TV.

chromecast-nowshowing

Dropcam HD Review

DropcamHD_front_turned_HI-RES

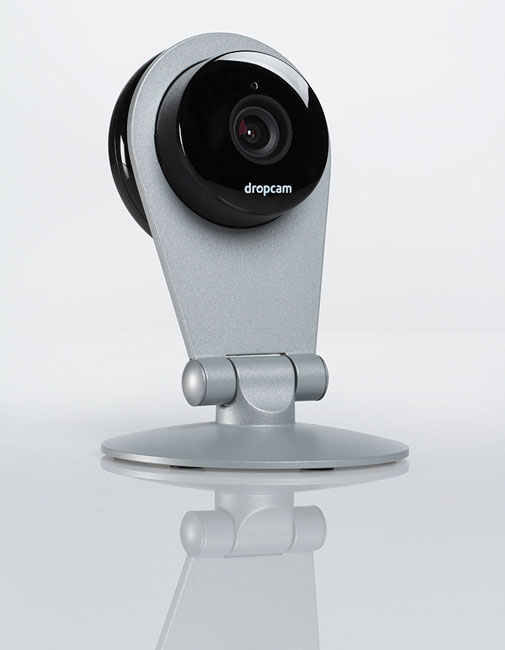
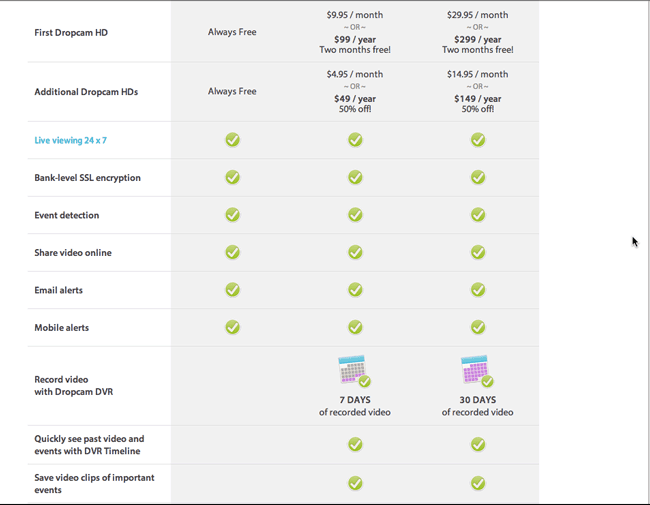
I’ve been using Panasonic IP webcams for years to keep an eye on things at home and at my studio. However, Panasonic has gotten out of this business and therefore it was time to look at newer cams to recommend to people that ask. I was intrigued by the Dropcam HD and finally got a chance to try one out. Dropcam HD is a 720p HD WiFi enabled video monitoring camera. It also broadcasts sound. Unlike the Panasonic cameras, Dropcam is both a hardware solution and service. During the setup process you configure a Dropcam.com account along with setting up the hardware. You have a choice of a “free” live viewing only account or a paid Plus or Pro account that not only allows you to view your Dropcam live, but also see either 7 or 30 days of recorded video respectively. The idea is that if you’re using it as a security camera that you’re not going to be watching it 24 hours a day. Therefore Dropcam will automatically record and keep the last 7 or 30 days of video so that you can review it if need. However, even with the Free account you can setup motion detection that can alert you that something is moving in front of your camera so that you can tune in immediately and watch.


The initial setup

drocam_setup

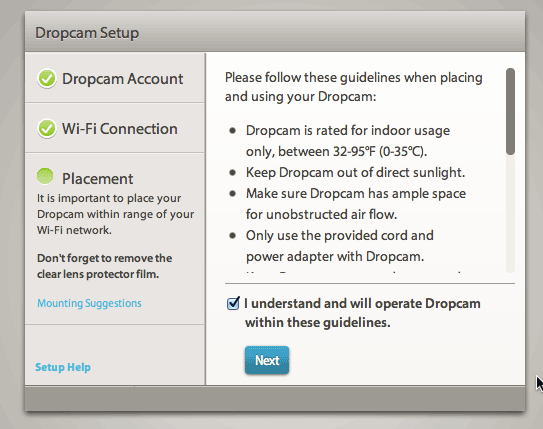
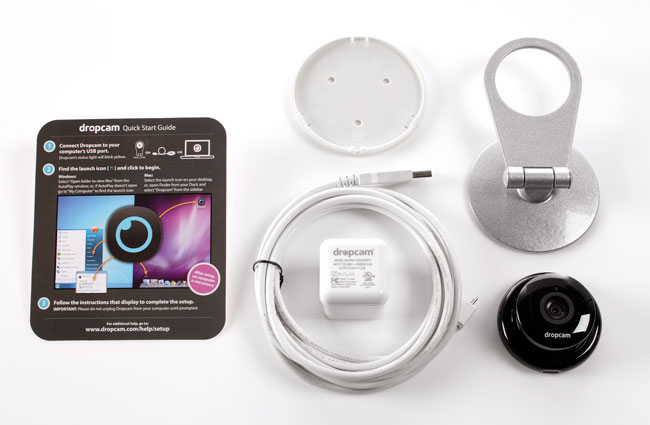
The initial setup couldn’t have been easier. Dropcam HD comes with a stand/mount, 10 foot long USB cable and USB power adapter. You plug the Dropcam HD into your Mac or PC initially and it mounts on your desktop as a volume containing the setup utility. No need to even download anything. During the setup you join the Dropcam HD to your existing WiFi network including password protected ones. You also setup your account on Dropcam.com during this process. Once you’ve got it setup, unplug it from your computer and place it where you want to monitor (indoor use only) and plug it into a AC wall plug. Once the camera powers up and connects to your network the setup completes. The mount can be either used on a desk, bookcase, etc. or you can wall/ceiling mount it. It even comes with the screws and anchors. Also the camera can easily be removed from the mount. It just pops in and out. Also the indicator light can be disabled for more discretion.


Image quality

dropcam_HD_studioview

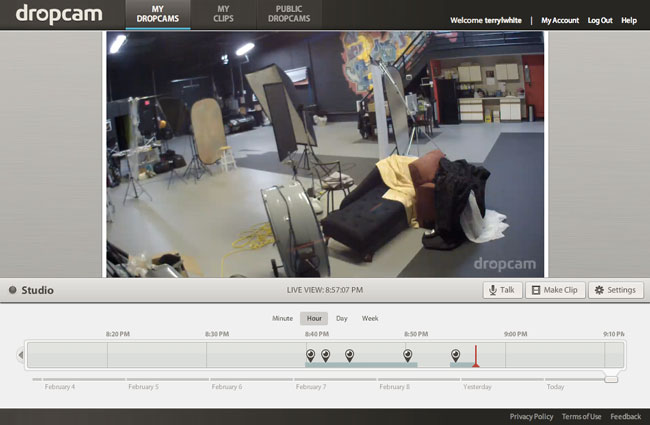
I was really impressed with the image quality. Definitely much better than the standard def/low def Panasonic cameras I’ve been using. You can watch the image in a Flash enabled web browser on your Mac or PC or you can download their mobile App and watch the stream live on your iOS or Android devices. See my review of the iPhone/iPad App here.


Works in the dark too

dropcam_hd_dark

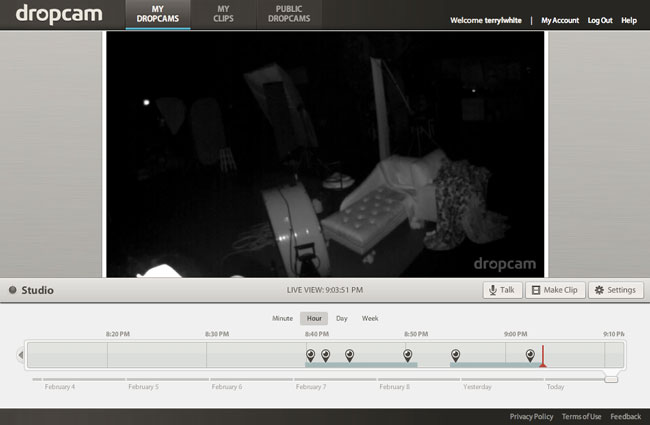
Unfortunately the room you’re monitoring may not always have the lights on especially if you’re not home. I was happy to see that Dropcam HD uses infrared technology to show you what’s going on even in the dark. It automatically switches to night vision when the lights go off and off again when the lights come back on.

dropcam_HD_rates

The Bottom Line

Dropcam HD is a very well thought out process and the company doesn’t rely on any other company or software to make their solution work. This is a good thing as many other solutions lack things like mobile apps or online recording. The image quality is exceptional and exceeded my expectations. You can setup multiple Dropcam HD units. You can do two way audio and it has digital zoom. While this hardware/service solution works as advertised there are a couple of things that would make it better. First off there’s no way to rotate/swivel the Dropcam. It’s a fixed camera and therefore can only cover the range that the built-in lens covers. With that said, the lens covers up to 107° field of view, so this may not be an issue for most. The next thing is that while it comes with a USB power adapter, it’s unnecessarily wide and you may have an issue plugging it in to an multiple plug outlet next to another plug. There’s no reason why it couldn’t be skinnier. The only other thing you might consider is that Dropcam uses about 60GB of bandwidth a month. Depending upon your ISP/plan this may be an issue. Comcast for example thinks anything over 300gb a month is excessive! As you can see I can’t find a whole lot wrong with Dropcam HD. I’m impressed and will look to replace my older Panasonic units with Dropcam HDs.

You can get Dropcam HD here.

You can also check out Dropcam on Facebook here.

DropcamHD_parts

Review: Shooting Wirelessly with the Nikon D600 and WU-1b Module

WU-1b

I’ve been a fan of shooting wirelessly to my iPad since the early days when I got my Nikon D7000 using an Eye-Fi Pro X2 card. After that I configured my Nikon D4 and WT-5a module to shoot either wirelessly to my MacBook Pro or my iPad and now that I have a Nikon D600 (and loving it!) I was interested in seeing how the new Nikon WU-1b module works. The idea in all of these scenarios is to use the iPad or iPhone for review of what I’m shooting with my DSLR and sharing with email or social media of quick event photos.

The Nikon WU-1b is a narrowly focused solution

WirelessMobileAdapterUtility

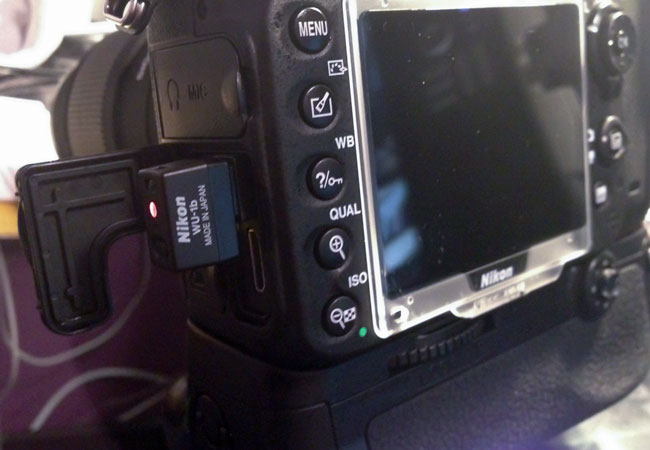
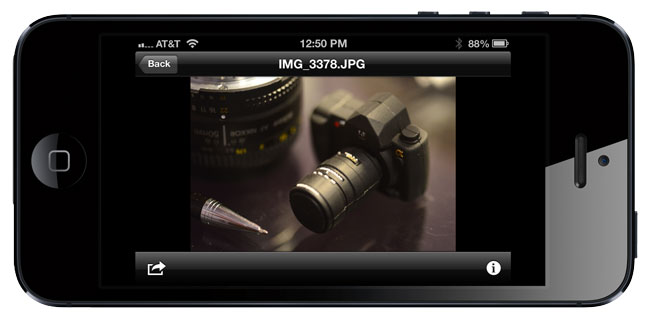
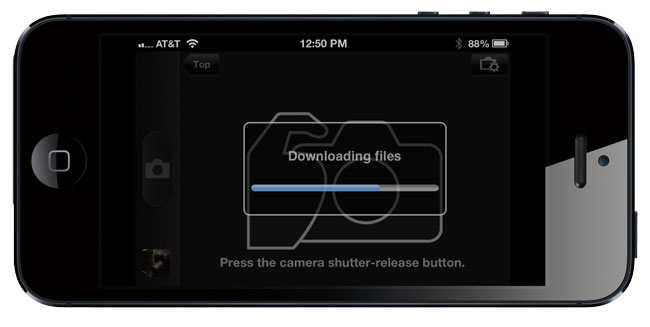
With the Eye-Fi and WT-5a module for the D4 you can wirelessly transmit your photos to a variety of Apps. However, the WU-1b seems to be narrowly focused by Nikon to shooting wirelessly to your iPhone or Android Smartphone. They provide a Free App (Wireless Mobile Adapter Utility) for both platforms (see my review of the iPhone version here). Once you download the App it’s pretty easy to get started. Just plug in the module into your D600’s USB port and turn your camera on. The WU-1b will start broadcasting its own WiFi hotspot. Connect to that hotspot via your smartphone and launch the App. Once you’re in the App you can either set it to wirelessly fire the shutter (with Live View on your smartphone) of your D600 and then transmit the image to your smartphone or you can switch the App to the mode that allows you to shoot normally with the camera and the images will be transferred to your smartphone as you take them. Whether you shoot in RAW or JPG the module will send JPGs to your smartphone. I normally shoot RAW to the 1st card and Basic JPG to the 2nd card (my Eye-Fi) card. When I’m in this RAW+JPG mode the WU-1b seems to send the smaller basic JPG. However, when I’m in just RAW mode it sends a larger full-sized JPG and of course that takes a lot longer. Speaking of time, the smaller JPG (about 500kb) takes about 5 seconds to show up on my iPhone. The larger JPG (about 1.6-2MB) takes about 10-15 seconds to show up on my iPhone.

Wireless Mobile Adapter Utility - Nikon Corporation

It works as advertised, but…

WirelessMobileAdapterUtility-transfer

While the WU-1b works as intended it really falls short in the review department. Unlike other tethering solutions you don’t actually see the images as they come in to their App. Instead you see a progress bar and once the images are there you tap to review them. Also while the camera settings are displayed, there is no way to change them in the App. Look at this is merely a transfer utility and remote shutter. Also there is no native iPad support. Yes the app works on an iPad, but in the smaller phone size.

Shuttersnitch saves the day AGAIN!

shuttersnitch-WU-1b_iPad

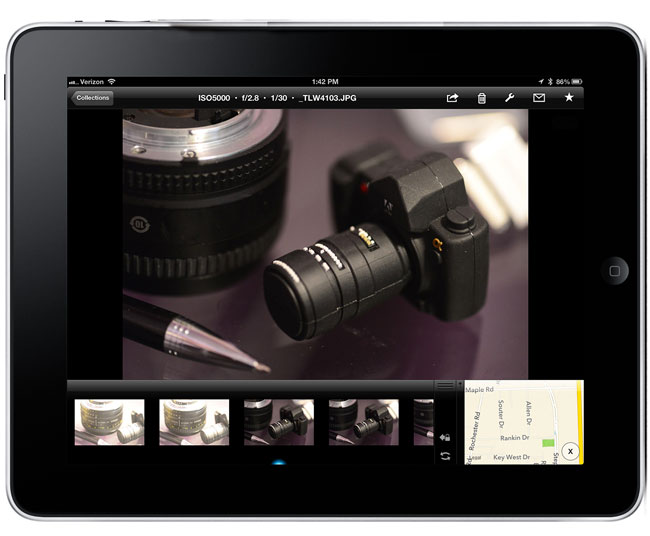
Shuttersnitch is the App I use for All my wireless tethering to iPad needs. It works with the Eye-Fi cards and it works with the Nikon WT-5a module. The good news is that it also works with the WU-1b module. Unlike the bear bones Nikon Utility, Shuttersnitch gives you a great way to review your images as you take them, star rate them, geotag them and share them via email, social media and cloud storage such as Dropbox or any FTP/WebDAV location. It’s a professional App! I remembered that a recent update of the App mentioned support of the WU-1b module and sure nuff it works great! I had to simply turn on support for the module in the settings and just start shooting. The images came in as usual.

Shuttersnitch for iPhone and iPad

ShutterSnitch - 2ndNature


The Bottom Line

For the price, there’s really no reason not to get the WU-1b module if you have a Nikon D600. It provides a pretty painless way to get images from your Nikon D600 wirelessly to your smartphone and it can work anywhere since it creates its own ad-hoc network. Add the Shuttersnitch App and you’ll be even happier with it. Oh yeah, one more thing: Nikon can you please explain why the Nikon WT-5a (for the Nikon D4) costs $500 more than the WU-1b (for the Nikon D600)? Is there really $500 more technology in the WT-5a? I’m thinking not! Yes I see the price is coming down on it from the outrageous $877 that I originally paid, but really? c-mon!


Do you really “need” unlimited data?

If you’re an early iPhone adopter like me, then chances are you are grandfathered in to AT&T’s “Unlimited” data plan. AT&T has taken a lot of heat (and deservedly so) over playing games with this plan and doing things like throttling users back that use a lot of their “unlimited” data and holding back features ie. Data Tethering and FaceTime over Cellular, from users still on these plans.

Never gonna give it up!

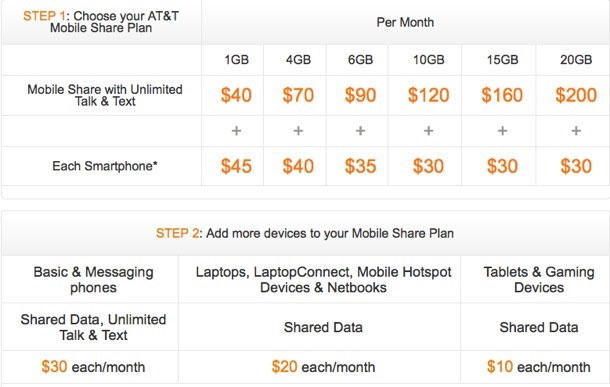
Like many of you I have no plans of giving up my unlimited data voluntarily. Actually I don’t have a choice as my AT&T plan is through work. I do use a lot of data when I travel. I’m on this plan until they take it away (cold dead hands) or until work changes to something else. However, I also have a family plan with family members on it. Many of those iPhones and iPads were on unlimited plans too. A couple of months ago I decided to look not only at my bill, but to also look at usage and I found that most of these family members don’t use a lot of iPhone 3G/4G data at all. They are on WiFi most of the time either at home, work or school. I also had 3 iPads on various monthly pay-as-you-go plans. I decided to bite the bullet and move everything over to one of AT&T’s Shared Data Plans. Doing the math it would save me about $30/month and everyone (but me) would get the benefits of tethering and FaceTime over 3G/4G. I went with the 10GB/month plan because for 5 iPhones and 3 iPads the math you don’t really save anything by going with a lower plan as the cost per phone goes up!

How’s it going?


iTunes

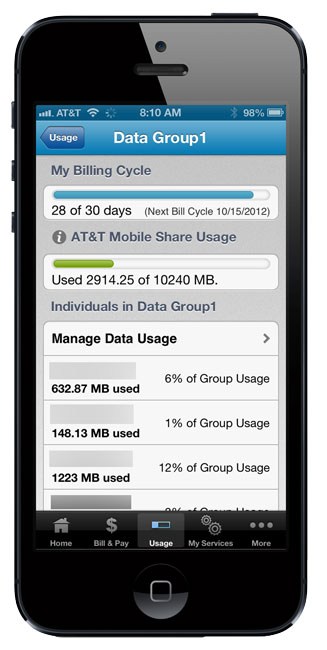
This is my first full month after the switch and as I suspected they didn’t go anywhere near the 10GBs of allotted data. Again remember this is for 5 iPhones and 3 iPads.

The Bottom Line

While I like the idea of buying data and using it anyway that I want, I still don’t like AT&T’s tactics here of not allowing you to use your device to fullest if you were an early adopter on an unlimited data plan. If you use the data (especially video streaming) then by all means stick to your unlimited plan. Stick it to the man! However, if you could save a few bucks and you’re not using that much data you might be actually better off on one of the new shared data plans. These plans also include unlimited voice and unlimited texting.

Check your usage in the My AT&T App

iTunes

Review: The 2012 AirPort Express – I love it, I hate it!

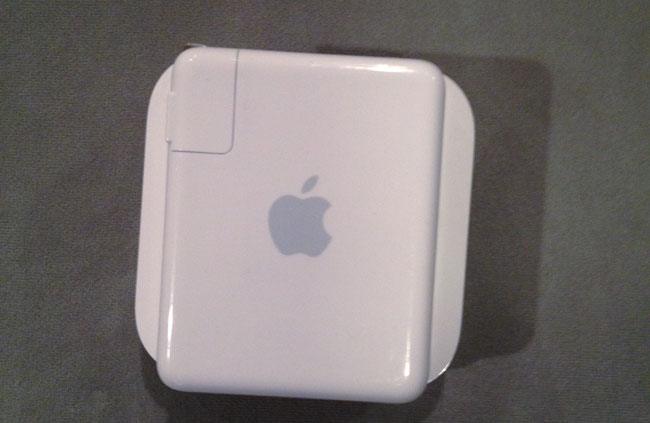
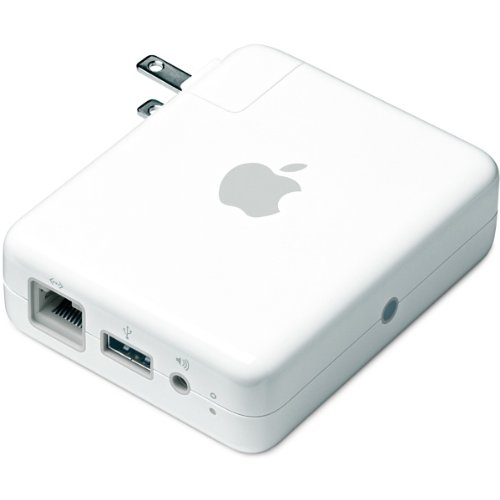
One of my favorite road warrior gadgets is the AirPort Express. I have several of them for AirPlay streaming around the house and studio as well as at least one with me at all times when I travel (it lives in my bag). See “What’s In My Laptop Bag.” I never had an issue with the design of it. I actually appreciated the simplicity of it being a compact self-contained router with flip out prongs to plug it into a wall outlet for power. It was fast, easy to setup and it just worked. Now that I not only have to demo cloud services for living, but also mobile Apps, I really appreciate being able to setup my own WiFi network on stage as well as my hotel rooms. The previous generation AirPort Express had 802.11n support as well as AirPlay and supported up to 10 devices simultaneously connected. It even supports connecting a USB printer for easy wireless printing. Yep, it was just about perfect what it was.


Apple changed it!

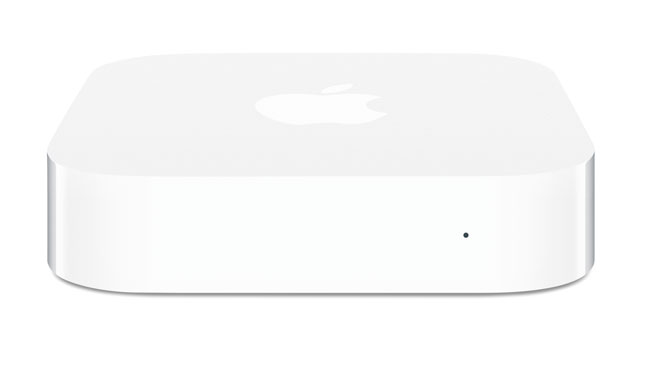
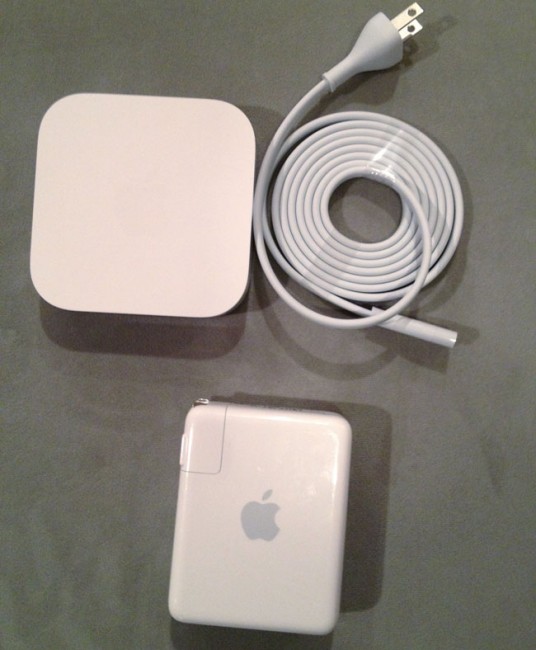
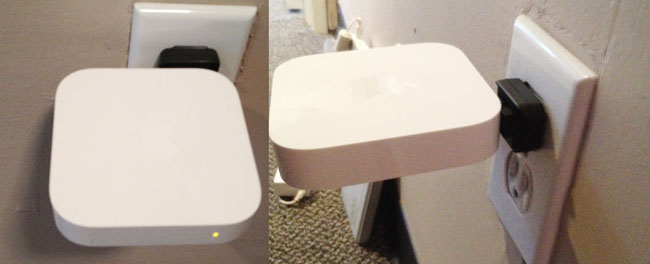
The new AirPort Express on top now comes with a freakin’ cord! Noooooooooo!


Apple quietly introduced a brand new AirPort Express model on Monday at the WWDC (along with new MacBooks and iOS 6 – yeah there was a speed bump to the Mac Pro too – sad that it’s virtually the same chassis as the Power Mac G5 and got no Thunderbolt or USB 3 love…). Although I was most excited about the new MacBook line up, I was quick to take a look at the New AirPort Express too. While the specs looked great, I cringed when I saw the back of it. Apple has gone away from the all-in-one design to one that is almost identical of the Apple TV. By that I mean that it now requires a power cord. This may not seem like a big deal and maybe it isn’t (I’ll be on the road with it next week), but I certainly will miss just flipping out the prongs and plugging it in!

The new one is slightly wider, but also slightly thinner.

On the plus side Apple added a second Ethernet jack so that you can connect not only the ethernet cable to your internet connection, but also plug in a device via ethernet for speed. Sadly though these still aren’t gigabit ethernet ports. Not sure how much I’ll need that second port on the road, but it’s nice to have. The new AirPort Express is also dual band (like the AirPort Extreme) simultaneously supporting 5Ghz and 2.4Ghz WiFi connected devices. It still has AirPlay and a USB port for printers as well as support now for up to 50 devices. It’s that last one that pushed me over the edge. While I personally don’t need more than 10 connections on the road, there are times when I’m using the AirPort Express on stage and sharing it with other presenters and perhaps a colleague or two in the audience. With laptops, tablets and phones connecting to it, it’s much easier to go past 10 devices than it was back in the day.

Setup

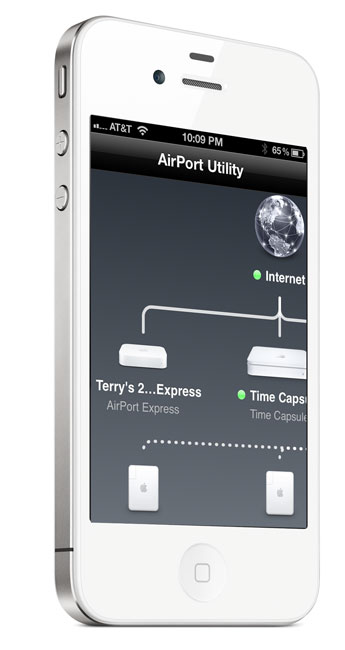
The setup is a piece of cake as usual with the AirPort Utility. You can even do the setup from your iPhone, iPad or iPod touch with the iOS version of the AirPort Utility. Now you can even setup a guest network like you can on the AirPort Extreme granting those users just internet access instead of access to your entire network.

AirPort Utility - Apple

The Bottom Line

New AirPort Express on the Left, Old AirPort Express on the right.

The 2012 AirPort Express is overall a nice upgrade at the same price as the old one. It’s about the same size as the old one being a little thinner, but a little bigger overall. I wished they had kept an all-in-one design as I don’t want to have to have one more cord to carry, but I’m sure I’ll be able to adjust. If you have a recent 802.11n model then there probably isn’t much of a reason to upgrade. However, if you’re on an older 802.11b/g model or you use one at home as your primary router, then you’ll want the new stuff in this one.

You can get it here for $99 or here for about $99.


UPDATE

Leave it to my buddy Scott Diussa from Nikon to give me an option. Apparently the plug adapter for the Nikon D7000 battery charger will fit the New AirPort Express and work in a pinch. It’s not elegant. It’s not pretty, but it does work. Now if it were only white. 🙂

Update #2 While the Nikon plug does fit (so does the original Apple one), it slightly blocks the WAN port making it a non-starter. 🙁

Shooting Wirelessly with The Nikon D4 and WT-5

You can find all kinds of reviews and sample images on both the Nikon D4 and D800 out there. My goal here is not so much to review this great new camera, but to put it to the test when it comes to shooting wirelessly with the New WT-5 WiFi module. The WT-5 currently only works with the D4 as it plugs into a special new port that only the D4 has. This was one of actually one of the deciding factors that pushed me to the D4 instead of the D800 (although the D800 should work with Eye-Fi cards).

Wireless Freedom

When I’m in studio I’m shooting tethered to my MacBook Pro and Adobe Lightroom 99.9% of the time. This means long USB cables and enviably tripping over them. The D4 has a USB port on it as well as an Ethernet Port! While the potential for fast Ethernet transfers intrigues me, it would still mean having a cable attached and potentially tripping over it regularly. While I had no doubts that the WT-5 would work, the question was would it be fast enough to allow me to cut the cable?

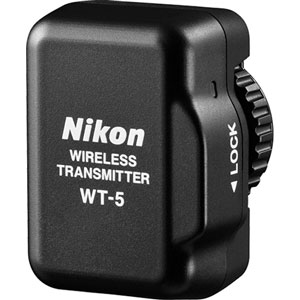
Last night I did my first shoot with the Nikon D4 and I did the entire shoot wirelessly with the WT-5! I configured the WT-5 to connect to my studio’s WiFi network and to send the images directly to my MacBook Pro on the same network. Keep in mind that I shoot in RAW and the images (16.2 MP NEFs) are also being written to the card when you use the WT-5. I stuck in one of my new Transcend 32GB 400x CF cards, configured a Lightroom 4 to Auto Import from the Nikon folder and began shooting.

The 1st image takes a while

From the time you press the shutter till the time you see the 1st image appear in Lightroom it can take an agonizing 30-60 seconds (wow we’re impatient). Much of this time is for the WT-5 to wake up, connect to your WiFi network and find your computer. However, if you keep shooting the subsequent images come in much much faster, usually 5-8 seconds for RAW. That’s much more acceptable and usable. While it wasn’t fun waiting for the 1st image to come in during my live shoot, it wasn’t the end of the world. Once I saw that the lighting was right I could just keep right on shooting knowing that the rest of the images would be transferring as I shot.

Here’s a video on how long it takes…


The Bottom Line

While shooting tethered via a wire is faster and cheaper, I’ll take the speed hit to shoot wirelessly any day! This solution also works great with the recently updated Shuttersnitch App on iPad. The WT-5 is way way way overpriced IMHO, but it works as advertised and the ability to add multiple profiles, setup an adhoc network, shoot directly to a PC/Mac via the Nikon software or to any FTP server makes it a killer solution for those that want/need wireless shooting. Next I’ll play with the remote control capabilities of the WT-5 and controlling it from any web browser including Safari on iOS.

You can get the Nikon D4 here

You can get the Nikon WT-5 here

Travel Tip: Use Wired Internet instead of WiFi

ethernet port

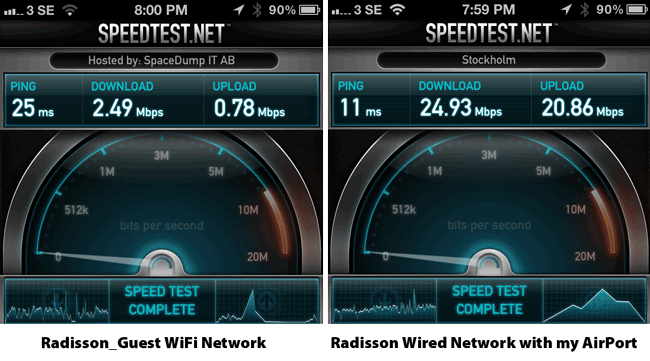
i'm currently traveling on the 2012 Adobe Nordic Design Tour. This means a different hotel each night or so. I spent the weekend in Sweden and my hotel (Radisson Blu) offered FREE WiFi throughout the hotel. All you need to do is confirm your room number, last name and accept the terms/conditions. Great! However, there was one major problem. The internet was almost unusable in the evenings because (and I'm guessing) that it was saturated with hotel guests. My connection dropped constantly and when I could get connected the speed reminded me of dial-up. Sadly, it wasn't until my last night at this particular hotel that I noticed an Ethernet port on the desk under the TV. Lately it has been my experience that when a hotel offers WiFi, that they pull the plug on the Ethernet ports in the guest rooms. However, i figured I had nothing to lose by plugging in and giving it a try. Not only was the port active, but it was about 10-20 times faster than the WiFi network!


Get the SpeedTest.net App I used above here from the iTunes


Yes, I still want wireless!

I carry an AirPort Express Base Station as part of my "always packed" travel gear. I plugged it in and in about 15 seconds I had my own private WiFi network that was way faster than the Radisson one and best of all I could put all my devices on it without having to do the terms and conditions setup, dropped connections, etc. on each one. 

You can get the AirPort Express Base Station Here. You might also want to carry a short ethernet cable as there wasn't one anywhere to be found in my room.


The Bottom Line

If you have the option of going wired vs. wireless, give it a shot. You'll probably get better performance not only because wired is faster, but because most people are going to connect to the public WiFi (overloading the routers) rather than the wired option. By having your own WiFi hotspot you still get the benefits of WiFi too! And yes, the wired connection in my room was also FREE.

The other benefit of a faster connection is faster VoIP calls, FaceTime, Skype, Netflix, Slingplayer, etc.  I was able to get so much more done with the faster connection, not the least of which was this blog post. 🙂