Actiontec MyWirelessTV Stream HDMI Sources Wirelessly to Another HDTV

In my studio I have one Comcast cable connection connected to a TiVo box in an upstairs office. However, in the reception area I have an HDTV on the wall that’s used to display photos via an Apple TV. While I could easily have Comcast run a line to that HDTV on the wall, I didn’t want an ugly cable box hanging off it. I could also perhaps run a long HDMI cable from the upstairs room through the walls to the HDTV in question. However, I didn’t want to attempt it on my own. I’ve been skeptical of the performance of wireless streaming systems, but I decided to give one a try. As a matter of fact I was so skeptical that I didn’t even open it for 2 weeks after it arrived.

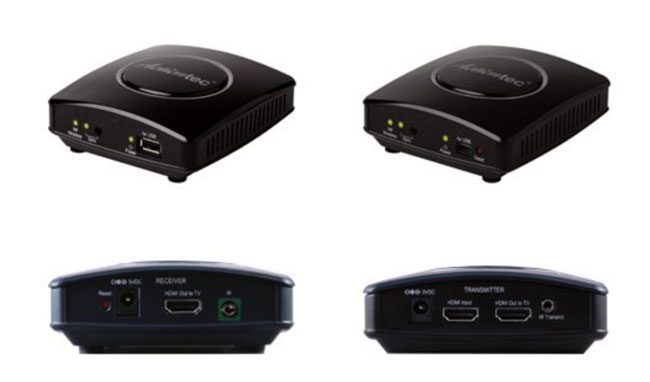
Actiontec My Wireless TV WiFi / HDMI Multi-Room Wireless HD Video Kit

Wow, that’s quite a product name (they need help there). Let’s just call it the Actiontec MyWirelessTV for the sake of this review. I decided to finally open the box and setup the Actiontec MyWirelessTV. The installation was very straight forward. I didn’t once think about looking at the manual. The transmitter has 2 HDMI ports, one for your source (my TiVo box) and the other goes back out to the HDTV (the one upstairs). They include 2 HDMI cables (one for the transmitter and one for the receiver). I plugged in the IR receiver as well as the power supply. I saw the lights blinking and headed downstairs to the reception area HDTV. I plugged the receiver into a second HDMI port on the TV, I plugged in both the IR transmitter and the power. Much to my amazement after a few seconds I was seeing the live broadcast from the TV box on the reception area HDTV right in front of me. The image quality was AWESOME. MUCH MUCH MUCH better than I expected. The sound was good. I was done! It worked! Floored!

The next thing I tried was grabbing the Harmony One remote from upstairs and trying to change channels. Unfortunately that didn’t work at all. I’m still trying to troubleshoot the IR Blaster transmitter/receiver to see if there’s something else I have to do? Luckily if I just point the remote at the staircase it bounces the signal up to the TiVo and I was able to change the channel.

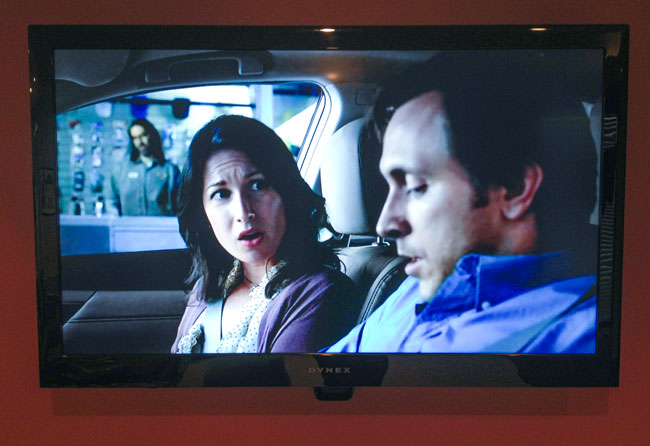
Lastly I don’t want to see the box! I tried simply putting the box behind the HDTV resting on the wall mount. At 1st I completely lost signal. I unplugged it and plugged it back in and everything came back. My HDTV reports that the signal being received is 1080p.

Now the only thing I have to do is get a multi-AC plug adapter so that I can hide the power cord behind the TV as well. Currently the two plugs are being taken up by the HDTV and the Apple TV.

One thing I should point out. Although the long name has the word “WiF” in it, it doesn’t connect to your WiFi network at all. It uses its own internal wireless technology. That’s why it just worked the minuted I plugged it in.

The Bottom Line

Even if I don’t get the IR function working, I’m completely happy to be able to watch my TiVo and LIVE HDTV in another room without having to run cables or pay for additional cable boxes. Is the quality as good as a hardwire HDMI connection? No, but it’s more than acceptable for the use that I bought it for.

UPDATE! I tried the original TiVo remote and the IR Blaster worked just fine. So it appears to be an incompatibility with my universal remote, the Harmony One. Now I’m 100% happy with it! I was planning on keeping the TiVo remote downstairs anyway so I wouldn’t have to carry the remote back and forth.

You can get the Actiontec MyWirelessTV Video Kit here.

You can get additional receivers here.

Review: The 2012 AirPort Express – I love it, I hate it!

One of my favorite road warrior gadgets is the AirPort Express. I have several of them for AirPlay streaming around the house and studio as well as at least one with me at all times when I travel (it lives in my bag). See “What’s In My Laptop Bag.” I never had an issue with the design of it. I actually appreciated the simplicity of it being a compact self-contained router with flip out prongs to plug it into a wall outlet for power. It was fast, easy to setup and it just worked. Now that I not only have to demo cloud services for living, but also mobile Apps, I really appreciate being able to setup my own WiFi network on stage as well as my hotel rooms. The previous generation AirPort Express had 802.11n support as well as AirPlay and supported up to 10 devices simultaneously connected. It even supports connecting a USB printer for easy wireless printing. Yep, it was just about perfect what it was.


Apple changed it!

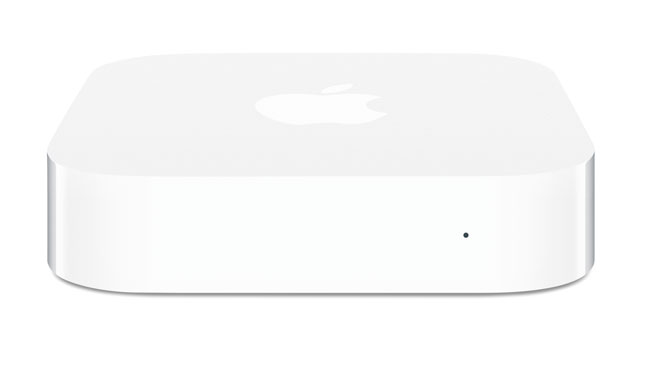
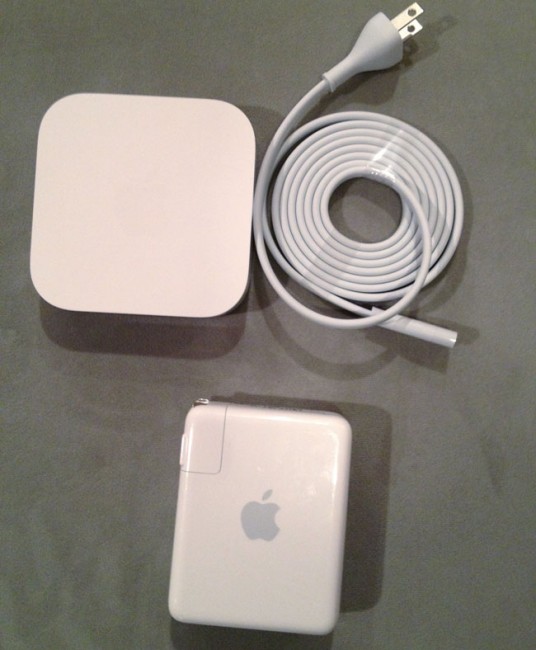
The new AirPort Express on top now comes with a freakin’ cord! Noooooooooo!


Apple quietly introduced a brand new AirPort Express model on Monday at the WWDC (along with new MacBooks and iOS 6 – yeah there was a speed bump to the Mac Pro too – sad that it’s virtually the same chassis as the Power Mac G5 and got no Thunderbolt or USB 3 love…). Although I was most excited about the new MacBook line up, I was quick to take a look at the New AirPort Express too. While the specs looked great, I cringed when I saw the back of it. Apple has gone away from the all-in-one design to one that is almost identical of the Apple TV. By that I mean that it now requires a power cord. This may not seem like a big deal and maybe it isn’t (I’ll be on the road with it next week), but I certainly will miss just flipping out the prongs and plugging it in!

The new one is slightly wider, but also slightly thinner.

On the plus side Apple added a second Ethernet jack so that you can connect not only the ethernet cable to your internet connection, but also plug in a device via ethernet for speed. Sadly though these still aren’t gigabit ethernet ports. Not sure how much I’ll need that second port on the road, but it’s nice to have. The new AirPort Express is also dual band (like the AirPort Extreme) simultaneously supporting 5Ghz and 2.4Ghz WiFi connected devices. It still has AirPlay and a USB port for printers as well as support now for up to 50 devices. It’s that last one that pushed me over the edge. While I personally don’t need more than 10 connections on the road, there are times when I’m using the AirPort Express on stage and sharing it with other presenters and perhaps a colleague or two in the audience. With laptops, tablets and phones connecting to it, it’s much easier to go past 10 devices than it was back in the day.

Setup

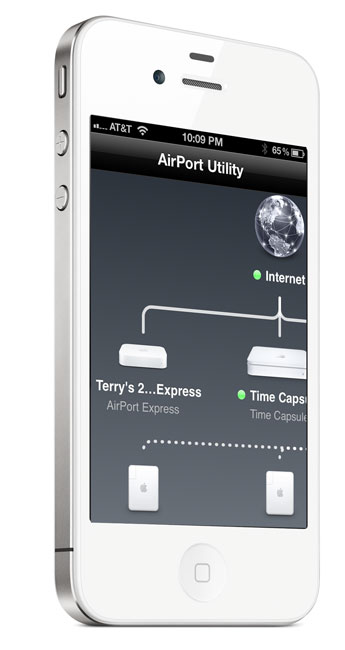
The setup is a piece of cake as usual with the AirPort Utility. You can even do the setup from your iPhone, iPad or iPod touch with the iOS version of the AirPort Utility. Now you can even setup a guest network like you can on the AirPort Extreme granting those users just internet access instead of access to your entire network.

AirPort Utility - Apple

The Bottom Line

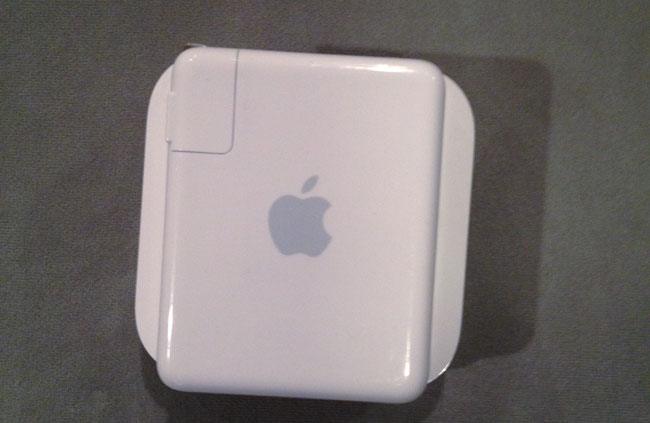
New AirPort Express on the Left, Old AirPort Express on the right.

The 2012 AirPort Express is overall a nice upgrade at the same price as the old one. It’s about the same size as the old one being a little thinner, but a little bigger overall. I wished they had kept an all-in-one design as I don’t want to have to have one more cord to carry, but I’m sure I’ll be able to adjust. If you have a recent 802.11n model then there probably isn’t much of a reason to upgrade. However, if you’re on an older 802.11b/g model or you use one at home as your primary router, then you’ll want the new stuff in this one.

You can get it here for $99 or here for about $99.


UPDATE

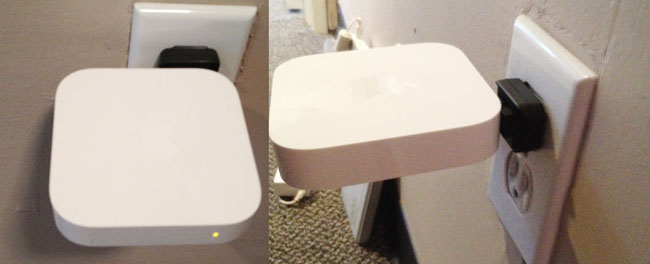
Leave it to my buddy Scott Diussa from Nikon to give me an option. Apparently the plug adapter for the Nikon D7000 battery charger will fit the New AirPort Express and work in a pinch. It’s not elegant. It’s not pretty, but it does work. Now if it were only white. 🙂

Update #2 While the Nikon plug does fit (so does the original Apple one), it slightly blocks the WAN port making it a non-starter. 🙁

Review: Gear4 AirZone Series 1 AirPlay Speaker

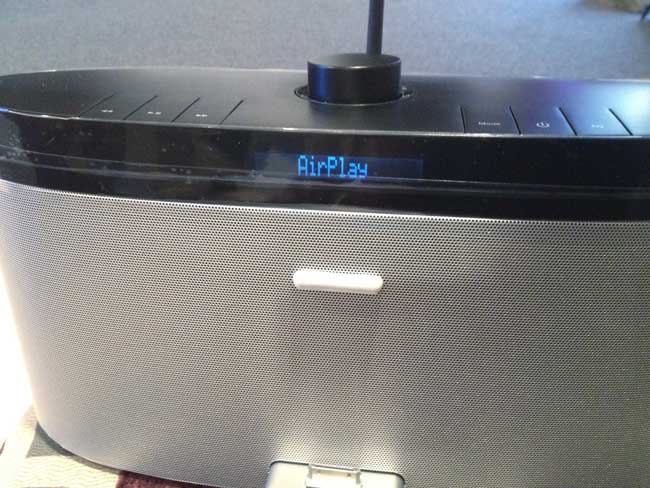
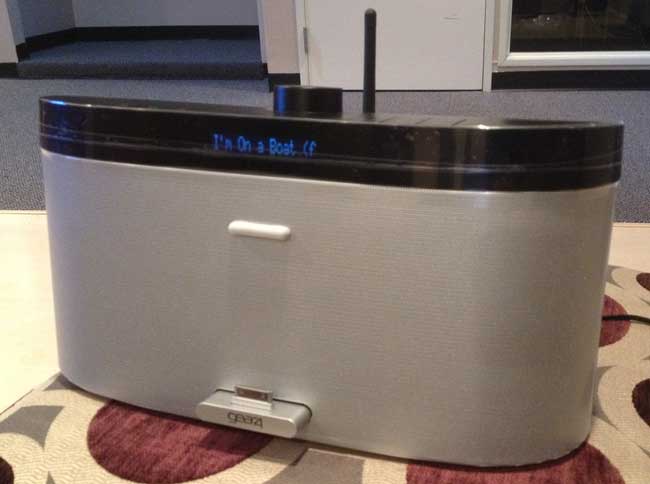
I’m a fan of AirPlay Speaker Systems. To date my favorites are the Bowers & Wilkins Zeppelin Air and the iHome AW1. Just recently the Gear4 AirZone Series 1 crossed my desk. I decided to give it a try. I grade AirPlay speakers on 3 criteria: Ease of setup, No skipping and of course sound quality. Let’s get started:

The out of the box experience

The AirZone Series 1 offers a decent out of the box experience. Much easier than the Zeppelin Air, but not nearly as easy as the iHome’s Setup App. With the AirZone you simply turn it on and navigate to the WiFi menu using the wireless remote. From there you can scroll through the available networks and then hit the enter button on the one you want to connect to. Sadly to enter your network password you have to scroll through the alphabet letter by letter like many game console onscreen setups. Fortunately this is the most difficult part of the setup. After I entered my password, the AirZone connected to my WiFi network and showed up immediately on my iDevices and iTunes.

No Skipping

So far, I haven’t had a single skip. The music has been continuous. This is probably due to the fact that the AirZone has a physical external antenna for the WiFi connection. I hate AirPlay speakers that skip or have dropouts due to weak connections.

Sound

The sound is as good as the iHome iW1, but not as good as the more expensive Zeppelin Air. In other words you get what you pay for. I do however appreciate the fact that the AirZone does have a built-in EQ.

The Bottom Line

The AirZone offers decent competition in this $200-$300 range of AirPlay speakers. It also offers a built-in dock, AM-FM radio and Audio In port so that you can listen to other sources besides those on AirPlay.  I also appreciate the fact that the AirZone displays the name of the current track on the LCD.

You can get the Gear4 AirZone Series 1 AirPlay Speaker here.

Shooting Wirelessly with The Nikon D4 and WT-5

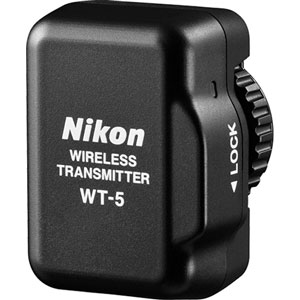
You can find all kinds of reviews and sample images on both the Nikon D4 and D800 out there. My goal here is not so much to review this great new camera, but to put it to the test when it comes to shooting wirelessly with the New WT-5 WiFi module. The WT-5 currently only works with the D4 as it plugs into a special new port that only the D4 has. This was one of actually one of the deciding factors that pushed me to the D4 instead of the D800 (although the D800 should work with Eye-Fi cards).

Wireless Freedom

When I’m in studio I’m shooting tethered to my MacBook Pro and Adobe Lightroom 99.9% of the time. This means long USB cables and enviably tripping over them. The D4 has a USB port on it as well as an Ethernet Port! While the potential for fast Ethernet transfers intrigues me, it would still mean having a cable attached and potentially tripping over it regularly. While I had no doubts that the WT-5 would work, the question was would it be fast enough to allow me to cut the cable?

Last night I did my first shoot with the Nikon D4 and I did the entire shoot wirelessly with the WT-5! I configured the WT-5 to connect to my studio’s WiFi network and to send the images directly to my MacBook Pro on the same network. Keep in mind that I shoot in RAW and the images (16.2 MP NEFs) are also being written to the card when you use the WT-5. I stuck in one of my new Transcend 32GB 400x CF cards, configured a Lightroom 4 to Auto Import from the Nikon folder and began shooting.

The 1st image takes a while

From the time you press the shutter till the time you see the 1st image appear in Lightroom it can take an agonizing 30-60 seconds (wow we’re impatient). Much of this time is for the WT-5 to wake up, connect to your WiFi network and find your computer. However, if you keep shooting the subsequent images come in much much faster, usually 5-8 seconds for RAW. That’s much more acceptable and usable. While it wasn’t fun waiting for the 1st image to come in during my live shoot, it wasn’t the end of the world. Once I saw that the lighting was right I could just keep right on shooting knowing that the rest of the images would be transferring as I shot.

Here’s a video on how long it takes…


The Bottom Line

While shooting tethered via a wire is faster and cheaper, I’ll take the speed hit to shoot wirelessly any day! This solution also works great with the recently updated Shuttersnitch App on iPad. The WT-5 is way way way overpriced IMHO, but it works as advertised and the ability to add multiple profiles, setup an adhoc network, shoot directly to a PC/Mac via the Nikon software or to any FTP server makes it a killer solution for those that want/need wireless shooting. Next I’ll play with the remote control capabilities of the WT-5 and controlling it from any web browser including Safari on iOS.

You can get the Nikon D4 here

You can get the Nikon WT-5 here

I went with the Verizon iPad WiFi+4G LTE

On Friday I posed the question: “Which iPad WiFi+4G LTE is Better: Verizon or AT&T?” and overwhelmingly people responded with “go with Verizon.” When I woke up that morning and looked at the comments on the blog and social media, I decided to head out to the Verizon store on my way to my studio. I figured that although I absolutely hate standing in lines for this stuff, it would be worth a shot. Keeping in mind that I was meeting someone at my studio at 9AM and that left me very little time from doors open at 8:00 AM to get in and out. I got to the Verizon store at 7:37 and I was stunned to see absolutely no line whatsoever!

I thought to myself “something must be wrong! I’m never 1st in line, let alone “only one” in line.” A sales rep opened the door and asked if I was here for the new iPad and I said “yes” and he told me that they would open at 8. I asked if they had the 64GB model in and he said that he would check. A few minutes later I looked back in the window and he gave me the thumbs up. By the time the doors opened at 7:56 AM (for the mad rush), there were only 4 of us there.
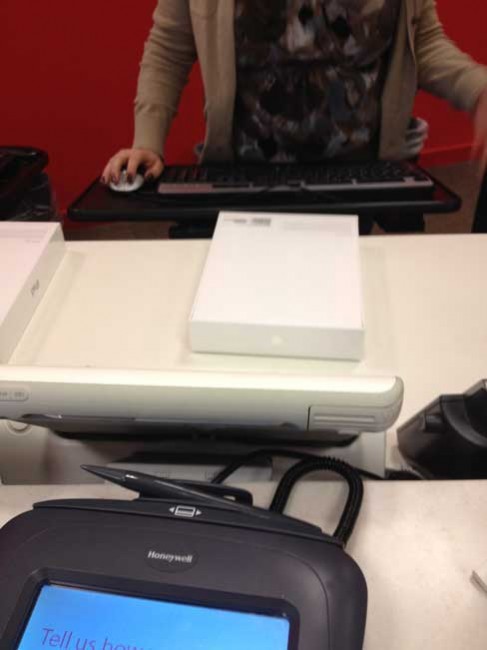
I was in and back out with a Black 64GB Verizon WiFi+4G LTE iPad in hand by 8:01 AM.

Why did I go with Verizon one this one?

My 1st two iPad WiFi+3G models were on AT&T and since I got in on the ground floor of an “unlimited data plan” with no contract, when the New iPad was announced I just automatically ordered the AT&T version. Then I started reading some other posts online asking “why go with the AT&T one?” and it got me thinking and doing a little research. This really cast a doubt in my mind as to why I should stick with the AT&T version? Here’s what I found out:

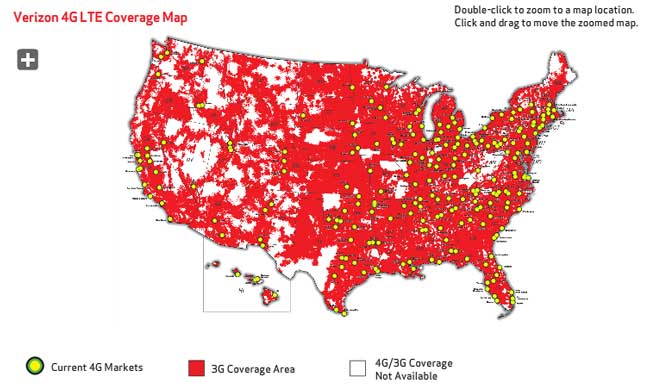
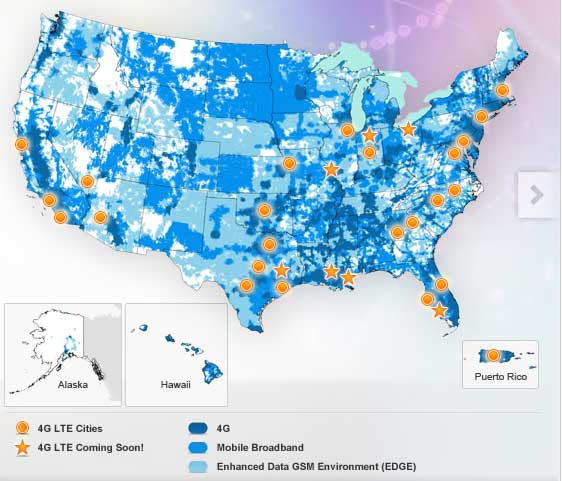
Verizon’s 4G LTE coverage in over 200 cities above.
AT&T’s 4G LTE Coverage above and with Michigan not even in the Coming Soon area.
  • I live in Michigan and Verizon has LTE service here and AT&T doesn’t. Not only don’t they have it, but it’s not even on the publicized roadmap for this year!
  • I travel abroad quite a bit and this was a big concern until I found out that the Verizon version also supports GSM and has a standard Micro SIM slot too. Yes Verizon does international too, but GSM is EVERYWHERE!
  • Lastly Verizon supports wireless tethering (sharing your fast LTE connection with your laptop or other WiFi devices) at no additional cost while AT&T is still scratching their heads on how or when they will make it available. <-this was kinda the last straw!

How well does it work?

I got back to my desk and began the setup and restore process on the New iPad. Once it was done, I saw the Verizon status bar, but before I setup an account I popped my AT&T SIM with unlimited data from my iPad 2 and put it in the New Verizon iPad and my jaw dropped when it just worked. I turned off WiFi and was surfing on AT&T’s faux 4G  (non LTE)  HSPA+ network from my Verizon iPad.
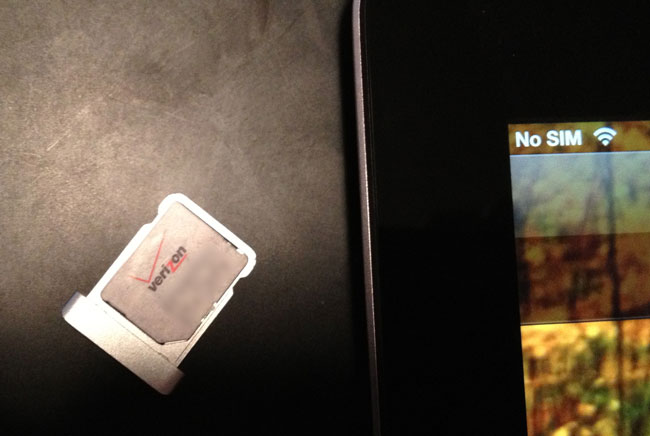
I put the Verizon SIM back in (yes it comes with one) and setup a 2GB/month plan for $30/month. Next I had to test the LTE speed

Whoa!
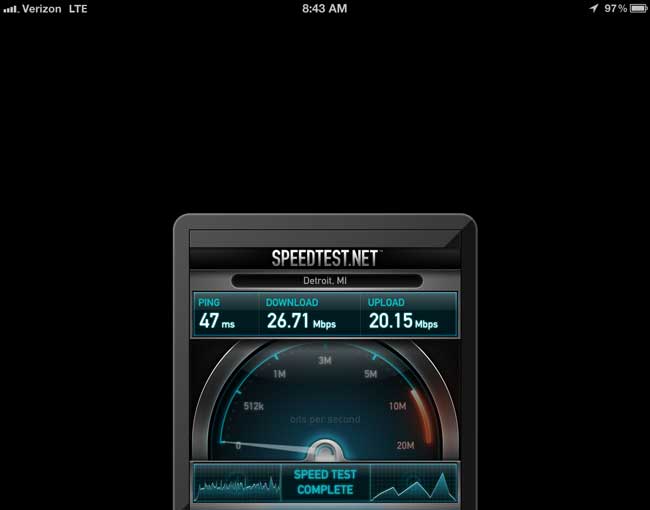
Yes the speeds live up to the hype. Very close to if not exceeding many broadband connections in people’s homes today and certainly faster than anything I’ve seen on AT&T to date.

Finally I have tethering

One of my other frustrations is that while I enjoy an unlimited data plan on my corporate iPhone 4s, I can’t do a Personal Hotspot (without jailbreaking) because in order to add that feature I’d have to give up the grandfathered unlimited data plan that I have. I have an AT&T MiFi (yes another monthly cost). So perhaps one of the tipping points was that Verizon freely allows tethering with no additional charges or contracts. You buy your data plan and use it the way you want. What a concept!
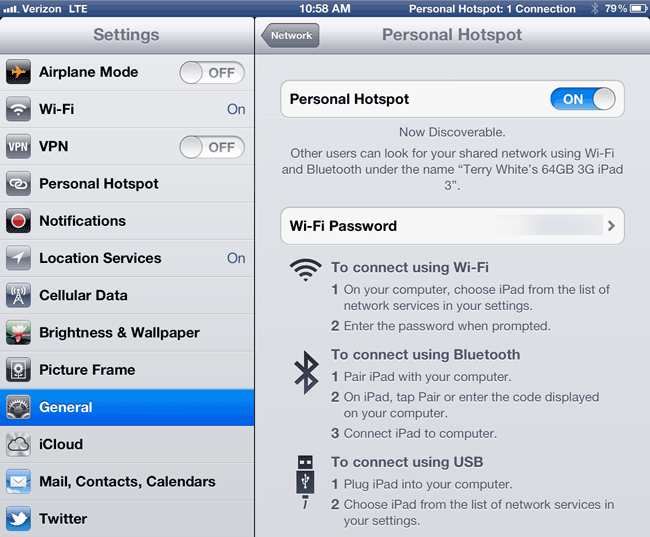
It’s also FAST! Here’s a speed test from my MacBook Pro while using the Personal Hotspot over the iPad’s 4G LTE connection.

Speedtest from my MacBook Pro tethered to the New iPad’s 4G LTE connection


Going Abroad

While Verizon claims that their iPad will work in other countries I see no provision for adding any international roaming data the way AT&T does directly on the iPad. Granted AT&T’s international roaming rates aren’t cheap and you can probably do better picking up a local SIM in the country you’re visiting, but at least they are convenient to do right there on the device and you buy as much or as little as you need for a trip. When that data runs out or the month (30 days) expires you can buy more when you need it. This is definitely one of those times where I could see the need to pop back in the AT&T SIM or a local SIM that you get in the country you’re visiting. Verizon wants you to call them and enable International Roaming and they aren’t really advertising the rates from what I can see.


The Bottom Line – The Best of Both Worlds

While I have no real love or hate for AT&T, I haven’t had any problems to date with my last two iPads. However, from a competitive feature advantage and 4G LTE coverage advantage I have to give the nod to Verizon! I returned my unopened AT&T iPad to the Apple Store over the weekend with no regrets. I have the option of keeping the unlimited AT&T data account by simply hanging on to the SIM (and continuing to pay for it) for a bit and see if I ever need it. Lastly because of the Tethering feature I could potentially kill my MiFi account and even save money while still hanging on to the AT&T plan as the MiFi plan costs more. Not to mention the iPad gets about 4x the amount of battery life of my MiFi.


Whoa, whoa, whoa, what about the Retina Display, speed, etc.

I thought I was done here, but you probably want to hear my impressions about the New iPad in general. So here are a few first impressions:

  • Although the New iPad is technically heavier I don’t notice the weight much. I did notice it going from the iPad to iPad 2 and figured that this one would feel heavy again. It doesn’t.
  • Yes the retina display is nice, but honestly with MY EYES, I can’t see that big of a difference YET. I have an eye doctor appt this afternoon as I’m overdue for new glasses 🙂
  • Photos still look great (ones at 1024×768 or higher), but I can’t DEFINITELY see the difference in LOW RES photos now. They look jaggy! If you are using your iPad as a portfolio device you’re definitely going to want to replace your photos on it with high res versions. While most of my photos look fine, some were apparently a lower resolution than others and I can see the difference immediately.
Low res photo above looks really bad zoomed in on the iPad Retina Display
My existing photos at larger resolutions of 1024×768 (and higher) look fine zoomed in.
  • YES, the camera is much better. That’s not hard to do since I viewed the camera on the iPad 2 as “unusable” for photos. I still wont’ be doing much shooting with it, but it’s nice to know that at least now I could.
  • Larger screen captures. Since you now have 2048×1536 resolution this means that your screen captures are going to be at the higher res too. This is a good thing for authors and bloggers.
  • Is it worth upgrading from an iPad 2? Probably not unless you want the faster speed of the 4G networks. Otherwise, you might want to skip this one and wait for next year’s model. If you don’t have an iPad or you have a 1st generation iPad, it’s time to upgrade. I’m already starting to see new Apps come out that don’t work on the original iPad. That trend will likely continue.

Get the SpeedTest App I used above here on the iTunes

Which iPad WiFi+4G LTE is Better: Verizon or AT&T?

My “New iPad” WiFi+4G AT&T iPad is on its way and should arrive today. However, I wondering should I swap it for the Verizon version? All jokes about AT&T’s “service” aside (or lack there of) I was one of the few that got in on the AT&T Unlimited Plan when the iPad first came out. Switching to Verizon would mean potentially giving that plan up. However, the Verizon iPad (3) seems to be the better deal as you get tethering at no additional cost (while AT&T is still – once again – trying to figure out the whole tethering thing). Also it appears that the Verizon one also has a SIM slot and since iPads are UNLOCKED and contract free, you can put a local SIM in when doing international travel. I also have to consider that Verizon’s LTE 4G network is larger than AT&T’s and AT&T doesn’t even have LTE service where I live (Michigan) with no plans to add it here anytime soon.

So what say you? Which one should I get and WHY? Please spare me the general just because “AT&T sucks” comments. I get it that they have the worst record of them all, but I’ve had no issues being on AT&T with my last two iPads. I’m looking for a sanity to check to make sure that I’m not missing something by going with the Verizon version. Keep in mind that I spend a lot of time on the road and I travel internationally for a living. Would there be a downside to the Verizon model overseas? Would an AT&T SIM work in the Verizon iPad domestically?
Travel Tip: Use Wired Internet instead of WiFi

ethernet port

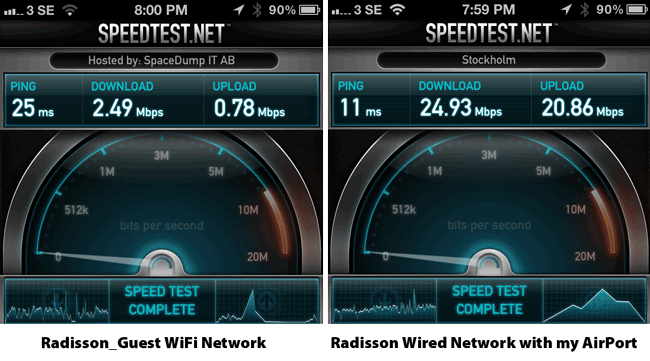
i'm currently traveling on the 2012 Adobe Nordic Design Tour. This means a different hotel each night or so. I spent the weekend in Sweden and my hotel (Radisson Blu) offered FREE WiFi throughout the hotel. All you need to do is confirm your room number, last name and accept the terms/conditions. Great! However, there was one major problem. The internet was almost unusable in the evenings because (and I'm guessing) that it was saturated with hotel guests. My connection dropped constantly and when I could get connected the speed reminded me of dial-up. Sadly, it wasn't until my last night at this particular hotel that I noticed an Ethernet port on the desk under the TV. Lately it has been my experience that when a hotel offers WiFi, that they pull the plug on the Ethernet ports in the guest rooms. However, i figured I had nothing to lose by plugging in and giving it a try. Not only was the port active, but it was about 10-20 times faster than the WiFi network!
 

Get the SpeedTest.net App I used above here from the iTunes
 

Yes, I still want wireless!

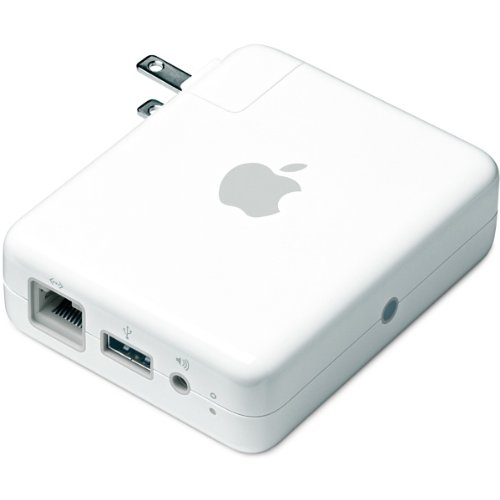
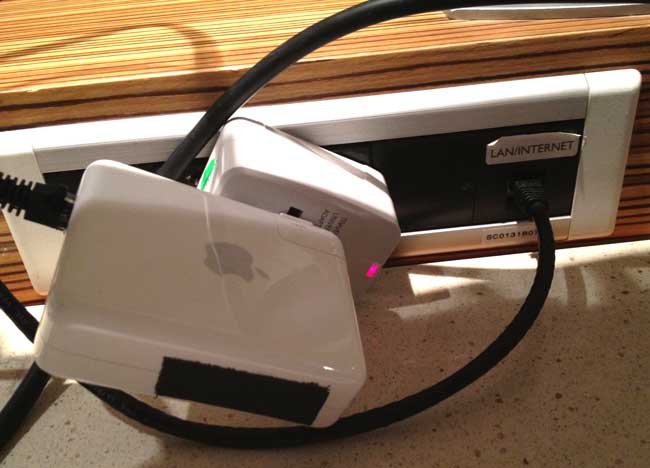
I carry an AirPort Express Base Station as part of my "always packed" travel gear. I plugged it in and in about 15 seconds I had my own private WiFi network that was way faster than the Radisson one and best of all I could put all my devices on it without having to do the terms and conditions setup, dropped connections, etc. on each one. 

You can get the AirPort Express Base Station Here. You might also want to carry a short ethernet cable as there wasn't one anywhere to be found in my room.


The Bottom Line

If you have the option of going wired vs. wireless, give it a shot. You'll probably get better performance not only because wired is faster, but because most people are going to connect to the public WiFi (overloading the routers) rather than the wired option. By having your own WiFi hotspot you still get the benefits of WiFi too! And yes, the wired connection in my room was also FREE.

The other benefit of a faster connection is faster VoIP calls, FaceTime, Skype, Netflix, Slingplayer, etc.  I was able to get so much more done with the faster connection, not the least of which was this blog post. 🙂

iHome iW1 AirPlay Speaker – Video Review

httpv://www.youtube.com/watch?v=g6M_HvgoRiM

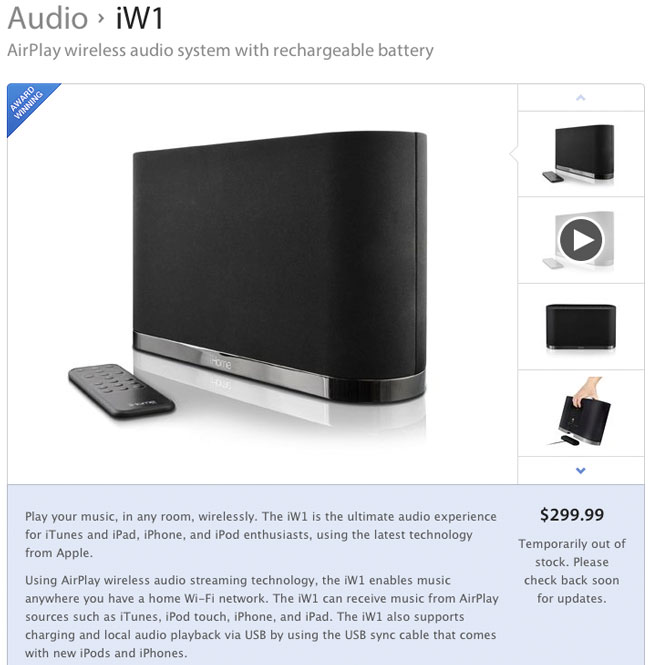
Not long ago I did a post on the "State of AirPlay" speakers and at the time I couldn't get my hands on the long awaited iHome iW1 AirPlay Speaker. While this speaker is stil in short supply I was able to snag one at my local Apple Store. Rather than write a review I decided to record a short video on why this speaker rocks!

As of the writing of this post, most places are still out of stock. However, you can check this link for availability. List price is $299.99

State of AirPlay Speakers

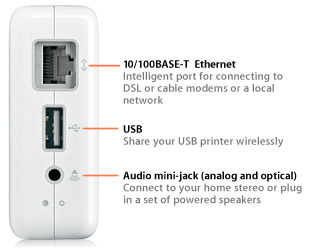
AirPlay is Apple's wireless technology that let's you stream audio and/or video to AirPlay enabled devices. AirPlay (formally known as AirTunes) first appeared in the original AirPort Express Base Station. The AirPort Express has a standard digital audio out jack on the bottom of it that lets you plug in a set of speakers or jack into an existing stereo system. Once you have the speakers plugged in you can stream music to them from your computer using iTunes or from your iOS Devices. Apple TV is also an AirPlay enabled device. With the Apple TV 2 you can also stream video to your TV wirelessly from your computer or iDevice. 


Setting up a multi-room AirPlay System

When I moved into my new studio I knew that I'd want music throughout the space. This meant have speakers in at least 3 areas. I've been patiently waiting for more AirPlay enabled speakers to hit the market. While I love my Bowers & Wilkens Zeppelin Air at home, I didn't want to spend that kind of money in this situation for all three rooms! I did get one Zeppelin Air for the largest area, but still needed something for the other two.


The folks at iHome have been teasing us with their $299 iW1 for over a year. As of the writing of this it's still out of stock (did they ever ship any?).


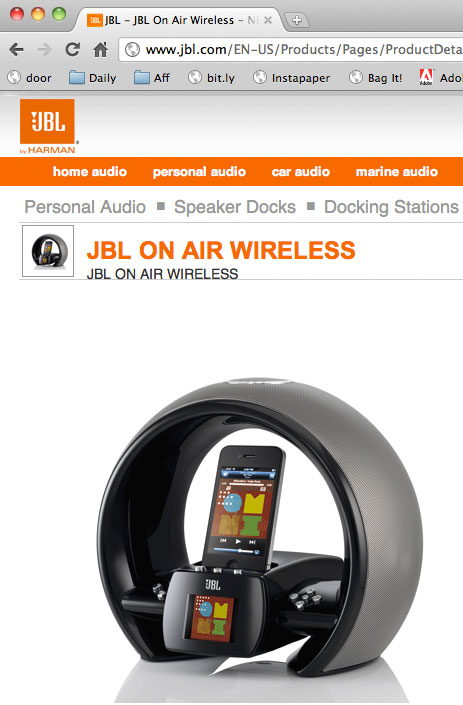
I also tried the JBL On Air Speaker. I usually don't waste time here writing about how bad something is, but the JBL On Air was probably one of my worst out of box tech experiences of all time. It just flat out didn't work! I made sure it did in fact have the latest firmware update, but it couldn't get through a single song without crashing, rebooting or skipping. I boxed it right back up and sent it back. Although I really liked the design of it and the nice color display for album art, I couldn't deal with that many issues on playback. Now keep in mind I may have just gotten a bad one. It happens, but I wasn't willing to go through shipping back and getting a replacement at this point.


Tired of waiting

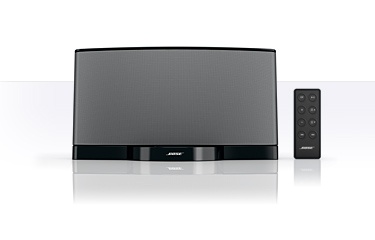
Since the iW1 wasn't shipping yet and the Zeppelin Air is out of my budget range for this multi-room setup, I went with something that has always worked well for me. I bought a couple more AirPort Express Base Stations and plugged regular powered speakers into them. I'm a fan of the Bose Sounddock II and went with a couple refurbs on those. The system works flawlessly! I can push music through to all three systems simultaneously and even control volume levels from my computer or the speakers themselves. Using the Sounddocks also means that in any room an iPod/iPhone can be plugged in on the spot to play something that someone brought with them and wants to hear.


What about streaming other source besides iTunes

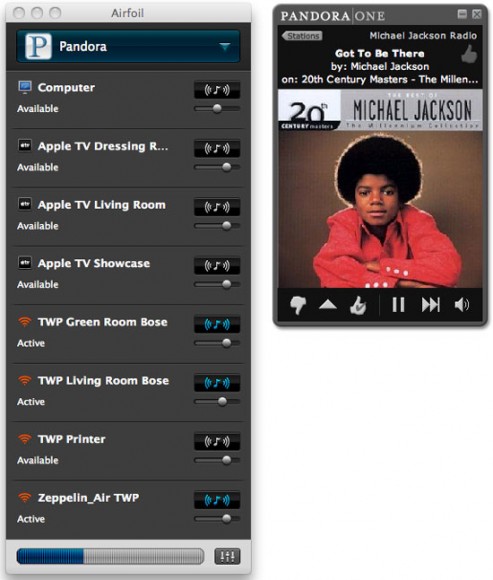
While I have a rather large iTunes music collection, there are times that I want to stream other music sources such as Pandora Radio or Sirius XM. This is where the software AirFoil comes into play. AirFoil is a 3rd party utility for your Mac or PC that lets you stream just about any source from your computer to your AirPlay speakers. With AirFoil I can fire up Pandora Radio and have continuous music throughout the day from just about any artist for just about any model or client's music tastes. 

You can check out AirFoil here.

Another reason to go with a computer and AirFoil is that while iOS Devices can stream to AirPlay enabled systems, they can only stream to one at a time. AirFoil and iTunes allow you to stream simultaneously to multiple systems. 


The Bottom Line

Even at the relatively low price of $299 for an iHome iW1, it's still hard to beat the AirPort Express Base Station for an AirPlay setup. You can plug in any powered speakers you want or already own and will probably save money. I'll probably still get an iW1 to review and if it works out I'll use it in a 4th location up stairs or in my office. There are more AirPlay enabled speakers and receivers on the horizon. While it's nice to have this technology built-in, unless they become much more reliable, stable, easier to setup and lower the prices I'm going to stick with the AirPort Express/Regular Speakers Combo. It just works!

Review: Withings Smart, Connected Scale and Blood Pressure Monitor

If you're watching your weight chances are you have a scale somewhere in your home. If you are health conscious then chances are you get your blood pressure checked on a regular basis. The folks over at Withings are aiming to bring these rather mundane tasks to the 21st century with Smart and Connected devices. GEEK ALERT: The objects you're about to read about are cool gadgets. However, make no mistake that there is a very high geek factor at work here. After all, the last time I checked you could pick up a decent bathroom scale for around $25. You stand on it, look down and see your weight. That's pretty much it! When a company figures out a way to bring MORE technology into this and you're interested, then chances are you're a geek 🙂 Now on to our story…


The Withings WiFi Scale

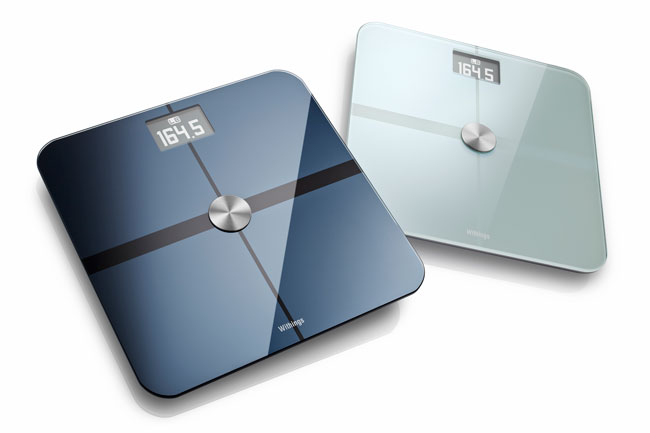
I remember way back when this product first came out and saying to myself: "Cool, but I can't bring myself to pay that much for a scale." Then I saw it on sale and I snapped one up. I already knew that the product would be cool and useful, but just a tad too pricy for most. Before we get to the sticker shock let's talk about what it does. The Withings WiFi Scale looks and acts like any other modern day digital scale on the surface. However, inside it has a WiFi chip and USB port. When you first set it up you plug it into your computer via the USB cable just long enough to associate it with your free Withings account and to configure it to connect to your WiFi network. From that point on you can put the USB cable away and place the scale where you want in your home as long as it's within range of your WiFi hotspot. Now when you or a family member steps on it it will not only display the weight (in pounds or KGs – your choice), but it will also transmit the data wirelessly over the internet to your account. You can then view your information/progress at any time via a web browser or via their FREE iOS App.

iTunes

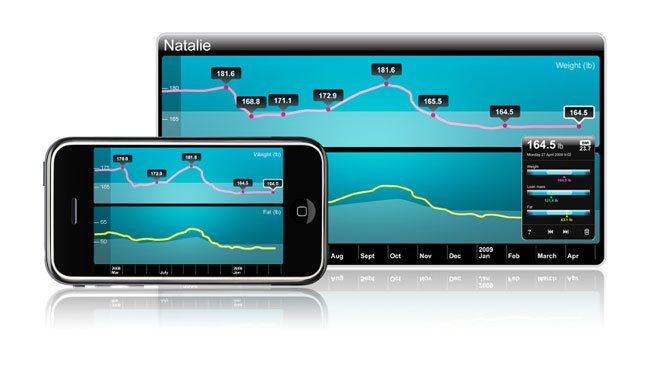
I've been working on my weight now more seriously for the past three years and I have had both successes and set backs. Any tool that can make the tracking easier is a plus for me. Prior to the WiFi scale I was using a regular scale and logging the progress into the Lose It! App. I can remember many times I'd go weigh myself, get busy doing something else and forget to log the number and of course, not remember what it was. Now I don't have to think about logging it. I don't even have to have my mobile devices turned on at the time. All I have to do is step on the WiFi scale and the numbers are automatically logged to my private account online. I look at them when I need to or feel the courage to 🙂

I was impressed by how the scale auto detects different family members and records their weight too. Yes that does mean that you can setup multiple users and whenever any one gets on it will log the weight of that person to the master account and by name.

It's more than just weight. The scale also keeps track of your Body Analysis providing info on Fat mass, Lean mass and BMI (Body Mass Index). 

Convenience doesn't come cheap. The only downside to this wonderful gadget is the price. At $159 you'll have to really really really want one to get one. I can't say "need one" because honestly no one "needs" one of these. Granted it does what no other scale I've seen does, but it does so at a steep price.

You can get the Withings WiFi Scale here for $159.


Still much more work to be done… Let's see how far I get by the time I see you at Photoshop World Vegas! (note: I didn't say what year 😉 )


Blood Pressure Monitor

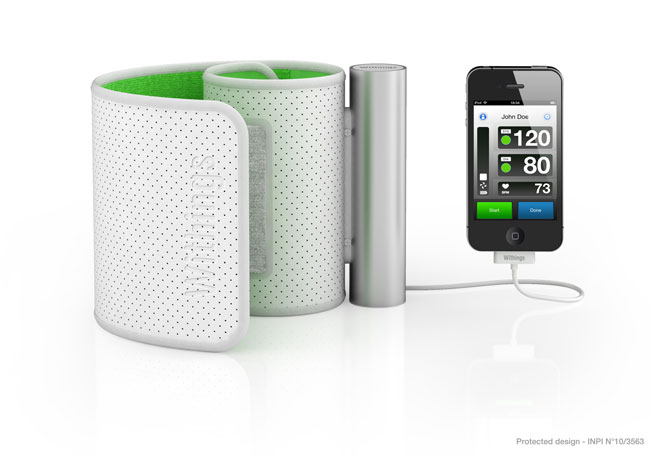
The Withings Blood Pressure Monitor is battery operated device that has a cable attached with a 30 pin iOS dock connector on the end. The idea is that when you're ready to take your blood pressure you plug it in to your iPhone, iPad or iPod touch and with their native App your iOS device becomes not only the display, but also the record keeper. Again this is pretty cool and geeky stuff. Just like with your weight you can keep track of your readings day to day and even email them to your doctor.  The App works with both devices and can display both your weight progress and blood pressure stats at the same time.

You can get the Withings Blood Pressure Monitor here for $129


The Bottom Line

They're useful albeit expensive toys. I haven't had any issues to date with either device and they work as advertised. If your budget can handle it and you like gadgets then you'll love em.


See them in Action

Continue reading “Review: Withings Smart, Connected Scale and Blood Pressure Monitor”