A Snowball in May?

I’ve always used a headset mic when recording my Adobe Creative Suite Podcast episodes. However, now that I’m experimenting with ScreenFlow and doing more "on camera" stuff, I don’t want to have the headset show in the video. So I decided to give the Blue Microphones Snowball Mic a try.

This USB mic puts you in the mind of the old radio style mics. It’s very stylish (kinda big – think softball) and draws stares by anyone who walks by my desk. Setup was as simple as it could be. Just plug in the USB cable and then choose it as the audio input source. That’s it!

The first time I used it, I wasn’t as happy with the sound quality as I was with my noise canceling headset mic. However, this time I tried it with my latest episode and I’m quite pleased with the results. It’s nice because you don’t have to be right up on it. As a matter of fact it sounds better when you’re back away from it a couple of feet. This makes it great because it doesn’t have to be in my shot.

Now this is one of those, "you get what you pay for" kind of things. This is a $100 mic. It’s not a $500 mic, so my audiophile buddies out there may not think it’s all that great, but for my needs and probably the needs of most of the readers here, it would be great.


What about travel?

There’s no way that I’m going to travel with this thing. It’s designed for your desk, not your laptop bag. While I was in Portland a couple of weeks ago, I stopped by the downtown Apple Store (had to take advantage of the "no sales tax".) I went in for a couple of things and then my buddy Dave pointed out another much smaller mic (wait for it:………), the SnowFlake! I haven’t had a moment to test this one yet, but I will try to get to it this week and review it here. The SnowFlake ($45) is very compact and folds down neatly to fit in a notebook bag pocket.

So in a nutshell, I’m snowed in! 🙂

JBL On Tour Rocks the House!

When it comes to gadgets I’m always looking for the smallest gear I can find that has the most impact or features. However, when it comes to speakers, usually smaller means sacrificing sound quality, bass and volume. Is it too much to ask to have a speaker system that’s small enough to fit in my laptop bag, yet loud enough or clear enough to enjoy from across the room? JBL doesn’t think so.

I was doing a seminar one day and one of my colleagues had the JBL On Tour Speaker System. I couldn’t believe how small it was, yet it was delivering enough sound for a room of about 100 people to enjoy. So I made a mental note and said to myself, the next time I need to take some speakers on the road with me, I’m going to have to try these out. That day came! I took the JBL On Tour Speaker System with me to California last week. I drove it with an iPod nano and the sound was better than I expected. It was certainly loud enough and clear enough. However, I’m a fan of bass and the bass just wasn’t as good as I would have hoped. Don’t get me wrong, very few if any small speakers have enough bass to satisfy me, so there wasn’t a whole lot of disappointment here. Other than that, this speaker system more than fit the bill for what I was looking for.


How small is small?

When you’re not using the speaker, it folds down to about half the size. VERY COMPACT to say the least. Although it’s not battery powered, the supplied power adapter is small enough that it fits into the sleeve with the speaker. Although I used it with an iPod, there is no iPod dock connector. So no iPod charging or line out audio. I simply connected the supplied cable to the headphone jack of the iPod nano. If you’re looking for an iPod only speaker, then you should probably look elsewhere. I got this speaker because it would not only work with an iPod, but also with my laptop.

It also works on batteries. I didn’t try it yet, but the On Tour works with 4 AAA batteries and is rated to play for 24 hours on a fresh set.

Dimensions Width: 7" (175mm) x Depth: 3.5" (88mm) x Height: 1.4" (35mm)
Weight 12 oz (350g)


The Bottom Line

If you need a SMALL travel speaker system for your presentations and personal enjoyment, you can’t go wrong with the JBL On Tour Speaker System. Amazon has it for $53.62.

OWC answers my storage needs

After my laptop debacle last weekend I started really thinking about having a backup WITH ME when I travel. Sure I backup religiously when I’m at home and now even automatically with Time Machine and Time Capsule. However, if something were to go wrong on the road I would be kinda screwed. So I decided that I should have a bootable backup with me. I was already carrying a mini G-RAID which houses all my demo files. It’s a very fast drive being a RAID and all, but it’s kind of bulky and not large enough to house a complete bootable backup AND my demo files. So I wanted something with more capacity and the timing was perfect!


Introducing the NEW OWC On-The-Go 500GB External Drive

I’ve always been a fan of OWC’s On-The-Go drives and have used them for years. They just started shipping the 500GB 5400rpm version. So I got one. This drive connects via Firewire 800/400 or USB 2.0. They provide a neat little carrying case, all the cables as well as a power supply if needed. I usually run on Firewire 800 bus powered, so I have a stack of these power supplies collecting dust. I partitioned the drive into two partitions. One to equal the size of my main boot drive and the rest for my demo and other misc. files. I used SuperDuper! to do the clone last night and all is well. Granted, this drive is only 5400 rpms (as opposed to 7200 rpms) and it’s not a RAID, however, it’s smaller in physical size and should still work out just fine for my needs. Oh and yes, I did label the drive too 🙂

The OWC 500GB On-The-Go drive goes for $360.

Controlling the whole studio from my laptop

As you know, I’m a big fan of shooting tethered right into Adobe Photoshop Lightroom (which by the way just came out with a 1.4.1 update) when I’m in the studio. Also as my buddy Scott Kelby mentioned during his Lighting Gear Week, that I recently switched to the Elinchrom strobes with the Skyport RX Wireless System. Well last night I took it up a notch with their USB RX module and EL Skyport app. When I first switched over to the Elinchrom strobes and Skyport wireless triggering system (in place of PocketWizards which are still cool and all), I thought it was extremely cool to be able to control the power output of each strobe directly from the unit on top of my camera (with this unit:).

I figured that would be enough (it’s never enough by the way is it?). Then while I was ordering a bunch of gear at Photoshop World, I decided to complete this setup by ordering their Skyport RX USB module.

The USB module and the FREE to download EL-Skyport app takes things to a whole new level. It gave me something I hadn’t considered before. It gives me not only the ability to control the power output of the lights remotely, but it also does it visually. Each strobe’s control panel shows up as a little floating window. So as you can see in my shot above, I was able to see and control each strobe (including the modeling lamp, sound, etc.) while looking at my shots in Lightroom as I took them.


I was in lighting heaven last night!

The Elinchrom system is NOT cheap. I never thought I’d be spending this much money on lighting for my "hobby". However, I was also tired of trial and error and I don’t want to have to keep buying lighting over and over again. So this was it! I wanted to buy a good set of studio lights ONCE and not have to think about it for a very long time (if ever again). I’m still learning about lighting and with each shoot I get better and feel more confident, but with this system it’s almost like cheating 🙂


Here’s my Elinchrom setup:

2 Elinchrom 600RX heads – $978 EACH (it’s like a big ‘ole Band-Aid – just yank it)

1 Elinchrom 53" Octa softbox – $307.95

1 Elinchrom Strip Bank softbox – $197.95

1 Skyport RX Radio System (1 hotshoe transmitter, 2 receivers) – $259.95

1 Skyport USB RX Radio Slave Tranceiver for your computer – $104.95

Time Capsule Review

As the saying goes, "there are two kinds of computer users: those who have lost data and those who are about to!" Unfortunately, I’ve lost data in the past. Therefore, I’m a firm believer in having a good backup strategy. When it comes to hard drives, it’s not a matter of if they will fail, it’s a matter of WHEN? I was always puzzled as to why Apple never had a backup utility built-in to the OS. However, I couldn’t wait for this to happen so I’ve used various backup utilities over the years and my absolute favorite is SuperDuper! SuperDuper makes a clone "bootable" backup of your drive to another drive. It has a schedule feature so that it can run unattended and it is the way that my server gets backed up every night. However, for my other Macs I wasn’t backing them up nightly. It was more like weekly (or sometimes bi-weekly) when I would think to plug in the external drive and do it. This was especially the case for my laptops which move around and don’t always have an external drive plugged in.

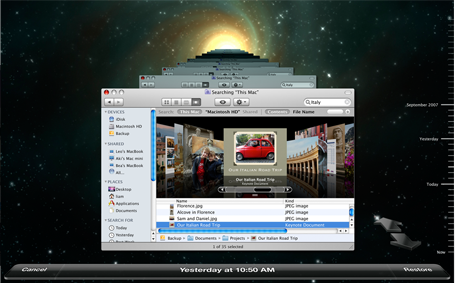
So needless to say I was quite intrigued by Mac OS X 10.5 Leopard’s Time Machine feature. You could call this "backup for idiots." In typical Apple fashion it’s just drop dead simple. You plug in an external drive, Time Machine asks if this is the drive you want to use for backups, you say "yes" and that’s it. There’s nothing to think about from that point on. It manages the backups from that point on automatically and hourly. When the drive fills up with all the incremental backups, Time Machine manages the task of deleting the oldest backups for you. It doesn’t stop there! The Time Machine interface for retrieving data from your backup is equally as slick, showing you cascading folders and allow you to scroll back in time to find the files that you want to bring back. You can even do a Spotlight search for them or bring back the whole drive if need be. Yes, Apple hit a home run with finally making backup so easy that you’d be a fool not to do it now.

This is all good except for one thing, those darn laptops. I have a young teenager that’s now on a MacBook instead of an iMac. Although I have an external drive setup on her desk, she doesn’t always remember to plug it in and of course if the drive is not plugged in, her MacBook is not being backed up.


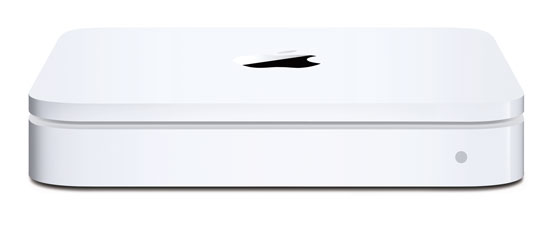
This is where Time Capsule comes in

Although my desktop Macs are fine, each with their own external drives for Time Machine backups, I wanted an easier more seamless way to backup notebooks. Time Capsule is simply an 802.11n AirPort Base Station (wireless router) with a 500 GB or 1 TB hard drive built-in. I opted for the 1 TB model and used it to replace one of my existing AirPort Extreme Base Stations. It has 1 Gigabit WAN port and 3 Gigabit Ethernet ports for wired devices. So I have my iTunes Server plugged in as well as my Slingbox Pro. I had already set up a separate 802.11n network with my existing AirPort Extreme Base Stations so that I could have a really fast network that wouldn’t drop down in speed when 802.11b/g devices connected to it. They are still on my older wireless network. It all works great! When I plugged in the Time Capsule and installed the updated AirPort Utility that comes with it, setup was a snap. Took less than 5 minutes to put in all the settings I wanted. Although you can hang printers and hard drives off it to share, I don’t have a need for those features. Once I had the Time Capsule set up, I took the first MacBook and plugged it in to my network from my office via Ethernet. It saw the Time Capsule right away and I was able to pick it as my Time Machine drive. I had already figured and heard that the initial Time Machine backup over ethernet would take a long time, so I did this over night and just let it run. When I woke up the next day it was done backing up. I then unplugged it from Ethernet and put it back on Wi-Fi.

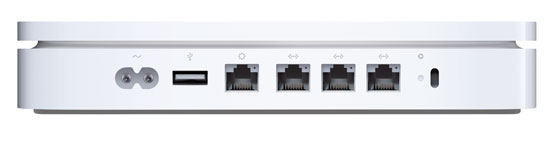
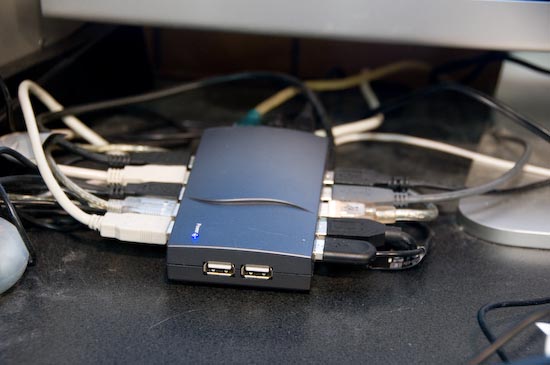
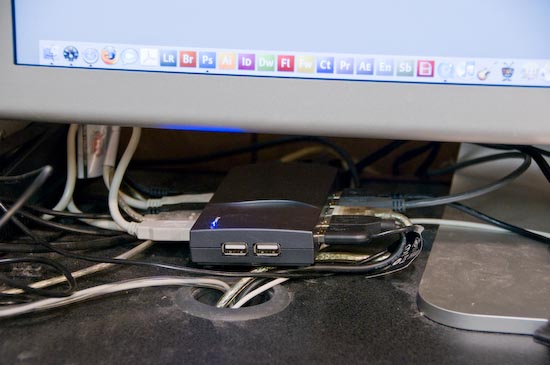
In addition to the Ethernet ports Time Capsule is expandable via the USB port which allows you to add external USB hard drives which could also be used for Time Machine backups. It’s also nice having the power supply built-in.


One of the biggest questions on my mind…

was how would it handle subsequent hourly backups. In other words, I knew that my family would NOT remember to mount the Time Capsule drive. If you’ve ever had a kid lose an important term paper or book report due to a drive hiccup, it’s not pretty! Although I had read other Time Capsule reviews, I didn’t find one that mentioned whether or not the Time Capsule drive would automount each hour. I was hoping that Time Machine would do the right thing and mount the drive as needed. I was happy that it does just that. There is no further interaction required on the users’s part. Time Machine automatically mounts the Time Capsule drive each hour (wirelessly), does the incremental backup and then unmounts the drive. Again, this is the solution I’ve waited for for years.


The next Mac to be added to the Time Capsule backup plan was my iTunes server which I had just upgraded to a 1 TB hard drive as well. This Mac is always connected to Gigabit Ethernet. When I switched to Time Machine drives to the Time Capsule I didn’t realize that Time Machine automatically backs up other attached hard drives. So my initial backup was 200 GBs bigger than it needed to be (400 GB in all). Even over Gigabit Ethernet, this took freakin’ forever! I’m not kidding, this took close to 18 hours. So let’s cut that in half and say 9 hours for 200GB. That’s a long time for the initial backup and I can’t even imagine how long that would have taken over Wi-Fi. The next day when I realized that I had backed up the second drive unnecessarily, I added it to the "do not" backup section of Time Machine. However, it didn’t automatically delete the data from Time Capsule. I assume that once the drive fills up that  that will be the first data set to go, but I would think that there would be a way to kill the extra 200GB manually. I tried and got all kinds of permission warnings and just aborted my attempts.

Now that the initial backups are done, Time Machine takes only a few minute to do the hourly backups and of course it does it in the background.


The Bottom Line

I’m happy with Time Capsule so far and have had no problems. It doesn’t get any easier than this and Time Capsule is the BEST/EASIEST way to backup your multiple Macs running Leopard. Although you could also use Time Capsule as a network drive to put data on and share it amongst your users, I don’t recommend this. The reason is, if you get in the habit of using it as a server to store your daily work files, then how will they be getting backed up? If your Time Capsule dies, you’d still have your Mac hard drives. However, if Time Capsule dies and you were using it as a network server, then that data that was on it would be lost.

Time Capsule is bigger than the AirPort Extreme Base Station and while it is quiet, it’s not silent. Like Apple’s other white boxes (AirPort, Apple TV, etc.) it does run warm.

The initial backup takes way too long. So the best way to do it is to plug in and let it run overnight or over the weekend. Don’t forget to exclude things that you don’t want backed up or things that are already backed up in another location and don’t change regularly. This will save on disk space. All in all Time Machine was worth the investment for me. Time Capsule/Time Machine only works with Macs running Leopard. It will not back up PC’s or Boot Camp partitions. For a complete list of specs, go here.

500 GB Time Capsule $299, 1 TB Time Capsule $499

Shooting tethered just got easier

I’ve been doing a lot more studio shooting lately and the one thing I’m addicted to (besides pretty models) is shooting tethered into Adobe Photoshop Lightroom. Although my new Nikon D300 has a nice big LCD screen on the back, it pales by comparison to the 15" display on my MacBook Pro. So I like to see the shots as I take them on the laptop screen so that I can make adjustments to lighting, exposure, etc. as I go. This way my shots bypass the camera’s memory card and download right to my hard drive of choice. My setup involves the D300, a long amplified USB2 cable, Nikon’s Camera Control Pro 2 software, which by the way supports the new Live View feature of the D300/D3. However, I think this app is still way overpriced! (Canon shooters, just use the software that came with your camera – It’s free) and of course Adobe Photoshop Lightroom. This setup has been working just fine.

However, what I got (after reading Joe McNally’s blog) was this Bogen-Manfrotto Double Head Accessory Arm and Gitzo Laptop tray that sits right on my tripod. I had been using a somewhat flimsy portable stand or whatever surface was nearby for the laptop to sit on. The problem was that I was always having to stoop down to see the screen. This NEW setup on top of my tripod puts everything at eye level. The difference is night and day in my productivity and speed. So I want to thank Joe for turning me on to this solution. It’s been working great.

Back to editing…


Fujitsu ScanSnap S510M

One of my goals this year is to have less paper clutter (yeah I know, but I can try). I have been hearing rave reviews on the Fujitsu ScanSnap from my colleagues at Adobe (Noha Edell recently raved about it to me and my my buddy Chita Hunter reviewed a different model in MacGroup’s newsletter back in 2005). I saw this scanner in action a couple years ago at Macworld Expo and always had it in the back of my mind. I recently ordered one (which is on the way). However, I just read Adobe’s Adam Pratt’s review on it and it got me all excited all over again.

The Fujitsu ScanSnap S510M (The M is for the Mac version) goes for $425 ($495 list) and includes a full version of Adobe Acrobat 8 Professional. It scans in color or B&W and does two sided scanning of stacks of paper. It automatically converts the scans to PDFs and from what I hear it’s blazing fast! Check out Adam’s review for more.

The mother of all USB hubs

You may remember that I put out a call to the readers of this blog for recommendations on a good USB hub. Most readers came back with Belkin as a suggestion and well, I took your suggestions and standardized on Belkin USB 2.0 hubs throughout my house. In most cases the Belkin 7 port USB 2.0 hub provided enough ports for most of the computers in my house. However, my main production desktop computer (Mac Pro) has a LOT of peripherals attached. On this one Mac I have a USB  scanner, Bravo Pro DVD duplicator, SoundSticks USB digital speakers, Epson R1800 Printer, Wacom tablet, Epson P3000 Multimedia drive, Maxtor Hard Drive, ShuttlePro 2 video controller, SanDisk 12-in-1 Card Reader, APC BackUPS, Griffin PowerMate, 3D Space Navigator, NuLOOQ Navigator, USB keyboard and mouse. Yes, I’m a peripheral junkie, but you knew that. With this many USB devices I had to string 3 Belkin hubs together just to have enough ports to plug in all my gear.

Although this solution worked, it was not ideal. There would be times where the last two hubs wouldn’t wake up when the Mac Pro woke up from sleep. While this was rare, it was still frustrating. It generally meant that I would have to unplug and re-plug the last two hubs back in.

Well the good folks at Synchrotech have come through for me once again. They make a 13 port USB 2.0 hub. That’s right! This one hub expands one of your USB 2.0 ports into 13 ports. So I was able to replace my 3 Belkin hubs with one 13 port hub.

While this hub provides me with enough ports (I have one left over now), there is one issue and that is the design of the hub itself. I’m not a fan of the "octopus design" where cables are coming out from all sides. The AC adapter, USB to Computer port and a single USB port are on the back. Then you have five USB ports on both sides and two in the front. This can make your desk look even messier. However, there is no requirement that the hub actually reside on your desk. So if the sight of cable clutter bothers you, simply relocate the hub under your desk. In my case I still like having access to the two front USB ports, so I simply relocated the hub under my Cinema Display. Now it’s time to do some dusting 🙂

If you have two or more hubs that you would like to consolidate down to one, then I highly recommend the Synchrotech 13 port USB 2.0 Hub. It’s $45 and comes with a USB cable to attach to your computer as well as the AC adapter to provide power.

Super fast CF reader for your desktop

As a digital photographer there is one part of the process that I find to be the most boring and that is waiting to see my shots. You may remember that I did a series of tests using the Synchrotech ExpressCard CF Reader. That also led me to do a series of tests on different brands of CompactFlash cards to see which ones were the fastest. I’m still quite pleased with my ExpressCard reader and my choice in cards (SanDisk, PNY and Lexar), but it begs the question, "What about desktop computer users?"

If you use a desktop Mac or PC as your post processing computer, then chances are you don’t have an ExpressCard slot. ExpressCard slots are common on modern day notebook computers. So what options do you have? Well up until recently I was using a rather slow SanDisk USB card reader (only slow because USB is slow by comparison). That all changed when the good folks at Synchrotech sent me a new FireWire 800 UDMA Reader! Not only is this puppy FireWire, it’s FireWire 800! That’s right, there’s a FireWire 800 cable built right in. If you only have FireWire 400, they will sell you a 800 to 400 adapter cable. However, keep in mind that you will only be operating at FireWire 400 speeds which are comparable to USB if you go that route.

The beauty of this reader was that I took it out of the box and plugged it in to my Mac Pro tower and there was nothing else to do. No drivers to mess with. It just works.


How fast is it?

Of course the thing you’re really interested in is, "how fast is it?" So I did some tests using the same cards and the same 1GB folder of test images as before (yep, that stuff was still on my desktop from before). I was very pleasantly surprised to see that the results were on par with my ExpressCard PCIe reader:


Card Read 1.1GB Write 1.1GB
Lexar Pro UDMA 300x 2GB card 1:00.4 43.2
PNY Optima Pro UDMA 4GB card 46.7 42.1
SanDisk Extreme IV 2GB card 37.4 57.6
Using a USB Card Reader (best time) 2:22  


Once again SanDisk came out ahead on the Reads with PNY coming in fastest on the writes. Granted your writes will happen in the camera and not in a card reader, but this should give you some idea of what to expect. Also to get the best speeds you will need the later generation cards that use UDMA like the ones in my test suite. If your camera supports these cards, you’ll also be able to take shots at your camera’s faster fps speeds. While this card reader is nice and speedy, I still prefer the ExpressCard reader for my MacBook Pro. My MacBook Pro does have a FireWire 800 port, but it’s so much nicer not having to have a cable.

The Synchrotech CFFire 800 Pro FireWire 800 to CompactFlash Drive Read-Writer goes for $59. If you have a FireWire 800 port and speed is important to you, then you can’t go wrong with this purchase.

Wacom Cintiq 12WX rocks!

I really took vacation over the past couple of weeks and just really shut down to recharge. However, I did pursue one of my passions and that was digital photography. I worked in a couple of model shoots and of course that meant that I had some retouching to do. Right before the holidays the great folks at Wacom were kind enough to ship me a New Cintiq 12WX to play with and demonstrate at my upcoming Macworld Expo sessions. I was already a big fan of the Wacom Cintiq 21UX and the Intuos line of tablets. However, as much as I love the 21UX, I just don’t find myself at my desk as much as I’d like to be. I’m on my MacBook Pro in different rooms depending on my mood. So until now I would mostly use my Intuos 4×6 which is also a great size to travel with. However, that all changed for me on Friday. I fell in love with the new Cintiq 12WX. It’s just the right size and the built-in LCD is gorgeous! The best way to describe it is to take a Intuos 6×11 and replace the tablet area with an LCD display that is also a pressure senstive tablet and you have the Cintiq 12WX.

I spent all day (and I mean ALL DAY) with it Friday retouching photos in Adobe Photoshop CS3. I had the Cintiq connected to my MacBook Pro via DVI and USB (for the tablet functions). I used it as my main display and the display on my MacBook Pro as the secondary display (yes it also supports mirroring). I kept Adobe Photoshop Lightroom open on the MacBook Pro display and Adobe Photoshop CS3 open on the Cintiq. Although it comes with an easel type stand, I found it most comfortable to just hold it in my left arm while I used the pen in my right hand. There were times also where I just laid it flat on the table and worked.

As with all the latest professional tablets from Wacom, I found the touch strips and side buttons to be indispensable. I configured the left touch strip to change brush size and the right one for zooming in and out. I configured the left buttons to the Brush Tool, Healing Brush, Clone Stamp, Space bar (for quick panning) and Undo. I configured the pen rocker switch for Option-Click. This setup meant that I rarely had to touch the keyboard and NEVER had to touch the trackpad.

The Cintiq performed FLAWELESSLY throughout the day. It did get a little warm, but nothing alarming and no where near hot. My only minor criticism (c’mon you know me. There would have to be at least one, otherwise you wouldn’t think I was doing an honest review) is that the breakout box seems a little cluttered. I don’t necessarily have a better design in mind and I do appreciate the fact that there is only one cable attached to the display itself, but when I looked at the box laying on my table it looked like an octopus. The breakout box is where you connect power, the display, the DVI/VGA cable and the USB cable. These are all necessary, so like I said, I don’t know of a better way to do it. OK, I lied there is one other small thing. I would like to see a way to connect this to a projector at the same time. I have to call the folks at Wacom and see if there is a way to be connected to the Cintiq AND a projector at the same time. Otherwise, I won’t have any way of demoing it to the masses. The breakout box connects to the video out on your Mac or PC, but doesn’t provide a pass-through or video out to go out to a another display or projector. Other than those two minor things (and the second one really won’t affect most), this new Cintiq is PERFECT!


The Bottom Line

If you need (OK, want) an integrated display and tablet, there simply isn’t a better choice! I love the Intuos line and the bigger Cintiq, but this new Cintiq 12WX hits the sweet spot on portability AND price. Amazon has it for $985.70 (list is $999). I couldn’t imaging retouching another image without it!