Nikon D7000 First Impressions

This is going to be an easy one! First off I've been waiting for this camera for a long time. I was waiting for it before I even knew it existed. What I was waiting for was a camera that met the specs I wanted for a second body that I would use primarily for travel and DSLR video. When I saw the rumors of the D7000 I salivated because if those rumors were true I would have the exact camera I wanted. When the D7000 was officially announced I almost couldn't believe it. Although my needs are actually quite simple for this camera, this is the first time that Nikon has shipped a model meeting those requirements. I love my D700 for my studio work. It's a full frame body and I get fantastic results. I got the NEW D7000 for use as my travel camera and for DSLR Video. 


What I wanted

Like I said, my needs for this camera were pretty simple. I wanted a Nikon body to support the lenses that I already have. Canon makes great DSLRs and their DSLR video features are legendary (I've never shot Canon so I can't compare this one to a 7D – sorry). However, in order for DSLR video to make sense it's best if you can use the lenses you already own. That means I need great DSLR video from Nikon. While I originally got the D5000 for this need it fell short in one important area. The audio on the D5000 is,…well….awful! It has a built-in mic that only supports 11hz mono audio. While that might be ok for a simple interview (talking head), it's not good for events, live shows/concerts, anything loud with bass, etc. The built-in Audio on the D7000 probably isn't much better, however it has the one thing you need to over come this and that's an audio/mic input! This way you can plug in whatever mic you want to get great audio. The next thing I wanted was 1080p HD. The D5000 only supported resolutions up to 720p for video. Not only does the D7000 have 1080p 24fps video, but it also supports face detection/auto focus to keep the shot in focus automatically. I was skeptical at first, but this actually works well as long as the subject isn't moving around frantically in the shot.


Here's a sample clip

I shot this clip in Cairo with the D7000 and 28-300mm VRII lens. There was no post production or editing applied to this. In other words shot, transferred to the computer and uploaded to YouTube (as is) as a 1080p clip.

httpv://www.youtube.com/watch?v=Tg_71brozxU


What about the camera?

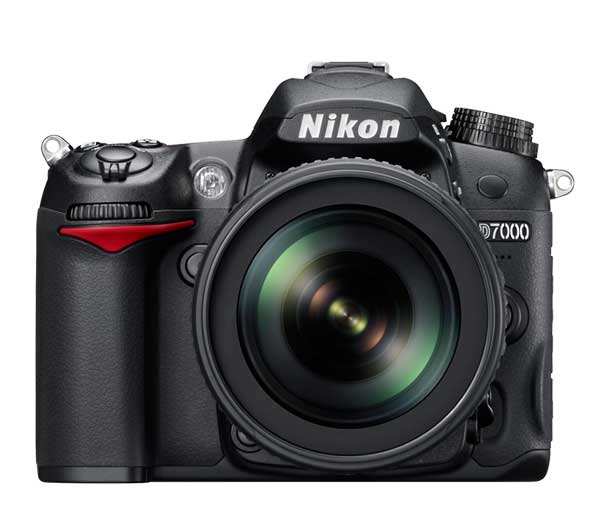
Oh yeah, it's a great camera too 🙂 That almost goes without saying. While video is important to me I will most likely always be shooting stills more than video with this camera.  The minute I took it out of the box I smiled because it had a GREAT FEEL to it. Bigger than my D5000 and smaller than my D700. Probably more in line with the D300s. It definitely feels less "consumery" than the D5000. The next thing I appreciated was the dual SD card slots. You can configure these to work in a few different ways. For me I set it to capture the stills to card 1 and the movies to card 2. Also by default if card 1 fills up it will start capturing to card 2. After about 15 minutes of tinkering with the settings I was all set with how I wanted the camera to work. Another new feature that I absolutely love is the user customizable settings "U1" and "U2" are on the main dial. You can set those up anyway you want. For example, to go into Bracketing Exposures on the D5000 was 2-3 steps. Now I just switch the dial to U1 and I'm all set! When I'm done taking the shot, I switch back to manual or aperture priority. While the megapixels have gone up to 16.2 from 12mp, that really doesn't matter a lot to me. I was quite happy with 12mp images. However, for those in the megapixel race, you'll be happy to have more. 
Continue reading “Nikon D7000 First Impressions”

Last Call for HyperMac MacBook Charging Cables

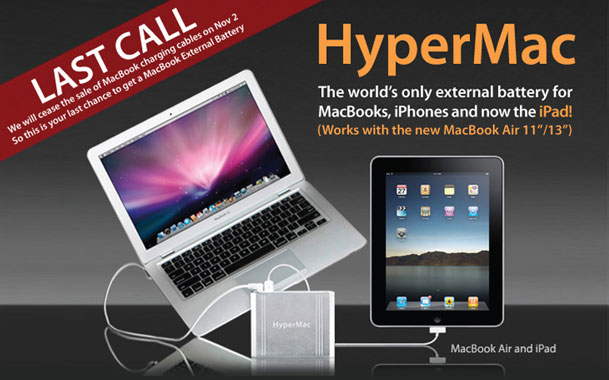
You may remember my review of the HyperMac Battery for the MacBooks here. Well it seems that a good thing has come to an end. The way I understand the story (and NO I'm not a lawyer, so this is just my opinion/interpretation) is that HyperMac guys were buying Apple's external MacBook (Pro/Air) chargers (legitmately) and then retrofitting the cable to their external batteries and selling them. That was until Apple's legal team came down on them and basically forced them to stop. I don't know the legal precedence here, but it seems sad that this vendor, who was providing a benefit to MacBook users is now being forced to stop. As you may know Apple no longer allows you to swap out your own batteries. All current model MacBooks have sealed batteries. So if you run out of juice on a trip, you're just out of luck until you can get to a wall plug. I've used my HyperMac batteries on many trips and it was great arriving with fully charged MacBook Pro and iPhone batteries. I plan to use it on my trip to LA next week for Adobe MAX. I haven't heard of any issues with the batteries or any incidents of MacBook failures as a result. Since Apple doesn't sell any external batteries of their own I don't see a competitive threat either. Lastly, you would think that Apple would license the MagSafe adapter to those wishing to build MacBook peripherals like the popular iGO chargers. 

If you're interested in a HyperMac Battery or Cable for your existing one, you have until November 2nd, 2010 to order. See them here. I may buy another just to eBay at a profit down the road 😉 Oops, did I say that out loud? Actually they'll probably still sell the batteries, just not the cables for Apple's MacBook line.


P.S. HyperMac wasn't the only game in town. I wonder how long these guys will be selling theirs?

OWC Mercury Pro Blu-ray Burner: Rip/Burn Blu-rays on a Mac

It's pretty clear to me at this point that Apple has no plans of offering a Blu-ray drive built-in to the Mac. Sure I could be wrong, but they have made no mention of Blu-rays in quite a while. After all, they sell and rent movies on iTunes and in a way Blu-ray movies are competition to that download/streaming model. Although there aren't many options to watch a Blu-ray movie on a Mac, there are still some reasons why you might want a Blu-ray drive on a Mac. First off, having a Blu-ray burner means that you could burn your own Blu-ray movie and data discs. Blu-ray discs hold up to 25 GBs of data per disc. That's a lot when it comes to archiving and transferring lots of information. Also since just about every digital camcorder being produced today has the option of recording in HD, it gives you a way to make High Def home movie blu-ray discs. I just got a brand new 12 core Mac Pro and I started looking at Blu-ray options for it.


OWC Does both External and Internal Blu-ray Drives

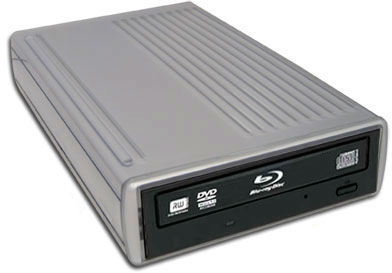
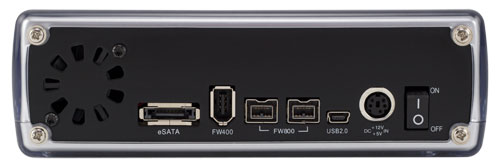
I'm starting off with a Mercury Pro External Blu-ray Quad-interface Drive review unit. This drive can connect via Firewire 800, 400, USB 2 and eSATA.

That pretty much covers all the connectivity options that I would care about.  The drive was very simple to setup. Take it out of the box, plug in the power and an interface cable and turn it on. That's it! Although the Mac OS doesn't provide the necessary support to play a Blu-ray movie, it does provide the necessary support to see the drive as a standard storage device for both reading discs and burning them. I popped in my copy of Avatar on Blu-ray and it showed up on the Desktop like any other disc. 


Ripping Blu-rays


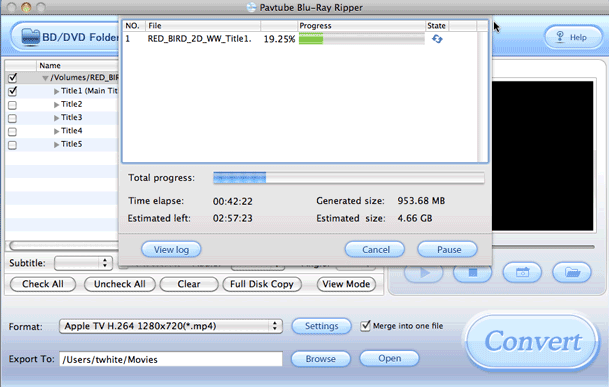
The next question many will have is what does it take to rip a Blu-ray disc? First off, you need to read up on copyright and know that I'm not a lawyer and nor am I'm sanctioning violation of any copyright laws. However, as far as I can tell (my interpretation) you are within your right to "backup" a movie disc that you PURCHASED (not rented) for your OWN PERSONAL USE.  With that said, I wanted the option of Ripping a Blu-ray disc to take with me on the go or to watch via Apple TV if I choose to. Avatar is a perfect example! While this movie is available on iTunes and even includes a Digital Copy with the Blu-ray disc, both the iTunes version and Digital Copy are NOT high def. If I want to watch this movie via high definition without having to load the disc, the only way to do so is to Rip it. In the past I've used Handbrake to rip my entire DVD collection. Handbrake doesn't yet Rip Blu-ray movies, so I had to find another solution. The first application I came across is a commercial one called Pavtube Blu-Ray Ripper. There may be free ones or even better ones out there, but this one seems to do everything I want and has an interface that I like. 

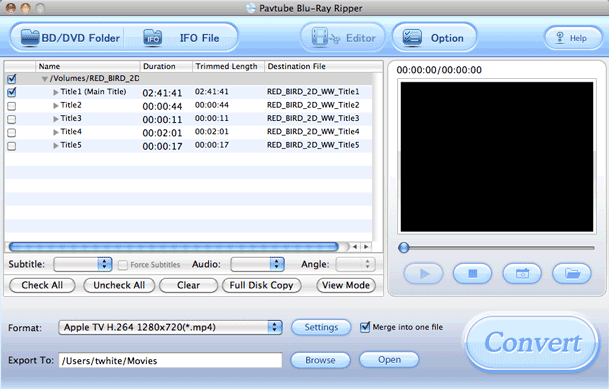
It's easy. Just put your Blu-ray disc in the drive and fire up Pavtube. Choose the Blu-ray disc using the BD/DVD Folder button and then choose your output destination and preset. All the usual suspects are there including iPhone/iPod, Apple TV HD and even iPad HD. Yep, Android is there too along with several other presets.

Then you just click the Convert button and be prepared to wait! Ripping a Blu-ray is no trivial task in terms of system resources. Even on my 12 core Mac, the 2 hour 42 minute movie is going to take over 3 hours to rip in Apple TV H.264 1280×720 resolution. Also the estimated file size for this movie is going to be a 4.66GB .MP4 file. Of course depending on the length of the movie, the preset you choose and the speed of your system, your mileage will vary. 

Continue reading “OWC Mercury Pro Blu-ray Burner: Rip/Burn Blu-rays on a Mac”

LaCie Rugged goes 1TB

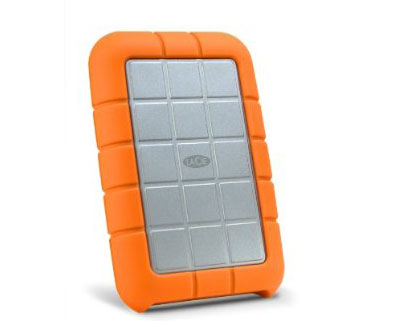
It still amazes me when I think about the fact that we've reached a point where we can carry around 1TB drives in our pockets. I typically carry an external drive or two in my laptop bag for carrying extra files, Windows 7 Images for Parallels, bootable backups and to backup my shots after my shoots before I leave the studio. Until the 1TB 2.5" drives came out this meant carrying two or three drives to accomplish this. Now I can carry one! I got the LaCie Rugged 1TB to put to the test. I wanted one drive that I could partition into three partitions and of course I wanted one that was bus powered over Firewire 800 (and USB when needed).

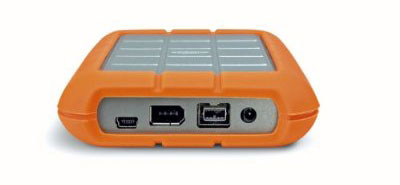
The LaCie Rugged meets those requirements. It has a triple interface with Firewire 800, 400 and USB 2 ports on back. Although it's bus powered, they even supply a USB to power cable for those situations when your single USB port isn't providing enough power, you can plug this cable into a second USB port to power the drive. They also provide FireWire 800, 400 and USB 2 cables.
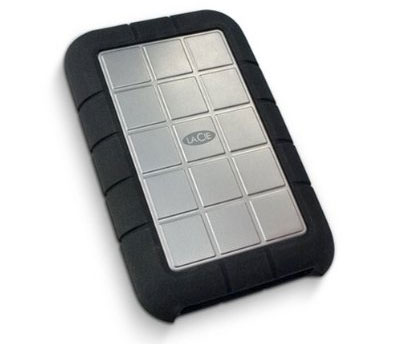
Although the bright orange color stands out (you'll have no problem seeing it in your bag or maybe even a dark room), I ordered the optional 3 pack of sleeves to change the color of the drive.

You get black, silver and purple in the sleeve pack. Even the purple/blue is a little more subdued than the orange.
 

So far so good

In my short time of using this drive it seems fast (5400 rpm speeds) and quiet. I had no problems cloning my boot drive to one of the partitions that I made and loading up the other two partitions with the files I need to carry. Also they call this drive "rugged" for a reason. It's meant to be traveled with. It has a rubber outer case (the sleeves) and it's one of the only drives I've ever seen that advertises a maximum "drop distance" although they clearly state that you should avoid dropping it while it's running (duh!).


Maximum Drop Height :  up to 2.2 meters in non-operating mode (dropping is not recommended in operating mode)

While this is not the first LaCie Rugged drive I've purchased (I got my daughter one for her Time Machine backups when she went off to college), it's the first one that I've gotten for me.

You can get the 1TB LaCie Rugged here for $199

You can get the 3 optional sleeves in Black, Grey, Purple here for about $17

Great Portable Speaker 2 Go

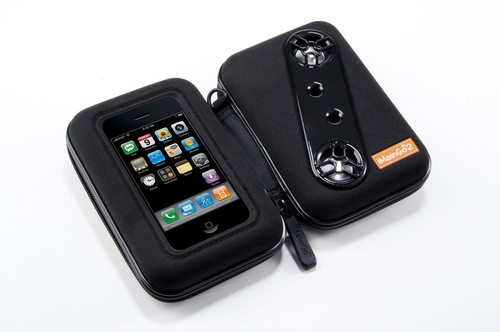
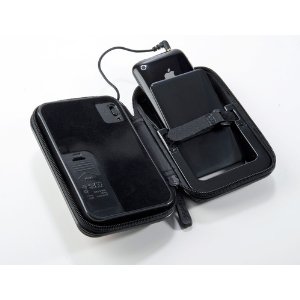
As a frequent traveler I'm always on the look out for a portable (smallest I can find with decent sound) speaker system for my iPod/iPhone. My main interest is personal listening in a hotel room. Although there are lots of small speakers out there, the problem is if you make it too small it sounds like crap! I'm a fan of the AirCurve acoustic speaker by Griffin, but I also like powered speakers too. My continuous search led me to the iMainGo 2 Handheld Speaker Case for iPhone and iPod. First off, there is nothing really iPhone/iPod specific about this case. It should work fine with just about any phone or MP3 player. There's a standard mini plug that goes in your device's headphone/line out jack so it should work with just about anything including your laptop or iPad.

What I like best about this speaker is that it's powered by standard AAA batteries that last about 30 hours on one set/charge. It would be nice if it were AC powered and had a dock connector to charge your iDevice, but I can live without that for portability, battery power and price. It's already hard enough finding enough plugs in a hotel room. Not having to plug in the speaker to use it is actually a good thing.


It sounds good too

One of the things I was most impressed with is the sound of this speaker in comparison to other portable systems I've tried that cost more and are bigger. 

If you're looking for something small that sounds good and works with just about any device you carry, this is it.

You can get the iMainGo 2 for about $39 here.


Continue reading “Great Portable Speaker 2 Go”

What’s Your Offsite Backup Strategy?

Yes, believe it or not there are people still out there that don't backup their computers on a regular basis and I suppose there always will be those people. It typically only takes one hard drive crash and the loss of important files and time to make someone backup their computer. As I've always said, "there are those who have lost data or those who are about to lose data – backup!" With all the digital photos and video you're taking, it's even more important than ever. With film cameras, you could at least go back to the negatives (to a point). Now with everything being digital, the file you import from your camera/card IS THE NEGATIVE! That's all you have. So let's say you do backup regularly. There are still some other considerations. Let's start off with the various categories of data storage and my workflow.

My working copy – There is always "current" data on my computer. My main, everyday computer is a Macbook Pro and whatever I'm currently working on is usually on the internal drive of that computer (if it's an intense video project, then it's on my Mac Pro). For the sake of example, let's say I just did a photo shoot at the studio. This means that I shot directly to my computer via tethering into Lightroom 3. The RAW .NEF files are sitting on my internal drive. Before I leave the studio, I plug in an external Firewire 800 drive and copy the folder for that shoot. This is just a temporary backup for the trip home. Yes, I'm that paranoid and don't want to lose the whole day due to a weird problem or crash between point A & B. Once I get home, I convert the .NEF files into .DNG files right in Lightroom and pitch the .NEFs. I also begin my Selection and Rejection process. The rejects go to the trash too. At this point I have a gallery for the client that I post online and they make their selections. This process can take a few days before they get back to me, and usually within an hour my MacBook Pro is backed up over my network via Time Machine. So now I have a 3rd copy of the photos. I do whatever is necessary (retouching in Photoshop CS5) to get the final images ready and they are delivered. Once everyone is happy. I move the images to the next location.

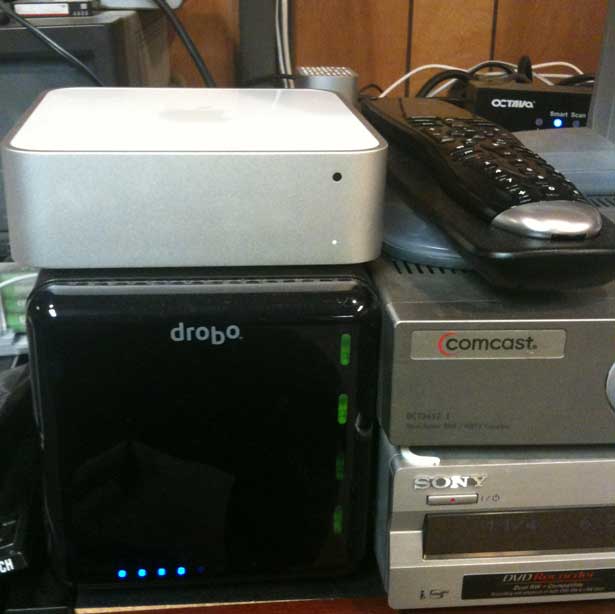
My network file server – this is a dedicated Mac mini (running Mac OS X 10.6 Snow Leopard Server) with a Drobo connected to it for mass storage. I'm using just under 1.5TB's of space on my Drobo and therefore it can be backed up onto an external 1.5 TB Firewire 800 hard drive. Yes, I backup my Drobo because while the Drobo is great at protecting you from drive failure, it does nothing to protect you against data corruption or accidental file deletion. My Drobo is backed up every night automatically via SuperDuper! to the external drive.


Archiving – this is the grey area for me. My idea of a archive is a set of files that you're done with. The client is happy, you've been paid and are under no contractual obligation (or the date has past) to hang on to these files. You don't really need them, but you just don't want to delete them "just in case." For me, I put these kinds of files on misc. external hard drives that may be lying around and I don't worry about them (no I don't trust/like DVDs for long term storage). The reason is, in over 20 years I've yet to have to load up a file from an archive. So I'm not too worried about these files and I'm keeping them just because I have the extra drives around the office. I've had a couple of archive drives die on me and I didn't flinch. I couldn't even remember what was on them and really didn't care. Of course your needs may be different and you may need to hold on to this data. I guess for me if it's important, then it's still on my file server above.


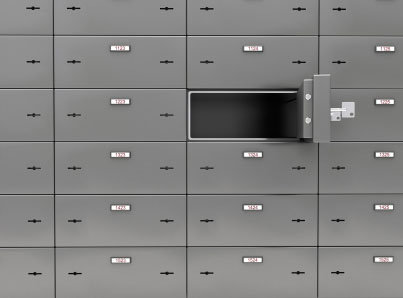
Off Site Storage – Now we get to the point of the post and that is "what's your offsite backup strategy?" For me, it's rotating those 1.5TB drives (I have two identical backup drives) that backup my server, to my safe deposit box at the bank. Most people just don't believe that a disaster will strike their perfect homes/offices. You'll never be robbed because of where you live and the tornado, flood, fire, hurricane, etc. always happens to the other guy. Um, ok! So be it! Then do me a favor. Have an offsite backup if for no other reason, than to have more than one backup of your "important" files. While it's rare that both your main drive AND your backup drive will fail at the same time, it's not too rare that a virus or other malware can infect them both. After all they are all connected to the same computer right? 


What about online storage? I think the online backup services are good. I don't really use one for the simple reason that it would take forever to backup and restore 1.5TB's of data online. It takes about a day to do it via Firewire. How many days would it take to do it over the internet? What I look to online storage and backup for is to backup smaller "in progress" projects. 


So what's your offsite backup strategy?

Is That 1TB in Your Pocket or Are You Just Happy To See Me?

I recently got the OWC Mercury On-The-Go Pro 1TB (one terabyte) drive to test. Before this drive I was carrying TWO external hard drives with me when I traveled. One was a clone backup of my internal drive. I swear by having a clone backup because I want the ability to "boot" from the external if my drive dies right before or during a presentation. Mac OS X's Time Machine is great, but since it's not bootable, there's no time to do a restore if something happens while on stage. The other drive contains files and videos that I may use from time to time during a presentation, but don't need to tie up my internal drive with. I also use that other drive to backup photos onto from a photo shoot in my studio until I get home. 


The 1TB OWC Drive Replaces 2 of My External Drives

My goal for this drive was to use it to replace the two drives I'm currently carrying. I got the drive and partitioned it to 2 500GB partitions. The first partition I use to backup (clone) my internal drive via SuperDuper! The second 500GB partition is for those other misc files and temporary backups I travel with. Although I knew from a size perspective that the 1TB capacity would be exactly what I needed, I was concerned about the relatively slow speed of this drive. Most laptop 2.5" drives spin at either 7200 rpms or 5400 rpms. This drive spins at only 5200 rpms. Back in the day, some 2.5" drives were as slow as 4200 rpms. So while it's not the slowest drive on the planet, it is slower than the speeds regularly available in other capacities today. So for the choice was either carry two fast drives or one big slower drive. 

After I did my clone backup and loaded on all the files I wanted to carry via the other partition, I did a boot test from this drive while it was connected via Firewire 800. It worked. While I could tell that it was slower than my internal 7200 rpm drive, it was tolerable. Keeping in mind that I would only be booting from this drive in an emergency anyway, I can live with the speed if it means carrying one less drive 100% of the time. 


The Mercury On-The-Go Pro  3 in 1 enclosure

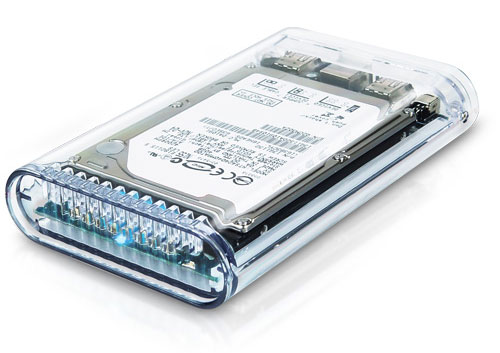
I've been a fan of this enclosure for years. Although there are certainly smaller, sleeker 2.5" drive enclosures out there, this enclosure has never failed me. I can connect via Firewire 800, 400 or USB 2. It's bus powered on all 3 ports and at a glance I can "see" exactly which drive is inside (make, model and capacity). I've had smaller enclosures overheat before and that's never been a problem for me with the Mercury On-The-Go Pro. The drive comes with all the cables you need, a carrying case and an Firewire 800-400 cable. 

The 1TB Mercury On-The-Go Pro drive goes for $260 and you can get it here.

I recommend this particular model for someone who needs to carry around a lot of data and speed is not the most important factor. If you want a faster drive, look at their other models here. The folks over at OWC are GREAT to deal with and I also buy my RAM from them too. Never had any issues buying from them. They stand behind what they sell.

Wacom Intuos 4 Wireless: Video Review

When I'm in Photoshop and I don't have my Wacom Tablet I feel naked! I've become so used to it that I won't retouch a photo without one. One of the things I've always wanted was a WIRELESS Version. As a matter of fact during my part of the Adobe Creative Suite 5 launch I was walking around with a Cintiq 12wx.

It was really wired to a Mac Pro, they green screened it out to give the allusion of it being wireless. Although we're probably still a ways off from having enough wireless bandwidth to do a wireless Cintq, we are at a time where we can have a wireless Intuos 4! Here's just a few minutes of video featuring the Intuos 4 Wireless Edition:


httpv://www.youtube.com/watch?v=X8AytkRxFJc


The Particulars

The tablet is using Bluetooth and therefore it's Mac and PC compatible. I'm using it above in the video with a NEW MacBook Pro 15" and Photoshop CS5. Most of the Creative Suite design tools support pressure sensitivity. It has 2048 levels of pressure and an 18 hour battery life per charge. It charges over USB with the same supplied cable that can also be used for a wired connection if the battery dies. The Battery is user replaceable. The wireless range is 10 meters. More specs here.

Continue reading “Wacom Intuos 4 Wireless: Video Review”

iPad Camera Connection Kit Review

httpv://www.youtube.com/watch?v=EFtx9HzM-lE


As a photographer one of the iPad accessories I was most anticipating was the iPad Camera Connection Kit. This kit consists of TWO adapters that connect right to the iPad's Dock connector. The first one is a standard SD (SDHC) Memory Card reader. You connect it to your iPad and then insert a memory card with images/videos on it and transfer those images to your iPad. No software to install because the iPad already has this ability built-in to the Photos App. The second adapter has a standard USB port on the oppositie end of the Dock connector. With this one you can not only connect your camera via USB and transfer images directly, but as my video above shows you can even use a Card Reader with it! This overcomes (although not as elegantly) the problem of wanting to use Compact Flash or other card formats. 


How does it work?

Continue reading “iPad Camera Connection Kit Review”

Jawbone MyTalk

A few weeks back I reviewed the NEW Jawbone ICON Bluetooth headset. I continue to be impressed by this headset and it is now my default Bluetooth headset for voice communications. It even works with my WeePhone VoIP App for iPhone. One of the features that I wasn't able to review at the time was the new Jawbone MyTalk service. However, since that time I have been accepted into their Private Beta program. This is the first headset that I've seen or used that can not only be upgraded via your computer, but it can also be enhanced with additional options. One of the first things that I had to try out was the ability to download and install a different voice. You might be wondering why a Bluetooth headset has a "voice?" Actually the Jawbone ICON can give you verbal feedback. For example, if you press the button when you're not on a call it will read back the remaining talk time based on the current charge. I opted for a better voice. I really like The Ace voice. I love the accent 🙂

Continue reading “Jawbone MyTalk”