The New Smaller 2014 Jawbone Era Bluetooth Headset

Jawbone_Era_2014_TW

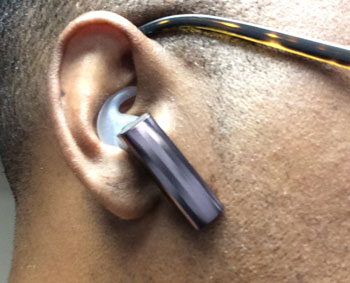
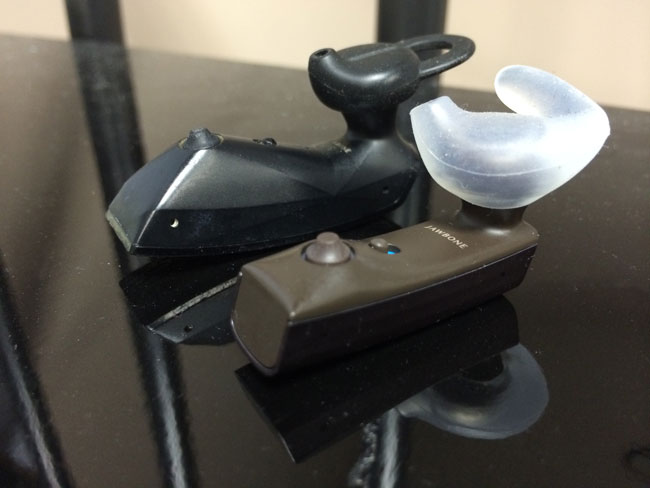
It’s been a while since I looked at Bluetooth headsets. After all my Jawbone ICON has been working just fine. However, I ordered the new 2014 Era by Jawbone because I thought I had lost my older model. I keep my Jawbone along with a couple of misc. adapters and wired Apple EarPods in a small vinyl pouch that I carry in my pocket. That pouch went missing for a week.  I couldn’t find it in all the usual spots that I normally leave it or drop it in. I figured that it was gone for good and that I had to replace the contents. I ordered the NEW 2014 Era by Jawbone. Although I hate buying things to replace lost, stolen or broken things, I wasn’t going to go without one any longer. When the new Era arrived I was immediately taken aback by how small it was. Oh by the way, I found the pouch containing my old gear one day after I placed the order for the replacement gear. It was at the cleaners, probably in one of my pants pockets. They returned it to me with all the contents intact. Anyway, I now have this new Jawbone Era (yes I could have returned it, but then you wouldn’t be getting this review 😉 ) and like I said, I was really taken aback by how small it was compared to almost all other headsets I had used. The only other small one that came to mind like that was the Apple Bluetooth Headset. Yes, Apple made their own for a while and then quietly discontinued it. The new Era is very sleek looking. Jawbone did away with the former cheese grate design and this one has smooth lines. It comes in four colors and rather than going with my default (black), I decided to live a little and get the bronze one.
Jawbone_era_vs_Era_2014
Jawbone Era 2014 (Bronze) next to my Jawbone ICON

Setting it up

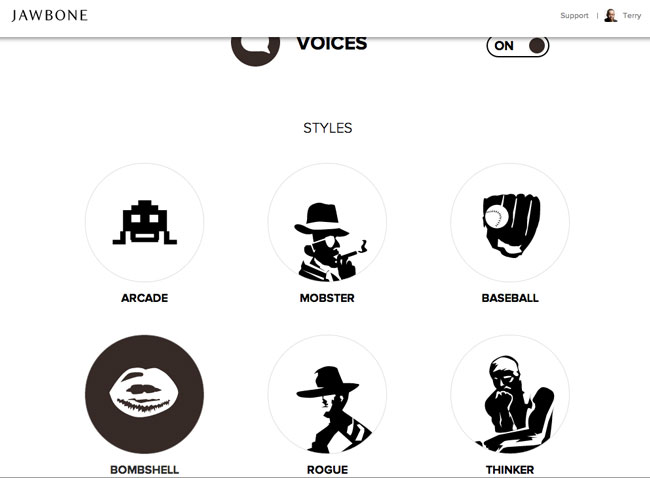
It came with four ear gels. You get  left and right small and medium size ones. I like to wear it on the right side and the small size was the best fit. After the initial charge I then made sure I had the latest version of the Jawbone updater on my MacBook. The software integration is what really sets the Jawbone headsets apart from the competition. Not only was there a firmware update waiting, but I also configured it with the more sexy “Bombshell” voice as well as set up about 14 out of my 20 allowed caller ID names. If you add in the names and numbers of up to 20 contacts your Era will announce their name in your ear when your phone rings. These are the kinds of bonus features that make using the Era fun and more elegant.
jawbone_voices

Sound Quality and Battery Life

This is what really counts with any Bluetooth headset. If you can’t hear your callers or if your callers can’t hear you then what’s the point? I have yet to use any Bluetooth headset that made me say “wow” when it comes to sound quality. In most cases the quality is “good” or as expected. For me the new Era is “good”. The Jawbone Noise Assassin is designed to help cut down or eliminate background noise and it does a good job of it. As far as battery life goes the smaller size means a smaller battery. Therefore your battery life will be about 3-4 hours of talk time. For many that may be a step down from the larger units. My older, larger Era got 4-5 hours of talk time. If you talk a lot throughout the day you will either want one of two things. You’ll either want the new Era charging case, which extends the battery life up to 10 hours of talk time, or you’ll want a different headset. I didn’t go with the charging case because I simply don’t spend that much time talking on the phone throughout the day. If I ever find that my talking on the phone is increasing I could always order the charging case separately.

Apple’s Siri and Google Now Integration

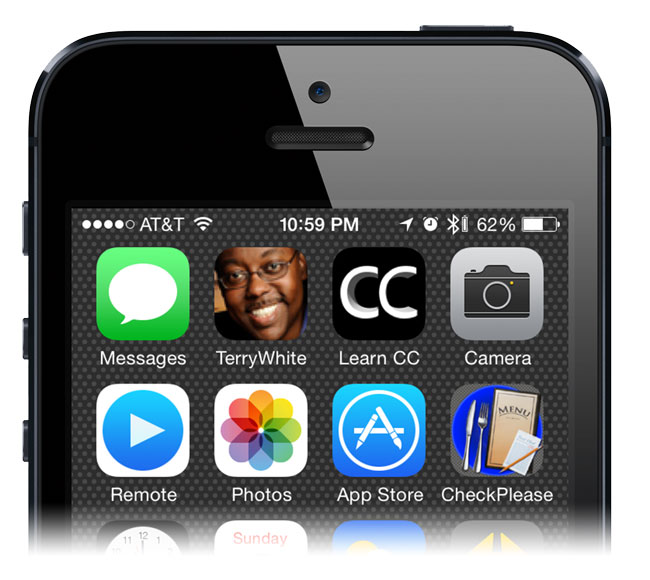
There are only two controls on the Jawbone Era. There is the physical on/off switch and the multifunction button on the end. When your phone rings you press the multifunction button once to answer the call. Press it again when it’s time to end the call. While the headset is idle and you’re not on a call you can press it once to hear the remaining battery time/status. However, if you press and hold it will activate Siri on the iPhone and Google Now on select Android devices. This is pretty cool as it gives you a more discrete conversation with Siri. I enjoy using Siri this way without having to physically pick up my iPhone to hold down the home button. Speaking of iPhone integration, you’ll also like the fact that the Jawbone Era’s battery indicator shows up next to the iPhone’s battery indicator on the iPhone display.
Jawbone_battery-iPhone5

The Bottom Line

If you looking for the smallest, arguably the most stylish Bluetooth headset then look no further, the New 2014 Jawbone Era will fit the bill nicely. If you can live with the relatively short talk time of 3-4 hours then I would say save $30 and go with just the Jawbone Era here. However, if you want a full day of hands-free conversation, then go with the Jawbone Era with Charging Case here.

4 Cool Ways to Charge Your iPhone, iPad and other Mobile Devices on the Go

lightning_wall_outlet

If you have a smartphone and you use it throughout the day chances are your battery won’t last from the time you wake up til the time you go to bed. If you work in an office or other stationary place then you probably charge your device at your desk. If you drive around you probably charge your device in the car. However, what if you’re out and about all day, take trains and are just not near a wall outlet? There are ways to charge on the go. Here are a few of my favorite accessories:


ChargeCard

chargecard

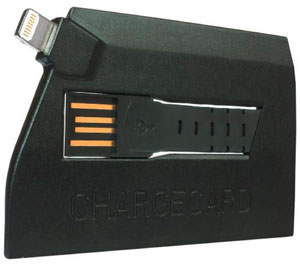
First off even if you can get to a charger or USB port and you’re an iDevice user then you’re going to need a cable. Good luck if you are borrowing a charger from your friends that use Android and other platforms. This is why I love the “ChargeCard” it’s a credit card size “cable” that I keep in my wallet. Pop out the USB plug, plug it into any standard charger or USB port and the other end into your Lightning port on your iPhone, iPad or iPod touch. Away you go…

Get the ChargeCard for Lightning devices here

Yep, they make one for Android here and older 30pin connectors on iDevices here.


RAVPower Flashlight Battery

RAVpowerFlashlight

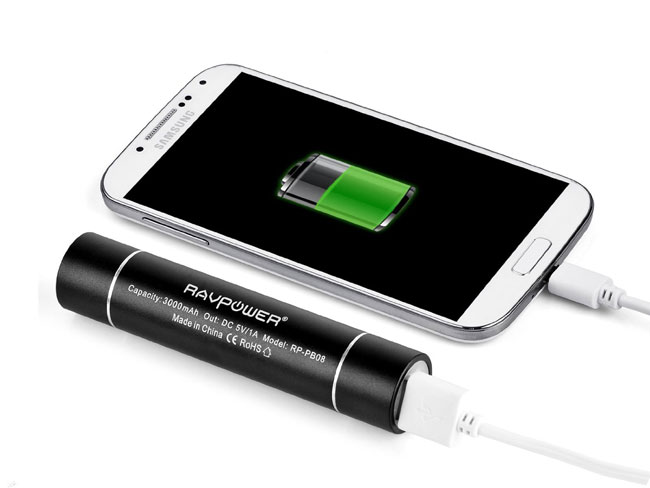
I have a variety of different portable batteries. However, this is one the coolest ones I have because of its size and form factor. At first glance it looks like a standard small LED Flashlight and it is! However, on the other end is a standard USB port so that you can plug in your smartphone and charge it back up. What more can I say? A device that serves more than one purpose effectively is always going to be a favorite of mine!

Get the RAVPower Lipstick External Power Pack here.


RAVPower Luster 6000 mAh Battery Pack

RAVPowerLuster

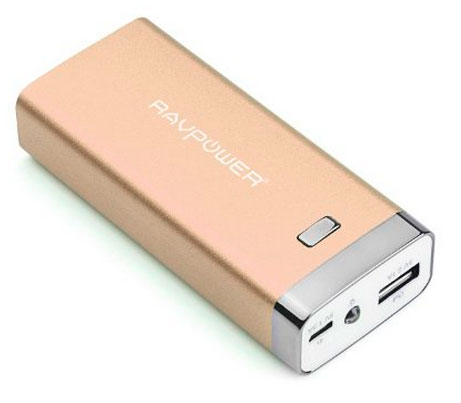
Need more juice? If you want to be able to charge either a smartphone or a tablet then you’re probably going to want 2.1A output. That’s why I carry a RAVPower Luster 6000 mAh Battery Pack. This one has enough juice to charge either my iPhone 5s or my iPad Air. Even if you’re only going to want to charge a smartphone, then you might want to get this one because the higher output will charge your smartphone faster!

Get the RAVPower Luster 6000 mAh Battery Pack  (in multiple colors) here.


Premium Solar Charger

solor_smartphone_charger

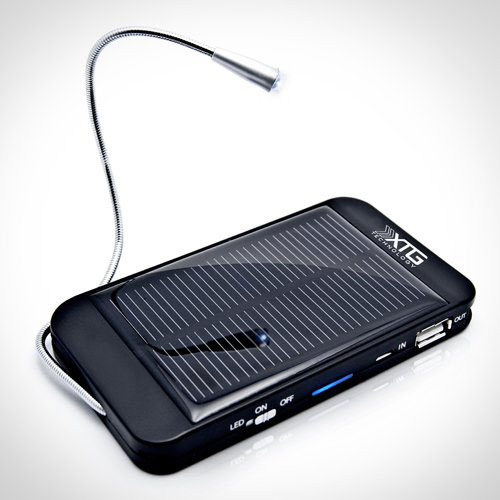
A battery is great, but what about those times when even the external battery goes dead? Well there’s always the sun as a backup. This is a battery pack similar to the ones above that can be charged up via a wall outlet, but it also can be charged via solar energy.

Get the Premium Solar Charger here for your next power outage!


TiVo Stream vs. Slingbox

TiVo_Stream_vs_Slingbox

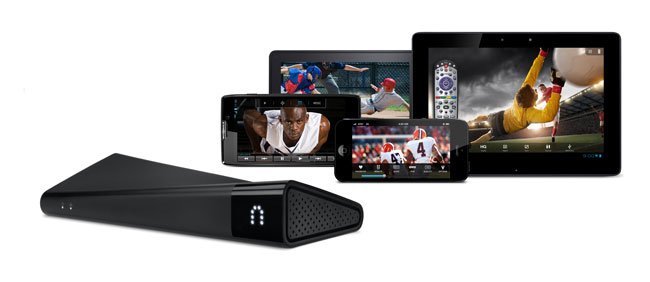
As a frequent traveler I’ve been a long time fan of Slingbox TV streaming devices. For those of you who are unaware of what Slingbox does, let me give you a quick description: A Slingbox is a physical device that you connect to the output of your cable/satellite box, DVR, etc. You also connect it to your Internet router via ethernet and once it’s set up you can remote control and stream content over the Internet to your computer or mobile devices while you’re on the road. I primarily used Slingbox units to stream shows recorded on my TiVo DVR to my laptop or iPad while on the road in hotel rooms. Since I do in fact use TiVo DVRs I was interested in TiVo’s relatively new solution called TiVo Stream. Much like a Slingbox, TiVo Stream connects to your router via ethernet and allows you to stream recorded shows from your TiVo DVR to your iPad or iPhone either in the home our outside the home over the Internet. If you get one of the newer TiVo Roamio DVRs this capability is actually built-in. So the real question is…

Which is Better?

I’ll start by saying they take different approaches and each has its pros and cons. Some users even use both devices because of this. Let’s start with the pros and cons of Slingbox:

Slingbox Pros

slingbox-500-slingplayer-family-lg

  • Doesn’t require a specific kind of DVR or set-top box. Depending on the Slingbox model you get you can either connect to it via HDMI or component cables.
  • Better streaming quality in low bandwidth situations. Slingbox has been around for years and has spent a lot of time tweaking their products to work in a variety of different situations and Internet connection speeds.
  • Slingbox supports playback on your Mac, PC, iOS or Android devices.
  • Allows streaming of any shows (like HBO content) regardless of copyright/copy protection.
  • Slingbox allows streaming over WiFi or Cellular
  • The Slingbox iOS App allows AirPlay to Apple TV.

Slingbox-iPad

Slingbox Cons

  • You can only stream content. There is no option to download to view offline.
  • It ties up the TV at home while in use. Since Slingbox is allowing you to control your DVR/set-top box live it means that no one in the home could really watch that TV while you’re using Slingbox. Unless of course they want to watch what you’re streaming.
  • You have to pay for the mobile Apps. This has always bugged me. Slingbox now charges $15 for each platform (used to be $30 per app). They even charge separately for the iPhone and iPad versions. I feel that if you’re paying for the hardware you shouldn’t have to also pay for the apps to use the hardware.
  • Remote control can be sluggish and the responsiveness can be several seconds behind.

TiVo Stream Pros

TiVo-Stream_iPad

  • The video quality is better as long as you have the bandwidth to support it.
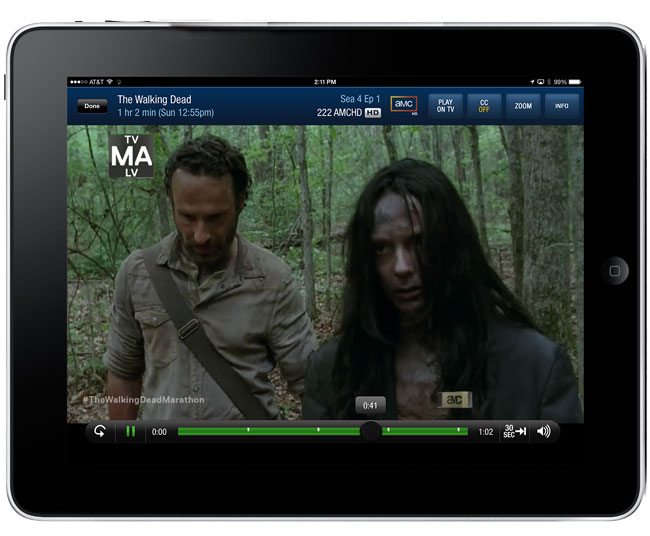
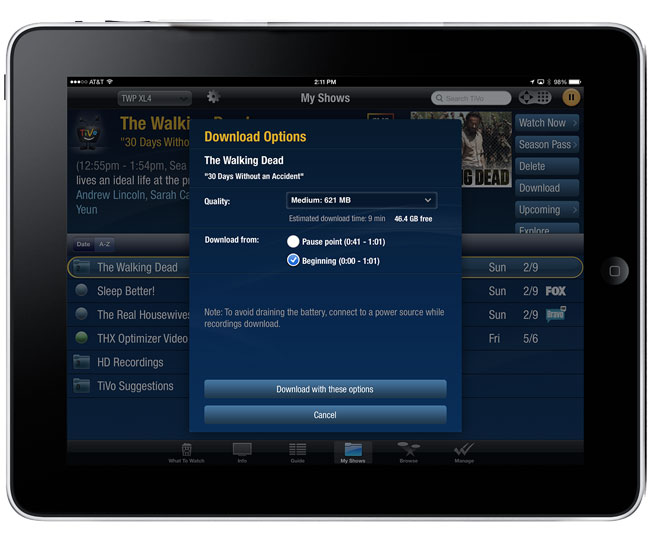
  • TiVo Stream allows you to download shows directly to your iPad or iPhone for offline viewing whether you’re at home or on the road.
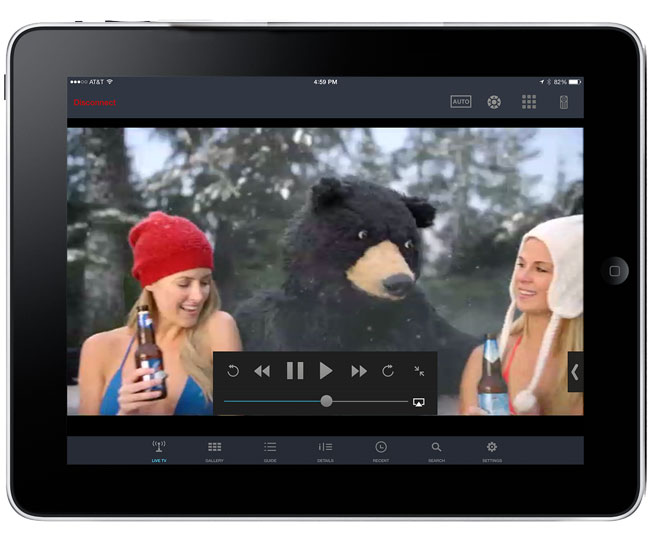
  • The TiVo iOS app is Free
  • TiVo Stream is built-in to the new/current Roamio TiVos
  • TiVo Stream doesn’t tie up your TV. Someone can be watching the TV at home while you’re streaming different recorded TiVo DVR content remotely.

TiVo-Stream-download_ipad

TiVo Stream Cons

  • TiVo Stream only supports iOS devices. No PC/Mac playback or Android support (promised in 2014).
  • Playback can be sporadic when you don’t have good bandwidth/Internet speeds
  • Only works over WiFi <- this really sucks seeing how I was grandfathered into an unlimited iPad 4G data plan via AT&T. I can’t think of a single reason why they wouldn’t support streaming over cellular if you’ve got LTE speeds.
  • No AirPlay mirroring. If you wanted to watch a show on your Apple TV say in another room or location, you can’t. Mirroring is not allowed in the app.
  • You may not be able to stream all of your shows due to copyright/copy protection. For example, let’s say you  record a show from HBO onto your TiVo, you probably won’t be able to stream or download that show because of the license agreements with HBO and various providers.

Created with Compare Ninja

The Bottom Line and My Recommendation

If you’re looking to get a streaming solution so that you can watch your recorded shows on the go then I’d probably go with Slingbox. While it is more expensive and I’ve had my issues in the past with Slingbox units dying early deaths on me just outside the warranty period, it’s the best overall solution with the least restrictions. If you are going to be upgrading or getting your first TiVo DVR and you’re going to get a Roamio with Stream built-in then I’d test Stream in your environment first before spending the extra on a Slingbox. TiVo’s limitations can be easily addressed, but they have to actually do the work. I would start with opening it up to more platforms besides iOS. I’d like to see a web browser option just like Slingbox has as well as the ability to stream over cellular networks. Not sure if they can get past the copyright issues since they have to play nice with providers too, but if they can they’ll need to do this before they can give Slingbox any real competition. I like having both options, especially being able to easily transfer shows to the iPad before heading out on a flight. If you can afford both, you’ll have the best of both worlds. If not, go with a Slingbox 350 or 500 for the best overall streaming solution.

You can get the Slingbox 350 here and the 500 here.

You can get the TiVo Stream for your TiVo Premiere here or the TiVo Roamio here.

Mophie Juice Pack Air for iPhone 5/5s

mophie-juicepack-air-red

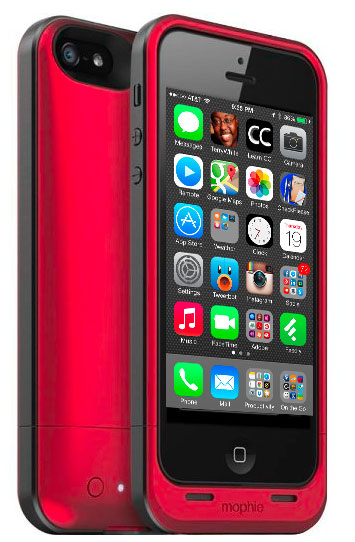
If you use your iPhone a lot during the day then chances are you’ll run out of battery before you run out of day. While at my desk I keep it plugged in and while in my car I use this car charger. However, when I’m on the road I tend to use my iPhone 5s quite a bit when I’m not near a power source. I also depend on it heavily and can’t afford to run out of juice. I’ve used a variety of external batteries before, but the one that is definitely the most convenient is the Mophie Juice Pack Air. The reason I like this one best is because it doubles as a case for iPhone 5/5s. This means that while your iPhone is in the Juice Pack Air it’s being charged and protected at the same time. Because it is a battery it does add a bit more bulk than a standard case, but not too much. It’s also very light and therefore doesn’t add a ton of weight. The Juice Pack Air charges via a micro USB cable (supplied). At first I was a bit disappointed in this because I had hoped for a Lightning connector pass-thru. However, on the plus side micro USB is more common and easier to share with non-iPhone users. You can charge just the Juice Pack or both the Juice Pack and iPhone at the same time. The Juice Pack Air has a physical switch to turn it on/off and an LED readout to let you know how much “juice” is left. The 1700mAh battery is designed to give you 100% more power effectively doubling your iPhone 5/5s battery life.

The Mophie Juice Pack Air comes in Black, White and PRODUCT (Red). I went with the PRODUCT (Red) one. I keep it charged and available for those “long days”. I’ve used previous models on previous iPhones and they have never let me down.

You can get the Mophie Juice Pack Air here.

CamRanger Review – Wireless Camera Control

camranger

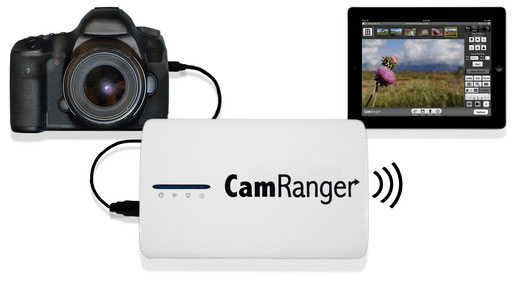
I’m finally getting to my CamRanger Review. This is a product I saw several months ago and always wanted to do review of it. I get the question all the time: “Is there a way to wirelessly shoot to my iPad?” I’ve covered many ways that the iPad can fit into a digital photography workflow here and another wireless solution here, but at the time CamRanger wasn’t out yet. CamRanger offers a complete wireless camera control solution for your Nikon or Canon DSLR. It’s a small lightweight box about the size of a smartphone that plugs into your compatible DSLR via a supplied USB cable. It creates a wireless network on its own and therefore doesn’t need a computer or other wireless hotspot. You can connect to it with your iOS devices (such as an iPad or iPhone), Android devices, or a Mac or PC. For my testing I used an iPad Air. Set up was very easy and only required about a minute of reading the instructions. I tested it with my Nikon D600. Once it was set up I was able to work in either direction. I was able to use the iPad to control most aspects of my camera including picking focus points, ISO, shutter speed, f/stops, white balance, etc. and I was able to take shots using the camera and have them show up as I was taking them on the iPad. The latter mode is probably the one I’d use the most out in the field because I really don’t need the remote control functions as much as say a landscape or wildlife photographer would.

Rather than continue to write about it, I recorded this short video of how it works:


The Bottom Line

CamRanger works exactly as advertised. It has a range of 150 feet and a battery life of about 5-6 hours. It allows the most control over your DSLR than any other solution I’ve seen and it allows you to shoot directly to your mobile devices. Many of the newer Nikon and Canon DSLR are actually coming with optional wireless connectivity. So if you have a new camera you probably have more options to choose from. However, if you’re working with a slightly older model like the Nikon D700 or Canon 5D Mark II for example, then this may be your only option. CamRanger comes with all the cables, chargers, etc. necessary to get started including a pouch to easily put it on your camera strap or belt.

You can get CamRanger here.

Chromecast – Stream web content to your HDTV wirelessly

chromecast-dongle

If you’ve followed my reviews you probably already know that I’m a fan of TiVo and Apple TV. Between the two devices I pretty much have all my TV watching needs covered. TiVo is definitely the best DVR experience for recording and watching TV shows and Apple TV is great for streaming all my media content, watching Netflix, YouTube, HBO Go, iTunes rentals, podcasts, etc. With Apple TV I can even stream/mirror any content from my iOS devices OR my Macs. The latest Macs and Mac OS X has AirPlay built-in. Even with all these capabilities I was intrigued by Chromecast. The low $35 entry price was low enough to give it a shot.

What’s Chromecast?

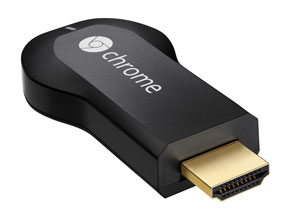
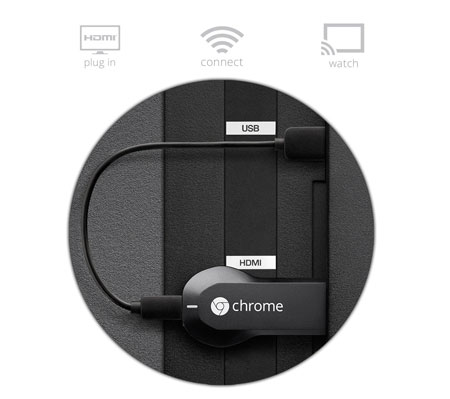
Chromecast is a small “dongle” that attaches to your TV via HDMI. However, don’t let the picture deceive you as it did me. You not only connect it to your TV via HDMI, but you also need to supply power to it. You can either use the supplied power adapter and plug it into the wall or you can use the USB cable and plug into an available USB port on or near your TV for power. This freaked me out at first because my TV is on the wall and I didn’t want any wires hanging down. However, I was lucky to have a USB port on my TV right next to the HDMI ports in the back. I was able to plug in the Chromecast and power it right off the USB port on the TV as well. No visible wires!

chromecast-setup

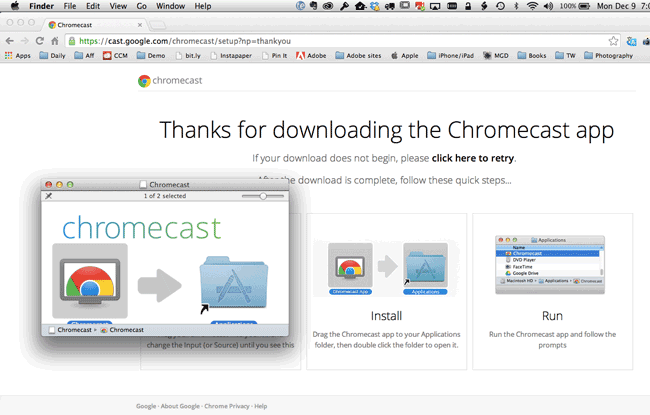
Once it’s plugged in and you turn your TV on to that HDMI input you’ll be presented with a setup screen. Head over to your computer and download the setup app. You computer should see the Chromecast wirelessly. During the setup process you’ll give it access to your WiFi network and enter your WiFi password. Mine needed to download a firmware update then I was up and running. After the Chromecast install on the TV, you’ll need to download (Google Chrome if you don’t already use it) the Chromecast extension for Chrome. This extension lets you broadcast from any browser tab you have open in Google Chrome to your TV.

settingupchromecast

How is this better or worse than Apple TV?

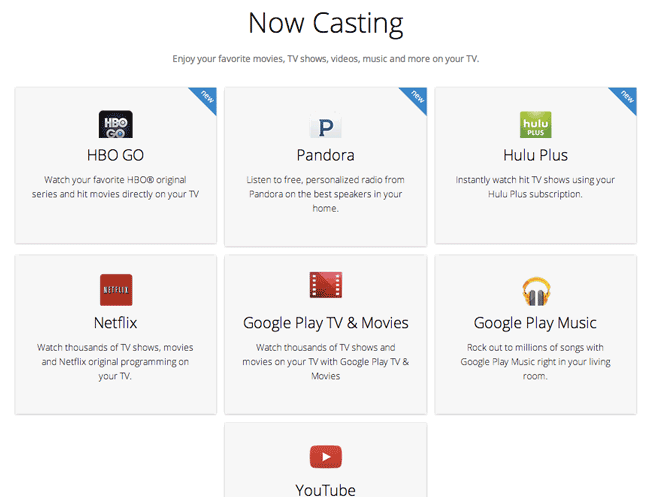
First off it’s not direct competition to Apple TV. Apple TV does way more and costs more. Chromecast only works with whatever you can display in Google Chrome or from a Chromecast compatible app on your computer or mobile device. So no streaming of other things on your computer unless they are Chomecast aware. However, that’s probably the one thing I like about it over Apple TV. While I can use AirPlay to stream ANYTHING from my MacBook Pro to my Apple TV, it’s a direct mirror. I cant’ say stream a slideshow in Lightroom and then go work on another photo in Photoshop. It’s a mirror of whatever I’m doing on the computer. (UPDATE – with Mac OS X 10.9 Mavericks you can AirPlay to an Apple TV and use the Apple TV as a second display/extended desktop and NOT mirror.) However, with Chromecast I can stream content from one browser tab and go work on anything else while that browser content is streaming in the background. That’s what I like about it most and I think that’s what people that are trying to cut the cable/satellite bills out of their lives will like too. You can stream Netflix, HBO Go, YouTube or any other site to your TV while not tying up your whole computer. There are times that I watch my Slingbox via my web browser. Now I’ll be able to stream that content to my TV.

What about audio? This is the tricky part. If your content is either Flash based or coming from an App that is compatible with Chromecast then your audio will also stream to your TV. However, if the content is not Flash based then the audio will play through your computer.

The Bottom Line

If you want to stream content from the web to your TV, this is your easiest most cost effective way to do it wirelessly. The playback rate is “decent”, not great or perfect, but certainly watchable without dropping too many frames. The picture quality was very good. It’s a one time cost with no monthly fees. I’m tempted to get another one for travel/hotel room use.  You can get one here for $32.88. If you want to MORE, then I’d still recommend getting an Apple TV.

chromecast-nowshowing

Charge 4 Mobile Devices At Once!


bolse

I travel with an iPhone, and iPad, a Jambox, a Nike FuelBand, etc. All of these devices charge via USB and all of course came with their own chargers. Rather than bring all those separate chargers with me I tend to look for multiple port USB charges that I can plug into one AC outlet and charge at least two devices. I was looking for one that could charge four devices including the iPad/tablets that need more power. I found one!

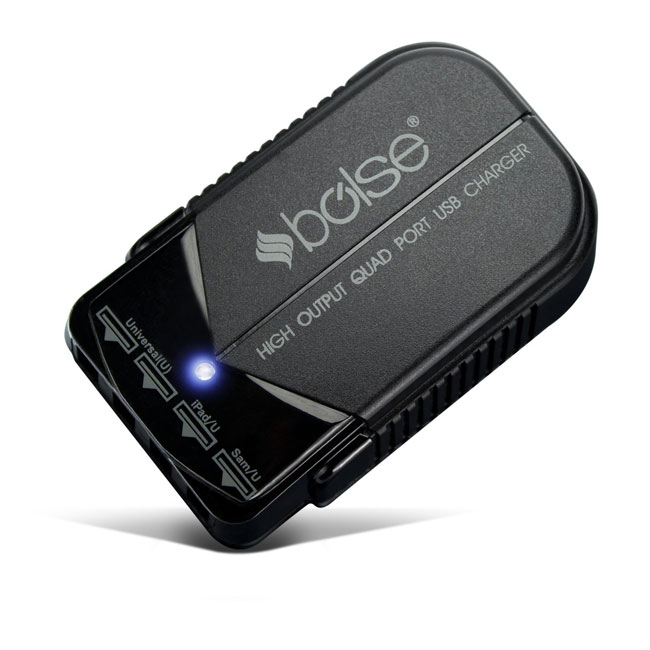
The Bolse 4 Port Premium High Output Wall Travel Charger has 4 Amps /20 Watts of output. That’s good enough to charge 4 devices at the same time including a tablet. I bought a couple of these and so far so good. As we speak it’s charging my iPad Air, iPod touch, external battery, and Jawbone headset. My only problem with it is the ultra bright blue LED status light. It’s blinding at night in a hotel room. Nothing a piece of gaffers tape or a Light Dim won’t cure, but I would love it if manufacturers either used lower power LEDs or allowed you to turn them off. Otherwise, this charger rocks and lets me easily charge 4 mobile devices at once!

You can order one here in white or black.

DJI Phantom Review

dji-phantom

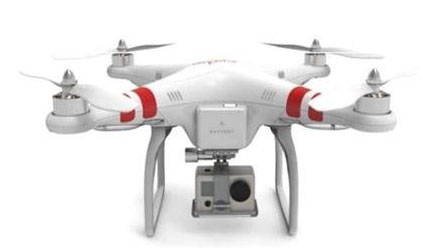
As some of you may remember, a while back I bought a Parrot AR Drone 2.0 mostly for fun and to fly around and record videos of my production setups. While the AR Drone 2.0 worked perfectly for short distance flights, it’s limited by the range of WiFi. It’s also limited to the built-in 720p video camera. During Photoshop World Vegas I attended Russell Brown’s pre-conference on the DJI Phantom Quadcopter. The entire class was given instruction on flying them and the chance to fly them all day. I was impressed by the control and range of this one over the AR Drone. It was like going from a point and shoot camera to a DSLR. Both can capture great images, but you have much more control and potential quality with a DSLR. The Phantom comes with a mount to mount a GoPro camera. Since I already had a GoPro Hero 3 Black camera and they were offering a show special to pre-con attendees on the Phantom, I figured it was time to upgrade and step up to a better quadcopter. When it arrived the setup was relatively simple. You have to put the landing gear on and the propellers. There’s a compass calibration routine as well. One of my friends told me to upgrade the firmware and I did. However, I was a little ticked that the only way to upgrade the firmware was with a Windows PC. Their Utility only runs in Windows. I use Parallels on my MacBook Pro with Windows 7 and had no problem updating the software as well as running the utility. It would be nice to have a native Mac version. Lastly I mounted my GoPro in the supplied mount.

My first flight

You can see the video here from my first flight. I already knew that to get steady video you’re really going to have to ditch the supplied mount and get a gimbal. This will make your videos a million times steadier. So my video is not steady. I also forgot to put the GoPro in 720p wide mode, but here it is:

http://www.youtube.com/watch?v=4qsiO3pKIE4

I basically flew it straight up, captured some video and brought it back down. It was getting dark and I didn’t want to crash. After I got the hang of it I took it out the next day and went much higher and this time having the GoPro capture stills every 2 seconds.

phantomflt1

I’m amazed at how high this thing can go! My colleague has taken his over 1600 feet. I don’t have an altimeter, so i can’t say how high I’ve flown it, but I’ve flown it so high that I could barely see it and could no longer hear it.

phantom-blackdot

In the pic above that I captured with my iPhone, you can see a black dot. That’s the phantom so high up that it almost disappears. I’m having a blast with this thing.

pantomflt3

Above is a shot I took recently as the sun was setting. I also realized at this point that the GoPro doesn’t do well at all in low light. Most of the shots from this flight were blurry because the Phantom is vibrating and fighting the wind, so the camera is far from still. One of the things I really like is that the Phantom has a GPS built-in. If for whatever reason you fly out of range of the controller or the controller loses contact, the Phantom will fly up about 60 feet and then automatically returns to the point where it took off and lands. While I’ve had some really great flights so far, I did have a crash. I actually lost a propeller during flight. It wasn’t screwed on tight or had shaken loose and it flew right off. The Phantom came straight down spinning out of control. Luckily for me it hit the grass and there was no permanent damage. Thankfully the DJI Phantom comes with an extra set of propellers. It was really windy that day and I was flighting the wind just to keep the Phantom in place. I happened to be capturing video at the time with the GoPro. You can see the crash video below.

You can get the DJI Phantom (ON SALE) here. It comes with a battery that gives you about 12 minutes of flight. You’ll probably want an extra one here.

You can get the GoPro Hero 3 here.

I don’t have a gimbal yet, but here are some to allow you to record more stable video.


Continue reading “DJI Phantom Review”

Use Any Smartphone on any iPod Dock

dock_boss_iphone5

I’ve reviewed several iPod music docks here over the years. Starting with the Bose SoundDock I’ve had an appreciation for these music devices to dock my iPods back in the day as well as my iPhones over the years. As a matter of fact I used to smile when I’d walk into a hotel room and see an iHome or other similar device on the nightstand. This meant that at a minimum I could dock my iPhone and charge it overnight even if I had no plans to listen to music via the dock’s speakers. Well those days are over, or at least I thought they were when I got an iPhone 5. Apple has aggressively phased out the 10+ year old 30 pin dock connector found on several of these music docks and in most modern cars. While Apple does sell Lightning Adapters to adapt older 30 pin connectors to the new Lightning connects found on the iPhone 5, newer iPods and current iPads. The problem is that compatibility can be hit or miss. Some may still play music, but not charge the device.

Enter the CableJive dockBoss 5

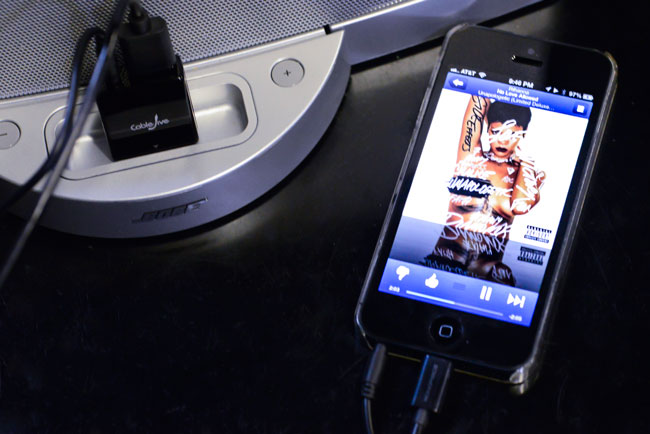
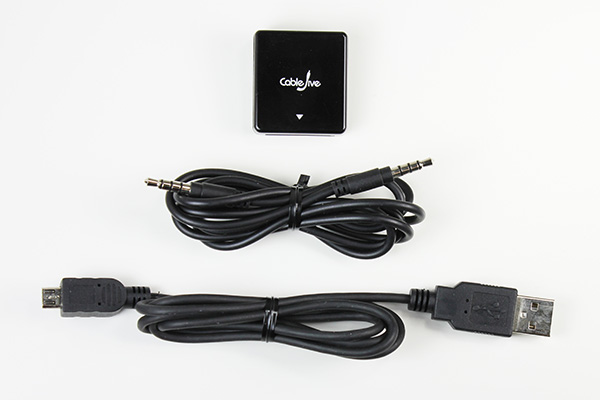
The dockBoss is an adapter for the older 30 pin based docks and on the other end is a standard USB port and 3mm audio-in jack. Instead of simply converting the older 30 pin connection to a Lightning connection, the dockBoss 5 converts to a standard USB port for power and a standard audio-in port for music. This means that not only can I use my iPhone 5 on any of these devices, but I can use my iPad or any other handheld device or smartphone. I now travel with a dockBoss 5 in my luggage. When I arrive to an iPod dock equipped room I just plug in the dockBoss and one of my regular USB-to-Lightning cables. Now my iPhone is charging without me have to search for a plug by the bed (some hotels still don’t get this need) and if I want to listen to music I can plug in the supplied audio cable that comes with the dockBoss 5 (as pictured above). If I don’t care to listen to music then it’s just a single cable connection. Also note that the dockBoss 5 includes both an audio cable and standard micro USB cable for connection to most other smartphones and other portable devices.

The Bottom Line

dockboss-cables

Since Apple retired the 30 pin dock connector most portable music player manufacturers are now leaning towards bluetooth and wi-fi for connectivity for there new devices. However, if you’ve got an older music dock that works perfectly there’s probably no reason to throw it away! With the dockBoss 5 you can get more life out of it and make it compatible with other devices that it never worked with before.

Order the dockBoss 5 here.

Scandock Turns Your Smartphone Into the Ultimate Document Scanner

wpid12392-TLW6221_sm.jpg

I have been using my iPhone to scan documents for a long time now. My App of choice is Scanner Pro. However, no matter what phone you have or which App you like, the problems of scanning documents are universal. You have to deal with lighting and positioning the document in just the right spot. Also if you’re scanning multiple pages chances are each one is going to be slightly off in terms of orientation, cropping, etc. due to not being able to hold the phone in the same spot for each page. Atiz, the makers of Scandock, want to solve this problem.

Scandock turns your smartphone into a document scanner

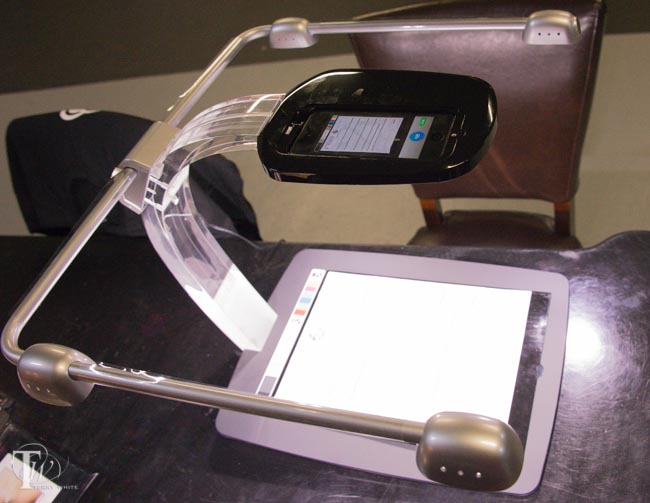
This combo hardware device and App will turn an ordinary iPhone or Android camera into a fast, efficient document scanner. I must admit that when I received my review unit that it was way more than I expected in terms of size, craftsmanship and design. I thought “whoa! They’re serious!” It took me about 5 minutes to put it together, plug it in and download the free Scandock App. Once I had the App, I placed a document on the bed and immediately noticed that they have a mat that’s designed to smooth out/hold down folded papers. I tapped the scan button on the App and like with any photo, it only takes a second and you’re on to the next page. Certainly faster than the fastest sheetfed scanners out there because it literally takes a second. It takes more time to position the paper than to do the scan. If you are scanning more than a few sheets then it will probably be on par with the time it takes to do it in a sheetfed scanner, but way faster than a flatbed scanner.

As you would expect, the App allows you to convert the document to PDF and share it. The one feature that blew me away was the multiple-doc feature. This feature allows you to place multiple items on the bed at once, such as several receipts or business cards, and it will auto-detect and scan each one as a separate document. I’ve not seen a smartphone App do that before. The built-in LED lights are the key to this device. By evenly lighting your documents you never have a shadow of YOU holding the phone over the document. There are trays for both iPhones and Android smartphones. You can even get it in Black or White.

The Bottom Line

Sounds great! Does everything that I would expect and more. What’s the downside? The only real downside to this solution is the asking price. At $499 (B.Y.O.D.) it will be out of reach for many and puts it in direct competition with other document scanners. Granted, other document scanners require a connection to a PC/Mac (which probably costs more than your smartphone) and perhaps the newer “Post PC” generation will see the benefit of this kind of solution.

You can learn more about Scandock here and order direct from the company.

Seeing is better; check out this video: