International Power!

Frequent international travelers have got the power thing figured out. When you travel from the US to another country the question becomes what do you need to charge/use your electronic devices. My friend Michele who was headed to the UK asked me this very question. So I thought I spend a few minutes here giving you some tips along with my favorite power adapter.
 

Converter vs an Adapter

Many of the electronics designed to be traveled with (like notebook computers, iPods, iPhones) are already geared to be used in different countries. An easy way to know is to look at the description on the power adapter for your gear. If it says that it can handle 100-240 volts then you're all set. All you need is a plug "adapter" so that you can plug it in the wall of the country you're going to.
However, if your power adapter has a max input of 120 volts. That means that it was designed to work in the US only and in order to use it in another country that has 240 volt wall outlets you're going to need a power "converter" something that can regulate the 240 volts down to 120 volts. Or you might just go with a compatible 3rd party adapter like the ones from iGo.
 

For your Mac, iPod or iPhone

appleworldtravelkit

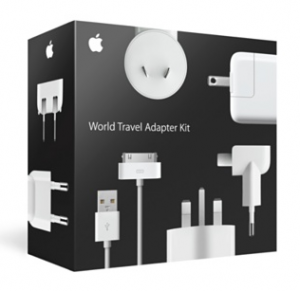
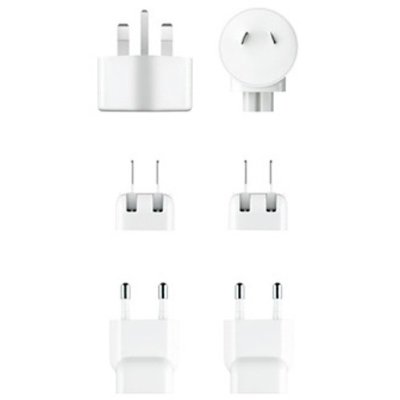
If you have a portable electronic device from Apple, your supplied adapter already works in other countries. All you need is an adapter and Apple sells a nice kit called the Apple International Travel Kit. This kit has everything you need to adapter your MacBook/PowerBook adapter as well as a USB power adapter (actually it's there older version with the removable prongs) and sync cable With this kit you'll be all set in the US, UK, Australia, Korea, etc.  You can get the Apple kit here.

appleintl
 

Continue reading “International Power!”

Best of 2009: Terry’s Top 10 Gadget Picks

Happy New Year! It's that time once again to take a quick look at my favorite gadgets of last year. The gadgets I've chosen were the ones that I used the most and that had the most positive impact on my day-to-day life. These gadgets were either introduced in 2009 or had significant updates in 2009. These are the gadgets that I would recommend to a friend without hesitation. So let's get to it…


iPhone 3GS

iPhone 3GS

Anyone that knows me knows that the iPhone 3GS is my communications device of choice. The 3GS made my life easier this year with more memory, a faster processor, and graphics to run apps that I never dreamed of right from the palm of my hand. I use my iPhone quite a bit in my day to day routine. I actually get a ton of work/communications done with this device.  I get both work and personal email, SMS and MMS messaging, productivity and business apps, and yes even the ability to make calls. This is the one gadget that I now couldn't imagine being without. See my original iPhone 3GS review here. Learn more about the iPhone 3GS here.

See my Must Have iPhone Apps here.

See my favorite iPhone and iPod touch accessories here.


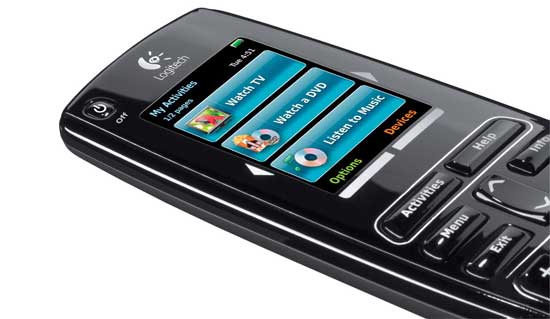
Logitech Harmony One Universal Remote

When I am at home and not producing content, I enjoy my home entertainment systems and home theater. The one remote that has worked for me better than any other remote I've tried is the Logitech Harmony One. This remote is configured from your computer to do exactly what you want. Anyone with more than a couple of entertainment components should do themselves a favor and check out the Harmony One. See my original review here. Get the Harmony One Remote here.

Continue reading “Best of 2009: Terry’s Top 10 Gadget Picks”

Creative Ways to Showoff Your Photography – Gelaskins

Yesterday I talked about showing off your Photography with Moo Cards. Today it's all about skins. My guess is that you have a cellphone, mp3 player, laptop or gaming device if not all of the above. So why not add some custom bling to your electronic devices.

gela

Gelaskins has been around for a while selling all kinds of creative looking skins for your various devices. Honestly I'm not really a skin kind of guy. The reason is that I usually don't find an image that I like so much that I want it on a device that I use/look at every day. However, once I found out that they now allow you to use YOUR PHOTOGRAPHY, I couldn't get the site fast enough. 

gelaskins-c

Continue reading “Creative Ways to Showoff Your Photography – Gelaskins”

A Weekend with Mac OS X 10.6 Snow Leopard

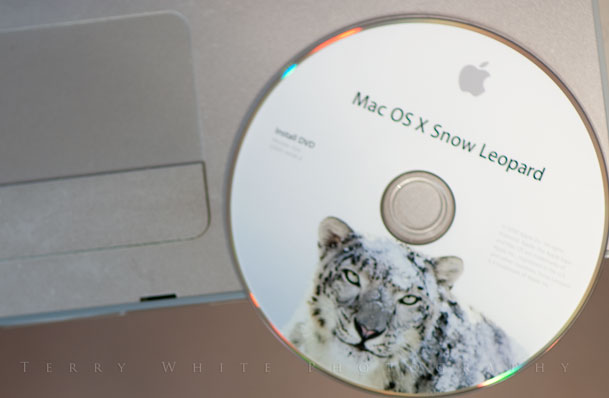
SL-installdisc

My copy of Snow Leopard (Family Pack) arrived via FedEx Friday afternoon and since I had already done a clone backup using SuperDuper and of course I stay backed up with Time Machine too.  I was ready to install the minute I opened the package. As with most Mac OS X  installs the package contained the installation DVD and simple brochure that covered the basic installation steps and the top new features.


Installing

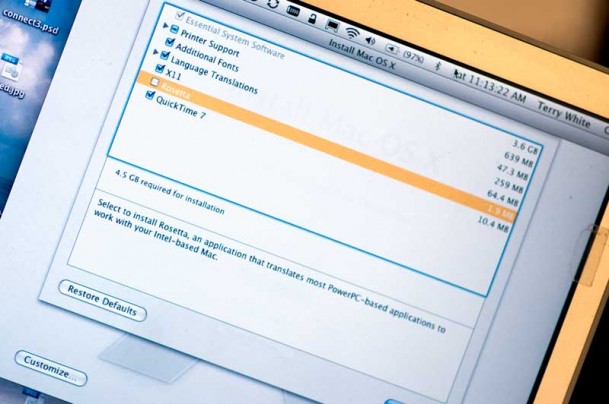
The Snow Leopard Installer was quite different than the Leopard installer. I expected to get to choose between an Upgrade and Archive and Install and the next thing I know, it was installing and I never saw the usual options. So I canceled it! Yep, I stopped the installation a few minutes after it got started because I wanted to verify some options. Good thing I did, because there are some defaults you need to be aware of. The first thing is that Rosetta is no longer installed by default. Rosetta is Apple’s technology to run non-intel native apps (apps built for PowerPC) on an intel Mac. While most people are probably OK here, I have a couple of apps that aren’t Intel native. Quicken comes to mind. Now the good news here is that reports say that if you didn’t install Rosetta and you try to run an app that needs it, Mac OS X will offer to install it right then and there via the Software Update utility. However, I just thought that since it only takes a few megabytes, why not at least alert the user and give them the option to install it without the user having to know to enable it it via the Customize feature? 

SL-customize

I still never got a chance to choose Archive and Install over Upgrade, but that OK since it appears that Snow Leopard (SL) now does an Archive and Install by default. This is good as I wanted to do this option to hopefully clear up a few weird issues I was having with Leopard (see "What got fixed" later). The installation took somewhere between 40-60 minutes on each of my Macs.

Installing it on my MacBook Air – When I bought the MacBook Air for home/family use, I also bought the external Super Drive. However, I purposely didn’t open it. I still have it in the original shrinkwrap. I wanted to see if Apple’s claims were true and that I could get by with a Mac with no optical drive. So far I have been doing just fine without it. However, this was the first major OS upgrade that I’ve had since getting the MacBook Air last year and I still wanted to see if I could do this without opening that Super Drive. So I put the Snow Leopard DVD in one of my iMacs and enabled CD/DVD sharing. I clicked on Remote Disc on the MacBook Air and within a few seconds I was installing Snow Leopard on the MacBook Air. It worked perfectly and the Super Drive is still in the shrinkwrap.

  Continue reading “A Weekend with Mac OS X 10.6 Snow Leopard”

HyperMac External MacBook Battery Review

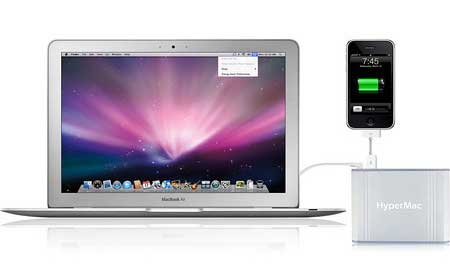
hypermac

Now that Apple has increased the number of MacBook models where the user is not able to change the battery, external battery options are more important than ever. No matter how long the battery lasts inside your MacBook Pro, chances are you’re going to encounter a situation where it’s not long enough. This is where the HyperMac External Batteries come in.

I’m planning a trip later this month that will involve a 6 hour flight and I want the option of using my MacBook Pro as much as possible. I don’t have the most current model with the sealed battery, but even with two batteries, it won’t be enough for this trip. So I was intrigued by the HyperMac offerings.

Rather than trying to put this review into words, I recorded this video explaining how the product works along with the results of my "worse case scenario test":


The Bottom Line

The HyperMac solution is definitely worth it if you need to get longer than a few hours of portable use out of your MacBook. If you have one of the newer MacBook products with a sealed battery, then this solution can be even more of a must have for frequent or long haul travelers.

HyperMac Batteries are priced starting at $199.95 and go up to $499.95 for the largest capacity/longest life model. Learn more about the HyperMac batteries here


Do anti-glare films for your display work?


Back when I got my New 15" MacBook Pro with a Glossy Display, one of the first things I wanted to try out was an anti-glare film. I was sitting at the Genius Bar at the Apple Store with an unrelated issue and the Mac Genius asked me if I had tried one/reviewed one yet. When I answered no, we all kinda looked at each other and decided that there was no time like the present.

The key to installing/putting on one of these films on any display is that the display has to be as clean as possible of marks, finger prints, etc. This way you lessen the chance for bubbles/air pockets too. So the tech took my MacBook Pro to the back room and did a meticulous installation job. It was flawless. No marks, bubbles or other problems. It looked like it had been done at the factory. 


OK, does it work?

The first thing I could tell right off the bat in the store was that the glare was cut down quite a bit! Although I was happy with what I was seeing, I really wanted to see it under my lighting/working conditions at home. So that I night I did my normal work which included a little portrait retouching in Photoshop. This is when I realized that the film had to come off! The problem was that the film adds a bit of grain to the look of the what’s being displayed. Most users probably wouldn’t care in non-image critical apps such as a web browser, email, etc. However, in Photoshop it was VERY DISTRACTING! It pained me to peel it off after the Mac Genius did such a good job putting it on, but I couldn’t take it anymore. Every time I would see the grain I would have to do a double take to make sure it wasn’t in the image itself.


The Bottom Line

If you’re not a photo retoucher and the MacBook Glossy screens bother you, then this Anti-Glare film may be worth a try. If your work is color critical and you rely on the display more than the average person you may want to pass on this film. I’ve gotten used to the Glossy Display and it doesn’t bother me at all. There are only rare occasions that I even notice it and even then I can just move it a bit. Rumor has it that Apple is going to offer more displays in a Matte finish. The collective creative community can rejoice if that’s true.

The Power Support Anti-Glare film goes for the 15" MacBook Pro goes for $34.95

No ExpressCard slot, no problem

_dsc0127

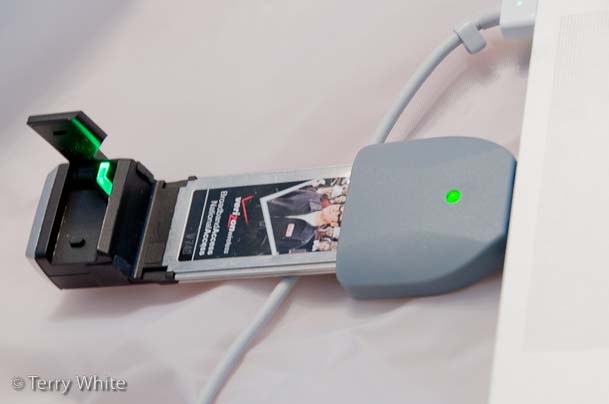
I must admit that I was a little taken back by Apple’s decision to eliminate the ExpressCard slot, in favor of an SD slot, from their New MacBook Pro 15" models. However, I can’t argue the reasoning. If most buyers aren’t using this slot then it probably does make since use the space for something more usable like an SD slot although personally I would have preferred a Compact Flash slot on the Pros and an SD slot on the regular MacBooks, but oh well. Then I got to thinking about the ExpressCard devices that I currently use and realized that I only have 3 of them. I have a Verizon V740 EVDO 3G Modem, a Synchrotech ExpressCard Compact Flash Reader and a Belkin Multi-Card Reader (reads SD, Memory Stick and a bunch of other formats). Although I don’t have any plans of getting a new MacBook Pro anytime soon, I like to be prepared by transitioning my peripherals to the new standards ahead of time so that when I do upgrade, it will be a lot less painful. Well the good news is that I can live without the Compact Flash reader because I already have a Firewire 800 Compact Flash Reader by Synchrotech that I use most of the time anyway. I could also live without the Multi-media Reader because the New MacBook Pros will have an SD slot built-in and I so rarely use the other formats supported by the reader that I could have a USB reader if need be. However, there is the issue with my Verizon ExpressCard Modem…

  Continue reading “No ExpressCard slot, no problem”

Updated MacBooks, iPhone OS 3.0, iPhone 3Gs and more

iphone3gs_4up

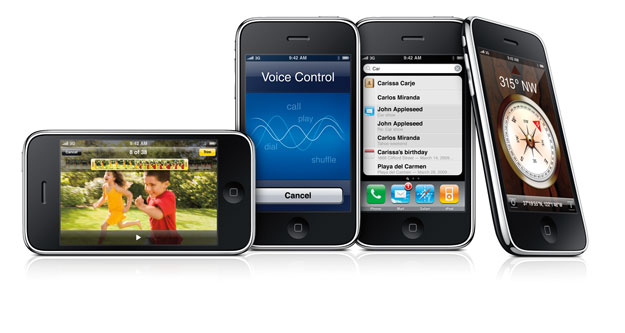
I thought I’d give a quick recap on today’s announcements since my friends are already ringing my phone off the hook anyway. 🙂 There certainly was no shortage of announcements from this morning’s Apple Worldwide Developer Conference (WWDC) keynote. Of course you can go to apple.com and get all the details of each and every item. This post is just serve as a quick recap for those that just want to know “what’s new?”

Updated MacBooks/MacBook Pros

Apple updated the specs on the 15″ MacBook Pro, 13″ MacBook (now Pro) and MacBook Air while at the same time reducing the prices!

The 15″ MacBook Pro now gets the same built-in battery as it’s 17″ sibling, boasting 7 hours of battery life. It can be configured with up to 8GB of RAM as well as a 500GB hard drive. Probably the most controversial move here is that they removed the ExpressCard Slot and replaced it with an SD card slot instead and they replaced the removable battery with one that’s built-in. The new prices are $1,599, $1,899 and $2,099.

The New 13″ MacBook Pro. The MacBook has been upgraded to MacBook Pro status. It now features an SD slot as well, configurable up to 8GB of RAM and a 500GB hard drive, and it now has a FIREWIRE port! Apple has seen the error of its ways in this regard. Probably the most exciting feature of the 13″ MacBook Pro is the price. The 7 hour battery is also built-in on this model. They start at $1,199 which is cheaper than the older model which had less features.

Lastly the MacBook Air gets a price reduction as well. Now the MacBook Air starts at $1,499.

See the new MacBook Pros here.

Safari 4.0 Now Available

The Safari web browser had been in beta for the past couple of months and now it’s officially available in its release form. It was already available via the Software Updates when I ran it a few minutes ago. I’ll have to see if they fixed a couple of the bugs I was having in the beta. Namely, posting links on WordPress on this very blog. Apple bills it as the fastest web browser on any platform.

Mac OS X 10.6 Snow Leopard

As you might expect, the spotlight was on Snow Leopard today. Apple showed off a miriad of enhancements and the one that got me most excited was the Microsoft Exchange support which means that I’ll finally be able to say goodbye to Microsoft Entourage for work email. There were all kinds of other neat UI enhancements to the Finder and the OS in general. The big focus was on 64bit as well it should be. Lastly, Snow Leopard will be available in September for only $29 for existing Leopard users. That has to be the lowest OS price that Apple has ever charged since they’ve been charging for OS upgrades. Snow Leopard is only for Intel Macs!

iPhone OS 3.0 Update

No surprises that Apple also showed more about the iPhone 3.0 update, which had already been previewed. It’s going to fill many of the gaps that the iPhone has had to date including MMS support, Tethering, Cut, Copy & Paste, background notification for 3rd party apps, Turn-by-Turn directions, peer-to-peer gaming, etc. This update will be FREE to existing iPhone users ($9.99 for iPod touch users) and available next week on June 17th! Yes, you know where I’ll be that day. 🙂

New iPhone 3GS

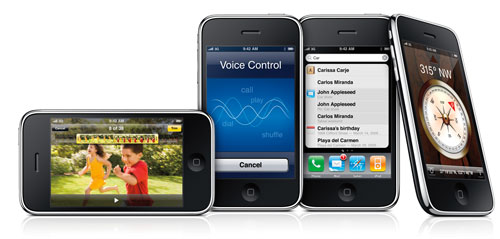
The most anticipated news of course was the new iPhone hardware. Today Apple introduced the iPhone 3GS. The main points are:

  • Faster processor
  • 7.2 Mbps HSDPA
  • 3MP Camera with better low light, auto focus and macro modes
  • Video Capture, trimming on the iPhone, share via email, MMS, YouTube, or MobileMe
  • Voice Control
  • Compass App
  • Nike+ support built-in
  • Hardware Data Encryption
  • Better battery life

Available Friday, June 19th – 16GB model (black or white) $199, 32GB model (black or white) $299

8GB iPhone 3G now only $99 and available today!

How I upgraded my MacBook Pro

500gb

It’s not unusal for me to go a couple of years without upgrading my main notebook, the MacBook Pro. As a matter of fact before getting the latest 15″ unibody, I had skipped the last two revs. The updates just weren’t significant enough for me to go through the hassle of upgrading. This time I timed it right and I love my “Late 2008 15″ MacBook Pro.” Granted there’s the Glossy Display debate, but I’ve gotten used to it and have no problem with it. Seeing how I will probably be using this computer for at least another 18 months (unless some major breakthroughs happen), I wanted to max it out. When I got it, it came with 4GB of RAM and a 320GB 7200 RPM drive. Although I knew that I would eventually want more hard drive space, I wanted to wait until the 500GB hard drives came in a 7200 RPM model instead of 5400 RPMs. Well that day is today!

Seagate 500GB 7200 RPM 2.5″ Drive and MORE RAM!
4gb

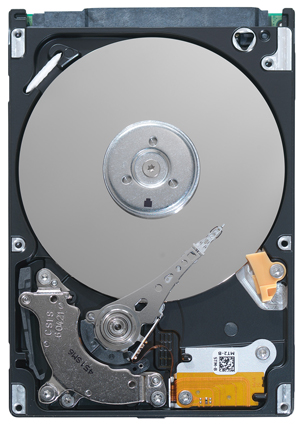
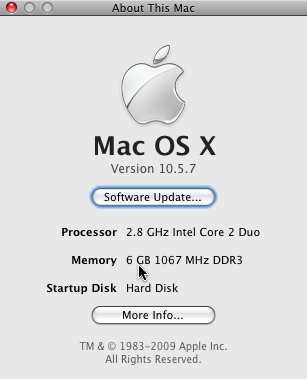
I checked with my good friends over at OWC and the NEW Seagate 500GB 7200 RPM 2.5″ Momentus drives were readily available. I thought the price was reasonable enough, so I ordered one. Since I was already going to be under the hood, I also wanted to take this opportunity to upgrade the RAM. Although Apple originally sold this MacBook Pro with a max of 4GB of RAM, it can actually address 6GB of RAM (the 17″ and the early 2009 models can do 8GB of RAM). I originally had two 2GB DIMMs installed, so this would mean replacing one of them with a 4GB DIMM to get to 6GB of RAM, which again is the max that this MacBook Pro will address. So I orded the 4GB DIMM also.

My installation procedure

I have 2-3 utilities that I rely on when it comes to upgrading to a new hard drive. If I’m upgrading to a faster drive of the same capacity or larger capacity, but not partioned I use CopyCatX. CopyCatX “duplicates” the drive to the new drive sector by sector. This is much faster than traditional cloning and creates an EXACT duplicate of the drive. The app has the technology to expand the duplicate to take into account the space available on a larger drive. However, if the original drive is partitioned AND the new drive is larger, you’ll end up with the difference in space as an unusable partition. So in my case since I have a BootCamp (Windows XP) partition AND I was going to a larger drive, using CopyCatX was out of the question.

I installed the new drive and the RAM
mbpopen

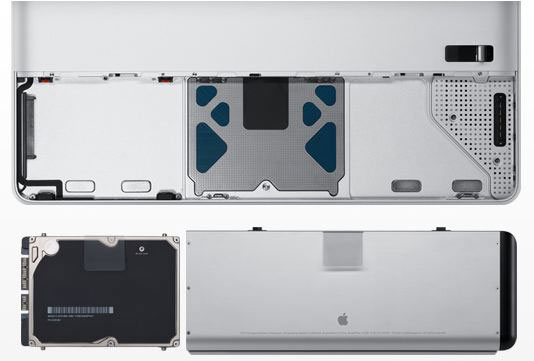
I took the cover off the bottom of my MacBook Pro and there it was! The battery and the hard drive are right there in plain sight. Asside from the original MacBook, this has got to be the most drive accessible notebook that Apple has ever created. All my previous drive upgrades were a pain in the neck. I was able to easily figure out how to take the drive out. It was actually only one very small phillips screw holding the bracket in place. I then had to remove the 4 pins from the drive itself that Apple uses to hold the drive in securely. These require a very small torx screw driver. Luckily, I had the necessary tools.

What I didn’t see was the RAM! Apple usually does it the other way around. Usually the RAM is in plain sight and the hard drive is buried. However, this time the RAM was no where to be found. Rather than guess at the location, I remembered seeing installation videos on the OWC site. So I went to another computer and watched the short clip to discover the the RAM was under the main cover which was held in place by 8 screws. The only thing I wasn’t sure about was did it matter if the new 4GB DIMM was in the lower slot or the upper slot. I didn’t think it would matter, so I put the 4GB DIMM in place of the 2GB DIMM that was in the upper slot. I then put it all back together.
6gbram

SuperDuper! was next

I took the original 320GB drive and put it in an external OWC Mercury On-The-Go Firewire 800 case and connected it. I also had my bootable backup drive. I decided that it would be cleaner to boot from the backup drive and clone the original drive to the new one. Since the 15″ MacBook Pro only has one Firewire 800 port, I had to daisy chain the two externa drives. Just to be on the safe side I plugged the OWC drive into the AC outlet to make sure there was enough power to run both external drives. I then ran Disk Utility from the backup drive to format the new internal drive. Next it was time to clone over the Mac partition onto the new drive. I fired up SuperDuper! and cloned over my Mac partition on my original 320GB drive (the drive I just took out) onto the new drive. This clone took about 3.5 hours for close to 240GB of data. I then booted from the New drive and everything was working so far.

Time to run the BootCamp Assistant and Winclone
winclone

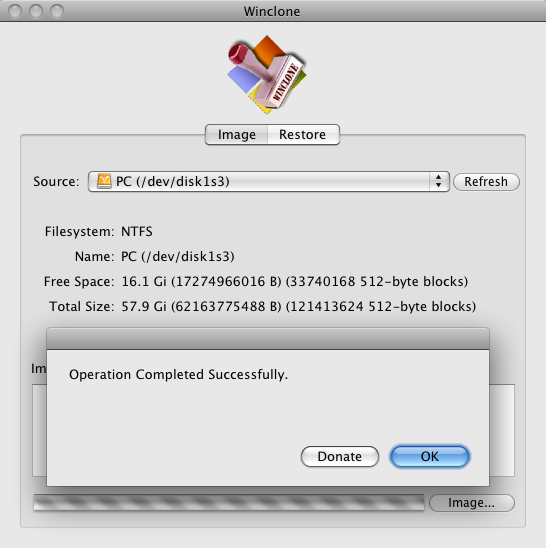
Now that I was booted from the new drive it was time to partition it again for BootCamp. I fired up the BootCamp Assistant and partitioned the drive slightly larger than the old partition I had (64GBs for the new one). Now in order to get my old Windows XP partiton over to the new partition I had to make an image of it first using Winclone. Winclone is a Mac app that lets you backup and restore a Windows partition. Since I had plenty of room on my new internal drive, I fired up Winclone and imaged my old partition (from the now external 320GB drive). The compressed image was only 24.51 GBs. I’ll move it another drive when I’m done as a backup. Once the image was completed, I click right over to the restore tab and restored it to the NEW BootCamp partition that I had created earlier.

The Bottom Line

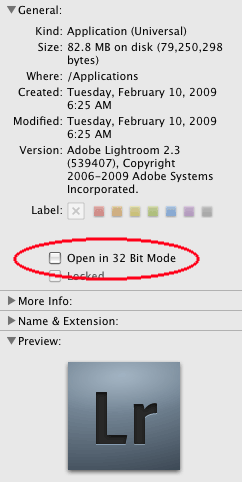
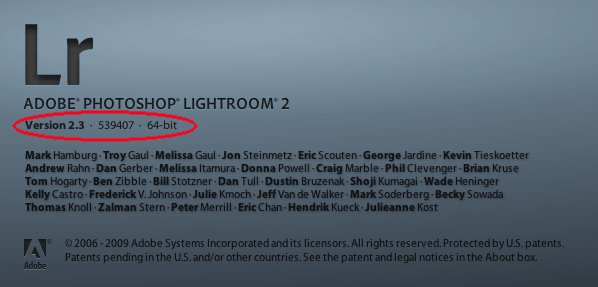
You can never have too much RAM and too much storage. If you’re going to use your existing computer for a while, then having more room and the capacity to run more/larger apps is always welcomed. Also since we’re going to see more and more 64 bit apps coming in the future, going beyond 4GB of RAM is going to be worth it. I use Adobe Photoshop Lightroom 2 every day and it’s already 64 bit enabled. All I had to do was do a Get Info on it and turn off the “Open in 32bit mode” checkbox. I feel that this upgrade was worth the time and money.
64bitlr1

64bitlr2

The upgrades cost:

500GB 2.5″ 7200 RPM Seagate Momentus Drive: $157.99

4GB DIMM $329.99.

If you need an external drive case to put your old drive in, this is the Firewire 800 one I used. I already had it, so I didn’t have to buy it for this job.  It’s $79.99. If you don’t care about Firewire 800, they make both Firewire 400 ($49.99) and USB 2.0 ($27.95) cases that cost less. They also sell the drive and cases as bundles. So you might save a few bucks buying them together.

Also if you don’t have the tools, you can get this installation tool kit for $17.95

I’ve dealt with OWC for years and never had a problem. Great company!