I’m usually an early adopter regarding tech, especially new devices in a new or existing category. I love gadgets and tech, and I’m not afraid of change. I ordered an Apple Vision Pro on day one. Here’s my initial review for reference. When I did my initial review, I had not taken Apple Vision Pro on the road yet.
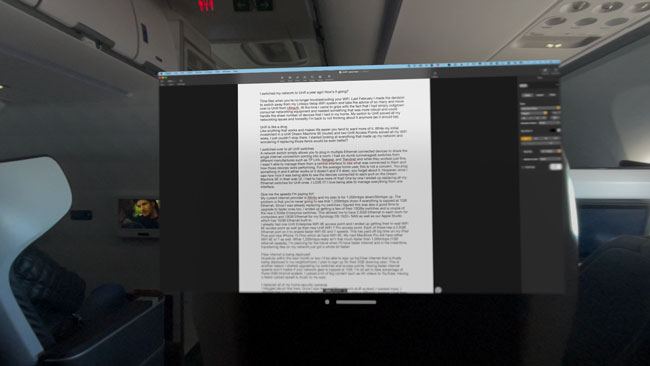
Recently, I had a business trip to LA and back. This is a five-hour flight from Atlanta. I usually use the time on flights to get some writing done, plus a movie or two. Working on a plane can definitely present a couple of challenges. The first is when the person in front of you leans their seat back, making it harder to open your laptop to a comfortable viewing angle. The second challenge is keeping the prying eyes of your seatmates off your work. Some privacy screens make it harder to view your screen from an angle, but I haven’t used one in years.
Apple Vision Pro Elevates In-Flight Productivity to New Heights
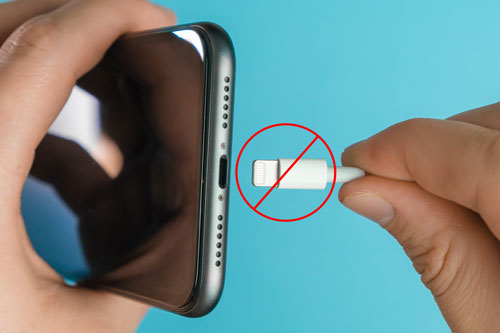
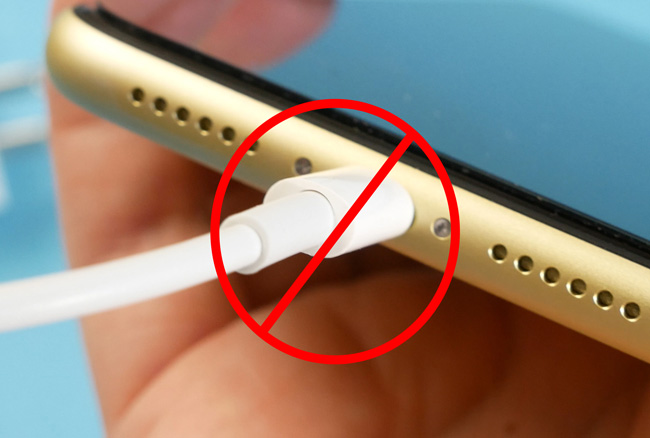
Before you pick up your pitchfork, here me out. There was a rumor floating around that Apple was considering removing the Lightning port altogether and that is NOT what I’m proposing here. I actually think there are times where using the physical port is better/faster than doing things wirelessly. We can certainly debate this at another time.
It’s time for Apple to switch from Lightning ports to USB-C ports on iPhone
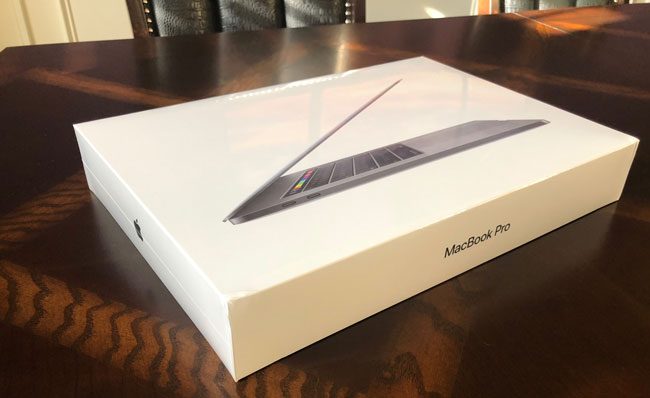
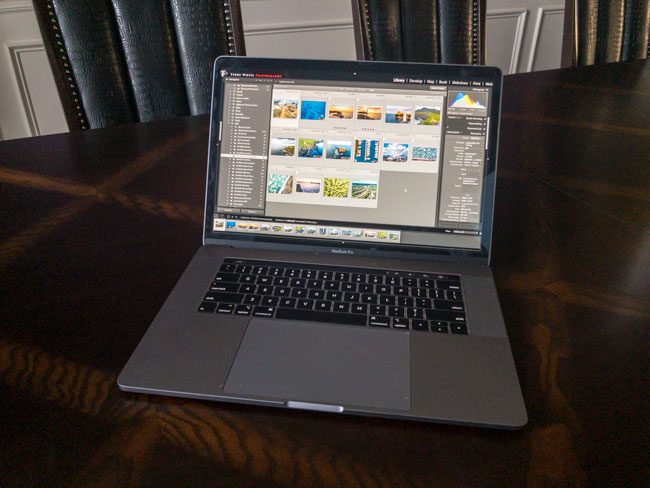
It was a surprise low-key announcement by Apple. An upgrade to the MacBook Pro line. I wasn’t expecting it as everyone was telling me not to expect a MacBook Pro capable of supporting 32GB of RAM until 2019. Perhaps when Apple starts using their own processors instead of Intel. I was just as surprised as the rest of the world. I was also happy that the wait was over. I had been holding out going to a new MacBook Pro for years. I was still using my work Mid-2014 MacBook Pro 15″. At work we are allowed to upgrade computers every 3 years and unfortunately for me that was in 2017. Instead of going with a 2017 MacBook Pro (which wasn’t much better than the 2016 MacBook Pro), I opted to go with a 27″ iMac instead. Most of my day-to-day work and live streaming is done from my home office these days. I don’t do roadshows and tours like I used to. Therefore a nice fast desktop Mac was the way to go.
The reason I skipped the 2016 and 2017 MacBook Pros
In 2016 Apple made the radical decision to redesign the MacBook Pro. In the process they did away with all the traditional ports and instead went with 4 Thunderbolt 3/USB C type ports. At the time this was painful for most users because it meant buying an adapter for every single peripheral that you wanted to connect. I was still intrigued until I talked with others that had the new one. The feedback was pretty consistent. I didn’t find a single friend/colleague that raved about the new 2016 MacBook Pro. Everyone I asked “so how is it?” the response was pretty much the same “it’s OK. It’s not really any faster than my previous model.” This coupled with having to buy a bunch of dongles and adapters AND still being limited to 16GB of RAM meant a pass from me. Apple upgraded the MacBook Pro again in 2017 moving to a faster Kaby Lake processor, but that was about it. It was still limited to 16GB of RAM and no significant speed benefit. There was also the problem with the design of the keyboard. I remember the day one of my colleagues sat down next to me and started working/typing on his 2016 MacBook Pro and the clicking/clacking was so loud that I wanted to scream. This coupled with the high number of people reporting keyboard failures meant another pass in 2017 and going with the 27″ iMac instead as I didn’t want to be stuck for another 3 years on 16GB of RAM.
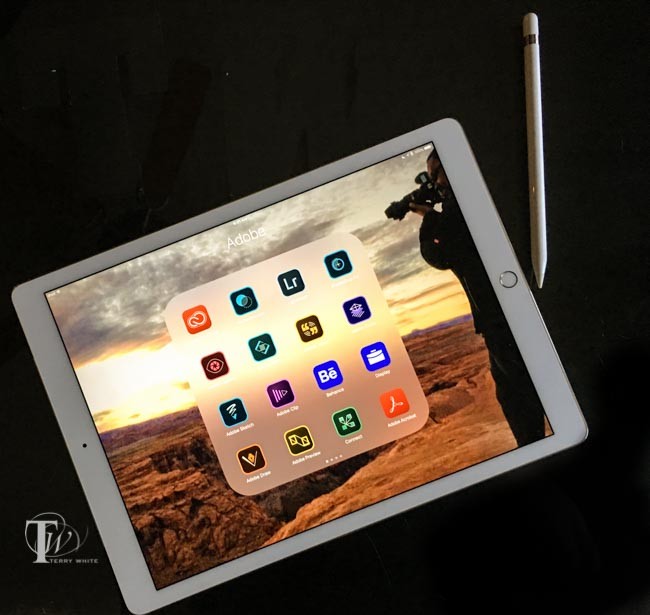
Time flies when you’re working! It’s hard to believe that I just looked at my calendar and realized that I’ve had my iPad Pro now for 32 days. I figured it was time to give you guys an update now that I’ve had a full month to experience it, work on it, travel with it and use Apps that were designed to take advantage of the larger display size and more importantly Apple Pencil.
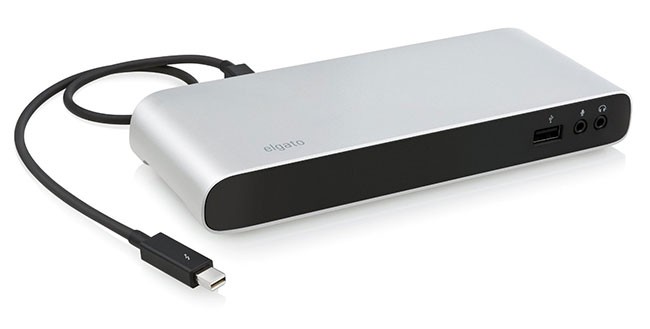
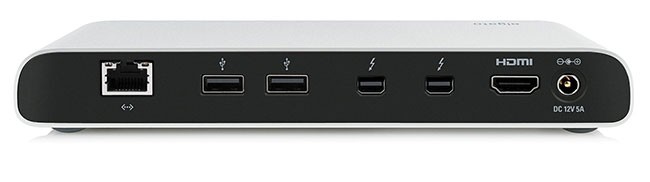
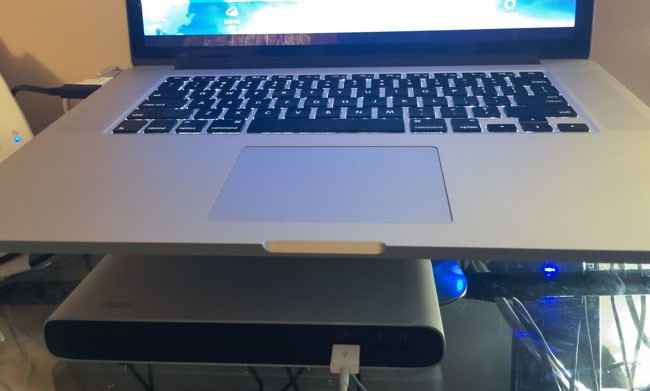
For years now my MacBook Pro has been my primary computer. Now my only desktop computer is my Mac OS X Server. Having a MacBook Pro doesn’t mean that I don’t have a ton of peripherals that I need to connect. The last thing I want to do when I leave or return from a trip is connect a bunch of cables. That’s where a Thunderbolt 2 dock comes in. Although I’ve used a Belkin one for years now, people are always asking for a lower priced alternative. Elgato has created one the fits the bill nicely. For a hundred dollars less than the competition you still get 2 Thunderbolt 2 ports, 3 USB 3.0 ports, 1 HDMI port, 1 Gigabit Ethernet port, and an audio in and audio out port. Really the only thing missing is more USB 3.0 ports and a legacy port like Firewire 800 or eSATA. Since I connect more than 5 USB devices anyway I would still need a USB 3.0 hub. Also most people at this point have probably replaced their older Firewire 800/eSATA devices with newer tech. If you fall into that category then I would save save the hundred bucks and use part of it to buy a USB 3.0 hub.
The design is nice and compact and it’s great having the audio ports on the front as well as the 3rd USB 3.0 port capable of charging your mobile device.
The Bottom Line
If you have a MacBook Pro then having a Thunderbolt 2 dock is a big plus. You’ll enjoy the single Thunderbolt connection and the additional ports. The one thing I wish that these devices offered are more Thunderbolt ports. You really don’t gain any because you have to connect the dock to one of your existing ports taking up a Thunderbolt port on the dock and one on your computer. That leaves you with the same number of Thunderbolt ports that you started with. I would like to see a model with 3 or 4 Thunderbolt ports for true Thunderbolt expansion.
You can get the Elgato Thunderbolt 2 Dock here on sale.
For a few bucks more you can get this one by OWC that has 5 USB 3.o ports and a Firewire 800 port.
Earlier this year in May I did a post called “Photographers: iMac or Mac Pro?” It was a post that was meant to really ask the question that as a photographer would you benefit from the faster and more expensive Mac Pro over say a nicely equipped iMac (or in my case MacBook Pro)? There was only one problem with that post. I didn’t actually have an iMac to compare. I ran all my tests using my high-end Mid 2012 MacBook Pro Retina Display. I noted that although my MacBook Pro fared quite well against the Mac Pro for common “photography workflow” tasks, that an iMac would probably do even better! Well now I have a NEW iMac Retina 5k Mac to test/review and I think you’ll be pleasantly surprised by the results. I was a little blown away!
The same game rules apply!
If you don’t like Macs/Apple or don’t want a Mac for whatever your reasons are, you can pretty much stop here and find something else to do with your time. I find it entertaining when people feel compelled to tell you/me how much they don’t want the thing you’re reviewing or writing about because they use something else. This is not a Mac vs. _______ post. If you’re happy with a Windows PC or Linux PC, or anything else, I’m happy for you. If you can build your own PC cheaper, that’s awesome!
If you’re reading the rest of this post then I’ll assume that you’re a Mac user or thinking of becoming one.
The next thing I’d like to get out of the way is that if you’re looking for a Mac Pro review that tells you this new Mac Pro is better than the previous Mac Pro with all the benchmarks to back it up, then you’d probably be better served by other reviewers who have targeted the performance of the new model vs. the older model. I’m doing this review/comparison simply to answer the question, “as a photographer would I be better off spending my money on the NEW iMac Retina 5K Display or a Mac Pro?” If you’re a videographer and you’re a Mac user then you probably already have the new Mac Pro because you demanded the fastest Mac you could get to render your videos on a daily basis.
Updated: Introduction
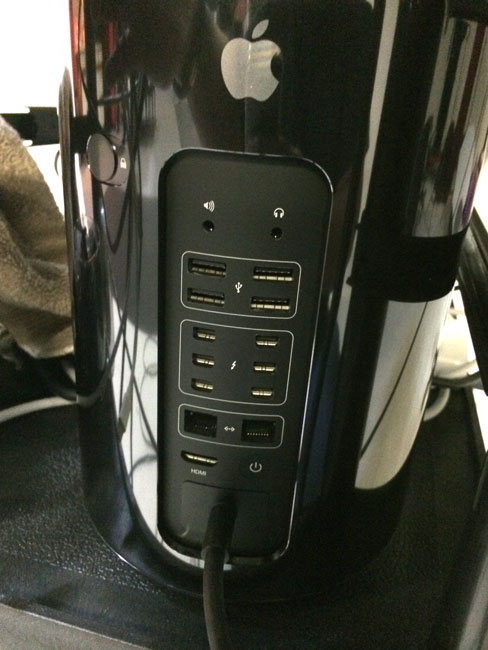
When I saw the rumors that Apple was going to release a radically different design for the Mac Pro, to be quite honest I was only mildly interested. As I stated above, I realized with my last Mac Pro that I wasn’t really a Mac Pro customer. Sure I appreciate the faster performance, but I found myself only using my Mac Pro when I knew a process was going to take a long time to complete. Otherwise I was quite happy just using my MacBook Pro simply because I could use it in any room at any time. I could take it with me on the road. However, I said to myself perhaps if the performance (for what I do) is significantly better and the price point for an entry model was $2,500 or less, I’d consider getting one. Well we know the latter didn’t happen, so now it was time to test the performance. I got the opportunity to test a Mac Pro standard configuration in my studio for a few weeks. I loaded the latest version of my Adobe Creative Cloud applications on it as well as a few utilities that I use such as ScreenFlow. Next, I began running side-by-side tests of the things that I do daily that take more than a few seconds. My assumption was that the Mac Pro would certainly be at least twice as fast at everything I threw at it than my 2012 MacBook Pro Retina Display Mac. Actually I was wrong! Now fast forward to November and I have brand new iMac Retina 5k here to review and test. At the time I did the tests back in May, I really wasn’t expecting to run these tests again. Therefore I didn’t really hold on to the test files that I used. Luckily I was able to reassemble most of them with a couple minor exceptions that I will outline below:
When will a Mac Pro significantly outperform any other Mac?
As I said above, I was wrong in my assumption that the Mac Pro would be at least twice as fast at everything. Actually it is faster at (almost) everything! Just not by a margin of two. On every test I threw at it the Mac Pro outperformed my now two-year-old MacBook Pro, but in some cases it was only slightly faster. With the new iMac Retina 5k there was even less of a difference. This is when I realized that in order to see significant speed improvements the software you’re testing not only needs to be optimized for the faster processors, but also it would need to take advantage of the multiple cores. Even then, the iMac and MacBook Pro are no slouch. They’ve got multiple cores too. Where I saw the biggest differences was in (no surprise) video rendering and processes that take longer than a minute or so anyway. At this point I now have a new iMac Retina 5K Display to compare as well. The differences in speed were less dramatic as I expected. However, even doing video tasks the iMac held its own and really started bringing into question “when would I ever want a Mac Pro?” When I ran the tests in May the Mac Pro was significantly faster at video tasks than my two year old MacBook Pro. However, I not only now have a new Mid 2014 MacBook Pro Retina that is faster than my old one, but I also have a base model iMac Retina 5k to compare too.
UPDATED TEST RESULTS
What I do as a photographer
As a photographer I spend most of my time in Adobe Lightroom 5 and Adobe Photoshop CC. Photoshop CC definitely takes advantage of multiple cores and now has Open CL support. So filters will run faster on the new Mac Pro. All of these applications are 64bit native and that means that they’ll take advantage of additional RAM.
My first test was one of the things I do after every shoot. I convert my RAW files into .DNG (Digital Negative) format. This is one of the few times that I see a progress bar in Lightroom because it does take time to do it. I converted 435 16MP Nikon .NEF RAW files into DNG format.
First on the MacBook Pro it took 14 minutes 35 seconds
On the Mac Pro the same conversion took 12 minutes 12 seconds.
OK, ready for this? On the NEW iMac Retina 5K a 435 16MP conversion took 11 minutes 39 seconds. Huh! What? Wait a minute! It was actually slightly (less than a second) faster than the Mac Pro. This of course left me scratching my head, but I have a couple of caveats to bring up. First off this is 6 months later and we’re on a newer operating system, Mac OS X 10.10 Yosemite, which in theory could be faster than Mavericks. The only caveat as I mentioned in the introduction was that I didn’t have all the same exact files from the May test. Yes I converted 435 16.2 MP files from my Nikon D4, but they weren’t the same exact images. I can’t see where that would make too big of a difference though. They are from the same camera and a similar portrait shoot, just not the same exact images as before. We can argue this one more, but just for kicks I ran the same test on my NEW Mid 2014 MacBook Pro Retina with a Core i7 Haswell processor and SSD drive (the iMac has a Fusion drive) and it was even faster at 9 minutes 56 seconds. This we can probably say is faster on the MacBook Pro over the iMac because it’s a faster processor and faster drive, but it doesn’t really explain why it would be faster than the Mac Pro. Since they aren’t the same exact images, let’s move on to the other test where the files ARE THE SAME!
HDR Test
The next test was a simple HDR (High Dynamic Range) conversion in Photoshop CC using three RAW files. This is a two-part process. The first part is simply combining the three (or more) images together and aligning them. Then the second part of the process is applying whatever settings you want to control how your HDR looks.
The first part on the 2012 MacBook Pro took 12.70 seconds and on the Mac Pro it took 9.10 seconds
The second part on the 2012 MacBook Pro took 13.00 seconds and on the Mac Pro it took 11.13 seconds.
What about the iMac Retina 5K?
Since I had the exact same RAW files for this test I ran it on the iMac:
The first part on the iMac took 10.75 seconds and the second part took 10.75 seconds. This makes it only 1.5 seconds slower than the Mac Pro for this test.
Pano Stitch
The next test was stitching a Panorama together using Photoshop CC and 10 RAW files
On the 2012 MacBook Pro this process took 1 minute 12 seconds
On the Mac Pro this process took 51 seconds.
On the iMac Retina 5K Display this process took 1 minute (9 seconds slower than the Mac Pro)
I could have gone on running other tests and other filters, but these are the things I do on a regular basis. If it was faster at something that I rarely do, then I really don’t care as much. As you can see from the results above, the Mac Pro wins on every test as you would expect it to, but the results (even if it was twice as fast in every case) may not justify the difference in cost. We’ll get to that at the end.
Next it was time to look at what I do as a Photographer when it comes to video
I use video in a couple of different ways. The first as a photographer is to tell my story. This means capturing video with my DLSR, GoPro, iPhone, etc. I use Adobe Premiere Pro CC to assemble those videos and then output them to share (usually on YouTube). The next way that I use video and probably the way that I use video the most often is to record my Creative Cloud TV video podcasts. These screen recordings are done with ScreenFlow and since the editing I do is pretty simple I can edit these right in ScreenFlow. Of course I need to export those videos out and this can take a while depending on the length of the video. I had no doubts that this is where the Mac Pro would really shine. After all these are the kind of processor and resource intensive tasks that the Mac Pro was built for. I was not disappointed.
The first test I ran was an export of an hour-long edited video out of ScreenFlow.
On the MacBook Pro this export took 60 minutes
On the Mac Pro this export took 33 minutes.
On the iMac Retina 5K this export took 35 minutes.
It gets better in Adobe Premiere Pro CC and the Adobe Media Encoder CC. I needed to convert this video into a different format using the Adobe Media Encoder CC.
On the MacBook Pro this conversion/export took 34 minutes 36 seconds
On the Mac Pro this conversion/export took only 12 minutes 36 seconds
On the iMac Retina 5K this conversion/export took 19 minutes 26 seconds
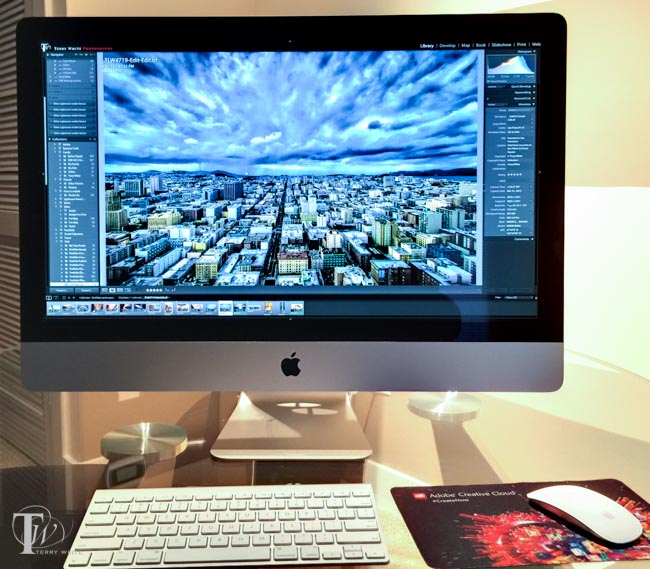
What about that beautiful 5K Retina Display?
No photograph can do this display justice. You have to see it in person with your own eyes to appreciate it!
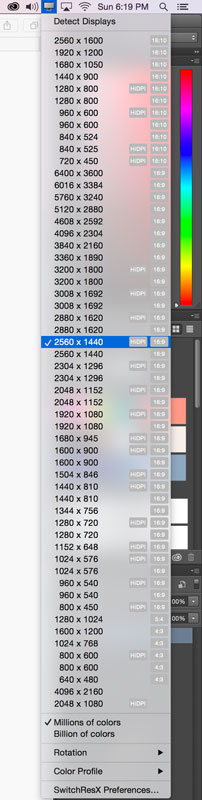
One the biggest reasons I would recommend an iMac over a Mac Pro to a photographer beside the money saved, is the fact that you’re getting a 27″ 5K Hi-DPI (Retina) display! Your images are going to look amazing on this display. I was blown away by the sharpness and the detail. Besides the obvious sharpness and detail, the other benefit is being able to work at high resolutions in programs like Photoshop. If you set the display resolution higher (I use SwitchResX for complete control of this) you can actually see more of your images as you work. No more having to zoom in to 100%. You can actually see them at 100% if you want. As it stands today, you won’t find a better display to see your images on. If you do, it will likely cost more!
The Bottom Line
I’m sure if we just ran processor and benchmark test that The NEW Mac Pro is the fastest Mac that Apple has ever created. The question you have to ask yourself is, “Do I run benchmark tests or do I use applications on a day to day basis that I’m waiting for tasks to complete?” For me the answer is no. Sure if I spent my days rendering video all day every day, I’d already have the Mac Pro. There would be no question. However, as a photographer I can’t justify the difference in price. Now that the iMac has a Retina 5k display it’s even a more compelling choice for photographers.
The Mac Pro model and configuration that I tested above is here. (Now keep in mind that if I was going to buy one I’d start with this configuration and I’d go with a bigger internal drive and more RAM)
Believe it or not the iMac Retina 5k that I tested was this base model. The results above were achieved with only 8GB of RAM and a 1TB Fusion Drive. If I were to buy an iMac I would get this model and I would buy this 32GB RAM upgrade and put it in myself. This configuration would give me a faster processor, an internal 512GB SSD, 32GB of RAM a 5k Retina Display, Keyboard and Mouse for less than the price of the Mac Pro that I tested.
Why an iMac? Although I don’t use one (I’ll have to send this one back if I don’t want to buy it), an iMac makes sense because you’re getting a fast Mac with a nice big 27″ 5k display all in one. You can’t really get a better display for this price and it includes a computer 🙂
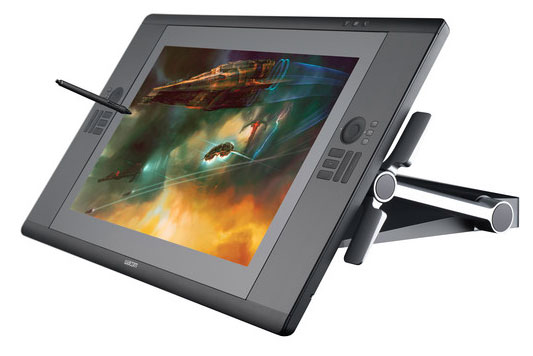
Why a MacBook Pro? For me the MacBook Pro makes the most sense because when I’m at my desk I have connected to a nice 24″ HD Wacom Cintiq display/tablet. When I get ready to go I disconnect it and go. I have a computer with a nice 15″ Retina display when I’m on the road. If I didn’t travel for a living then I would absolutely have an iMac. Since I travel a lot, a MacBook Pro makes more sense. With that said, if I had never used a Cintiq AND I had seen the iMac 5k with my work on it as I have with this test unit I would be hard pressed not to buy one and just use an Intuos Pro tablet instead.
If you want the fastest Mac and you don’t mind spending $3,000-$4,000 (or more) on it plus having to buy a display, keyboard and mouse, then definitely go with a Mac Pro. Almost everything you do will likely be faster than the Mac you’re currently using. At the end of the day I realize that computers have become “fast enough” and that I don’t spend a lot of time waiting these days. Even when a process such as a video render/export is going to take a few minutes I can toss it to the background and work on other things in the foreground. My last Mac Pro once configured set me back over $5,000 and while it was a beast, I found that I wasn’t really using it as much as I had hoped I would, so I sold it. The new Mac Pro is faster, but is it $4,000 + display, keyboard and mouse faster? For me it’s not. The NEW iMac Retina 5k and MacBook Pro Retina 15″ will definitely hold their own against a Mac Pro for the kinds of tasks that photographers do.
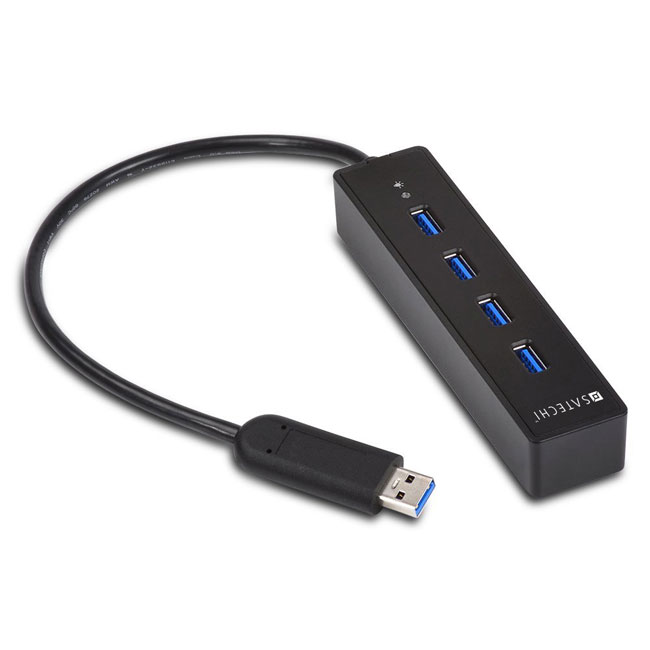
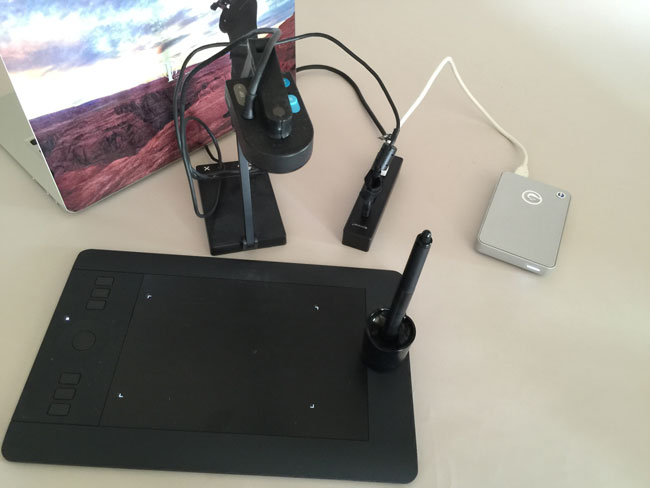
Back in 2012 I did a review of what I consider to this day to be The Best USB 3.0 Hub. I still have this hub on my desk to this date with zero problems with it. It just works! While this USB 3.0 hub is great, it’s a bit too large for my travel tastes. Yes they do make this 4 port version but it’s still larger than I wanted for travel. The big decision you have to make when going with a travel USB 3.0 Hub is whether or not you want/need a powered hub or not. Obviously a powered hub is the way to go when you have the ability to plug it in to a power supply and you don’t mind carrying yet one more power supply in your bag. However, USB 3.0 offers more juice than USB 2.0 does. Therefore you may be able to get by with a self powered hub especially for occasional use during travel. When I’m using my MacBook Pro or MacBook Air on the road, I’m usually in need of one extra port. I usually have my Wacom Intuos Pro tablet plugged in and an external USB 3.0 hard drive. At that point I may need to plug in a document camera/scanner or a Lightning cable to sync/copy something from my iPhone or iPad. Or I could simply need to plug in a thumb/flash drive to copy a quick file. These are the kinds of things I need to do via USB 3.0 on the road from time to time. The hard drive can be plugged into Thunderbolt. That frees up the USB port if needed, but not all of my portable external drives are Thunderbolt equipped.
I went with this portable USB 3.0 Hub
Although Anker makes this 4 port USB 3.0 Hub, I went with this Satechi 4 port USB 3.0 Hub. It seemed to have high ratings across the board on multiple sites. I havent’ been disappointed as the Satechi 4 Port USB 3.0 Hub has been GREAT!. It performs as advertised as long as you keep in mind that it’s NOT a powered hub. So let’s get the rules of using a bus powered hub out of the way. First off if you plug in too many devices that require USB power you will likely run into issues where the devices may not work or may not work at their top USB 3.0 speed. So when I want to use a bus powered USB 3.0 hard drive I plug the hub into my computer first and then I plug in the hard drive. Lastly I plug in any slower devices. If you stick to these rules (plug in the hub first, and the most power hungry devices next) then you’ll be more successful. I was able to easily plug in my USB 3.0 G-Tech hard drive, and my Wacom wireless module and lastly my Ziggy document camera with one port on the hub to spare. This is likely more than I will actually use on a regular basis, but I wanted to test my worst case scenario. Also keep in mind that I have one more available USB 3.0 powered port on my MacBook Pro/Air. With this Hub I could easily have two external bus powered hard drives (one in the USB 3.0 hub and the other in the built-in port) and still have other ports available for less power hungry devices. Since I only travel with three external hard drives on a regular basis, this is exactly what I needed as I never need to plug in more than two at a time and If for some strange reason I need all three, I can plug at least one of them in via Thunderbolt.
The Bottom Line
If you need a powered USB 3.0 Hub for travel, then you should probably get this one. However, if you’re looking for a smaller one that can be used even if you don’t have an available AC power port nearby or you don’t want to carry one more power brick, then you could go with this Satechi 4 Port USB 3.0 Hub and get the extra ports you need.
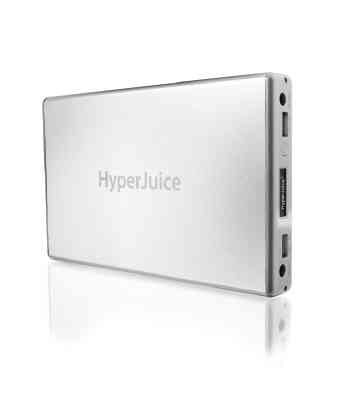
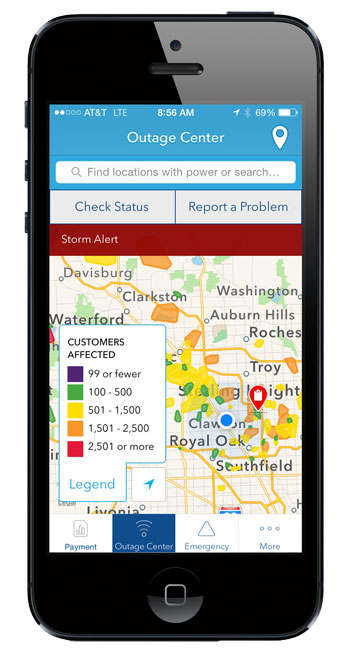
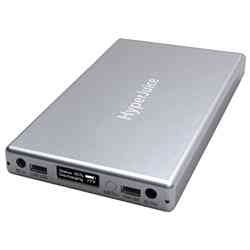
There I am at my desk at 5PM on a Sunday and I can hear the rain outside. Next I hear the wind really whipping by and bam, there go the lights. After a few seconds the lights came back on and then after a few more seconds they went off for good! Sure my APS UPS Systems kept my Server and Internet Router going for a while before they eventually ran out of juice. Since I was headed out of town the next morning I just decided to relax and take it easy for the rest of the evening. However, the one thing that I definitely wanted to keep charged and running the entire night was my iPhone. I have a battery that I keep in my backpack which is good for a couple of charges, but I had never tried to go all night with it. Also while I was sitting at my desk I hadn’t plugged my phone in so it was already down to around 40% battery left. That’s when I remembered my HyperJuice battery that was also in my office and fully charged!
I commend DTE Energy for having a nice App to not only report the outage, but get status updates and see what other areas are affected:
This battery is really designed to power your MacBook for long periods of time when AC power isn’t readily available. However, it also has a USB port for charging/powering phones and tablets. I plugged my iPhone into the USB port and not only did I wake up fully charged 8 hours later, but the HyperJuice still had plenty of juice to top off my MacBook Pro as well! When I originally bought this battery it was for long flights and being at seminars where there were no plugs nearby. I hadn’t carried it in a while and never thought that I’d be using it to get me through the night because of a power outage.
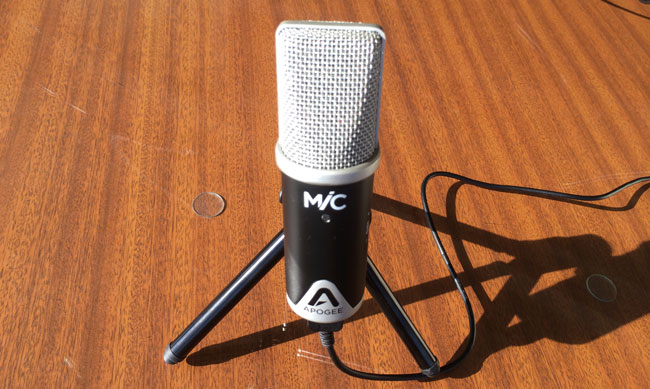
I’m on the road and I realized that I’m going to be doing more tutorials for my YouTube channel and Creative Cloud TV. While I have a great microphone in my studio, I really didn’t have a good one that’s small enough to travel with. I was in the Apple Store in San Francisco and decided to check out their selection. I was with my colleague and musician Jason Levine. I picked up a small microphone by Apogee and Jason immediately recognized the name and said “you can’t go wrong with them.” Apparently they are well known for professional audio equipment. He saw that it was 24-bit and was again very impressed. Since I trust Jason’s opinion when it comes to audio gear I knew I was holding the best one. I was also intrigued to see that this particular microphone not only had GREAT specs, but it was designed to work with a Mac, iPad, or iPhone! That made this a win-win purchase. I could have a great quality mic for recording on any of my devices.
Setting up the Mic 96k
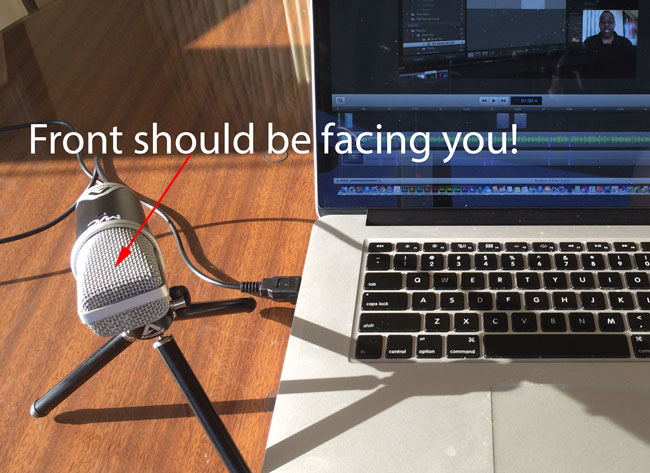
One concern I had before leaving the store was that it was unclear if it included the stand that was pictured on the box. It stated that it included a “mic adapter” (which it does). The Apple Store rep didn’t know either. I was pleasantly surprised to see that once I opened the box it not only included the little tabletop stand, but also three cables. I expected to have a USB cable for the Mac and one for the Lightning connector on the iPad/iPhone, but it even included the older cable with the 30pin connector for older iOS devices. Setting up the Mic 96 is really easy. Just attach the appropriate cable for your device and plug it in. That’s it. No software to install. The light will go on blue at first. This lets you know that it’s on but not ready. It will then turn green when it’s ready and red if your gain is too high.
I screwed up my first recording
I mistakenly positioned the capsule up instead of facing me.
OK sometimes I’m an idiot when it comes to things like this. I didn’t pay attention to the capsule location so I had the mic pointing at me like a singer would hold a mic instead of straight up and down. It worked, but boy what a difference it made once I put it in the proper orientation. I did a quick test into Screenflow and the sound quality was outstanding. Sadly it was too late to re-record my latest episode as it was already posted.
Testing on the iPad Air
Since I blew my chance to get a real world recording for this week’s episode, I decided to do a quick test on the iPad using Adobe Voice. You can hear the results below or here:
The Bottom Line
Overall I’m very happy with the quality of the hardware itself as well as the audio quality. My only complaint is that for the price I feel it should have come with a carrying case, especially since they tout it as a solution for iPad/iPhone. This means that they expect people to carry it. Other than that I love it!
Last month while out of town on business I had an urgent need for more storage. One of my colleagues wanted to give me some new demo material and in total it was going to take up almost 1 terabyte of space. I had no where near that much available space on my laptop drive or either of the other two external drives I had with me. There was an Apple Store nearby so I headed over to buy a drive. I had no particular drive in mind although another colleague showed me his new LaCie 1TB Thunderbolt/USB3 drive. At least I had that one in the back of my mind as a starting point. I also had no idea which drives Apple would actually have in stock. I was going to be at the mercy of whatever was on the shelves as I needed the drive that day. I got to the store and found that they did in fact have the LaCie Rugged 1TB drive, but upon a quick glance at the specs I was stopped in my tracks to see that it had only a 5,400 rpm drive inside. What a waste! After all you’re paying extra for a Thunderbolt port and the drive would be pretty much crippled by the relatively slow spinning drive. I kept looking. For a moment I was tempted by a 2TB external drive (can’t even remember the manufacturer), but again saw that it was a 5,400 rpm drive. However, the 2TB capacity did sound nice since I knew that I was going to be getting almost 1TB of files to start with.
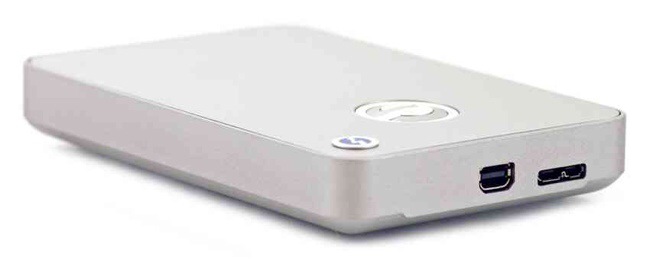
Then I saw the G-Drive 1TB Thunderbolt/USB3 Drive and since I knew the G-Drives were usually good performers I wasn’t surprised to see that it had a 7,200rpm mechanism inside. Now my debate was a fast drive but at only 1TB or a slow drive at 2TBs. Decisions, decisions. I ended up going with two of the 1TB G-Drives. The price worked out to be only $100 more than the 2TB drive and I was getting the same total capacity, but with much better performance.
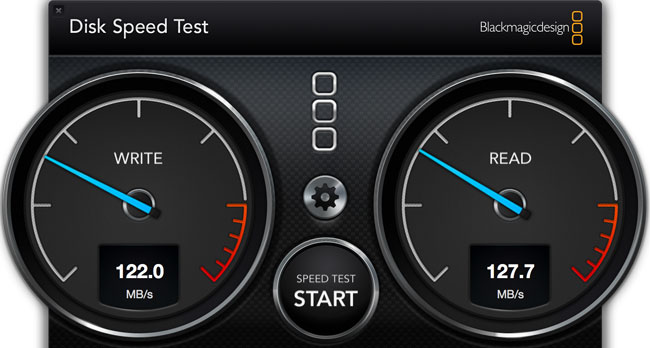
About the performance
I knew the drives would be fast, but I was actually a little blown away by how fast they actually were. They came with both USB 3 and Thunderbolt cables and since I have a Thunderbolt port on my MacBook Pro, I plugged it in via Thunderbolt. I was floored by how fast the data copied. I even handed one to my colleague Jason and said “here, choose a fairly large file on your computer and copy it to this drive.” As luck would have it he had a 4GB file that was handy and it copied in under a minute.
Having both a Thunderbolt Port and USB 3 port means that I have the option of connecting it to pretty much any modern computer and I’ll get good performance. Even if I have to connect it to an older computer I’ll get USB 2 speeds. I didn’t really expect to like this drive as much as I do. I was just running out to get a drive to fill an immediate need. However, it’s now my favorite portable drive.
You can get the G-Drive 1TB Thunderbolt / USB 3 Portable Drive here.
SAVE MONEY! If you don’t have a Thunderbolt port or simply don’t need the Thunderbolt connectivity then you can actually get the same drive in a USB 3 ONLY configuration for about half the price here. I’ve used the drive above connected via USB 3 and it was still plenty fast.