Review – The Logitech Ultrathin Keyboard Cover for iPad 2 and the New iPad

Sometimes I get comments here, jokingly about how much money I just cost you because I reviewed something cool that now you must have. Well you’ll take pleasure in knowing that it just happened to me too. My colleague and gadget buddy Dave Helmly just showed me his latest gadget and in about 3 seconds I knew I’d have to have one.

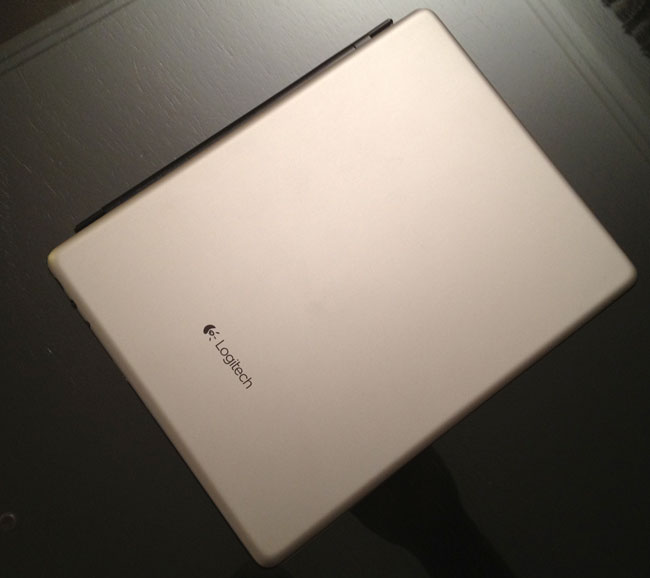
The Logitech Ultrathin Keyboard Cover for iPad 2 and the New iPad

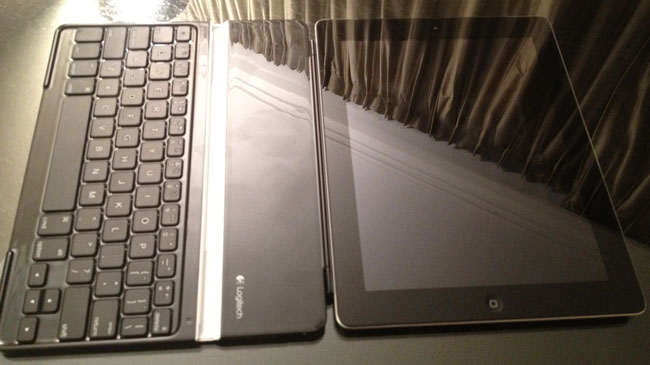
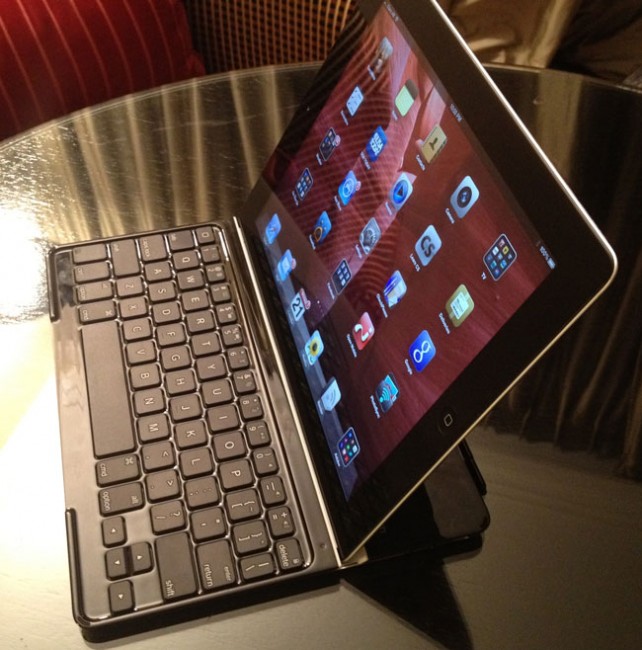
I’ve tried other iPad keyboards and while they work, I usually just ended up carrying my Apple Bluetooth Keyboard. The problem I had with the ones that are designed to be a case for the iPad is that they typically added more weight and bulk to the iPad than what I was willing to carry. At that point I figured I might as well carry my MacBook Air. That all changed when I saw the Logitech Ultrathin Keyboard Cover! First of all the “ultrathin” part is key. I use Apple Smart Covers now and I don’t want any cover that’s much thicker than those. Logitech brilliantly designed their Keyboard Cover as a “Smart Cover”. That’s right, it magnetically snaps on to the iPad 2 and the New iPad just like Apple’s Smart covers do. Just snap it on and close it. It maintains a very low profile and is very thin when attached. The next smart thing they did was they made a magnetic slot to dock the iPad in to prop it up either vertically or horizontally while you use the keyboard.

The keyboard is bluetooth as you would expect and rechargeable via a standard USB micro cable. Speaking of the keyboard itself, the first key I looked for was the import Shift Key on the left side! The other keyboard I tried (Brookstone) didn’t have a Shift Key on both sides and that really bothered me. Typing on this keyboard seems very natural. I can’t speak to battery life yet as I’ve only spent a few hours playing with Dave’s, but I’ve already ordered one for myself. Damn you Dave you just cost me money (again)! 🙂

You can get the Logitech Ultrathink Keyboard Cover for iPad 2 and the New iPad here for about $99.

Best App Site Gets a Make Over

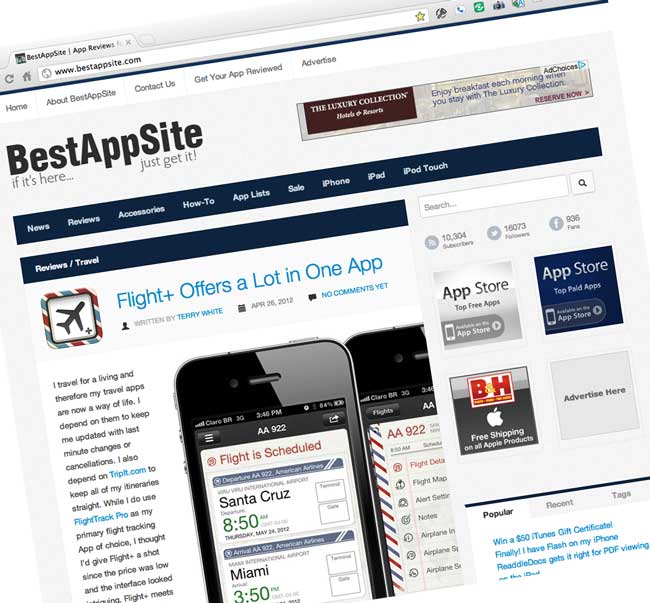
Along with reviewing technology and gadgets, I also review mobile apps. When the App Store came out a few years ago I started doing an “App of the Week” here on my blog. However, I realized that one iOS App per week just wouldn’t cut it seeing how there there hundreds if not thousands of Apps being released every week. So I decided to setup a dedicated site Best App Site so that App reviews could happen more regularly and also not tie up space here for reviews that some may have no interest in. One of Best App Site’s co-authors and web designer Erik Bernskiold just overhauled the site with a new look and feel. Aside from making the site more appealing to the eye, Erik also did quite a bit a work on the backend to make it easier for us to post reviews and to make it easier for visitors to find the reviews they want. The New Best App Site also is even more mobile friendly with a fluid design that quickly adapts to tablets and smartphones.

A big thanks to Erik and I hope that all of you enjoy the new site as much as I do! Head over to bestappsite.com and check it out.

AR.Drone 2.0 – My In Studio Test Flight

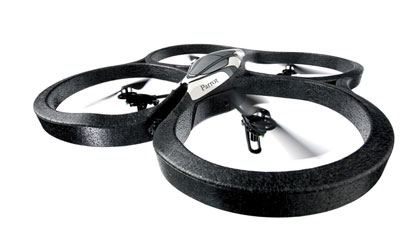
When the original AR.Drone came out I have to admit that I immediately dismissed it as a “toy” and I had very little interest in it. Sure, like any toy it would be fun to play with for a while. However, like many other toys you could quickly lose interest. Therefore I never bought one. Not even for the “cool (aka geek) factor”.  Then the AR Drone 2.0 came along and it added something that I thought would be useful. The AR Drone 2.0 adds a better camera that does video at 720p HD. Yes, this raised an eyebrow and I decided to take a look. I did a pre-order and my AR.Drone showed up a couple of days ago. I figured I might have a use for this on set, especially on location shoots to do fly arounds of the set and the area that I’m photographing.

What’s Great…

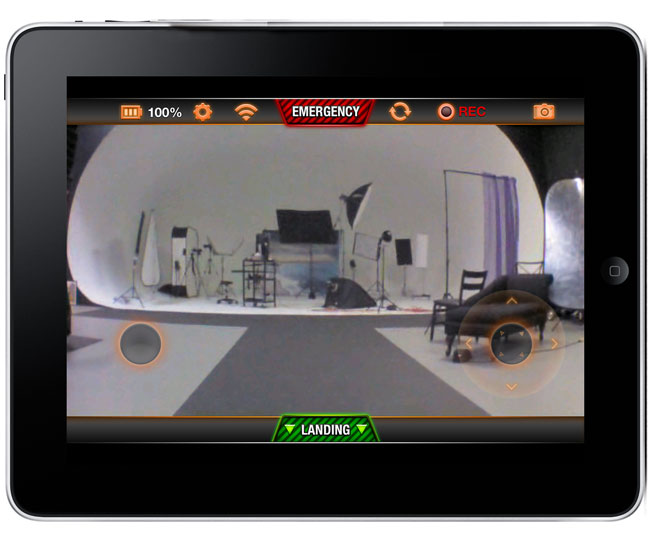
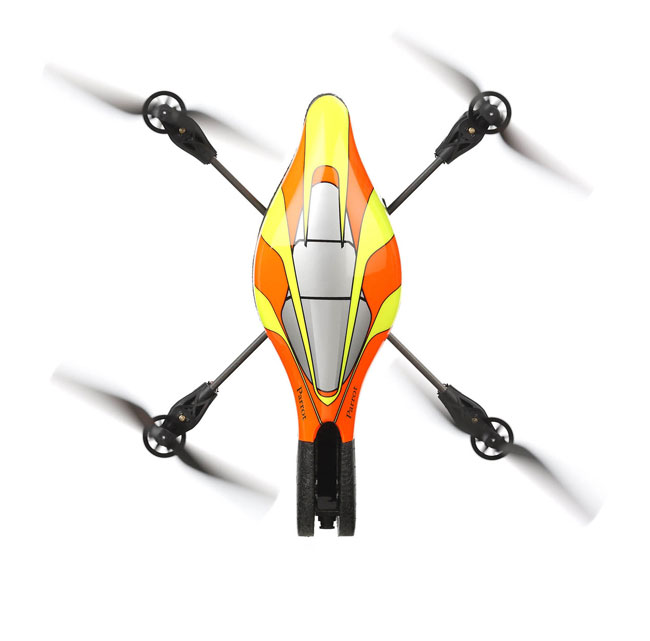
The great thing about this little drone is that it’s light weight and very easy to fly. It doesn’t come with a remote control! You actually fly it from your mobile device (iOS or Android). I downloaded the App on my iPad and iPhone. The AR Drone 2.0 has it’s own built-in WiFi network. Once you charge the battery and pop it in, it powers up and starts broadcasting a network. You connect to this adhoc network from your device and then launch the AR Drone App (a free download). You see what the AR Drone sees right on your device. Using the accelerometers in your iPad, iPhone, etc. you tilt the device to control direction. There’s an on screen joystick to turn the drone. If you suddenly lose control, just take your fingers off the screen and the Drone will hover in place.

Since the built-in camera is always running you can tap the record button within the App and start recording/streaming video from the AR Drone right to your mobile device. Very Cool! The App even allows sharing directly to YouTube.

Here’s a sample video I did flying around my photography studio while a friend also video’d the AR.Drone 2.0 itself using my iPhone 4s:

What’s not so great…

Battery life is still relatively SHORT! You get one rechargeable battery and charger and the battery last for about 10 minutes of flying. Then you’ll need about 90 minutes to charge it back up. Unless you plan to do really short flights/videos, you’ll definitely want to have a couple of charged batteries on hand (about $35 each). It’s light weight and while that’s a good thing for travel, it means that a strong wind will take it away. Since it works via WiFi you’ll also have limited range. Like most small cheap HD cameras, this one doesn’t do well in low light. With a small lens/sensor comes lower quality video in low light. However, with enough light the video is more than acceptable for my needs.

The Bottom Line

The AR.Drone 2.0 is an improvement over the original! Adding 720p Video Recording makes it useful as a tool. On a calm day I can really see some great outdoor uses for it.

You can get the AR.Drone 2.0 for about $299 here.

You can get the AR.Drone Free Flight iOS App here from the iTunes

Lightroom to InDesign to iPad: Interactive Portfolios for Photographers

In this episode of the Adobe Creative Suite Podcast Terry White shows how to use a Lightroom Web Gallery from The Turning Gate in InDesign to make an Interactive Portfolio for your iPad or Android Tablet.

Grab the Photoswipe Gallery Plug-in that I used in the video here.

Are you missing out on my Bonus Content?

See more of my Adobe Creative Suite Videos on my Adobe Creative Suite Podcast and get the App here. It features EXCLUSIVE CONTENT that no one else gets to see. This episode has a BONUS CLIP that is available only in the App! My iOS App is a Universal App for iPhone, iPad and iPod touch. I also have an Android version:

Learn Adobe Creative Suite with Terry White - Wizzard Media

Homeworks Internet Controllable Radio Thermostat

Programmable thermostats are certainly not a new thing. I’ve had one in my home for several years. They allow you to lower your energy costs by turning the temperature up/down automatically at times throughout the day/night where you’re either not home or wouldn’t notice as much because you’re asleep. You can set these times and days of the week to match your daily routine/schedule. While that’s all well and good, it doesn’t help much in a situation where you don’t have a daily routine. For example, in my studio I’m not there on any kind of regular schedule. Some days I could be there every day for several days in a row and other times I could be gone for weeks at a time. In the past I would simply put the thermostat on the lowest setting before I leave and turn it back up when I arrive. There have also been times where I’ve forgotten to turn it down and the heat was going for no reason for a day or two with no one there. I started looking for a better solution.

The Homeworks Radio Thermostat was the answer

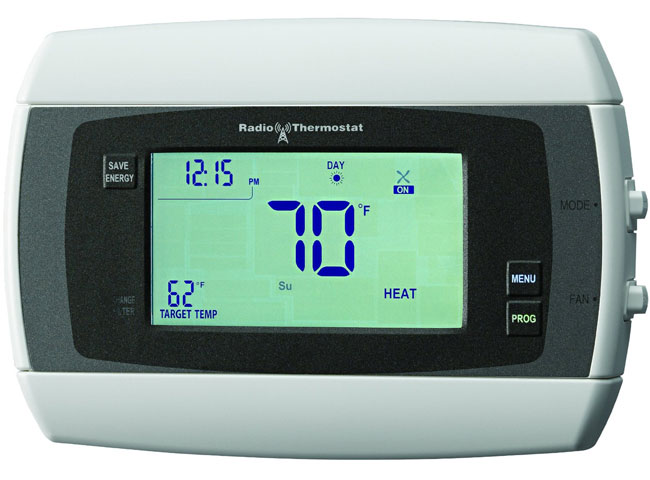
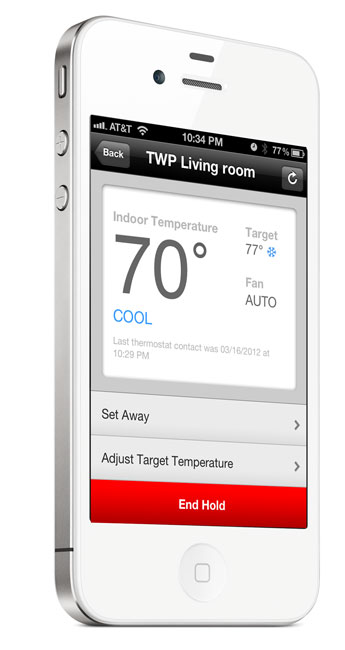
This thermostat is programmable like all the others, but it also allows you to control it via an App on your smartphone or tablet over the internet or locally via WiFi! With the App I can see the current temperature of the studio AND adjust the thermostat remotely at any time. If I forget to adjust it when I leave, no problem as I can now adjust it from anywhere in the world. If I want to turn the air conditioning on to cool it down before I arrive, I just pull out my iPhone and adjust the thermostat on my way in. So far this device and App have worked really well.

Installation – While I have installed thermostats myself in the past, I decided to let my electrician do it since I had him out working on other things anyway. It didn’t take him long to wire it up. Once It was installed all I had to do was set it up via the iOS App (works on Android too) and connect it to my WiFi network and pair to my account. From that point I could control it from my iPhone or iPad inside the building or via the internet from anywhere. The only thing that I can’t seem to figure out how to do is to switch it from Heat to Cool or to Auto from the App. I can do this from the panel itself, but not remotely. Otherwise, I have the control I need from the App.

You can get the Homeworks Radio Thermostat here for about $107.

You can get the App for free here from the iTunes

I went with the Verizon iPad WiFi+4G LTE

On Friday I posed the question: “Which iPad WiFi+4G LTE is Better: Verizon or AT&T?” and overwhelmingly people responded with “go with Verizon.” When I woke up that morning and looked at the comments on the blog and social media, I decided to head out to the Verizon store on my way to my studio. I figured that although I absolutely hate standing in lines for this stuff, it would be worth a shot. Keeping in mind that I was meeting someone at my studio at 9AM and that left me very little time from doors open at 8:00 AM to get in and out. I got to the Verizon store at 7:37 and I was stunned to see absolutely no line whatsoever!
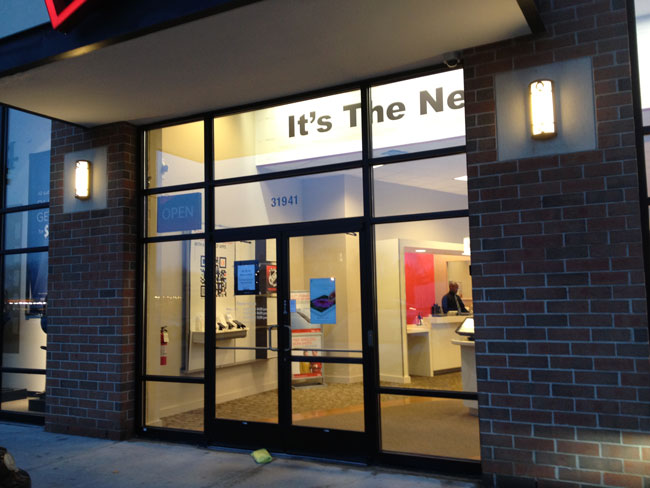
I thought to myself “something must be wrong! I’m never 1st in line, let alone “only one” in line.” A sales rep opened the door and asked if I was here for the new iPad and I said “yes” and he told me that they would open at 8. I asked if they had the 64GB model in and he said that he would check. A few minutes later I looked back in the window and he gave me the thumbs up. By the time the doors opened at 7:56 AM (for the mad rush), there were only 4 of us there.
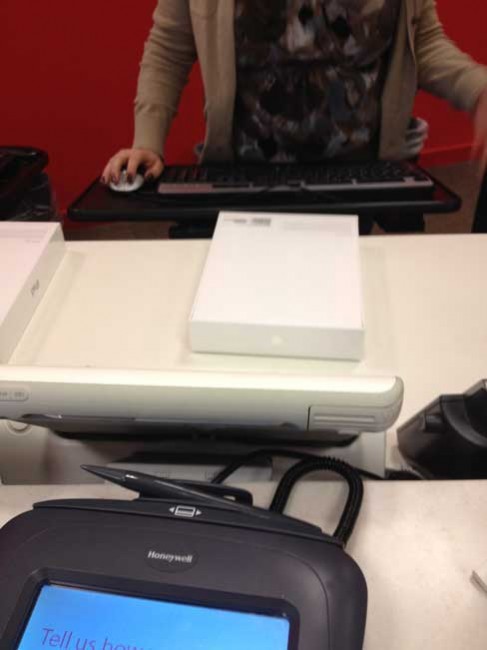
I was in and back out with a Black 64GB Verizon WiFi+4G LTE iPad in hand by 8:01 AM.

Why did I go with Verizon one this one?

My 1st two iPad WiFi+3G models were on AT&T and since I got in on the ground floor of an “unlimited data plan” with no contract, when the New iPad was announced I just automatically ordered the AT&T version. Then I started reading some other posts online asking “why go with the AT&T one?” and it got me thinking and doing a little research. This really cast a doubt in my mind as to why I should stick with the AT&T version? Here’s what I found out:

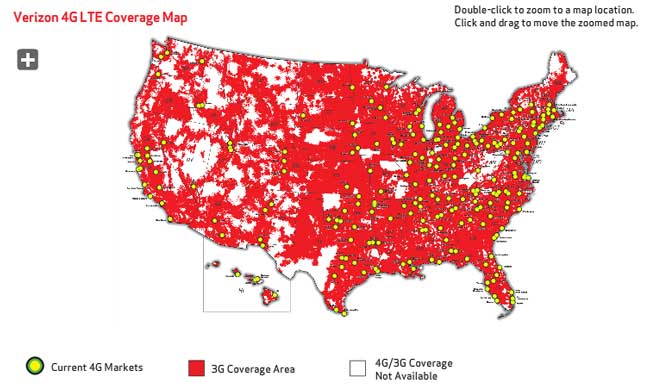
Verizon’s 4G LTE coverage in over 200 cities above.
AT&T’s 4G LTE Coverage above and with Michigan not even in the Coming Soon area.
  • I live in Michigan and Verizon has LTE service here and AT&T doesn’t. Not only don’t they have it, but it’s not even on the publicized roadmap for this year!
  • I travel abroad quite a bit and this was a big concern until I found out that the Verizon version also supports GSM and has a standard Micro SIM slot too. Yes Verizon does international too, but GSM is EVERYWHERE!
  • Lastly Verizon supports wireless tethering (sharing your fast LTE connection with your laptop or other WiFi devices) at no additional cost while AT&T is still scratching their heads on how or when they will make it available. <-this was kinda the last straw!

How well does it work?

I got back to my desk and began the setup and restore process on the New iPad. Once it was done, I saw the Verizon status bar, but before I setup an account I popped my AT&T SIM with unlimited data from my iPad 2 and put it in the New Verizon iPad and my jaw dropped when it just worked. I turned off WiFi and was surfing on AT&T’s faux 4G  (non LTE)  HSPA+ network from my Verizon iPad.
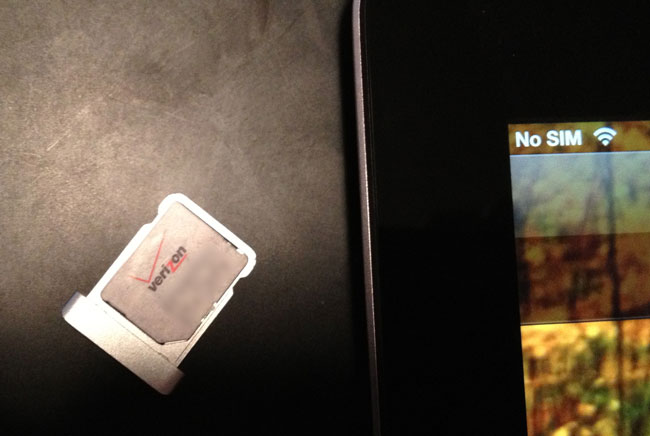
I put the Verizon SIM back in (yes it comes with one) and setup a 2GB/month plan for $30/month. Next I had to test the LTE speed

Whoa!
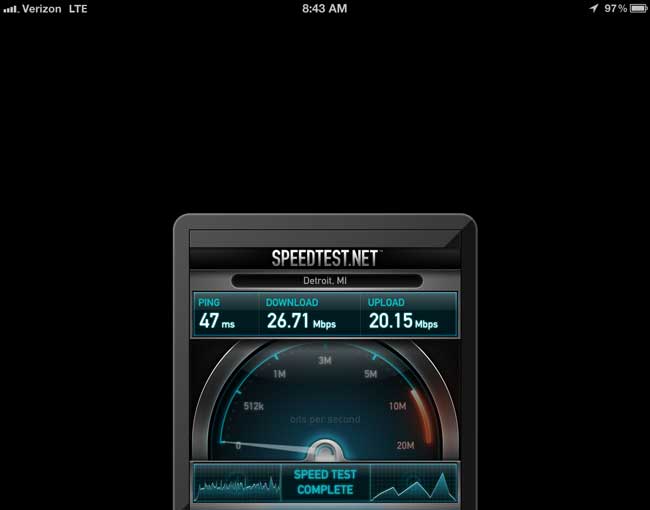
Yes the speeds live up to the hype. Very close to if not exceeding many broadband connections in people’s homes today and certainly faster than anything I’ve seen on AT&T to date.

Finally I have tethering

One of my other frustrations is that while I enjoy an unlimited data plan on my corporate iPhone 4s, I can’t do a Personal Hotspot (without jailbreaking) because in order to add that feature I’d have to give up the grandfathered unlimited data plan that I have. I have an AT&T MiFi (yes another monthly cost). So perhaps one of the tipping points was that Verizon freely allows tethering with no additional charges or contracts. You buy your data plan and use it the way you want. What a concept!
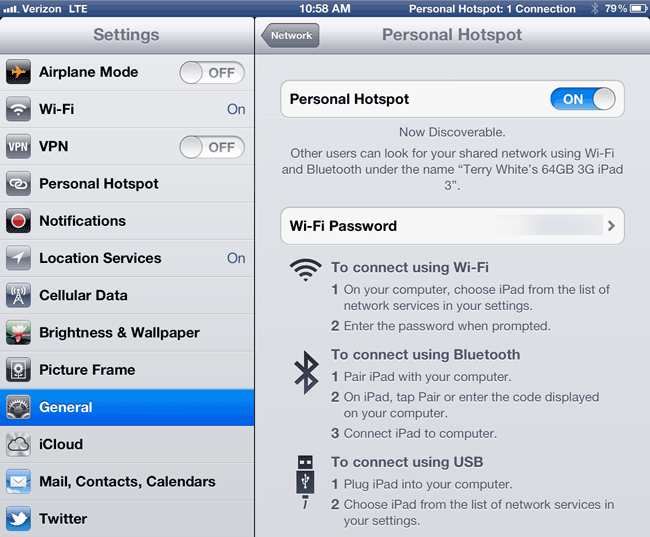
It’s also FAST! Here’s a speed test from my MacBook Pro while using the Personal Hotspot over the iPad’s 4G LTE connection.

Speedtest from my MacBook Pro tethered to the New iPad’s 4G LTE connection


Going Abroad

While Verizon claims that their iPad will work in other countries I see no provision for adding any international roaming data the way AT&T does directly on the iPad. Granted AT&T’s international roaming rates aren’t cheap and you can probably do better picking up a local SIM in the country you’re visiting, but at least they are convenient to do right there on the device and you buy as much or as little as you need for a trip. When that data runs out or the month (30 days) expires you can buy more when you need it. This is definitely one of those times where I could see the need to pop back in the AT&T SIM or a local SIM that you get in the country you’re visiting. Verizon wants you to call them and enable International Roaming and they aren’t really advertising the rates from what I can see.


The Bottom Line – The Best of Both Worlds

While I have no real love or hate for AT&T, I haven’t had any problems to date with my last two iPads. However, from a competitive feature advantage and 4G LTE coverage advantage I have to give the nod to Verizon! I returned my unopened AT&T iPad to the Apple Store over the weekend with no regrets. I have the option of keeping the unlimited AT&T data account by simply hanging on to the SIM (and continuing to pay for it) for a bit and see if I ever need it. Lastly because of the Tethering feature I could potentially kill my MiFi account and even save money while still hanging on to the AT&T plan as the MiFi plan costs more. Not to mention the iPad gets about 4x the amount of battery life of my MiFi.


Whoa, whoa, whoa, what about the Retina Display, speed, etc.

I thought I was done here, but you probably want to hear my impressions about the New iPad in general. So here are a few first impressions:

  • Although the New iPad is technically heavier I don’t notice the weight much. I did notice it going from the iPad to iPad 2 and figured that this one would feel heavy again. It doesn’t.
  • Yes the retina display is nice, but honestly with MY EYES, I can’t see that big of a difference YET. I have an eye doctor appt this afternoon as I’m overdue for new glasses 🙂
  • Photos still look great (ones at 1024×768 or higher), but I can’t DEFINITELY see the difference in LOW RES photos now. They look jaggy! If you are using your iPad as a portfolio device you’re definitely going to want to replace your photos on it with high res versions. While most of my photos look fine, some were apparently a lower resolution than others and I can see the difference immediately.
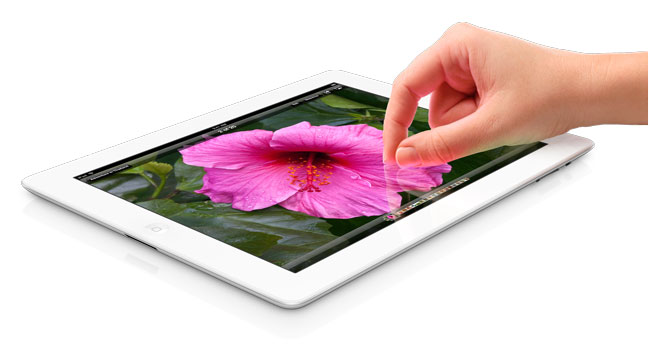
Low res photo above looks really bad zoomed in on the iPad Retina Display
My existing photos at larger resolutions of 1024×768 (and higher) look fine zoomed in.
  • YES, the camera is much better. That’s not hard to do since I viewed the camera on the iPad 2 as “unusable” for photos. I still wont’ be doing much shooting with it, but it’s nice to know that at least now I could.
  • Larger screen captures. Since you now have 2048×1536 resolution this means that your screen captures are going to be at the higher res too. This is a good thing for authors and bloggers.
  • Is it worth upgrading from an iPad 2? Probably not unless you want the faster speed of the 4G networks. Otherwise, you might want to skip this one and wait for next year’s model. If you don’t have an iPad or you have a 1st generation iPad, it’s time to upgrade. I’m already starting to see new Apps come out that don’t work on the original iPad. That trend will likely continue.

Get the SpeedTest App I used above here on the iTunes

Which iPad WiFi+4G LTE is Better: Verizon or AT&T?

My “New iPad” WiFi+4G AT&T iPad is on its way and should arrive today. However, I wondering should I swap it for the Verizon version? All jokes about AT&T’s “service” aside (or lack there of) I was one of the few that got in on the AT&T Unlimited Plan when the iPad first came out. Switching to Verizon would mean potentially giving that plan up. However, the Verizon iPad (3) seems to be the better deal as you get tethering at no additional cost (while AT&T is still – once again – trying to figure out the whole tethering thing). Also it appears that the Verizon one also has a SIM slot and since iPads are UNLOCKED and contract free, you can put a local SIM in when doing international travel. I also have to consider that Verizon’s LTE 4G network is larger than AT&T’s and AT&T doesn’t even have LTE service where I live (Michigan) with no plans to add it here anytime soon.

So what say you? Which one should I get and WHY? Please spare me the general just because “AT&T sucks” comments. I get it that they have the worst record of them all, but I’ve had no issues being on AT&T with my last two iPads. I’m looking for a sanity to check to make sure that I’m not missing something by going with the Verizon version. Keep in mind that I spend a lot of time on the road and I travel internationally for a living. Would there be a downside to the Verizon model overseas? Would an AT&T SIM work in the Verizon iPad domestically?

Review: BlackMagic Intensity Extreme Thunderbolt HD Capture Device

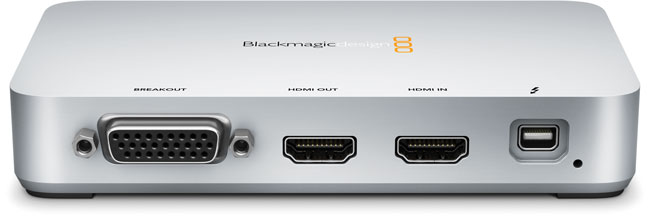
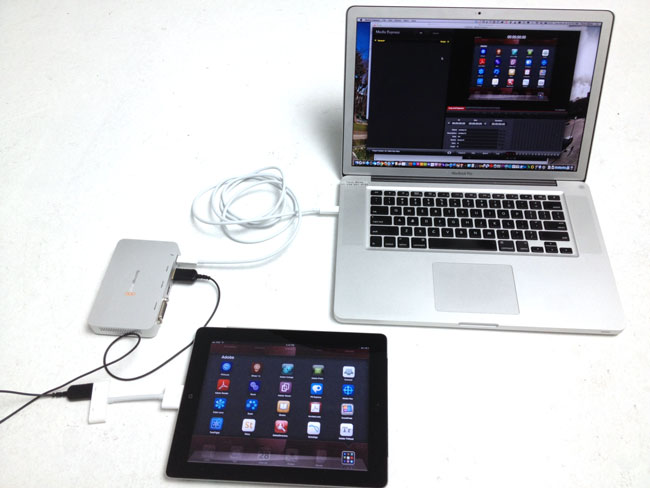
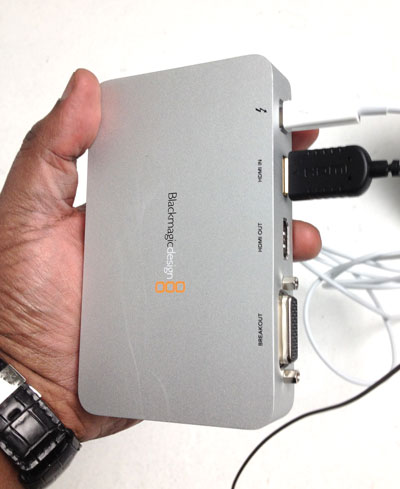
Earlier this week I released a video showing the NEW Photoshop Touch for iPad 2. The video was recorded using the iPad Digital AV Adapter that allows you to connect an iPad 2 to an HDTV via HDMI and a BlackMagic Intensity Pro that is installed in my Mac Pro tower. While the Intensity Pro card works well it means that any videos that I want to produce directly from my iPad 2 have to be done on that computer. A few months back BlackMagic announced a new external verison, the Intensity Extreme! The difference is is that the Intensity Extreme is an external capture device that connects to your Mac via the super fast Thunderbolt connector. As a matter of fact this is my 1st Thunderbolt device. While Apple has been equipping their new Macs with Thunderbolt ports, the actual 3rd party Thunderbolt equipped devices and peripherals have been slow coming to market.

How does it work?

Before I could even get started I had to go get a Thunderbolt cable from the Apple Store, as it’s not included. As far as I can tell Apple is currently the only company shipping a Thuderbolt cable ($49). While I’m totally against overpriced cables, the Thunderbolt cable is more than just wire and connectors. The cable actually has some chips/processors in it. However, I expect that competition will bring the price. down.

Once I got back with the cable I installed the BlackMagic software/driver, connected the box and to my pleasant surprise the Intensity Extreme is bus powered via the Thunderbolt port. NO POWER BRICK! I was already used to the software as it’s the exact same software that the Intensity Pro uses. Once I set my preferences, the iPad 2 showed up in the capture window and I was ready to go (record)!

What about audio?

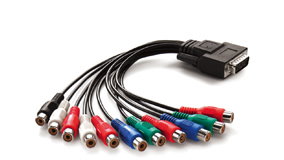
While HDMI does carry both video and audio, the problem is that I want the audio from my voice to be recorded along with the demo. There are a couple of options. The Intensity Pro also supports a breakout set of analog cables and even supplies all the female connections (pictured above). Just plug in your audio gear and you should be good. However, just like on my Intensity Pro, I don’t use this set of connections. The reason is I’m also going to want to be on camera and may integrate things/software demos from my computer too. In this case I record both my talking head image, whatever I’m doing on my computer and my audio simultaneously into Screenflow while I’m doing the demo on the iPad 2, which is being recorded into the Intensity Extreme. I put the two videos together in post using Adobe Premiere Pro CS 5.5 as well as adding the iPad “frame” as a Photoshop file on a layer below.

The Bottom Line

This new Intensity Extreme is a winner on all counts. While it took longer than expected to actually ship it, they got it right. It’s small enough to travel with and produces FANTASTIC uncompressed HD results so that you’re starting with the cleanest HD video possible!

UPDATE: this also works the exact same way with the iPhone 4s. You use the same Apple AV Adapter and plug it in and you can record video out from your iPhone 4s as well. Thanks blog reader “RF” for the tip!

You can get the BlackMagic Intensity Extreme here for about $285. You also get your Thunderbolt cable on the same order here.


Continue reading “Review: BlackMagic Intensity Extreme Thunderbolt HD Capture Device”

Introducing Adobe Photoshop Touch for iPad 2

In this episode of the Adobe Creative Suite Podcast, I’ll show you the NEW Adobe Photoshop Touch for iPad. While there are lots of photo editing Apps for iOS, there are none that are truly like “Photoshop.” Photoshop Touch gives you the power and familiarity of Photoshop tools and techniques on your iPad. Best of all the layered files you create can be opened in Photoshop CS5 on the desktop and continued to be refined.

You can get Adobe Photoshop Touch for iPad 2 for $9.99 here from the iTunes

Note:
• Requires iPad 2 and iOS 5. Not available for iPad (first generation).

or here from the Android Market

If you’re looking for a great Stylus to go along with this App, here’s the one I use.

Are you missing out on my Bonus Content?

See more of my Adobe Creative Suite Videos on my Adobe Creative Suite Podcast and get the App here. It features EXCLUSIVE CONTENT that no one else gets to see. This episode has a BONUS CLIP that is available only in the App! My iOS App is a Universal App for iPhone, iPad and iPod touch. I also have an Android version:

Learn Adobe Creative Suite with Terry White - Wizzard Media

Travel Tip: Watch Your iPad Movies on the Big Screen HDTV in Your Room

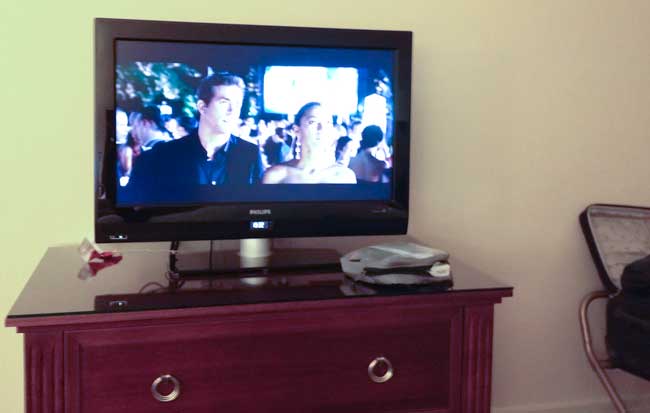
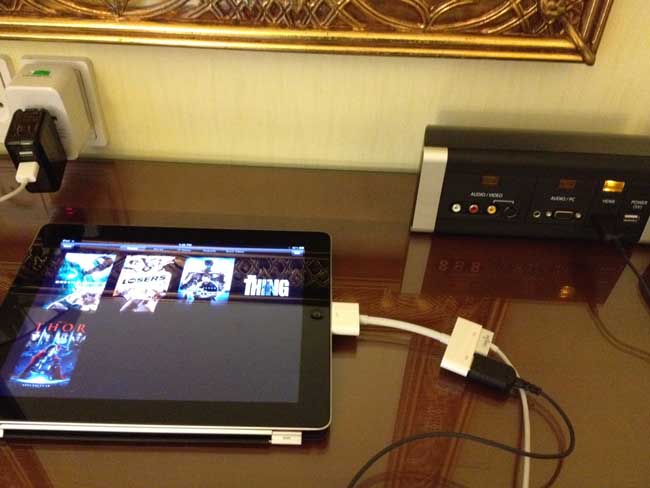
If you have an iPad 2, then you have the ability to mirror your display to either VGA or HDMI connections. While most hotels now have LCD/LED Flat Panels in their guest rooms, some even let you connect your own gear to them. Marriotts are known for this and while I was in Copenhagen I decided to watch some of my rented movies on the 32″ HDTV in my room.

What does it take to connect your iPad to a HDTV?

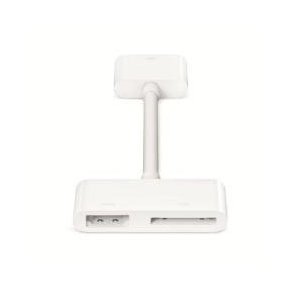
If your HDTV has an available HDMI port then it’s much easier as Apple sells an iPad HDMI (Digital AV) adapter. The best part about this adapter is that not only does it send the video and sound, but it also has a standard 30 pin connector so that you can attach your power/sync cable too. This way your iPad can be charging while you’re watching your video content. There is nothing really to setup. All you do is plug in the cable and adapter and your iPad 2 will automatically mirror its display to your HDTV.


What if my Hotel Room only has a VGA connection?

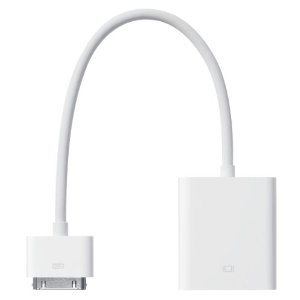
Not all hotels offer an HDMI connection. Some offer only a VGA connection assuming that you’ll be connecting your laptop. Before the iPad 2, Apple sold a VGA iPad Adapter. The good news is that this Adapter works just fine on iPad 2 as well. The downside is that the VGA connection doesn’t carry sound. So if you want to also output sound to your TV, you’ll need an adapter from your headphone jack out to RCA (left/right) connections or to a 3.5mm in.


The Bottom Line

If you’re on the road and you’ve got some time to kill and movies to watch, you might as well enjoy them on a bigger screen.
Here’s what you’ll want

Besides an iPad 2, you’ll want the following adapters/cables:
iPad HDMI (Digital AV) Adapter

Thin HDMI cable for easy travel (hotel rooms most likely will not have any cables for these connections)


If you want to be prepared for just about any connection, then you’ll want these too:

iPad VGA Adapter

Thin VGA Cable

3.5mm to 3.5mm audio cable

3.5mm to RCA cable