Behance ProSite is now included in Creative Cloud

behance-adobe

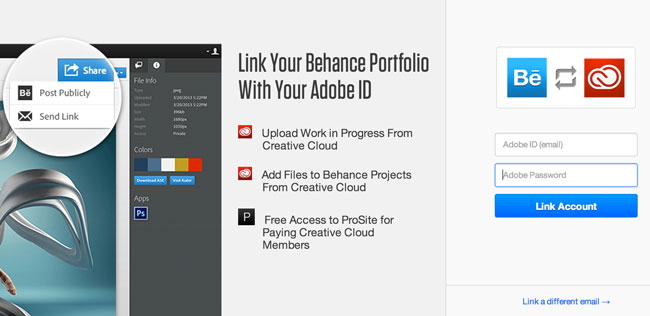
You might remember that back in December Adobe acquired Behance, the leading online social media platform that enables creative professionals to showcase and share their work with millions. We wanted to share some great news for our Creative Cloud complete members.
As of yesterday, Behance ProSite (normally $100/year) will be available at no additional cost for all paid Creative Cloud complete members. ProSite transforms a public Behance portfolio into a fully customized personal portfolio site with your own URL. You can design an incredible portfolio site that stays in sync with your projects on Behance, increasing your efficiency and helping your work get more exposure from Behance’s 18+ million visitors every month.

Continue reading “Behance ProSite is now included in Creative Cloud”

The Making of My Adobe Create Now Tour Recording

CreateNow-RecordingSetup-web
photo by Shawn Lee

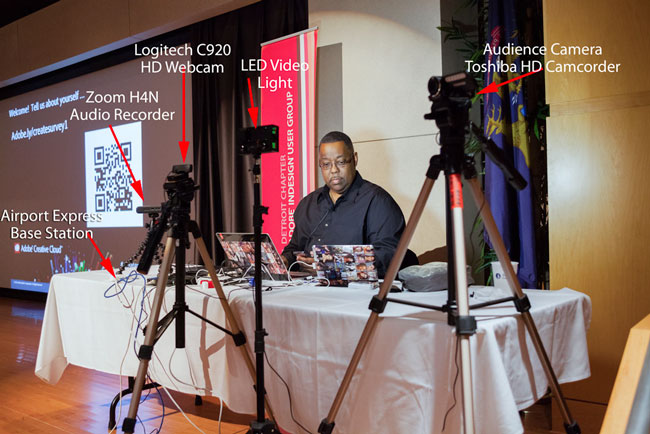
I got a few questions regarding my setup for recording my last Adobe Creative Now Tour Event.


Here’s what I used:

I did the presentation on my MacBook Pro 15″ Retina. I was connected to the 1080p in house projector via the built-in HDMI port. I had my Wacom Intuos 5 tablet plugged into one USB port and my Logitech C920 HD Webcam plugged into the other one. While the Mac has a built-in FaceTime HD camera, it’s only as good as the angle of your display. By using the C920 I’m able to put it on a tripod and therefore position it anywhere I want.


Networking

I always travel with both a MiFi and AirPort Express. This way I can create my own network either by using the venue’s ethernet cable or via 4G. This is important for when I show Touch Apps and DPS SE so that I can mirror both my iPhone 5 and iPad to the same screen as the audience is seeing AND being recorded with Screenflow. I used Reflector on the Mac to Airplay from both my iOS devices at the same time.


Audio

As my buddy Jason Levine would say “It doesn’t matter how good your video is, if your audio sucks no one will care about your video.” This means using either a really good USB tabletop mic OR a audio recording device. In Cleveland I used a Blue Yeti USB mic and the audio was good. However, I had a Zoom H4N on order that arrived in time for Detroit and I decided to use that instead since it has legendary audio quality. As a backup I had Screenflow recording from the built-in mic on the MacBook Pro since I hadn’t used the H4N before. The H4N records to an SD card in WAV format or MP3 at various quality settings. It uses 2AA batteries and can also be mounted on a stand/tripod. I mounted it onto a Gorillapod and set it on the table.

Continue reading “The Making of My Adobe Create Now Tour Recording”

5 Myths About Adobe Creative Cloud

Adobe_Creative_Cloud

As I begin to wind down the Adobe Create New Tour, I couldn’t help but notice that no matter what city I went to, the story was the same. While people generally knew about Adobe’s Creative Cloud, they often had misconceptions about it. I started each presentation explaining what Creative Cloud was and what it wasn’t. Since not every one can attend a Create Now event Live, I thought I’d debunk the Top 5 Myths about Creative Cloud that I hear the most.

#1 “I don’t want to run my Applications in a web browser!”

When people hear “cloud” they get visions of running applications in a web browser. While that may be the case with other cloud offerings, it’s not the case with Creative Cloud. Creative Cloud members download and install their Apps as Adobe customers always have. The Apps like Photoshop , Illustrator, InDesign and even the new app Muse runs from your Hard Drive, not from the cloud.


#2 ” I don’t want to have to be connected to the internet just to use Photoshop.”

Once we get past the fact that you download the Apps and install them on your hard drive, people still sometimes think that they need to be connected to the internet to actually run the Apps because they are Creative Cloud Apps. Again, this is not true. Your Apps not only install on your hard drive, but they also can very much run offline. You computer does have to connect to the internet once a month to verify that your membership is still current, but that’s it. Once that check has happened you can disconnect and run all of your Creative Cloud apps OFF-line.

Update as of 5/6/2013: You will need to be online when you install and license your software. If you have an annual membership, you’ll be asked to connect to the web to validate your software licenses every 30 days. However, you’ll be able to use products for 99 days even if you’re offline.


#3 “I can’t share files to my clients or colleagues unless they’re Creative Cloud members.”

With your Creative Cloud membership you get 20GBs of cloud storage. You can use this storage to sync files between your devices and access them via the Touch Apps like Photoshop Touch and Adobe Ideas. If you place files in your Creative Cloud folder on your hard drive those files will not only be accessible when you’re offline, but you can also log into creative.adobe.com and share them. Once you decide to share a file you can email a link to your colleagues or clients and they will be able to view your file in their web browser even if they’ve never heard of Creative Cloud or the Adobe applications you used to create them. They don’t have to create an account or register for anything. See my video on how to share files with Creative Cloud here.

Continue reading “5 Myths About Adobe Creative Cloud”

Kelby Digital Photography Tour

digital_photography_book

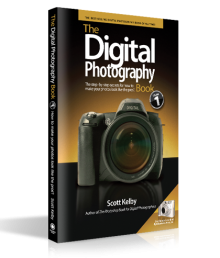
You probably already have this book (it’s the #1 bestselling book on digital photography ever), and if you like that book, you’ll love Scott’s brand new tour based on the book series! When I started to take my photography more seriously this was one of the 1st books I read from cover to cover. It certainly filled in a lot of gaps for me and I learned a ton.

If you don’t have the book, here’s the link (you’ll love it!).

He also wrote three bestselling follow-ups to the book, Volumes 2, 3, and 4 (all different content).

Well Scott is about to kick off a tour that is based on his Digital Photography Book series (and is taught by Scott himself).

Here’s the link for more info on the tour. Even if you can’t make the tour, you should definitely check out all four books. They also come packaged as a set here.

Continue reading “Kelby Digital Photography Tour”

Introducing the Westcott “Terry White” Travel Portrait Lighting Kit

westcott-tw-portraitkit

You might remember that I recently reviewed the NEW Westcott Rapid Box 26″ Octa softbox. In that review I actually put together the items that I would travel with to do a portrait shoot. Well it seems that Westcott and B&H liked it so much that they honored me by naming it after me. Introducing the Westcott Terry White Travel Portrait Lighting Kit! How cool is that? I remember when B&H did this for Scott Kelby back when he was touring with his Light It, Shoot it, Retouch it Kit. I know what some of you are thinking so let me address your question now. Nope I’m not getting a single dime from Westcott. Nada! Zip! Zilch! I recommend products here because I use them, not because I get paid to promote them (with the exception of Adobe of course since that is my employer/day job). The point of this kit is that I now have a single URL to refer people to when they want to know/buy my setup rather than having to send them 4-5 different links. From what I heard, some of my readers even printed out my review and took it the WPPI show and shopped with it at the show.

The only thing that the kit doesn’t include is the speedlight. The reason for that is that B&H would have to create several separate SKUs for each manufacturers speedlight and it’s just easier to tell people to use whichever speedlight they want or in most cases already have.

The Kit Includes:

1 Westcott Rapid Octa 26″ Box

1 Westcott X-Drop kit “white” background

1 lightstand to hold the Rapid Oct and your speedlight

2 Pocket Wizard PlusX Transceivers


I’m also happy to announce that B&H has marked it down as an introductory offer taking $25.95 off the price. You can check the kit out here.

It’s quite an honor as a photographer to recognized by both Westcott and B&H and I thank everyone for your support and being a fan of my work. See more of my gear here.


Updating My Photography Website Just Got A Lot Easier

twp_safari

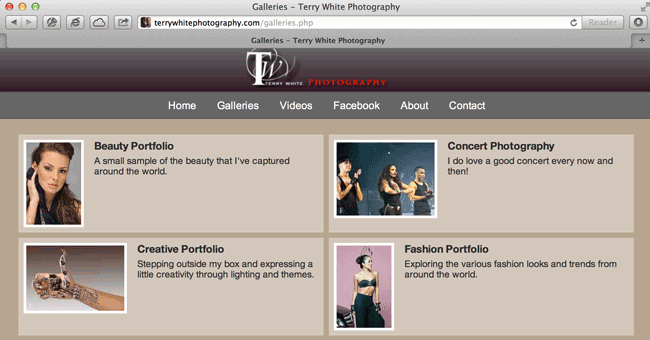
I’ve talked about and raved about the Lightroom Plug-ins from The Turning Gate here before. I use their Lightroom Plug-ins to build and maintain my photography website. I also use their awesome Client Response Gallery to provide my clients proofs via the web. I’ve been in contact with the developer on many occasions and I often beta test and give feedback on what he’s planning next. There was one plug-in though that caught me completely off guard. It isn’t often that something comes along that revolutionizes my entire workflow! The new TTG CE3 Publisher has done just that!

The old process of updating my galleries

I maintain my web galleries in Lightroom as Collections. So I have a Fashion Collection, Travel Collection, Beauty Collection, Fitness Collection, Recent Work Collection, etc. When it comes time to update one of those Collections, the process in Lightroom is very easy. Just drag in new images and delete old images. It takes all of a few seconds to do it. After updating the Collection then the time would come to update my website. This would involve a trip to the Web module and selecting one of my Gallery presets. This would choose the appropriate TTG gallery and restore all my settings for color, styles, text descriptions, etc. Great so far! Now I would either hit the Upload button in Lightroom or the Export button so that I could upload via my own FTP client. While this procedure wasn’t hard, it was time consuming. Each time you update a web gallery in Lightroom, Lightroom has to upload the entire gallery and all of the images from scratch. It has no way of just adding the new images and deleting the old ones.

Continue reading “Updating My Photography Website Just Got A Lot Easier”

Adobe Creative Cloud – How To Share Files with Clients/Colleagues for Review

Adobe_Creative_Cloud


In this episode of the Adobe Creative Suite Podcast, Terry White shows how to share Photoshop, Illustrator and InDesign Files with clients and colleagues and all they’ll need is a browser to comment and see your Photoshop Layers.

Are you missing out on my Bonus Content?

See more of my Adobe Creative Suite Videos on my Adobe Creative Suite Podcast and get the App below. It features EXCLUSIVE CONTENT that no one else gets to see. My iOS App is a Universal App for iPhone, iPad and iPod touch. I also have an Android version on the Amazon App Store:

Learn Adobe Creative Suite with Terry White - Wizzard Media


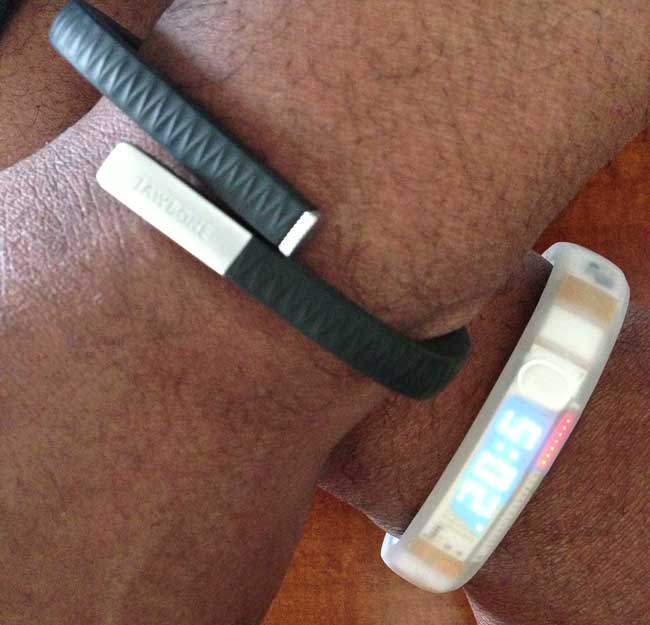
Nike FuelBand vs Jawbone Up

jawbone_up_vs_nike_fuelband

After reading my buddy Jason’s review of the Jawbone Up over at BestAppSite.com I decided to order one. Like so many of my fellow Americans I’m simply not active enough. I know it. No need to tell me. The idea behind the Up is that you wear it all day (and night) and it monitors your activity/steps. You can sync it with your smartphone and get reports anytime you want. You can see how many steps you’ve taken on a given day as well as how many hours you’ve slept and if you’re diligent about entering the food you eat, it can monitor that too. If you have friends that use the Up you can become buddies and see each other’s progress. This is where my competitive side kicks in as I want to have as many or more steps than my friends on a given day. Having used the Jawbone Up for a couple of weeks now I can give you guys some feedback. Before I jump into the feedback though, I recently received the Nike Fuelband as a gift! Wow! Now I can compare and contrast between the two and tell you which one I like best at the end…

Continue reading “Nike FuelBand vs Jawbone Up”

Why I Carry 3 Portable Hard Drives When I Travel

Solution-2-Elgato-Thunderbolt-SSD

People are always asking me about backup strategies and while I usually discuss my home/studio backups I rarely discuss my “on the road” backups. My MacBook Pro has a 768GB SSD internal drive. While SSDs tend to be more reliable than old school rotating platters, I’m still as paranoid as I’ve always been. I don’t back it up any less than I did before SSD. I’ve had two major data scares while traveling on business. The 1st was on a trip to Toronto several years ago to do a seminar. I was the main/only presenter and I had an audience of about 400 people. My presentation was going to start at 10AM and I was in the hotel connected to the event hall. I woke up that morning and did some work on my laptop before heading over to the hall. I closed my laptop and headed over giving myself just enough time to get there and plug in to the projector. I got there, plugged in and opened my laptop to a “blue screen”. I immediately thought “oh my God, if this thing doesn’t come up I’m screwed!” Although I had my files and fonts on a drive at the time and I could have used a colleague’s computer it would have taken no less than 30 minutes to get everything loaded and setup. It could have easily taken an hour or more if they didn’t have the right applications loaded. Luckily everything came back after a forced reboot. But what if it hadn’t?

Hard Drive #1: A Bootable Clone Backup

gdrive_1TB

A USB 3 and Firewire 800 Portable External Drive

After my experience above in Toronto I realized that simply having a backup of the data was not good enough. I need to be able to be up and running in 5 minutes or less in the event of a total drive failure. From that day forward I started carrying an external portable hard drive that was an exact clone of my internal drive. I update this clone before heading out on each trip. I use SuperDuper!, which is a fantastic utility to clone your drive from one to another. In the case of a blue screen or total drive failure I could plug in the clone backup drive and reboot directly from that drive. Since it’s a recent clone it would have all of my applications and demo/data files. Continue reading “Why I Carry 3 Portable Hard Drives When I Travel”