I Just Became An UPstrap Fan

I recently talked about the OPTECH strap that I was using and a few of my photographer buddies suggested that I also look at the UPstrap, so I did. I ordered an UPstrap and finally got a chance to try it out. I gotta say that I was a little skeptical about any strap claiming to not slide off your shoulder. I've heard those claims before. However, I have to say that the UPstrap lives up to its claims. I put it on my Nikon D7000 and no matter what I did (jumping, dancing around, running, etc.) it stayed in place. Wow! While it's not the prettiest strap out there (it's really plain and rubbery looking), it's now my new favorite! Can't wait to do my next photowalk with this one.


Check out the UPstrap here.

I’m headed to Cairo next week!

It's time to head to the Middle East/Africa for my CS5 Masters Tour! Of course I'm looking forward to seeing all the Adobe Creative Suite users in Cairo as well as the numerous photo ops. So I'll be blogging on location throughout the week with a hectic schedule. If you're in Cairo I look forward to seeing you there. It's my first time back to Egypt since 1990.

If you're going to be in the area register here.

Photographers: MacBook Air vs. iPad

When the iPad arrived in April I had high hopes (I still do) for it to become a great tool for photographers and in many ways it has. More photographers showed their portfolios at Photoshop World this past September electronically than they did in print. Just recently I published my list of 8 Must Have iPad Apps for Photographers. Yes, progress is being made, but yesterday Apple released the long awaited update to the MacBook Air and the more I looked the specs the more it made me think about this new MacBook as a better choice for photographers in the field. 


The iPad appeal
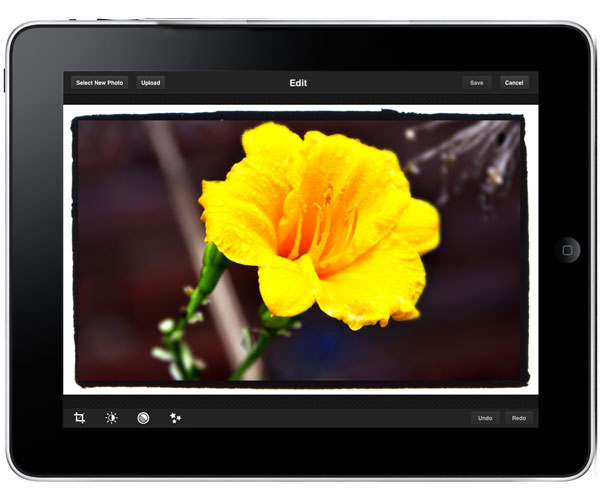
The iPad is/was appealing because it was small, lightweight, has a relatively long battery life, relatively large display and is capable of importing images via the Camera Connection Kit. It can do moderate photo editing on the go. Also the instant on and not having to manage a file system are pluses in many ways.


The NEW MacBook Air offers so much more for not much more money

The most fair comparison I can make is to compare the 64GB iPad Wi-Fi model ($699) with the new 64GB 11.6" MacBook Air ($999). Yes, the MacBook Air is $300 more and weighs 0.7 lbs. more. The MacBook Air is also a few inches bigger.


MacBook Air iPad

Size and weight

Height:
0.11-0.68 inch (0.3-1.7 cm)
Width:
11.8 inches (29.95 cm)
Depth:
7.56 inches (19.2 cm)
Weight:
2.3 pounds (1.06 kg)1

Size and weight1

Height:
9.56 inches (242.8 mm)
Width:
7.47 inches (189.7 mm)
Depth:
0.5 inch (13.4 mm)
Weight:
1.5 pounds (0.68 kg) Wi-Fi model;


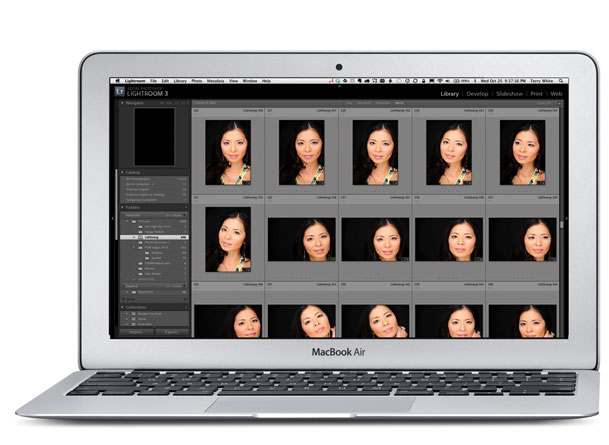
Once you get past the slightly larger size and weight of the MacBook Air, you can then start to justify it for what it offers over the iPad. The MacBook Air (MBA) has the ability to run your standard Mac applications (or even Windows Applications using Parallels or other Virtualization apps). So instead of trying to find replacement Apps on the iPad, it can actually fun Adobe Photoshop Lightroom 3 and Photoshop CS5. Instead of having to use the Camera Connection Kit with low power/speed CF Cards/Readers, you can plug in any standard USB Card Reader and Import photos from any memory cards. With the MBA you can also more easily offload your images onto another hard drive just by plugging it in to the USB port and doing a standard file copy. Also since many photographers publish their websites using Adobe Flash, you can view those sites on the MacBook Air by installing the latest Flash Player if you choose to. Lastly, and probably one the biggest reasons is that the you can shoot tethered to a MacBook Air and see your images on the nice big 11.6" display. Lightroom 3 already does native tethering and that means that the MBA can already do this. Yes, the MBA is $300 more, but you get a much more capable device for that $300.


What I would have liked to have seen

There are two things that I would have liked to have seen on the MacBook Air. The first is a built-in option for 3G connectivity. That's one of the things I love about my iPad is that I can take it out of my bag and get online pretty much anywhere. Sure I can use my MiFi or a 3G USB Stick, but a contract free 3G option built-in the MBA would have been killer. The next thing I would have loved to have seen is a TRUE HYBRID between these two devices. Imagine a MBA in the same form factor, but if you open the lid and flip it over it becomes an iPad and can run iOS Apps. While it's true that a touch screen on a vertical display would be a pain, there's no reason that the display has to stay vertical if it swiveled and reversed. That would have truly been the best of both worlds!


What will I do now?

Believe it or not I have no plans to get a MacBook Air pretty much for the same reasons that I didn't buy myself the first model. When I travel for business I need the most full featured and powerful MacBook Pro available and the MacBook Air just isn't enough muscle for what I do. Since it's not going to replace my current MacBook Pro I see no need to travel with TWO laptops. A MacBook Pro and iPad will continue to be my tools of choice. However, if you're a photographer that doesn't demo software for a living like I do, then the MacBook Air might be a GREAT tool for you! If I didn't need the power of a MacBook Pro, I would seriously consider the Air!

My Web Gallery for Client Image Selection

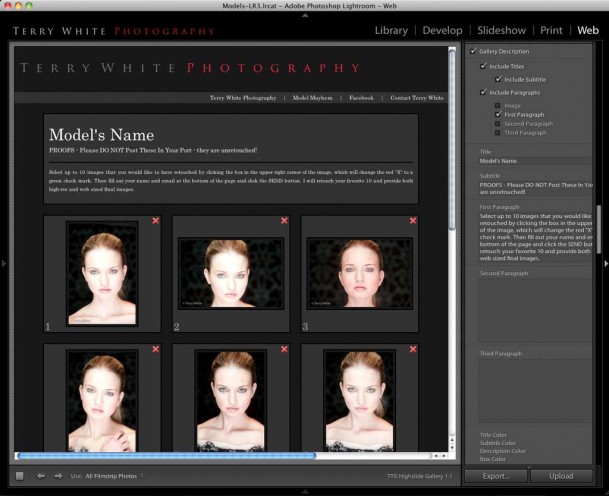
click the image above to enlarge

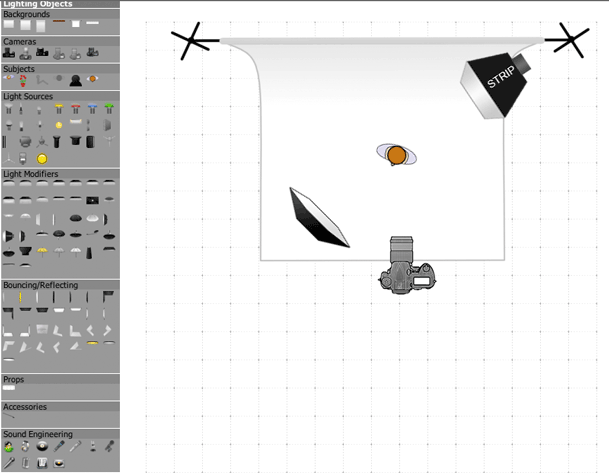
It's no secret that I manage my photos using Adobe Photoshop Lightroom 3. Whenever I do a model or client shoot whether I'm shooting tethered into Lightroom in the studio or shooting to a memory card in the field and importing the shots later, they end up in Lightroom. I do my non-destructive adjustments using Lightroom's Develop Module. Before I do any compositing and further retouching using Photoshop CS5 Extended those initial images are posted online in a private gallery for the model/client to review and make their selections. 

While Lightroom has had built-in web galleries since day one, none of the ones that come with Lightroom automate the process for receiving the client picks. A couple of years ago I discovered a really cool Lightroom Web Gallery Template/Plugin by The Turning Gate and I haven't looked back.

The Turning Gate Highslide Gallery

I'm so used to using this template that I often forget when I'm presenting Lightroom, that it doesn't come with Lightroom. Once you download this plug-in and install it, it shows up in Lightroom alongside all the rest of your Web galleries. You can customize the look and feel of your gallery pretty extensively. You can then either upload your gallery to your FTP space directly (hosting is NOT included with the plugin) from Lightroom or Export a folder of your web gallery and upload it via any other method that you use to get files to your space.

The one caveat is that your web server/space has to allow you to be able to run PHP scripts. Luckily most web hosting packages do! This FormToMail script is necessary to process the form that the client uses for their selections to send back to you via email. It's very transparent on the clients end. They basically see a web page with all the images that you provided. They can click to make them larger (again sizes you specify) and they can check off the ones they want. At the bottom of the web page is a spot for them to enter their name, email address and comments. At that point they hit the submit button and you get an email (to the address you configured in the plug-in/script) containing the choices they made. 

You can get the Turning Gate Highslide Gallery here for $25. They also make a pretty cool Client Response Gallery with less features for $10 here.

I couldn't imagine using Lightroom without this plugin!

Thanks for Attending My Westcott Top Pro Tour Event Last Night

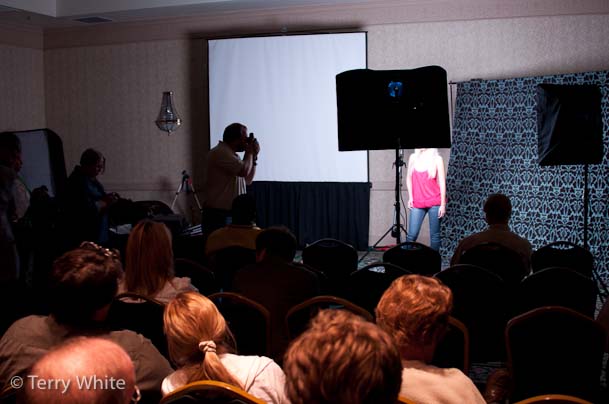
If you attended my 2010 Westcott Top Pro Tour Event last night I want to take this opportunity to thank you! It was a blast doing this event and seeing everyone so engaged. I not only had fun but yes I learned a lot too. The evening started off with John from Westcott showing the 6 different lighting patterns and how light affects your subject. Although I've been doing this for years, I've never heard it or seen it explained that way and it clicked with the audience. I now have a whole new appreciation for my gold reflector. 🙂 Then it was my turn to show my complete end-to-end workflow when photographing a model. Once again I had the beautiful Shannon Bayless as my subject and not only did I shoot, but I gave the audience an opportunity to shoot with each of my setups.

We then got into image selection and management with Lightroom 3 as well as the final retouching techniques that I use in Photoshop CS5. This was the first time that I've been able to walk a class through the exact things that I do during a shoot all the way from Makeup by Renata to final client image delivery via Lightroom. I ended up going over my time by about 20 minutes and the telling sign for me was not a single person moved to leave 🙂 So I guessing you guys were getting something out of it.

Thanks again to Westcott for putting this tour together and I look forward to more opportunities like this to share my workflows with you.


Gear mentioned last night

Nikon D700

Nikon 70-200mm VRII f/2.8 lens

Westcott Spiderlite TD5

Westcott Modern Vintage Backgrounds

Adobe Photoshop CS5 Extended

Adobe Photoshop Lightroom 3

Wacom Intuos 4 Small <-It's the one that's always in my bag. Yes, i have a medium and medium bluetooth too. Yes I like all 3. If I had to pick one it would be the bluetooth one.

1TB Portable Backup Drive

The Turning Gate Client Response Gallery for Lightroom 3

Model/Property Release Apps for iPhone/iPad – Contract Maker Pro (more customizable) & Easy Release (native iPad and iPhone version)

The long USB cable that failed me during my tethered shoot 🙂 All kidding aside I've been using this cable for about two years now and it has worked flawlessly up until last night. I have already replaced the one from last night with a new one that I had ordered and forgot to pack. Cables that you're winding and unwinding day in and day out don't last forever. My lesson learned is that I will now always have TWO of these in my camera bag as you never know when one is going to die.


Be sure to check the Westcott Top Pro Tour Schedule for the one coming to your area.

Thanks Germany & Switzerland! Great CS5 Masters Tour


Yes, I even got to present in a real Castle! – Schloss Lenzburg Switzerland

photo by  Markus Dobbelfeld

Last week I wrapped up the Adobe CS5 Masters Tour with the last stop in Schloss Lenzberg Switzerland! I have to thank my overseas audience for a great tour. It was great seeing so many of you in Munich (sadly I didn't make it to Octoberfest or Photokina), Düsseldorf, Vienna, Hamburg and Zürich. We had a back to back world-wind schedule and as much as I loved the locations I visited, I didn't get a chance to enjoy the sites as much as I would have liked to. Nonetheless I had a great time!

photo by  Markus Dobbelfeld


See more of Markus' shots here.

Continue reading “Thanks Germany & Switzerland! Great CS5 Masters Tour”

Guest Blog: Erik Bernskiold’s Photokina Wrap-up Report


There is a reason why photokina is only once every two years, it is a huge place to visit and get around. Have you been to Photoshop World? PhotoPlus Expo? To sum it up you would be able to fill these expos into the bottom floor of one hall. There are seven halls at Photokina and four of them are two floored! Imagine an entire floor filled with china, japan and hong kong companies, many of which are just copies of other vendors! It is crazy! Here are some highlights for me:


Yes, there are vendors…

There might be a reason as to why the show needs to have see seven halls, everyone wand I mean everyone is at photokina. While vendors like Canon, Nikon, Olympus etc. have almost an entire floor to themselves, smaller ones still have good sized booths and as you can guess, there are a lot of the small ones here! One of the main reasons to visit the show is to chat with vendors and get up to date on all the new gear that ends up being released in connection to Photokina, maybe even more so getting to chat with all the smaller vendors and finding new companies that you haven't heard about before that might stock your next favorite gadget.


Seeing the news!

Inevitably there are a bunch of new cameras being released before Photokina and this year was no exception. For me, the Nikon D7000 is a true highlight and a camera that is high up on my wishlist now that I got around to playing with it! It just kills, even the D300s is pretty much beaten by the D7000. Sure there were a lot more of the news from the show but you can find that on sites that are all about covering them (like 1001 Noisy Cameras) instead of me even trying to list it all here in a wrap-up.


Animoto

I caught up with the good guys over at Animoto and got a good demo of their software which makes it very easy to design a slick video slideshow to music. The photo slideshow that you can see above is all made by the animoto slideshow interface. Check them out!


Seminars

Even though photokina really is about the vendors that are exhibiting, there are a bunch of different seminars going on in the different booths. Big names such as Joe McNally and Vincent Versace were there and a special shoutout to Rufus Deuchler who did a great job presenting the CS5 news specific to what photographers can do with them, especially within InDesign. What can you say, the crowd loved what you can do in CS5.

Getting Started with DSLR Video for Photographers – Part Three

httpv://www.youtube.com/watch?v=WxaN2bWwxKU


Adobe's Worldwide Evangelist for Video and Audio, Jason Levine is back once again to give us his second installment on Getting Started With DSLR Video for Photographers.

Download a FREE fully functional 30 day Trial of Adobe Premiere Pro CS5 and work right along side Jason.

Continue reading “Getting Started with DSLR Video for Photographers – Part Three”

iPhone’s One Button HDR: Another wakeup call to camera manufacturers

Yep, I'm back on my "point and shoot cameras are dying" rant again. You might remember this post where I talked about camera phones being the "new point and shoot cameras" and I gave my reasons as to why I felt this way then. As I stated in the earlier post, when it's important I shoot it with my DSLR. However, when it's just about capturing the moment and for fun I'm going to pull out my smartphone and take the shot. Before you argue with me, let me state the obvious: yes point and shoot cameras offer better optics and higher megapixels. They also offer a wider range of features for controlling the shot as well as the higher end models even offering RAW capabilities. Yep, I get it! They are technically better "cameras". No question. However, whenever there's an exciting moment unfolding at a public event I see 10 times more camera phones go up in the air than I do dedicated point and shoot cameras. The reasons for this are numerous. The most common ones are: people don't want to carry multiple devices and probably the biggest reason is that the camera phone shot is "good enough" for the average person. Beyond those reasons I think a bigger reason is that the camera phone and especially the smartphone offer instant sharing of those pics AND in device image editing!


iOS 4.1 Brings One Button HDR (high dynamic range) shooting to the iPhone 4

When I saw this feature come out in the latest update to the iPhone's operating system (iOS 4.1), I had an immediate "Duh" moment! Apple once again took something that is so obvious and added a "one button" interface to it. Professional Photographers have been shooting HDR images for years now. It has actually become a "creative" effect in photography. However, pros have to do this in a multiple step fashion that involves setting their camera up a certain way (bracketed exposures) and combining the multiple shots in post using software like Photoshop CS5 (Merge to HDR Pro). in its simplest form HDR is ability to combine multiple exposures into one high dynamic range image that achieves the best exposure for highlights, shadows and midtones. This is where the amateur photographer often fails. The shots that come from these low end cameras and camera phones often over expose one area or under expose another. Since there aren't very many if any manual controls on these devices you're usually stuck with what the device thinks you should have. So Apple took HDR and brought it to the masses in a seamless way. Just turn it on before you take the shot! With an iPhone 4 running iOS 4.1 you have the option to turn on HDR. Once it's on you aim at your subject and press the onscreen shutter button. The iPhone 4 then captures 3 images in rapid succession instantly with no lag, one under exposed, one over exposed and one in the middle and combines them together AUTOMATICALLY as an HDR shot. There is no user interaction required. Of course pros will want control. They'll want to tweak things an get the image just right and I applaud you for that. However, this feature isn't aimed at pros! This is aimed at everyone else so that right out the camera they can get better exposures.


For example…

The iOS 4.1 update gives you the option of keeping both shots. So here's the original shot BEFORE HDR.


Here's the HDR version (again, all automatic and with no adjustments on my part)

Is it perfect? No! I'd still like to see a little more light in the shadows of the barn. Is it better than what we were getting from these low end cameras? ABSOLUTELY!


Get HDR on the iPhone 3GS too

If your iPhone model doesn't support the iOS 4.1 HDR feature, you can still have HDR because there's an App for that. Before iPhone 4 and iOS 4.1 supported this feature natively, I was using the Pro  HDR App to do the same thing. Of course it takes more steps, but it get's the job done. You can get Pro HDR for the iPhone 3GS and iPhone 4 for $1.99 here from the Pro


Camera Manufacturers: Step Your Game Up!

There is absolutely NO REASON that this kind of feature shouldn't be on every point and shoot camera sold today. Yes, I applaud Canon for adding an HDR mode to the NEW G12 – way to go!

The lack of it (one button HDR), built-in wifi, built-in GPS/geotagging, etc. on the vast majority of P&S cameras continues to further my argument that point and shoot cameras are dead! Hell I'd like to see some of these features make it on to DSLRs too. Now I know I'm dreaming….