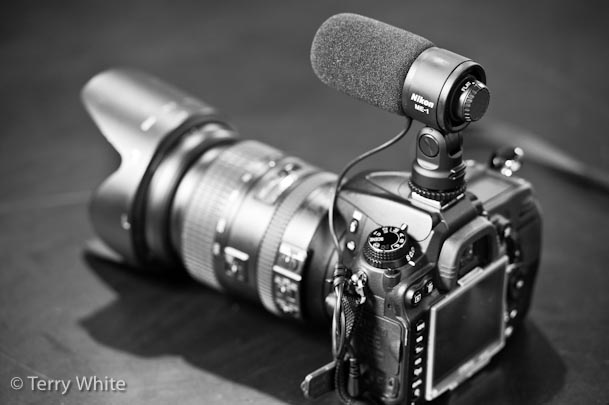
Nikon ME-1 Mic for DSLR Video


I love my Nikon D7000 DSLR camera. I hate the built-in mic. While the camera takes both great stills and high def 1080p video, the built-in microphone…well um…yeah…sucks! It's barely adequate for an interview and the 11Hz mono audio is pretty much useless for anything else. While I've been happy with my Rode VideoMic and VideoMic Pro, I was intrigued by Nikon's announcement of the NEW ME-1 Mic because of its small size. The ME-1 is about half the size of my VideoMic Pro and that makes it much better for travel. Keep in mind that my D7000 is my travel DSLR. I use it more on the road than I do at home. That means that if I'm I recording a video I'm most likely recording it on the road too. On my last international tour I had no room for the VideoMic and of course as luck would have it I had to do an impromptu video recording in Australia. The video looked great, the audio was…"meh." The whole time I was kicking myself for not bringing the VideoMic Pro. The ME-1 had shipped, but hadn't arrived before I left home to go my trip. 

Note: When you plug in an mic to the Nikon D7000 you get Stereo/Mono audio at 48kHz/16bit. 


ME-1 Pros and Cons

Continue reading “Nikon ME-1 Mic for DSLR Video”

Lessons Learned on The Flash Bus Tour

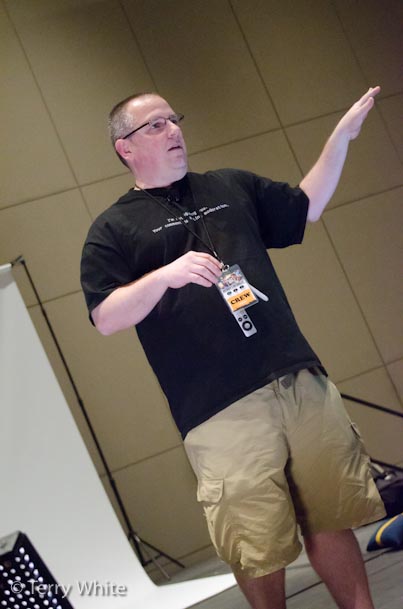
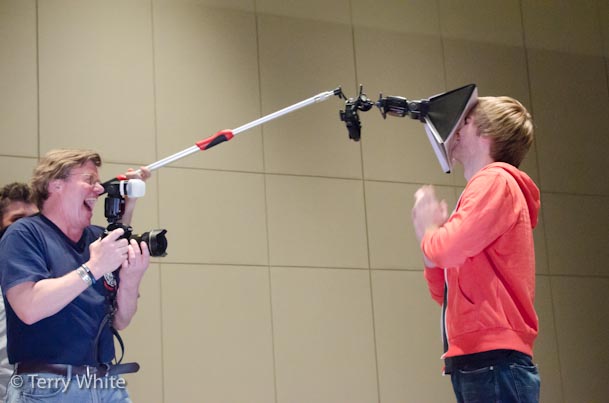
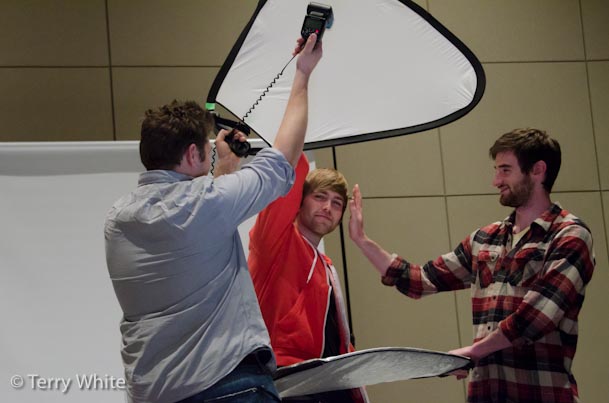
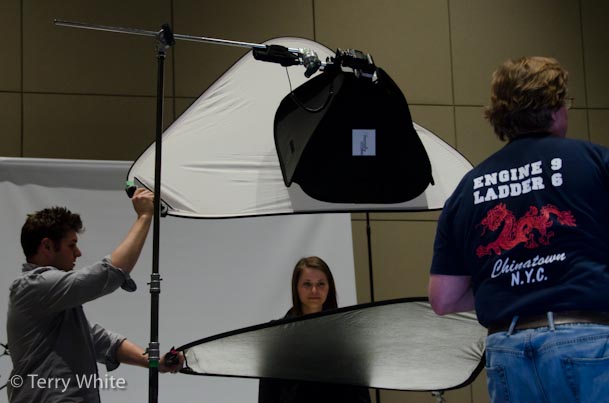
I had the great pleasure of attending the Flash Bus Tour put on by none other than Joe McNally and David Hobby aka The Strobist. I couldn't pass up an opportunity to learn from these "flash" experts! The day was packed with different lighting setups and live examples.


David Hobby almost never wears long pants 🙂


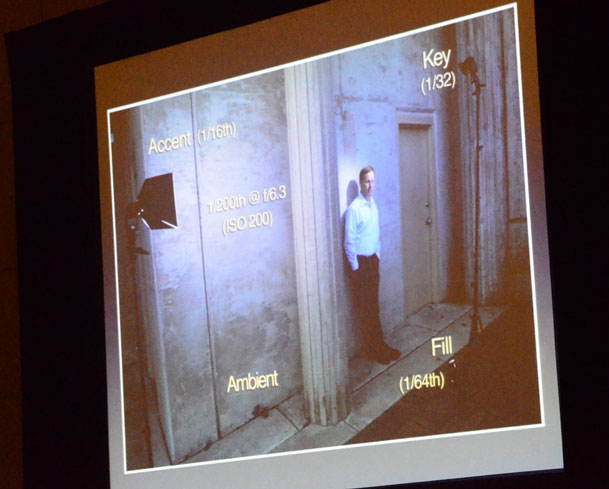
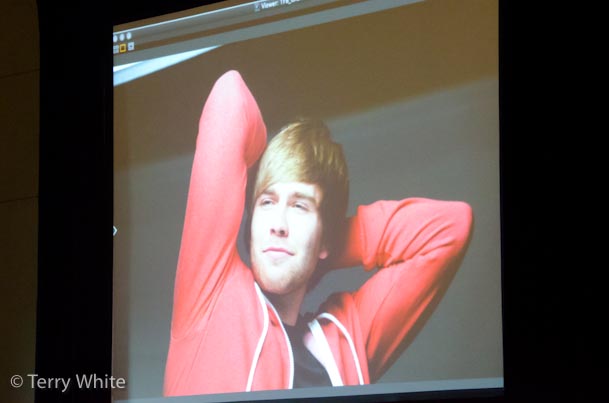
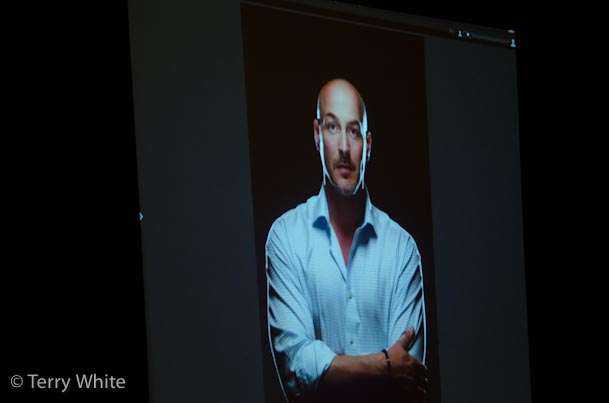
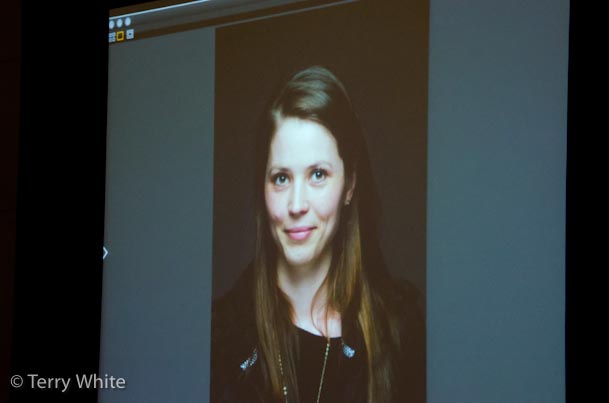
David Hobby took the morning and started off by deconstructing a couple of his recent shots.


Joe McNally aka Numnuts

Joe McNally took the afternoon and showed how much POWER there is in shooting with speed lights. Drew, I think it's a little close 😉

So that's how they do that Justin Bieber look!


Amazing what you can do with 3 Nikon Speedlights and shooting in TTL.


Audience participation


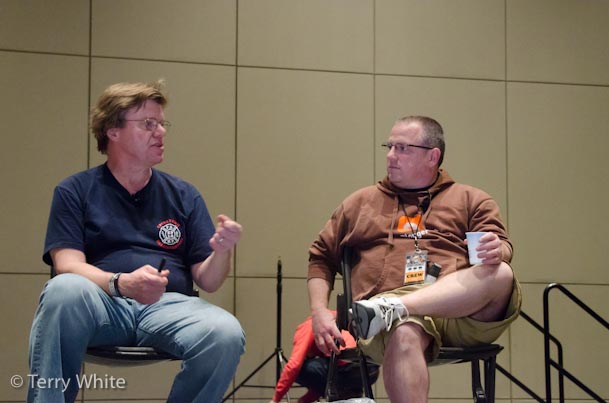
Great Q&A at the end.


My take-aways


While I own 3 speedlights, I always looked at them as the lights I would use when I travel and don't have the ability to take my "big lights". However, after watching Joe and David I'm really starting to think about using my speedlights more often. As a matter of fact in a recent shoot I did, I decided to use a Nikon SB 900 to augment my natural light setup. I'm having a blast with the possibilities and want to thank Joe and David for not only putting on a great show, but also for bringing the tour to Michigan!

Stuff we mentioned Live on The Grid yesterday

photo by Brad Moore

First off I want to thank everyone that participated online in yesterday's The Grid LIVE show! The response was amazing! We mentioned quite a few products yesterday and I've gotten questions from people as to what they where so here's my list:


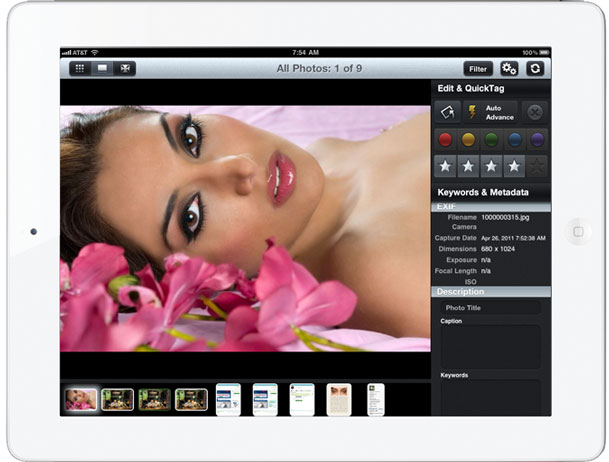
FlilterStorm Pro

The App that Scott showed that gives you Photoshop Like editing capabilities on your iPad

Get it here from the iTunes


The Eye-Fi Pro X2 Card (the one that handles RAW)

Get it here for $92.99 (was $149)

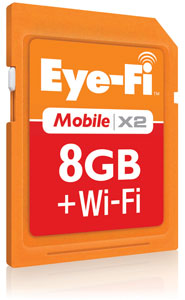
The Eye-Fi Mobile X2 Card (the cheaper one that doesn't do RAW)

Get it here for $79.99


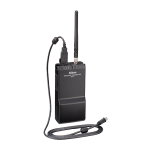
The Nikon 4T-4A Wireless Transmitter

The one that looked like a walkie-talkie (or C4 detonator) that has the 500 foot range and was used during the Olympics.

Get it here for $699


The Cameras I Used

Nikon D7000 (the body with TWO SD Card Slots)

Nikon D700 (Full frame DSLR with CF Card Slot)


Shuttersnitch

The App that Terry was using on the iPad to import images wirelessly as he was shooting with either the Eye-Fi card or the Nikon WT-4a

See my review here

Get it from the iTunes


The FREE Eye-Fi App for both iOS and Android

Although I prefer Shuttersnitch, the Eye-Fi App is FREE and does import your shots

See my review here

Get it from the iTunes

Get it here for Android


The NEW Photosmith App (Lightroom features on the iPad)

This is the App that Scott mentioned that will let you rate, sort, manage Collections, add metadata to images on your iPad and then SYNC via WiFi back to your Lightroom Catalog on your computer!

Just came out Today! Get it here from the iTunes


Catch the replay

If you missed yesterday's LIVE broadcast you'll be able to catch the replay that should be posted later today on the site as well as on iTunes as a downloadable podcast to watch offline here:

The Grid

Eye-Fi Enables Direct Mode and Releases Mobile Apps


I’m liking Eye-Fi on a whole new level these days. This company and their products  have come a long way since I tested/reviewed the first card back in 2007. They’ve delivered on their promise to enable Direct Mode transfers from their X2 cards and they’ve released Mobile Apps for both iOS and Android platforms. This is great news for photographers as it gives you a way to shoot wirelessly from your camera to your tablet device or even your smartphone. Although I was quite content with the testing I had done thus far with the Pro X2 card going through my MiFi mobile hotspot, I’m even happier that I wont need it (the MiFi) anymore to shoot to my iPad 2.

Upgrade your Firmware

The first thing you’ll need to do is download the new Eye-Fi Center Application from their site and upgrade the Firmware of your Eye-Fi X2 card. I and others had problems doing the upgrade as it would immediately fail no matter what. The work around seems to be delete your existing Eye-Fi account (back up your photos first of course) and then create a new account and you should then be able to successfully upgrade your card.


Enable Direct Mode on your Card

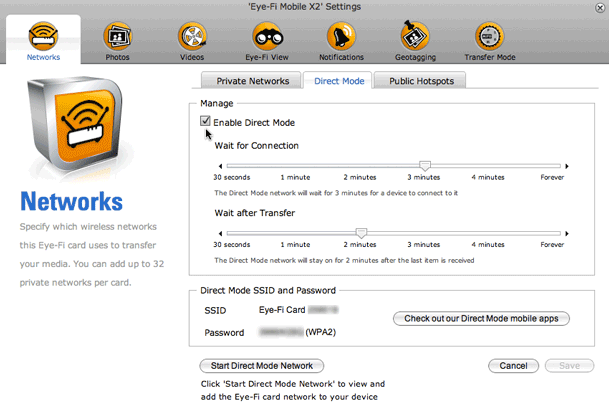
Once your firmware is up to date you should then be able to Enable Direct Mode on your X2 card. You will see the SSID (network name) of the card as well as the password for the card’s network. To save time you can turn on Direct Mode while the card is in your computer and then connect your devices to its network. This is what I did with my iPad 2 to enable me to easily see the password while I was keying it in on the iPad.


Download their App

If you have an iOS or Android device you can download their FREE App for your device and log into your Eye-Fi Account. Once you log in you can then enable your card to transfer to the App directly.


A Tip

By default your images will just import and show in the grid. I want to see my images full screen and have them auto advance as i shoot. This is not really called out in the preferences. However if you go to Application Preferences and turn on “Full Screen”, your images will not only go to full screen as they come in, but they will also auto advance! YAY!


See more about the Eye-Fi App

I did a more complete review of the Eye-Fi App here.


How fast is it?

In my testing I used my Nikon D7000 (a 16.2 MP Camera) and I used the first card slot to shoot RAW to my regular 16GB SD card and I put the Eye-Fi Mobile X2 card in the second slot. I set the camera to shoot BASIC JPG to the second slot. This means that it’s transferring a 16.2 MP Basic JPG image to the iPad.

See the speed for yourself here:


The Bottom Line

Before you can say it, yes I wish there was a Compact Flash option (adapters aren’t supported with the X2 cards). However, if you’ve got a camera that shoots to an SD card, this solution totally rocks! If you got a camera with two card slots, then it gets even better as you’ll be able to shoot RAW to one card and your smallest JPG to the Eye-Fi card. I’m loving my D7000 even more now!

You can get the NEW 8GB Eye-Fi Mobile X2 Card here for $79

You can get the 8GB Pro X2 Card (which handles RAW) NEW LOWER PRICE here for $99

You can get the Nikon D7000 here 🙂

You can get the FREE Eye-Fi iOS App here: Eye-Fi - Eye-Fi

You can get the FREE Eye-Fi Android App here

If you want MORE OPTIONS check out the Shuttersnitch App here. Yes it works with Direct Mode too!

How I Broke My D700 By Tethering

If you've been reading my posts for the past few days you've probably noticed a theme: Wireless Tethering/Shooting. Now I'll disclose the reason that increased my interest in wireless solutions for shooting to my iPad or laptop. A couple of weeks ago I taught a workflow workshop in Texas for Precision Camera and Westcott. An important part of my workflow is shooting tethered into Adobe Photoshop Lightroom 3. On the 3rd day of this 3 day workshop I just couldn't get the tethering to work. Nothing really changed on my end that I could see and it had worked flawlessly for two straight days, but for some reason I couldn't get past the 1st shot. I tried the usual troubleshooting things, but nothing would get this working again so I moved on. I shot to the card and just took breaks to import the shots via my Firewire 800 CF card reader and showed the class. I got home and didn't think about it again until my next studio shoot. This is when I knew something was really wrong. I tried different cables and nothing would work. Again I had to move on and shoot to the card to get through the session. When I got home that evening I decided to do some additional testing. I tried different cables and again nothing would work until I realized that the cable attaching to the camera seemed slightly more loose than usual. Nothing crazy, but noticeable. I applied a little more finger pressure to the cable end pressing leaning it one way and Lightroom saw the camera. I tried holding it this way as best I could, but the slightest movement would cause a disconnect again. 


It was time for a repair

On my way out the door to Photoshop World I stopped by my local authorized Nikon Repair Facility – Midwest Camera Repair (these guys are great) and dropped off the D700. They said that it was probably an issue with the port being broken off from the circuit board or the board itself had gone bad. If it was just the port then the repair would be around $125. If it was a bad board – oh oh – "we'll call you." Needless to say I was praying for a "disconnected port." Luckily that's all it was and I was happy to pay for this versus a whole new board. 


I don't want this to happen again

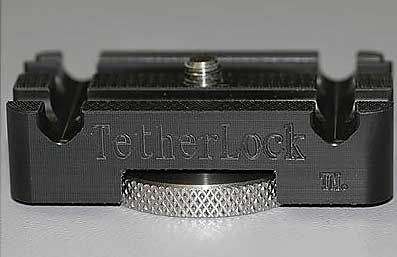
I shoot tethered 99.9% of the time in studio. I can't imagine going back to just looking at a 3 inch LCD. My colleague Tom Hogarty (Lightroom Product Manager) pointed me a device called TetherLock.

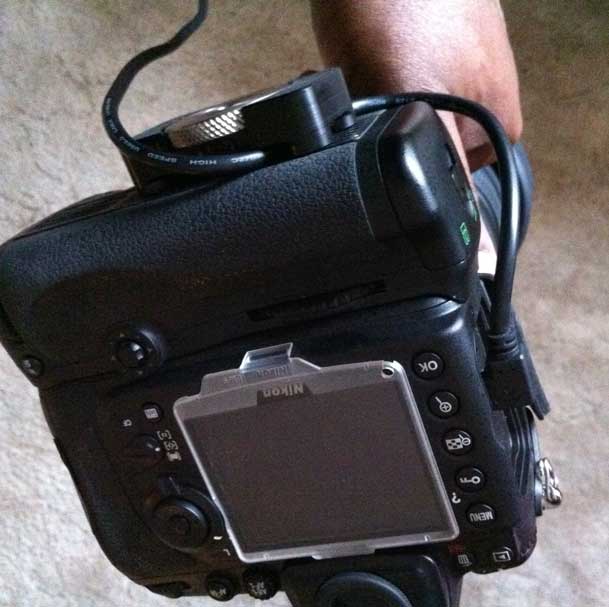
The concept is simple. You attach this device to your tripod hole/port (there is a pass-through so that you can still use a tripod) and run your cable through it. When you tighten it it not only keeps the cable in place, but if you accidentally step on or otherwise tug the cable while shooting there will be zero pressure/tension applied to the USB port on the camera. Like I said, the concept is simple. I ordered one here and it works fine. It's crazy expensive for what it is and YES there are several do-it-yourself options (I don't need you to list them for me, I get it 🙂 ), but as I've said before I'm not a D.I.Y. kinda guy. Clearly I'm not the only one with big feet tripping over tethering cables while shooting or this product wouldn't exist. 

The other thing I would recommend whether you go with TetherLock or your own solution, is a USB cable that has a L-Left head on it. This allows the cable to run down flush along the body as opposed to sticking straight out. Here's the one I use.


The Bottom Line

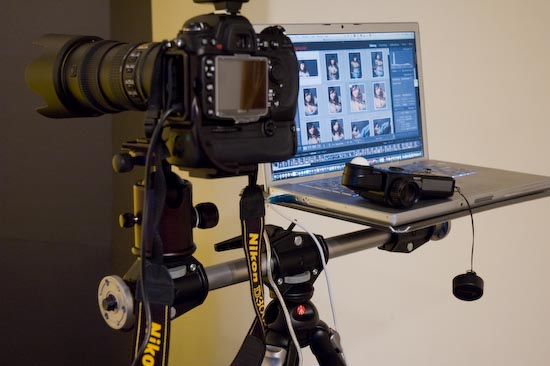
Above setup Bogen-Manfrotto Double Head Accessory Arm and Gitzo Laptop tray that sits right on my tripod.

Built-in WiFi on all cameras can't get here fast enough for me. Until that day happens I'll continue to shoot tethered via a USB cable for my studio shoots. Not ripping the cable out during future shoots is going to be nice and better yet not damaging the camera/USB port is even going to be better.

3 Things I Want In My Next Nikon Body

images compliments of iStockphoto.com

I'm actually pretty content with both my Nikon DSLR bodies. I use my D700 primarily for studio work and my D7000 for travel and event photography. I've had the D700 for a while now and of course the rumors have been circulating for a while regarding a D700 replacement. Even if there were no rumors we all know that there would be a D700 replacement (let's call it a D800) getting announced eventually. In thinking about what I would want in my D800 there are really only three things that come to mind. Sure, I'll take better sensors with less noise at higher ISOs and even a slight bump in megapixels is OK. However, neither of those things would make me want to buy it. I'm not unhappy with the 12 megapixels I have now and the ISO:Noise ratio of the D700 is fine for what I shoot. Nope, those features alone would not get me to upgrade. 


I Want 3 Things


1080p HD Video

This one is almost a given. I can't imagine that Nikon or any other manufacturer would not include DSLR HD video in their bodies from here on out. Although my D7000 has the video features I wanted including external mic support, I would like to see those same exact features in my D800 too. If they have to improve upon them, then give us a 60fps video capture option too. This is not rocket science and like I said, it's all but a given that the D800 would have this.


Built-in WiFi

I continue to be amazed that WiFi is not being built into every camera being sold today, especially the higher end models. After spending a few days shooting wirelessly to my iPad 2 via the Eye-Fi Pro X2 Card, I want this even more. It's crazy to have to continue to transfer images via cables and card readers as the only options. 802.11n chips are small and cheap. If an iPod touch can have WiFi, why not a $2,500+ camera body?


GPS Geotagging

I love the fact that Nikon DSLRs have built-in GPS support right in the camera's menu.

However, the actual GPS receivers continue to be an external option only. I have several different models, but it's time to have this functionality built-in. Again these chips are small and relatively inexpensive. After all you can get an entire portable GPS unit for your turn-by-turn directions for $99 or less. Those devices have touch screens, speakers, storage, etc. The actual receiver can't cost that much by comparison. Also size can't be much of an issue since most modern smartphones being sold today have them built-in. As big as a D700 (D800) is there has to be room in the case. 


I'll gladly take any additional features that Nikon wants to throw my way, but the three things above are the ones that would make it a no brainer for me to upgrade.


Plan B

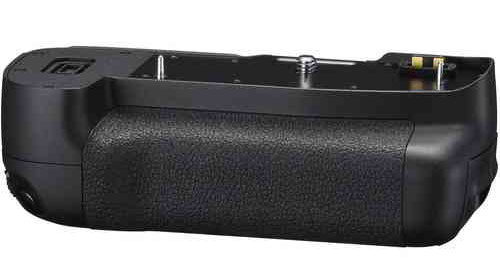
I've even got a way that they can make these last two features available optionally for those 5 people on the planet that wouldn't want them built-in to the bodies themselves. There is easy way to give us WiFi and Geotagging in a more convenient way. They could build them into the Battery Grips. A WiFi transmitter in the Battery Grip is not a new idea. Both Nikon and Canon have done this before. The problem is the early ones were both SLOW and EXPENSIVE! It's time to go back to the drawing board and make these grips more functional, less costly and bring them into the 21st century. 


iTunes, App Store and Mac App Store

With the tragedy that has happened in Japan, we can all certainly wait! There are more important things to focus on right now.

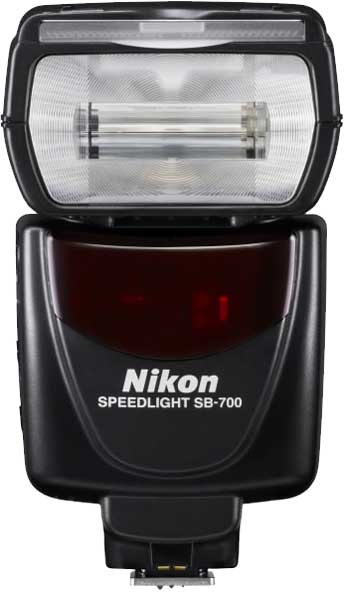
Nikon SB-700: Guest Review by Jason Lykins


I love the Nikon CLS flash system. For me, it is THE reason to choose Nikon over any other brand. Their R&D, fit and finish, and performance are second to none in the small flash arena. For a few years the SB-800 was the go to flash for me, offering the control, and power needed for a working professional. Recently Nikon updated it’s flash line; first with the flagship SB-900 replacing the SB-800, and more recently the SB-700 replacing the SB-600. I am currently using SB-900’s as my go to main flash units, but when my last SB-800 died I decided to take a look at the new SB-700 as an alternative. After reading David Hobby’s (aka the Strobist) initial review of the flash I decided to give it a go. After a couple of weeks with it, I’m not only impressed, but sold on this unit. I’ll be buying more.
 

What it had to have

There were a few things that this flash had to have to make it useful for me. The first and most important thing that I need is power. I often double, and triple diffusing my flashes to increase the quality of light. This requires a lot power to shoot through all of these layers of diffusion and still have enough “oomph” to light the subject. The SB-700 has power to spare. After shooting it side by side with a SB-800 I’m pretty sure that the power output is on par with that unit. Of course I didn’t do a scientific comparison to measure this, but just the light output, the coverage, and the recycle times make me think that this flash is right there with the 800. Nikon claims not, but I have to think that the low power rating by Nikon is to drive pros to the SB-900 over the 700. Suffice to say that this flash meets my power and output needs without a problem.


The next thing on my list of must have’s is control. I need to be able to control wireless flash systems just as I would with the SB-800 if I’m going to be using these flashes as replacements. The SB-700 gets part of the way there. Let me explain. Nikon did a great job by putting a lot of the controls on the outside of the flash similar to the SB-900. They placed a rotating switch similar to the 900 for TTL, remote, and Master selection for the wireless CLS system. While we’re on this subject, the 700 can act as a Master flash for the CLS system, but only offers two groups. For me this isn’t a big deal because I use them with the Pocket Wizard Flex units, which allow me to add that control externally anyway. The 700 also adds a physical switch to the back of the unit to select your mode. With the option of TTL, Manual, and guide number, it has every option that I would want. Another Physical switch added to the back of the flash is the light output type (standard, even, and center weighted). The FEC (flash exposure compensation) for your main unit, and the remote units when in master mode is controlled just like the SB-900 with a quick button push and a spin of the wheel. If you’re already accustomed to the SB-900 controls, you will feel right at home.

The reason that I said Nikon only get’s part of the way there on the control has to do with the way it handles it’s wireless flash units. With the 700 in master mode, the remote flash units are set to the same flash exposure mode as the 700. This means that if you are using TTL for the main on camera flash, you can’t set the remote units to anything else. For most this probably won’t cause a problem. For me I want to make my remote flashes different exposure control than my master sometimes. Sometimes my subject is being lit with TTL, but in the background I want to add a small amount of kicker light with a gel. The SB-900 allows for this independent control of the wireless flashes, but for whatever reason they excluded it from the SB-700. To work around this, I use the SU-4 mode to trigger the background lights instead. Speaking of SU-4 mode, it works remarkably well on the 700. Nikon flush mounted the light sensor for triggering making this thing super sensitive. When I say sensitive, I mean SENSITIVE. It picks up any little glint of flash and triggers it.
Continue reading “Nikon SB-700: Guest Review by Jason Lykins”

Guest Blog featuring Scott Diussa: Basic Audio for DSLR Video Shooters

Hi Everyone! My name is Scott Diussa and I’m the Field Operations Manager for Nikon Professional Services. I want to thank Terry for the opportunity to share with you something that I have been talking to photographers about more and more in the past year or two. If you have been a DSLR still image shooter for a long time and you are making your way into the world of creating multimedia projects with your DSLR that shoots HD video then you have been experiencing quite a learning curve. Now, I’m not say that learning curve has been solely based around how to actually shoot the video footage with a camera that wasn’t originally designed for this purpose, I’m talking about the fact that now you have to be an audio expert just as much as a video expert! It’s sort of like when digital photography first came out, people could shoot the images but had no idea that they now had to be their own photo lab! But, things change and the more you learn the better you get so I’m going to talk to you today about some of the basics of audio and how they relate to DSLR video that I think will help you from here on out with any of your multimedia projects.

First of all, before I went to school for photography I went to school for audio engineering. There I learned a lot, actually too much to retain. But, even thought that was in the late days of analog audio the principles of things such as microphones and levels and editing still remain the same today. This isn’t any different than a photographer coming from film to digital photography. Camera bodies, apertures, shutter speeds and lenses still do the same thing as they did when film was king. So, as you can see there are ways of relating some theories about audio to photography and that’s what I plan to do here to make understanding the relationship between the two easier. So, let’s get started…
 

Microphones (Lenses)

There are just as many microphone choice and price ranges as there are lenses in photography or even more so… It can be a pretty overwhelming task to choose the right one. But, as any good photographer knows, you can’t just have one lens that does it all. Sure you can have one that does a lot but there isn’t one single lens that does it all. This is exactly the same for microphones as well. Also, when it comes to lenses… you get what you pay for. It’s the same with microphones. Of course, there’s always the thought of… get what you need to get the job done… within reason.

There are two main types of microphones available that you will need to understand some basic about, dynamic and condenser.

Dynamic mics are more durable, less sensitive and don’t require any extra power to work. They deliver what known as a “mic level” signal which requires a device such as a mixer at the other end to amplify the sound to “line level” which is what a DSLR camera mic input needs. So, most mics that hook up to a DSLR camera are not dynamic mics.

Condenser mics are a bit more fragile (but not too bad in some cases) and require either a battery or what called “phantom power”. “Phantom power” is delivered to the microphone by a mixer and DSLR cameras don’t work this way. So, mics that you will get that work well for a DSLR camera will require a battery. These mics deliver “line level” output that the camera likes in order to deliver good quality sound. There are other variables in play here, too, but let’s keep it somewhat simple today.

Now that we know we are most likely going to be using mics that require their own power source which type of mic will we need? Just like lenses, it all depends on the shooting situation. If you are going want a “wide angle” type of sound then you would want a stereo mic. If you want a more “telephoto” sound then you would want a shotgun mic. Those are the two main types of mics that you will use on a normal basis. So, if your multimedia piece needs to portray a sound moving from left to right then a stereo mic would allow the sound to go from left to right. If you are needing to capture the sound of a single voice then a shotgun mic will do a better job of picking up that voice and ignoring the competing sound off to the sides of the subject.

Another type of mic that is commonly used in any sort of video interview situation is a “lav” mic. You’ve seen these on every news person on TV. It’s the small mic clipped to the lapel of a shirt that is somewhat un-noticeable. You can have either wired or wireless versions of these microphones. Wireless versions can be expensive but there is a new one coming out by Samson that looks very interesting…

Continue reading “Guest Blog featuring Scott Diussa: Basic Audio for DSLR Video Shooters”

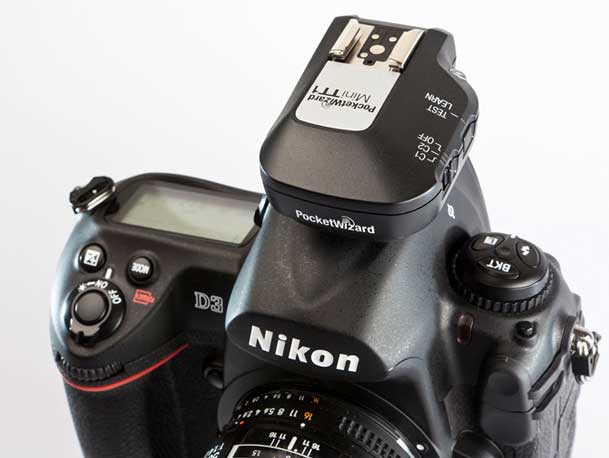
Guest Blog with Jason Lykins Reviewing The PocketWizard Flex units for Nikon

I want to thank Terry for offering up his tech blog to me today. I can’t say enough about Terry, his tutorials, videos, and all around great advice. He’s helped me immensely over the years. Terry asked me to talk to you guys today about my experience with the PocketWizard Flex units for the Nikon CLS system, as I’ve been in the Beta testing program since June. I was first approached by Phil Bradon about a year ago. Phil is the Product Marketing manager of the MAC group which is the distributor for Pocket Wizards in the US. He told me that he had added me on the (short) beta list of photographers to test out the new Flex Units for PocketWizard along with the Likes of David Hobby, Joe McNally, and the guys from the Fstoppers, just to name a few. A bit intimidating list… you had better believe it! Being a Nikon Shooter I couldn’t wait to get my hands on a set of the Flex units. I lusted after them since they were released for the Canon system. I LOVE the Nikon CLS (Creative Lighting System) Flash System. It is the main reason that I chose to go with Nikon over the years. The only thing that I (along with every other Nikon shooter that I know) has really, really hoped to see added was the addition of radio communication for the system instead of IR. With no option from Nikon, Pocket Wizard has answered our prayers with the Flex TT1 transmitter and the Flex TT5 Receiver.
 

Do they live up to the hype?

Long story Short, these things ROCK! Every Nikon shooter that I have talked to wants to know if they work as claimed. Do you really get rock solid construction just like every other PocketWizard Product? Yup. Do you really get 800 feet of TTL control? Yup. Everything that PW claims about these units is true. Anyone that has ever had any experience with PocketWizards in the past knows that when they do something, they do it right. The Flex units are no exception. The build is a solid high impact plastic. Securing them to the hot shoe is done via threaded locking screw on top of the hot shoe connectors. Staying true to form they have ¼ 20 metal threaded input for secure mounting to external sources.
During my time with the Beta Units I pushed them to the limits. I arranged models, at distances of up to and beyond the claimed 800 feet. I placed flashes behind walls, under benches, behind windows, hundreds of feet outside of windows on stands, and more… Each and every time the flashes fired without issue. Pocket Wizard did a stellar job of design and alpha testing. They have really allowed me to be more creative with my small flash lighting, and placement.

When I was looking to add TTL radio capability to my Nikon Flashes I looked at one other brand of transmitters besides the Pocket Wizards, the Radio Poppers. Without talking too bad about the other system, the advantages that I saw in the Pocket Wizards were this: The Pocket Wizards were backwards compatible with the older Plus II units that I was already heavily invested in for triggering my studio strobes. The Flex units had a solid connection with the camera and flash units unlike the Radio Poppers which required some creative field engineering to attach. There were a few other small things that came down to personal taste but it’s safe to say that I prefer the Flex Units over the Radio Poppers.


What I wasn’t expecting

The Flex Units lived up to everything that I expected. They did absolutely everything that I wanted. What surprised me were the things that they did that I wasn’t expecting. PocketWizard has not only made these units backwards compatible with the Plus II’s but they have also made them compatible with the Multimax units as well. Offering 52 channels you never have to worry about being on another shooters channel. One feature that I wasn’t expecting but totally took me by surprise is called Hypersync. High Speed FP mode allows your flash and camera to sync all of the way up to 1/8000th of a second, but with Hypersync you can sync with your studio strobes at 1/500th of a second or faster! This is HUGE! This is the difference between background in focus, and background out of focus while shooting with studio strobes in certain situations. This has to be my favorite feature added to these units. Something else I was hopeful that the system would do, but I wasn’t sure was sync regular Plus II’s with Studio strobes, and Flex units with Speed Lights running TTL seamlessly. The Shot of the girl on the motorcycle was done in this fashion with an Alien Bee for fill and a Sb900 as the main. PocketWizard has added one more thing that should make every Nikon shooter rejoice, the AC3 zone controller. Basically the AC3 is PocketWizard’s version of the SU800. On camera flash control for remote units, but for only $79.00!
 

Should you get them?

Absolutely! I have recommended that every Nikon shooter I know to get on the waiting list for these things. I ordered three more to expand my lighting possibilities myself. If you’re tired of losing CLS distance in bright sunlight, if you want to extend your flash distance and keep TTL, if you want to put flashes out of the line of sight and still be able to trigger them reliably, the PocketWizard Flex units are for you. With the backward compatibility, the introduction of the AC3 Zone controller in February, and PocketWizard’s reputation for solid performance, you can’t go wrong with these units. 

Get the PocketWizard FlexTT5 Transceiver Radio Slave for Nikon i-TTL Flash here for $219.00

Get the PocketWizard MiniTT1 Radio Slave Transmitter for Nikon i-TTL System here for $199.00


See more of Jason's photography here.

Review: blueSLR Wireless Camera Control & GPS Geotagging

A couple of my favorite gadgets just got married 🙂 I’m a Nikon shooter and an iPhone user. It’s rare that I’m ever anywhere shooting without my iPhone on my belt. So when XEquals Corp sent me a message about their new blueSLR Wireless Camera Control and GPS Encoding solution I was all ears.


Wireless Control for my Nikon DSLRs
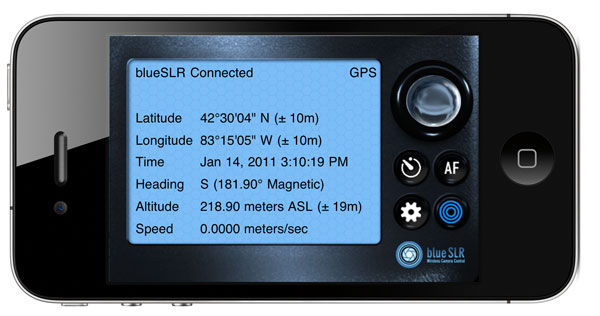
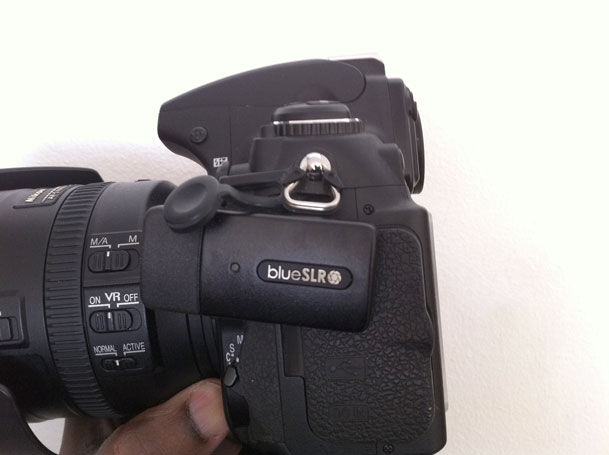
Once you plug in the blueSLR into your Nikon D3100, D5000, D90, D3(s), D200, D300(s) or D700, you can then fire up their free iPhone App. With the blueSLR App you can then remote control your shutter release, auto focus and even time lapse or bracketed exposure from up to 300 feet away via bluetooth. This is the feature that most of the initial announcements were touting and reviewers were so excited about. While I definitely think this is cool, it’s not what excites me most about this solution…


GPS Geotagging is where it’s at – Literally

Click the above shot to see where it was taken – Nikon D700, Nikon 28-300mm lens, blueSLR and iPhone 4


I’ve reviewed many Nikon compatible GPS attachements here over the years and while they have all worked well, they all have one thing in common. They attach to your camera via a cable and have to either sit in the hot shoe or on your strap. They also have to acquire a signal from the global positioning satellites in the sky. Yep that means you’ve got to be outside to grab a signal before you can go inside with the newer units and continue shooting. However, the iPhone’s “Location” feature works off not only GPS satellites but also cell towers and WiFi hotspot locations.

Click the above shot to see where it was taken – Nikon D700, Nikon 28-300mm lens, blueSLR and iPhone 4

This means that your iPhone (iPad or iPod touch) knows where you are even if you’re inside a building. The blueSLR solution can use this Location information and input the info right into (the EXIF data) your shots as you take them with your Nikon compatible camera! Woohoo! Finally! Also unlike all the other solutions out there XEquals prides themselves on their “flush with the camera” design. They’ve gone out their way to make the attachement as unobtrusive as possible. I applaud this effort!


How well does it work?
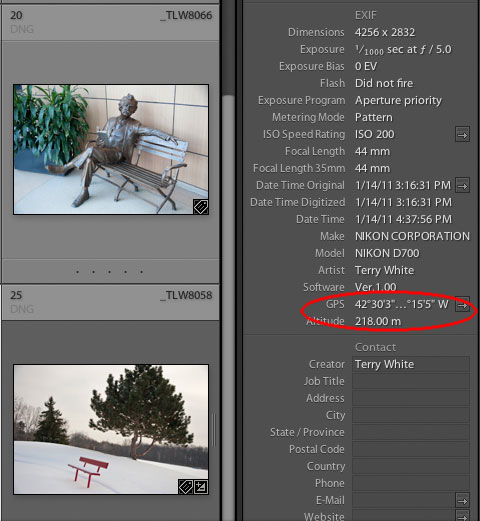
images displayed in Adobe Photoshop Lightroom 3 with clickable GPS button that takes you to Google Maps


I’m very happy with the way this gadget works. The first thing you’ll want to do is (it’s in the instruction card that comes with the device) change the default metering timeout on your camera from 6 seconds to something like 30 minutes. Otherwise you’ll be quickly frustrated by the device constantly timing out before you get to pair it with your iDevice or use it with the App. Once you make that adjustment in your camera, it looks and acts like any other GPS/Remote Shutter Release on your camera.
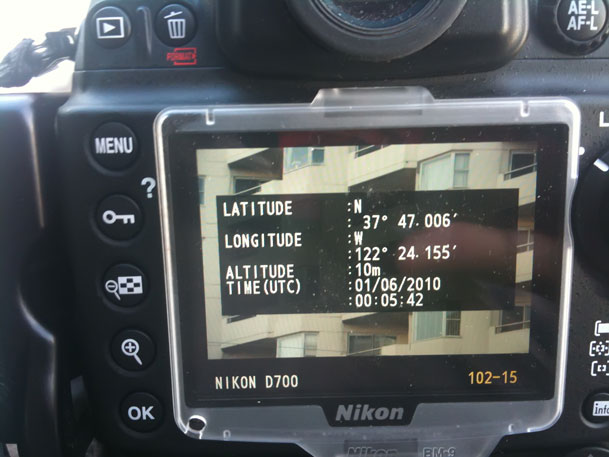
My Nikon D700 has GPS support built-in with a menu to display the status of the attached module. This is one of the reasons I use Nikon over Canon and others. With that said, it’s 2011 and I still can’t believe that ALL camera manufacturers don’t offer a built-in option! More power to XEquals!

Since I don’t have to wait for a satellite signal to be acquired I can start shooting right away! Both the remote features and the GPS features work as advertised. The iPhone app also takes avantage of the iPhone’s built-in compass for heading info. Sweet!

What about battery life? To be honest I haven’t had it/used it long enough to judge the impact on battery life over other GPS units. I know that Nikon has done a lot of work in their latest firmware to reduce the battery drain from GPS devices so I’m not really worried about it.

How’s the GPS accuracy? Keep in mind that it’s only as accurate as your iOS device. iPhones and iPad WiFi+3G devices are going to be the most accurate because they actually have GPS chips built-in. iPod touch and WiFi only iPads will have to rely on Wi-Fi triangulation which could be an issue in the boonies. In my limited testing the shots were geotagged very accurately using my iPhone 4.


How would I redesign it?

my Kirk L-Bracket has to come off to use the blueSLR

There really isn’t anything that is majorly wrong with this device. I do like it A LOT! However, with the “flush” (a blessing and a curse) design, this means that the port door on my D700 is covered while I’m using it. It also meant that I had to remove my L-bracket for my tripod head since it covers that part of the camera. Since it is a remote trigger, most likely I’d want to use it while it’s on my tripod. This would mean having to go back to the standard tripod mount instead of my L-bracket . Not the end of the world, but  I would like to see the next version offer a “swivel” feature with a lock. If I could swivel it up or out then it would be out of the way of everything that I wanted to attach. For a moment I was going to complain that it didn’t offer a 10 pin passthrough on my D700. Then I realized that the only time I’ve needed a passthrough on my other GPS units was to attach a shutter release. Duh! This is already a “wireless” remote shutter release too. However, if you have some other accessory that uses the 10 pin terminal, then you’re going to have to decide which one you want to use.


The Bottom Line

Kudos to XEquals for making a killer device/App combo! I know that there were some manufacturing issues with the Nikon D7000 model and as soon as that one is available It will undoubtedly become my default travel camera GPS unit. If you’re not waiting on the D7000 model, then I wouldn’t hesitate in getting one of these TODAY!

You can learn more about blueSLR and order directly from their site here.

Get the App for your iPhone, iPad or iPod touch for free here from the iTunes

See my blueSLR App review here.