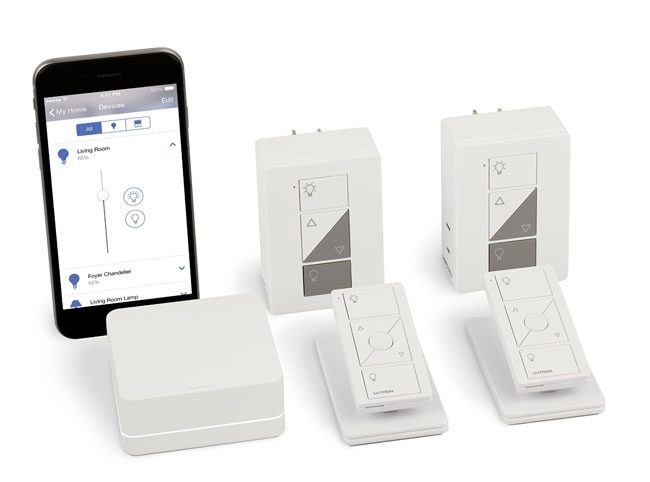
It’s Day 3 of my Smart Home product review week and now it’s time to talk about wireless lighting and shade controls. Once again I wanted something that would be Apple HomeKit compatible and my search led me to the Lutron Caséta system. This is not my first wireless lighting system. As a matter of fact I go all the way back to the Radio Shack X10 system (remember those?) Thankfully things have gotten a lot better in the last 25-30 years and now you not only get in-home wireless control but you also get the ability to control your lights and shades from (yep you guessed it) anywhere in the world from your smartphone.
I started with the Lutron Caseta Wireless Smart Lighting Plug-In Lamp Dimmer Kit
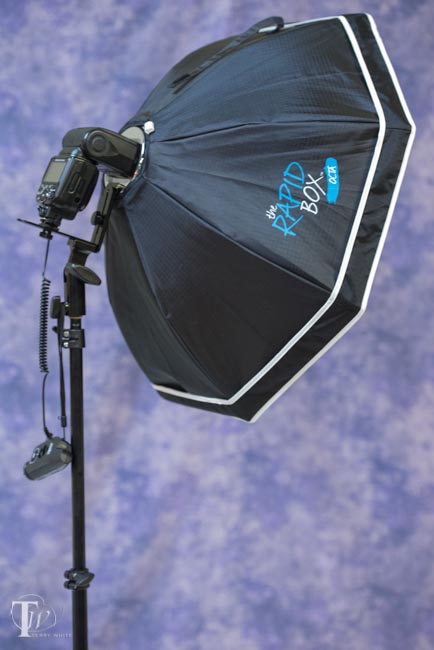
If you’ve followed my photography over the years you know that I’m always looking at new light modifiers. I can never have too many in my arsenal. Over the past few evenings I’ve been experimenting with some new ones that have made their way into my studio. Let’s take a look at them and some of the results I’ve been getting so far.
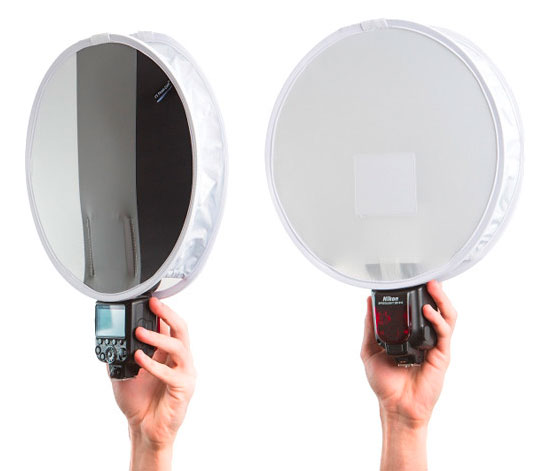
Fstoppers Flash Disc
The first one was actually what I call a “checkout line impulse buy”. In other words my cart at B&H Photo had the items I wanted and I still had some money left on my gift card. I couldn’t think of anything else I wanted in the amount that was left over so I decided to add the Fstoppers Flash Disc. It looked cool, very portable (it folds down to a size smaller than the speed light), and I figured if nothing else I could use it as my white balance card.
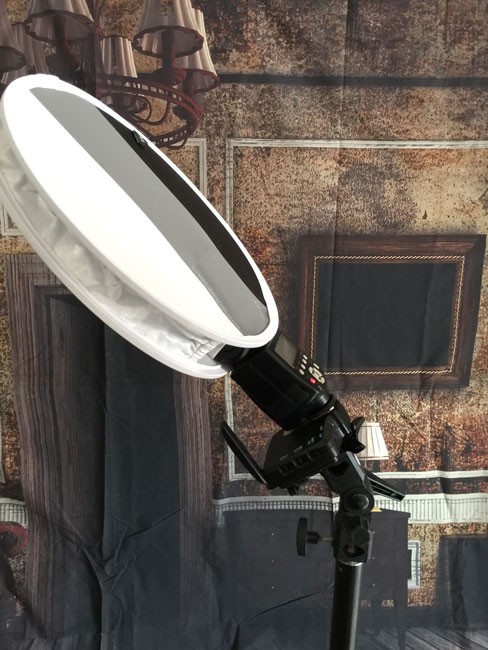
Before last night’s shoot I decided to take a few test shots so that you can get a feel for what this will do for you. Now keep in mind that the bigger the light and the closer it is to your subject, the softer it will be. Since this modifier is relatively small I was skeptical. However, it did exactly what I expected. It gave me a better light than I would have gotten without it!
First up, here is worse case scenario. No modifier at all. Just flat horribly harsh lighting from the speed light using just the little built-in flip down diffuser. (yes I could have bounced it to make it better. Yes I could have turned the power down. Yes I could have done _____., but the point here is to show what small lights typically do straight on).
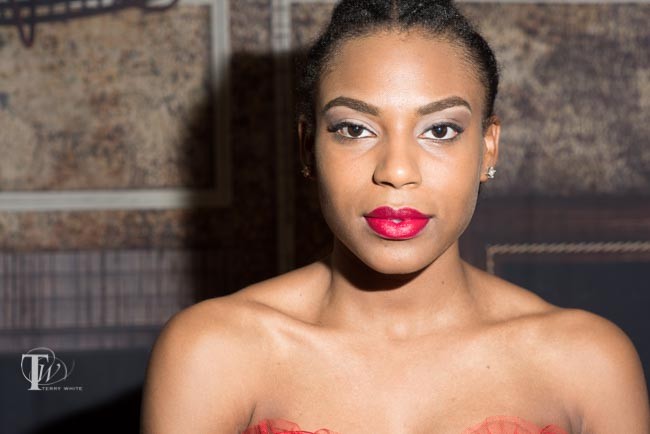
Now with the Fstoppers Flash Disc mounted directly on the speed light. The results are notably better than without it. If you look at the shoulders you see a software light pattern and her face is less blown out and not as flat. Again there are more things you can do to make the results even better, like bouncing the light and perhaps a different position/distance, but again the point here is to see simply what difference it would make by adding the Flash Disc.
Adding in the Westcott Omega
The next modifier I was going to look at was the NEW Westcott Omega 10-in-1 Reflector Kit. The material directly connected to the frame is a one stop diffusion panel. So before getting to my Omega setup I simply added the diffusor to my existing Flash Disc set up to get this result.
Same light. Same Flash Disc. However, the results are much much better simply by diffusing the light a little more. Add a reflector for under the eyes/chin and you’re golden.
Since the Omega was effectively going to take the light down 1 stop, I increased the power setting on the speed light from 1/8 to 1/4 to compensate.
The Omega 10-in-1 Reflector Kit
This reflector kit adds one element that I haven’t seen or had in any of my previous multi-use its and that is a “shoot through window”. First off you get a typical 5-in-1 kit right off the bat. You get Silver, Gold/Sunlight, White, Diffuser (built on to the frame) and Black. Now take all of those surfaces and remove the center piece for a 10-in-1 kit.
When doing a shoot through setup like this, you kinda have to think backwards as you’ll be using the reflective side facing the subject to light the subject. In the setup above I used two speed lights. The one in back (no modifier) was position up high to act more as a hair light and to add a little fill. The second speed light was mounted in a Rapid Box Strip to provide both a rim light and main light.
I like the results and the fact that this modifier made me think outside my box in ways of setting up lights that I probably wouldn’t have tried otherwise. It’s also ideal for putting up in front of a window either as a diffuser or shooting through the window from outside into the room without blocking the light.
The Westcott Omega 10-in-1 38″ x 45″ Reflector Kit is the one I’ll be traveling with from now on as it provides the basic reflecting, diffusing, flagging functions that I would need, plus the ability to shoot through.
The big difference here is that this one allows you to mount one or two speed lights to give you more light. It’s also a slightly bigger size at 32″. It still collapses down for travel and comes with all the mounting hardware/angled bracket for mounting your speed lights outside for better triggering.
Here I have an Nikon SB 910 and SB 800 mounted.
Adding in the Westscott Eyelighter, which is probably my favorite modifier of all time. I get the results on location that I would typically get with more expensive studio strobes.
As I’ve said many times. You can have the most expensive camera in the world, but without great light your pictures are liable to suck.
However, if you have great light you can get good results with just about any camera.
You can get the Fstoppers Flash Disc here. You’ll also want this “tilt mount” to be able to mount your speed light and tilt it down.
You can get the Westcott Omega 10-in-1 Reflector Kit here.
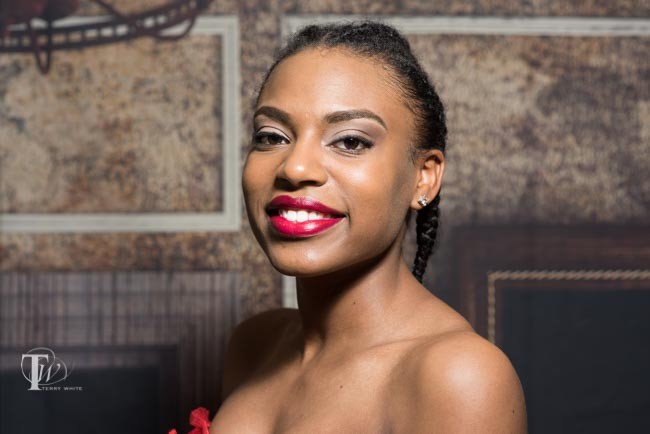
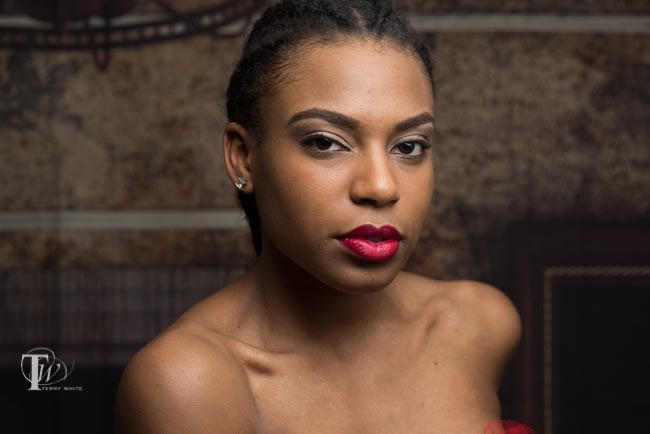
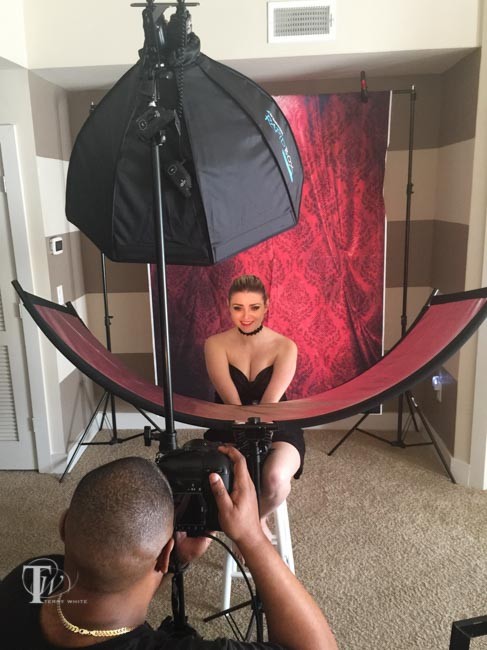
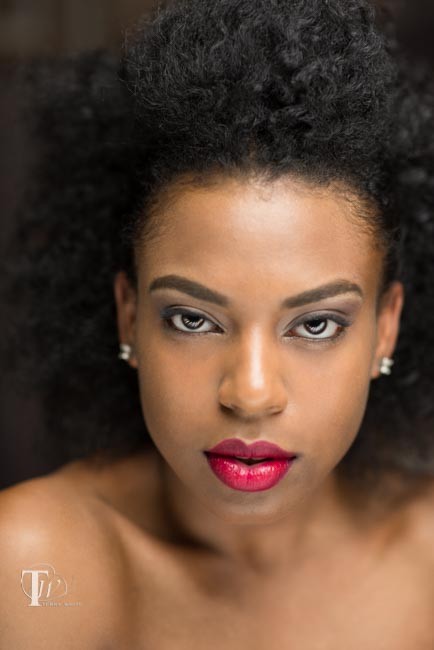
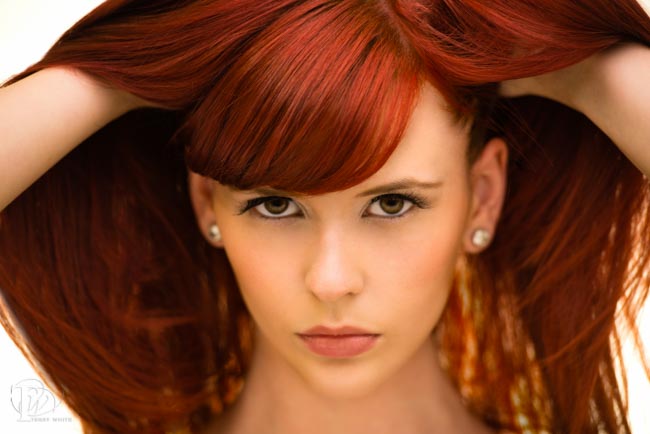
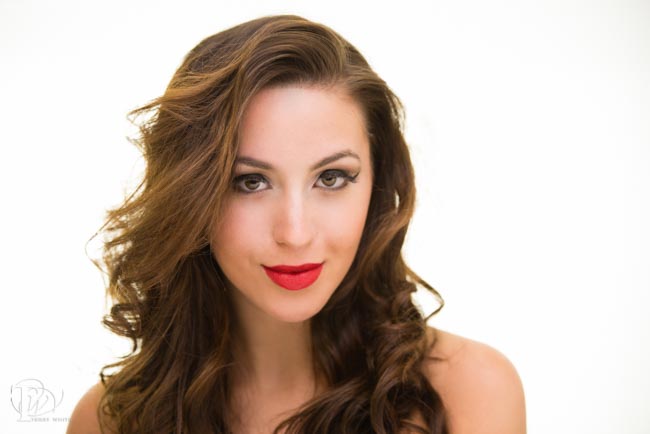
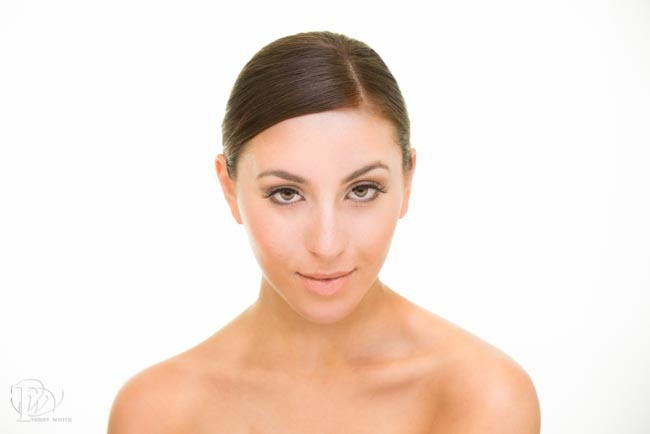
When I initially gave a first look at the NEW Westcott Eyelighter a couple of weeks ago (here), one thing I failed to do was to show a before and after comparison
So I took some time away from my vacation last week and setup a beauty shoot with a few models to really give you an idea of what the Eyelighter really does beyond providing interesting catchlights in the eyes. In the two shots above you can see the affect of the Eyelighter not only in the eyes of my subjects but also under the chin.
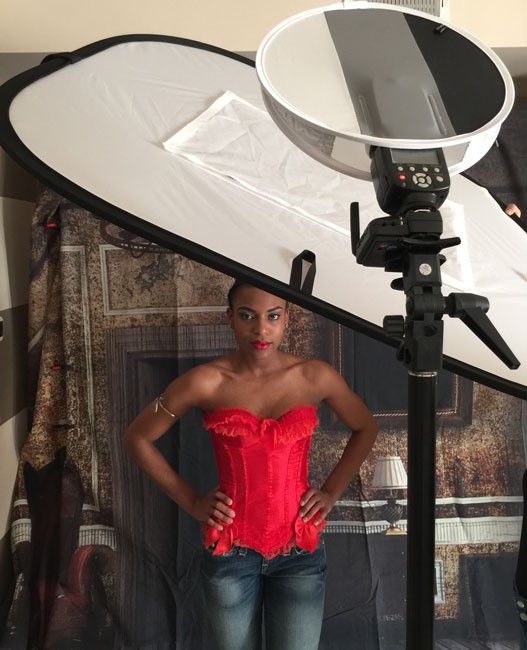
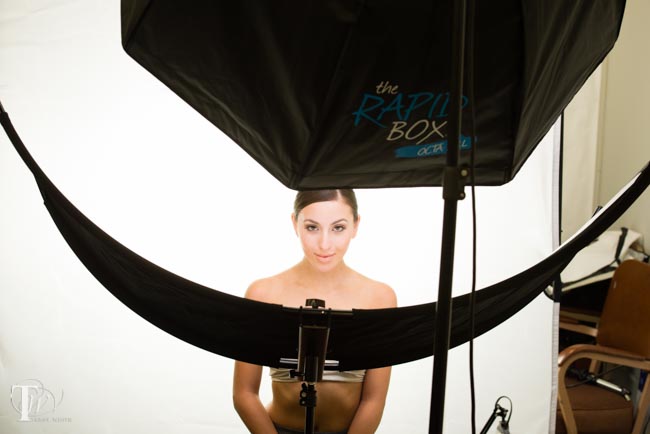
The shot above is a production shot showing the Eyelighter setup just in front of the subject with the Skylux LED light above subject.
The results are AWESOME and pretty much night and day.
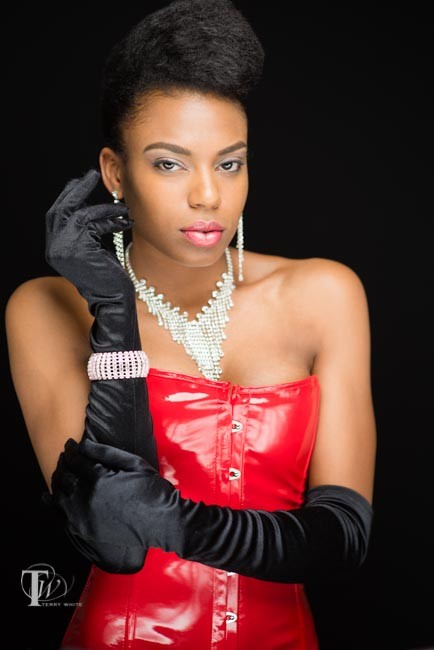
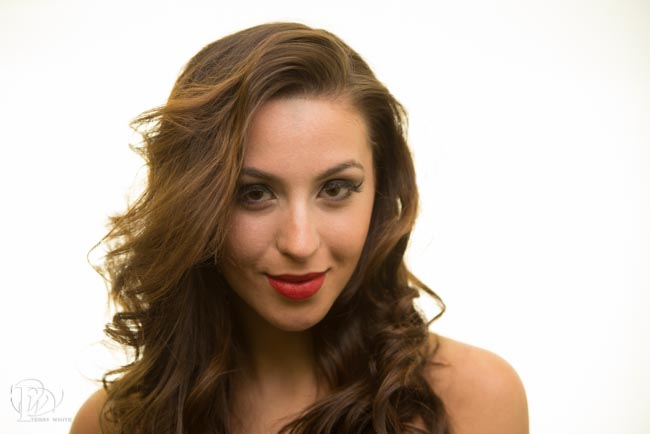
Again here’s another look without the Eyelighter using the exact same main light, subject and camera settings.
But what about the background?
The background was lit using two lights shining through the Westcott Scrim Jim. This gave me the High Key look that I wanted by providing a nice big soft light source directly behind the subject that wrapped around the subject with beautiful rim lighting.
The Bottom Line
I’ve always been a fan of this clamshell beauty look and the Westcott Eyelighter makes it much much easier to do now with one light. Adding another light or two behind with the Scrim Jim makes this accessory useful for in studio work as well as on location work. All of the images above were shot with my Nikon D600 and 70-200mm f/2.8 VRII lens.
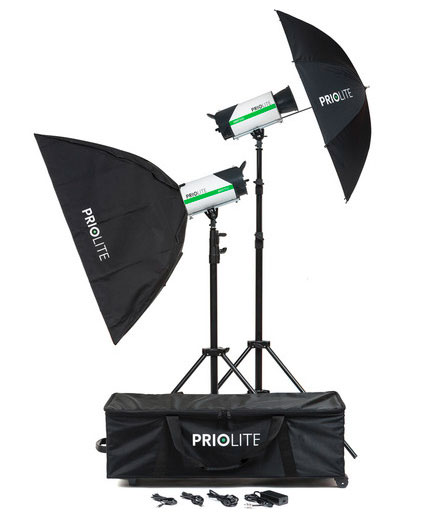
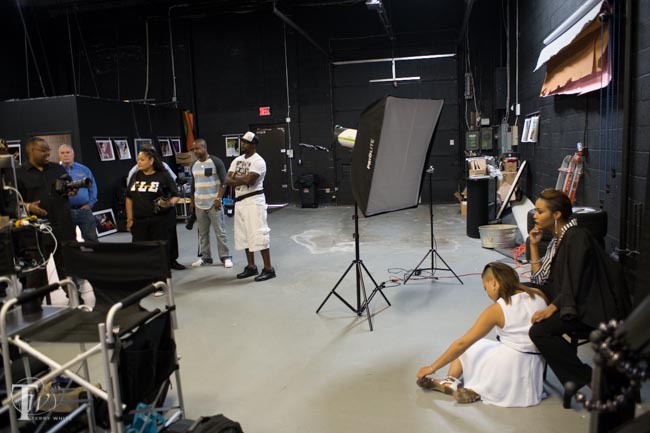
I held my Master the Shoot Digital Photography Workflow Workshop this past Saturday in my studio. We had a great turnout and a great time shooting and exploring my digital photography workflow. During the workshop and on our third shoot I decided to give the Priolite MBX500 a shot. I had just received this kit to review and quite honestly after setting it up and testing it only to make sure it fired, I hadn’t actually used it in a real shoot yet. I figured what better real world testing than during a live shoot in front of a room full of other photographers. Yeah the pressure was on, but as I always say it will either work or it won’t. It worked!
Photo by Jason Lykins
What’s a Priolite MBX500?
The Priolite MBX500 looks like a standard studio strobe at first glance. What makes it special or different is the fact that it has a removable/exchangeable battery pack built right in! That’s right, you can go completely wireless. This means that these are not only great studio strobes, but they also double as on-location lighting.
What I liked
The Priolite MBX500 strobes are very easy to set up. I didn’t receive a manual with my review units, but I was able to figure out everything I need to know on my own.
They were easily adaptable to my existing softboxes with the supplied speed ring.
Having full powered strobes that run on a removable/exchangeable battery is KILLER
Not having a battery pack dangling from them is also great.
Being able to leave them plugged in while in studio means uninterrupted shooting.
The LED modeling light is another nice benefit
What I wasn’t thrilled about
It’s really hard to find anything wrong with this solution, but here are a couple of things that I wish were better.
The strobes are larger/heavier than the average strobe. Not the end of the world and that battery has to go somewhere.
The only other issue for some will be the price. They are a bit pricier than other studio strobes, but if you were to combine both on-location lighting and studio lighting, then you’d probably come out ahead with the Priolite MBX500 kit.
Would I recommend them?
Absolutely! Here’s the real kicker. For anyone looking to make an investment in quality lighting gear, it’s hard to go wrong with the Priolite MBX500. The reason is that you’re getting two lighting solutions for the one price. You’re getting a great studio strobe AND you’re getting location lighting too. Having paid for BOTH studio strobes AND on-location lighting I can testify that I spent more than the Priolite kit costs.
I remember when I first started out in photography and wanted to get serious about it, I had lots of questions about what to buy? No one wants to make a large investment in the “wrong gear”. I often get questions from New Photographers or Photographers looking to set up their 1st studio, asking what equipment should they get? That’s a hard question to answer without knowing what you plan on shooting the most, your space, and your budget. My primary focus is Portrait – (Beauty, Fashion & Glamour). Rather than trying to address every single situation individually, I thought it would be easier to share with you the equipment I use, and then you can take it from there. I had a 4,800 sq foot studio space and yes I LOVED IT! If you see something you think you’d like to have in your studio then you can just go ahead and get it.
Your DSLR/Mirrorless most likely came with a camera strap and in big bold print, it advertises the brand and model of your camera. It’s like saying to the world, “Hey, I’ve got an expensive camera right here. Come steal it!” I prefer something a little less flashy and more versatile.
Black Rapid R-Strap – I like this one for photo walks and when I’m using longer lenses, or heavier bodies.
Up Strap – I like this one for travel and photo walks as it will NOT slip off your shoulder.
I used to use Elinchrom strobes for the first 10+ years of my photography journey. However, in February 2021 I made the switch to Westcott’s new lighting system.
3 Westcott FJ400 Strobes – these are awesome because I can use them in the studio AND on-location because of the built-in battery packs.
Arkon Clamp Stand for DSLR Camera, Tablet, or Phone this arm is simply amazing because it’s strong enough to hold my DSLRs/Mirrorless cameras so that I can get those shots straight down on top of my subject.
Kata R-103 – My smaller backpack when I don’t need to travel with as much gear.
I have a variety of smaller bags, but the 3 above are the ones I use the most.
Studio Music System
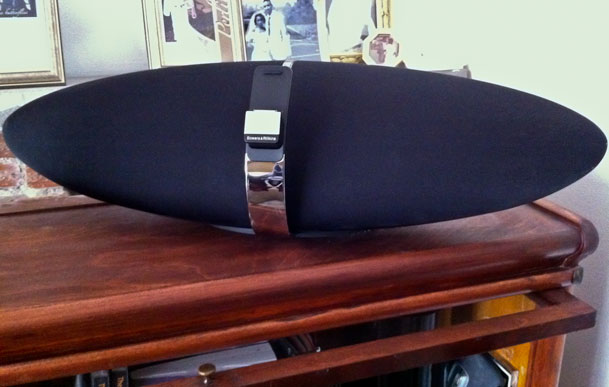
Music is a very important part of my shoots, therefore, the sound has to be good (sometimes loud) and able to be heard throughout the building. Therefore I stream the same music via my Bose Soundtouch 20.
DJI Mavic Air – for aerial photography/4K Video and behind the scenes shots
WD 1TB My Passport Wireless SSD for in-field backups and mobile editing workflows.
Apple TV 2 Set-top boxes – My photography is on display throughout the studio both in print and electronically via HDTVs and Apple TVs driving them.
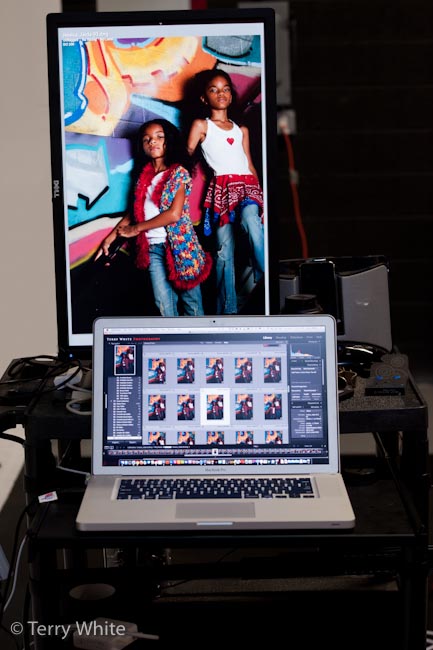
Apple The New iPad Pro – I use it for portfolio display, image review, model releases and variety of other tasks. See how it fits into my workflow here.
Mac Mini Mac OS X Server with a Drobo 5D attached. There’s also a Drobo FS on the network for additional backups of the main Drobo – Network backups for every shoot I do before I leave the building
The list above represents equipment that I’ve acquired over the past 4 years. By no means do you “need” all of it, especially if you’re just starting out. Take from it what you will and keep in mind that I didn’t start with it all on day one! That’s the thing about photography, “there’s always something to buy!” No one ever told you to get into photography because it would be a “cheap” hobby! 😉
I had the great pleasure of attending the Flash Bus Tour put on by none other than Joe McNally and David Hobby aka The Strobist. I couldn't pass up an opportunity to learn from these "flash" experts! The day was packed with different lighting setups and live examples.
David Hobby almost never wears long pants 🙂
David Hobby took the morning and started off by deconstructing a couple of his recent shots.
Joe McNally aka Numnuts
Joe McNally took the afternoon and showed how much POWER there is in shooting with speed lights. Drew, I think it's a little close 😉
So that's how they do that Justin Bieber look!
Amazing what you can do with 3 Nikon Speedlights and shooting in TTL.
Audience participation
Great Q&A at the end.
My take-aways
While I own 3 speedlights, I always looked at them as the lights I would use when I travel and don't have the ability to take my "big lights". However, after watching Joe and David I'm really starting to think about using my speedlights more often. As a matter of fact in a recent shoot I did, I decided to use a Nikon SB 900 to augment my natural light setup. I'm having a blast with the possibilities and want to thank Joe and David for not only putting on a great show, but also for bringing the tour to Michigan!
I love the Nikon CLS flash system. For me, it is THE reason to choose Nikon over any other brand. Their R&D, fit and finish, and performance are second to none in the small flash arena. For a few years the SB-800 was the go to flash for me, offering the control, and power needed for a working professional. Recently Nikon updated it’s flash line; first with the flagship SB-900 replacing the SB-800, and more recently the SB-700 replacing the SB-600. I am currently using SB-900’s as my go to main flash units, but when my last SB-800 died I decided to take a look at the new SB-700 as an alternative. After reading David Hobby’s (aka the Strobist) initial review of the flash I decided to give it a go. After a couple of weeks with it, I’m not only impressed, but sold on this unit. I’ll be buying more.
What it had to have
There were a few things that this flash had to have to make it useful for me. The first and most important thing that I need is power. I often double, and triple diffusing my flashes to increase the quality of light. This requires a lot power to shoot through all of these layers of diffusion and still have enough “oomph” to light the subject. The SB-700 has power to spare. After shooting it side by side with a SB-800 I’m pretty sure that the power output is on par with that unit. Of course I didn’t do a scientific comparison to measure this, but just the light output, the coverage, and the recycle times make me think that this flash is right there with the 800. Nikon claims not, but I have to think that the low power rating by Nikon is to drive pros to the SB-900 over the 700. Suffice to say that this flash meets my power and output needs without a problem.
The next thing on my list of must have’s is control. I need to be able to control wireless flash systems just as I would with the SB-800 if I’m going to be using these flashes as replacements. The SB-700 gets part of the way there. Let me explain. Nikon did a great job by putting a lot of the controls on the outside of the flash similar to the SB-900. They placed a rotating switch similar to the 900 for TTL, remote, and Master selection for the wireless CLS system. While we’re on this subject, the 700 can act as a Master flash for the CLS system, but only offers two groups. For me this isn’t a big deal because I use them with the Pocket Wizard Flex units, which allow me to add that control externally anyway. The 700 also adds a physical switch to the back of the unit to select your mode. With the option of TTL, Manual, and guide number, it has every option that I would want. Another Physical switch added to the back of the flash is the light output type (standard, even, and center weighted). The FEC (flash exposure compensation) for your main unit, and the remote units when in master mode is controlled just like the SB-900 with a quick button push and a spin of the wheel. If you’re already accustomed to the SB-900 controls, you will feel right at home.
The reason that I said Nikon only get’s part of the way there on the control has to do with the way it handles it’s wireless flash units. With the 700 in master mode, the remote flash units are set to the same flash exposure mode as the 700. This means that if you are using TTL for the main on camera flash, you can’t set the remote units to anything else. For most this probably won’t cause a problem. For me I want to make my remote flashes different exposure control than my master sometimes. Sometimes my subject is being lit with TTL, but in the background I want to add a small amount of kicker light with a gel. The SB-900 allows for this independent control of the wireless flashes, but for whatever reason they excluded it from the SB-700. To work around this, I use the SU-4 mode to trigger the background lights instead. Speaking of SU-4 mode, it works remarkably well on the 700. Nikon flush mounted the light sensor for triggering making this thing super sensitive. When I say sensitive, I mean SENSITIVE. It picks up any little glint of flash and triggers it. Continue reading “Nikon SB-700: Guest Review by Jason Lykins”
I'm terrible when it comes to documenting how I lit a shot. My lighting setups are not that complex, but when someone asks me how did you light that shot the first thing that comes mind is "very well, thank you." Of course I'm totally kidding here, but I do cringe when I think about trying to explain it to them. Luckily there are a couple of solutions out there now that will make it much easier for me and you to explain the setups that we use to someone visually.
The Online Lighting Diagram Creator
is a website that gives you drag and drop items from a range of categories to build your diagram right there on the spot. You can then export the image out and send it to someone. This site is free to use for your personal use. If you have a commercial use (you're writing a book or teaching a paid class, etc.) then you should contact them to work out how best to compensate them for use of their technology. The images you export will have their copy right info on the bottom, which I don't have a problem with.
Strobox is another Free solution for your iOS device. Like the solution above it has built-in popular lighting pieces that you can drag around on your display and then save. You can either email the diagram you create directly from the App or save it to your camera roll.
As a Nikon shooter, when people ask me why I use Nikon over the other brands I tell them that I really am not into the religious war between the various camera brands out there. I bought a Nikon D70 (upgrading from an Olympus EN-20) back in the day because at the time the specs met my needs and of course once you start investing in lenses you're pretty much locked in. So honestly I don't really care what you use. I don't! If you're a Canon shooter and you're happy with your gear, more power to you. That's great! Go out and take great pictures because that's what it's all about anyway. Once I get past the story about how I started, I then tell them that now that I am a Nikon shooter there are a couple of things that definitely keep me with Nikon over the other brands (besides the lens investment). One is the integrated GPS support in the Nikon DSLRs.
Although I wish the GPS chips themselves were built-in to ALL CAMERAS, I do appreciate the fact that I can buy the GPS module of my choice and just plug it in. The Nikon DSLRs will automatically record the Geo location information into the metadata of the images (both RAW and JPG) and there's even a menu for it right on the camera.
The other thing that I LOVE is the built-in support for wirelessly controlling the Nikon Speedlights.
If you have a Nikon DSLR that has the Commander mode/feature built-in, then the pop-up flash can be configured to send out a pulse (instead of/or in conjunction with a flash) to not only fire the Nikon Speedlight remotely, but also control the power output directly from the back of the camera. You can even control different groups of Nikon speedlights turning the power up and down as needed. This way you can put the lights on stands or anywhere you want around your subject. If your Nikon DSLR doesn't have the built-in Commander, you can buy an external one and put it in your hotshoe. I use both these features all the time and would miss them dearly if I were to switch brands. I started with an SB-600 Speedlight. Then I bought an SB-800 and then an SB-900. I have and use all three when needed. The other night I was having dinner with some fellow Nikon shooters and we got on the subject of the SB-900. We all agreed that in many ways the SB-900 was actually a step backwards from the SB-800. So the question becomes…
How would you change the Nikon SB-900?
Yes, I know you would drop the price to $99 🙂 So let's move on to the features. We all agreed that the one new feature that is VERY NICE is the simple selector switch to switch the light from being a Flash to a Remote Flash. So simple and so long overdue. On the previous models you'd have to dig through the menus to make these simple choices. Beyond that it was hard to come up with things we liked better. The SB 900 is bigger than the 800, but yet doesn't put out any more power. It just makes it harder to fit it into your existing cases. Also Nikon still only puts the sensor eye on ONE SIDE of the speedlight. While you can swivel it around, it would GREAT to have this sensor on BOTH sides or make it RF based instead of requiring line of sight. We can assume that Nikon is probably working on the their next Speedlight and here's what I'd want:
Either give me a sensor on both sides or make it RF based
Make it smaller or give it more power. Pick one!
Give me the option of buying an accessory that allows me to plug it into the wall! If I'm using it inside and power is available why should I have to use AA batteries.?
Lower the price a bit. It's hard to justify buying more than one of these when you can get strobes for the same price!