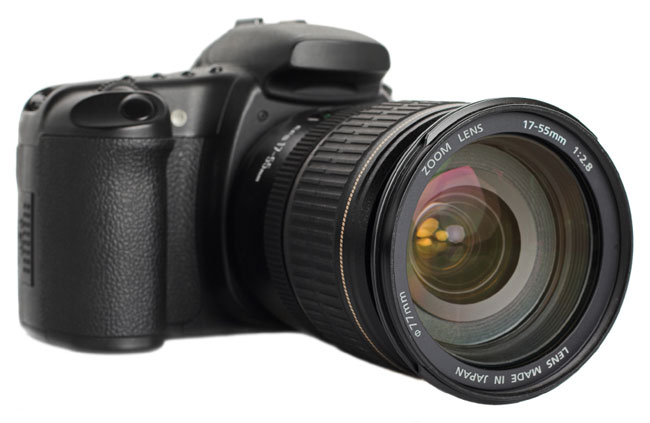
If you could design a DSLR, what would it have in it?

Image compliments of iStockphoto.com

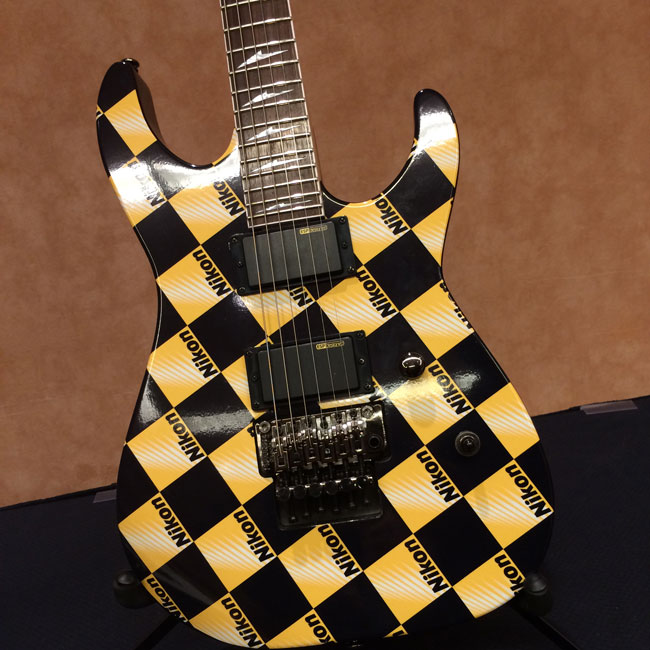
Last week while I was at Photoshop World, I stopped in to drop off my Nikon D600 for cleaning at the Nikon lounge. They offered a GREAT FREE cleaning service to all attendees and cleaned over 400 bodies. While hanging out in the lounge and catching up with my friends from Nikon I took a shot of the one of a kind Nikon guitar that they were giving away.

nikon-guitar

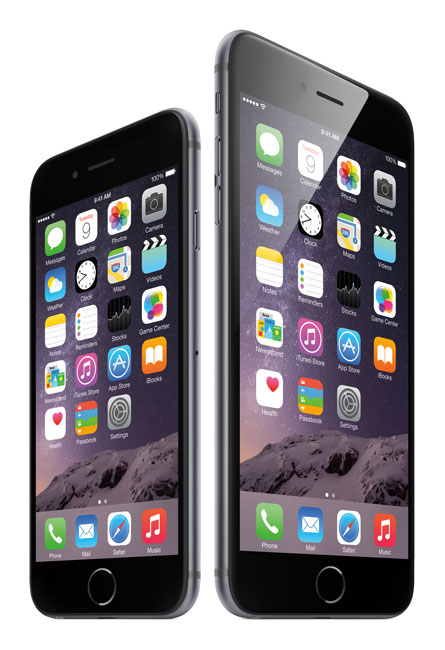
One of the Nikon reps started giving me crap (in fun) about shooting it with my iPhone instead of my Nikon camera. I threw it right back at him and said “well if this $3,300 Nikon D810 had WiFi built in and social sharing, then maybe I would have taken the shot with it instead.” Then we got into a debate about built-in WiFi and why the magnesium (metal) bodies didn’t have it. I said “so you mean to tell me that there’s just no way possible to design a metal body with Wifi? Really?” He couldn’t argue with me anymore. Nonetheless, I used the tool (in this case my iPhone 5s) that would get the job of shooting and sharing a shot on social media most efficiently. This friendly debate and jabbing got me to thinking (once again) about my dream DSLR body and what features it would have in it. Here are just a few of mine:

  • 16-24MP (36MP is GREAT, but only if they let me dial it down to smaller RAW file when I want)
  • Native DNG support
  • Built-in WiFi
  • Built-in GPS
  • Touch screen with customizable menus like a smartphone
  • 4K Video (not that I need that right now, but we are dreaming)
  • Very water resistant if not waterproof
  • Super light weight and rugged
  • Wireless control built-in to trigger from a mobile device and see a Live View

Now I know that many of the features above can be done with add-on accessories, but it’s 2014 and these things should be standard, especially on higher end models. Even for those that would say that they don’t want or need all of those things and therefore don’t want to have to pay for them by default, then I say at least build them all into an optional battery grip. That I buy the grip that adds ALL the modern features to my DSLR.

So I ask you, what would your list have?


My 1st Photoshop 3D Prints Have Arrived!

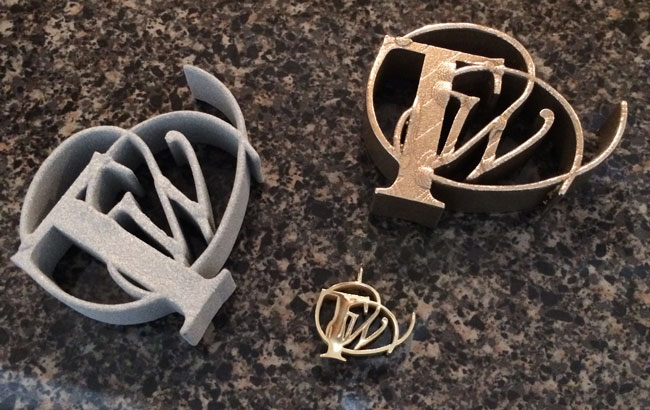
TW-3d-printed

I will be the first to admit that when I saw that Adobe Photoshop CC had 3D printing capability I thought “oh cool”, but I never thought that I would actually use it. I couldn’t think of a single thing that I wanted to have printed in 3D. It’s great for architects, designers, modelers, and anyone else that wants to turn their concepts into real objects. Again, COOL! However, I just couldn’t think of anything that I wanted to have printed from my own designs.
Photoshop-3D-tw

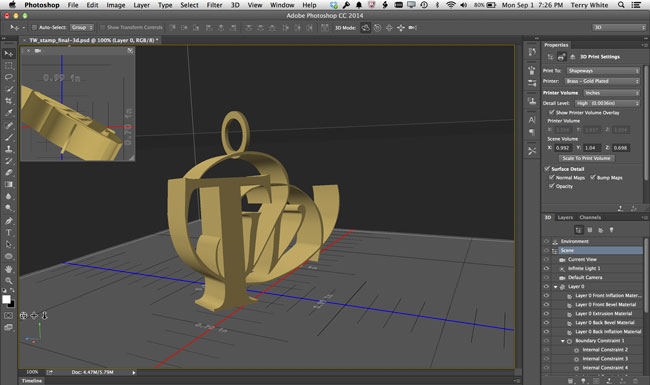
Then I had to give a presentation on it. Anyone that knows me knows that I don’t like to speak on a subject that I really don’t have first hand knowledge of. So it was time to have something 3D printed and I figured my logo was as good as any other object. I opened up my logo in Photoshop and removed my name from it. I just wanted the “TW” part of it as 3D print. Next I used the 3D Workspace and simply converted my logo into a real 3D object simply by using the Extrusion feature. I added a metal material to it and it was ready to go.

This is when I got excited
shapeways-3d-materials

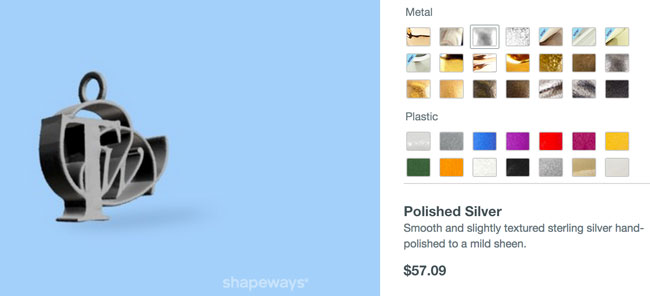
I wasn’t excited to have my logo in plastic. However, once I saw all the material choices that Shapeways (one of the service providers that you can send things to directly from Photoshop) offered I was blown away. I knew they had metal, but I had no idea that you can get bronze, copper, gold plated bronze, 14K gold, silver and even platinum. Wow! Suddenly 3D printing became very very COOL! I would have never gone into a jewelry store to have a custom piece of jewelry made for myself. I like jewelry, but not that much. However, knowing that I could do it myself and have it 3D printed and shipped to me made me excited. I started thinking of all the custom gifts I could make for loved ones.

How much is it?

As with anything custom, the price will vary by the size and complexity of your object. The prices for my 3D prints were more than reasonable for what I was going to be getting. Since it was my first one I wasn’t quite ready to step into precious metals yet, but I did go with a small gold plated brass version with a loop that I added in Photoshop so that I can put it on a chain.

My prices were:

IN: 0.999 w x 0.702 d x 1.04 h – Polished Brass (Jewelry) $39.88

IN: 2.761 w x 1.852 d x 2.269 h – Metallic Plastic $37.89

IN: 2.761 w x 1.852 d x 2.269 h – Stainless Steel $172.37


How long did it take?

I submitted my order on August 7th and received them via UPS on August 19th (originally estimated as September 4th). They came much quicker than I expected.


The Bottom Line

makerbot2

Photoshop CC is allowing people more than ever to realize there visions in physical form. The ability to design something in Photoshop and have it 3D printed and shipped right to your door is amazing. If you’re lucky enough to own a 3D printer you can print right to it from Photoshop. As a matter of fact you can even buy one here. Photoshop 3D is not hard to use and it takes about 5 seconds to do simple extrusions. Give it a shot!


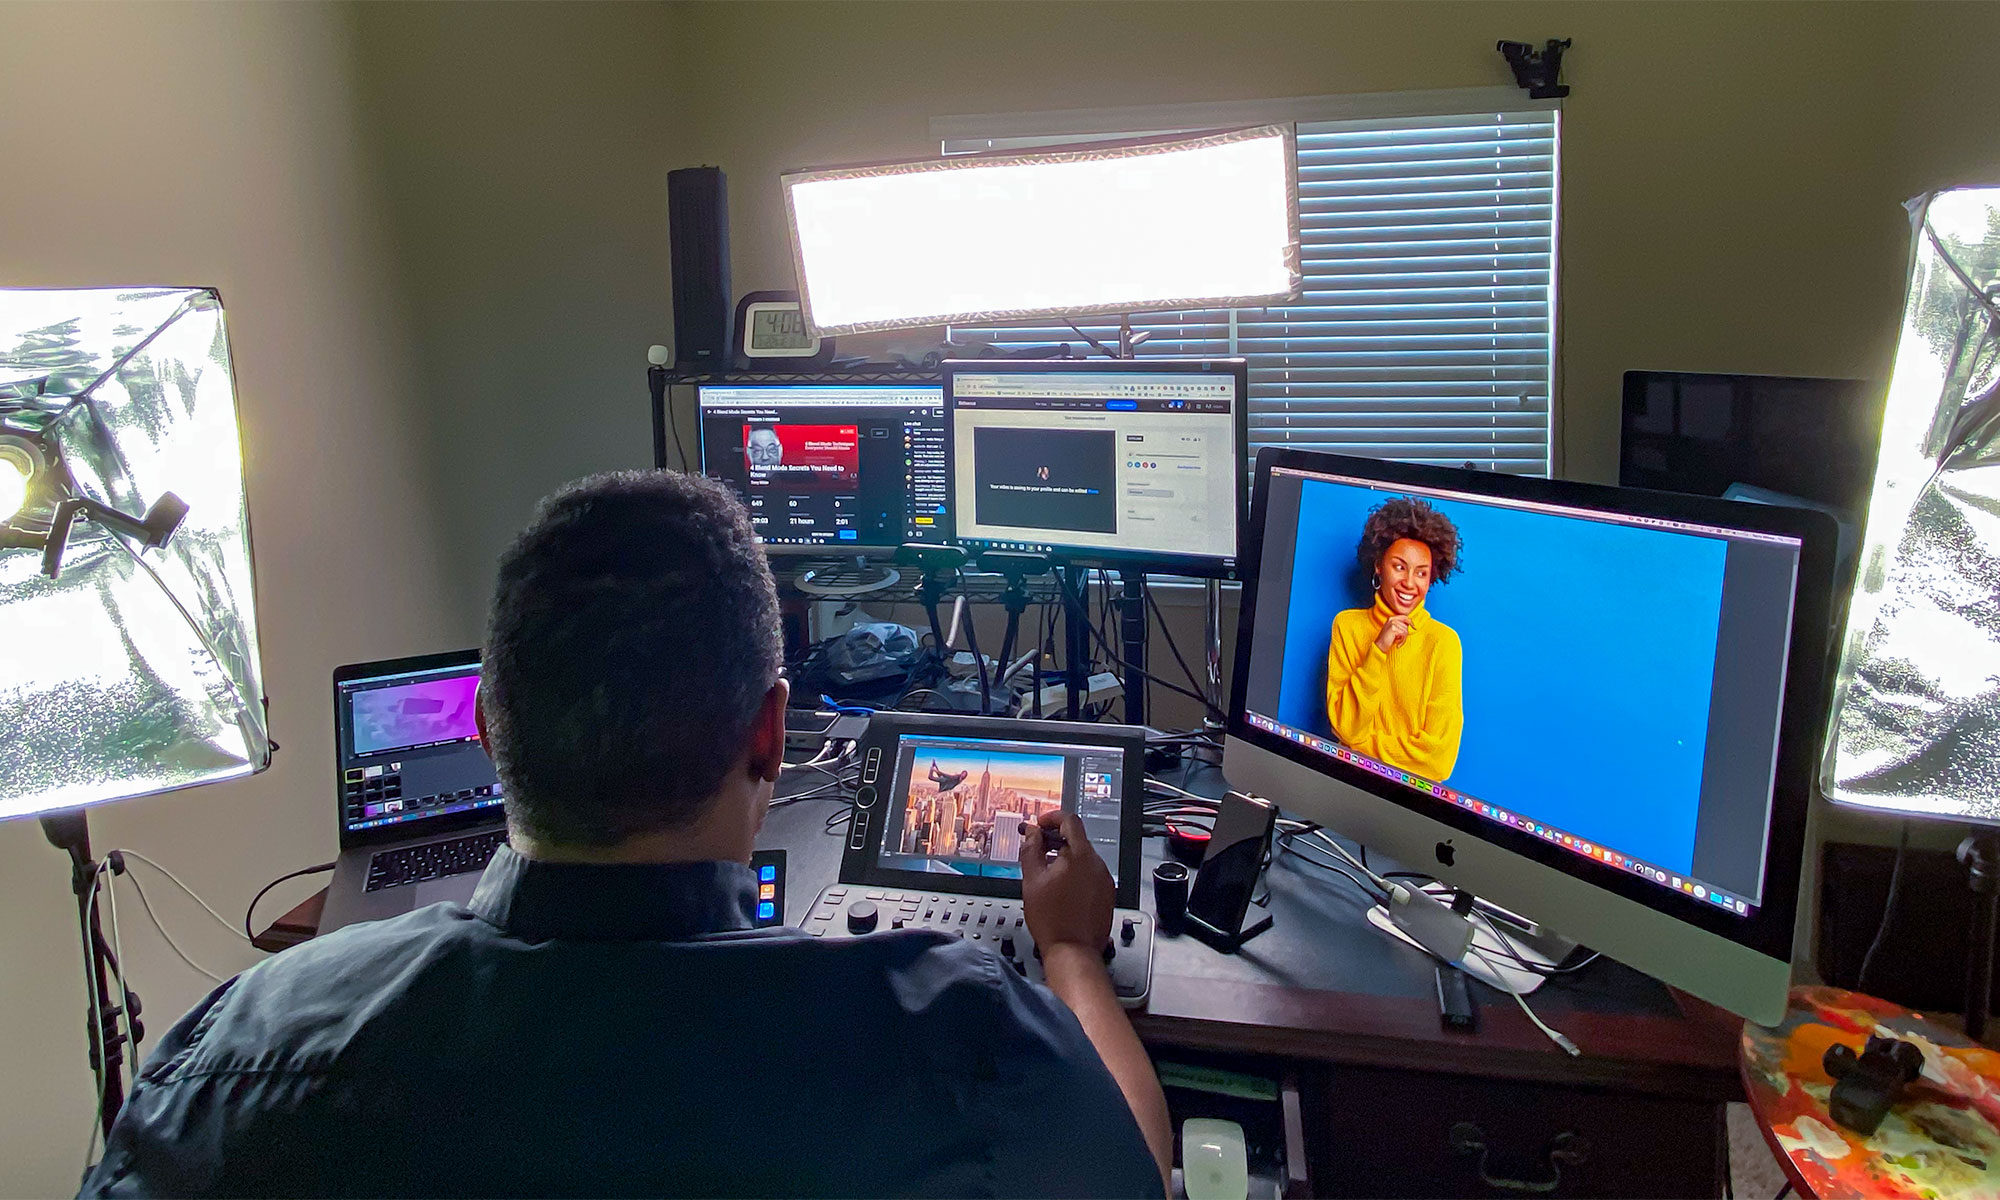
What I’m Teaching Next Week at Photoshop World Vegas

photo by Jason Lykins

It’s almost time for my favorite conference, Photoshop World! It’s time to head back to Las Vegas and I’m really looking forward to it. Not only do I get to see so many of you, but I’m psyched about teaching some updated classes.

PSworld-classes-1

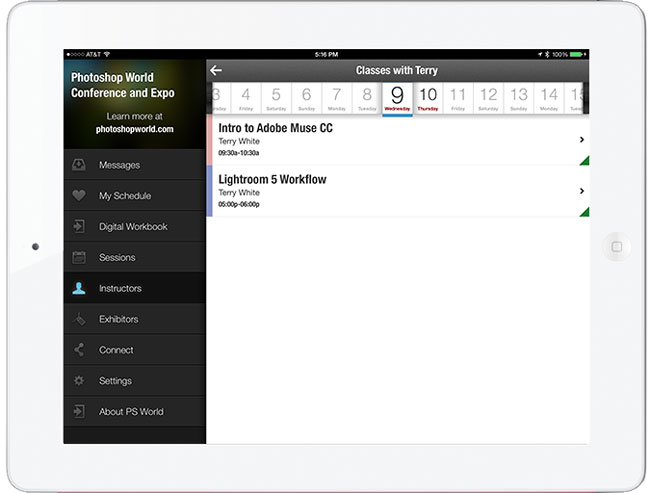
First up I’m teaching an updated “Intro to Adobe Muse CC” class. I did this class at Photoshop World in Atlanta and it went over great. This time I get to teach it on the brand new rewritten, 64bit native Mac/Win version. If you’ve always wanted to be able to create your own website, but don’t want to write code you’ll leave this class knowing how.

Also back by popular demand is my “Lightroom 5 Workflow” class. In this class I’ll take you through my Lightroom workflow from start to finish.

PSworld-classes-2

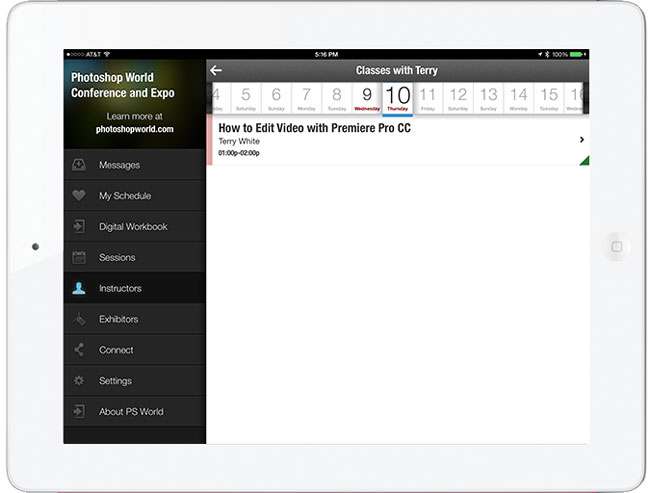
I’m also teaching a brand new “How to Edit Video with Adobe Premiere Pro CC”. This class is aimed at Photographers rather than videographers. I aim to cut through all the jargon and the interface to get right to the basics of how to edit video from your DSLR or other video cameras, smartphones, etc.

I’m also going to be doing short presentations in the Adobe booth on the trade show floor.  I’ll be showing “Introduction to Creative Cloud”, “Photoshop CC Tips”, “New Tools for Designers” and “Lightroom 5 and Lightroom Mobile”,

Be sure to stop by and say that you read my blog and watch my videos, you never know what small giveaways I may have in my pocket. 😉

Get the Photoshop World App here:

.


I went with Bluehost.com for all my web hosting needs

hosting

I haven’t been happy with my web hosting for a long time now. Let me give you a little history of  the sites I have and the various hosting providers I’ve been through. I currently manage:

terrywhite.com

terrywhitephotography.com

bestappsite.com

macgroup.org

creativecloudtv.com

and a site for my family reunion/tree.

When I first started doing web hosting I had it all under one roof (except creativecloudtv.com because it’s hosted by my podcast hosting company libsyn.com). I was using Network Solutions for all of it including email. While Network Solutions did all I needed technically, they were more expensive than other providers. I was even willing to overlook the higher cost because the service was good. Then one day my sites all got hacked. Malware, spam and just tons of stuff to clean up. Once the clean up happened, the attacks continued to the point that I ran from Network Solutions as fast I could because I couldn’t handle the daily hacks. I ended up moving terrywhite.com, bestappsite.com and macgroup.org to Godaddy. I know, I know, but I didn’t know at the time. Anyway, yes Godaddy. The price was right and everything seemed to work at the time. However, of the three sites I moved over, two of them were always having issues. terrywhite.com got hacked there too. Not as often, but it happened. Bestappsite.com got hacked too. Then it seems like Godaddy has too many sites on the same shared servers. Bestappsite.com was constantly having performance issues. It was like throwing the dice on whether or not the site would load or it would just be a blank white page. I called support and got the usual, “everything seems fine on our end, try reducing the number of plug-ins on your wordpress site. You seem to running out of memory.” Next I moved terrywhite.com to VPS.net. They came highly recommended and my site hadn’t been there for a week and their servers went down. I couldn’t believe it! Their data center had a “power outage”. Really? No backup power? No rollover to another data center. My site was down for hours. Ok stuff happens. If you run an internet service of any kind, it will go down at some point. However, my site was down again within a few weeks after that and again for hours. I complained and they moved my site to another data center. Things got better for a few months and next thing you know my site was down again. It wasn’t down for long, but it was down! Internet providers usually aim towards a 99% up time. I can’t say that I experienced that rate with VPS.net. Also I was paying the MOST with my plan with VPS.net.
Time to move on!

bluehost-05

I had some time out of my busy schedule and decided it was time to get my sites under control again. Bluehost.com came highly recommended. However, this time I did a little research before simply moving over. Bluehost.com is HIGHLY rated and one of the top ranked hosting providers for wordpress. Their prices for regular hosting and WordPress managed hosting was very reasonable and less than VPS.net. Cost wise it was a no brainer. Once I did my research and signed up, then it was time to move over. I moved over my photography site first. It was still at Network Solutions and not having any issues, but again I was trying to consolidate. Then I moved my family reunion site over and everything was working perfectly. Now it was time to move over my three wordpress sites: terrywhite.com, terrywhite.com and bestappsite.com. For this I needed the help of my web guy, Erik Bernskiold. Erik did all the backend magic of backing up and transferring my databases over from VPS.net and Godaddy.

Everything just works!

Now that I’m on Bluehost.com, (knock on wood) I haven’t had a single issue. The sites that weren’t working well on Godaddy are working fine now. Same database, same content and same plugins. I’m using Bluehost’s Managed WordPress hosting and so far it’s been GREAT! I did have a couple of initial questions and Bluehost prides themselves on having 100% of their tech support based here in the U.S. The techs knew their stuff.

You can check out Bluehost’s services here.


I accepted the ALS Ice Bucket Challenge

My buddy Scott Kelby called me out on The Grid yesterday and challenged me to take the ALS Ice Bucket Challenge and I did. I also donated to ALS a.k.a. Lou Gehrig’s Disease (and Adobe did a 100% match to my donation) and you can too right here. I challenge my good friends Paul Trani, Jason Levine and Willie Blue. Can’t wait to see your videos guys 🙂

Enjoy the video and thankfully it was a warm day 🙂

What’s In My Bag?

whatsinmybag2014

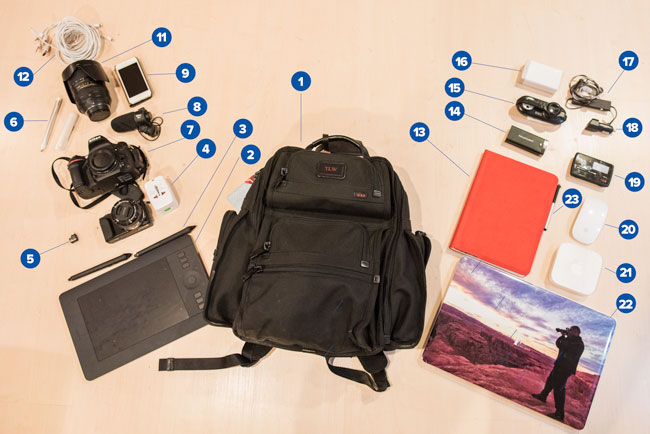
The good folks over a shotkit.com recently featured me on their site and the contents of my camera bag. You can see all the other photography gear that I use here. People are always asking what kind of gear I shoot with. On the flip side of that coin when I’m out on tour people are always asking about the gear I use on stage to do my presentations. So I thought it was time for a “What’s in my bag?” update. My backpack weighs a ton. Every now and then I take everything out and try to only put back in the things that I’m using on a regular basis. That time has come again and this past weekend while everything was out I decided to photograph it and detail it here:

  1. Let’s start with the bag itself. My FAVORITE computer backpack is the Tumi Alpha T-Pass. This backpack has really held up well with the load I put on it and shows no signs of wear. I was going through backpacks about once a year before this one. While it’s more expensive than I’m used to, it’s been worth it thus far. Also can beat the T-Pass feature for TSA checks at the airport. It unzips in half so that you don’t have to take out your laptop. Get it here.
  2. I shoot on the road and that means I need to retouch on the road. I couldn’t imagine retouching a picture in Photoshop without my Wacom Intuos Pro Small tablet. Get it here.
  3. In addition to the regular pen that comes with the Intuos Pro I have the Wacom 6D Art Pen for drawing in Illustrator. Get it here.
  4. My favorite international travel adapter. It covers most countries and has a smart design. Get it here.
  5. Nikon WU-1b Wireless Mobile Adapter. This allows me to transfer images from my Nikon D600/D610 to my iPhone or iPad wirelessly. Get it here.
  6. Adobe Ink & Slide – Pressure sensitive pen and digital ruler for drawing on the iPad. Get it here.
  7. Nikon D600 – I travel with either my Nikon D600 DSLR or my smaller Sony NEX 3 mirrorless camera. I love them both, but the DSLR is considerably bigger and heavier. Get the Nikon D610 here. Get the Sony Alpha NEX 6 here.
  8. Nikon ME-1 Stereo Micophone – You can’t have good video without good audio. The built-in microphone just doesn’t cut it. Therefore I use this one for those on the go interviews and recordings. Get it here.
  9. iPod touch – Although I have an iPhone and an iPad. I still prefer having a dedicated device on stage to play music and to run my presentation timer app. I’m usually using the iPhone and iPad in my demos. This way I have a dedicated device to do the tasks I need. Get it here.
  10. Oops – I left out #10. So let’s move on to number 11. 🙂
  11. Nikon 28-300mm lens. This is my main travel lens and while I do have better lenses, this one covers a nice range and it has a good quality. Perfect for travel. Get it here.
  12. I have to charge all these devices. My main cables are the 6 foot Lightning cable by Apple – Get it here and the nice and short Lightning cable by CableJive. Get it here.
  13. iPad Air with Logitech Ultrathin Keyboard Folio. I use my iPad Air all the time and now on stage to demo mobile apps. Get it here. I couldn’t imagine not having my Logitech ultrathin Keyboard Folio. Get it here.
  14. RavPower Battery – Sometimes my iPhone doesn’t make it through a long day of heavy use without another charge. I’m not always near an outlet. This RAVpower Battery can easily charge it twice. Get it here.
  15. I gave up fighting for additional outlets in hotel rooms and airports. Now I just bring this ultra compact 3 outlet powerstrip with me. Get it here.
  16. Charge 5 USB Devices at Once (including 2 tablets) with this slick 40w Anker 5 port charger. Get it here.
  17. Bose QuietComfort 20i Noise Cancelling Headphones. These need no explanation other than I gave up the full size pair for these because they do just as good of a job and take up a fraction of the space in my bag. Get them here.
  18. If I rent a car I want to be able to charge my iPhone and possible my iPad while I drive. This car charger gives me 4.2 Amps on BOTH USB ports. Get it here.
  19. Verizon 4G LTE Hotspot. I’m grandfathered into an unlimited data plan with AT&T on my iPhone and the only way to get the mobile hotspot feature on my phone is to give up that plan. I refuse to do that, so I have a separate hotspot to give me WiFi access in places where there is none or hotels where their internet is soooo slow that it’s unusable. Get it here.
  20. Apple Magic Mouse. It’s low profile, bluetooth, has a touch pad on it for smooth scrolling and gestures. It works. Get it here.
  21. Apple AirPort Express. I love creating my own WiFi network. This makes it easier to share a single connection on stage or in a hotel room and easily allows all my devices to talk to each other on the same subnet. Get it here.
  22. Apple MacBook Pro 15″ Retina Display Mid 2014 – This is probably the most important item in my bag. It’s my main work computer and it has enough power to handle everything I do. Get it here. The skin on top is a custom skin from Gelaskins. Make yours here.
  23. Wacom Bamboo Stylus Pen for writing and digital signatures on mobile devices. Get it here.

Not Pictured (forgot that these items were on my desk when I cleaned out my bag)!

Forgot the external hard drive that I always carry, but wasn’t in my bag at the time when I took everything out. I carry two G-Drive 1TB 7200 RPM External Thunderbolt, USB 3 Drives.

Also my favorite smartphone tripod mount.

My Hoodman USB 3.0 CF/SD Card Reader.

And my favorite cable bag to keep it all straight in my bag.


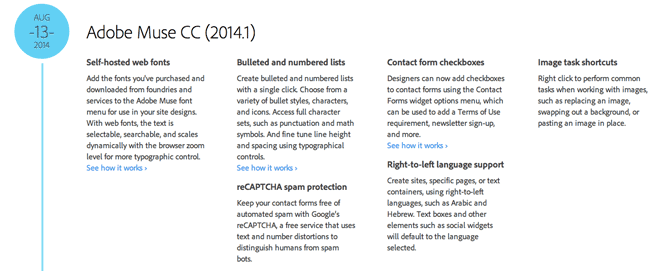
August 2014 Update: 3 NEW Features in Adobe Muse CC

Muse-totem


Right on the heals of the 2014 Release of Adobe Creative Cloud in June, the Adobe Muse team has already come out with a NEW feature update for August 2014. In this episode of Adobe Creative Cloud TV, I’ll show you 3 NEW features in Adobe Muse CC for this August 2014 Update.

muse-8-2014-features

While you’re here, check out this video on How To Create Custom Page Navigation Menus

Are you missing out on my Bonus Content?

See more of my Adobe Creative Cloud Videos on my Adobe Creative Cloud TV and get the App below. It features EXCLUSIVE CONTENT that no one else gets to see. This episode has a BONUS CLIP that is available only in the App! My iOS App is a Universal App for iPhone, iPad and iPod touch. I also have an Android version on the Amazon App Store:

.


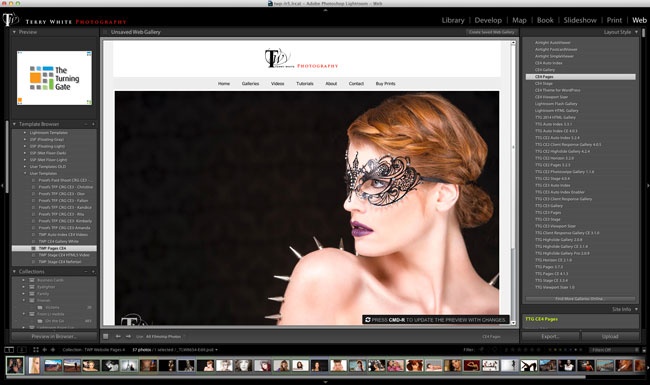
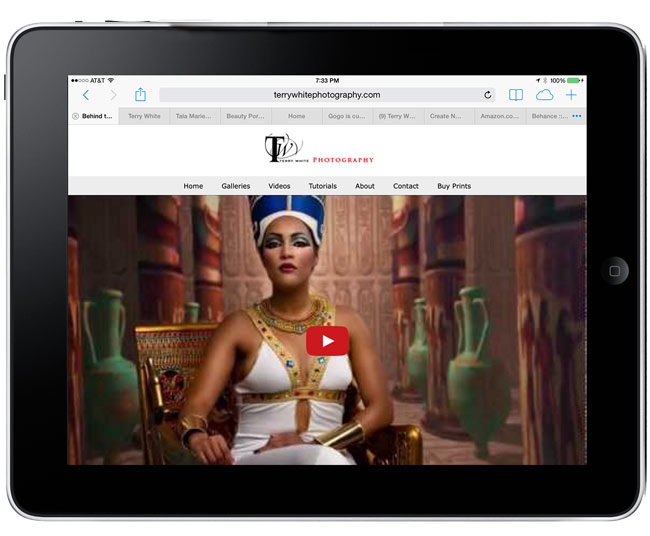
I Built My Photography Website with Lightroom and TTG

twp-ttg-ce4-web-publishing-Lightroom

As much as I love using Adobe Muse CC to create websites like macgroup.org, I have one website that was better to build using Lightroom 5 and the NEW CE4 Web Publishing Suite from The Turning Gate. My terrywhitephotography.com site is built 100% from Lightroom and the plug-ins from The Turning Gate. While I can certainly have a more customized site using Adobe Muse CC, the one thing that makes it better to do this site in Lightroom is the ease of updating it when I have new photos and videos.

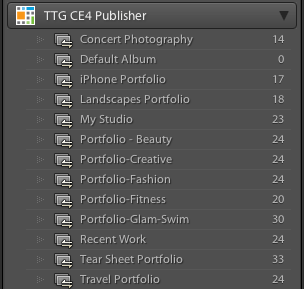
It starts with Collections

TTG-collections-publisher

Each of my Portfolios are Collections in Lightroom and from there I can sort images, add, and remove images at any time. My website has a slideshow on the home page and again that’s simply controlled by another collection that I can change at any time. One of the BEST features of the CE4 Web Publishing Suite is the “Publisher” plug-in. Once you set this up all you have to do to update your website is add/remove images from the Collection and hit the Publish button. Behind the scenes the images are uploaded to your hosting provider and put right into your galleries. I can’t believe how easy and fast it is to update my website at any time. This is the main reason why I prefer Lightroom for this site instead of Muse. I’m constantly changing my “Recent Work” gallery and it’s so easy to do it with the collection in Lightroom and hit the Publish button as opposed to manually exporting the images and having to update a slideshow in Muse. Again I LOVE Adobe Muse CC, but this workflow rocks in Lightroom!


Yep it’s Responsive

twp-landscapes-iphone

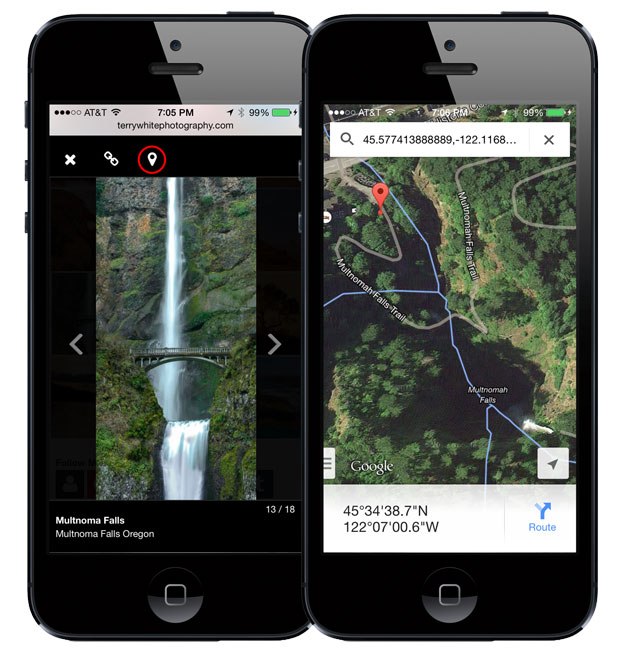
All of the modules/plug-ins used in the CE4 Web Publishing Suite use modern web technologies such as Responsive web design/CSS that looks good on desktops, tablets and mobile phones. This way I know that visitors to my site will see my work the way I intend them to no matter what device they view it on. My photos and videos playback great on all platforms. Even my landscapes will show the location where they were shot if the use taps/clicks on the location icon.


It works with Videos too

twp-video-ipad

The CEW Web Publishing Suite supports HTML 5 video that you host on your site or videos from YouTube and Vimeo. You can even mix them as I have some in HTML 5 and one from YouTube. Again using the Publisher plug-in I can add new videos with ease.

Watch me do a LIVE update to my site in this short clip


A GREAT Client Response Gallery

TTG-CRG-chrome-mac

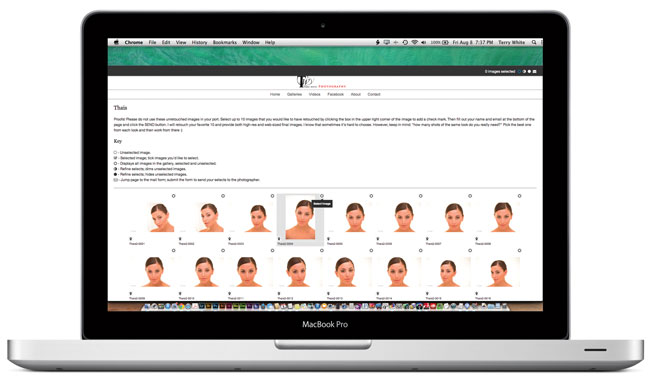
Although it’s not a part of my main site, another one of The Turning Gate plug-ins that I couldn’t imagine life without is the Client Response Gallery. This is the one that I use when I want to send a client their proofs and have them make their choices/selections on the web and send them back to me from the site. Even if you’re not going to build your website with the CE4 Web Publishing Suite, you should still check out the Client Response Gallery Plug-in for Lightroom.


The Bottom Line

My photography is my hobby and my way to express my creativity. Since I don’t have a staff or web team I have to do everything myself. The CE4 Web Publishing Suite from The Turning Gate makes my life so much easier and as I always say, “If a website is easy to update you will update it more often, if it’s not you won’t!” My photography website is always up to date because I manage all my photos with Lightroom and updating my website is as easy as clicking a button.

Learn more about The Turning Gate CE4 Web Publishing Suite here.


Great hosting matters too

I’m going to do a separate post on my recent move to Bluehost.com, but they totally ROCK! I moved all my main sites there and haven’t had a single problem. It’s such a relief knowing that my sites are UP and that if there is a problem they have 24/7 phone support with people located here in the U.S. Highly Recommended!


How to Use Photoshop Generator to Make iOS Webclip icons for your site

PS_CC_totem


In this episode of Adobe Creative Cloud TV, I’ll show you how to use Adobe Photoshop Generator to make webclip icons for your website so that when people bookmark your website to their home screens on iPad, iPhone or iPod touch they’ll get your custom icon.

webclip-apple-touch-icon-iPhone5s

Are you missing out on my Bonus Content?

See more of my Adobe Creative Cloud Videos on my Adobe Creative Cloud TV and get the App below. It features EXCLUSIVE CONTENT that no one else gets to see. This episode has a BONUS CLIP that is available only in the App! My iOS App is a Universal App for iPhone, iPad and iPod touch. I also have an Android version on the Amazon App Store:

.


Thank You for Attending the 2014 Adobe Create Now World Tour!

wpid13685-IMG_2517_sm.jpg

On behalf of Jason Levine, Paul Trani, Terry Ryan, Andrew Trice, Rufus Deuchler, Michaël Chaize, Dennis Radeke, our other co-presenters, organizers and staffers, we want to give you guys a big THANK YOU!

wpid13702-IMG_2694_sm.jpg

The Adobe Create Now World Tour for the 2014 Release of Creative Cloud has been a tremendous success and we’ve been on the road non-stop since June 18th.

wpid13688-IMG_2531_sm.jpg

It was great seeing so many of you in person and having you come up to me and tell me how much you enjoy my content.

wpid13697-IMG_2407_sm.jpg

While it’s always flattering to be asked to sign autographs, I was floored when a fan wanted me to autograph his laptop.

wpid13700-IMG_2682_sm.jpg

Some fans came from half way around the globe, even Asia Pacific.

wpid13691-IMG_2225_sm.jpg

It was also a pleasure showing you many of the cool new things in the 2014 Release of Create Cloud! The cheers, the oooohs, the ahhhhs, and the clapping were greatly appreciated.

wpid13706-IMG_2535_sm.jpg

Thanks for taking the time to hang out with us after the events…

wpid13683-IMG_2681_sm.jpg

There’s so much talent out there and it was great hearing about all the cool things you guys do with our products. We look forward to seeing you all when we hit the road again! Be sure to check out my videos here.

wpid13679-IMG_2222_sm.jpg
Paul Trani in action!