For a limited time and the first time you can get $300 off the Nikon D810 here. Also the Nikon D610 drops another $100 (a steal) here. These price drops only last until December 13, 2014.


Welcome to my technology blog!
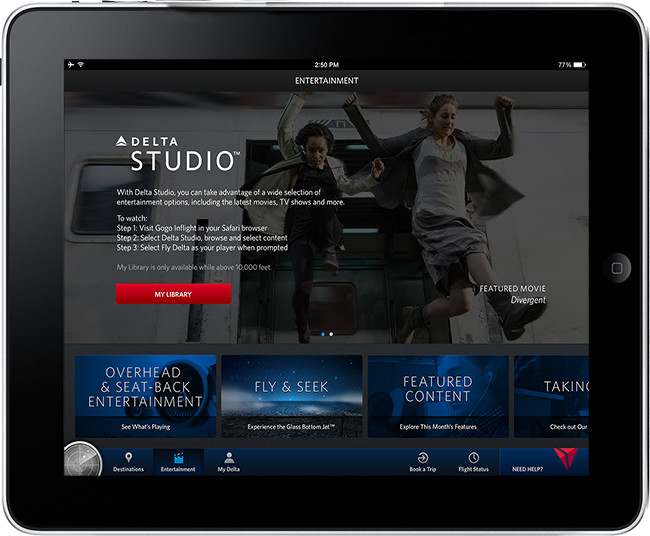
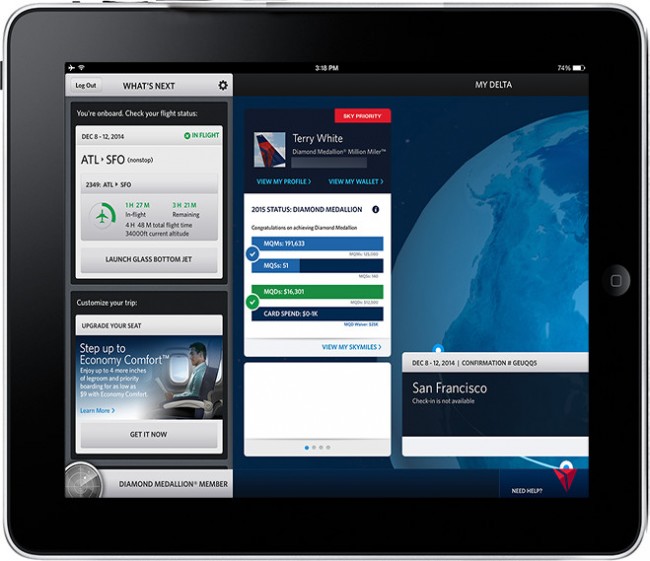
As a frequent flier (Diamond Medallion – Million Miler) on Delta I’ve always applauded them for their firsts in making air travel a tad bit more enjoyable. It’s tough to please fliers these days because airlines tend to care more about profits these days than making the flying experience more enjoyable for its customers. However, Delta tends to come out on top when it comes to overall customer satisfaction and that’s largely in part due to the fact that they invest in their planes and try to offer a bit more than the others. Delta for example has more domestic planes equipped with WiFi than any other carrier. So much so that when I’m sometimes forced to fly other carriers I feel like I’ve stepped back in time. One of their latest perks recently introduced is Delta Studio. The idea is simple. Using your mobile device, say an iPad you can launch the Delta App and choose various video entertainment to stream over the plane’s WiFi. This content would play from the plane’s on board systems rather than streaming over the relatively slow Gogo Inflight internet. Sounds simple right? It should be, but Delta (and Gogo) chose a really bazar way to make this work. I’ve tried it twice now and have yet to be able to watch anything!
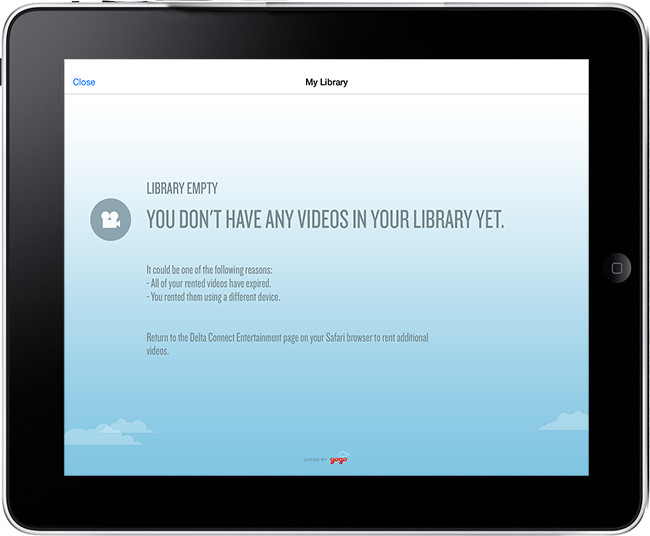
You might think that you fire up the Delta App, choose a movie or tv show and watch it right? Nope. It’s not that simple. If you do fire up the Delta App first it will simply tell you that you don’t have anything in your library. Well OK, that kinda makes sense a little.
Fine, let’s add something to “My Library”. Here’s where it starts to get strange. The Delta App tells you that you must leave the app and launch Safari to add content to your Library via the GoGo website. This one really boggles my mind. First off, Apple for years has allowed developers to build a browser (Safari) into their apps. So if the Delta App needed to go to a browser it could simply just bring up a window right in the App. No need to leave.
Nonetheless I launched Safari and navigated to the GoGo website. I signed into my account. I went to the entertainment tab and I found a movie that I wanted to watch and it was free. Awesome! I added it to my library and then tapped to watch it now. The website asked me to pick an app to watch it with and of course I picked the Delta app. It took me right back to the Delta App only to tell me that the movie was unavailable. WTF?
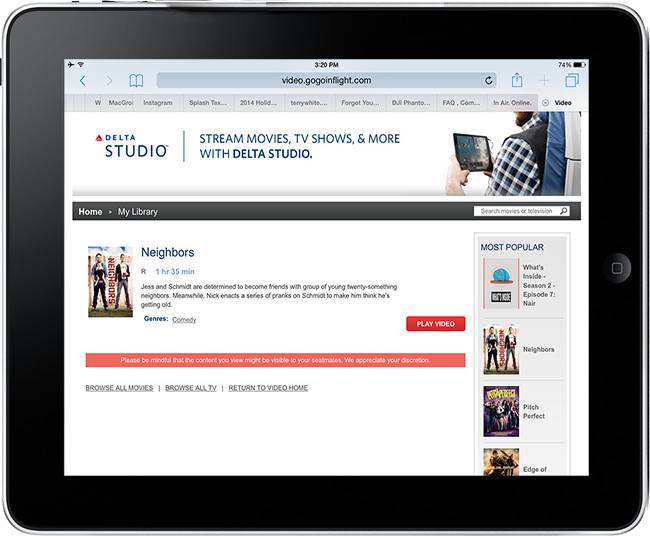
Sure, there could have been a problem with that selection. No problem, I went back to Safari and this time (silly me), I picked a movie that I had to rent. The cost was $6. I paid it and once again I tapped to watch it in the Delta app and I’m sure you’ve guessed by now that this movie was also unavailable and no there was no apparent way to get a refund.
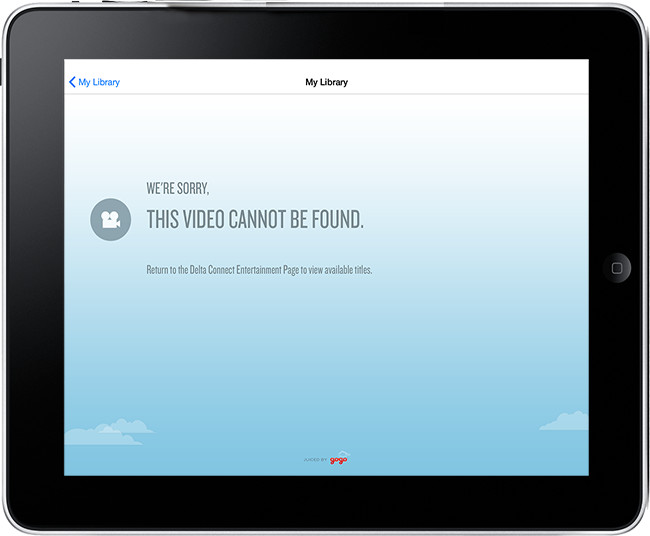
I was at a loss for words since the Gogo site knows which plane you’re on when you’re logged in and therefore should know what’s available and what’s NOT. Alas, I went back to work on my iPad and needless to say I wasn’t entertained. You actually allowed me to choose a movie, pay for it, only to tell me after the fact that it’s not available.
Delta and Gogo, if you’re reading this, you’re current implementation is screwed up at best. It appears that Gogo is collecting the money for the content and that’s fine, but there is absolutely no reason that this transaction shouldn’t be transparent to the user and the entire process should happen within the Delta App. I’ve been on two flights thus far and have yet to see any of this wonderful content. The first time was on a flight without the entertainment system and therefore there were no videos available but at least it told me that up front instead of wasting my time having me browse selections that I would never be able to actually view.
BTW: Will I ever get my $6 back?
UPDATE: Gogo reached out to me on twitter to tell me that they found my purchase and refunded it. Thanks!
I can’t help but think about the iTunes model. If I buy/rent a movie on iTunes then it’s available to me on all of my devices at any time when I have a connection. I have the ability to download the video to my device or simply stream it. If we apply this to the Delta/Gogo model then I would envision something similar. I’m a Delta customer with a “my library”. I would be able to browse content and make choices up to 24 hours before my flight for streaming. Once I make my choices those files are download to the plane that I’m going to be on (with the 24 hour window before my flight). I fire up my device in the air and the content is streamed locally from the plane’s servers. If someone else rents/buys the same content/movie then great. You only have to download it to the plane once and stream it to both of us saving you money. Until it’s this seamless I think I’ll stick to my TiVo and iTunes content downloading to my devices the night before the flight as usual.

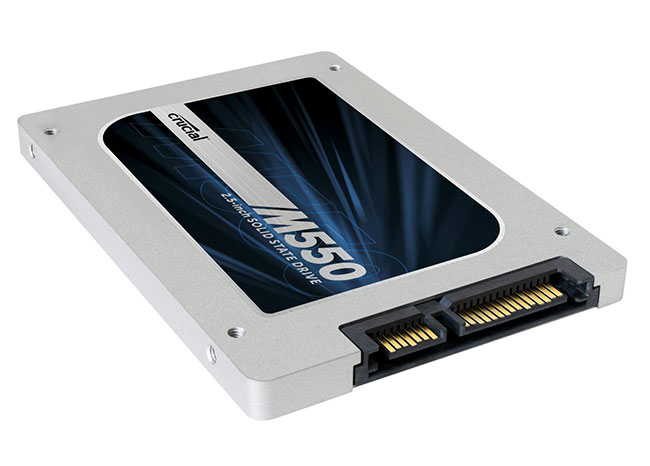
I was surprised to see how much the price of SSD’s (solid state drives) have dropped in price. I decided it was time to replace my slower portable drives with faster SSD ones. One thing I also learned a while ago is that many times it’s cheaper to buy the drive and buy external case to put it in, rather than buying a drive already assembled. I already a couple of generic USB 3.0 external cases that I picked up on sale at Micro Center. So I ordered this Crucial 1TB SSD drive.
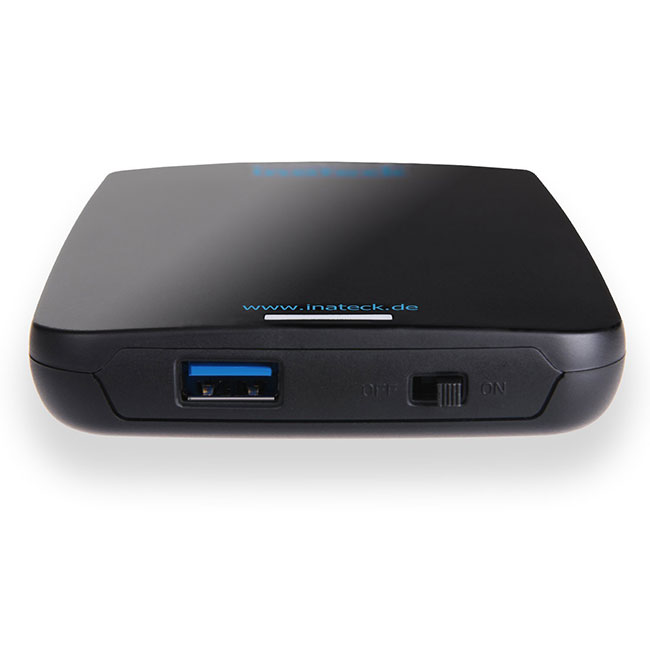
I put the SSD in my existing generic USB 3.0 external case. I formatted the drive and and copied the data to it from my existing external drive. All was well. Then I saw an ad for another enclosure by Inateck that claimed to be “Optimized for SSD”. I have seen firmware make a difference in the past with external drive enclosures, so I figured it’s possible that this enclosure could be faster. Since the price was only a few dollars more than generic USB 3.0 enclosures (under $20), I decided to try it and compare. The first thing I noticed that I really liked was the fact that you can install the drive without any tools. The cover comes off/unlocks by sliding it forward. Just plug your drive in and slide the cover back on. Then I saw the thing that I don’t like about this enclosure. I went to plug in my existing USB 3.0 cable that I’ve used on every USB 3.0 drive I’ve ever used only to see that for whatever reason they put a USB 3.0 A connector on the drive (the same one that’s on your computer). Granted they also give you the A to A cable, but it means that I would only be able to use that cable (or one like it) every time I use this drive. I’m still scratching my head over that one.
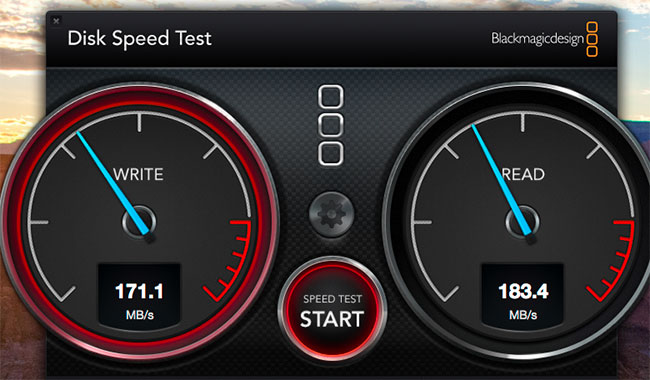
Next I decided to try a speed test. I had already tested the drive in the old case before taking it out and here are the results.
Then I plugged in the new enclosure with the same drive and and ran the same test and here are the results.
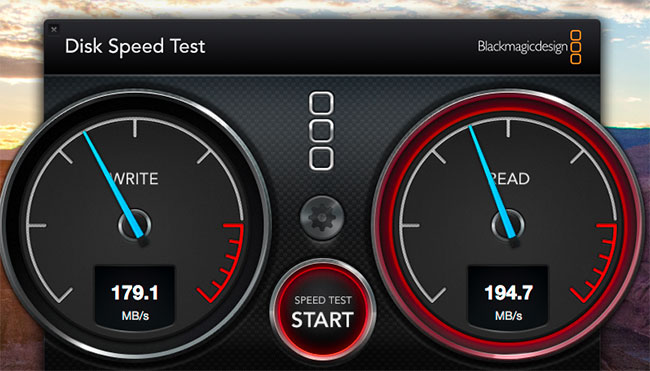
Going SSD is definitely the way to go if you’re looking for speed and better reliability over spinning platter drives. While the Inateck enclosure is slightly faster, I’m not sure that it’s worth it because of the weird cable needed to connect the drive.
You can get the Crucial 1TB 6Gbs SSD here.
You can get the Inateck SSD Optimized enclosure here.
You can get a standard/generic USB 3.0 enclosure here.
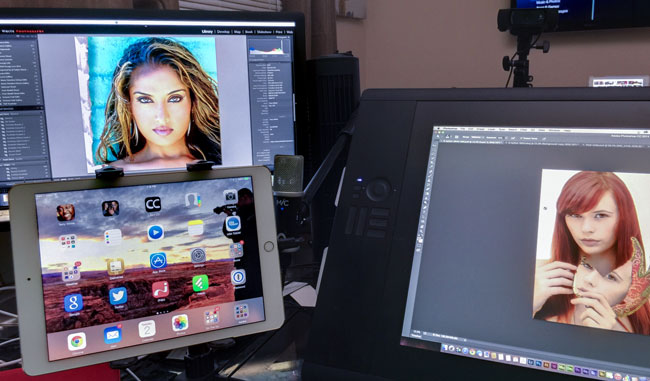
At my desk I work with three displays and usually my iPad Air 2 is within arm’s length. The problem is that when I want to use it I have to either turn away from my main display or pick it up and put it on my lap as there is little available desk space left in front of me. What if my iPad could just “float” in midair almost at eye level and always be there when I need it? That’s what the Arkon solutions provide me. Arkon makes a variety of mounts for your smartphones, tablets and cameras. Many pieces within their product line work together to allow you to build the right system for you.
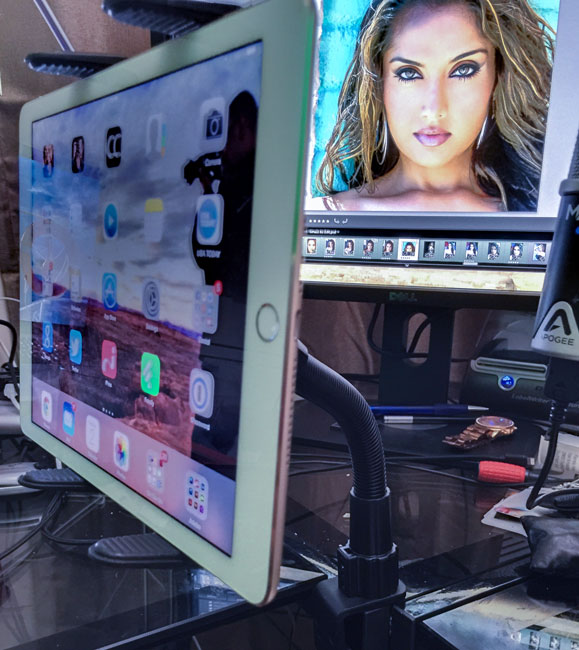
This holder comes with different “feet” to allow you to configure it for any full size iPad or Galaxy Tab. It comes with a Heavy Duty Gooseneck arm.
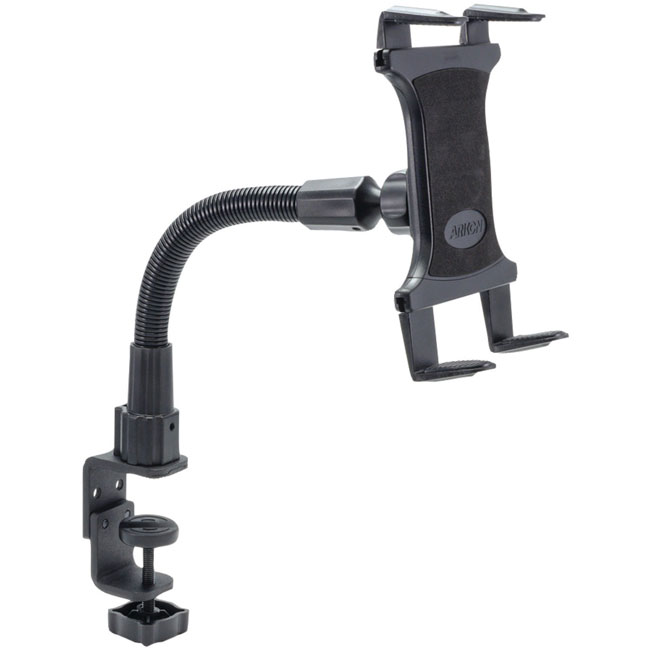
This thing feels as if it can hold up a car. Once you put it in the position you want, don’t worry it won’t move! Now keep in mind that this gooseneck can be used for more than just holding your tablet. If you add their low cost Camera Head Adapter kit it will hold your camera too. Yes even your heavy DSLR!
Get the Arkon Heavy Duty Table/Desk/Wheelchair Mount here.
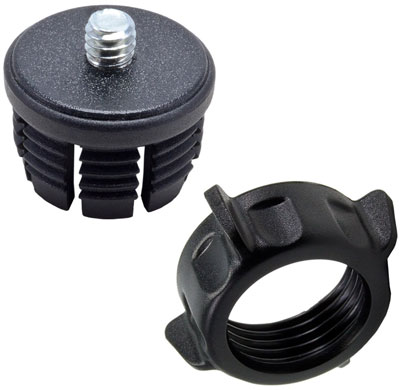
Get the Camera Head Adapter Kit here.
CORRECTION: I was told by Arkon that the camera mount I listed above is too small for this gooseneck. So if you want to use this for a camera then you should order this model instead.
Arkon makes mounts to mount just about anything on anything. However, this is definitely one of my favorite solutions for mounting stuff in my office or home. If you’re looking for the best iPad mount, this is it!

I can remember a time when Black Friday was the Friday after Thanksgiving and Small Business Saturday was the following day which led to Cyber Monday the Monday following Thanksgiving. Black Friday was for those that wanted to get up early, stand in lines and clamor for deals with brick and mortar stores. Cyber Monday was reserved for the online deals. Now it’s 2014 and that’s simply no longer the case. Sure there are still lines on Black Friday for local deals, but stores are competition more and more each year our attention. Each year they tried outdo each other by opening earlier and earlier until finally Friday at 12:01 AM was no longer good enough. Thanksgiving evening became fair game and that finally became Thanksgiving afternoon. As sad as that sounds especially for those workers wishing to spend time with their families and friends on Thanksgiving, Black Friday online (you know that Cyber Monday thing) suddenly became “Black November”. Some online retailers have been running deals all week while others have been running deals all month. With that said, Black Friday probably still sees the deepest discounts. So what’s left for Cyber Monday? Not much, but in some cases the big names have different items on sale today. Here are a few to check out:
Check them out here.

Check them out here.
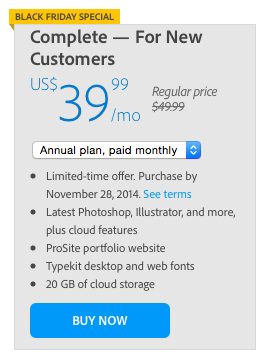
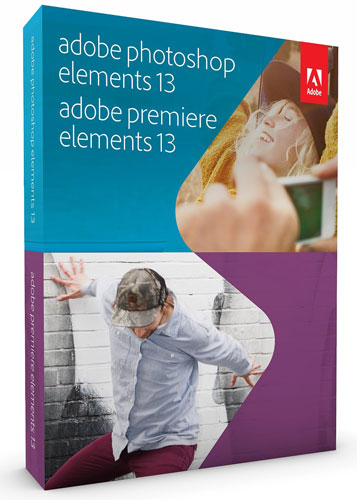
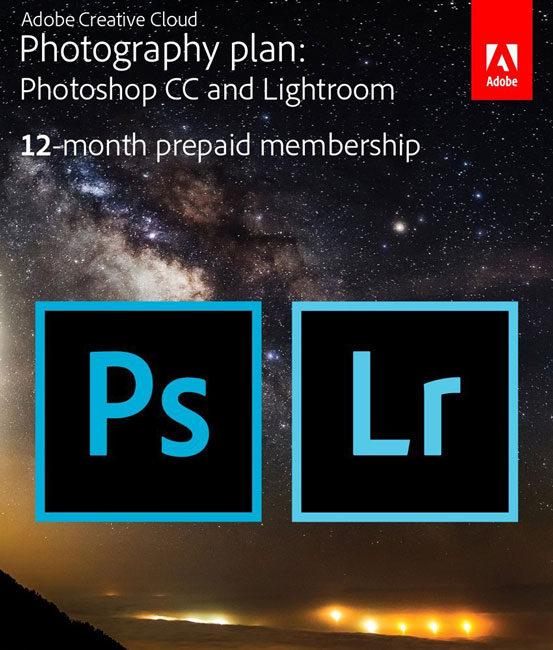
You can get a Full Creative Cloud Membership for only $39.99/month down from the usual $49.99/month. If you’re a student or teacher it gets even better. You can get your first year of the Full Adobe Creative Cloud for only $15.99/month (down from $19.99). Get the deals here.

Yep, it’s still going on and it’s a good one. See it here.
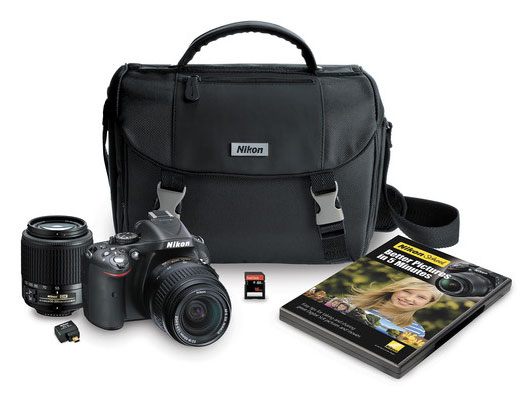
Save $400 on this Nikon D5200 kit. Great DSLR for beginners. Now at a price that’s hard to pass up. Includes TWO lenses, 16GB SD Card, Wireless Module, Nikon School DVD and Travel Case. Get it here.

See it here.

Black Friday is here although each year it’s becoming more and more “Black November”, nevertheless I’ve got my picks for the Top 10 Black Friday deals that you don’t want to miss. In no particular order let’s get to it:


My friends over at Kelby One are offering the FULL set of NIK plugins, NIK Collection ($149 value) when you sign up for a year of online training starting at $149. Get it here.
You can get a Full Creative Cloud Membership for only $39.99/month down from the usual $49.99/month. If you’re a student or teacher it gets even better. You can get your first year of the Full Adobe Creative Cloud for only $15.99/month (down from $19.99). Get the deals here.
Check out the deals here

In particular the Power Reserve is now only $29.97 (regular $49.95). I carry this battery on my keychain everyday. I always felt that the $49.95 price was a bit pricy, but at $29.97 it’s a lot better. Head to mophie.com and use the code “power” at checkout.
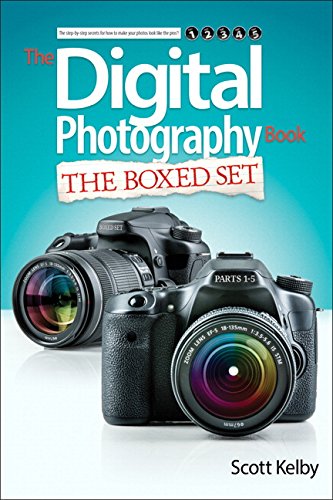
Normally goes for $149.99, on sale for only $79.99. Get it here (boxed or electronic download).

One of my favorite sources for RAM and computer accessories is having a huge sale. Check it out here
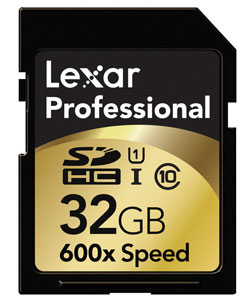
Because you can never have too many memory cards, get this professional grade 32GB card for only $19.95 here.
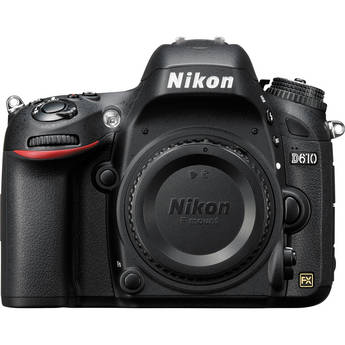
The Nikon D610 is Nikon’s lowest priced full frame DSLR and at this price it’s very hard to beat. Get it here for $400 off.
See it here.

I have a LOT to be thankful for and one of the things that I’m most thankful for is the overwhelming amount of support that I receive from my readers and fans. Enjoy time with your friends and family.
If you get into the whole holiday shopping thing be sure to come back tomorrow to take a peek at some hand picked Black Friday Gadget/Tech Deals. I would ask that you not give in to the desires of retailers today and not go shopping on Thanksgiving. Black Friday is starting to become Black November and there’s really no reason that the deals can’t wait until Friday.
Otherwise, enjoy! I’m looking forward to the long weekend.

In this episode of Adobe Creative Cloud TV I answer a Facebook Fan request on “how did they do that?” Specifically what he wanted to know how to do was the Full Screen Slideshow Scroll Effect seen here on a recent Adobe Muse “Site of the Day.” I was curious myself and I took the approach of “how would I do that” if I wanted to do it for my own site? In the video below you’ll see my approach for having a full screen slideshow that changes the background image of the site as visitors scroll/navigate down the page (using scroll effects).
See more of my Adobe Creative Cloud Videos on my Adobe Creative Cloud TV and get the App below. It features EXCLUSIVE CONTENT that no one else gets to see. This episode has a BONUS CLIP that is available only in the App! My iOS App is a Universal App for iPhone, iPad and iPod touch. I also have an Android version on the Amazon App Store:


Last week I released my 2014 Holiday Gadget Gift Guide as an interactive EPUB and as promised I’m releasing the web version today!
That’s right it’s my guide to help you with you holiday shopping for the gadget lover (freak) on your list. The way this thing started was each year towards the holiday season all my friends started asking me and emailing about what my picks were in various categories and of course the answers were usually the same. So I decided to compile a list and just email it to the folks that asked.
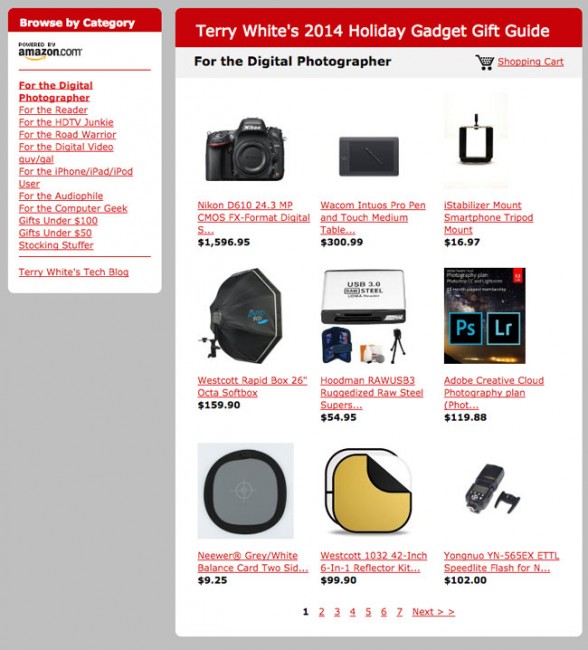
Once again I’ve put together a Holiday Gadget Gift Guide to help you pick out gifts for the techies and gadget lovers on your gift list. I’ve chosen Amazon.com simply because they are the one online retailer with not only the largest presence, but also the one that carries 99% of the items I recommend. Another advantage is that I can continue to add things that come up all the way up to the final days of the holiday season. In previous years I would always find some cool gadgets after the static gift guide was published.
Simple! If it’s in my guide it’s because I either use it now, have used it in the past or one of my close friends or colleagues use it and I trust their opinion. Now in some cases there may be an item in the guide that is NEWER than the one I use and I had to list that one because my model is no longer available. Unless I’ve used it or know someone who has, it doesn’t get in PERIOD.
The guide is broken out by Category so that you can shop accordingly. This way you can pick your gift by the kind of person you’re shopping for. I know that sometimes you have to buy a gift based on a certain dollar amount or budget (like gifts for co-workers), so I’ve given you a couple of dollar amount categories too. Happy shopping and in case I don’t see you later, Happy Holidays to you and your family! You can go straight to my 2014 Holiday Gift Guide here.
While the guide above has the vast majority of tech things that I like and would recommend, here are my Top 10 picks for 2014:
Get it here for about $24.99
Get it here for about $99.90
Get it here for about $159.90
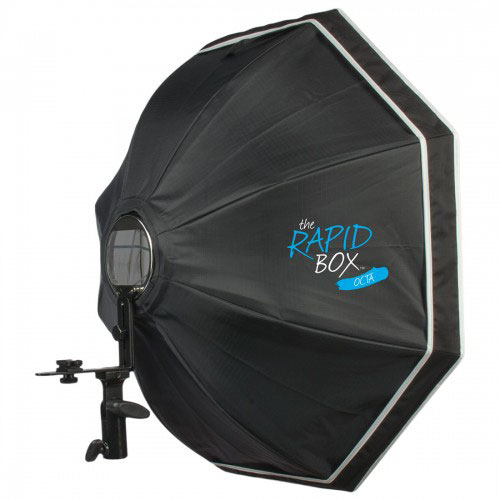
Also check out the official “Terry White Travel Portrait Lighting Kit” here
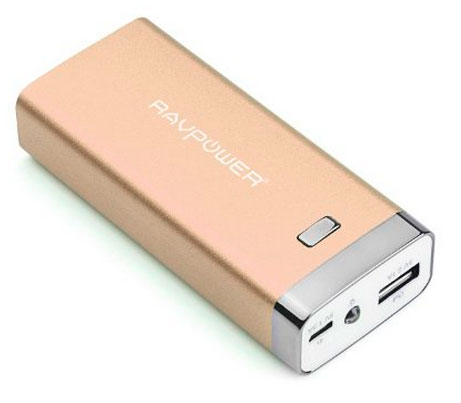
Get it here for about $68.17
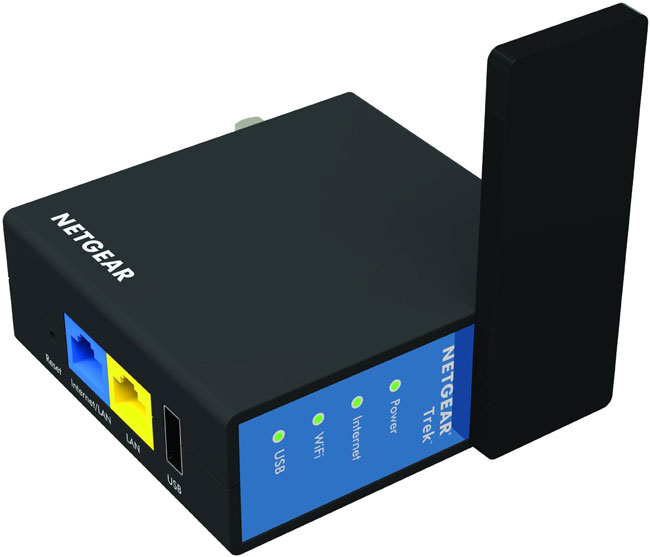
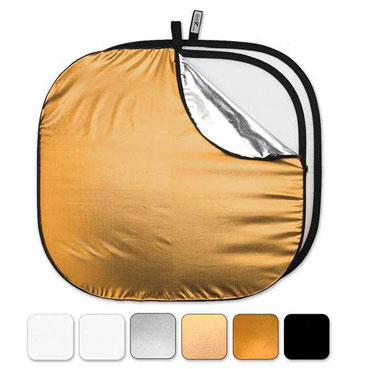
Get it here for about $42.80
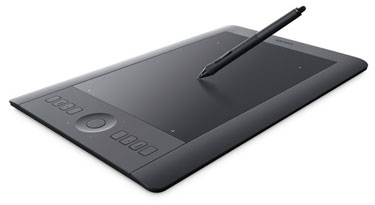
Get it here for about $309
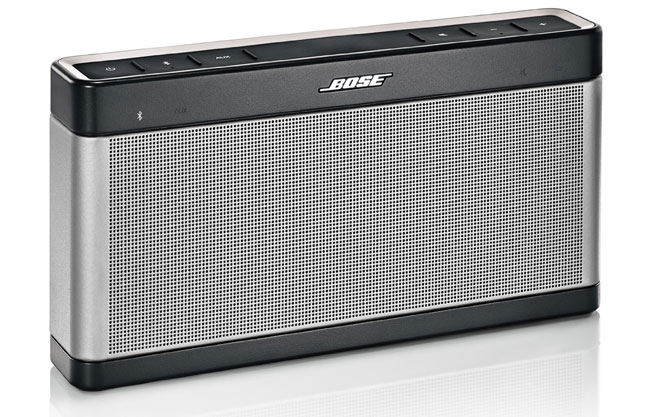
Get it here for about $299
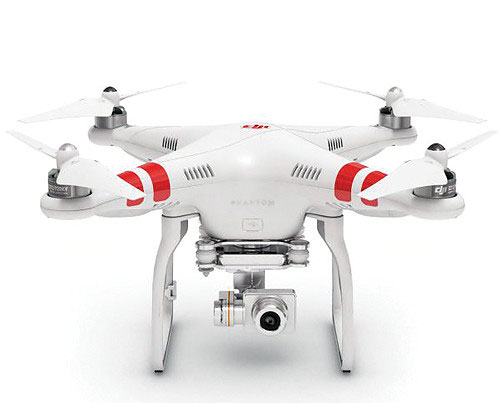
Get it here for about $1,159
Get it here for about $2,299 (on sale)
Get it here for about $119.88
Also check out “The Only Black Friday App You Will Need“
Continue reading “My 2014 Holiday Gadget Gift Guide (web version) is Here!”
In this episode of Adobe Creative Cloud TV, I’ll show you how to use Lightroom Mobile to get client feedback on your photos. Find out which photos your clients like and perhaps want to purchase.
I cover the new features of Lightroom 5.7 as they relate to Lightroom Mobile in the video above. However, there are some more things you should know:
Integrated a utility to import images from Apple Aperture and Apple iPhoto libraries into Lightroom:
New Camera Support in Lightroom 5.7
Newly supported cameras for Tethered Capture in Lightroom 5.7
New Lens Profile Support in Lightroom 5.7
Apple iPhone 6
Apple iPhone 6 Plus
Canon EF SIGMA 18-300mm F3.5-6.3 DC MACRO OS HSM C014
Canon EF SIGMA 150-600mm F5-6.3 DG OS HSM S014
Canon EF Tokina AT-X 116 PRO DX-II 11-16mm f/2.8
Canon EF Zeiss Otus 1.4/85 ZE
Fujifilm X Fujifilm X100T
Fujifilm X HandeVision IBELUX 40mm F0.85
GoPro Hero
GoPro Hero4 Black Edition
GoPro Hero4 Silver Edition
Leica M Leica SUMMARIT-M 35 mm f/2.4 ASPH
Leica M Leica SUMMARIT-M 50 mm f/2.4
Leica M Leica SUMMARIT-M 75 mm f/2.4
Leica M Leica SUMMARIT-M 90 mm f/2.4
Leica M SLR Magic 50mm T0.95 Hyperprime Cine Lens
Leica M Voigtlander VM 12mm F5.6 Ultra Wide Heliar ASPH.
Leica M Voigtlander VM 15mm F4.5 Super Wide Heliar II ASPH.
Leica M Voigtlander VM 21mm F1.8 Ultron ASPH.
Leica M Voigtlander VM 21mm F4 Color Skopar
Leica M Voigtlander VM 25mm F4 Color Skopar
Leica M Voigtlander VM 28mm F2 Ultron
Leica M Voigtlander VM 35mm F1.2 Nokton II ASPH.
Leica M Voigtlander VM 35mm F1.4 Nokton Classic
Leica M Voigtlander VM 35mm F2.5 Color Skopar
Leica M Voigtlander VM 40mm F1.4 Nokton Classic
Leica M Voigtlander VM 50mm F1.1 Nokton
Leica M Voigtlander VM 50mm F1.5 Nokton
Leica M Voigtlander VM 75mm F1.8 Heliar
Leica S Leica SUMMICRON-S 100 mm f/2 ASPH.
Nikon F Nikon AF-S NIKKOR 20mm f/1.8G ED
Nikon F Nikon AF-S NIKKOR 400mm f2.8E FL ED VR
Nikon F SIGMA 18-300mm F3.5-6.3 DC MACRO OS HSM C014
Nikon F SIGMA 150-600mm F5-6.3 DG OS HSM S014
Nikon F Tokina AT-X 116 PRO DX-II 11-16mm f/2.8
Nikon F Voigtlander SL 40mm F2 Ultron ASPHERICAL
Nikon F Voigtlander SL 40mm F2 Ultron ASPHERICAL Close-up Lens
Nikon F Zeiss Otus 1.4/85 ZF.2
Pentax HD PENTAX-DA 645 28-45mm F4.5 ED AW SR
Pentax HD PENTAX-DA 16-85mm F3.5-5.6 ED DC WR
Pentax HD PENTAX-DA 20-40mm F2.8-4 Limited
Sigma SIGMA 18-300mm F3.5-6.3 DC MACRO OS HSM C014
Sigma SIGMA 150-600mm F5-6.3 DG OS HSM S014
Sony Alpha SIGMA 18-300mm F3.5-6.3 DC MACRO OS HSM C014
Sony Alpha SIGMA 24-105mm F4 DG OS HSM A013
Sony Alpha Sony DT 18-55mm F3.5-5.6 SAM
Sony Alpha Sony DT 18-70mm F3.5-5.6
Sony Alpha Sony DT 55-200mm F4-5.6
Sony Alpha Sony 75-300mm F4.5-5.6
Sony Alpha Sony 300mm F2.8 G SSM
Sony Alpha Sony 500mm F4 G SSM
Sony E HandeVision IBELUX 40mm F0.85
Sony E SLR Magic 50mm F0.95 Hyperprime Lens
Sony E Sony FE 16-35mm F4 ZA OSS
Sony E Sony FE PZ 28-135mm F4 G OSS
Sony E Zeiss Loxia Biogon T* 2/35
Sony E Zeiss Loxia Planar T* 2/50
Bugs Corrected in Lightroom 5.7
Download Links
Lightroom 5.7:
ACR 8.7 now supports HiDPI displays on Windows. Please use the following steps to enabled HiDPI on Windows:
Bug Fixes:
Please note – If you have trouble updating to the latest ACR update via the Creative Cloud application, please refer to this installation note.
DNG Converter 8.7
See more of my Adobe Creative Cloud Videos on my Adobe Creative Cloud TV and get the App below. It features EXCLUSIVE CONTENT that no one else gets to see. My iOS App is a Universal App for iPhone, iPad and iPod touch. I also have an Android version on the Amazon App Store: