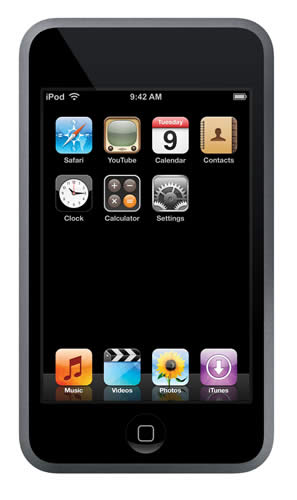
iPod touch
Besides dropping the price of the iPhone (read below), the big news today is the brand new iPod Touch. I gotta admit, that while I predicted Apple would come out with an iPod that was everything that the iPhone was without the phone, I didn’t think that they would actually have the guts to do it. Apple will sell boat loads of these. While the iPhone appeals to many (including yours truly), there are millions that won’t buy it. Some of those millions would love to have a touch/wide screen iPod that also has Wi-Fi and internet surfing capabilities. Does this mean that the iPhone is a failure? Absolutely not! It means that Apple is smart enough to try to sell the right product mix to EVERYONE! If I was stuck in a contract or for whatever reason (such as AT&T) didn’t want an iPhone or was happy with my existing phone, I would definitely want an iPod Touch.
With the iPod Touch you basically get an iPod that looks very much like the iPhone. You get a gorgeous 3.5" touch screen, 8GB or 16GB of storage (which the iPhone sorely needs), Wi-Fi, Safari, YouTube, and Wi-Fi music downloads from the iTunes store.
How is this different from the iPhone?
The obvious one is that there is no phone and therefore no EDGE data network. So you can only surf the web and use YouTube when you’re in a Wi-Fi covered area. There’s also no Bluetooth, not that you’d need it since there is no Bluetooth syncing yet. No camera, no Widgets, no SMS texting and no Google Maps.
Where’s Mail ?
The one BIG thing that is mysteriously missing from the iPod Touch is email? Granted if you have access to webmail, you can check your email with Safari, but it would be nice to have the Mail app that comes with the iPhone. I guess Apple had to draw the line somewhere and to entice you to move up to iPhone, Mail was that line.
Although the iPod touch is missing some of the iPhone goodies, it’s still a great iPod for those that want their music, videos and do a little surfing while waiting in a line somewhere. Hey Apple, are we ever gonna see games again on these touch screen iPods/iPhones?
Apple drops the iPhone 8GB price by $200 bones
You knew the day would come when Apple would drop the price of the iPhone. However, you probably didn’t think it would happen in just over two months and by $200. Yeah, that’s one is kind of a shocker and I’m sure there are some $600 iPhone owners out there that are a bit steamed at the moment. However, I’m not one of them. Why? Is it that I have this unlimited fountain of money? Nope, I just don’t get ticked about money I’ve spent months ago for a product that I’ve been enjoying. Sure, if I had just bought an iPhone this past week, I’d be marching down to the Apple store for a refund. However, I’m just not going to sweat money I spent on bleeding edge technology 65 days ago. Ouch! OK, I’m over it.
Now the real question is, how much is the 4GB model? Apple says they will sell the 4GB model while supplies last (read – they don’t have many left), but they didn’t say at what price. Does that mean that the 4GB model is now $299? If so, that would be a steal for someone that could get by with 4GB of storage. NOTE: A quick call to my Apple store and yes the 4GB model is $299 while supplies last. So if you want one at that price, don’t hesitate.
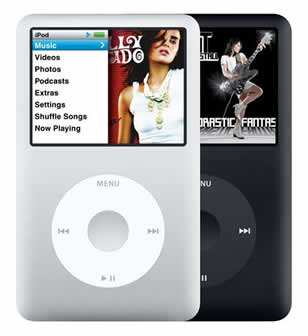
iPod Classic
Apple kept the award winning iPod interface intact. They realize that everyone doesn’t want a touch screen (you know who you are). So if you still want the very easy to use without looking at it click wheel, you can get an iPod Classic. You might also note that Apple did away with the “white” color and now uses a grey to match the rest of their new products. Also if your music/video collection didn’t fit on the previous iPods, there’s now a 160GB version! Wow! Is that a music store in your pocket or are you just happy to see me?
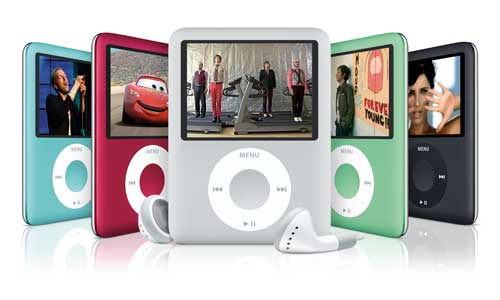
iPod nano gets phat (fat too)
Woah! Now you too can watch videos on your iPod nano. Basically Apple is allowing video (and photo) playback on any iPod with a screen. I’m not sold on the design though. It looks like someone took a regular iPod and squished it in Photoshop. The nano was very popular because it was just so darn small and thin. The new nano (aka fatty as some are calling it), kind of loses some of that sleekness. However, it is still very thin since it doesn’t have a hard drive. iPod case manufacturers, get your pencils out. You now have a new market to go after.
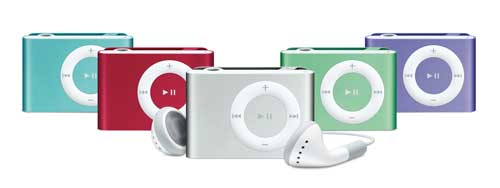
iPod shuffle
Not a lot of news here. Apple refreshed the line with some new colors. Quite honestly I couldn’t tell you what the old colors were. I do own the original second generation shuffle in silver and since I got my iPhone I haven’t used it. So I haven’t been keeping up with what’s going on in the iPod shuffle world.
iPod/iPhone pricing
Here’s a break down of what the iPods and iPhones cost. I still don’t get why you’d buy a 8GB nano for $199 when you can get an 80GB Classic for only $50 more, but hey, Apple sells a ton of nanos.
| |
Capacity/Price |
Capacity/Price |
| iPod Touch |
8GB $299 |
16GB $399 |
| iPod Classic |
80GB $249 |
160GB $349 |
| iPod nano |
4GB $149 |
8GB $199 |
| iPod shuffle |
1GB $79 |
|
| iPhone |
8GB $399 |
4GB $299 |
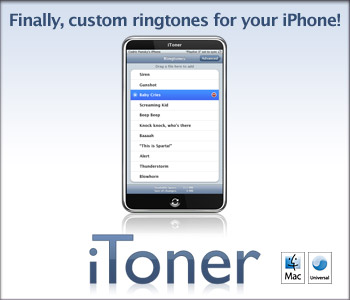
iTunes Wi-Fi Music Store & Custom iPhone Ringtone Maker
OK, where do I begin here? I think it’s very cool that you’ll now be able to buy a song right on your iPod and listen to it right away. That makes total sense to me and it’s hot! However, I just don’t get the whole "buying ringtones" thing. I’m not just talking about Apple, I’m talking about the market as a whole which brings in MILLIONS of dollars every year. It’s only natural that Apple would want their fair cut of this growing pie.
Don’t get me wrong, I totally love custom ringtones. I have some on my iPhone right now and had them on my Treo and RAZR before that. However, in each of those cases I made them myself out of songs that I already bought. I just don’t understand the business model of selling "ringtones" specifically. A quick sanity check over at Sprint.com reveals ringtones that they are currently selling (Beyoncé just started blaring "Me, Myself and I" – I hate when sites play music that I didn’t click on. I love Beyoncé, but that’s besides the point) for $2.50 each! How can this be? I can go to iTunes and buy the WHOLE SONG for .99¢ and play it back on several devices and even burn it to an Audio CD. Yet, Apple (and others) expect me to pay MORE for a 30 second version that only plays on my phone? Help me understand this. Apple’s price is a little better than Sprint’s. Here’s the deal. You buy the song you want (out of only 1 Million of the millions of iTunes songs. So you might not even get the one you want), and then you pay another 99¢ for the ability to customize it down to the 30 seconds you want to be a ringtone on your iPhone. Granted you still get to keep the full song and use it anyway you want just as before, but to use it as an iPhone ringtone, you pay $1.98.
No thanks! I’ll continue to use iToner and put my own ringtones on my iPhone (unless of course Apple breaks this ability with an iPhone software update and then I would be ticked off).
Apple and Starbucks
Apple just got all chummy with Starbucks in an exclusive deal that you will be able to go to a Starbucks location with your Wi-Fi enabled iPod touch/iPhone and download music from the iTunes store without paying a Wi-Fi charge to Starbucks. OK, whatever.
If you really want to get my attention, let me surf on my iPhone free of charge while I’m in a Starbucks. I don’t even drink coffee, never mind.
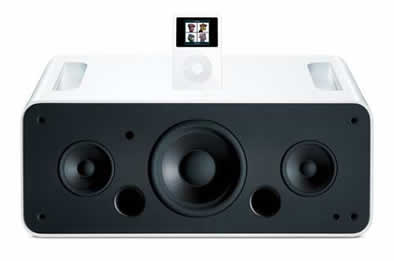
Buh-bye iPod Hi-Fi
Looks like sales of the iPod Hi-Fi were disappointing enough that Apple quietly removed the iPod Hi-Fi from its online store. I’ll kind of miss the Storm Trooper. Oh well. Bose and all the others win this round.