I need a lens!

lenspro


A few months back I took a trip to Page Arizona and I mentioned the fact that I rented the Nikon 14-24mm Wide Angle lens ($1,600). I also mentioned that I would tell you more about the company I rented it from. Well I’m finally getting around to it. I was reminded about this great service in two ways recently. One way was that it was mentioned on a recent episode of Nikon DTown TV and the other is that I have a family reunion coming up in a couple of weeks.


Sometimes renting is better
nikon200-400

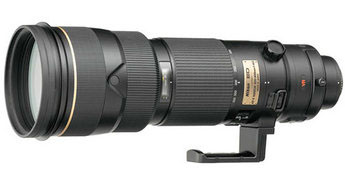
Let’s face it. You could go broke buying all the really nice lenses that are out there today. While I have no problem spending money on something that I’ll use and benefit from, there are just some things that I won’t use enough to justify the price of ownership. I have all the lenses I need for my day to day shooting. However, there are those special events that come up once or twice a year that you really need a specialty lens. For example, maybe you’re shooting a sporting event that will only happen once for you because you’re not a regular sports user. Wouldn’t it be nice to have a nice 200-400mm lens or maybe a 200mm f/2.0 lens? Well those lenses cost many thousands of dollars. So instead of buying them and only using them a couple of times a year, why not rent them for much much less?

To buy the Nikon 200-400mm lens would be $6,280. However, to rent it for a week would only cost $250.

To buy the Nikon 200mm f/2.0 lens would be $4,900. However, to rent it for a week would only cost $175.


LensPro To Go

These guys were great to work with! I met them personally at the last Photoshop World Conference and tried them out for my last vacation. Not only was the service very trouble free, I got to use the really nice glass that I really wanted to take and for a price that was really reasonable and well within my budget. You order the lens you want directly from their website. They offer insurance which I highly recommend, because it’s one thing to pay for a really nice lens, it’s another to pay for one that’s not even yours because it got damaged! My lens arrived in a really good Pelican case along with the Fedex prepaid airbill to ship it back. 


The Bottom Line

If you need a really nice lens but won’t be using it often, LensPro To Go is your answer! Check them out here.
 

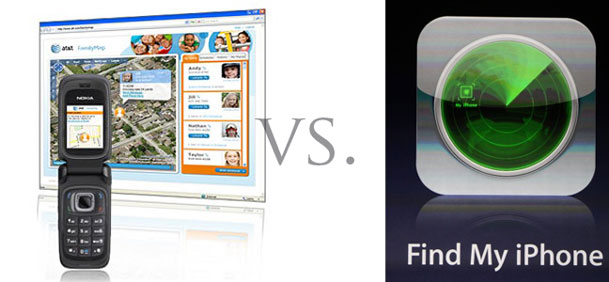
AT&T FamilyMap vs. MobileMe Find My iPhone

familymapvsfmi

A couple of months ago I reviewed AT&T’s FamilyMap service. This service allows you to track the location of the cellphones you have on an AT&T Family Plan. However, since that time Apple introduced the Find My iPhone feature, which works with iPhones and iPod touch devices as long as you have a MobileMe account ($99/year or less). After I posted my FamilyMap review, many of the blog readers here signed up for the free trial and many said the same thing. "It’s just not accurate enough." Now while I didn’t have a problem with the accuracy of it, I do have a problem continuing to pay for a service I may not need anymore. 


AT&T FamilyMap

This service works by giving you a website that you can go to and "Locate" your loved ones. Depending on the phone the accuracy and the ability to pinpoint the location can vary widely. For example, a phone with a built-in GPS is liable to be more accurately found than a phone without one as it would have to rely on cell tower triangulation. AT&T FamilyMap starts at $9.99/month for up to 2 phones and 14.99/month for up to 5 phones on the same family plan.


MobileMe – Find My iPhone

The MobileMe Find My iPhone feature only works with iPhones and iPod touch devices. You log in to the me.com website, click the settings icon and then click the Find My iPhone link. Your iPhone’s location will be pinpointed on a map. You have to have a MobileMe account to use this feature and MobileMe retails for $99/year (or less if on sale). In order to find more than one iPhone, you would need the Family Pack which is $149/year (or less if on sale). 

Continue reading “AT&T FamilyMap vs. MobileMe Find My iPhone”

iPhone App of the Week – Navigon MobileNavigator North America

navigonlogo

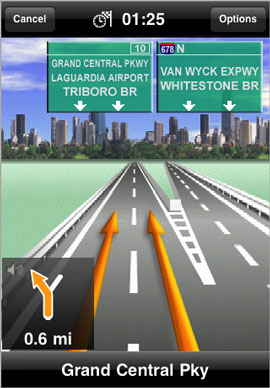
When the iPhone OS 3.0 update was introduced, Apple opened the door to 3rd party turn-by-turn apps. They brought TomTom up on stage to show off the app that they were working on. I was impressed by what I saw and thought that this might be a chance to carry one less device when I travel. I'm very fond of my Garmin Nuvi 765T and the chances of a Garmin App for the iPhone are slim. It seems that Garmin would rather compete with a phone of their own (Garmin, look at the Palm Pre. You guys just don't stand a chance against iPhone and Blackberry). So an iPhone app would have to be really killer to make me give up my Nuvi. I'm also a fan of Navigon GPS units too. Actually it's not so much about their hardware that I'm impressed by as much as it is their software. I fell in love with the Navigon 3D Reality View, which pops up a photo realistic image of the road signs you're going to go under so that you're in the right lane. Not long after the TomTom announcement was made, Navigon announced that they would have an iPhone app too!

navigon-3d

It's a race!

In many cases first to market can definitely get you a leg up on your competition. If you have a really good app, then it makes it that much harder for your competitor. It's pretty clear that Navigon wanted to be first. Why you ask? Two reasons: for one they are offering their app for an introductory price of $69.99 until August 15th. Then the price goes up to $99.00. This of course creates a sense of urgency. The second reason is that they state right on their App Store page that a free update is coming with additional features. I would argue that a few of those features should have been in the first release. What was the hurry? Oh yeah, right. That whole get it out first thing. I remember now.

Continue reading “iPhone App of the Week – Navigon MobileNavigator North America”

Do anti-glare films for your display work?


Back when I got my New 15" MacBook Pro with a Glossy Display, one of the first things I wanted to try out was an anti-glare film. I was sitting at the Genius Bar at the Apple Store with an unrelated issue and the Mac Genius asked me if I had tried one/reviewed one yet. When I answered no, we all kinda looked at each other and decided that there was no time like the present.

The key to installing/putting on one of these films on any display is that the display has to be as clean as possible of marks, finger prints, etc. This way you lessen the chance for bubbles/air pockets too. So the tech took my MacBook Pro to the back room and did a meticulous installation job. It was flawless. No marks, bubbles or other problems. It looked like it had been done at the factory. 


OK, does it work?

The first thing I could tell right off the bat in the store was that the glare was cut down quite a bit! Although I was happy with what I was seeing, I really wanted to see it under my lighting/working conditions at home. So that I night I did my normal work which included a little portrait retouching in Photoshop. This is when I realized that the film had to come off! The problem was that the film adds a bit of grain to the look of the what’s being displayed. Most users probably wouldn’t care in non-image critical apps such as a web browser, email, etc. However, in Photoshop it was VERY DISTRACTING! It pained me to peel it off after the Mac Genius did such a good job putting it on, but I couldn’t take it anymore. Every time I would see the grain I would have to do a double take to make sure it wasn’t in the image itself.


The Bottom Line

If you’re not a photo retoucher and the MacBook Glossy screens bother you, then this Anti-Glare film may be worth a try. If your work is color critical and you rely on the display more than the average person you may want to pass on this film. I’ve gotten used to the Glossy Display and it doesn’t bother me at all. There are only rare occasions that I even notice it and even then I can just move it a bit. Rumor has it that Apple is going to offer more displays in a Matte finish. The collective creative community can rejoice if that’s true.

The Power Support Anti-Glare film goes for the 15" MacBook Pro goes for $34.95

My DVD to MP4 Media Conversion Project is Done!

emptydvdracks 

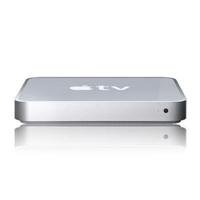
You might remember my post from May when I was in the middle of converting my Movie DVDs over to a hard drive. I have successfully converted my DVD movie connection to .MP4 H.264 format! This means that I can now enjoy any movie I own on any HDTV in my house via Apple TV or I can take the movies with me on my laptop or iPhone. I actually finished the conversion a couple of months ago, which was much earlier than I anticipated.

appletv

How did I do it?

I have over 380 standard def Hollywood DVDs. Painstakingly one-by-one I converted each one over to an .MP4 file using Handbrake. All 440 movies total (some were already digital or home movies) were imported into iTunes and reside on a Drobo connected to an intel iMac. This iMac serves as my iTunes server. It’s the one that all of my Apple TV’s are sync’d to and it’s the one that I use to sync my iPhone to for media ( you can sync an iPhone to more than one computer for data and media separately). I also use this iMac to sync my iPods too. So it has it all, music, movies, TV shows, podcasts, best of the best photos, etc. 

Continue reading “My DVD to MP4 Media Conversion Project is Done!”

Another Successful Photowalk

skpwlogo4color


15

Not sure how all the other cities did, but my Scott Kelby Worldwide Photowalk – Detroit was a big success! We had an absolute perfect day weather wise and a great group of photographers.  We went on a 2 mile walk throughout downtown Detroit snapping shots of some great landmarks and interesting landscapes. I can’t wait to see everyone’s shots.

148

I got a couple myself that I liked, but nothing really outstanding. I was too busy enjoying everyone else that was there.

Continue reading “Another Successful Photowalk”

iPhone App of the Week – Air Sharing Pro

 airsharingprologo

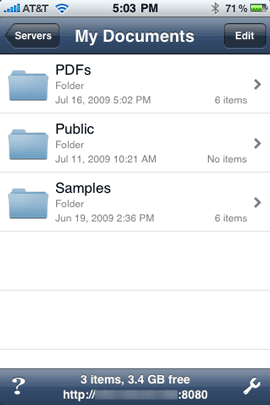
My favorite app for putting files on my iPhone just went Pro! The one thing I never understood is that Apple allowed you to turn on Disk Usage almost since day one with the iPod, but still to this day doesn’t do it with the iPhone. There are plenty of things that would be nice to carry on your extra storage space such as PDFs, presentations in PPT, word and excel files, etc. Yet, for some reason Apple hasn’t seen fit to allow this natively. No worries, there are apps in the App Store that fill this gap. I wrote about the Air Sharing app back in September 2008. I got in when it was first introduced and it was FREE! It was and still is a great solution for putting documents on your iPhone and viewing them while you’re on the go. Basically Air Sharing turns your iPhone into an HTTP file server that you can copy files to and from over your Wi-Fi network.

asmydocs

  Continue reading “iPhone App of the Week – Air Sharing Pro”

Too good to be true? 6 foot HDMI cable for 17¢ No way!

Way!

hdmicompared

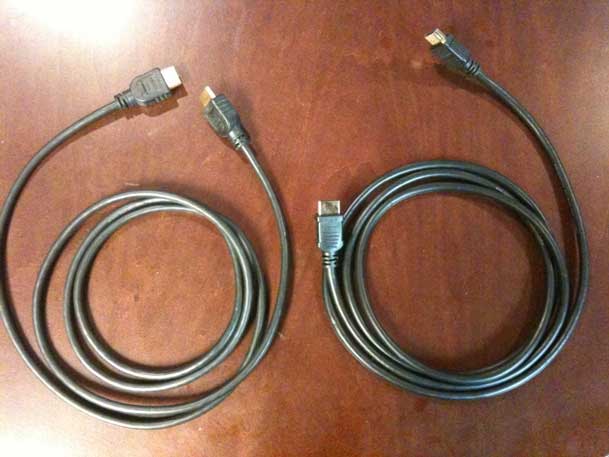
What’s the difference between these two HDMI cables?

The one on the right cost about $14 and the one on the left cost 17¢. I know what you’re thinking, "what’s the catch?" That’s certainly the first thing I thought when my buddy Corey pointed this out to me. You may remember a few weeks back, I wrote a post about paying too much for cables. Well several readers responded with where they buy their cables. Corey contacted me later on and pointed me to this HDMI cable on Amazon.com for only 17¢. Needless to say we were both highly skeptical! Usually deals like this are not really a deal because they jack up the shipping to basically be the price of the item. However, that was not the case here. I ordered two of them and the total for the order including shipping was still under $6. Of course the other gotcha could be the cable itself. I was half expecting this thing be made out of cardboard. However, it was almost indistinguishable from the cable I was already using on one of my sets. Well of course looks can be deceiving! We still don’t know about the quality of the materials inside the cable. So this required a real test. I unplugged my "good" cable and plugged in one of these cheap ones. I could NOT tell a difference in picture/sound quality at all. 

  Continue reading “Too good to be true? 6 foot HDMI cable for 17¢ No way!”

Join me at Adobe MAX!

signature_max09_speaker


Once again I’m honored to be a Featured Speaker at this year’s Adobe MAX conference! I had so much fun and learned a lot at last year’s conference in San Francisco. This year the conference will be held in LA and I’m counting the days. Adobe MAX brings together some of the brightest minds in the industry and covers everything from developer workflows, to creative pro techniques to a look at where Adobe is headed. 

I’m joined this year by my esteemed colleague Russell Preston Brown, Adobe’s Sr. Creative Director and he will be doing a special 3 Day Hands On Workshop!

I’m looking forward to see you there. If you haven’t registered yet, you can do so here.


Lastolite Kickerlite Softbox Review

 lastolitekickerlite

The good folks over at Bogen sent me one of the NEW Lastolite Kickerlite Softboxes to check out. My friends over at NAPP were raving about it and my buddy Scott Kelby did his review a few weeks ago. Although I’ve had it for a while now, I just didn’t have the right shoot lined up to try it on. Well that all changed last night. Last night I got to work with one of my favorite models and my goal was to use the Kickerlite during the shoot. Scott let me get a sneak peak at his NEW Digital Photography Book Volume 3 and in it I found a technique that I just had to replicate:

shay-glass2

If you want to learn how to do the exact setup for this shot, grab a copy of Scott’s book.

  Continue reading “Lastolite Kickerlite Softbox Review”