Use the Simplicam to monitor your home or office

simplicam

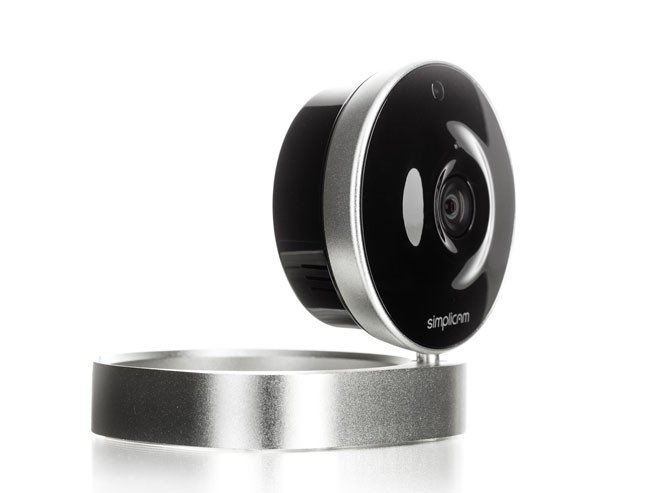
WiFi connected webcams are nothing new. When someone enters this category I quickly look to see if they’re adding anything new or if it’s just a me too product. In most cases there isn’t a whole lot that’s new, but companies do sometimes find a way to improve on an already crowded product category. The Simplicam + Closeli is a standard WiFi connected webcam with a nicer design than most. It has a well thought out base/stand as well as things like a 10 foot “flat” USB cable so that you can more easily hide it in your home. This camera can be monitored from your iPhone, iPad, Android device or web browser.

The setup process is pretty straight forward. Just plug the supplied “short” USB cable into your Simplicam and the other end into your Mac/PC. The software mounts in a volume on your computer that you can run from there. Once you’re in the setup utility you’ll use it to connect the Simplicam to your WiFi network. You’ll also create an account on Closeli.com where you’ll get a year of included cloud recording service. Closeli like others has different plans so that you can go back and review footage from your camera based on motion and sound detection. They also bring “face” detection to the table to distinguish between someone actually entering the room vs. the cat running by. You can get push notifications of any of the aforementioned types of activity. You can also schedule times when notifications need not be received (you’re home) or when the camera should be off. Notifications or not you can see what’s going on in the room on demand by just firing up the Closeli app on your mobile device or logging in with your web browser on your computer. You can export clips or still grabs as need. If you need to talk to the people in the room remotely you have two way audio. Yes there is also night vision.

Here’s a video review of the product.

The Bottom Line
simplicam-Face-Recognition-Manager

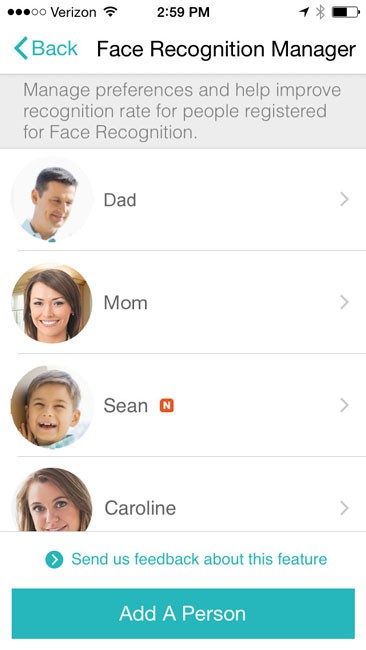
While I haven’t reviewed any of the newer cameras in this category lately, I would say that just looking at the specs alone Simplicam brings at least two things to the table over the competition and that’s face detection (a beta feature, which can also be set up to recognize specific faces and can tell you when an unrecognized face enters the room.) and a lower priced cloud storage/recording service. The 720p 107° view camera is also better than my older cameras.

You can get Simplicam HD + Closeli here.

The Logitech Type+ for iPad Air 2 is Just Right

logitech-type+

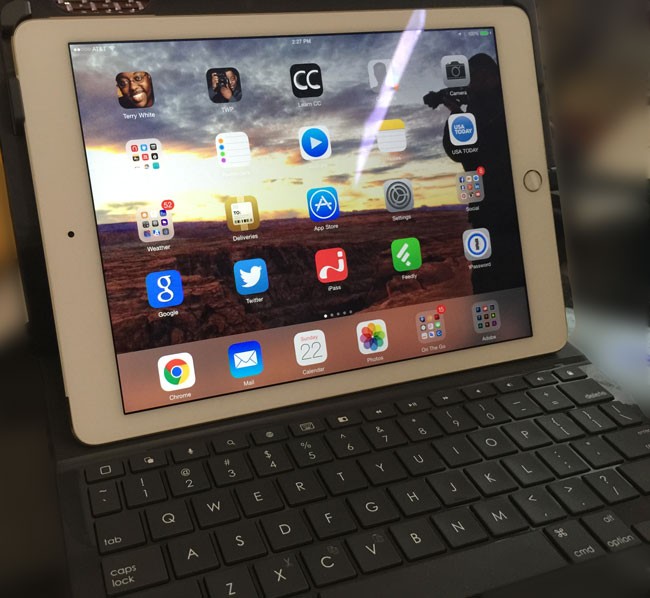
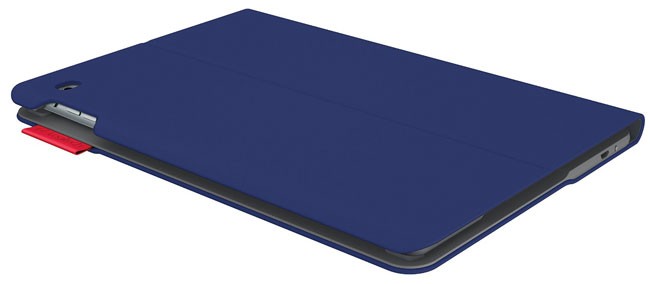
This is probably my third or forth Logitech keyboard for iPad and this one by far is the closest one to being perfect. The Logitech Type+ is a both a bluetooth keyboard and protective case. What makes this one better than the previous models is that Logitech made it even thinner so that it doesn’t add much bulk to your nice new iPad Air 2.

logitech_type+_leyboardlayout

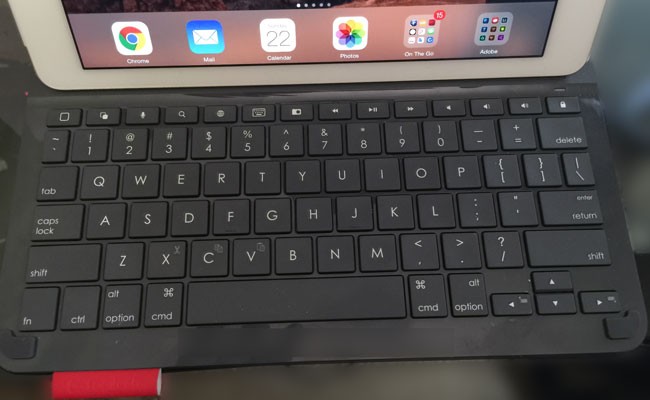
The keyboard layout is also better. With the previous mode I was constantly hitting the  the home key (returning to the home screen) when trying to type a 1. They moved the home button up to the row at the top on this layout (thank you!). Lastly I love the way that they integrated the ability to lay the iPad flat over the keyboard when you just want to use the iPad without using the keyboard without having to remove it from the case.

logitech-type+side

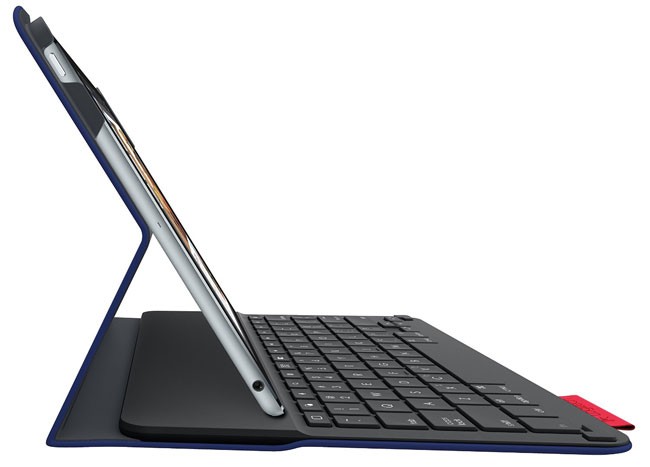
Actually the keyboard is activated when you put the iPad in the “stand” position where it magnetically held in place right above the keyboard. The only thing keeping this case from being “perfect” is that you cant’ use it if you want to stand your iPad up in the vertical position. Sure you can hold it vertically, but you wont be able to stand it that way.

logitech-type+flat

If you have an iPad Air 2 this is the best keyboard case I’ve seen. You can get it here.
If you have the original iPad Air, then I’d recommend this one.


Check out Nomad’s latest phone charging accessories

NomadKey

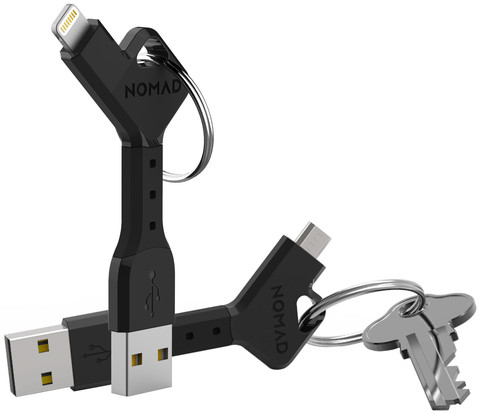
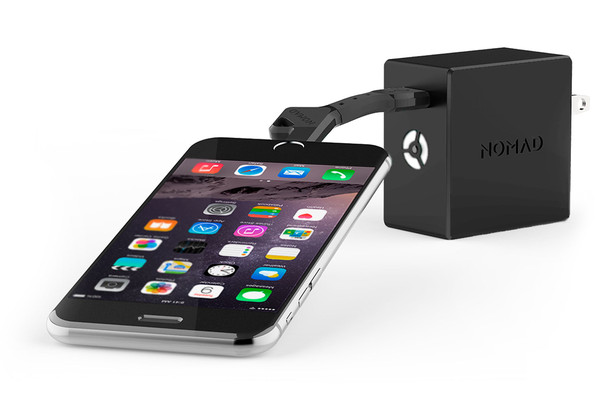
Nomad has three new smartphone charging accessories that are pretty cool and convenient. The first one is their new NomadKey. This slightly larger than a key sized accessory means that you will always have a micro USB or Lightning cable with you right on your key ring.

You can get the NomadKey Lightning here.
You can get the NomadKey Micro USB here.

nomadclip

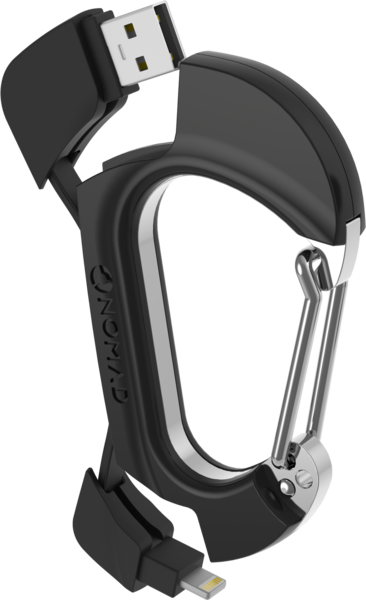
The next one is their new NomadClip. This is great for those of you who like to clip your keys to a belt loop or backpack.

You can get the NomadClip Lightning here.

You can get the NomadClip Micro USB here.

NomadPlus-charger

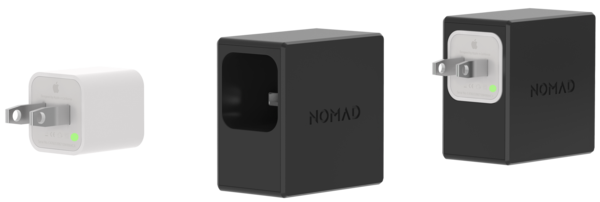
Last but not least is their cleverly designed NomadPlus. Your existing iPhone charger goes right inside turning this device into both a charger and 1800mAh battery backup as well. My only disappointment with this one is that it’s only 5V/1A (same as the iPhone charger). I was hoping that as a battery backup it could be 2.1A instead for fast charging and charging iPads at full speed. Otherwise it’s a cool charger/battery backup for your iPhone.

NomadPlus-iPhone

You can get the NomadPlus here.

OWC Creates a Better Thunderbolt Dock

OWC-thunderbolt-2-dock

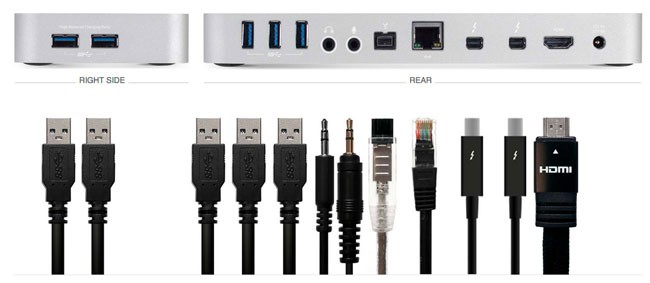
In 2013 I got the Belkin Thunderbolt Dock and I’ve been quite happy with it. So what could change in two years? Well, a lot. The basic principle is the same. A Thunderbolt dock allows you to plug in a single Thunderbolt cable into your Mac and expand the ports giving you more USB 3 ports, Firewire 800, audio line in/line out, etc. The NEW OWC Thunderbolt 2 Dock does what you would expect but offers 5 USB 3.0 ports instead of 3. It offers 2 Thunderbolt 2 ports, and HDMI (with 4K support) in addition to Firewire 800, Gigabit Ethernet, Audio in/out. Two of the five USB 3.0 ports are also high powered for charging your bigger devices such as iPads. With they addition of HDMI this means that now I only have to plug ONE Thunderbolt 2 cable and one display port cable to my Cintiq 24HD into my MacBook Pro and ALL of my devices and displays are connected.

wpid14281-IMG_3522_sm.jpg

For those of us who use our MacBook Pros like a desktop computer when we’re at our desks, these Thunderbolt docks are indispensable. It makes coming home or back to the office so much easier by just having to plug in one or two cables to have all of your devices connected. Now if it could only cut down on the amount of clutter on my desk, I’d be even happier! 🙂

You can get/pre-order the OWC Thunderbolt 2 Dock here. Initial supplies are limited. I ordered mine the minute they announced it and was happy when it shipped.


Gadget of the Year 2014: WD 1TB MyPassport Wireless

WD-MyPassport_Wireless

I come across a lot of really cool gadgets all year long. Some are cool just from a technology perspective and others are cool because they’re really really useful. However, when I look back at 2014 there is one gadget that really stands out as cool technology AND really useful. External hard drives are a dime a dozen and pretty much a commodity these days. The cost of storage has really dropped. The capacities have gone up. So what would make an external portable hard drive so special that it’s my pick for Gadget of the Year 2014?

best-gadgets-of-2014

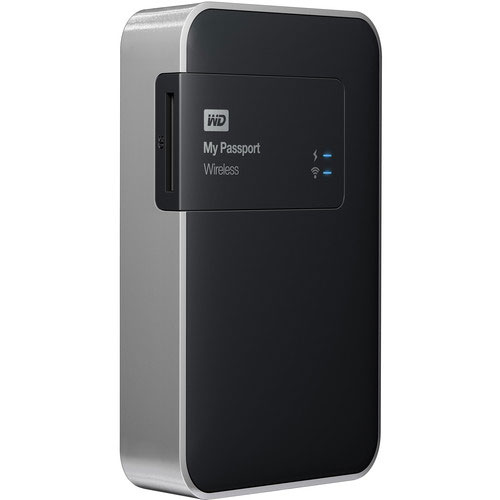
This one has so many uses that I sometimes lose track. The WD 1TB MyPassport Wireless hard drive is a portable hard drive that has built-in WiFi connectivity. This means that not only can you connect to it via USB 3.0, but you can also connect to it from any computer or mobile device even if there is no WiFi hotspot nearby.

Use it wirelessly from your computer(s)

Screenshot 2014-12-28 19.29.06
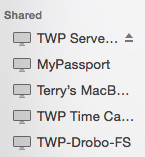
The MyPassport shows up as a shared volume in Mac OS X.


Once the drive has been configured all you have to do is turn the drive on and it can either create its own adhoc wireless network or join an existing one. In either case you can see the drive as a “network volume” directly from your desktop/laptop OS without any special software. You can copy files to it or from it. Up to 8 devices can connect to the WD MyPassport Wireless at one time.

Use it from your iPad, iPhone or Android mobile devices

WD-MyCloud-iOS

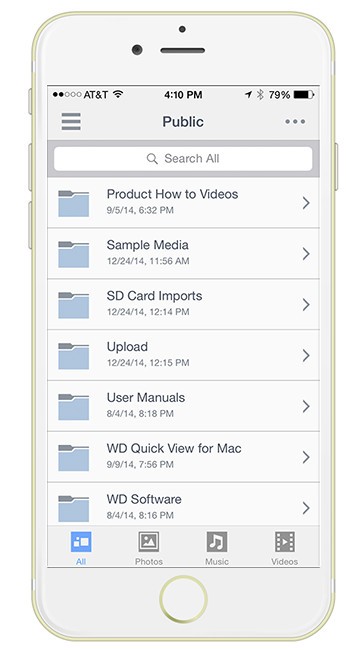
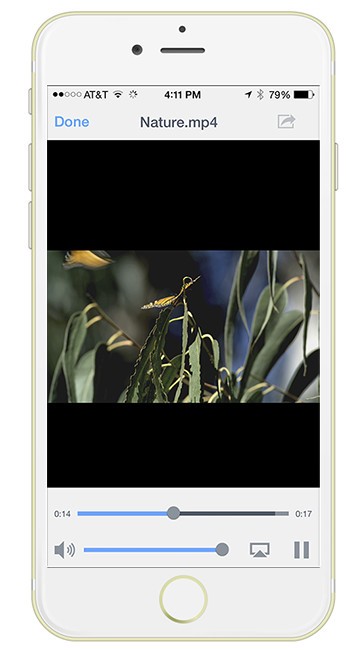
Download the WD My Cloud app for your mobile platform (iOS or Android). Join the network that the drive creates or see it on your existing network. Now you have 1TB of extra storage to use on your mobile devices. Want to take a bunch of movies with you on a trip and stream them to your iPad? No problem. Just load up the drive before you leave your home/office and view any compatible videos on the drive. Yes it also works for music and pictures too. No need to copy this media to your mobile device because you can just stream it. Wondering what you’ll do for power on say a plane? No problem the drive has a built-in rechargeable battery so stream away… The iOS App even has AirPlay built-in so that you can stream from the drive and play to an Apple TV or speaker system.

WD-MyCloud-movie

.

The Killer Feature: A Built-In SD Card Reader with Auto Import

SD-card-import

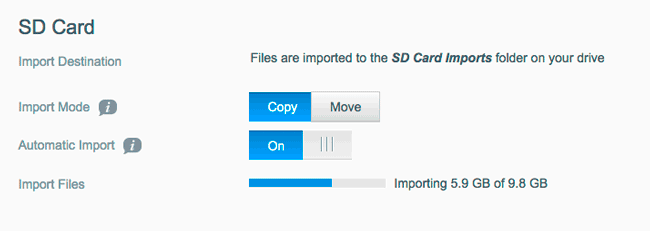
While the above features alone make this a pretty cool device, there is one feature that takes it over the top. I get this question all the time: “I’m going on vacation and I don’t want to take my laptop. Is there a device that allows me to backup my photos while I’m out of town?” Until now the options were few and expensive. By putting an SD card reader on this drive it just got a whole lot easier to backup those precious memories on the go. You can either manually import the pictures via the web interface or the App or you can configure the drive to do an “auto import” each time you stick a memory card in. It will copy the entire card (yes even the RAW files and movies) to the hard drive. The drive doesn’t have a display. However, there’s nothing stopping you from viewing your shots on your nice big iPad display or your phablet – WIRELESSLY!

The Bottom Line

This gadget has uses for everyone that I know. If you’re just a regular user needing more storage on the go, you’ve got it. If you’re a photographer this becomes an indispensable tool in your mobile workflow. Western Digital thought of everything on this one. It does everything I would expect it to do as if I had designed it myself.

You can get the WD 1TB MyPassport Wireless drive here.

Better yet, you can get the WD 2TB MyPassport Wireless drive here. <-it’s a better deal!


My New Favorite Travel WiFi Router

wpid14051-IMG_3946_sm.jpg

I’ve traveled religiously with an Apple AirPort Express Base Station for years. It’s portable, it’s fast, and pain free in terms of setup. It just works. However, there’s one thing that made me look for a new solution. More and more hotel rooms and locations that I’m in on the road are now WiFi Only, meaning that newer hotel rooms are no longer equipped with wired ethernet jacks. Even those rooms that do have the wired ethernet ports are often disconnected. Sure I could just connect my devices to the WiFi network offered but that offers a set of challenges that I was avoiding by bringing my own router in the 1st place. When you connect to the hotel WiFi (free or paid) chances are each device has to go through a sign-in, login, accept the terms process. Usually this login is only good on average for up to 24 hours before having to repeat the process for each device each day. On the other hand if I connect my own WiFi router (hotspot) then I use one device to sign on/login etc. and all the other devices on my network can surf freely without the need to have to sign on/login individually.

Why the AirPort Express is no longer the solution

The AirPort Express is great and even the newer form factor has grown on me, however the AirPort Express requires a wired connection to the internet in order to work. If I’m in a hotel with WiFi only the AirPort Express has to go back in my bag. Sure the AirPort Express can be used to extend an existing “AirPort network”, but I have yet to see a hotel equipped with AirPort Base Stations, let alone the access needed to make that kind of configuration work.

Netgear built the WiFi Travel Router I was looking for

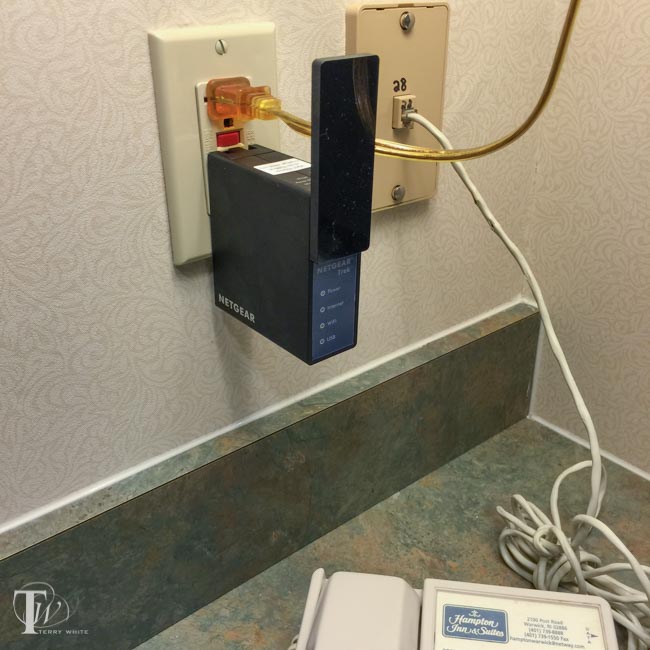
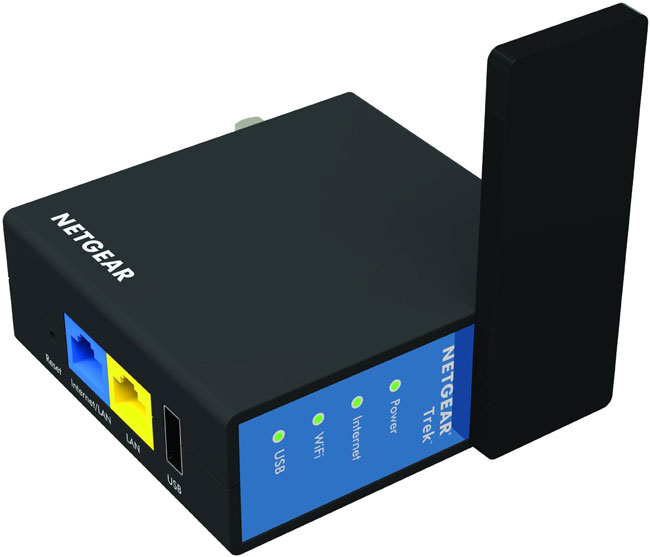
The Netgear Trek  N300 does the one extra thing I need. It allows you to connect to an existing WiFi network and then share that connection via the WiFi network that it creates. Having my cake and eating it too. It can work in either a wired or wireless setup. If there is an Ethernet jack in the room then the Netgear Trek N300 can plug into it and route it just like the AirPort Express. However, if there is only a WiFi network you can have the Trek N300 join it and share it creating your own private password protected WiFi hotspot for the rest of your devices/guests.

How does it work?

As you might expect the setup requires a couple of extra steps when connecting it to an existing WiFi network. The first thing you’ll do is simply configure it with a web browser to set up the wireless network for your devices to connect to. Let’s say for example you want to create a network called “Get off my LAN”. Once you set that up with a password you’re all set to travel. Once you get to your hotel room or other public WiFi area, just power the Trek N300 up using the built-in foldout plug or plug in a standard micro USB cable (it comes with it) and power it via USB. This is a very nice touch because I don’t have to have an extra free wall outlet available. I can power it using my Anker 40w 5 port USB charger/power source.

netgear_wifi_page

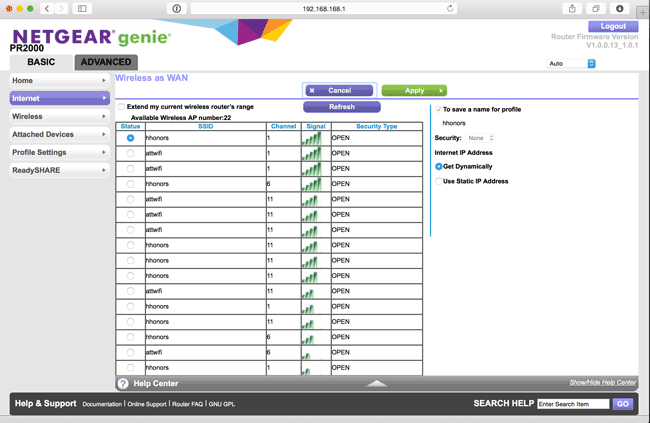
Now simply connect to it from any of your devices. Bring up your web browser and enter the address of your Trek N300. Signin with your admin password and from there you will see a list of the visible WiFi networks to choose from. Choose the public network that you wish to connect to and you will likely be prompted by the public WiFi’s login page. Login as you normally would if you were connecting to this network directly, but you are actually connecting the Trek N300 to it. Once you’ve successfully logged in or paid your Netgear Trek N300 will be online and able to route that WiFi connection to your private WiFi network “Get off my LAN” for all your other devices/guests to connect to.

This Router/Range Extender works GREAT, especially after I upgraded it to the latest firmware. Unfortunately it won’t speed up a painfully slow hotel WiFi connection, but it will make it less painful for you to use by eliminating device limits and multiple device logins. Also it will give you one more layer of security because all of your devices will be behind the Netgear firewall and not visible to the public WiFi network.

The Bottom Line

netgear_trek_n300

The Netgear Trek N300 didn’t disappoint. I’m using it this week on the road as I write this post from my room at a Hampton Inn. There are no ethernet ports here in the rooms and without the Trek N300 I would have had to connect each device to the hotel public WiFi and sign in each device separately. You get an extra Ethernet port on it to connect wired devices too.

Also when you compare the price to the AirPort Express it’s a no brainer.

You can get the Netgear Trek N300 on sale here.

They also have an iOS App to manage it that you can download here for iPhone:

.

Or here for iPad:

.


Best USB 3.0 Hub for Travel

Satechi-USB3.0-hub

Back in 2012 I did a review of what I consider to this day to be The Best USB 3.0 Hub. I still have this hub on my desk to this date with zero problems with it. It just works! While this USB 3.0 hub is great, it’s a bit too large for my travel tastes. Yes they do make this 4 port version but it’s still larger than I wanted for travel. The big decision you have to make when going with a travel USB 3.0 Hub is whether or not you want/need a powered hub or not. Obviously a powered hub is the way to go when you have the ability to plug it in to a power supply and you don’t mind carrying yet one more power supply in your bag. However, USB 3.0 offers more juice than USB 2.0 does. Therefore you may be able to get by with a self powered hub especially for occasional use during travel. When I’m using my MacBook Pro or MacBook Air on the road, I’m usually in need of one extra port. I usually have my Wacom Intuos Pro tablet plugged in and an external USB 3.0 hard drive. At that point I may need to plug in a document camera/scanner or a Lightning cable to sync/copy something from my iPhone or iPad.  Or I could simply need to plug in a thumb/flash drive to copy a quick file. These are the kinds of things I need to do via USB 3.0 on the road from time to time. The hard drive can be plugged into Thunderbolt. That frees up the USB port if needed, but not all of my portable external drives are Thunderbolt equipped.

I went with this portable USB 3.0 Hub

satechi-USB_3.0_hub_with_harddrive

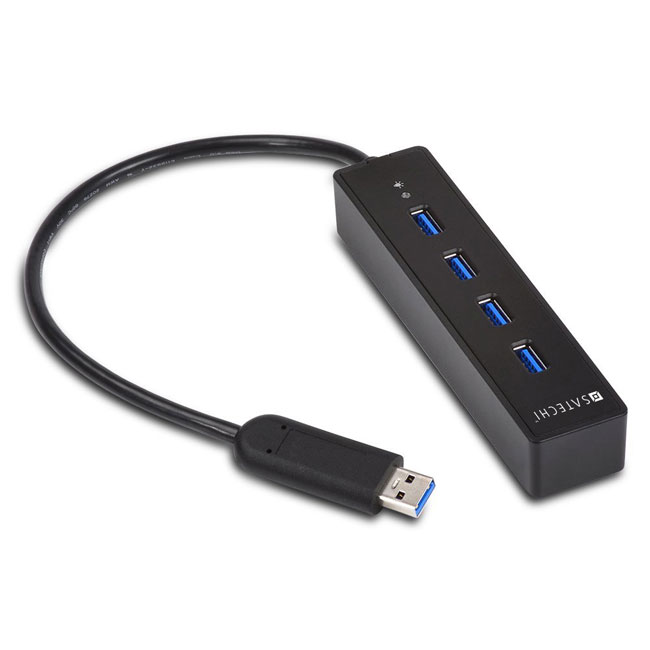
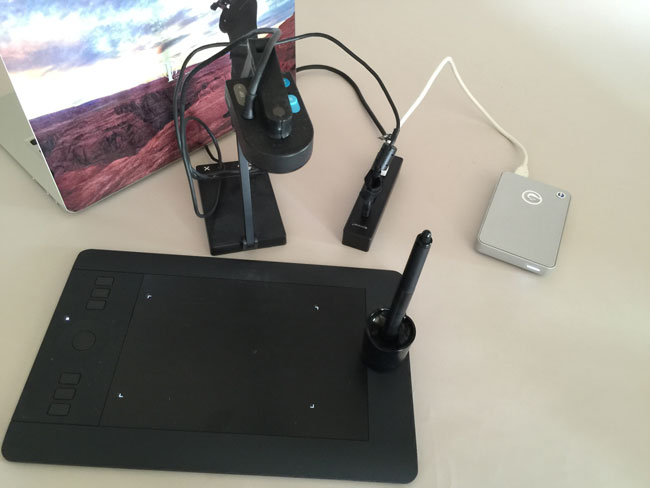
Although Anker makes this 4 port USB 3.0 Hub, I went with this Satechi 4 port USB 3.0 Hub. It seemed to have high ratings across the board on multiple sites. I havent’ been disappointed as the Satechi 4 Port USB 3.0 Hub has been GREAT!. It performs as advertised as long as you keep in mind that it’s NOT a powered hub. So let’s get the rules of using a bus powered hub out of the way. First off if you plug in too many devices that require USB power you will likely run into issues where the devices may not work or may not work at their top USB 3.0 speed. So when I want to use a bus powered USB 3.0 hard drive I plug the hub into my computer first and then I plug in the hard drive. Lastly I plug in any slower devices. If you stick to these rules (plug in the hub first, and the most power hungry devices next) then you’ll be more successful. I was able to easily plug in my USB 3.0 G-Tech hard drive, and my Wacom wireless module and lastly my Ziggy document camera with one port on the hub to spare. This is likely more than I will actually use on a regular basis, but I wanted to test my worst case scenario. Also keep in mind that I have one more available USB 3.0 powered port on my MacBook Pro/Air. With this Hub I could easily have two external bus powered hard drives  (one in the USB 3.0 hub and the other in the built-in port) and still have other ports available for less power hungry devices. Since I only travel with three external hard drives on a regular basis, this is exactly what I needed as I never need to plug in more than two at a time and If for some strange reason I need all three, I can plug at least one of them in via Thunderbolt.

The Bottom Line

If you need a powered USB 3.0 Hub for travel, then you should probably get this one. However, if you’re looking for a smaller one that can be used even if you don’t have an available AC power port nearby or you don’t want to carry one more power brick, then you could go with this Satechi 4 Port USB 3.0 Hub and get the extra ports you need.


The Best, Fastest Car Charger for your Phone and Tablet

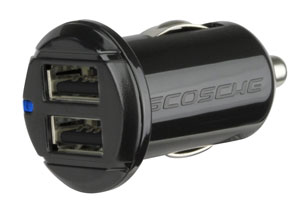
schosche_dual_12watt_car_charger

Every time I turn around there seems to be a new, better car charger than the one I’ve been using. I actually started with this Scosche Dual Charger over a year ago. It worked great, but the thing that I didn’t like about it was that only one of the ports charged at the faster 2.1A speed. Then I discovered this one by Lenmar. It gave me what I wanted, TWO ports both charging at 2.1 AMP/10 watts each. Perfect! Well it was perfect until I discovered that Schosche released a dual 12 watt charger! If you have a newer iPad 4th generation or iPad Air you might have noticed that Apple now includes a 12 watt wall charger instead of the 10 watt charger included with previous models. Now you can charge your iPad Air in car at full speed or speed charge a smartphone. Since we usually aren’t in our cars for hours at a time each day, speed matters. You might be able to get back up to a full charge faster on a shorter commute. I also figure why have just one port when you can have two? This way you can charge your phone and another device such as a tablet or a passenger’s phone.

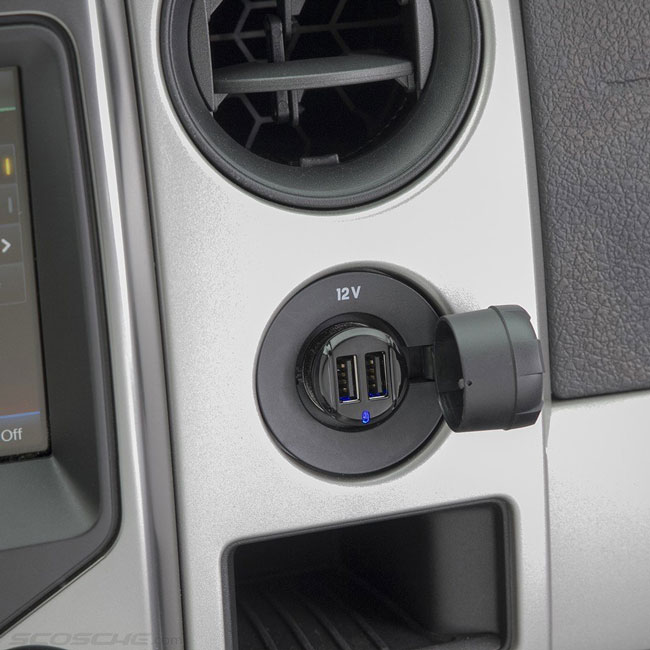
schosche_dual_12watt_car_charger_in_car

I also like the low profile fit. The original Schosche I used back in the day stuck out of the socket quite a bit. This one almost fits flush with the 12V socket. Even if your car has a built-in USB port I’m going to go out on a limb and say that it doesn’t provide 12 watts of power. In most cases it’s probably a 5v 1A USB port.  As far as I can tell this is one of the fastest car chargers on the market.

You can get the Schosche 12 Watt USB Car Charger here.


I went with this color laser printer

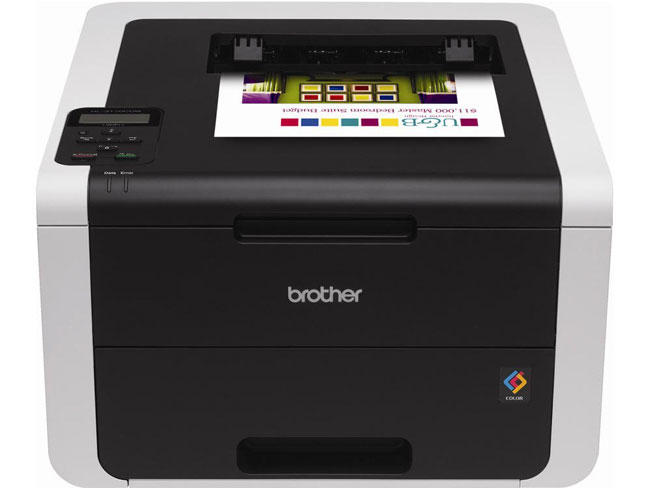
brother-HL3170CDW

A few weeks ago I posted on my Facebook page asking for recommendations for a new printer. The requirement was that it had to be color and be ready to print when I’m ready to print. In other words I print very infrequently and my frustration with inkjet printers is that some models dry up when not used regularly and take lots of ink just to get the nozzles clean and printing again. My previous office printers had all been Xerox Phaser (dry ink) printers. While these printers have always served me well, it was going to be overkill to get another one as I just don’t print that often anymore. When it comes to photo printing I usually send them out (Mpix, Costco, etc.) So in house high quality photo printing was not a requirement either. I got lots of different recommendations about Canon inkjets, HP laserjets and others. I decided that for the cost of consumables and again the infrequent use, I would be better off this time with color laser. The other requirement was that it had to be wireless. I did look at the Xerox color laser printers, but it seems that Xerox just doesn’t get it when it comes to wireless. In order to go wireless with Xerox I’d have to go with their midrange Phaser 6600, which lists for $499 and still requires a $99 wireless add-on to do WiFi?? WTH! Really Xerox? Wake up! It’s 2014!

My research led me to the Brother HL3170CDW

Not only did this printer meet all of my requirements:

  • Color laser
  • Wireless (WiFi – AirPrint – Google Cloud Print)
  • Automatic Duplex (2-sided) printing
  • Low cost & low cost consumables
  • Quiet
  • Small

But it excelled at all of my requirements as well. Setup went perfectly because I never had to plug in a single cable besides the power cable. The first thing I did after installing the 4 supplied toner cartridges was to power it up and join my WiFi network from the built-in control panel. Next I added it wirelessly to my MacBook Pro and MacBook Air. Finally I did a print test from my iPad and iPhone, which both saw it over AirPrint. Yes, this was the out of the box “it just works”, experience that I was looking for. The print quality is good as well. No problems to date.

What’s the downside?

I would say the only downside is that it’s not as fast as I’m used to with my Xerox printers. When I’m talking speed, I’m talking from the time I hit print til the time the printer wakes up, receives the job and prints it. After that it prints at a speedy 23ppm. My only other concern was that while reading other reviews for this printer, people complained that once it goes into “deep sleep” that it falls off the wireless network for AirPrint. In other words you would have to walk over and hit a button to wake it up to print or print from a computer. I’m happy to report that I have not had this issue at all. As a matter of fact I’ve not printed for two days now and it still shows up and ready to print from my iOS devices via AirPrint. It says “deep sleep” on the LCD. Now there is an option to let it power itself OFF after a user defined interval. At that point I would assume that you would have to press a button to turn it back on and that wouldn’t bother me. However, that option is off by default and the deep sleep conserves power (using less than 1 watt of power). I will turn it off when I’m away on business.


The Bottom Line

If you’re looking for a good quality, color laser printer that supports all the latest and greatest wireless protocols as well as printing via USB, then this printer is definitely worth consideration. It fit the bill for what I was looking for at less than half the cost of a Xerox printer with similar features. It’s also less costly to run than typical inkjets.

You can get the Brother HL3170CDW Color Laser Printer here.


Don’t buy another USB wall charger for your phone!

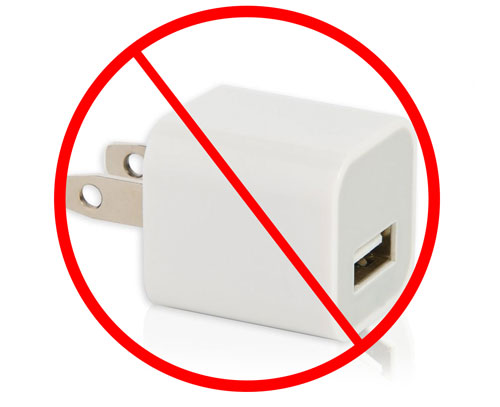
no-charger

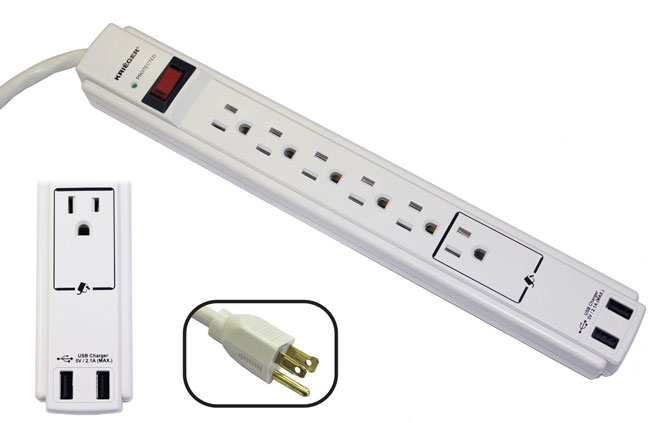
Your smartphone probably came with a USB wall charger. Chances are you probably need or at least would find it convenient to have more than one. Perhaps one at your desk, one by the bed and maybe one in your travel bag. A quick check shows that the retail price of an Apple USB wall charger is $19. Of course you could get ANY 3rd party wall charger for half that price or less. However, even at $9 for a good quality generic charger you might want to consider a different option. If you’re buying a charger that’s going to have a permanent home under your desk, behind a nightstand, etc. then why not just get a power strip that also has USB ports on it? This way you could plug in your lamp, computer, speaker, etc. and charge your smartphone and/or tablet as well.

power_strip_USB_ports

I just bought 3 of these for use around the home and home office. So far they’re working out GREAT! Unlike most power strips/surge protectors this one has a longer than average 6 foot cord. It has a lighted power switch as well as 2 USB ports that can provide up to 2.1A of power, which is enough to charge an iPad. Also the fact that it’s a surge protector as well doesn’t hurt. The only downside is that the 2.1A is shared between the two ports. This means that you can charge two devices or one device at the full 2.1A speed. Yes, you can charge an iPad (or other tablet) and iPhone (or other smartphone) at the same time, just not two devices that both require 2.1A each.

Here’s the best part: This power strip is on sale for only $14.99, which is less than the cost of a name brand single port USB charger. Get this one and you can use the charger that came with your phone as a travel charger.

My other favorite USB chargers

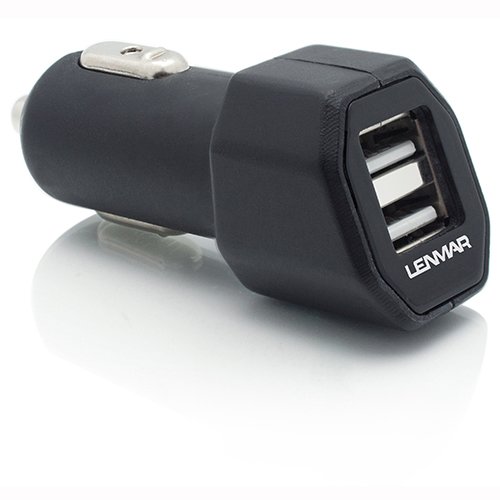
lenmar_USB_car_charger

For the car, I like this one.

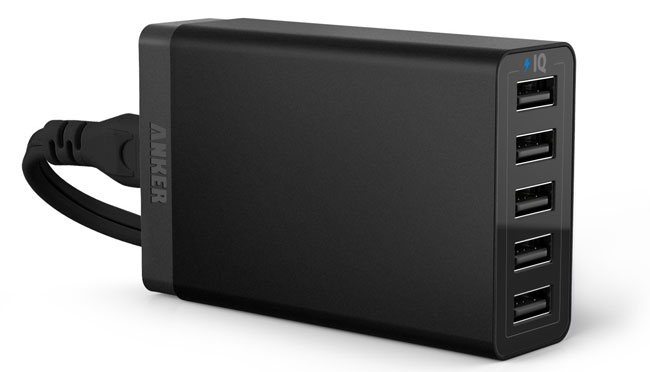
anker_40w_USB

For charging several USB devices at once I like this one.

USB_wall_outlet

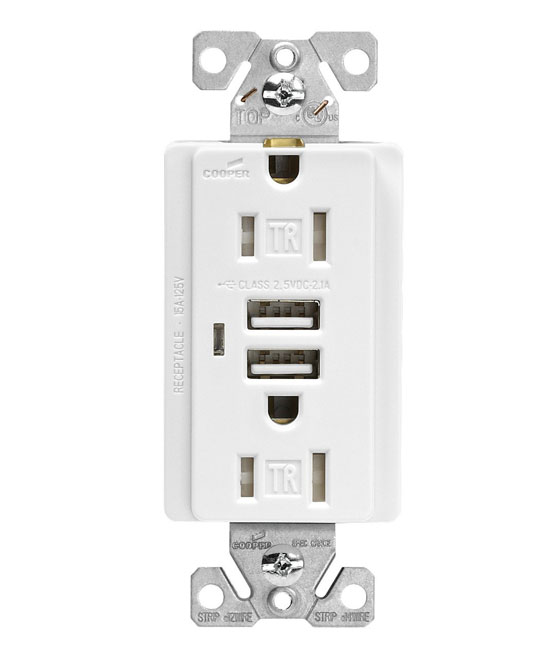
For a permanent installation I like this one.

plugbug_1

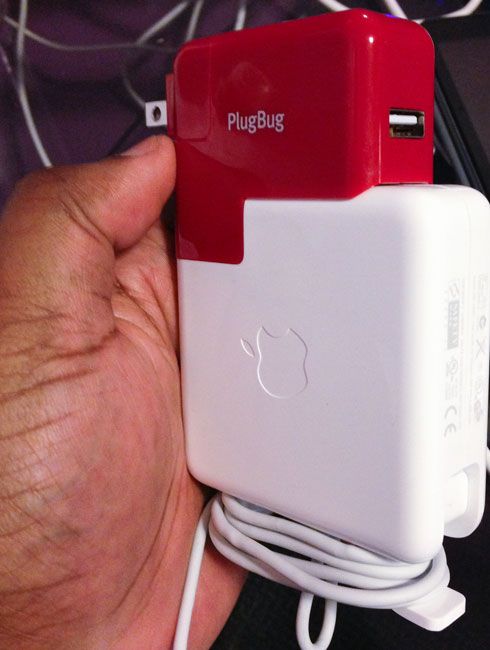
For charging while traveling to hotel rooms with limited outlets, I like this one.