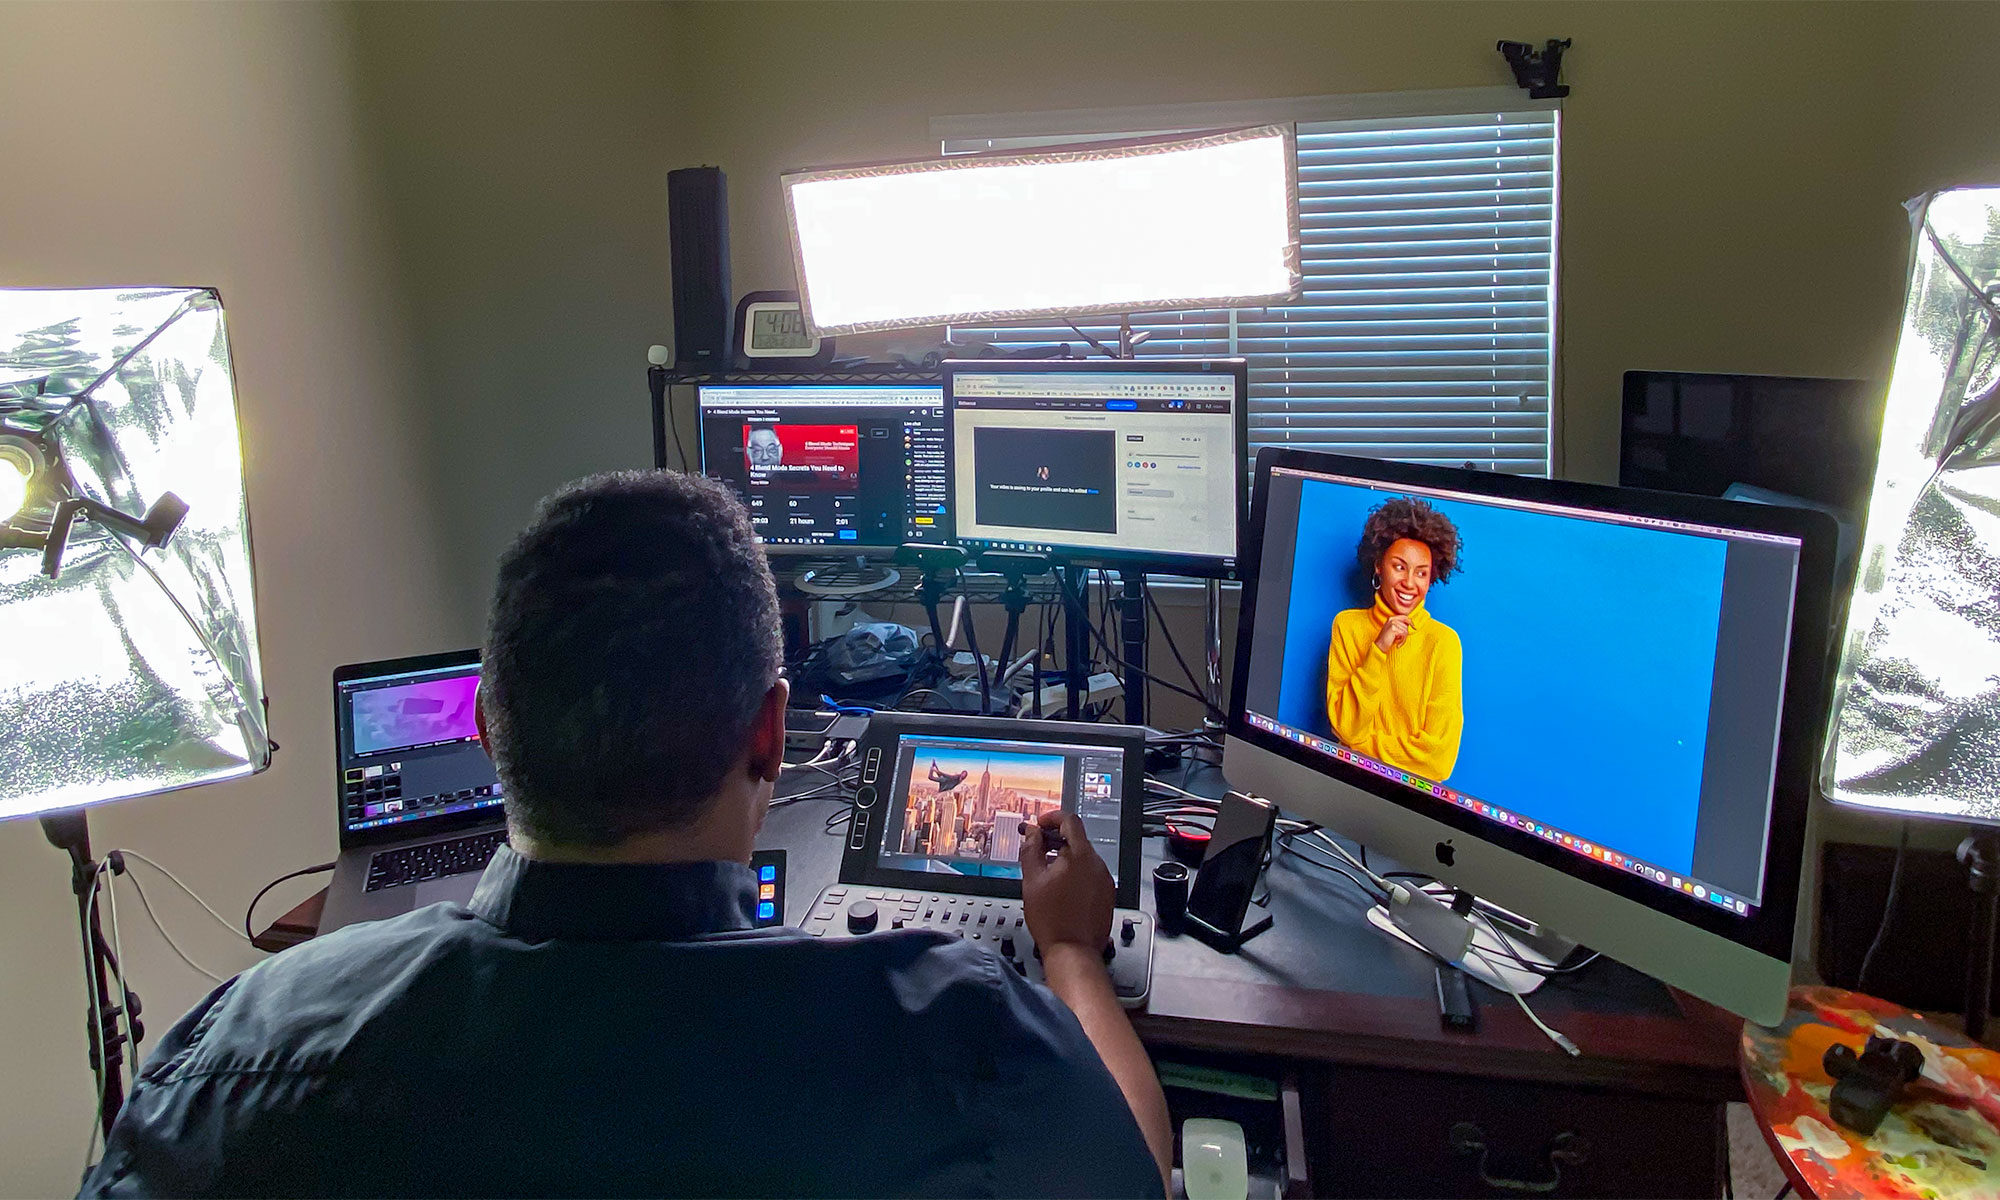
As many of you know I’ve been a fan of Apple’s products for years. Usually I’m attracted by the style, integration, and ease of use. Yesterday, I was left scratching my head like many of you. Apple all of a sudden decided to get into the iPhone backup battery game. That in and of itself surprises me. What it says for the first time is that we admit that our iPhone batteries don’t last long enough for some people so we’re gonna sell you a battery to make it last longer. Just not a move that I expected from Apple.
A 20MP DSLR Quality Camera for your iPhone – DxO ONE
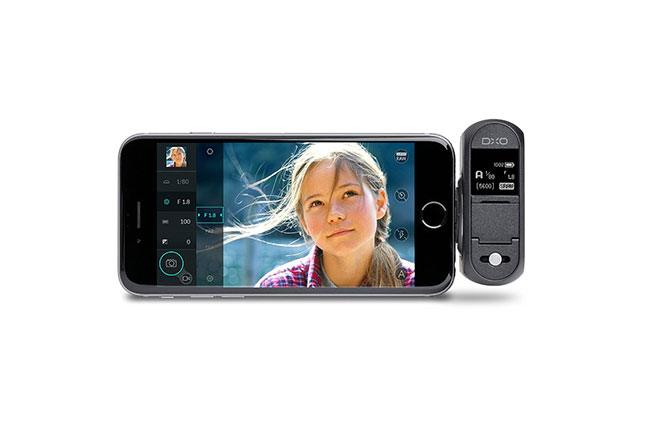
For many people their smartphone is their main or only camera. I’m finding that I use my iPhone 6 Plus to take more and more pictures when I’m out and about. I have no problems with the quality of the images that the iPhone produces, however the one thing that keeps me from using it when it really matters is the lens. Your smartphone has a relatively small lens and sensor. Sure there are some lens attachments out there, but nothing I’ve seen that rivals the quality of my Nikon glass while still maintaining the convenience of a camera that’s in my pocket at all times.
The DxO Labs ONE hopes to solve this problem

The DxO ONE is a 20MP digital camera with a 1″ sensor that has its own storage and battery. Unlike other solutions in this category that connect wirelessly and therefore slowly, the DxO ONE
has a built-in Lightning connector that attaches directly to your iPhone or iPad. This effectively turns your iPhone/iPad display into a touch screen view finder. Because of this direct connection there is virtually no lag. Once in you’re in the Universal DxO ONE app you can control all the settings on the camera including switching between RAW, Super RAW or JPEG as well as Auto mode, Aperture Priority, Shutter Priority, or fully Manual Mode. You can also switch between taking stills and video.
Sometimes showing is easier than writing. Check out this video review I did:
Continue reading “A 20MP DSLR Quality Camera for your iPhone – DxO ONE”
4 Ways To Keep Your Mobile Devices Charged on the Go
If you are out and about these days then chances are you in need of charging your smartphone, tablet and other mobile devices. I travel for a living so I figured I would share the four ways that I keep everything charged when I’m on the go:
The external battery that’s in my pocket
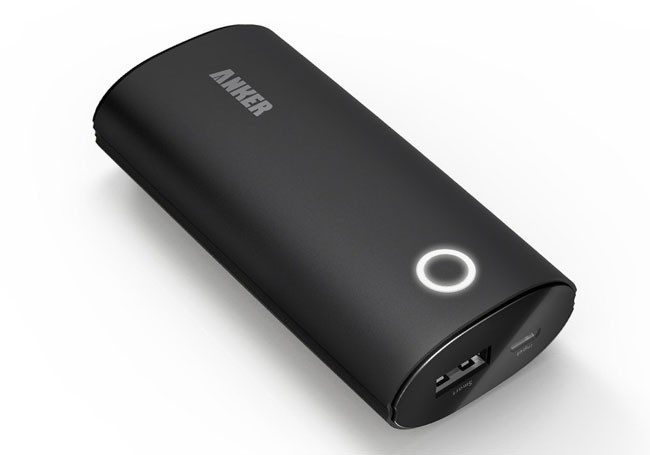
The 2nd Gen Anker Astro 6400 mAh is a great external battery to keep on your person. I love it because it has a smooth surface with no buttons to accidentally get pressed while it’s on my pocket. It change charge my iPhone 6 Plus up to 1.5 times.
Get it here.
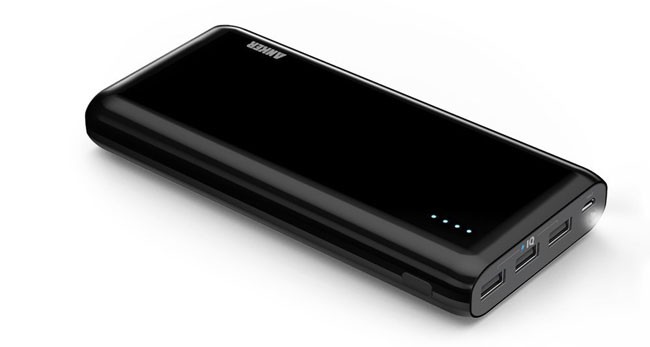
The mother of all batteries that’s in my laptop bag
Continue reading “4 Ways To Keep Your Mobile Devices Charged on the Go”
Introducing the NEW TW Broadcaster Pro
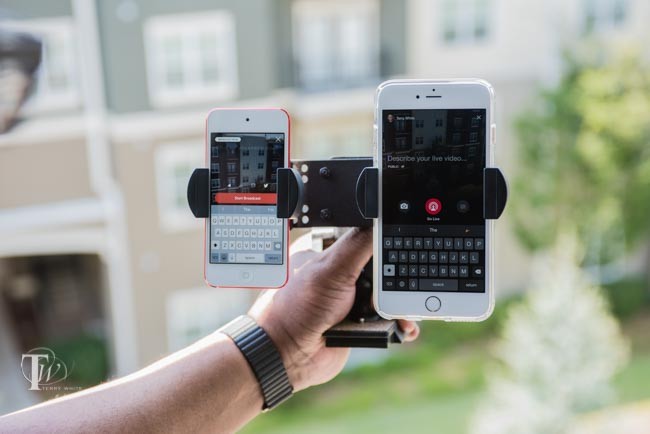
You might remember my post a couple of weeks ago comparing the NEW Live from Facebook Mentions to Periscope. After doing a few more broadcasts to both services I quickly realized that I usually have a larger number of views on Facebook. I thought that it would be great to be able to stream to both services simultaneously. That way I could finally address both my large Twitter/Periscope following as well as my large Facebook following at the same time. This would of course require streaming from two devices. I could use my iPhone 6 Plus and an iPod touch. The real question was, how would I hold both devices at the same time and keep them steady? I went in search of a “dual tripod head mount” and I found this one on Amazon. I ordered it, but when it arrived I wasn’t that happy with it. For one it was bigger and heavier than I hoped and the bigger problem was that the devices were spaced out too far apart for broadcasting the same thing up close.
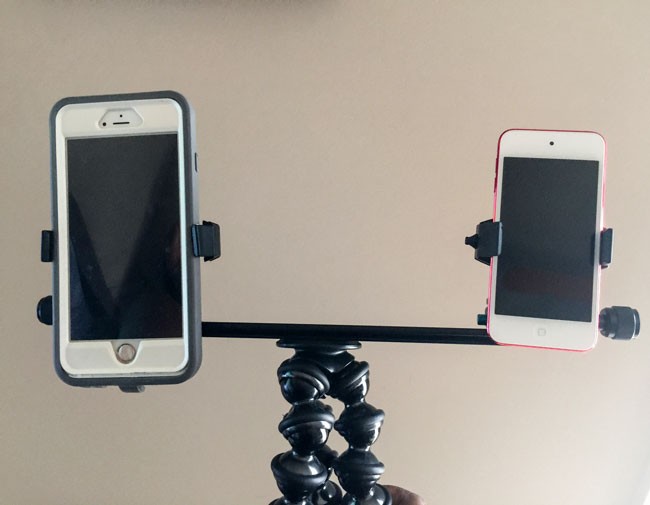
That’s when I challenged my friends over at Arkon Mounts to make something better! Not only did they accept the challenge, they showed a mock up the very next day.
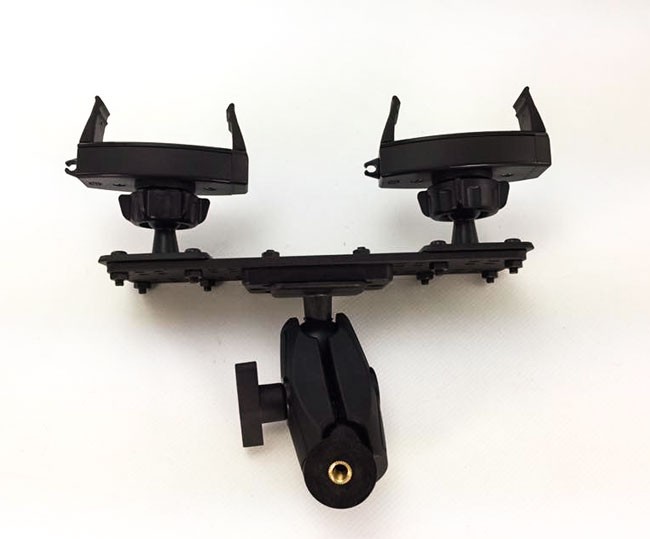
The mock up was night and day better than the one that I had put together and even better they would bring it to Photoshop World and hand it to me to try. After I used it for a day I was thrilled with it. It was everything I wanted, but that wasn’t good enough for Aaron. Aaron was concerned that the devices could possibly pop out. He had his company overnight their better smartphone grips (the ones used on their motorcycle mounts) and replaced the ones on mine with the stronger ones.
The TW Broadcaster Pro was born
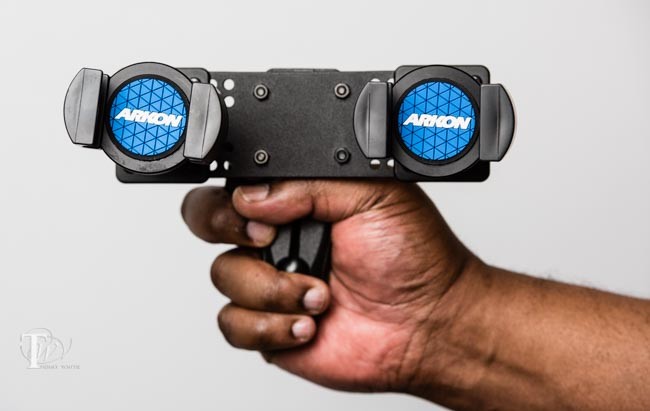
Check out this video review that I recorded over the weekend:
https://www.youtube.com/watch?v=sbslnsl41_I
I did several simultaneous live broadcasts to Periscope and Facebook Mentions Live. As I was walking around the show I got lots of double takes as people assumed I must be shooting 3D video.
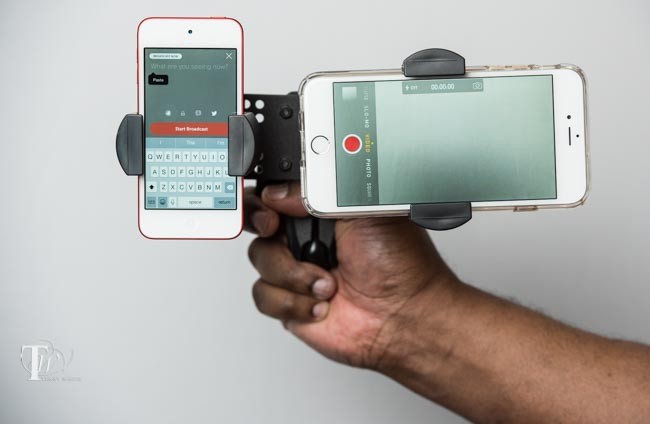
Even if I wasn’t streaming to both Periscope and Facebook at the same time, I’d still use this to broadcast to Periscope in it’s current vertical video format and use the second device to record standard 16:9 wide video.
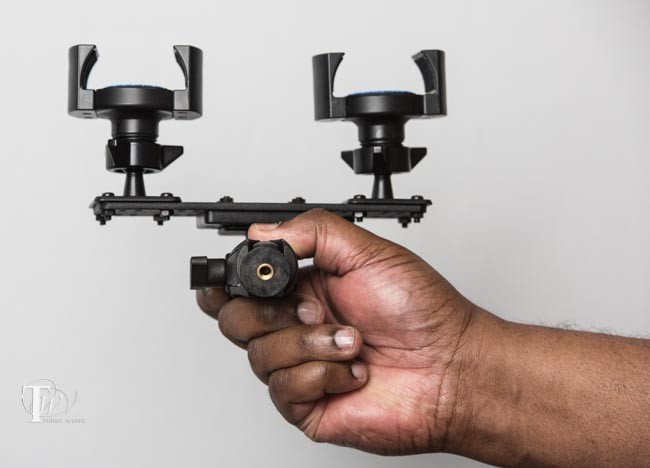
This mount is just freaking awesome with lots of uses. Of course it can be mounted on a tripod too.
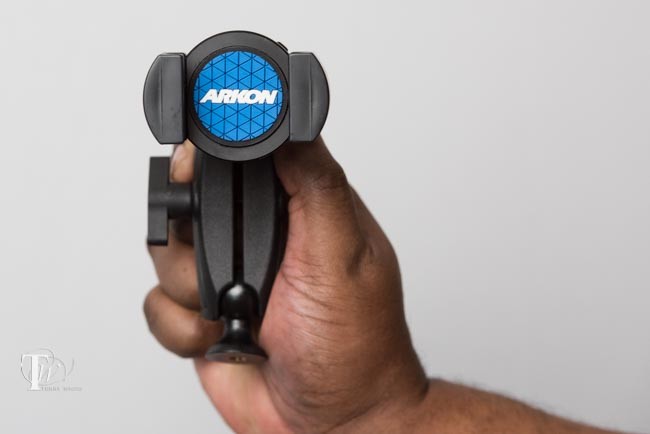
It’s also versatile enough to be converted into a single mount (the TW Broadcaster) for those times when you only need to mount one mobile device.
The Bottom Line
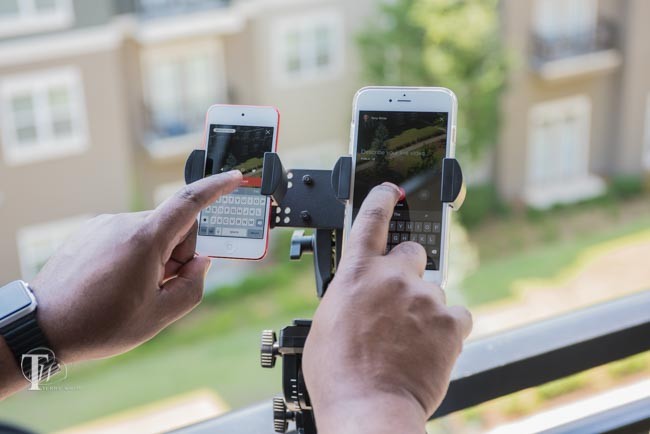
I’m thrilled to have this new product which perfectly fits my broadcasting and recording needs. I’m deeply honored to have it named after me as well. Even if you’re not interested in this particular solution you should definitely check out the mounting solutions at www.arkon.com. If you have a need to mount a mobile device, camera, etc, on to something they’ve likely already built a solution for you. If you are interested in the TW Broadcaster Pro you can order it here. Or if you’re interested in the single mount (also great for selfies) TW Broadcaster model you can order it here. You can even take 10% off anything you order from their site with my discount code “twhite”.

Why I shoot Nikon?
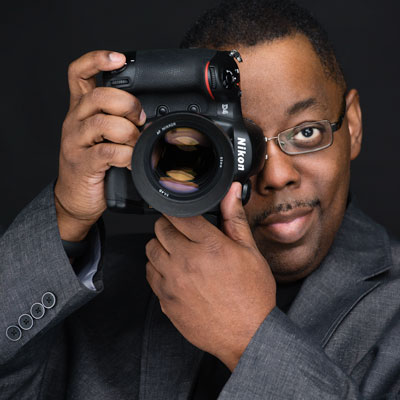
I can’t believe how many times this question comes up. Usually it’s asked by new photographers or photographers that haven’t yet made a decision on which brand DSLR they’re going to go with. Last week I attended a photography meet-up at one of the local studios. Keep in mind that this was just a casual setting and I didn’t even bring my gear (in hindsight I wish I had as there were some shooting opportunities there with new models). Two of the photographers walked up to me and we started talking about photography and videography in general. One of them asked me “so do you shoot Nikon or Canon?” and I said Nikon, his partner high-fived me while he turned and walked away in disgust as if he had just lost another bet or something. It was all in fun of course, but I guess I find it odd that people are so passionate about what tools they work with that if you use a different tool it upsets them. Last night I got asked on my Instagram feed.
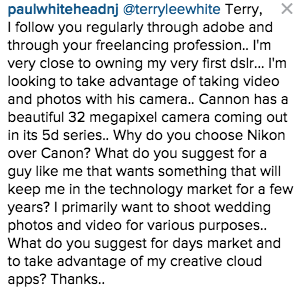
This one was obviously more looking for a recommendation than anything else and I respect that. It prompted me to write this post so that I can answer the question and of course point people to it the next time I’m asked 🙂 So let me get to the answer(s):
Why did I pick Nikon?
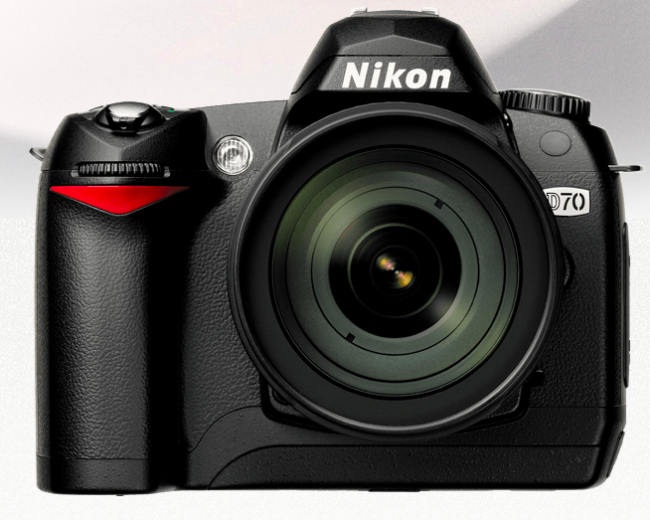
My first DSLR was actually an Olympus E20N. I started to take my hobby more and more serious and while I liked my Olympus camera, it had a fixed lens. It was finally time (2004) for me to upgrade to a DSLR with interchangeable lenses. Having watched the market I knew that I was going to go with either a Nikon or Canon camera. I want to make this part perfectly CLEAR! I had ZERO bias towards either brand (and still don’t to this day!) None of my close friends were photographers. I was making my own choice simply by my budget and the specs. I knew I wanted a camera with a fast start up time. Yes we take for granted now that we can just turn on our cameras and start shooting, but back then it “startup time” was a concern. My budget at the time was around $1,000. That put me in the price range of the 1st generation Canon Rebel. It looked good to me, but the only problem is that that model had been out already for almost a year and while I new a newer model was probably coming, it hadn’t come by the time I was ready to buy. On the other hand Nikon had just introduced the Nikon D70. It was new, and this 6.1MP beauty had all the specs I wanted and was in my price range. That was it. Plain and simple. I went with the newer camera by one of the two brands I was looking at.
Why did I continue with Nikon?
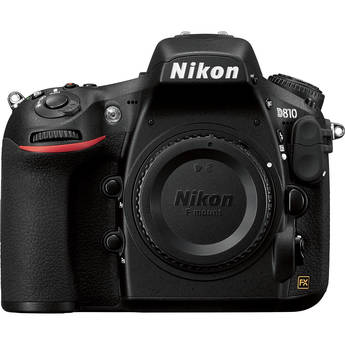
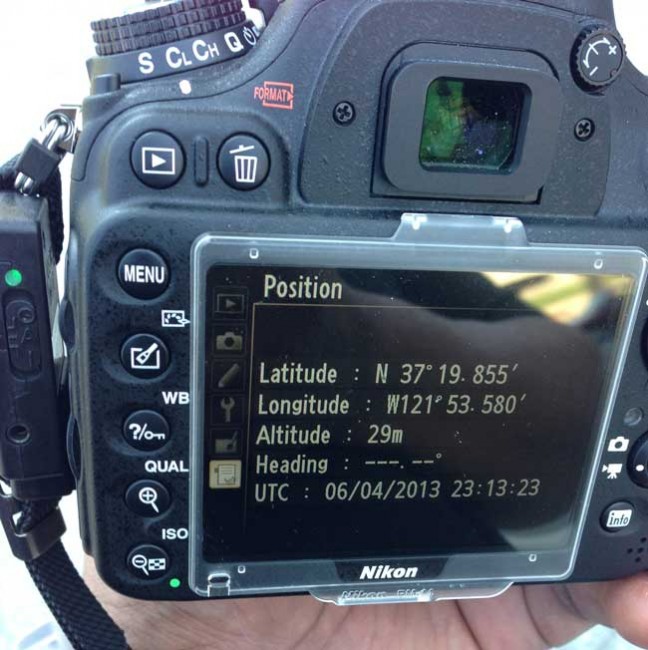
As almost any photographer will tell you, once you start buying lenses you’re not going to switch brands on a whim. There’s always a new Nikon and a new Canon camera coming out. So you’ll always be glancing at the other brand and latest new toys. However, there hasn’t been anything on the Canon side that made me say “I gotta sell everything and switch.” On the other hand for years Nikon has had a couple of features that lacked on the Canon side that made me happy with my choice. For one I was a heavy user of the Nikon Creative Lighting System (CLS) and the ability to fire and control Nikon speedlights from the built-in flash. This wireless control is beyond just a simple wireless trigger and allows you to control the power and groups of flashes. The other long time advantage that Nikon had was built-in GPS support right in the menu of the cameras for years. While you still need to buy an external GPS module (when will you guys build these in as a standard option or least put them in the battery grips?), the support for them is and had been built-in for a very long time. I love having the geotag info go right into the metadata as a I shoot. Now these features that I’m sure Canon probably offers by now, but for years they didn’t.
Did I ever consider switching?

Yes there was a time. Well I’ll say that I considered ADDING a Canon DSLR back in the days when Canon was ahead on low light/high ISO shooting. Yep, I was drooling big time. I almost pulled the trigger on buying a Canon DSLR a couple of times just to have this capability. However, I waited and the next Nikon to come out had great low light performance and that was the end of my envy. I stepped up to a D700 (from the D300 that had replaced my D80 which had replaced my D70) and used it happily for several years before going to the D4 (D600 backup body, which replaced the D7000 and D5000 backup bodies before it) and now a Nikon D810!
Do I think Nikon is better than Canon?

I can see the eyebrows raising as I type this. Let me answer it this way. Both brands produce GREAT cameras and with any two things you’re going to have advantages in one area over the other. So yes, I think Nikon glass (lenses) are better. But keep in mind that’s just from my observations looking over the fence. I haven’t actually spent a lot of time shooting different Canon lenses. It’s just an observation and even something that I’ve had Canon shooters whisper to me on the side. I think Canon does and has done a much much better job with video than Nikon has. There’s no question about it. If you’re looking to do DSLR video then you should probably look at Canon first. Also Canon seems to have the sports shooting market all but locked up. You’ll see more Canon cameras on the sidelines than any other brand in professional sports. Since I never shoot sports this isn’t something that I consider. My Nikon D810 does a great job shooting video too. My primary use for my Nikon camera is shooting portrait work and for that I’ve been happy since day one. Never had a complaint about the quality and my work has been used in print. If you were hoping for a clear definitive one is better than the other. I can’t give you one. It’s because I think they are both great and both have advantages and disadvantages over the other. I never understand why some people feel that in order to be justified in their choice, the other one must suck/fail. It’s a lack of confidence thing I think.
Which one should YOU buy?

Believe it or not I really don’t care. Last time I checked neither Nikon nor Canon has paid a single one of my bills. So I don’t gain anything if you buy Nikon or if you buy Canon. The best advice I can give you is to buy the one that does what you need it to do. The one that’s in your price range and it probably wouldn’t hurt to buy the brand that your friends use. Huh? What do my friends have to do with it? Think about it this way. If you’re always shooting solo then no, it doesn’t matter which brand you choose. However, if you’re shooting with your buddies on a regular basis then having the same brand means that you guys can swap lenses, batteries and other accessories while you’re shooting. You’ll have a lot more fun and be able to focus on your photography rather than constantly glaring at the fact that he/she’s using something DIFFERENT. Both brands will allow you to capture amazing images, if YOU are up to it.
The Bottom Line

I’m not really into the whole Canon vs. Nikon war that so many of you fight (if you want to have a health RAW vs JPEG debate then I’m all for it – kidding…). I explained my choice above and most importantly I get the results I want from the investment that I made in my tools. I have friends that shoot Nikon. I have friends that shoot Canon. It’s all good (unless of course you shoot Sony! We just can’t have that at all! OMG YOU SUCK! —— Just kidding. LOL my buddy Frank Doorhof shoots Sony. It’s ok. No, really it is.)
Now you know Why I shoot Nikon.
Going to Photoshop World 2015?
Hey! If you’re going to Photoshop World this year that’s great and I look forward to seeing there. So much so that i’m going to give you $50 off your Photoshop World registration simply by clicking here to register and by using discount code: TerryWhite50

The Best Apple Watch Stand for the Money
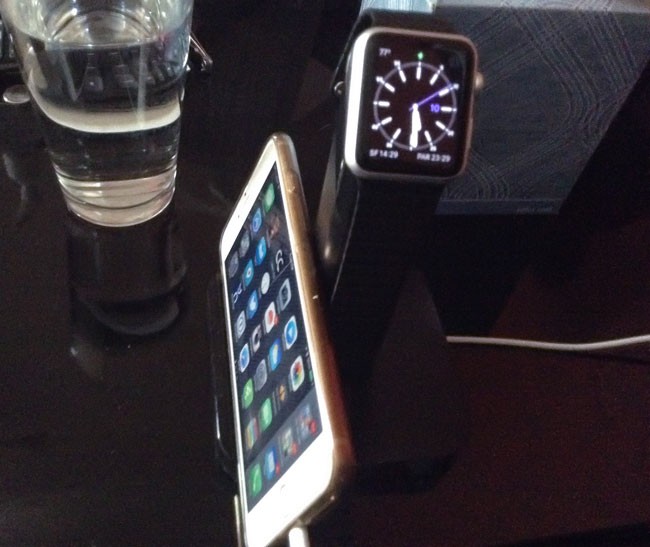
If you’ve been following this blog then, you know I got an Apple Watch on day one 4/24/2015. I also bought an extra charging cable that could remain in my suitcase for travel. I take my Apple Watch off every night and put it on the charger for the night. I hate wearing any kind of jewelry when I sleep and even if Apple Watch never needed to be charged I would still take it off every night. I knew from day one that I would want a charging stand to put it on. Even before Apple Watch shipped there were companies showing their stands and I was shocked by the price of some of them. Let me explain why. An Apple Watch charging stand has NO ELECTRONICS in it. It’s simply a stand that you supply with your charging cable and it gives you place to simply lay your Apple Watch on and because of the magnetic charging cable it would simply float there on the stand. The stands are usually made of plastic, metal or wood. For something that has no electronics I couldn’t believe what some companies were charging for theirs. For example, this one goes for a whopping $99! Granted it’s made of walnut, but still that seems like a lot of money for a small piece of wood. I don’t mind spending money on engineering and R&D, but the only thing to really figure out with these is to make sure the hole is the right size to hold the Apple charging cable. The first one I got was by Spigen and it’s OK. It works. However, for just $5 more you can have the BEST one.
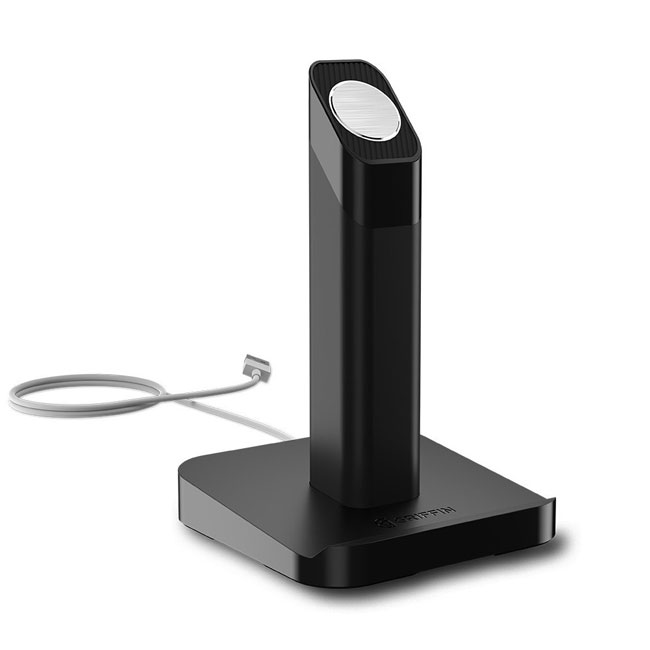
I ordered three different models including one that I had 3D printed from a design I downloaded from the web and I’m happy that I found the Griffin Technologies WatchStand. It’s by far the best one I’ve seen for the money. Like most of the others, there are no electronics in it and you need to supply your own Apple Watch charging cable. However, unlike most of the others the design is well thought out and provides great cable management and most importantly great weight at the base. There is no way that this one will tip over (a common problem with the plastic ones, like the one I 3D printed). I also really like the “lip” on one side that allows you to easily lean your iPhone up against it. While there are more expensive models that actually have a lightning adapter in them for your iPhone/iPad, the lip is all that I needed. Sometimes I grab my iPhone in the middle of the night to check messages and if I had to look for the dock to set it back on in the dark it would be a nuisance. With this one I can leave the lightning cable attached to the iPhone and just lean it back on the stand when I’m done.
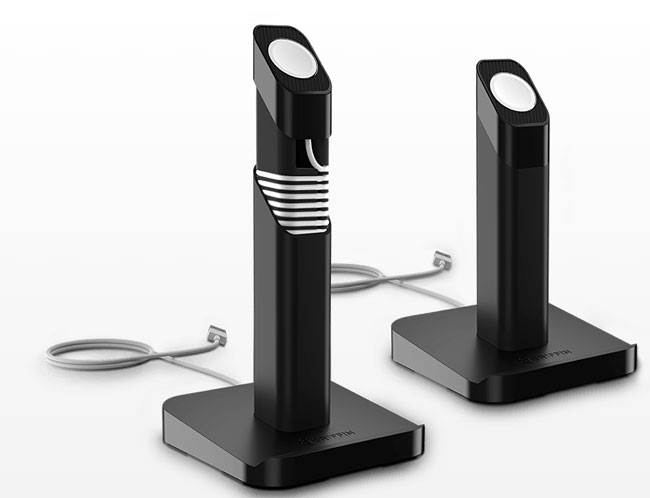
The center column detaches so that you can wrap any excess cable inside. You can also face the center column in a different direction. For example, I wanted to lean my iPhone on the side vs. the front. I was worried about those that have Apple Watches that have bands that can’t open, how would you use this stand. Then I saw this shot on their website and it became clearer:
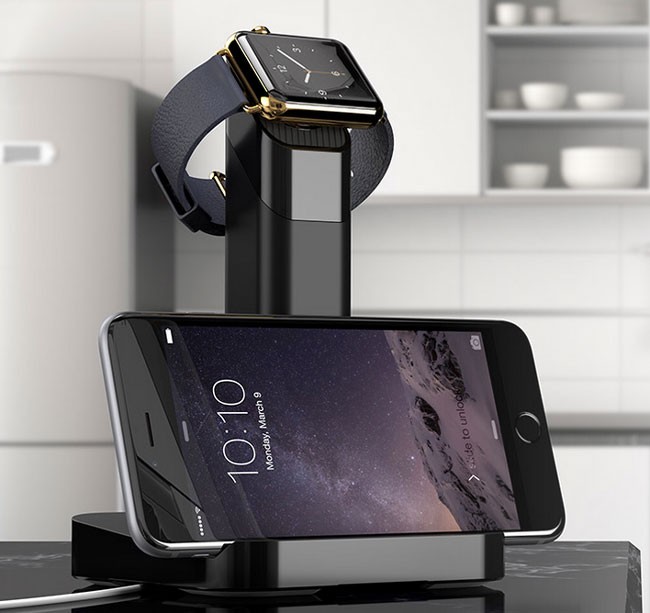
If you’re an Apple Watch owner and you want the Best Apple Watch Stand for the money, then look no further than the WatchStand by Griffin Technologies.
You can get it here.

An Affordable Thunderbolt 2 Dock with 4K and Dual Display Support
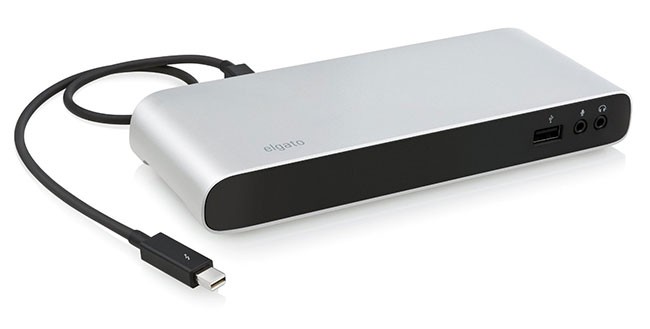
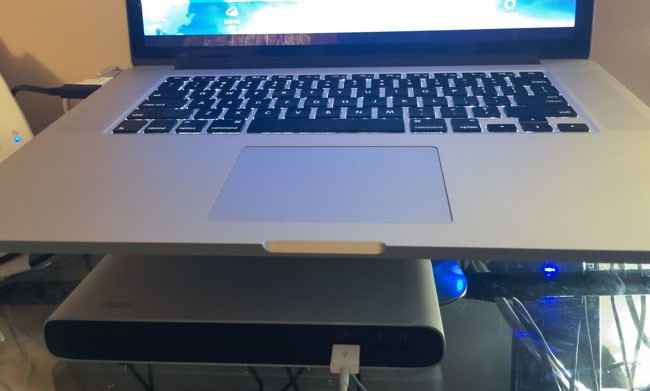
For years now my MacBook Pro has been my primary computer. Now my only desktop computer is my Mac OS X Server. Having a MacBook Pro doesn’t mean that I don’t have a ton of peripherals that I need to connect. The last thing I want to do when I leave or return from a trip is connect a bunch of cables. That’s where a Thunderbolt 2 dock comes in. Although I’ve used a Belkin one for years now, people are always asking for a lower priced alternative. Elgato has created one the fits the bill nicely. For a hundred dollars less than the competition you still get 2 Thunderbolt 2 ports, 3 USB 3.0 ports, 1 HDMI port, 1 Gigabit Ethernet port, and an audio in and audio out port. Really the only thing missing is more USB 3.0 ports and a legacy port like Firewire 800 or eSATA. Since I connect more than 5 USB devices anyway I would still need a USB 3.0 hub. Also most people at this point have probably replaced their older Firewire 800/eSATA devices with newer tech. If you fall into that category then I would save save the hundred bucks and use part of it to buy a USB 3.0 hub.

The design is nice and compact and it’s great having the audio ports on the front as well as the 3rd USB 3.0 port capable of charging your mobile device.
The Bottom Line
If you have a MacBook Pro then having a Thunderbolt 2 dock is a big plus. You’ll enjoy the single Thunderbolt connection and the additional ports. The one thing I wish that these devices offered are more Thunderbolt ports. You really don’t gain any because you have to connect the dock to one of your existing ports taking up a Thunderbolt port on the dock and one on your computer. That leaves you with the same number of Thunderbolt ports that you started with. I would like to see a model with 3 or 4 Thunderbolt ports for true Thunderbolt expansion.
You can get the Elgato Thunderbolt 2 Dock here on sale.
For a few bucks more you can get this one by OWC that has 5 USB 3.o ports and a Firewire 800 port.

Why You Should Enable Dual Redundancy on Your Drobo
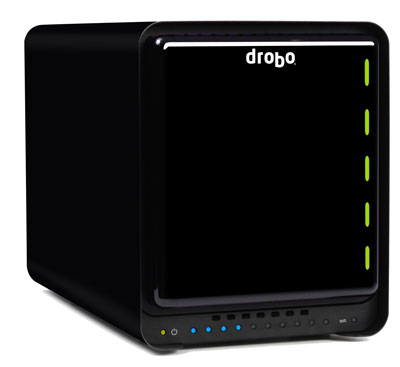
Like you, my data is very important to me. I have several backups and offsite cloud backups too. In my home office I use a Drobo 5D connected to my Mac OS X Server as well as a second Drobo 5N to backup the Drobo 5D. The whole reason to have a Drobo is so that if one of your hard drives fail your data will be protected and you can just keep working. You’ll probably replace the failed drive with a larger one since larger drives come out every year. The one thing we don’t really think about is what happens if two drives fail at the same time? Normally this means you’re screwed and it would be time to restore from a backup (after replacing the two failed drives). The last time I had a Seagate 3TB drive die in my Drobo 5N, I not only replaced it with a WD 4TB NAS drive, but I also enabled Drobo’s dual redundancy feature in the settings.
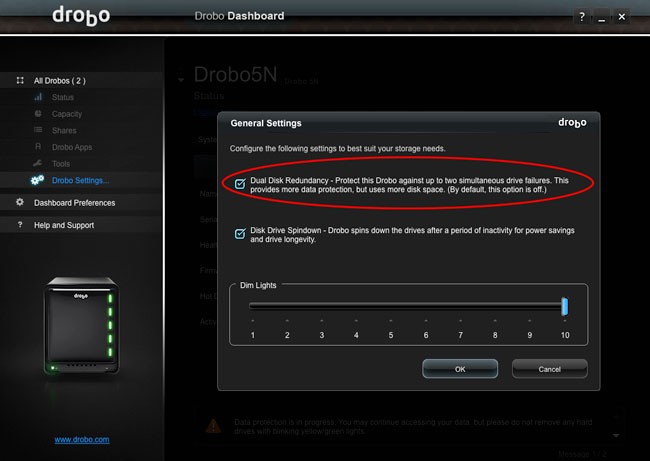
With this feature enabled now two drives could fail at the same time and I’d still be protected.
C’mon how likely is it that two drives would fail at the same time?
I hear ya! However, before I tell you what happened on my other Drobo (5N), think about it. When you setup your Drobo (RAID), chances are you bought multiple drives at the same time. So if one fails (especially as they get older), then it’s likely that another one bought around the same time could fail shortly thereafter. As a matter of fact I now know this can happen. Although I had turned on Dual Redundancy on my Drobo 5D, I had not yet turned it on my Drobo 5N. While traveling on business I received an email alert that one of my drives had failed (an older 2TB Seagate). No big deal as my data was protected. However, by the time I got home several days later a second 2TB Seagate drive had failed. That’s it. Game over. It wasn’t a huge deal since this Drobo served as a backup to my main Drobo. I didn’t lose anything other than Time Machine history.
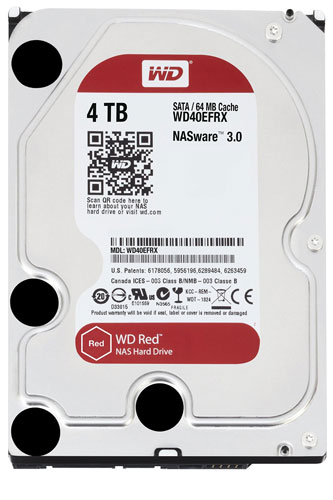
I replaced both drives with new 4TB WD NAS drives and during the setup process I enabled Dual Redundancy. My Drobo 5N still has two of the 2TB Seagates and a 3TB Seagate (which have been failing on my pretty regularly and it’s why I’m kinda done with Seagate) in it. Now I’m a little less worried if two of the older drives bite the dust at the same time. Keep in mind that I just put two 4TB drives in my Drobo 5N at the same time. Chances are if they die in a few years (no premature failures) under normal wear and tear, they’ll probably die around the same time.
What’s the downside to enabling Dual Redundancy?
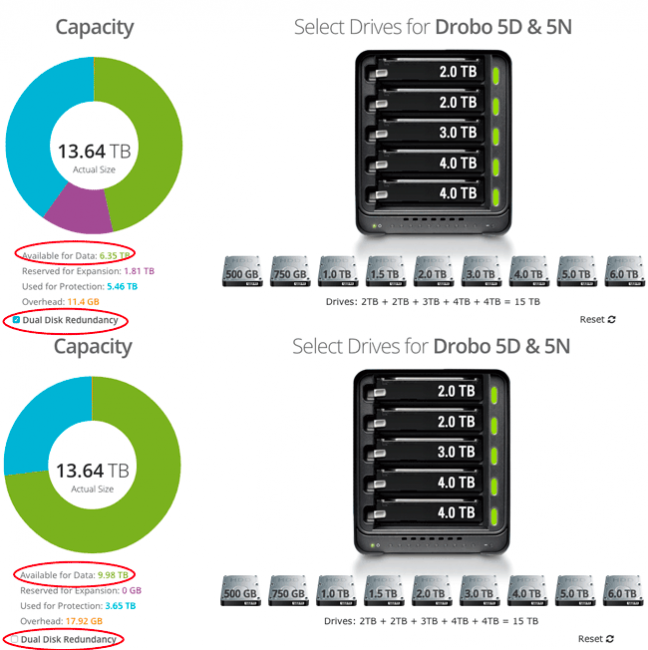
There is a downside otherwise this option would be on by default. By enabling Dual Redundancy your Drobo will have less usable space. You can figure out how much storage space you’ll have by using the Drobo Capacity Calculator on their website.
The Bottom Line
Yes two drives can fail at the same time or back to back. While enabling Dual Redundancy does give you less storage space, drives are relatively cheap and it’s better safe than sorry.

A Fast Thunderbolt/USB 3 Portable SSD
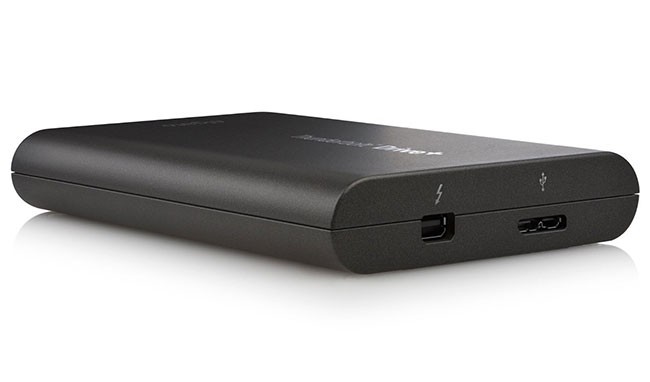
You can never have too much storage and fast external storage is even better. A few years back I bought the first Elgato External SSD and my only complaint with it was the fact that it only had a single Thunderbolt port. That pretty much killed the use that I thought I would have for it which was to boot from it during certain presentations. Since the MacBook Pros back then only had one Thunderbolt port I couldn’t connect the drive and an external display/projector at the same time. Fast forward to today and the NEW Elgato Thunderbolt Drive + and while we still get a single Thunderbolt port, we get the addition of a USB 3 port as well as great performance in an external portable hard drive.
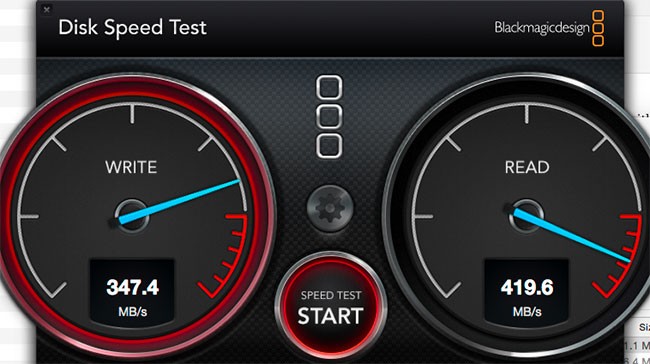
I ran the above speed test on the 512GB model connected and the results were respectable!
What’s in the Box?
You can choose between the 512GB model or the 256GB model. Both come with a USB 3 cable and Thunderbolt cable. The metal enclosure is very solid and sleek unlike many of the plastic USB 3 cases.
The Bottom Line
While it’s great having a FAST portable SSD that can be connected via USB 3 or Thunderbolt, the only issue with this drive is the cost. If you want quality vs. cheap, then this is the one for you.
You can get the 256GB model here or the 512GB model here.

F.J. Westcott Flex LED Light Review
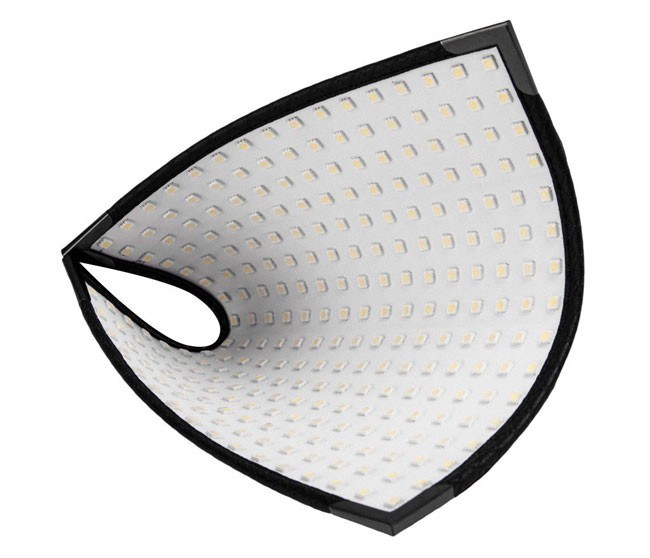
I remember when I first saw the above photo on Westscott’s website, I immediately and without hesitation said “WOW!” I love continuous lighting and the thought of having an LED light panel that would be easy to travel with was intriguing. I recently put the 10×10″ model to the test. Here’s a short video of my setup:
The Flex LED is 5,600 daylight balanced. The Flex™ 1-Panel Daylight kit includes a mounting bracket and a 1/4 stop diffusion panel. The dimmer goes from 5% to 100%. The panel is water resistant and the kit also includes a 16′ extension cable.
Here’s a production shot from my test shoot:

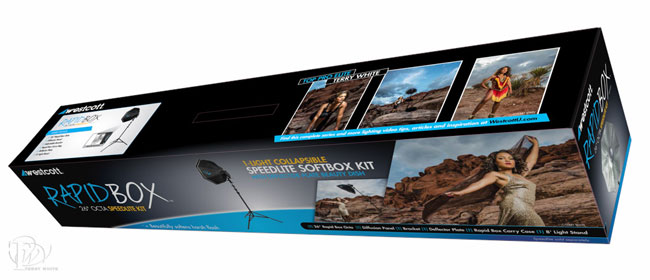
The mounting bracket includes a “clip” style mount instead of a traditional light stand mount. That’s both a plus and a minus. However, since the panel is so light you should be able to attach it to any light stand or any other suitable stand. I also clipped it to a chair back at one point to light the background. In the picture above I simply clipped it to the light stand holding my Westcott Skylux LED and Rapid Box Octa XXL softbox which was powered off at the time.

The above shot was captured with my Nikon D810, 70-200mm VRII f/2.8 lens at ISO 200, 190 mm, f/3.5 1/80 sec. Although I prefer bigger, softer main lights for portrait work I was impressed with this light for its size and incredible amount of output. It was soft enough with the diffusion panel on front.
The Bottom Line

The Westcott Flex LED is another great tool in my lighting arsenal and it’s probably the first LED light that I feel very comfortable in traveling with and knowing that it won’t take hardly any room in my carry-on luggage. The “clip” means that I can probably get away without having to carry or find a light stand too. While the price may seem relatively high, it’s actually on par with high end name brand speed lights from the top camera manufacturers. However, the fact that it’s continuous lighting means that I can also use it for video recording too making it more flexible than a speed light.
You can get the details/order the kit here.

