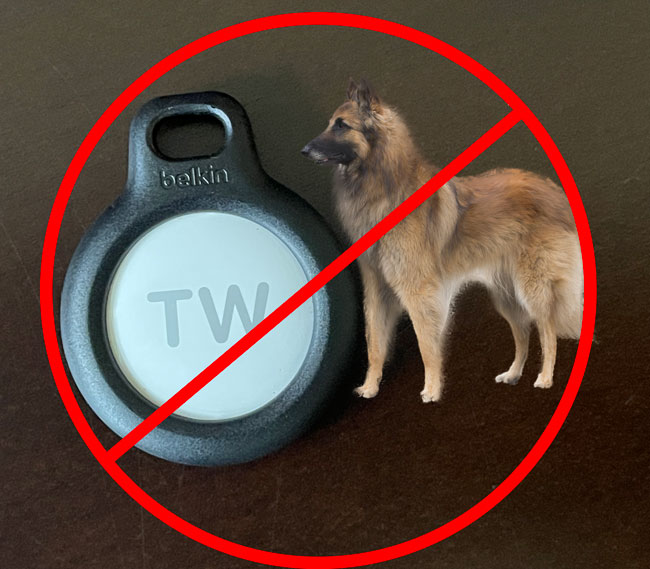
Don’t Use an Apple AirTag as a Pet Tracker – Use a Whistle Instead!

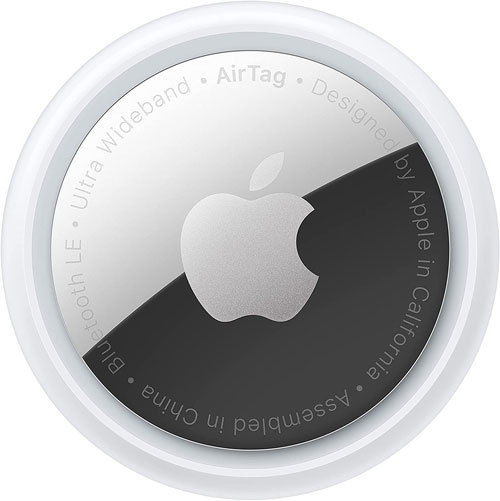
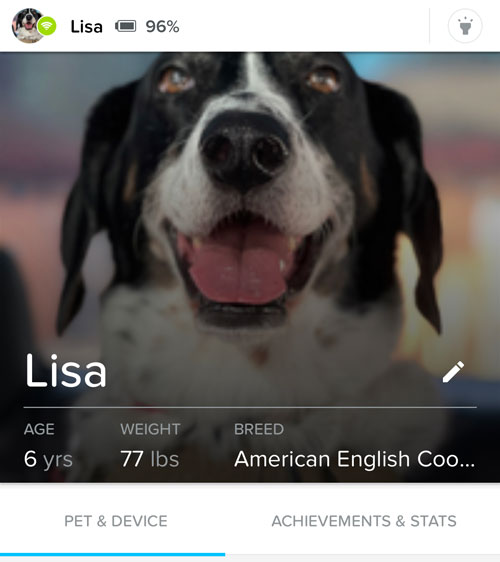
Apple introduced their AirTag (a Tile competitor) for those looking for an easy way to keep track of things like keys, purses, wallets, etc. However, many have been tempted to use them on their pets too. There certainly isn’t anything wrong with this thought process, but it really depends on your situation and where your pet may go missing.

How do AirTags work?

With an AirTag there is no subscription fee, no WiFi, and no GPS. It works with Ultra Wideband technology to show itself to the Find My app on your iOS devices. In order for your lost/misplaced/stolen object to show up on the Find My network it would have to be within range of another Apple device such as an iPhone, iPad or Mac. Let’s say you left your backpack with an AirTag attached to it/in it, in the library and you drove home. Now you’re miles away from your backpack.

You are way out of the range of bluetooth or even the 800 foot range of Ultra Wideband technology. However, if someone else is in the library near your backpack with an iPhone, iPad or Mac your backpack AirTag would automatically be picked up by the Find My network and show its location in the Find My app on your iOS device. Luckily the people near your backpack don’t need to do anything special. There’s nothing they need to install or activate. It all happens in the background. Your AirTag in your backpack would privately be detected and shown on the Find My network just being near another Apple device. Cool!

This is not ideal for pets depending on where they may get lost

Continue reading “Don’t Use an Apple AirTag as a Pet Tracker – Use a Whistle Instead!”

Live Streaming from a DSLR Point of View

MAGHOTSHOE-0006_sm.jpg

Live Streaming from a DSLR Point of View

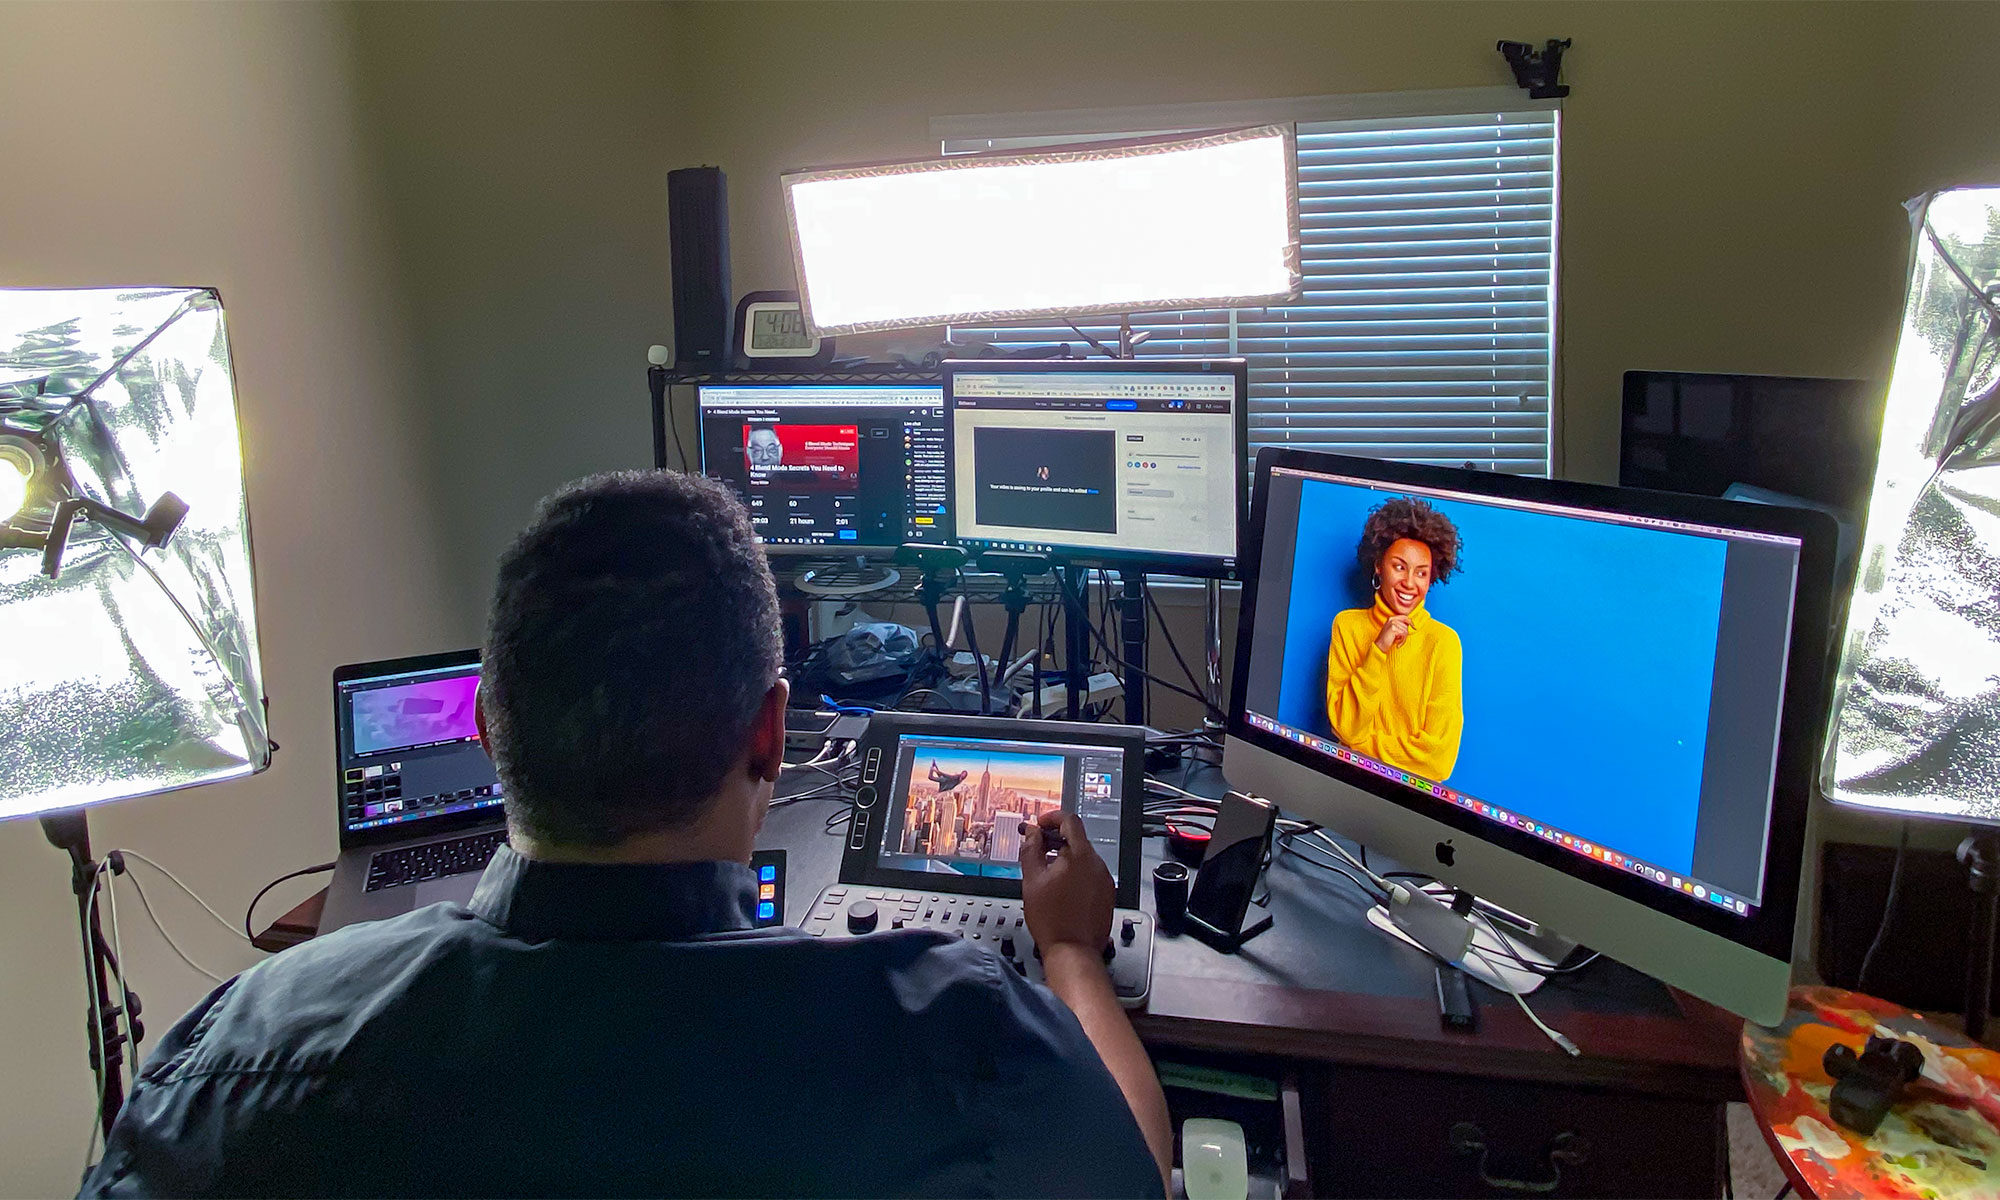
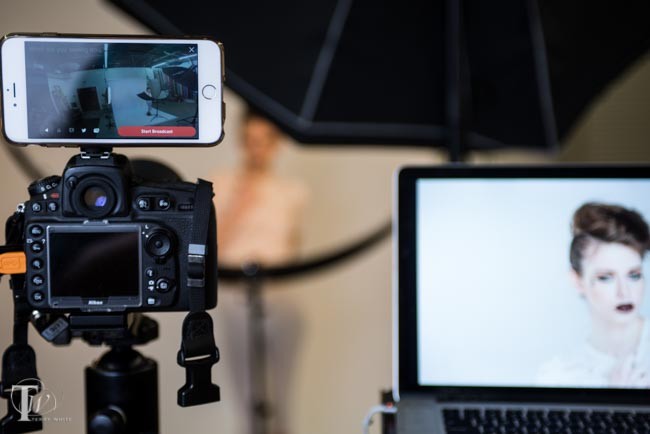
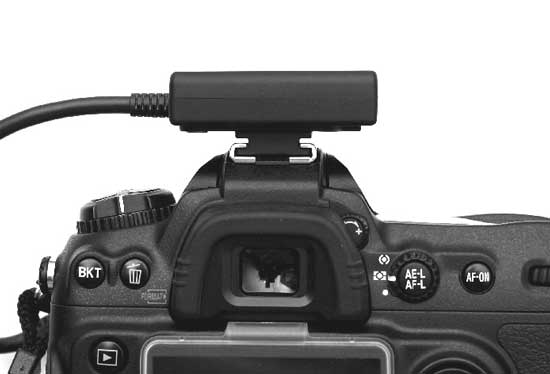
Live streaming is becoming more and more popular and whether or not you’re live streaming your photo shoots or just wanting to create a behind the scenes video, your DLSR has the best view. Let’s face it. Your DSLR is pointed at the subject and has the best point of view. Sure, you can mount your smartphone or video camera on a stand/tripod to capture the “set”, but your DSLR is always going to be focused on the action!

Continue reading “Live Streaming from a DSLR Point of View”

Best Nikon DSLR GPS

di-gpsoncamera.jpg

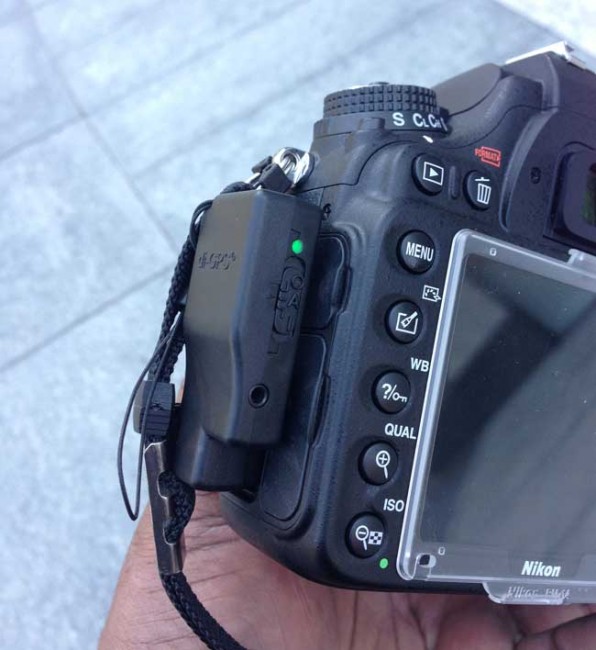
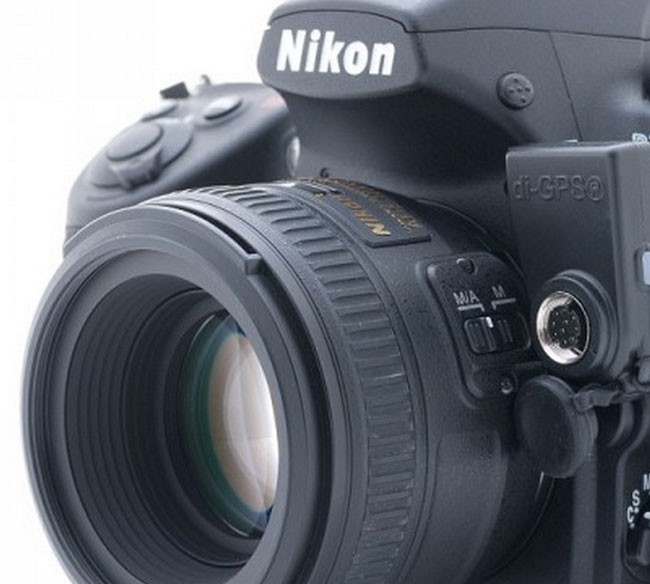
It has been a while since I’ve looked at GPS units for my Nikon DSLRs and yes it’s sad that in 2015 we still have to look at external solutions. However, that is the current state of affairs and the good news is that the prices have come down and the units continue to get better. Recently I was debating going with a NEW Nikon D750 vs a D810. When I was leaning strongly towards the D750 I tested my existing GPS unit (the one on my Nikon D600) and realized that since the GPS port was in a higher spot on the body that my Dawn di-GPS Eco model just wouldn’t work.

di-gps-eco-prosumer

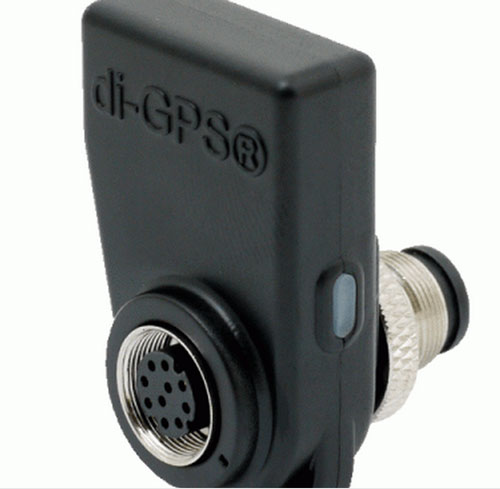
It’s a shame because I really like the flush to the body design of the di-GPS Eco models. I reached out to Dawn Tech to see if there was one on the horizon for the D750 and they informed me that they were working on something, but it wasn’t ready yet. In the mean time I got the UPDATED Mini3 MTK S5. I had worked with the older model in the past and this newer one now includes the “Last Position Memory” function, which is great for those times when you go inside and keep shooting. More importantly it has an even lower power consumption (19mA, less than 1/3 of the current consumption of Nikon’s own GP-1). While it doesn’t have the flush to the body design that I like so much in the di-GPS Eco, it’s very lightweight and can either sit in the hot shoe or attach to the camera strap.

di-gps-eco-pro

I ultimately decided on and bought the Nikon D810. So this means that I get to use the Eco ProFessional M model. This one has the same “flush” design that I like and it even has the important pass through terminal port so that I can use my cable release or other accessories.

di-gps-eco-pro-detatched

The Bottom Line

di-gps-eco-prosumer-Nikon_d600
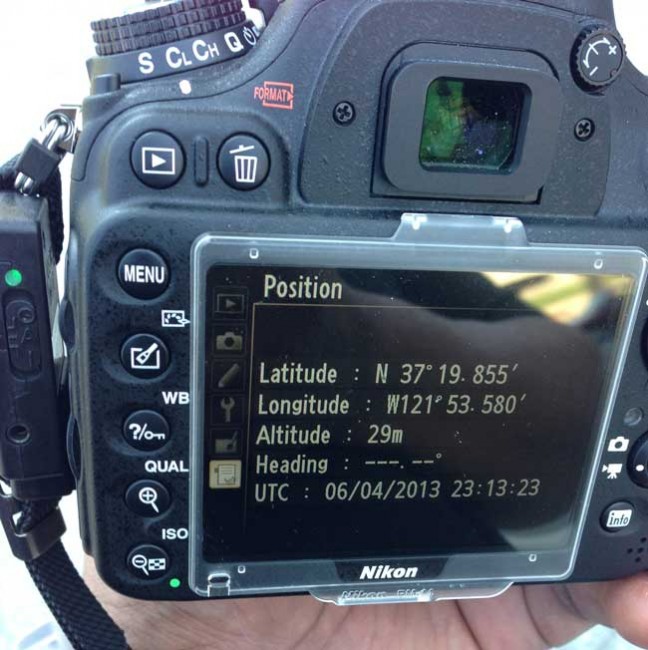
Nikon has had GPS support built-in to their DSLRs for years, but still refuses to build the actual GPS receiver in to their DSLR bodies or battery grips.


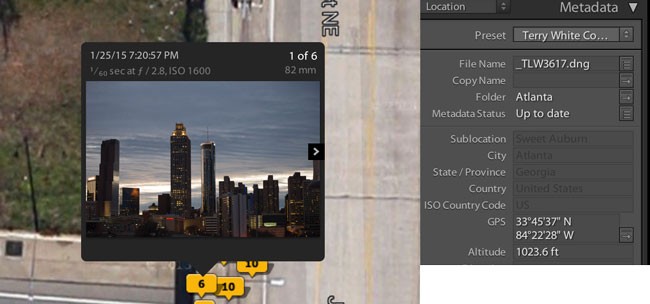
I love geotagging my photos as I take them. I use the Maps module in Lightroom quite a bit for my landscape and travel photos. It’s also easier to answer that “where did you take that shot” question as the galleries on my website also take advantage of this data allowing visitors to see exactly where each shot was taken. Sure there are many solutions and even iPhone apps like this one, but the most accurate and convenient way is to have the GPS data logged right into the metadata of each shot as you take them. While I applaud Nikon for having direct GPS support right in the menu of their DSLRs, it’s a shame that in 2015 we still have to buy “EXTERNAL” modules. As I’ve said many times I’d love to see this either built right in or at least built into an “optional” battery grip. Until that happens The GPS units from Dawn are your best bet.

Lightroom_GPS_Maps_Module
Using the Maps module I can easily see exactly where shots were taken and even copy to GPS data to images that were taken with other cameras that didn’t have GPS.


Google Adds Street View to their Mobile Web Based Maps

I think it would be an understatement to say that there is disappointment among users of Apple’s iOS 6 Maps App. It replaces the long standing and trusted Google Maps App and it fall short in many key areas. While I wasn’t a huge Maps user to begin with, I do use the App from time to time to find local businesses, get phone numbers, websites, etc. Long ago I adopted the Navigon App as my choice for turn-by-turn voice directions. However, since the new Maps App offers turn-by-turn plus direct Siri support it’s nice to be able to simply say things like “navigate to 123 Main St” and have the Maps app find the location and start navigating to it. Just last night I had the opportunity to use that feature and this was my first frustrating experience with the new Maps App. Since I was driving I wasn’t staring at my iPhone. I was simply listening to the voice directions. One of the directions was make a u-turn in a half a mile. However, by the time I got to the point to make the u-turn I realized that it had me navigate almost a mile past my destination just to turn around and go back to it. I could have made that u-turn right at the location I was headed to. That’s a mile of my life that I’ll never get back 🙂

Another problem I’m having with the new Maps App is that it simply doesn’t have the businesses listed that Google does. I ended up looking up that address last night using a regular Google search since Apple’s Map App didn’t have it.

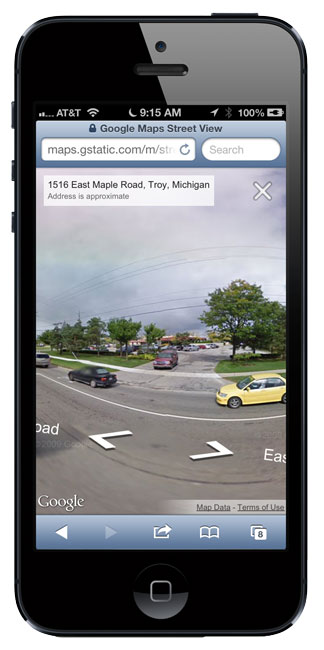
Google beefs up their Maps Mobile Web App with Street View

One of the other missing features of Apple’s Maps App is Google’s Street View. Before today that feature wasn’t available in the mobile browser version of their Maps. Now it is. This means that I’ll likely use Google’s Map in my mobile browser more often and definitely use Navigon for my turn-by-turn directions as I’ve learned that I just can’t trust Apple’s Map app at this point for even basic navigation. Luckily there’s even a good trick to use Siri to get the Maps App to show you where you want to go and then hand it off to Navigon. Fire up Siri and simply say “navigate to __________ by train”.

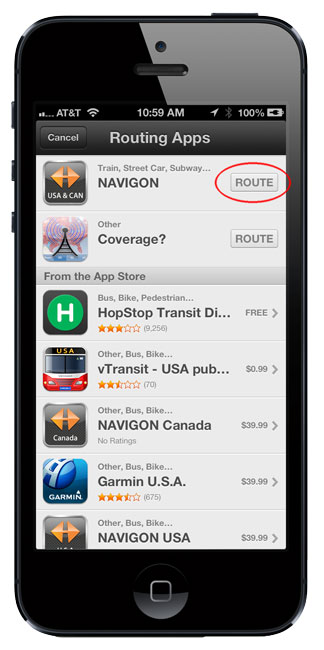
Apple’s Map App doesn’t offer public transit options and therefore you’ll be offered the choice to use another app to do your navigation. Tap the Route button for Navigon and away you go (by car or public transit). This is by far the fastest and easiest way to get your destination into the Navigon app provided that the place you asked for is in Apple’s Map app or you simply use an address. I should also point out that Navigon has Google features built-in to their app. In addition to Google Local Search for POIs, it also has a Street View feature that comes up automatically as you arrive at your location so that you can see where you’re going on foot from the car, bus, train, etc.

NAVIGON North America - Garmin Wuerzburg GmbH

I’m sure that Apple will improve their Maps app over time, but at this point I definitely can’t recommend using it. The combination of Google Maps Web App, Navigon and Siri will be my solution for the foreseeable future.

Solmeta Outs a New N3 GPS for Nikon DSLRs


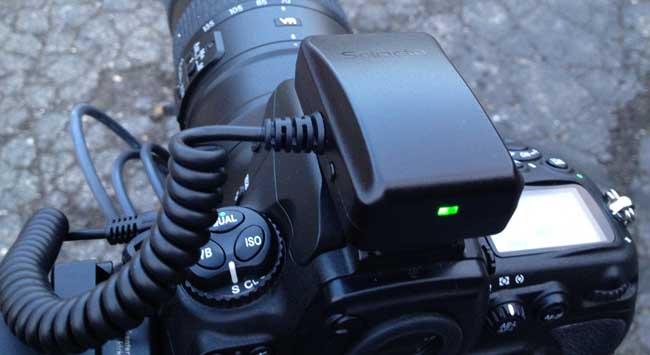
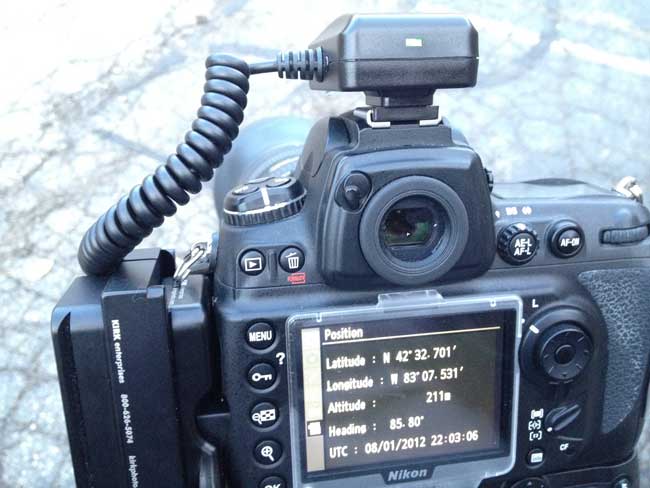
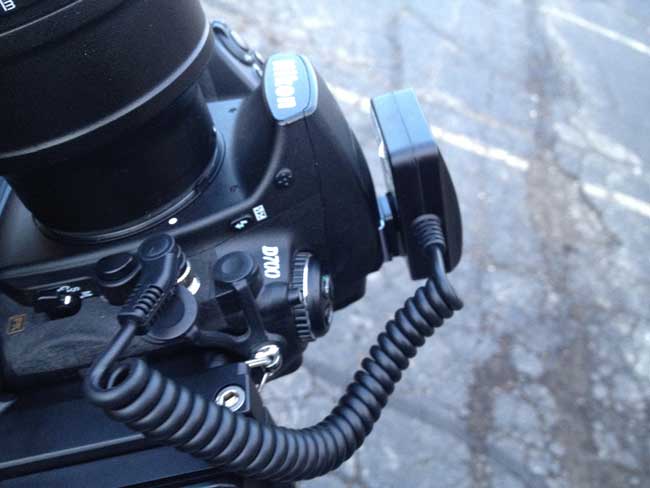
It's been a while since I did my Nikon GPS Smack Down. Back then I chose the Solmeta N2 as the winner for overall best GPS for Nikon DSLRs. Since that time Solemta has come out with another new model, the N3 and I got a chance to try one out. Like previous model the Solmeta N3 plugs right into your compatible Nikon DSLR and geotags (adds longitude/latitude and heading) your photos as you take them (both JPG and RAW support). However, unlike the previous model you now have to choose between the one for professional DSLRs like the D700, D3, D4, etc. and the prosumer models like the D5100, D7000, etc. The reason you have to choose is because the interface cable is now hardwired in. This has it's advantages and disadvantages. The advantage is that the connection is perfectly secure. The N2 allows you to plug in a cable to match your camera, but the connection could easily get damaged if you bumped/hit it the wrong way. The new connection is very well designed. The disadvantage (at least for me) is that if you have multiple camera bodies of different types you'll now need one of each type to go with your camera as opposed to just ordering the additional cable. This will only affect a small percentage of people, but it is a slight step down in convenience for me. Another small but notable cable improvement is that the cable is now coiled instead of being too long or too short. It will be just right for however you attach your GPS (in the hotshoe or on the strap). 


Faster and more accurate

This model uses a 3-axis electronic compass like their top of the line model the Geotagger Pro. The N2 uses a 2 axis compass. The first thing that impressed me was how fast it was ready to go. By the time I tuned the camera on and was ready to snap the 1st picture it had already locked on to a satellite and was providing the location info to my Nikon D700. The other big difference is that this model gets its power directly from the camera. The other models have internal batteries that you charge and then only after they run down will it get power from the camera. While having a built-in battery does provide for potentially longer shooting, the N3 is designed to use less power, sleep and take advantage of the Nikon GPS power saving features. I haven't had it long enough to compare battery life, but I did notice that it went to sleep a few seconds after I turned the camera off and was ready almost instantly when I turned the camera back on.

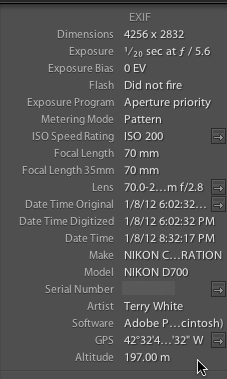
The GPS data shows in Lightroom 3 and allows you to click the arrow/button to take you to that spot on Google Maps.


New Indoor Fixed Mode

GPS units work best when used outside, but if you are going in and out of buildings a GPS that only works outside isn't much use to you. The N3 has an Indoor Fixed Mode that will use you last known location to continue tagging photos as you take them inside.


Built-in Remote Trigger Support

One of the usual concerns pro photographers have is that the model for the pro cameras use the 10 pin terminal port. That port is also often used for cable releases (remotes). While Solmeta does sell a Y splitter cable so that you can use your existing cable release, the also have a port on the side for use with a basic remote too.


The Bottom Line

I have mixed feelings about this model. I'm happy with the speed and accuracy, but I'm less happy about needing a specific model for your camera. Luckily the N2 and Geotagger Pro are still available as options. Solmeta has positioned the N3 right between the Pro and N2 and it's priced at $189. You can't go wrong with any of these models as they are all solid performers. 

Learn more or order here.

Why the iPad is becoming my Favorite GPS Navigation Device

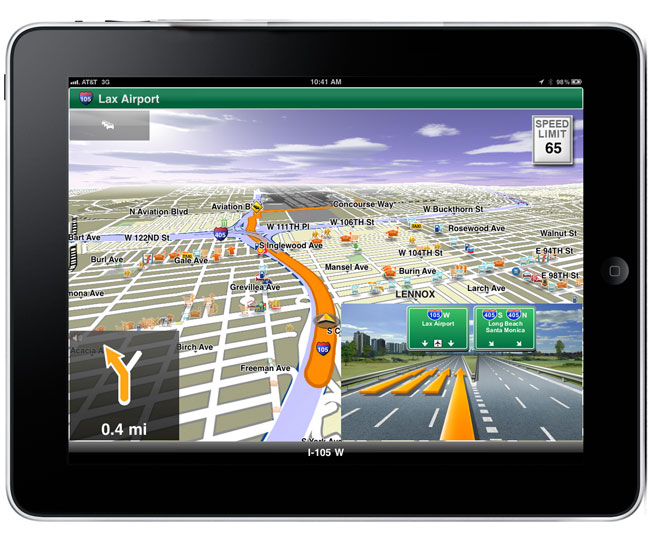
Once Apple updated iOS to allow Apps to run in the background I gave up on dedicated Turn-byTurn GPS units. I've been using the Navigon App on my iPhone ever since.  Navigon updated their Apps to be Universal Apps so that they would be native on the iPad too. I remember thinking at the time, "when would I ever want to use a big iPad for GPS navigation?" The first time I used Navigon on the iPad was actually the Europe version in Denmark. The advantage for me then was that i didn't have a car charger with me and the iPad battery would last much longer than the one on my iPhone 4. On that trip I was the passenger, so I could hold the iPad while Scott Kelby drove. I realized something during that drive. It was really nice having a big screen navigation system. While I love the Navigon App, I've always said that the text was a tad bit too small. However, on iPad that's it's big, beautiful and easy to read. Another advantage is that the iPad has a louder speaker that's easier to hear the directions. 

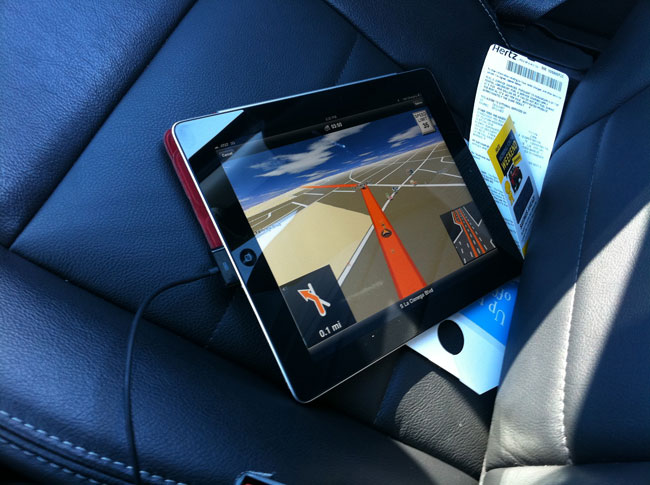
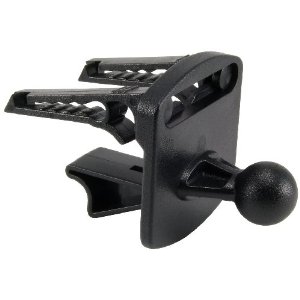
I decided to give it a try solo. During my last trip to LA I used the iPad as my GPS navigation. I just set the iPad on the seat as I didn't really need to look at it once I started driving. The voice directions were good enough. If you wanted to mount an iPad in your car permanently you could use something like this Arkon mount. However, I only use these devices/Apps in rental cars. Therefore, I don't need a permanent mounting solution.


The Bottom Line

The iPhone is always with me and I have no plans to delete the Navigon App from it. However, if I have both devices with me and I'm in a rental car, I'm going to use the iPad for navigation over the iPhone. If you want to use an iPad for navigation, you're going to want the WiFi+3G model as it has a GPS chip in it and the WiFi model does not. Also here's a car charger that will charge both your iPad and phone.

You can get the  Navigon North America App here from the NAVIGON MobileNavigator North America - NAVIGON AG

Unleashed GPS Bluetooth Geotagging Solution for Nikon DSLRs

I've spent quite a bit of time reviewing GPS based Geotagging solutions for my Nikon DSLR cameras. You might remember my most recent review of the blueSLR solution, which involves attaching a bluetooth module to your Nikon DSLR and using your iOS device to run their App. The folks over at Foolography saw that review and asked if I would take a look at their solution. Since I have a passion (or geeky interest) in this area I jumped at the chance.


The Unleased Dx000 is the smallest one I've seen to date

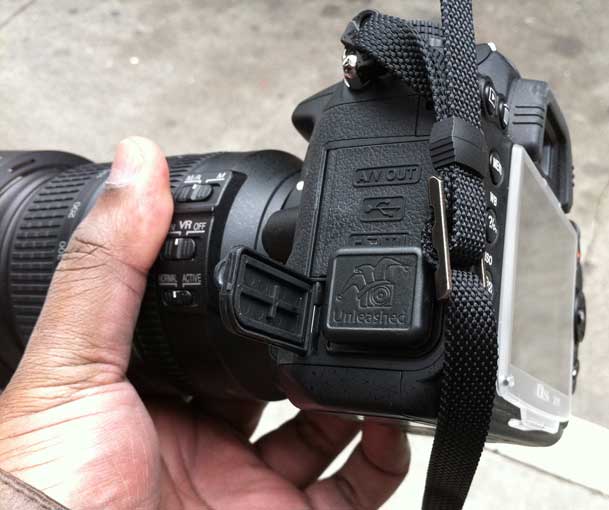
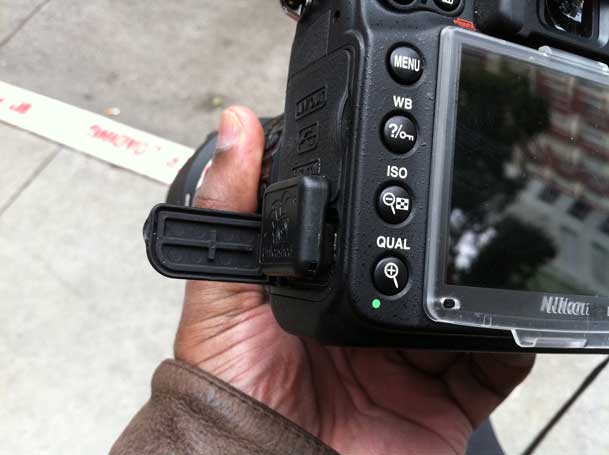
One of the issues with a GPS device on your Nikon DSLR is that it's not built-in. This means that you either have a module that attaches to the 10 pin terminal port (on the higher end DSLRs) or the GPS port on the side of the body (yes you can have one that doesn't attach and do it later in post, but I hate those solutions). These modules either attach via a cable, which means the module itself has to either sit on the hotshoe (not electronically, just for placement) or on the strap. The potential problem with these types is that as you walk around you're going to bump it and either knock it around or even possibly break the cable/port going into the module (I've done that). The Unleased Dx000 as you can see in the picture above fits very snuggly against the camera body. The only problem in the case of the D7000 is the port door hangs open.

When I first saw this product I almost jumped out of my chair until I realized that this was only one half of the solution….


The Unleashed Modules Require a Bluetooth GPS Receiver

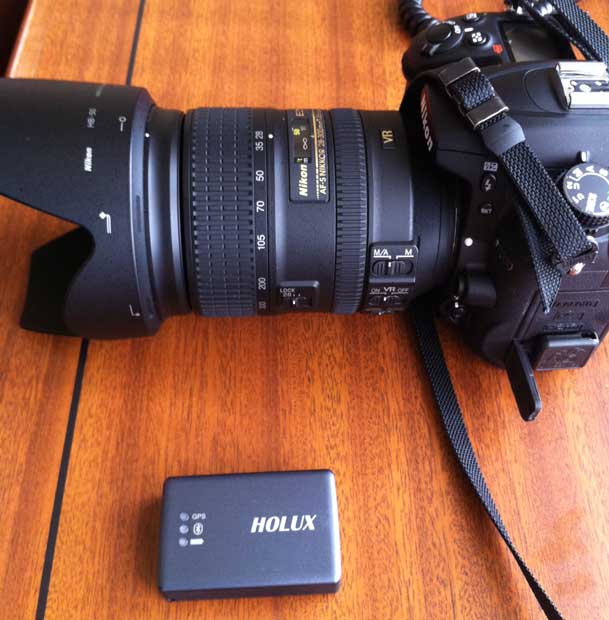
While the module that plugs into your DSLR is in fact the smallest I've seen, there is another piece you need to actually Geotag your photos as you take them. You need a compatible Bluetooth GPS receiver.  Luckily there are quite a few to choose from. I received the Holux M-1000C for review. This (Holux M-1000C) module is the actual GPS receiver. It pairs with the Unleashed Dx000 wirelessly via Bluetooth. 


How does it work?

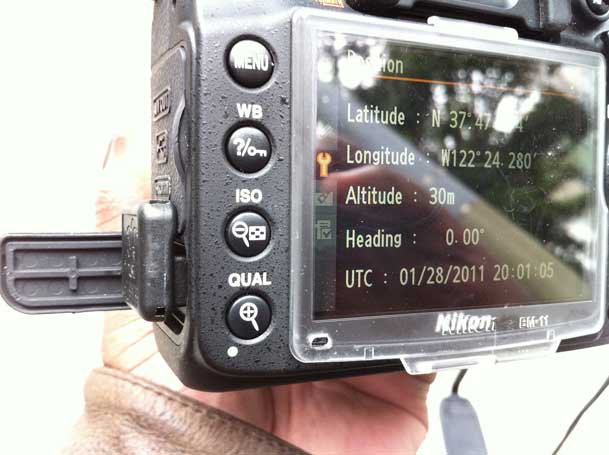
Once you pair the Unleashed Dx000 with your Bluetooth enabled GPS receiver, you then just turn on the GPS receiver and your camera. Mine came already paired and ready to go. I charged the Holux via USB and took it out to test it. Per the instructions I turned on the Holux and my D7000 with the Unleashed Dx000 attached. Once the Holux M-1000C locked on to a satellite the Nikon D7000 picked up the location from it wirelessly. At this point I put the Holux unit in my jacket pocket and started shooting. 


The Bottom Line

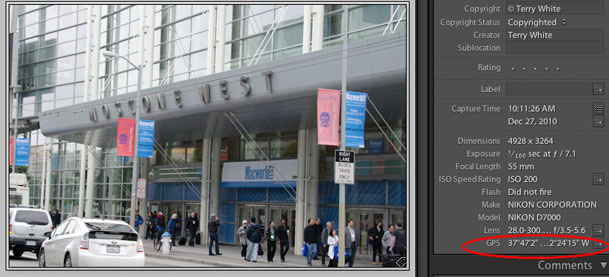
Click the above photo in Lightroom to see where this shot was taken/geotagged on Google Maps


This solution worked as advertised. The accuracy seemed a bit off but that may very well be to the placement of the Holux device in my pocket instead of out in the open. For example, when I took the shot above I was outside on the sidewalk across the street. However, when you click the shot above to see it on Google Maps you'll see that it places me (the green arrow) just inside the building. For this reason you're probably going to want the GPS module more out in the open. It would be nice if someone developed a GPS bluetooth hat 🙂

When I went inside the convention hall the module continued to transmit my last known location to the camera. However, this doesn't work indefinitely. After so long the GPS module will no longer transmit your location if it doesn't get an update. It's hard to say when it stopped, but my guess is about an hour inside. This is fine if you're ducking in and out of locations, monuments while shooting, but it's not suitable for prolonged indoor geotagging.

Battery life was great on both units. I kept the Holux on the entire day and the battery was still going strong until I turned it off for the evening. Also there was no significant drain on the D7000, which I did turn on and off as needed throughout the day.
Yes you can also attach a compatible shutter release for those long exposure shots.


Which one should you get?

There isn't a Nikon compatible GPS that I flat out don't recommend (although the Nikon branded GP-1 would be on the bottom of my list in terms of features). They all do what they say they do. It really boils down to the features you're looking for and form factors. I look at each solution as having a place depending on the kind of shooting you're going to be doing most. So here are my recommendations:

For the all day landscape shooter

If you're out and about all day then battery life will be a concern. While these newer bluetooth units offer better form factors they do pose a potential concern for the additional battery life you'll need in your iPhone/iDevice or your Bluetooth GPS receiver. So if you're out and about from sun up to sun down I would still recommend the Solmeta N2. It's my favorite all around unit that works with all of my Nikon bodies.

For the on location shooter

This is the person that will be shooting both inside and outside, but they will be shooting inside a lot! Monuments, museums, and other buildings where there isn't a clear view of the sky. For this shooter I would go with the blueSLR solution. Because it gets its GPS location data from your iPhone it stands the biggest chance of geotagging shots that the other solutions will miss! Also with the blueSLR solution you get the benefit of a wireless shutter release from your iPhone including time lapse photography.

For the photowalk photographer

If you are doing a lot of walking with your camera, say on a photowalk and you don't want to have to worry about constantly looking out for the GPS attached to your camera body, then hands down I would go with the Unleashed solution. I like the fact that you turn this on and forget about it. The flush mount design is awesome and again it's smallest on camera solution that I've seen. Prices start at 125 Euros for the Unleashed module and about 63 Euros for the Holux GPS receiver. 


The good news is that you can't go wrong with any of the solutions above. Pick the one that's right for you!

Review: blueSLR Wireless Camera Control & GPS Geotagging

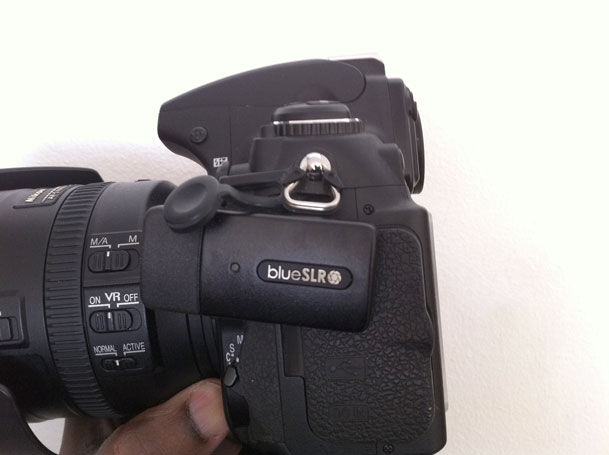
A couple of my favorite gadgets just got married 🙂 I’m a Nikon shooter and an iPhone user. It’s rare that I’m ever anywhere shooting without my iPhone on my belt. So when XEquals Corp sent me a message about their new blueSLR Wireless Camera Control and GPS Encoding solution I was all ears.


Wireless Control for my Nikon DSLRs
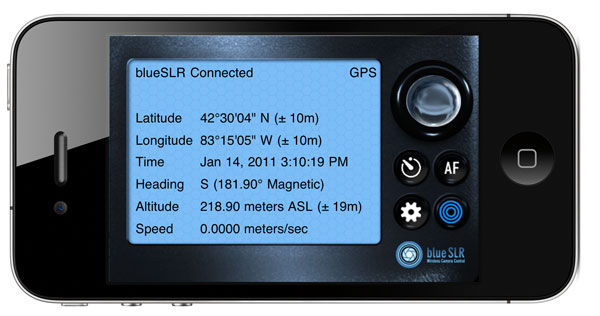
Once you plug in the blueSLR into your Nikon D3100, D5000, D90, D3(s), D200, D300(s) or D700, you can then fire up their free iPhone App. With the blueSLR App you can then remote control your shutter release, auto focus and even time lapse or bracketed exposure from up to 300 feet away via bluetooth. This is the feature that most of the initial announcements were touting and reviewers were so excited about. While I definitely think this is cool, it’s not what excites me most about this solution…


GPS Geotagging is where it’s at – Literally

Click the above shot to see where it was taken – Nikon D700, Nikon 28-300mm lens, blueSLR and iPhone 4


I’ve reviewed many Nikon compatible GPS attachements here over the years and while they have all worked well, they all have one thing in common. They attach to your camera via a cable and have to either sit in the hot shoe or on your strap. They also have to acquire a signal from the global positioning satellites in the sky. Yep that means you’ve got to be outside to grab a signal before you can go inside with the newer units and continue shooting. However, the iPhone’s “Location” feature works off not only GPS satellites but also cell towers and WiFi hotspot locations.

Click the above shot to see where it was taken – Nikon D700, Nikon 28-300mm lens, blueSLR and iPhone 4

This means that your iPhone (iPad or iPod touch) knows where you are even if you’re inside a building. The blueSLR solution can use this Location information and input the info right into (the EXIF data) your shots as you take them with your Nikon compatible camera! Woohoo! Finally! Also unlike all the other solutions out there XEquals prides themselves on their “flush with the camera” design. They’ve gone out their way to make the attachement as unobtrusive as possible. I applaud this effort!


How well does it work?
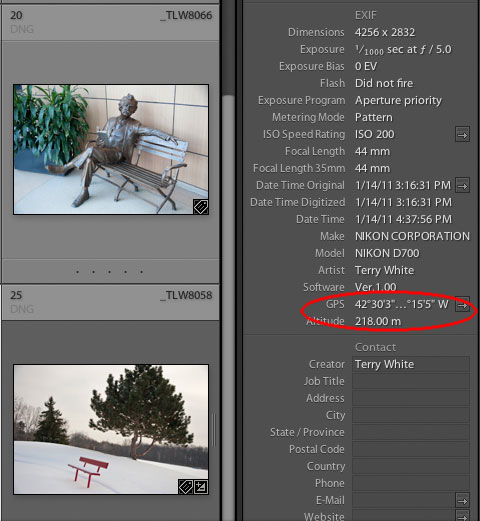
images displayed in Adobe Photoshop Lightroom 3 with clickable GPS button that takes you to Google Maps


I’m very happy with the way this gadget works. The first thing you’ll want to do is (it’s in the instruction card that comes with the device) change the default metering timeout on your camera from 6 seconds to something like 30 minutes. Otherwise you’ll be quickly frustrated by the device constantly timing out before you get to pair it with your iDevice or use it with the App. Once you make that adjustment in your camera, it looks and acts like any other GPS/Remote Shutter Release on your camera.
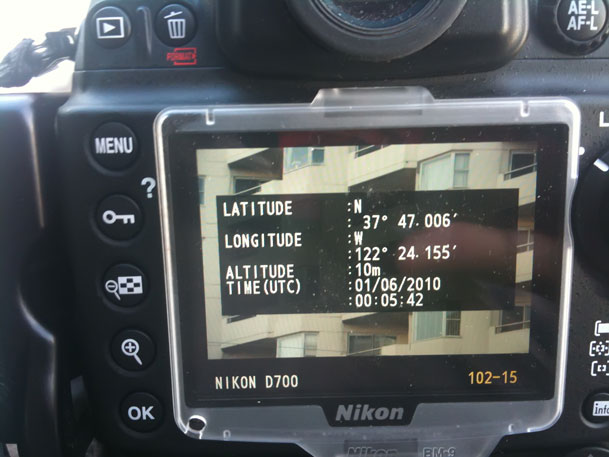
My Nikon D700 has GPS support built-in with a menu to display the status of the attached module. This is one of the reasons I use Nikon over Canon and others. With that said, it’s 2011 and I still can’t believe that ALL camera manufacturers don’t offer a built-in option! More power to XEquals!

Since I don’t have to wait for a satellite signal to be acquired I can start shooting right away! Both the remote features and the GPS features work as advertised. The iPhone app also takes avantage of the iPhone’s built-in compass for heading info. Sweet!

What about battery life? To be honest I haven’t had it/used it long enough to judge the impact on battery life over other GPS units. I know that Nikon has done a lot of work in their latest firmware to reduce the battery drain from GPS devices so I’m not really worried about it.

How’s the GPS accuracy? Keep in mind that it’s only as accurate as your iOS device. iPhones and iPad WiFi+3G devices are going to be the most accurate because they actually have GPS chips built-in. iPod touch and WiFi only iPads will have to rely on Wi-Fi triangulation which could be an issue in the boonies. In my limited testing the shots were geotagged very accurately using my iPhone 4.


How would I redesign it?

my Kirk L-Bracket has to come off to use the blueSLR

There really isn’t anything that is majorly wrong with this device. I do like it A LOT! However, with the “flush” (a blessing and a curse) design, this means that the port door on my D700 is covered while I’m using it. It also meant that I had to remove my L-bracket for my tripod head since it covers that part of the camera. Since it is a remote trigger, most likely I’d want to use it while it’s on my tripod. This would mean having to go back to the standard tripod mount instead of my L-bracket . Not the end of the world, but  I would like to see the next version offer a “swivel” feature with a lock. If I could swivel it up or out then it would be out of the way of everything that I wanted to attach. For a moment I was going to complain that it didn’t offer a 10 pin passthrough on my D700. Then I realized that the only time I’ve needed a passthrough on my other GPS units was to attach a shutter release. Duh! This is already a “wireless” remote shutter release too. However, if you have some other accessory that uses the 10 pin terminal, then you’re going to have to decide which one you want to use.


The Bottom Line

Kudos to XEquals for making a killer device/App combo! I know that there were some manufacturing issues with the Nikon D7000 model and as soon as that one is available It will undoubtedly become my default travel camera GPS unit. If you’re not waiting on the D7000 model, then I wouldn’t hesitate in getting one of these TODAY!

You can learn more about blueSLR and order directly from their site here.

Get the App for your iPhone, iPad or iPod touch for free here from the iTunes

See my blueSLR App review here.
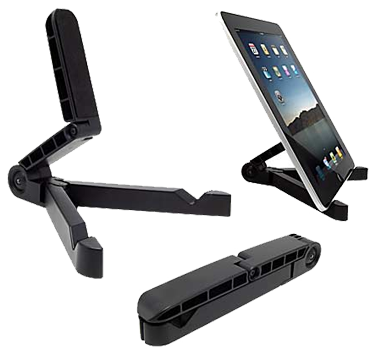
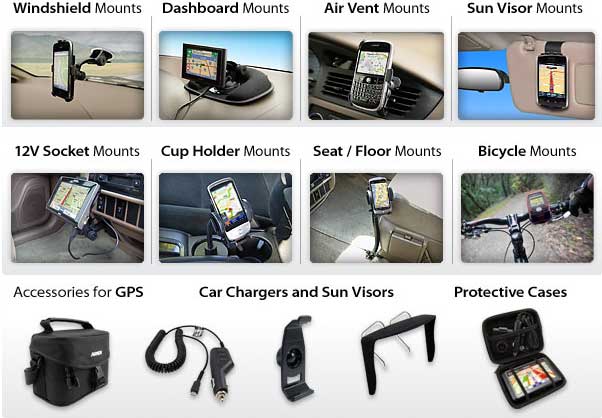
If you need a gadget mount Arkon has you covered

My first experience with Arkon mounts was their Vent Mounts for iPhone and later a vent mount for my Garmin Nuvi GPS (R.I.P. now that I use my iPhone for GPS navigation). These initial reviews led to a great relationship with the manufacturer and being one of the first to play with their latest and greatest mounts. I must admit being a little overwhelmed (in a good way) by the vast variety of choices they offer. Arkon makes a mount for just about everything that you would want to mount in your car or on your desk. 


So what's New?

A new portable stand for your iPad or other tablet computer! When I opened the box, I didn't know what it was (there were other mounts in the box too). I knew they were sending me their new iPad stand, but it was so compact and light weight folded down that I didn't recognize it right away for what it was. As a frequent traveler "small" and "light weight" means that it stands a good chance of going in my bag. This new stand is so simple. Folded down it easily fits in a pocket in my laptop bag. However, it's both rigid enough and strong enough unfolded to hold the iPad with ease!

You can get this new iPad/tablet stand here for $16.95. See it in action in this short clip:

httpv://www.youtube.com/watch?v=_ySZx-GWDEU


Don't have an iPad?

No worries. They have something for just about everyone!


These guys are GREAT to deal with and they are always inventing new mounts and holders for our favorite gadgets. See all of their various solutions here.

What do Point & Shoot Cameras and GPS Nav Units Have in Common?

They are both on my endangered species list…

I wrote a post a while back asking the question, "Are camera phones the next point and shoot cameras?" Back then, I pointed out how I either carry my DSLR camera when the picture that I want to take really matters or I shoot casually with the camera on my smartphone (which is always with me) when it's something casual and in the moment. While point and shoot cameras will probably continue to have the advantage when it comes to better lenses, more megapixels and probably better quality files, smartphones continue to drive the one feature that matters most to most casual shooters: SHARING! Most people take pictures so that they can not only capture the moment, but also so that they can share them easily. Yet only a fraction of point and shoot cameras today include built-in WiFi and even then it's difficult to setup and use. The standard smartphone (iPhone 4 and various Droid models) have all gone up to between 5MP-8MP sensors.  While it's true that point and shoot cameras typically come in the 8MP-14MP range these days, for the average person 5MP is plenty. Not only are these devices shooting great pictures, but they are also shooting great HD video! Although I love my Kodak Zi8, I honestly think that I won't be carrying it anymore by the end of this year. 
 

What about GPS Turn-by-Turn Directions?

When I travel I live by my GPS devices. I'm the first to admit that I'm very directionally challenged. However, my beloved Garmin Nüvi 765T sits on a shelf now. Why? Because the Navigon App on my phone just keeps getting better and better. I paid for it once and it has had several significant feature updates. The latest update brings background multitasking support, weather info, the latest Maps and now finds available parking. Sure I could buy a new dedicated GPS that offers these features too, but why? I'm always gonna have my phone with me and the App on my phone will continue to get better with minimal cost in upgrading.


I think the days of these one trick ponies are over. Why carry a point and shoot camera, a GPS navigation device and a phone if your smartphone can do it all?


Don't believe me? Take a look at these videos:


A photo shoot done with a camera phone (iPhone 3GS)

httpv://www.youtube.com/watch?v=TOoGjtSy7xY


A movie shot and produced (back story here) entirely on an iPhone 4:


Navigon demonstrating their New Clever Parking feature:


httpv://www.youtube.com/watch?v=bo84K678Rbc


Also be sure to check out this book on what can be done with a camera phone: The Best Camera Is The One That's With You: iPhone Photography by Chase Jarvis (Voices That Matter)

Continue reading “What do Point & Shoot Cameras and GPS Nav Units Have in Common?”