Reading SDHC cards via the ExpressCard slot

I’ve been using ExpressCard media readers for about as long as I’ve been using a MacBook Pro (years). I’ve used ones from SanDisk, Griffin Technologies, Synchrotech and now Belkin. Hands down my favorite Compact Flash reader/writer is the Synchrotech CF Express Card Reader. This is one of the only ones that takes true advantage of the ExpressCard slot’s speed when reading high-speed UDMA enabled Compact Flash cards. Read my earlier reviews of this card here and here.


What about reading SD cards?

My point and shoot still camera and consumer HD camcorder both use SD cards. So what about those? Although I love my San Disk 12-in-1 memory card reader, it’s really overkill since I’m only dealing CF and SD cards these days. Also since I don’t want to read CF cards at USB speeds, then I would only be using that reader for SD cards. So my answer is a very small ExpressCard Media Reader. I actually have a couple of these. However, I recently realized that the ones I have are older models that don’t read the high capacity SD (SDHC) cards. I ran into this problem just last weekend while doing an Adobe Premiere Pro CS4 demo. I needed the read the 8GB SDHC card from my Canon HF10 HD camcorder. My old Belkin ExpressCard reader wouldn’t mount the card. Luckily there was someone in the audience with a newer model and he let me use his.

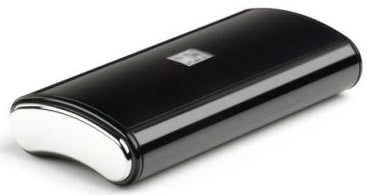
Knowing that I was going to need to use one from here on out (SD cards continue to grow in capacity), I stopped by the Apple Store while I was in San Francisco for Adobe MAX. I was looking for the same brand that he had let me borrow (SanDisk). Unfortunately, I could only find ONE model and it was the Belkin. As a matter of fact it was the last one left and it looked just like the one I was using already. However, on the side of the packaging it did specifically show the SDHC logo, so I took a chance and bought it. When I got back to my hotel room, I compared the two and there was a difference in part number. So apparently Belkin had upgraded it. It worked like a charm!

Although these ExpressCard readers from Belkin and others (not counting the Syncrotech CF reader), go in the ExpressCard slot, they operate at USB speeds. So you really don’t gain anything speed wise (until someone develops a native ExpressCard slot one for SD), however, you do gain on compactness. When this Belkin reader is in the ExpressCard slot it’s flush with the side of my MacBook Pro. So nothing sticks out. You could even leave it in all the time if you don’t use your ExpressCard slot for other cards.

These readers read/write: SD/SDHC, MMC, MMCplus, MemoryStick, MemoryStick Pro, and xD-Picture Card without the need for an adapter. There really is no functional difference between the Belkin, SanDisk and Griffin Technology (although the Griffin reader doesn’t specially call out SDHC. It may not be updated yet!) readers. However, since they they all do the same thing and both the Belkin and SanDisk readers specifically list SDHC, you’re probably better off going with the SanDisk. Why? Because it lists for only $17.29, while the Belkin reader lists for $29.99. Had the Apple Store had the SanDisk model for that price, I would have gotten it.

If your Mac or PC notebook has an ExpressCard slot, then having one of these adapters is a must. They will fit in just about any pocket in your laptop bag. If you need Compact Flash support and you have an ExpressCard slot, then go with the Syncrotech. It will be way faster than your USB reader. If all you’re going to use is SD/SDHC cards, then you might be better off going with SanDisk’s very clever Ultra II SD/SDHC Plus Cards. These cards fold in half to expose a USB plug that goes right into your computer. No card reader necessary. They are my FAVORITE SD cards hands down!

My 2008 Holiday Gadget Gift Guide is here!

It’s that time of year already! I’ve just completed my annual “Terry White’s 2008 Holiday Gadget Gift Guide”. That’s right it’s my guide to help you with you holiday shopping for the gadget lover (freak) on your list. The way this thing started was last year towards the holiday season all my friends started asking me and emailing about what my picks were in various categories and of course the answers were the same. So I decided to compile a list and just email it to the folks that asked. This year I start the guide off with a (humorous) look at gifts WE DON’T WANT!

The guide is broken out by product category and lists my picks from the lowest dollar amount to the highest. So there are products in just about every price range. The guide is interactive with links to each of the products (just click on the price) on sites that I trust to make online purchases from and have dealt with in the past. Each of the products are either products that I use or products that come highly recommended by friends whose opinions I trust.

So check it out today!


PS. As you might have guessed the entire guide was built in Adobe InDesign CS4 and Adobe Acrobat 9 Professional.

Synchrotech Firewire 800 to 400 adapter

Apple has certainly made a couple of controversial moves in the latest MacBook line up. The New MacBook drops Firewire altogether and both the New MacBook and MacBook Pro come with a glossy screen behind a piece of glass. Luckily, the 15″ MacBook Pro does still include a single Firewire 800 port.

While I’m waiting to receive my new MacBook Pro before passing judgement on the glossy display, I am getting ready for the loss of the Firewire 400 port (the older MacBook Pro had both a Firewire 800 AND Firewire 400 port). Although I do have some Firewire 800 to 400 cables, sometimes you may have cables that are just the right length and rather than go out have to buy all new cables, there’s a simpler option…


The Synchrotech Firewire 800 to 400 adapter

This simple adapter lets you keep using your existing Firewire 400 cables. All you do is plug this adapter into your Firewire 800 port and it converts it to a Firewire 400 port. That’s it! No muss, no fuss.

The Synchrotech Firewire 800 to 400 adapter goes for a mere $9. You can order it here.

Fujitsu ScanSnap S300M Review

If you’ve been following my blog over the past few months, you know I have had an interest in portable document scanners. The first one that I took a look at was the Fujitsu ScanSnap S510M. I’m still using it and VERY HAPPY with it. Then I wanted something smaller and more portable for scanning receipts. So I took a look at the latest one from Neat Receipts. It fit the bill for the size that I was looking for and has a great app that drives it (especially for scanning receipts), but the hardware pales by comparison to the ScanSnap S510M. So that brings me to the Fujitsu ScanSnap S300M. This scanner is smaller than the S510M, but larger than the Neat Receipts scanner. It’s not as fast as the S510M, but much faster than the Neat Receipts model. So it clearly fits right in the middle of the two in just about every way.

Â

Neat Receipts

ScanSnap S300M

ScanSnap S510M

Speed 4 rpm-receipts per minute (single sided) 8 ppm (double sided) 18 ppm (double sided)
Two Sided Scanning No Yes Yes
Color & B&W Scanning Yes Yes Yes
Size 10.8″Wx1.6″Dx1.3″H 11.18″Wx3.74″Dx3.03″H 11.2″Wx6.2″Dx6.2″H
USB Powered Yes Yes (either USB or AC) No
Scan to PDF Yes Yes Yes
OCR Capability/Searchable PDF Yes No Yes
Auto Document Feader None 10 sheets 50 sheets
Comes with full Acrobat No No Yes
Price $161.85 $266.79 $433.89

How fast is the ScanSnap 300M?

I decided to put all 3 scanners to the test and record it so that you can see for yourself. I took the same 3 documents and scanned them on each scanner. See for yourself in this video:

I like all 3 models

Of course each one has its pluses and minuses. When it comes to eliminating paper on my desk, nothing beats the ScanSnap S510M. I’m still blown away by how FAST this scanner works. I’ve never seen anything like it. I also like its “baby brother” the S300M because it takes up less space and costs less. Also since I already own Acrobat 9 Professional, I don’t need the added expense of having that bundled in (like it is on the S510M). When It comes to scanning on the go and especially scanning receipts, the NeatReceipts scanner is my choice. But what if you only could buy one?

As you can see, the S300M is at least twice the size of the NeatReceipts

Which one is right for you?

Chances are you only need one of these. So it really depends on what you need to scan most and how cost conscious you are. Clearly the NeatReceipts scanner is the smallest and costs less, but it’s also by far the slowest and only handles single-sided documents one page at a time. If you plan to scan a lot of stuff, often, then the S510M would be the way to go. Like I said above, this thing devours stacks of paper without blinking an eye. If you want a happy medium, then I would say go with the S300M. It’s a nice balance between the two. You get double-sided scanning. You get a smaller form factor than the S510M. It can be USB powered for portability and you don’t end up paying for Acrobat if you already have it. The only two downsides to the scanner is that you don’t get OCR (searchable PDF capability built-in), but again if you already own Acrobat, you can do the OCR in Acrobat instead. It’s also a bit bulkier. So you won’t be sliding this one into your laptop bag as easily as the NeatReceipts scanner.

The S300M: Although the S300M doesn’t come with Acrobat or the AbbyFine Reader software like it’s big brother the S510M, it does come with Cardiris for scanning business cards and automatically adding them to your contact manager (such as Address Book on the Mac). The S300M can be USB powered from your computer or powered with the supplied AC adapter. However, I should note that powering it over USB requires TWO USB ports: one for data and one for power. It comes with the necessary cables to either run via USB or AC power.

The Bottom Line

You really can’t go wrong with either one of these 3 scanners. Like I said, I like them all. I do find myself using the NeatReceipts scanner when it comes time to do expense reports at work and the S510M for home/office clean-up and archiving. The NeatReceipts app just can’t be beat for filing receipts and its even improved in a few ways since my initial review.  All of these scanners are available for Mac or Windows PCs. The S510M and S300M are specifically for Mac (that’s what the “M” stands for), but like I said, you can get the Windows version too (the one without the “M”). These 3 scanners are truly a “Good”, “Better”, “Best” scenario. If I could only have ONE of these, it would probably be the S300M. It’s the right balance between performance and features. See the S300M specs here. You can get the Fujitsu ScanSnap S300M for $266.79 here at Amazon.com.

A Great Watch

There is one piece of technology that we pretty much all take for granted and that is our watches. Yep, most of us wear one, and I’m no different. As a matter of fact you might expect my watch (being a gadget junky) to be all techy and loaded with features. However, my watches are usually quite simple. They tell time and maybe they show the date. I don’t even own a digital watch. I do have a watch that has a USB connection to a built-in thumb drive, but I don’t like it as a watch, so I never wear it.

The one thing that drives me insane is having to constantly replace my watch batteries. There is a watch band store near where I live and it seems like I’m always in there getting a new watch battery. After my last one went dead in what seemed like a relatively short amount of time, I was fed up! As a matter of fact the watch store (which makes a good business selling watch batteries) had a huge banner add for Citizen ECO Drive watches. These watches NEVER need batteries. They are powered by light! According to Citizen they can even go for 6 months in the dark on a full charge. This Solar technology can charge from any light source. The engery cell is designed to last a lifetime.

So I ordered the Citizen Eco Drive Men’s Stiletto Two Tone Watch back at the beginning of July and it’s one of the best watches I’ve ever owned. It’s pretty freeing to just set it and forget it. Plus I like the style. Citizen has a complete line of Eco Drive watches for both men and women.

I do have one tip for those who have battery driven watches. You can prolong the battery life of watches that you don’t wear all the time by simply pulling the stem out (like you would to set it) and usually this will effectively turn the watch off until you push the stem back in. Granted you’ll have to reset the time when you’re ready to use it, but at least it won’t be draining the battery while it’s sitting in a drawer.

di-GPS Pro for Nikon DSLRs – GeoTagging!

Back in November of 2007 I wrote about using the N2 di-GPS with my Nikon D300 and I was quite happy with it then and I’ve been happy with it all along. This little GPS unit writes the longitude and latitude of where you are at the time you took your shots, directly to the EXIF data of the images. No post processing required. Once the GPS coordinates are there you can use various apps or services to plot your picture locations on a map. Adobe Photoshop Lightroom is great for this as well as www.flickr.com.

I really didn’t think that were was too much that they could do to make this accessory better. Boy was I wrong! As it turns out there were two areas that could be improved and guess what? They made those two improvements! When you use any GPS device, the first thing you have to do is wait for the GPS to acquire a satellite signal. Depending on the GPS device this could be anywhere from 30 seconds to 2-3 minutes. The N2 di-GPS was always pretty quick (closer to 30 seconds), but I didn’t like having to wait that 30 seconds or so every time I wanted to use it. So once I put in my camera, I would just leave it in the ON position during my entire shoot so that it stayed on even if the camera was off. Since it gets its power from the camera, this would ultimately shorten the battery life of the camera too. It wasn’t bad so I just lived with it. The other area for improvement was that the model I had been using ties up the 10 pin terminal port on the camera. So if you had another accessory such as a shutter release, you had to decide which one was more important to you.

I didn’t even know that Dawn Technologies had come out with a new "Pro" model until someone who read my original review asked me which one did I have? This lead me to their site and to read up on the new model. Well they did it! They made a great device even better. The NEW di-GPS Pro has all the great benefits of the first model, plus a built-in battery to save GPS satellite location information even when the unit is OFF AND a Terminal Pass Through Port! That’s right you can plug in the GPS into your Nikon (or Fuji) camera and then plug in your accessory into the top of the di-GPS Pro. This will come in handy as I do have a shutter release cable and YES, there was at least one time that I wanted to use both at the same time. I was doing a beach shoot and wanted to geotag the location and use my shutter release cable at the same time. I couldn’t do it! So I ended up using the release cable instead of the GPS. Using the camera’s timer in that situation wasn’t an option. I was trying to shoot the waves as they came in and I had to hit the shutter just at the right time.

I’ve known about this model for a couple of months now and I actually wasn’t going to upgrade. Gasp! (I know, right?) That was until someone saw my existing model and said that if I ever wanted to upgrade (sell it), that they would be buy it. Of course that’s all I needed to hear and I ordered the di-GPS Pro the next day. It arrived two days after I placed the order! They’ve really got their shipping process down as it comes directly from Hong Kong. They don’t having any resellers in the US (which amazes me).


Putting the di-GPS Pro to the test

I wasn’t too worried about the unit actually working. What I was more curious about was satellite acquisition times and how long it would take to reacquire the signal after being turned OFF. I had to go pick up dinner at one of my favorite restaurants and decided to take it with me for a test. I sat in the parking lot and turned it on for the first time after connecting it to my Nikon D700. I then timed it. It took exactly 35 seconds to acquire a signal. I then snapped this shot and turned it off (click on it to see the location):

I went into restaurant and picked up my order. Afterwards I got back in my car and took a drive to Woodward Avenue. This is the site of the annual Woodward Dream Cruise where all the classic cars cruise up and down Woodward all weekend. Although it was Thursday, I was sure there would be some cruisers out there and I was right. I pulled over where I saw these two beauties parked and I turned the di-GPS Pro back on. I was floored! The signal was acquired INSTANTLY! Seriously it was like ONE SECOND and I had a solid red light. I then snapped these two shots before turning it off again and driving a little further to grap that last shot. (click on them to see the location):


Adobe Photoshop Lightroom 2 gives you a one click link from your GPS data to the location on Google Maps


The Bottom Line

If you already have the N2 di-GPS, then you’re probably fine as you are and don’t "need" to upgrade. However, if you use it a LOT and turn it off and on a lot or you have additional things that you would like to plug into the terminal port then this model is a must have. Also if you’re going to buy one for the first time, the I would spend the extra $70 to go up to the Pro model. The built-in battery for saving GPS satellite location info is worth it (to me). Both models work natively with the following cameras: Nikon D3, D700, D300, D2XS, D2X, D2HS & D200, Fujifilm S5 Pro. The D3, D700 and D300 even have a GPS menu right on the camera to display status information about your GPS device:

I was also happy to see that this model came with a little carrying case. A nice touch and a welcomed addition.

The di-GPS Basic goes for $198 and the di-GPS Pro goes for $268. There is a flat $45 shipping free. Shipments are via FedEx and FAST! Order here.

Logitech Harmony One Remote Review

I’ve been pretty content over the years with my Sony RM-AV3000 universal remote. However, a couple of my buddies have been really going on and on about the Logitech Harmony One Universal Remote. So I decided to give the Harmony another try. This is not my first Harmony remote. I had one of the earlier models and I just didn’t like it. It wasn’t very forgiving if anyone turned on or off a device by hand. It just seemed like it was more work than it was worth. This remote is much improved over the earlier models in several ways.


How do you set it up?

I’ve always dreamed of a remote that would be 2/3rds touch screen and 1/3rd physical buttons and the touch screen would actually look exactly like the original remote for the device you’re trying to control. Think of an iPhone like experience as a remote. This way no matter how many devices you bought or got rid of, your remote would never be outdated. The Harmony One is the next closest thing to my dream remote. There is a small touch screen at the top of the device with the rest being physical buttons for common things like volume up/down, channel changing and things like Play, Pause, Stop, etc. The buttons are uniquely shaped which makes it easy to operate it without having to look at it. It also feels much better in my hand compared to the rather large footprint of the Sony remote.

The Harmony One comes with the remote, charging cradle, Lithium Ion rechargeable battery, USB cable, setup guide and software CD. That’s right, you configure this remote from your computer which downloads the latest and greatest device profiles from the internet. This offers a huge advantage over other remotes that make you enter codes or learn every function manually.

The setup is quite simple actually. You start by just listing the make and model of each of your devices. In my home theater setup, I wanted this remote to control my Epson HD projector, TiVo HD, Apple TV, Sony PS3, Bose Lifestyle 28 sound system and my Lutron Maestro Lighting Control. The Harmony One is IR only and doesn’t control RF or Bluetooth devices. So in theory that would rule out the Bose which is RF based and the PS3 which is Bluetooth based. However, the Bose systems now include an IR receiver just so you can use universal remotes. I also solved the PS3 problem (so that I can watch Blu-ray and DVD movies) with the Nyko Playstation 3 BluWave Remote which adds IR remote capability to the PS3 via a USB dongle. This is child’s play for the Harmony One because Logitech has the device information on over 5,000 different consumer electronic devices.

In theory after you input your devices all you would have to do is then configure your "Activities" such as "Watch My TV" or "Watch a Movie". Activities are designed to be one button macros that automatically turn on the right components and switch to the right inputs. Although the Harmony One software seemed to know about all my devices, there were still several issues that I had to fix manually. For example, my projector just didn’t come on. I had to whip out the original remote and manually program the power buttons using the "Learn IR Command." Also it seemed that no matter what, it insisted on switching the input from HDMI to PC on my projector. I finally had to setup a NEW button called "HDMI1" and then I mapped my activities to use that input. Once I did that all was fine.

My three activities are "Watch TV/TiVo", "Watch DVD/Blu-ray" and "Watch Apple TV". The only one that worked first time with no modifications necessary was Watch Apple TV. I found it odd that the Harmony One software warned me that the PS3 couldn’t be controlled via IR and offered the Nyko remote as a solution, but didn’t offer to set it up that way since I already had one. I just set it up manually.


Switching sources

Although my projector stays on HDMI 100% of the time, I use an Octava HDMI and Optical 4 port switcher to switch each device to the one HDMI cable going to the projector and the one Optical Audio cable going to the Bose. The Harmony software knew of this switcher and I was able to easily incorporate it into my activities. For example, if I’m watching a movie and after the movies is over I decide to switch to watching TV, all I have to do is press the "Watch my TV/TiVo" on screen button. This will automatically switch the Octava box back over to input 1 which has my TiVo on it.


How does it work?

Once I got everything tweaked to exactly how I wanted it (a couple of hours later), the Harmony One worked beautifully. I must admit that it’s easier to use than my Sony. The reason for this is that I can customize just about ever aspect of it. For example, with my Sony remote there was no preset button or activity for controlling my lights. So I had to use one of the other functions namely the CD player. Since I don’t use a stand alone CD player, I used that button and screen for my lights. Not very intuitive! This is not a problem with the Harmony One. I not only have the exact components I need setup, but I can name the Activities, Devices or even the onscreen buttons to whatever I want. For example, the Lutron Light system uses one predefined light level that is referred to as "Scene1" on the Harmony One. I renamed it "Low Light".

I was also amazed that not only could you setup your Favorite Channels for TV stations, but you could even use custom graphics as the buttons that show up right on the remote!

Although the Harmony software lets you use custom graphics for your Favorite Channels, they don’t provide the logos. They had a few sample ones from FOX, but that’s about it. So I found this site that had all the ones I wanted. Another very cool feature is that this remote has a motion sensor in it. When you pick it up it comes to life and lights up the touch screen and the keys. After a few moments of no activity it goes back to sleep to preserve the battery.


The Bottom Line

I’ll have to agree with other reviewers in that the only thing keeping this remote from being perfect is the lack of RF and Bluetooth support. Luckily for me my setup doesn’t require this, so this remote is perfect for me. So far I can’t really find anything wrong with it. I love the fact that it recharges when it’s in its cradle. Once you get it setup the way you want, it just works!

It’s pricey at a list price of $249, but Amazon has it for $187.08.

A Snowball in May?

I’ve always used a headset mic when recording my Adobe Creative Suite Podcast episodes. However, now that I’m experimenting with ScreenFlow and doing more "on camera" stuff, I don’t want to have the headset show in the video. So I decided to give the Blue Microphones Snowball Mic a try.

This USB mic puts you in the mind of the old radio style mics. It’s very stylish (kinda big – think softball) and draws stares by anyone who walks by my desk. Setup was as simple as it could be. Just plug in the USB cable and then choose it as the audio input source. That’s it!

The first time I used it, I wasn’t as happy with the sound quality as I was with my noise canceling headset mic. However, this time I tried it with my latest episode and I’m quite pleased with the results. It’s nice because you don’t have to be right up on it. As a matter of fact it sounds better when you’re back away from it a couple of feet. This makes it great because it doesn’t have to be in my shot.

Now this is one of those, "you get what you pay for" kind of things. This is a $100 mic. It’s not a $500 mic, so my audiophile buddies out there may not think it’s all that great, but for my needs and probably the needs of most of the readers here, it would be great.


What about travel?

There’s no way that I’m going to travel with this thing. It’s designed for your desk, not your laptop bag. While I was in Portland a couple of weeks ago, I stopped by the downtown Apple Store (had to take advantage of the "no sales tax".) I went in for a couple of things and then my buddy Dave pointed out another much smaller mic (wait for it:………), the SnowFlake! I haven’t had a moment to test this one yet, but I will try to get to it this week and review it here. The SnowFlake ($45) is very compact and folds down neatly to fit in a notebook bag pocket.

So in a nutshell, I’m snowed in! 🙂

JBL On Tour Rocks the House!

When it comes to gadgets I’m always looking for the smallest gear I can find that has the most impact or features. However, when it comes to speakers, usually smaller means sacrificing sound quality, bass and volume. Is it too much to ask to have a speaker system that’s small enough to fit in my laptop bag, yet loud enough or clear enough to enjoy from across the room? JBL doesn’t think so.

I was doing a seminar one day and one of my colleagues had the JBL On Tour Speaker System. I couldn’t believe how small it was, yet it was delivering enough sound for a room of about 100 people to enjoy. So I made a mental note and said to myself, the next time I need to take some speakers on the road with me, I’m going to have to try these out. That day came! I took the JBL On Tour Speaker System with me to California last week. I drove it with an iPod nano and the sound was better than I expected. It was certainly loud enough and clear enough. However, I’m a fan of bass and the bass just wasn’t as good as I would have hoped. Don’t get me wrong, very few if any small speakers have enough bass to satisfy me, so there wasn’t a whole lot of disappointment here. Other than that, this speaker system more than fit the bill for what I was looking for.


How small is small?

When you’re not using the speaker, it folds down to about half the size. VERY COMPACT to say the least. Although it’s not battery powered, the supplied power adapter is small enough that it fits into the sleeve with the speaker. Although I used it with an iPod, there is no iPod dock connector. So no iPod charging or line out audio. I simply connected the supplied cable to the headphone jack of the iPod nano. If you’re looking for an iPod only speaker, then you should probably look elsewhere. I got this speaker because it would not only work with an iPod, but also with my laptop.

It also works on batteries. I didn’t try it yet, but the On Tour works with 4 AAA batteries and is rated to play for 24 hours on a fresh set.

Dimensions Width: 7" (175mm) x Depth: 3.5" (88mm) x Height: 1.4" (35mm)
Weight 12 oz (350g)


The Bottom Line

If you need a SMALL travel speaker system for your presentations and personal enjoyment, you can’t go wrong with the JBL On Tour Speaker System. Amazon has it for $53.62.

Take that Hi-Key shot the easy way

Because it opens on all four sides you can either use it in a portrait and landscape orientation.  I have one Interfit strobe pointed into on the right.


I got an early birthday present! The Lastolite HiLite Background totally rocks. Think of it as a giant 6×7′ wall of light to put behind your subject. Although I’m getting better with my lighting all the time, it’s still a pain to get a white background to be perfectly and evenly lit. Well that is no longer a problem for me. The HiLite Background is a collapsible, portable background that takes about 5 minutes to setup. Once it’s setup it’s about 1′ wide. All four sides can be accessed via zippers, but the idea is that you stick one or two strobes on the end(s) and fire right into it. The beauty is that the strobes don’t have to be that powerful or expensive. I even tried it with an Nikon SB800 speedlight and got good results. However, I did buy a dedicated low end Interfit strobe that I run on a very low power setting (I need to turn it down even more now that I look at the histogram/clipping warning of my latest shots).


Here’s the shot I got of Model Ada from the above setup


Lastolite also sells a vinyl train so that you can create a semi-seamless background. Although the HiLite background is 7′ tall, that may not really be quite tall enough depending upon your subject. So you may want to use it for portraits of people that are seated or on a posing stool.

Lastolite makes a smaller version of this background that is 5’x7′, but trust me, you’re going to want the bigger one. It’s interesting that I’ve now used it 3 times and the first and last times I was able to fold it down in about 2 minutes. However, the second time I wrestled with this thing for 15 minutes to get it back into the bag. Go figure!

If you’re looking to do easier Hi-Key, this is your answer! It goes for $473.99 at B&H Photo.