Review: Withings Smart, Connected Scale and Blood Pressure Monitor

If you're watching your weight chances are you have a scale somewhere in your home. If you are health conscious then chances are you get your blood pressure checked on a regular basis. The folks over at Withings are aiming to bring these rather mundane tasks to the 21st century with Smart and Connected devices. GEEK ALERT: The objects you're about to read about are cool gadgets. However, make no mistake that there is a very high geek factor at work here. After all, the last time I checked you could pick up a decent bathroom scale for around $25. You stand on it, look down and see your weight. That's pretty much it! When a company figures out a way to bring MORE technology into this and you're interested, then chances are you're a geek 🙂 Now on to our story…


The Withings WiFi Scale
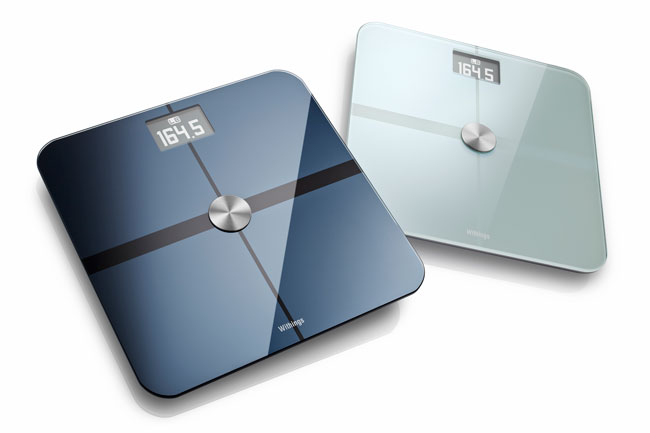
I remember way back when this product first came out and saying to myself: "Cool, but I can't bring myself to pay that much for a scale." Then I saw it on sale and I snapped one up. I already knew that the product would be cool and useful, but just a tad too pricy for most. Before we get to the sticker shock let's talk about what it does. The Withings WiFi Scale looks and acts like any other modern day digital scale on the surface. However, inside it has a WiFi chip and USB port. When you first set it up you plug it into your computer via the USB cable just long enough to associate it with your free Withings account and to configure it to connect to your WiFi network. From that point on you can put the USB cable away and place the scale where you want in your home as long as it's within range of your WiFi hotspot. Now when you or a family member steps on it it will not only display the weight (in pounds or KGs – your choice), but it will also transmit the data wirelessly over the internet to your account. You can then view your information/progress at any time via a web browser or via their FREE iOS App.

iTunes

I've been working on my weight now more seriously for the past three years and I have had both successes and set backs. Any tool that can make the tracking easier is a plus for me. Prior to the WiFi scale I was using a regular scale and logging the progress into the Lose It! App. I can remember many times I'd go weigh myself, get busy doing something else and forget to log the number and of course, not remember what it was. Now I don't have to think about logging it. I don't even have to have my mobile devices turned on at the time. All I have to do is step on the WiFi scale and the numbers are automatically logged to my private account online. I look at them when I need to or feel the courage to 🙂
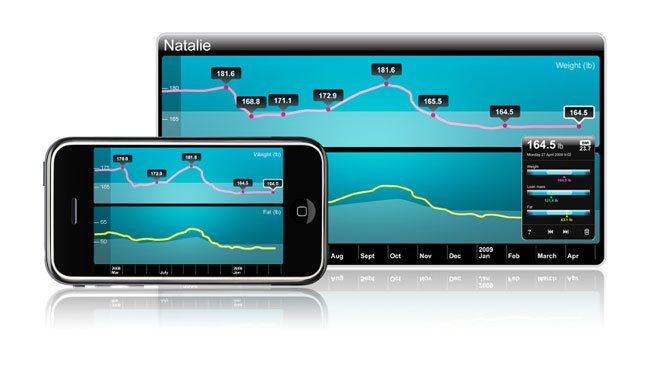
I was impressed by how the scale auto detects different family members and records their weight too. Yes that does mean that you can setup multiple users and whenever any one gets on it will log the weight of that person to the master account and by name.

It's more than just weight. The scale also keeps track of your Body Analysis providing info on Fat mass, Lean mass and BMI (Body Mass Index). 

Convenience doesn't come cheap. The only downside to this wonderful gadget is the price. At $159 you'll have to really really really want one to get one. I can't say "need one" because honestly no one "needs" one of these. Granted it does what no other scale I've seen does, but it does so at a steep price.

You can get the Withings WiFi Scale here for $159.

 

Still much more work to be done… Let's see how far I get by the time I see you at Photoshop World Vegas! (note: I didn't say what year 😉 )


Blood Pressure Monitor
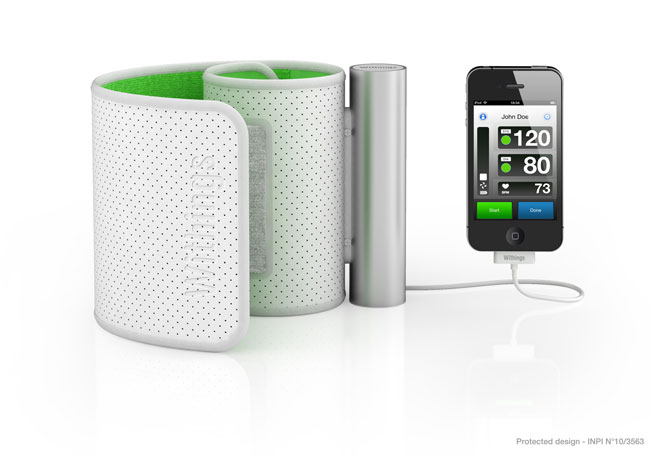
The Withings Blood Pressure Monitor is battery operated device that has a cable attached with a 30 pin iOS dock connector on the end. The idea is that when you're ready to take your blood pressure you plug it in to your iPhone, iPad or iPod touch and with their native App your iOS device becomes not only the display, but also the record keeper. Again this is pretty cool and geeky stuff. Just like with your weight you can keep track of your readings day to day and even email them to your doctor.  The App works with both devices and can display both your weight progress and blood pressure stats at the same time.

You can get the Withings Blood Pressure Monitor here for $129


The Bottom Line

They're useful albeit expensive toys. I haven't had any issues to date with either device and they work as advertised. If your budget can handle it and you like gadgets then you'll love em.


See them in Action

Continue reading “Review: Withings Smart, Connected Scale and Blood Pressure Monitor”

Review: IPEVO Tubular Wireless Speakers


I've been watching the Bluetooth Wireless Speaker revolution from the sidelines now for several months. I've reviewed a few different sets of travel speakers in the past but they were all wired. While I have wanted to try out some of the new bluetooth wireless options such as the Jawbone Jambox, I couldn't get past the asking price of $199 retail ($179 street) for a speaker that would spend the bulk of its time in my suitcase. Don't get me wrong, I'm sure the Jambox is fantastic, sounds great and is worth the money if you plan to use it regularly. I also certainly don't have a problem spending money on something of good quality. It's just that my need for a travel speaker is for those occasions when I'm traveling and want to hear my music, videos, etc. on something better than the speakers in my laptop or iPad. 


IPEVO Tubular Doesn't Break The Bank

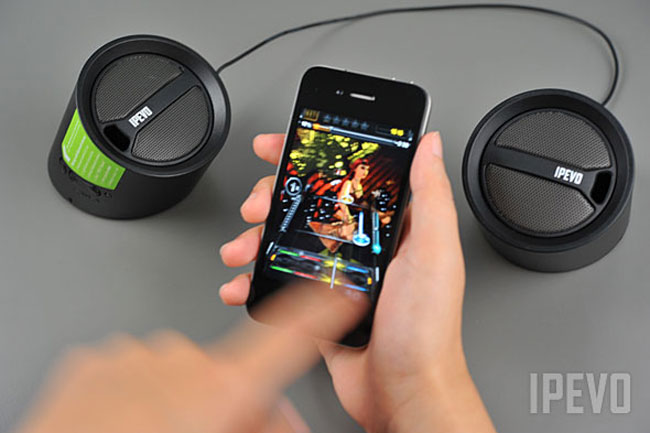
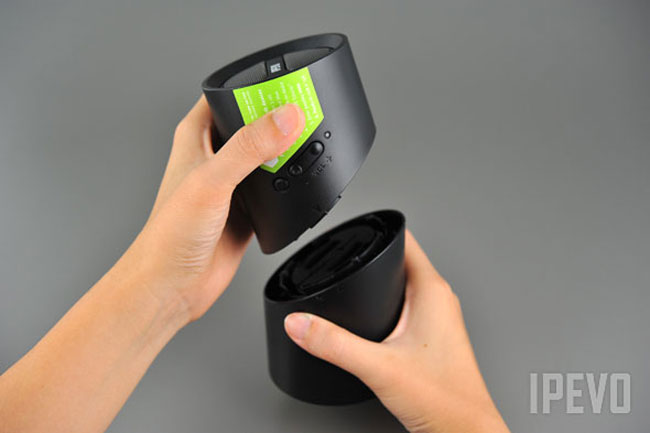
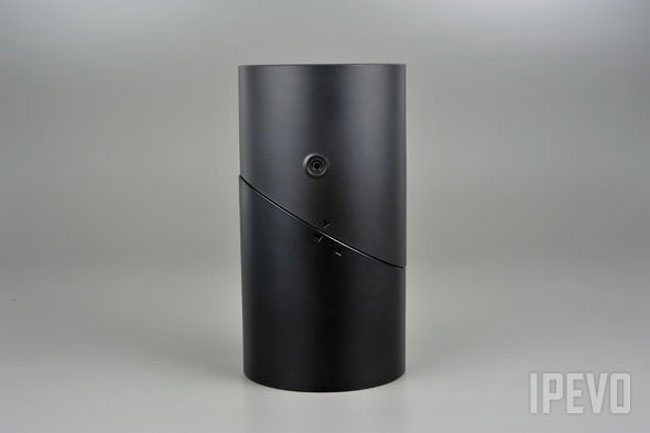
This is actually my second IPEVO product. You might remember my review of the IPEVO P2V webcam for doing mobile device demos. Again, it's a product that solves a specific need that I have at a reasonable price. The IPEVO Tubular Speakers are exactly what I was looking for. They are small enough to stick in a suitcase or laptop bag, yet the sound good enough to compete with most "small shelf" speakers. They are designed for travel. The two speakers connect together in a "tube" fashion when not in use. When you're ready to use them you untwist the tube to separate them out. They connect to each other via a single built-in cable. That's the only "wire" you have to deal with during normal operation. You can play your music to them via Bluetooth. iOS 4.x supports stereo bluetooth music playback. So your iPod touch, iPhone or iPad can stream music to these speakers wirelessly. I also had no problem pairing them to my MacBook Pro. They showed up immediately after pairing as a an Sound Output Device. 

There is a power button and volume control right on the speaker itself. Not to mention a small LED status indicator to let you know that they are on or in pairing mode.


How are they powered?

This is both a plus and a minus. The speakers have their own built-in rechargeable battery. There's a USB connector on the bottom of the main speaker that you can plug into any USB power source. It takes 2 hours to charge for 6 to 8 hours of playback. While it's great having a built-in battery, it also means that if you forget to charge them you can't simply pop in a set of AA's. 


Room for improvement

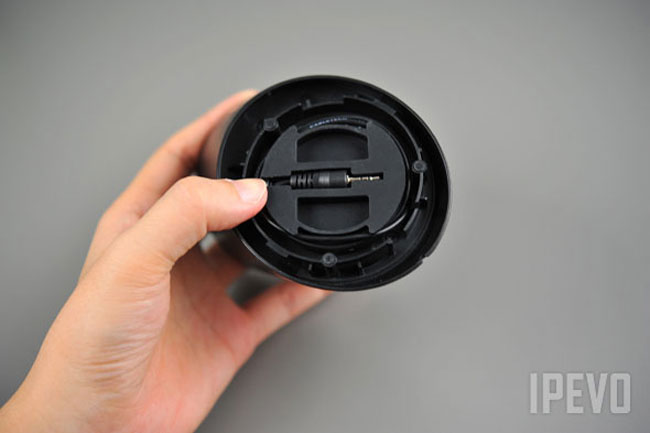
The speakers work and sound great. I've had zero problems with connectivity or playback. My only issue is that the cable under the speaker for connecting to the second speaker simply wraps around a circular section in the base of the speaker. I would have preferred this to be a retractable cable as it sometimes takes 2-3 tries to get it wrapped around just right so that the end of the cable fits in the holder for storage. Otherwise I have no complaints.


The Bottom Line

These speakers are a great alternative to the more expensive options out there. While they perform well, the best part is the price. The IPEVO Tubular Wireless Speakers go for a mere $59.95 (list price $79.99). That's less than half the price of other speakers in the category and they sound as good if not better than any other travel speakers I've tried.

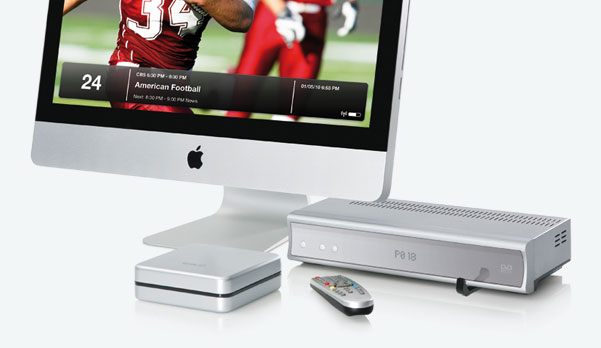
Turn your Mac into an HD DVR with EyeTV HD

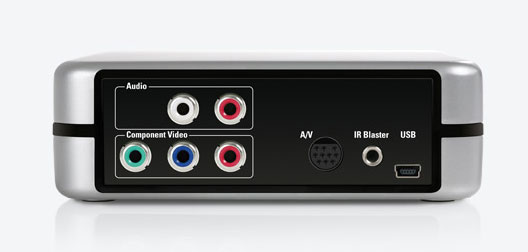
As many of you already know I’m a fan of DVRs in particular TiVo HD and Premiere boxes. However, I recognize that many of you don’t want the costs associated with TiVo, but you do want to be able to record your shows in HD and transfer them to your iOS and other mobile devices. For this Elgato has got you covered with their EyeTV HD. I’ve used Elgato products in the past to simply bring in cable TV to an iMac and have “TV” playing in a window as I worked. However, since those days a lot has changed in the world of TV. For example, Comcast in my area no longer broadcasts “basic” cable without a box. This was one of the things they cut in the move to “Digital” TV. Although there was probably no technical reason to cut it, they cut it and now in order to get cable in my area you need a set-top box to decode the digital signals they send. This also means that in order to record those shows (especially in HD) that you either need to rent their DVR (not a fan of their boxes) or buy a TiVo. With the EyeTV HD you can use your Mac as the HD DVR. You still need a cable or satellite box to decode the signals from your provider. However, with a one time purchase of an EyeTV you can connect this small box to your cable/satellite receiver and then connect it to your Mac via USB (it’s bus powered, so no power brick). Once you load their software you’ll have access to your guide and even the ability to have your Mac remote control your set-top box via the IR emitter. It even comes with it’s own wireless remote control and all the cables you’ll need. Yes it pauses live TV too.
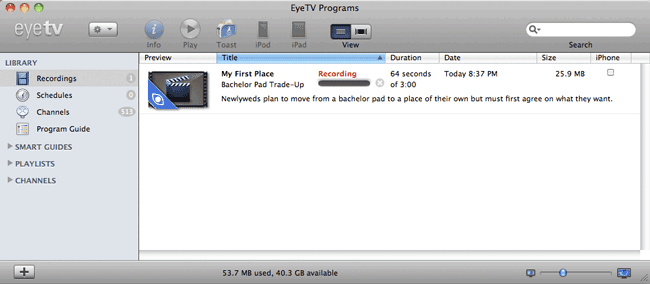
Recording a live show in HD

Record and Watch Anywhere

Besides being able to record to your Mac’s hard drive (internal or external) you can choose to record in two different modes simultaneously. For example, you can record the HD version to watch on your TV (or Mac) when you return home AND you can have it record an iPad/iPhone version at the same time. Of course this uses more disk space, but it definitely saves time for people that want to record and then take their shows with them. That’s one of my frustations with TiVo is that while it can transfer a show to my Mac, it takes a while to transfer it and then even longer to transcode it to a mobile compatible format. With EyeTV, the mobile versions would be sitting there waiting for you as soon as the show ends.

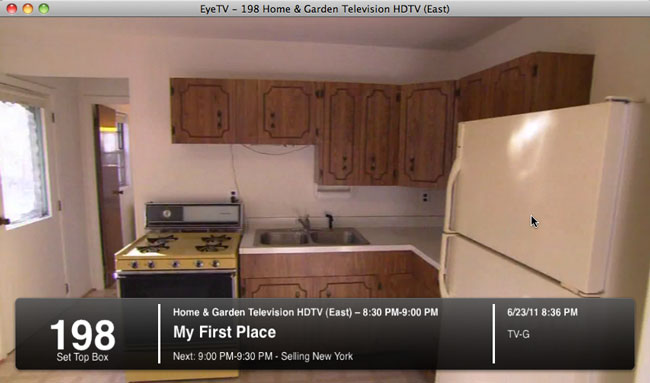
Playing back the recorded show on my MacBook Pro

There’s an App too

While it’s great to have the ability to do dual format recordings, it’s even cooler just to be able to stream your shows from your Mac to your iPad, iPhone or iPod touch via their App. It streams over WiFi or 3G and eliminates the need for a Slingbox.

You can get the EyeTV App for $4.99 (also a bargain when compared to the $30 Slingplayer App) here from the iTunes

What’s the downside?

While this solution solves a few problems, there are some things you have to take into consideration. First of all you’ll need a Mac that is relatively close to your cable/satellite box. Also that box will need to have a free Component Out port if you want HD recording. The EyeTV uses Component video instead of HDMI to avoid Copy Protection issues. You’ll also need ample amounts of hard drive space to be able to record shows in HD. If you plan to stream your Mac will need to be awake. While the solution works, it could be expensive to “dedicate” a Mac to it. However, if you’ve got a Mac server or other Mac that just sits there it might as well get some use doubling as a DVR too. The EyeTV requires Mac OS X 10.5.8 or later as well as an Intel Core 2 Duo processor or better. Lastly you’ll need to connect you Mac to your TV if you want to watch the show you just recorded on the big screen as there is no direct connection from EyeTV HD back to the TV. If you have Apple TV you could stream the recordings that way.

You can buy it here for $169.89 (a bargain compared to long term DVR renting or TiVo/Slingbox buying).

Charge your iPad and Phone at the Same Time

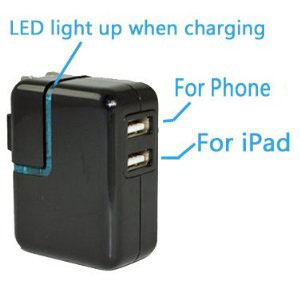
I'm always on the look out for ways to reduce the number of chargers I travel with and while I have found some great 4 Port USB Chargers in the past the one thing they all seem to lack is the 5V 2 AMP (10W) power requirement for the iPad. Granted the iPad will still charge on the lesser current, but it will take longer. Recently I found a dual USB charger that has one port that operates at the higher voltage. The other USB port is a standard 5V 1 Amp port for your other USB devices such as your cellphone. This is GREAT! This means that I can charge my iPad 2 at full speed and still have a port to charge my phone. The other requirement I have is that any charger I buy has to also work on the higher powered International plugs and this one does (with an appropriate wall plug adapter).

I have replaced my standard iPad white chargers with these for on the road. Yes it comes with a sync cable too. The only annoyance is the bright blue LED that lets you know it's plugged in. You know how I feel about LEDs 🙂

You can get the Dual Port USB Charger here for about $12 or here on eBay for about $12.

A standard Apple iPad charger retails for $29 (granted it does come with a long cord too).


Here's one for the Car too:

Order it here.

Scottevest Wearable Tech

Got Gadgets?

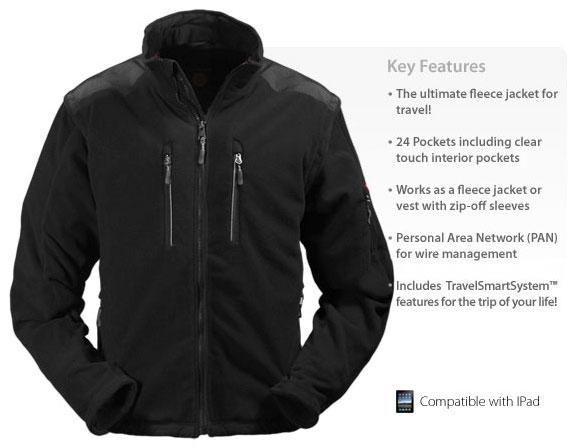
Of course you do. Why else would you be reading my blog? I routinely walk around with iDevices, Android devices, cameras, gps units, chargers, cables, batteries, etc. Normally these items are in my pocket if they are small enough or in my computer bag if they are larger items. When I travel I almost never check my luggage. If I do check a bag, it's a bag of clothing and never a bag with gear in it. At the same time my carry on bag has to be small enough to fit under the seat in front of me. Since I'm now tasked with carrying more and more devices for work and having to carry a smaller bag due to the ever decreasing space under the airline seats I'm always looking alternative ways to carry stuff. I read a review from a friend of mine on the Scottevest line of clothing. I've seen "geek wear" before and had no interest in integrating gadgets into my clothing. I still don't have any interest in "wearable tech." However, I am very interested in clothing that is simply designed to carry more of my tech gear. That's exactly what Scottevest jackets/vest are to me.
 

It's my 3rd carry-on

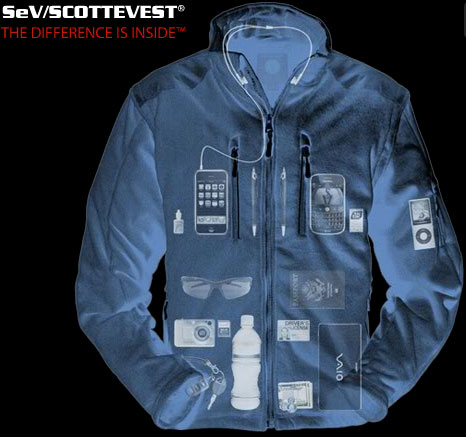
Scottevest jackets have on average 20+ pockets in them. They are designed to carry today's portable electronic gear and at the same time not showing visible bulges. That last part was pretty hard for me to believe. That was until i got one. The Scottevest clothing doesn't just have a bunch of pockets, It has a bunch of pockets that are carefully laid out to provide optimum storage and accessibility while providing minimal visible bulge. They thought of the little things. For example the two inner breast pockets are see through on the inside so that you can see and operate touch screen devices. Also you can run a set of earbuds through the inside of the jacket up to the collar where there is a special set of flaps to completely hide them when you're not listening to music/making calls. They put a screen cleaning cloth in one of the inside pockets on a string to allow you to quickly wipe your touch screens or camera lenses. There's even a pocket large enough to carry a tablet like the iPad. I first thought: "NO WAY will that not show from the outside!" While I don't really plan to carry my iPad 2 in my jacket, I did have to try it. OMG! It actually does fit and doesn't show from the outside.
 

What's in my pockets?

To date I have carried my: Kodak Zi8, Motorola Atrix, Mophie Air iPhone 4 Backup Battery, Holux GPS module, iPad stylus, keys, iDevice sync cables, iPad charger, boarding pass, passport, business cards, 2 ink pens, cash, and yes on occasion an iPad 2 🙂
 

Added security

While on my latest international tour I realized that the Scottevest has an additional benefit. It allows you walk around with gear that isn't showing to the general public. Granted, it doesn't hide a DSLR, but it can hide just about every other valuable that you're carrying.
 

The Bottom Line

Is that while I have jackets that I like to wear, the Scottevest has become my new favorite travel jacket. They come in a variety of styles and materials for both men and women.
You can check them out here.

Continue reading “Scottevest Wearable Tech”

Shooting with Scott Kelby in Denmark and Sweden

In case you haven't noticed I'm on tour in Europe. I've been on the Adobe CS 5 Evolution Tour since the beginning of May. Often times there are weekends where it doesn't make sense to come all the way home and then go right back out again, so we try to pick a good place to regroup for the weekend. It just so happened that this past weekend we stayed in Copenhagen. My good friend Scott Kelby told me before that he always wanted to visit Copenhagen and it worked out with his schedule that he could join me for the weekend to see the sights and of course do some photography. Scott asked his Twitter and Facebook followers for some shooting location suggestions and they came pouring in. Needless to say we not only had a blast, but we got to see some fantastic places. Be sure to head over to Scott's blog to see his photos from the weekend and I put together a few of my favorites below (most of my shots are geotagged, so if you're interested in "where" these photos were taken head over to my Flickr gallery). It's time to prep for the London stop this Wednesday, so I'll be signing off for now. Have a great week everyone!


The Turning Torso in Malmö Sweden

Continue reading “Shooting with Scott Kelby in Denmark and Sweden”

International Power! Revisited

Image compliments of iStockphoto.com

Last year I wrote a post called "International Power" and the purpose of that post was to recommend adapters and accessories that you might use when you travel abroad. Since that time though I have been experimenting with different solutions and have just about completely revamped my list of travel adapters and plugs. The first goal was to reduce the amount of adapters needed and the second goal was to accomodate the ever increasing number of mobile devices that I'm traveling with. Since my job now not only involves showing Adobe Creative Suite on the desktop, I now show tablet and mobile apps on both iOS and Android devices too. On my current trip I'm traveling with a MacBook Pro, iPad 2, iPhone 4, Motorola Atrix and Motorola Xoom. Not to mention a Nikon D7000 DSLR, iPod nano watch and camera GPS device. That's a LOT of batteries to keep charged each night. One of the other big problems is that many hotel rooms can have as few as one single accessible AC outlet for you to use! Here is my current crop of adapters and gadgets to accomodate charging and powering on the go.


The Universal Adapter

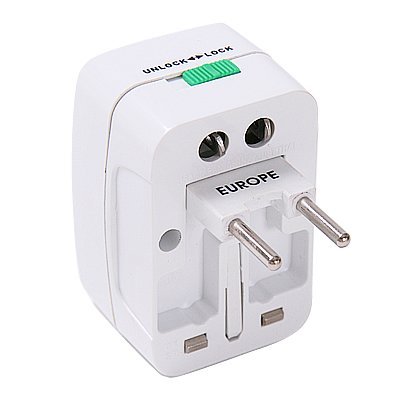
All of my devices either can accomodate the higher voltages in other countries or charge via USB. Therefore I only need a couple of "adapter" plugs to adapt the US prongs to the sockets of foreign outlets. The one above is one of my new favorites. I like it because the prongs fold into it so that they don't protrude in your bag. I typically have at least two of these in my suitcase to leave in the hotel while I'm out and about and one in my computer bag for meetings and presentations.

Get one here.


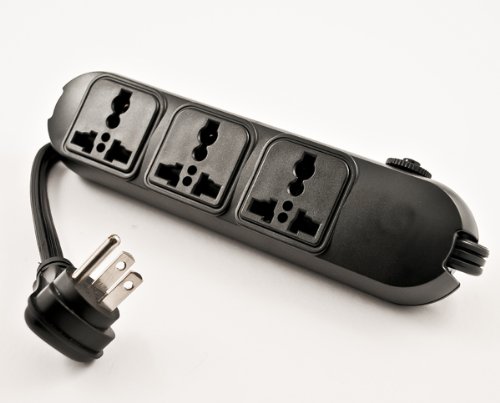
The Universal Power Strip

I don't want to have to adapt every single charger to a foreign plug and as I mentioned you may not even have the luxury of multiple outlets in the room. So just like at home I would love to use a power strip that plugs into the Universal Adapter above. This Power Strip not only works on US current and the higher European 220v outlets. Also the plugs work for both US and European based prongs.

You can get one here. I use this one in my computer bag.


Retractable Extension Cord

Another common problem is that the single available power outlet in the room may be located across the room. This is when I pull out my retractable extension cord. Granted it's only 5' long, but it can make all the difference in the world.

You can get one here.


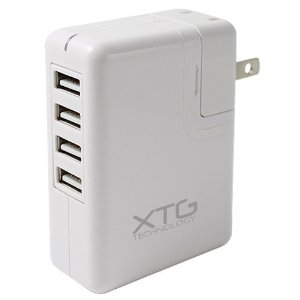
Charge 4 USB Devices At Once

My phones, camera GPS and iPod watch all charge via USB. Therefore I can get away with one of these multiple USB charging devices. Yes they work on the higher 220v current too and deliver standard USB power to up to 4 devices simultaneously and yes I've charged 4 devices at once without issue.

You can get one here. I also like this flater one too.


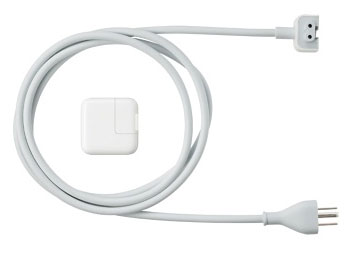
The iPad Power Adapter

While the iPad will charge over standard USB, it will do so at a slower rate. In this case I always travel with an iPad 10W adapter to charge the iPad/iPad 2 at top speed. This adapter also works at the higher voltages.

You can get one here.


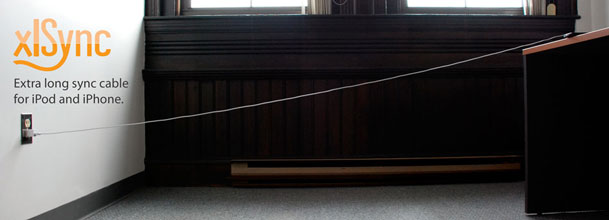
Longer iOS and USB cables

Since the only available outlet in the hotel room is sometimes behind furniture or across the room it may be necessary to have longer USB and iDevice cables. I found some nice long ones here.


The Bottom Line

When I have all these things plugged into a single outlet, it's not pretty! However, it works. I can easily charge 6 devices without any problem. It definitely cuts down on the number of little adapters I have to carry and I don't have to worry about not having enough of the right adapters for the country I'm in .

Review: M.I.C Compact Flash Reader for iPad

I reviewed Apple's Camera Connection Kit when it first came out. The Apple kit is two adapters. One is an SD reader and the other is a USB port designed to connect your camera directly to your iPad for image import. The one glaring omission is the lack of a way to bring in images directly from a Compact Flash (CF) card. During my review, I showed how you could attach a standard (San Disk) reader to the Camera Connection Kit and bring images in directly from your CF Cards. However, shortly after I did the review Apple released an iPad software update that basically reduced the amount of power that the dock connector outputs making it virtually impossible to power a card reader. I guess they didn't like people plugging in all the things (keyboard, drives, etc.) they were plugging in to the Camera Connection Kit on their magical devices. That left us with the only option being to use a USB cable and connect the camera directly to the iPad. While this works, it's slow and will drain the cameras battery during long transfers. 


Problem Solved by M.I.C

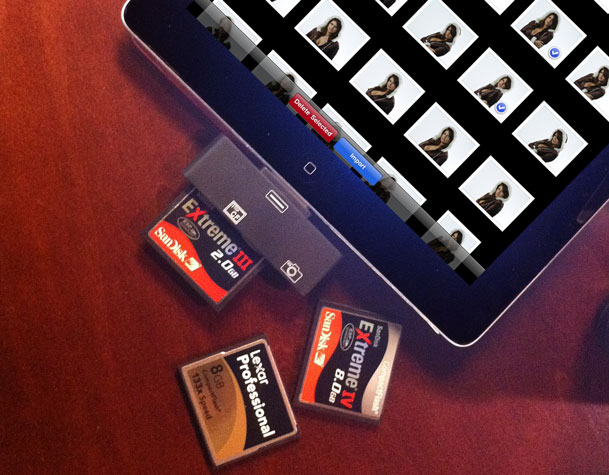
This Hong Kong based company has developed a CF Reader that attaches directly to your iPad and allows you to import your CF cards (up to 400x speed cards) right into your iPad. Of course I ordered a couple of these immediately and mine just arrived this past Friday. I was hopeful and doubtful at the same time. I just couldn't figure out how they would get around the power problem. Well, they did! I plugged in my standard SanDisk 8GB Extreme IV card and it showed up just like the Apple Camera Connection Kit does. I imported my RAW (.NEF) files with no problems. 

Hallelujah!

You can order the M.I.C CF Reader here. They are back logged (as you might expect), so give it a couple of weeks.


Show me!

I would normally do a video of such a gadget in action. However, they already had a video that shows it in action and I concur with the results shown. So here it is:

httpv://www.youtube.com/watch?v=CIQc22RoTyg

I Love LightDims

You might remember my rant from a few weeks back on the unnecessary LEDs on many consumer electronics that keep me up at night. While some of these devices allow you to turn off their annoying LEDs, there are many more that do not! In the past I've used everything from electrical tape to gaffer's tape to cover up these LEDs. While an inexpensive tape solution certainly gets the job done there are two problems with it. The first is that black tape doesn't look great over your expensive gear. The second is that sometimes you do actually need to see these status lights. For example, I have tape over the VERY BRIGHT LED on my AirPort Express. However, if I plug it into a connection in a hotel room I sometimes need to see the status light to see what's going on. Yep, I've just been peeling back the tape to take a peek. 


LightDims are better

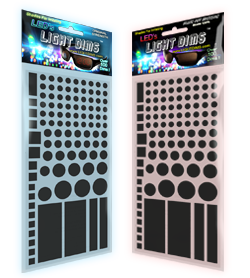
When I wrote my rant, one of my readers chimed and suggested that I take a look at LightDims. I did. I ordered both versions. These "stickers" come in two flavors. You can get the set that simply cut down on the brightness, effectively dimming the LEDs or you can get the total blackout set. There are situations where I would want to use one or the other. 

I gotta say it. I'm in love with these! I've replaced the unsightly tape on most of my gear and used the nicely precut LightDims instead. They really work! My bedroom is now completely dark at night just the way I like it.

You can order LightDims here starting at $5.99 for a set of 100!

Continue reading “I Love LightDims”